Arts and crafts, writing, home and garden, dollhouse and miniatures, pets, and anything else!
How to Make a Stuffed Animal Zoo
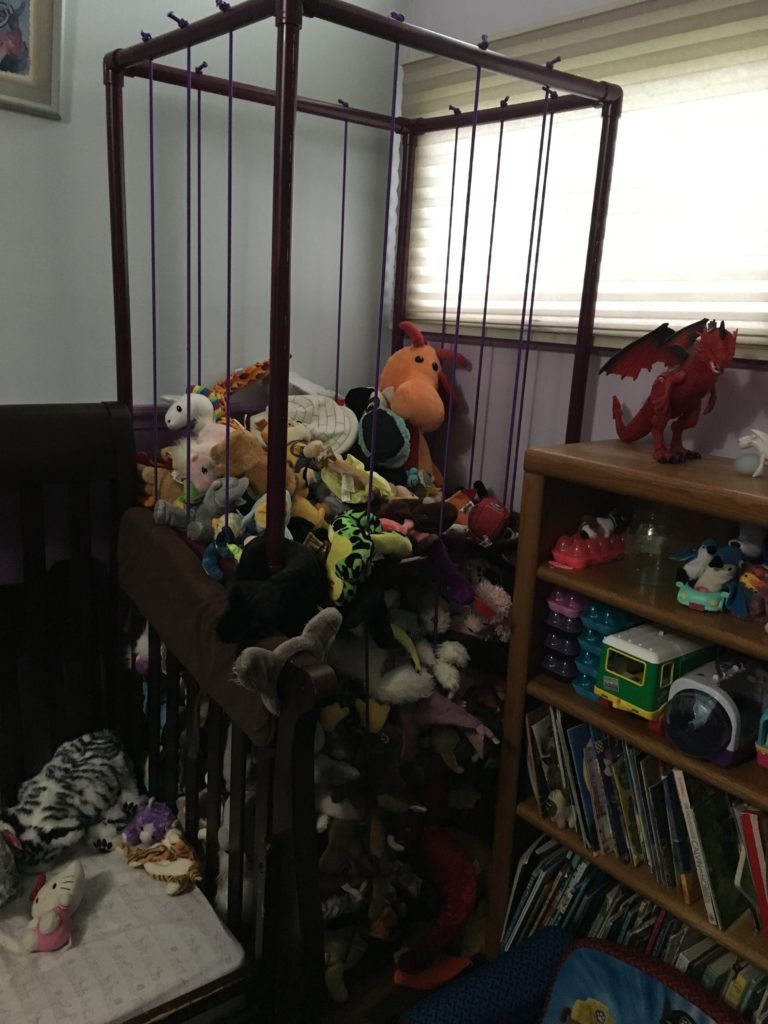
If your child enjoys stuffed animal toys as much as mine does, you may be in need of a storage solution. I love her stuffies as much as she does, but OMG it can be so overwhelming to get them out of the way!
After a long search on Pinterest, I got the idea to make a bin that is much like the ones they use in stores to keep beach balls in. It consists of a framework of wood, or in my case PVC pipe, with bungee ropes strung through it to keep the animals in. You could also use this for balls, toys, or whatever you want, really.
After some quick calculations, and seeing the sheer mountain of her animals, I decided to make my bin 6feet high, 2 feet deep, and 30 inches wide. This may seem a bit much, but, believe me, she has a lot of animals!
Needlenose pliers, if available, although probably any pliers would do
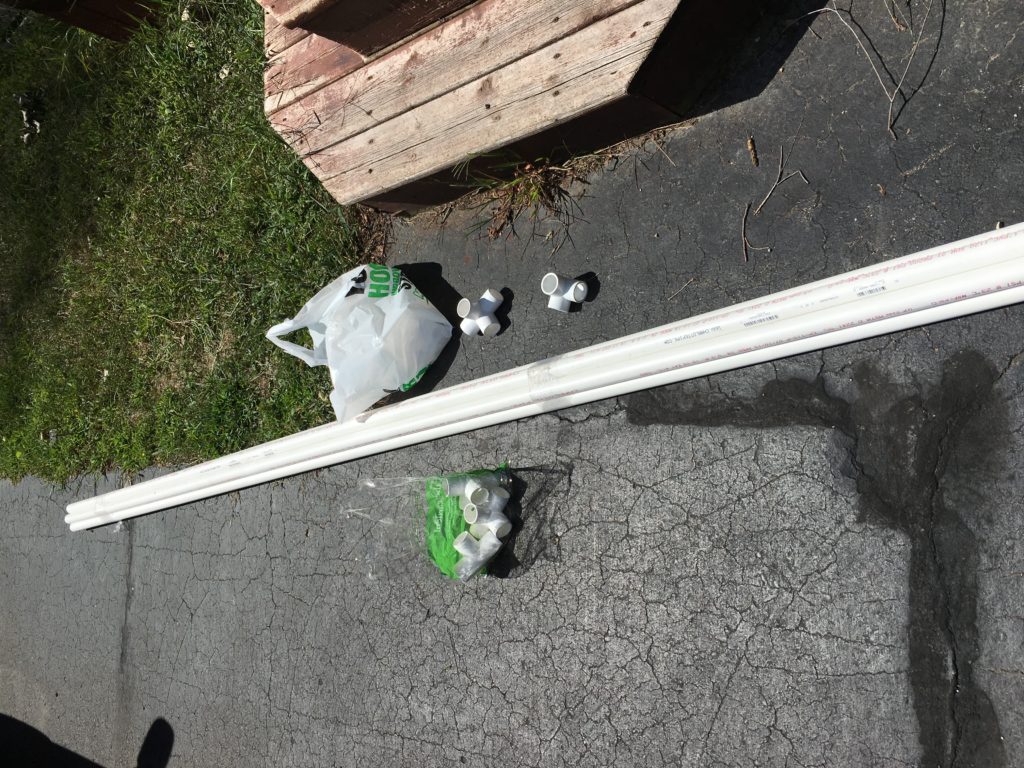
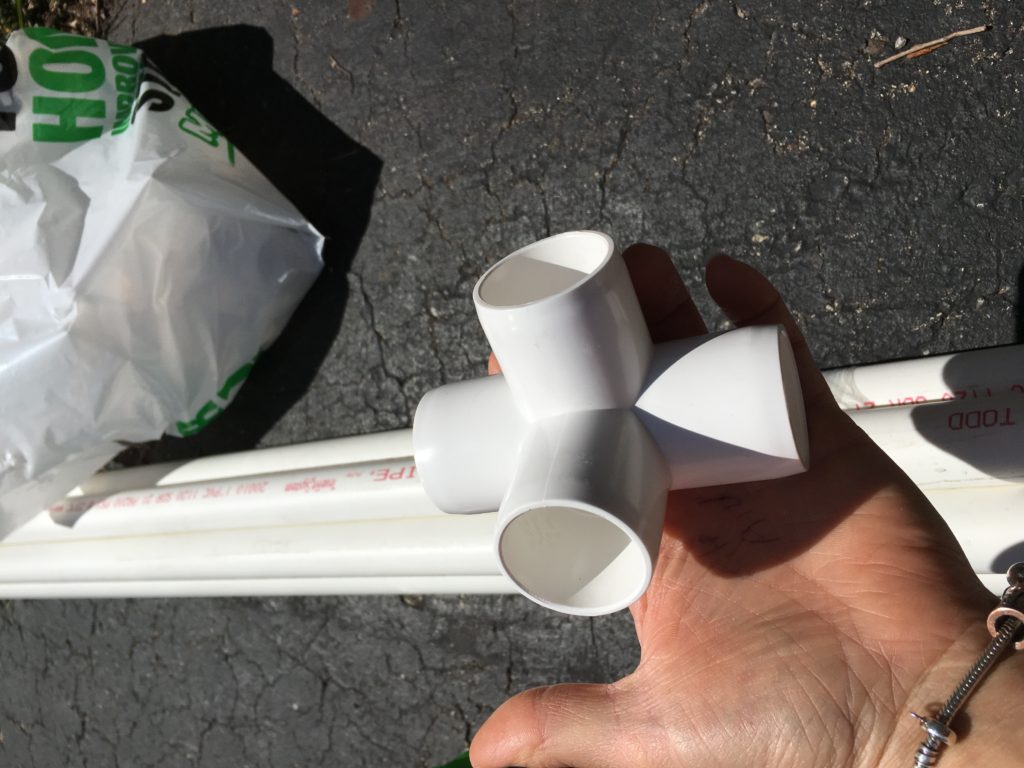
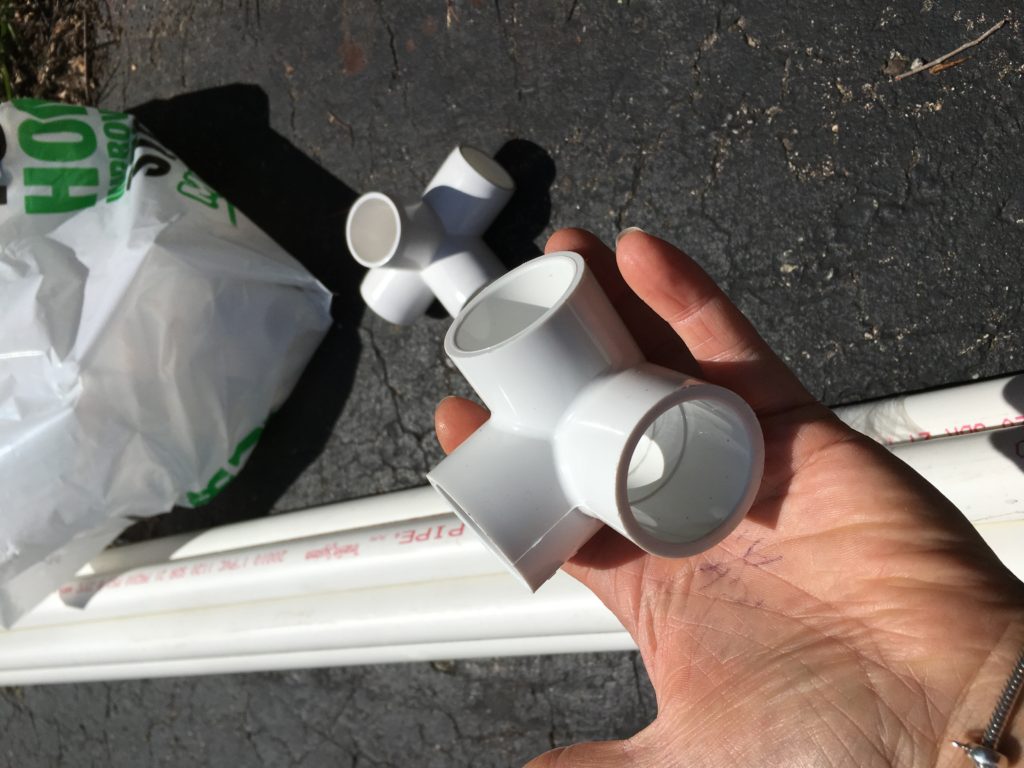
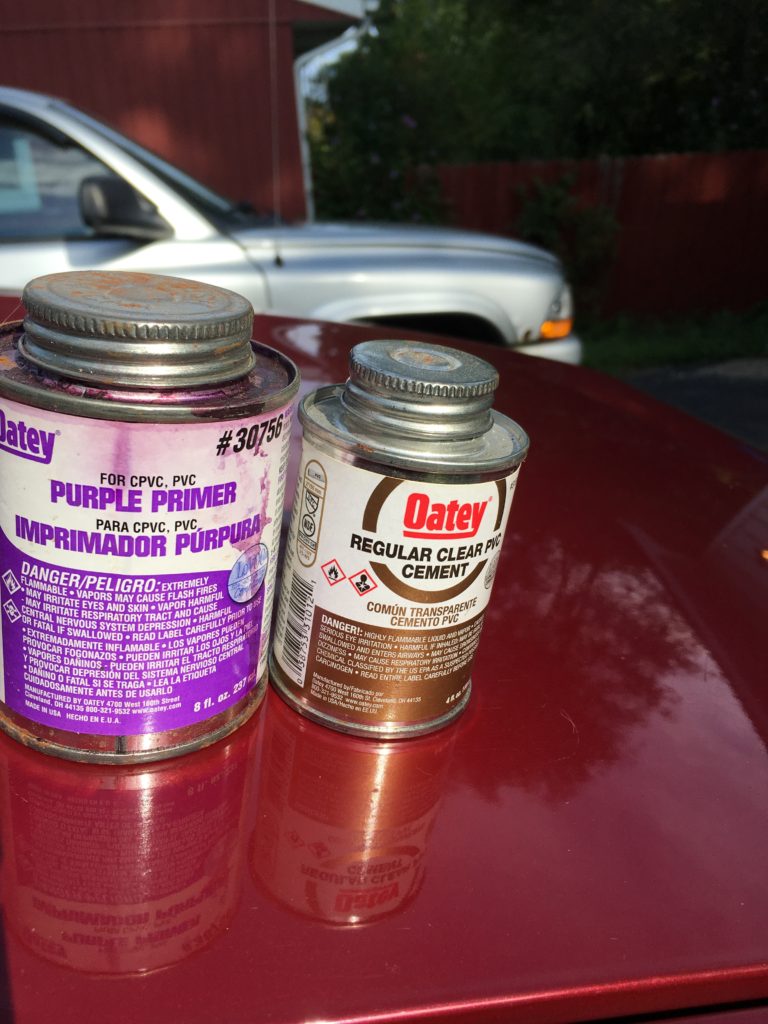
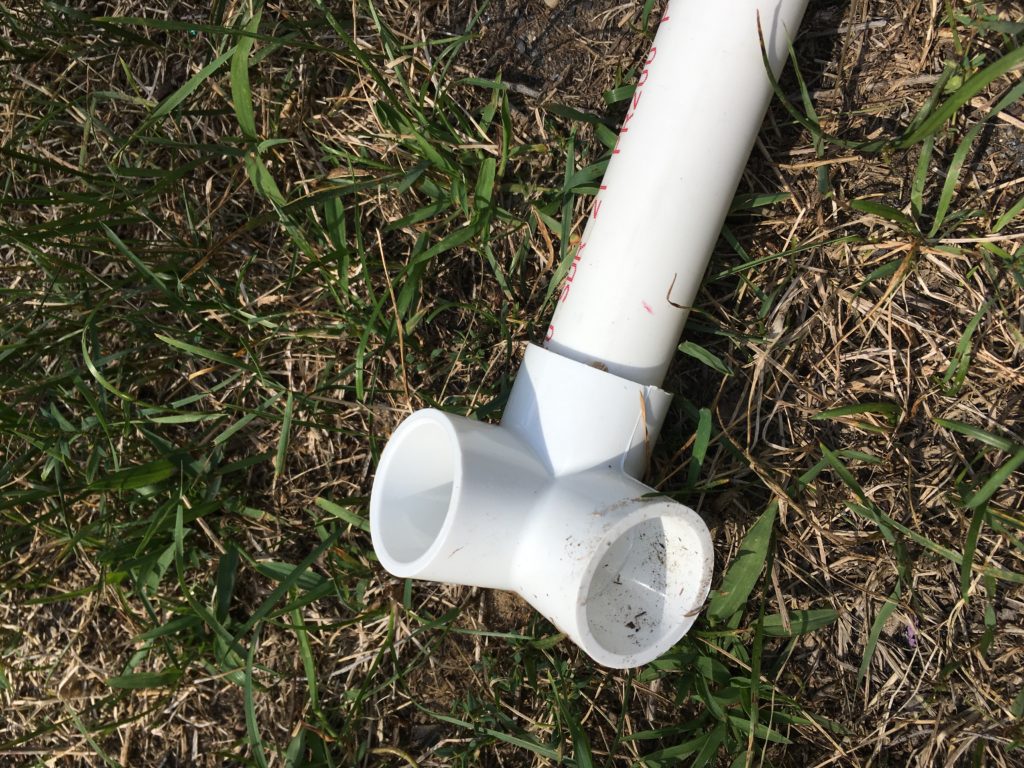
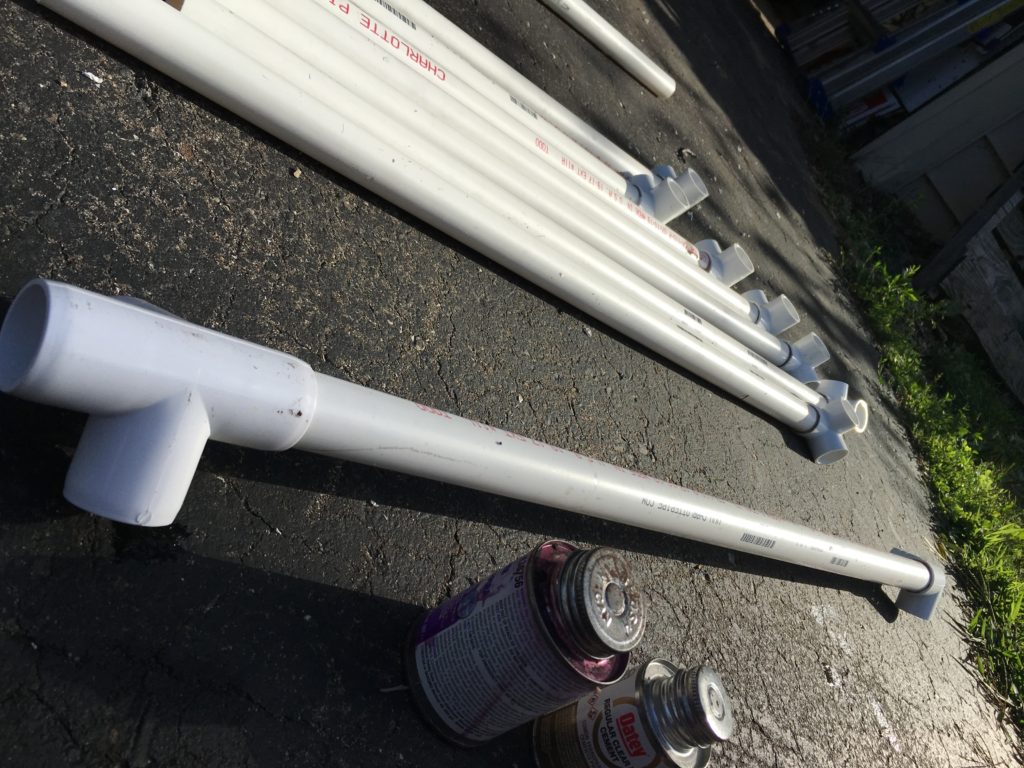
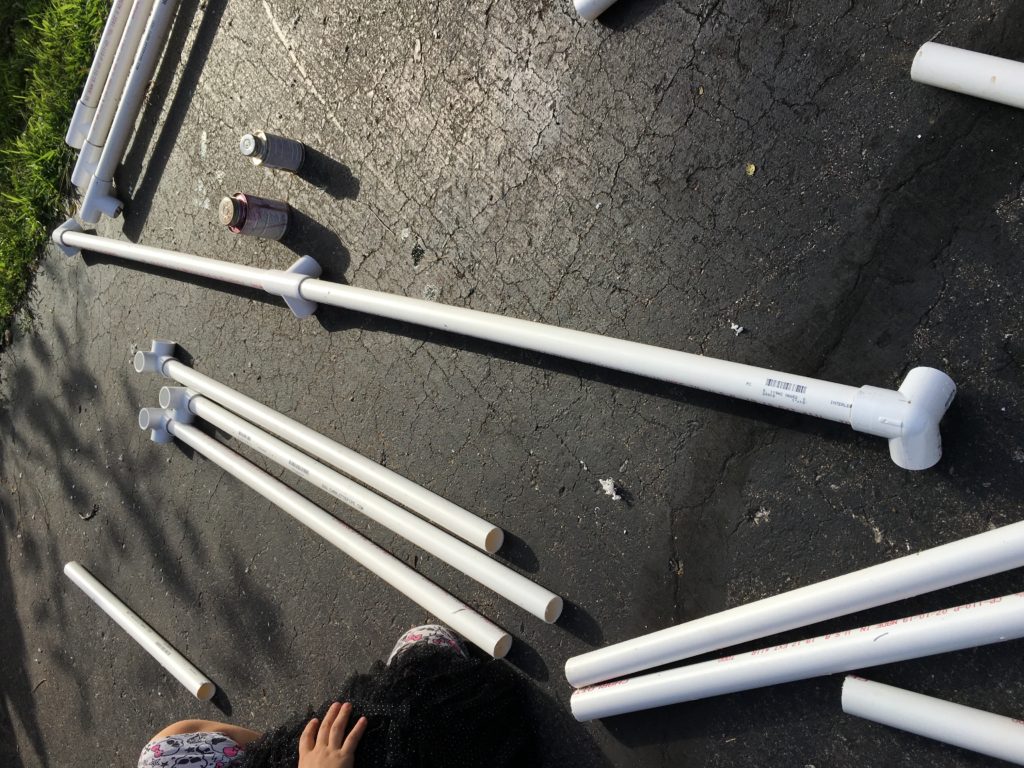
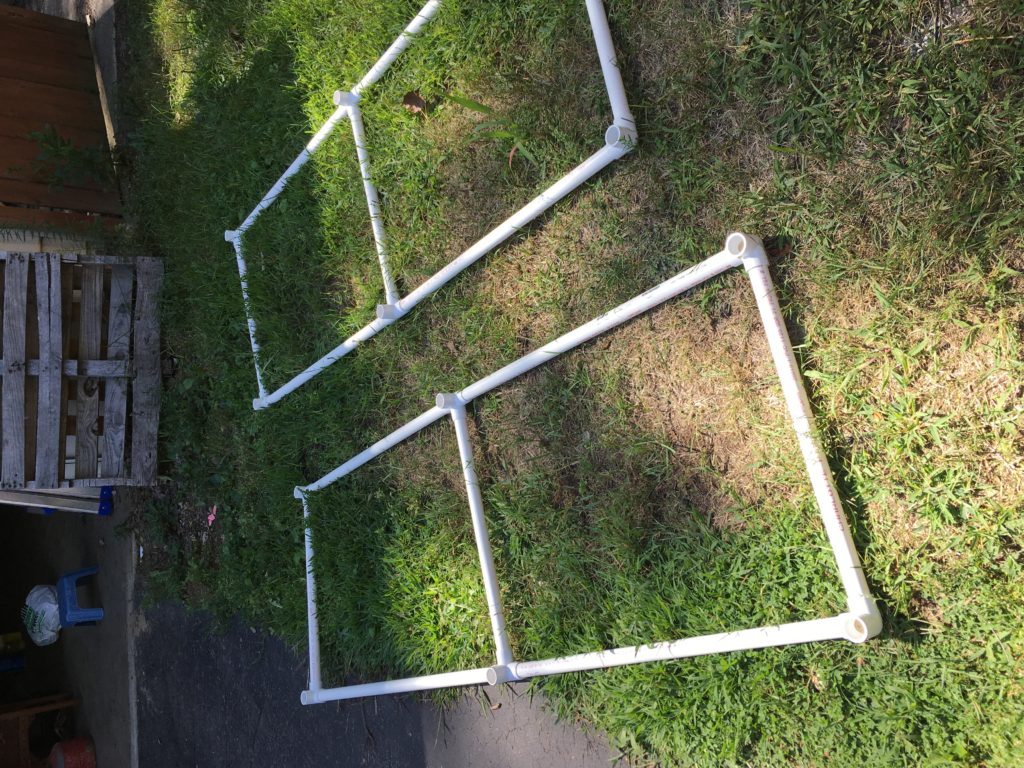
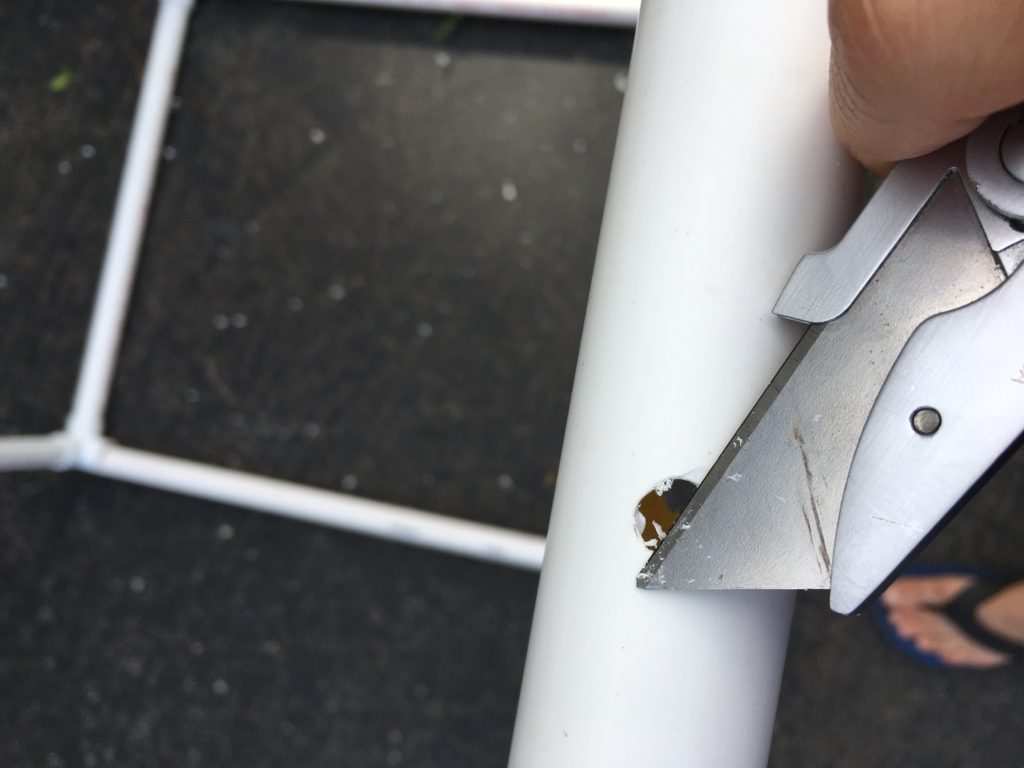
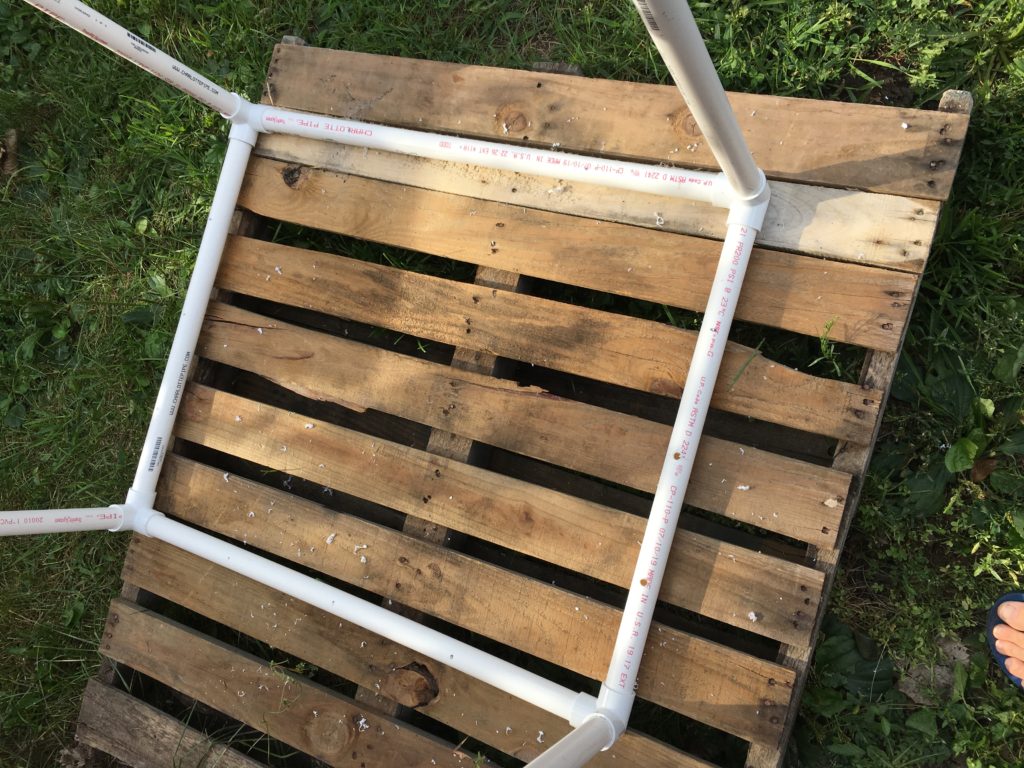
To start, I bought 1-inch pvc pipes from the local home improvement store. I needed to buy 5 10-foot lengths, plus an extra 5-foot piece. Then, using a hacksaw, I cut the pieces into 8 lengths that are 3 feet long, 6 lengths that are 24 inches long, and 6 lengths that are 30 inches long.I needed 4 of these doo-hickeys, that I ordered off Amazon. They were called 4 way 1-inch tee PVC fittings. These pieces are for the midsection supports. I needed 8 of these things. They are for the top and bottom corners. They are called 3 way 1-inch pvc fitting elbows. I used PVC glue and Primer to connect the pieces. This is easily obtained in the plumbing section of a home improvement store.
For this piece, I will need a total of 8 pieces of pipe that are 3 feet in length (for the vertical supports of the frame), 6 pieces of pipe that are 30 inches long (for the longer sides), and 6 pieces of pipe that are 24 inches long (for the shorter sides). I measured with a ruler, marked it with a sharpie, and then cut with a hacksaw.
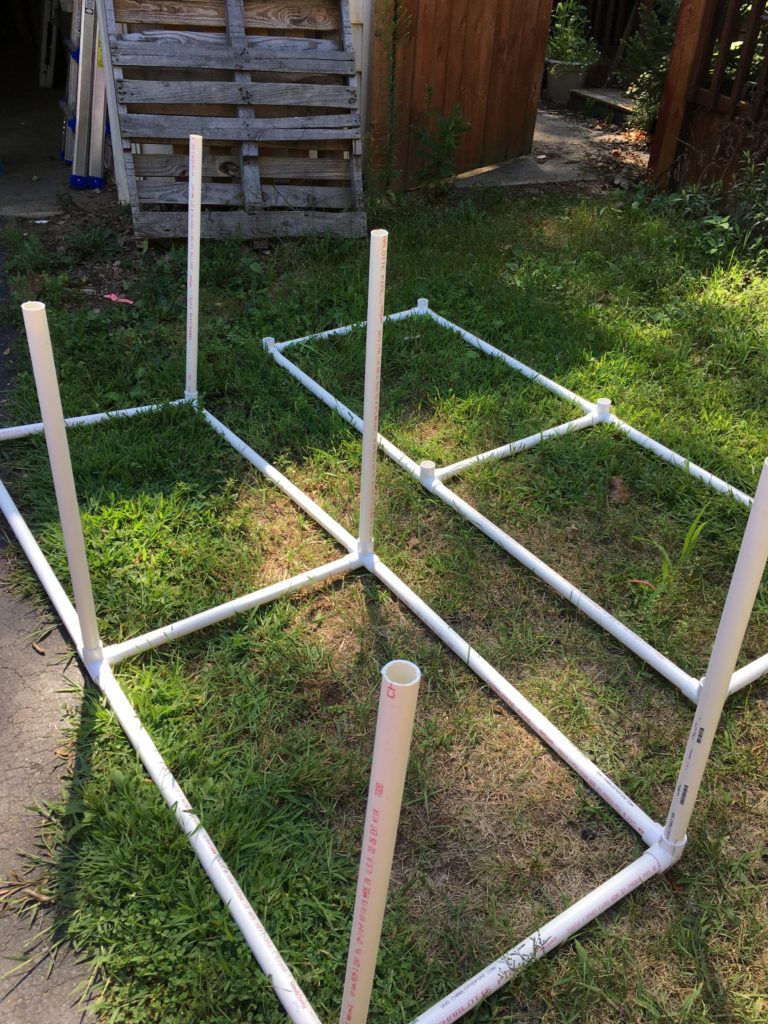
After cutting the pieces, it was time to assemble them. I started with all of the 3 foot long sections. These are the vertical supports of the structure.
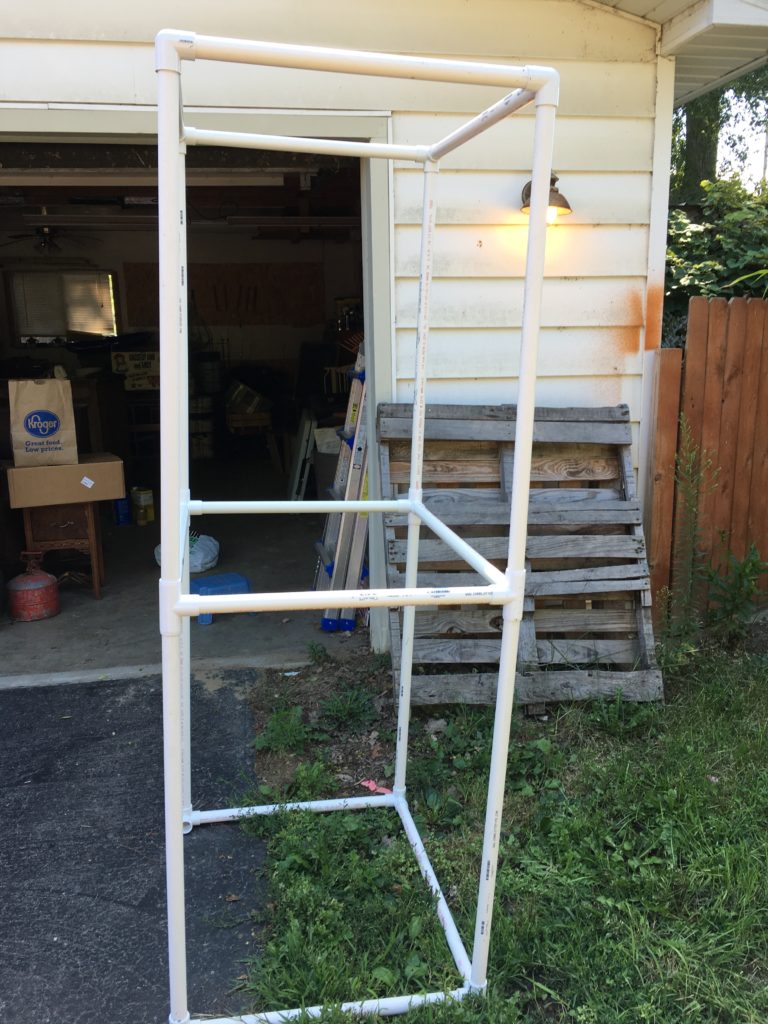
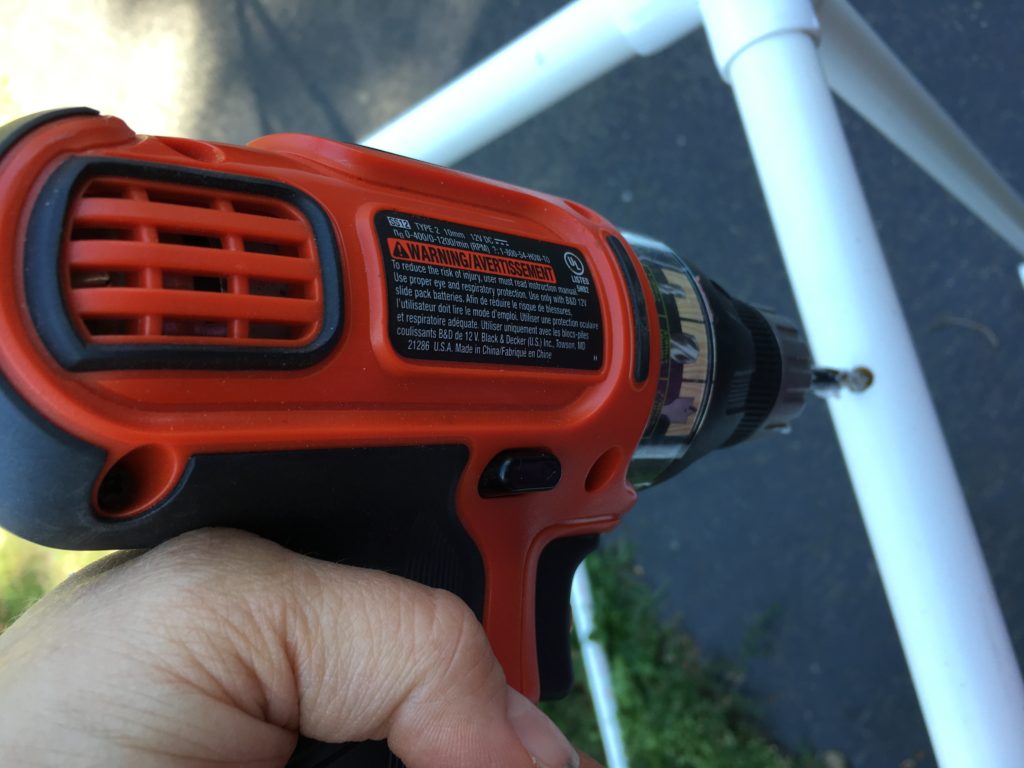
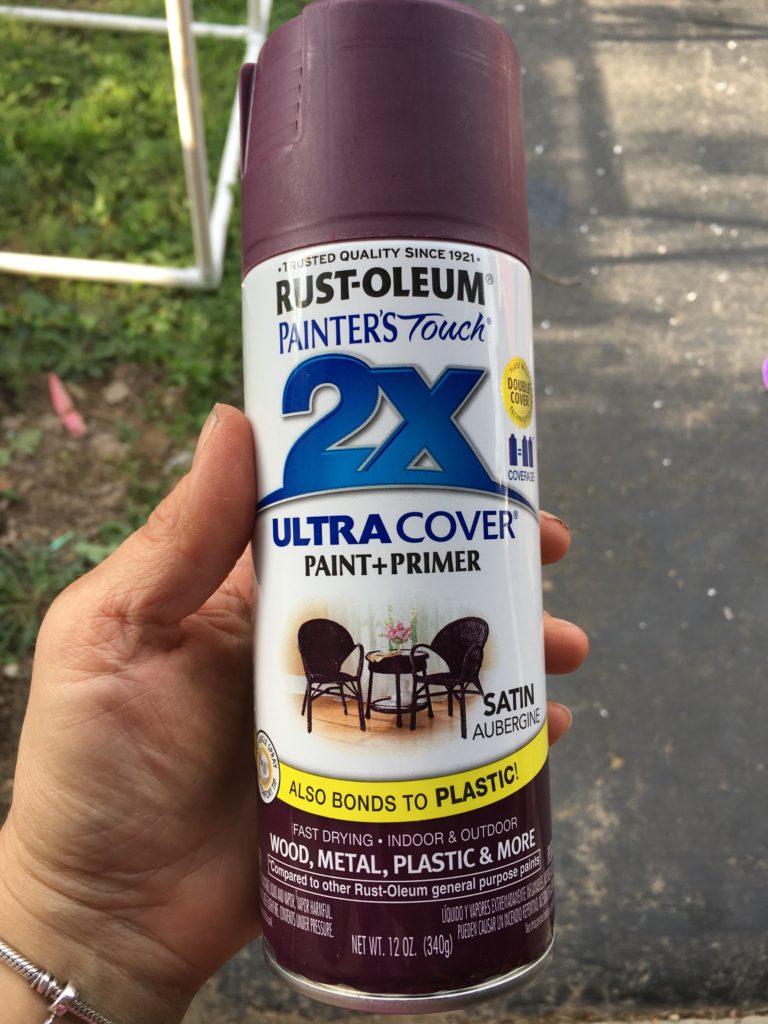
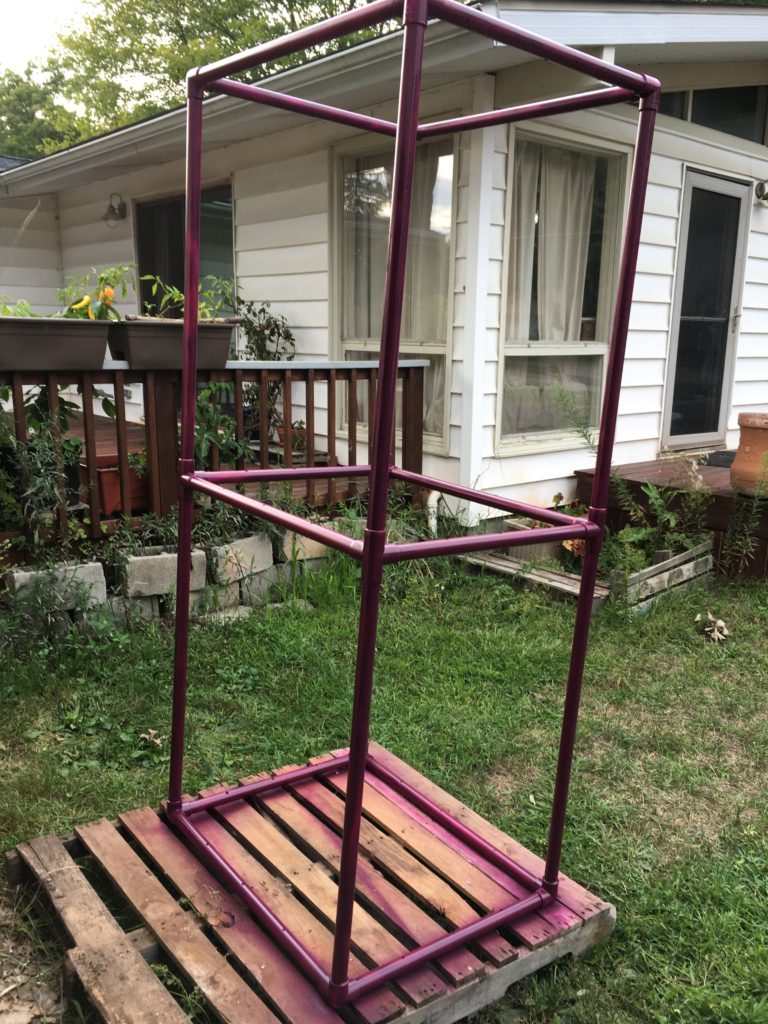
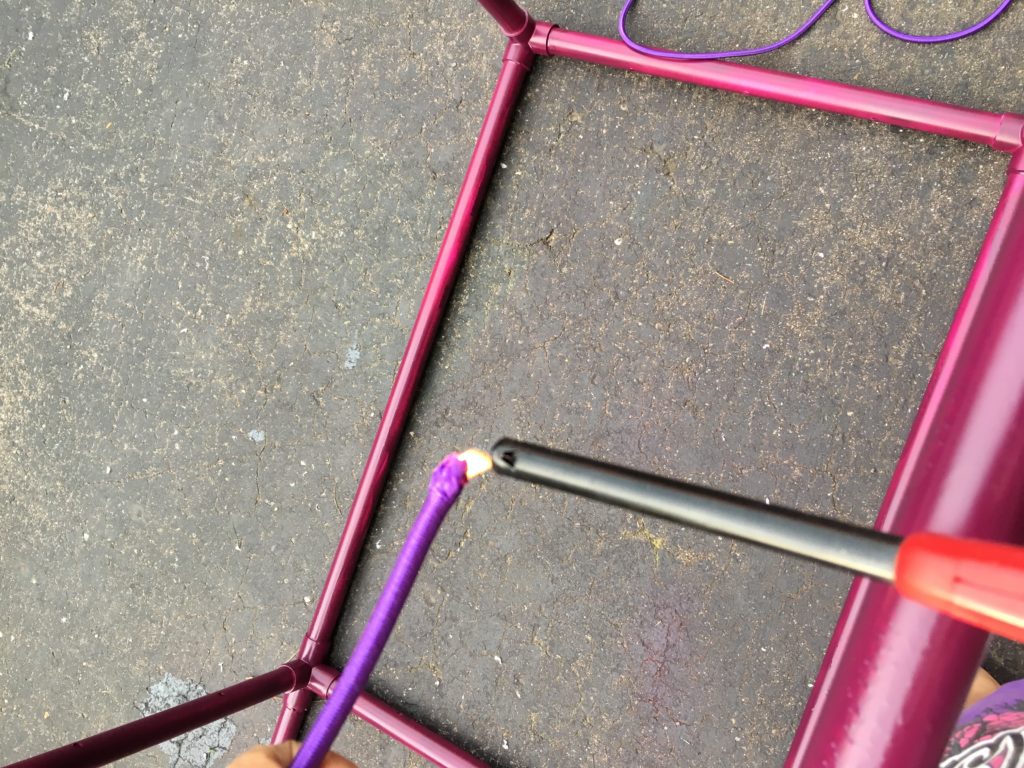
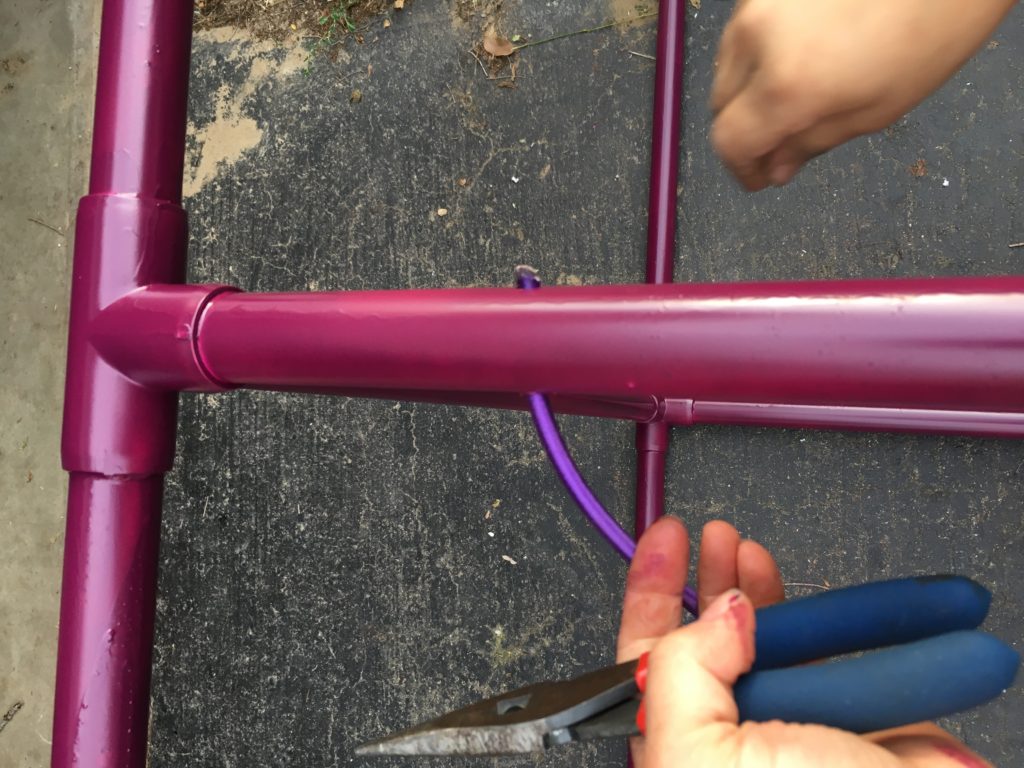
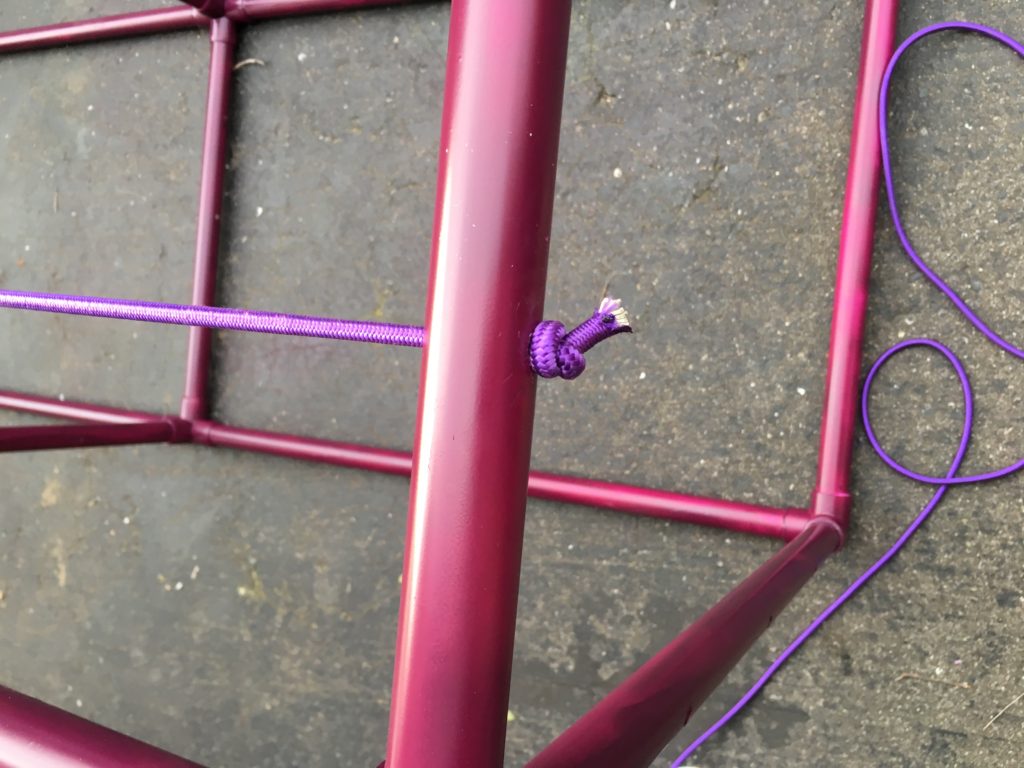
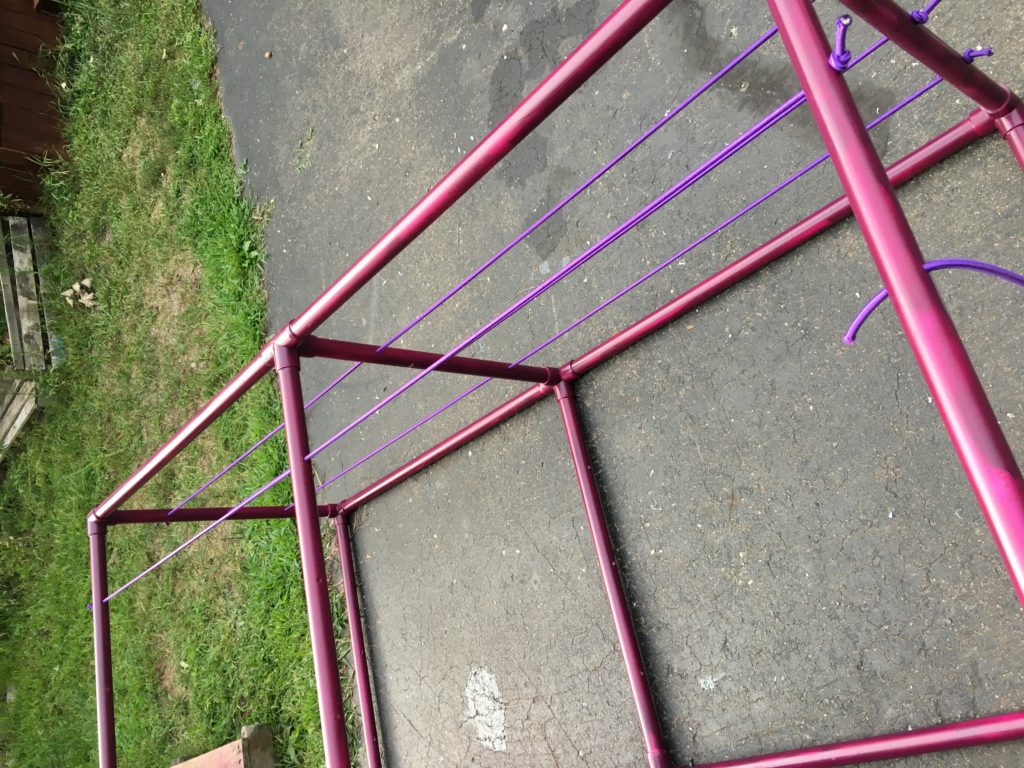
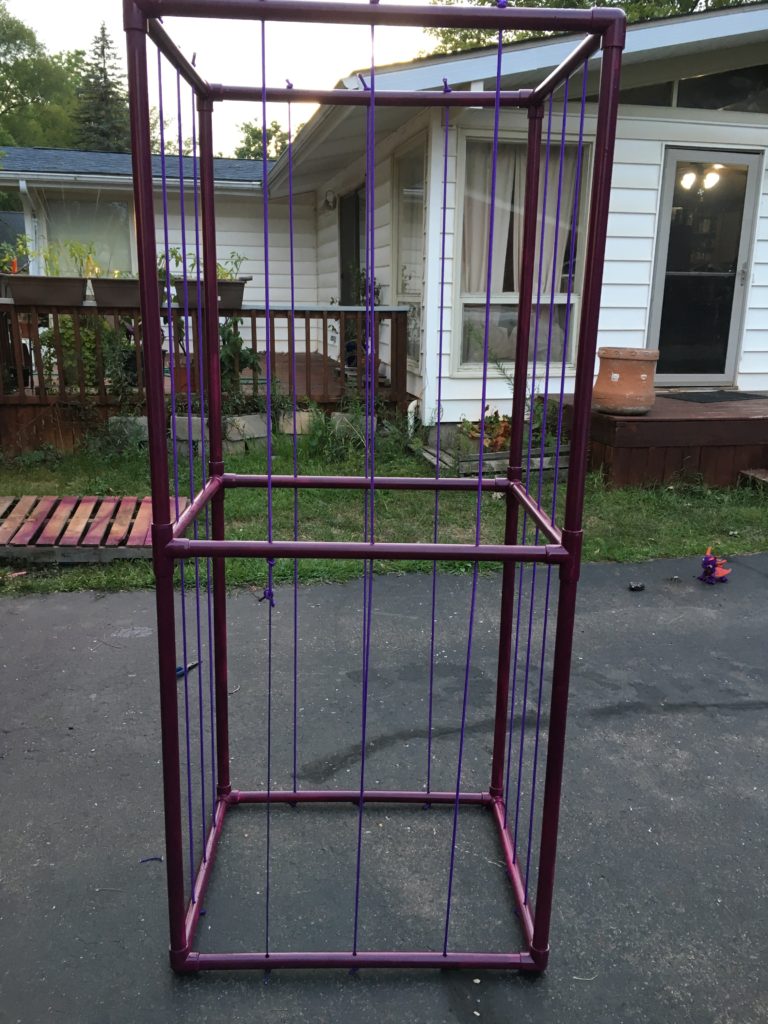
For each 3 foot length of pipe, use the PVC primer and glue to fasten a 3-way elbow to ONE END of the pipe. You should end up with 8 lengths of 3 feet pipe with a 3 way elbow on each end. BE VERY CAREFUL TO MAKE SURE YOU HAVE THE RIGHT PIECES BEFORE YOU GLUE! To be certain, I fitted each of the pieces together and formed the whole structure before I glued anything, just to be sure I had the right lengths and quantities, etc. Next, attach the 4-way elbows to the opposite end of the pipe, so that there is a 3-way elbow on one end, and a 4-way on the other. Be careful to have the ends line up angle-wise, to that when the pipe is laid down, the elbows sit like legs and don’t rock. This was the best way I could think of to keep the angles straight. If each end goes off on a different angle then your whole piece will be out of sync. That glue dries fast, so you must be very careful to get the angles correct while placing. Next, attach the 2nd length of 3-feet pipe into the 4-way elbow. Do this to all 4 corner pieces. Then add the 3-way elbow on the end. You should end up with 4 sections that look like this, with the 3-way elbow on each end and a 4-way in the middle.Now, use the 2-foot sections to connect two of the long sections together. Repeat with the other two long sections, so that you end up with these two big sides.Glue the remaining poles (they should all be 30-inch) into the vacant holes on one of the sides.Connect the two sides together. Note the bottom pole on the left is missing-I miscalculated and had to run back to the store for another short section of pipe. Next, I drilled holes using a 5/16 bit, using a ruler to space them evenly across the pipe-3 holes per side. I drilled the holes all the way through both sides of the pipe, so that bungee can pass all the way through the pipe unobstructed. I ended up using the tip of a utility knife to carefully score each mark to help the drill stay in place as it was starting out. The drill bit left some rough edges around and inside of the holes, so I carefully trimmed it away, to make it easier to pass a bungee through the hole, and also to keep it from scratching little fingers.Holes need to be drilled through the top, bottom, and middle. You won’t need them on the vertical sections, as the bungee won’t be passing through them. They need to all be in approximately the same areas, otherwise the bungee will be zigzagged. Be sure to measure! The pallet underneath helped support the structure while i drilled the holes between the boards.When all of the holes are drilled, and everything is glued and secure, it is time to paint! I find that this 2x spray paint from Rust-Oleum works decent on plastic. I ended up using about 2 cans of spray paint to get this covered well. My spray painting isn’t the greatest, as it’s still a new medium for me, but I am still pleased with it.Next, for the bungee! I singed the end of it with a lighter, and squished it with my fingers so it would fit through the holes better. This particular bungee was purchased through Amazon. The home improvement store also had some that was black.Beginning at one end of the structure, push the cord through each hole and pull it through. Needlenose pliers helped a bit to pull it through the other end when it was being stubborn. Keep working, pulling it through each hole working from bottom to top.When you get to the other end, tie a knot. Go back to the end you started on, pull the bungee tight and cut it off, making sure to leave enough rope to tie a knot. Keep tight hold as you cut it, or it might bounce out of the hole. If it does, just pull it back through and tie it off.Keep going!Completed! This thing is now ready to move into the house!