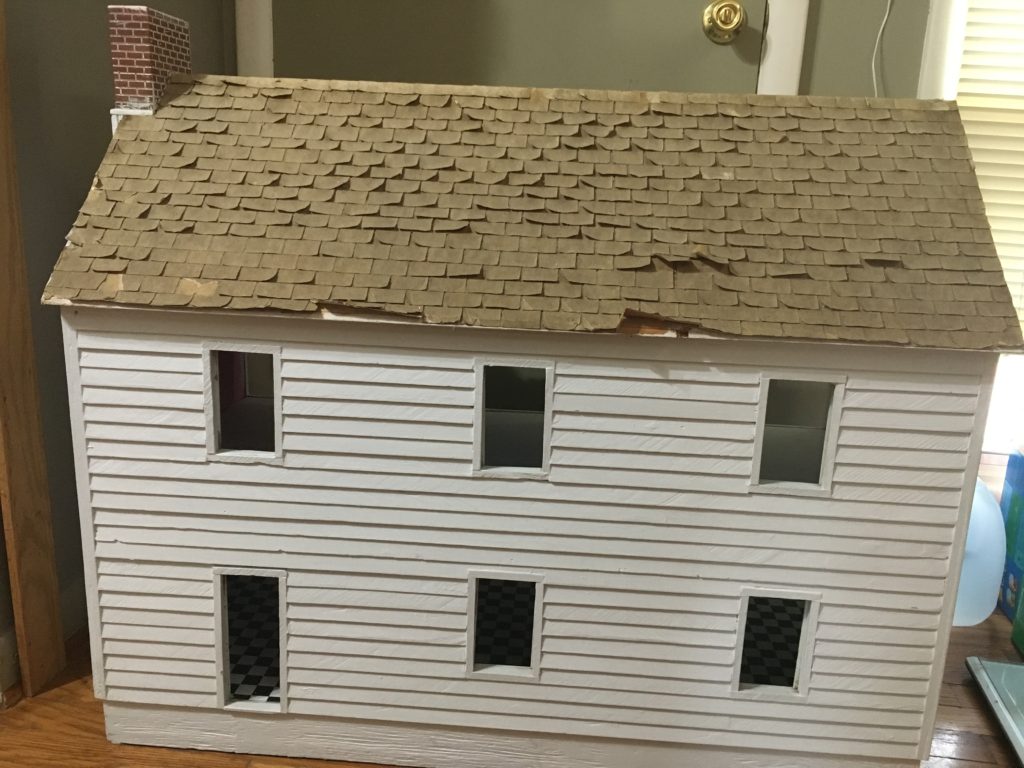
I found this dollhouse on Marketplace for $20, and I just love the simple design! It reminds me so much of a 1700’s colonial, that I am going to decorate it for that era, as well as I can.
When I found this dollhouse on Markeplace for $20, I just had to have it! It reminds me of a 1700’s colonial (first period home), with its simple design and nice wood siding.
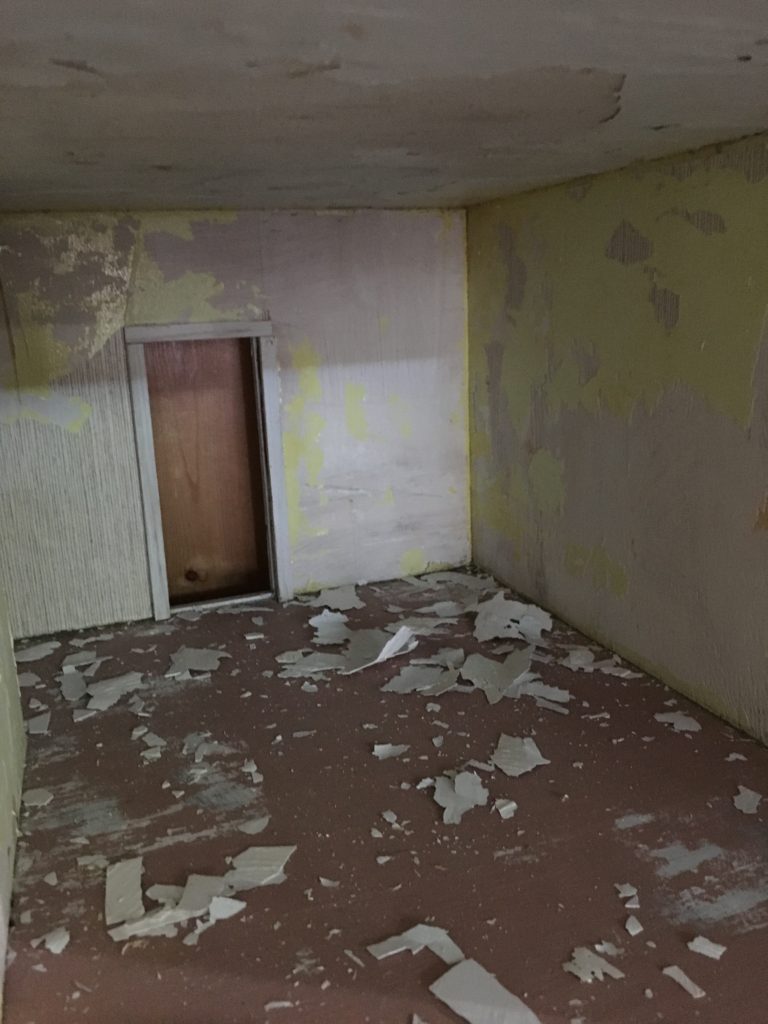
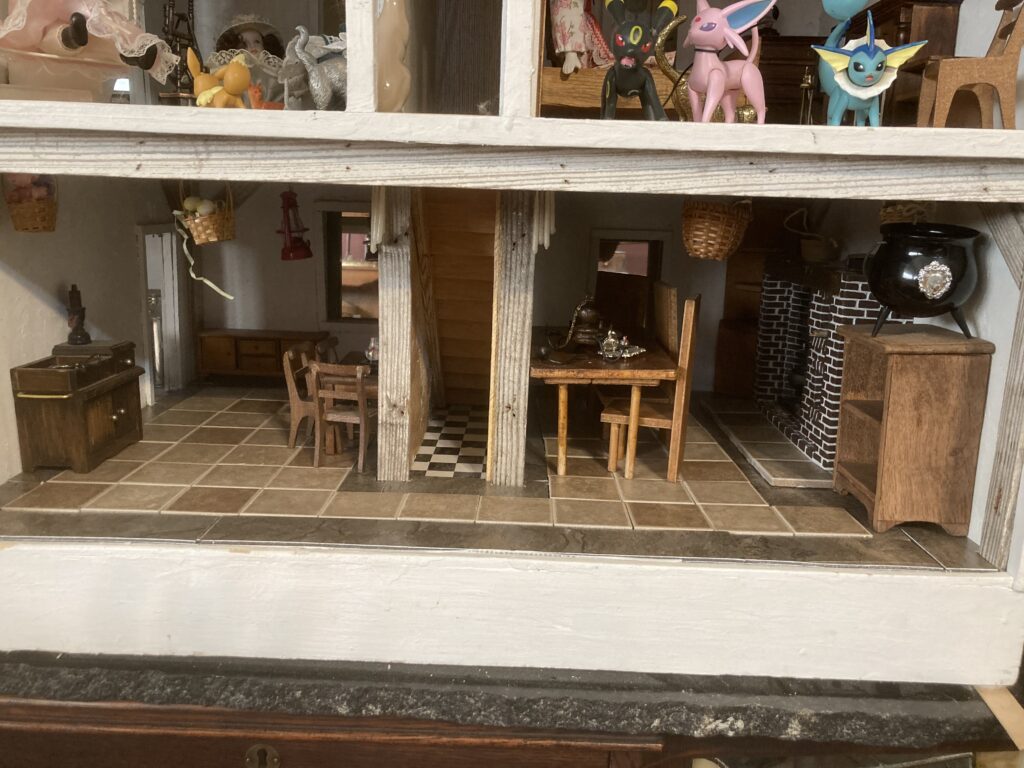
Wouldn’t this be awesome with a walk-in fireplace?The inside needs some definite updating.
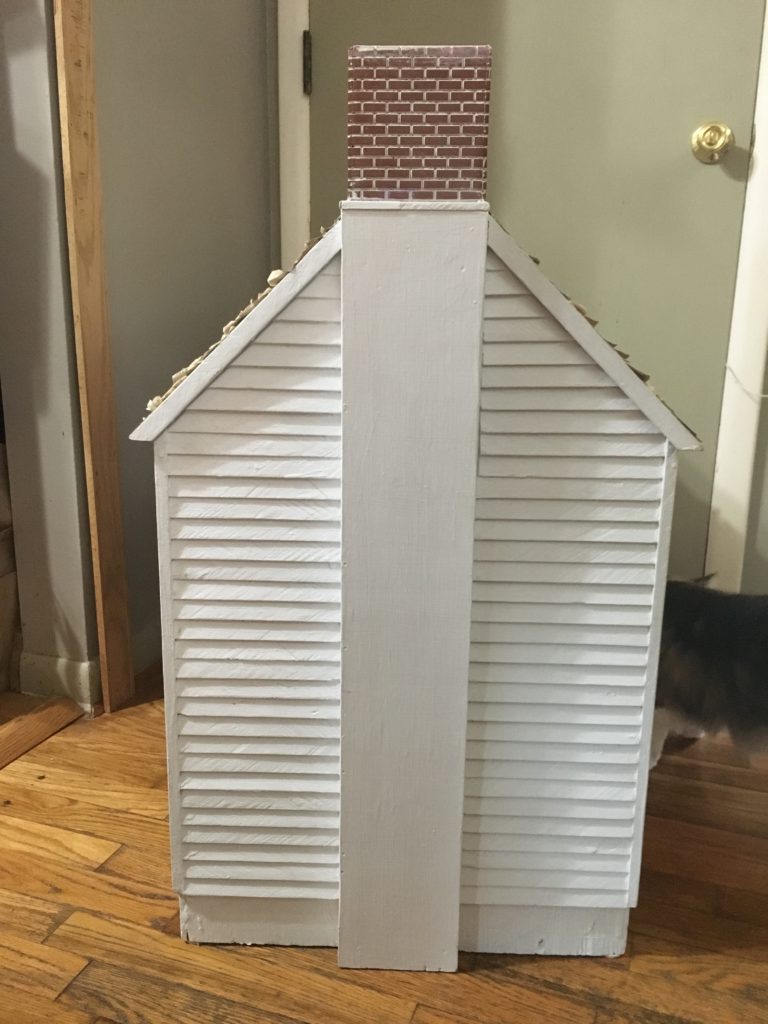
The first thing I did when I brought this huge, heavy dollhouse home was to scrape off the old shingles. They appear to have been made out of sandpaper, which seemed to have worked well enough, but they were in such poor, water-damaged shape that I felt I needed to wash my hands thoroughly after handling it.
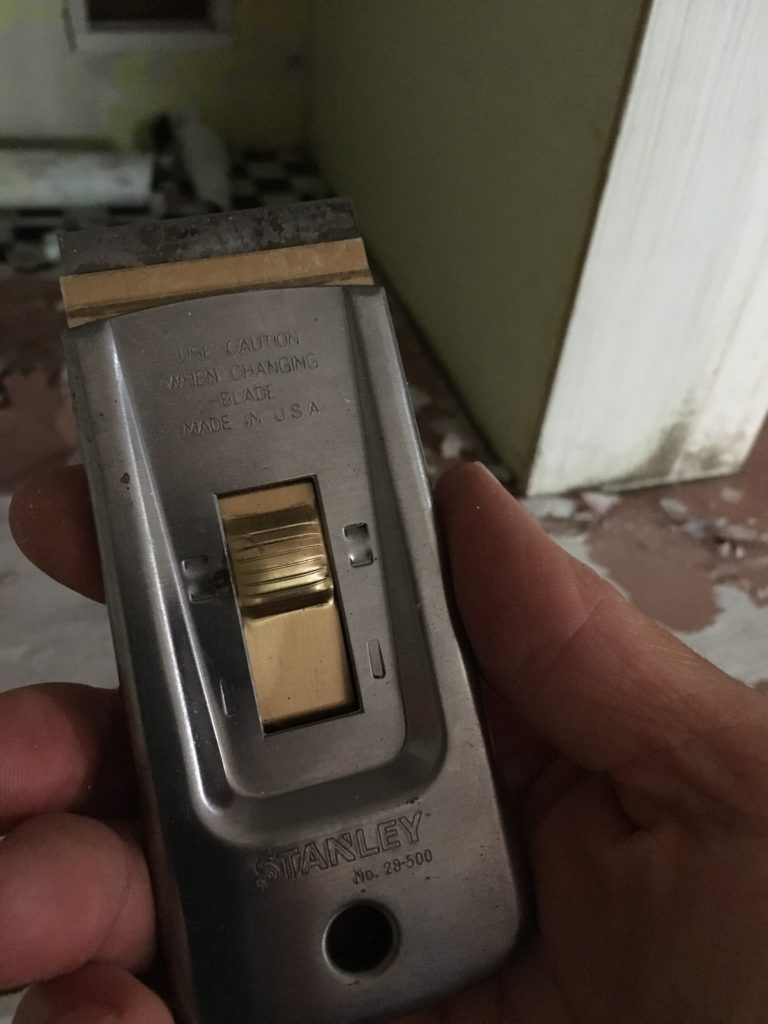
This handy tool holds a razor blade that I can use for scraping paint and whatever.
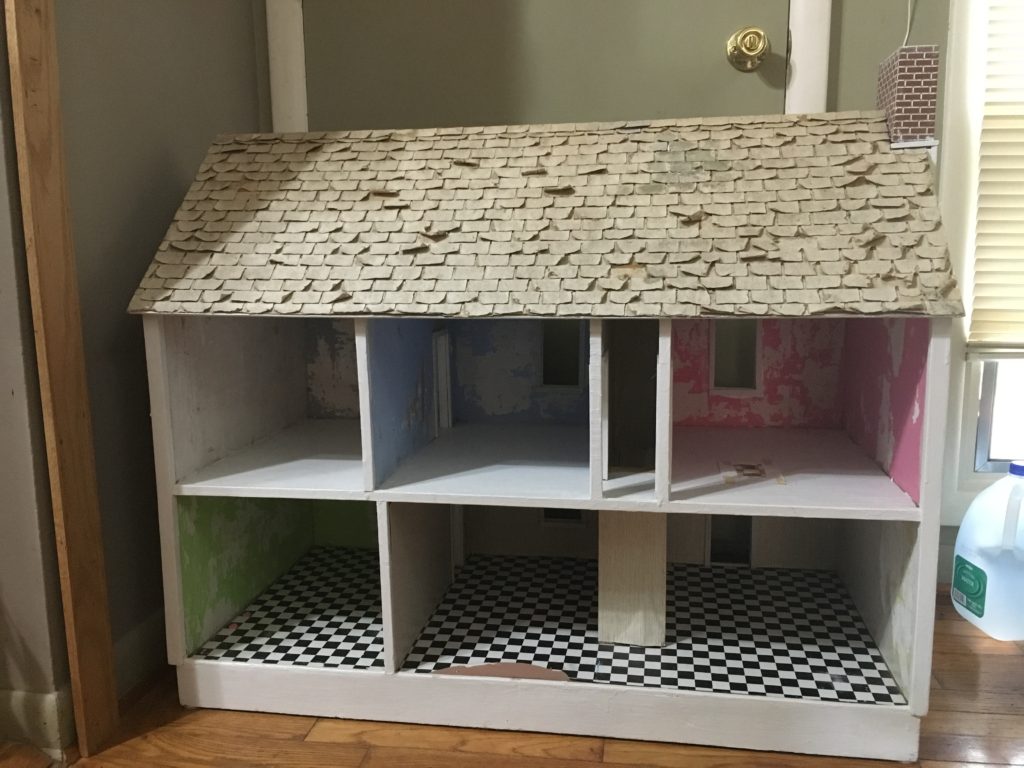
Next, I used a handy-dandy paint scraper, and went to work scraping off some of the peeling paint from the floors, walls, and ceiling.
While scraping the paint off. I focused more on removing any peeling paint, as I plan to put a thin coat of plaster on the walls, with some thin wood supports in walls and ceiling, to give it a more primitive effect.
So far, I plan to apply a thin coat of plaster to give the walls a more uneven white texture, with thin pieces of wood applied to walls and ceilings to suggest supports that I can hang things like dried herbs and baskets from. Because of this, I was only interested in removing flaking paint (which there was a lot of).
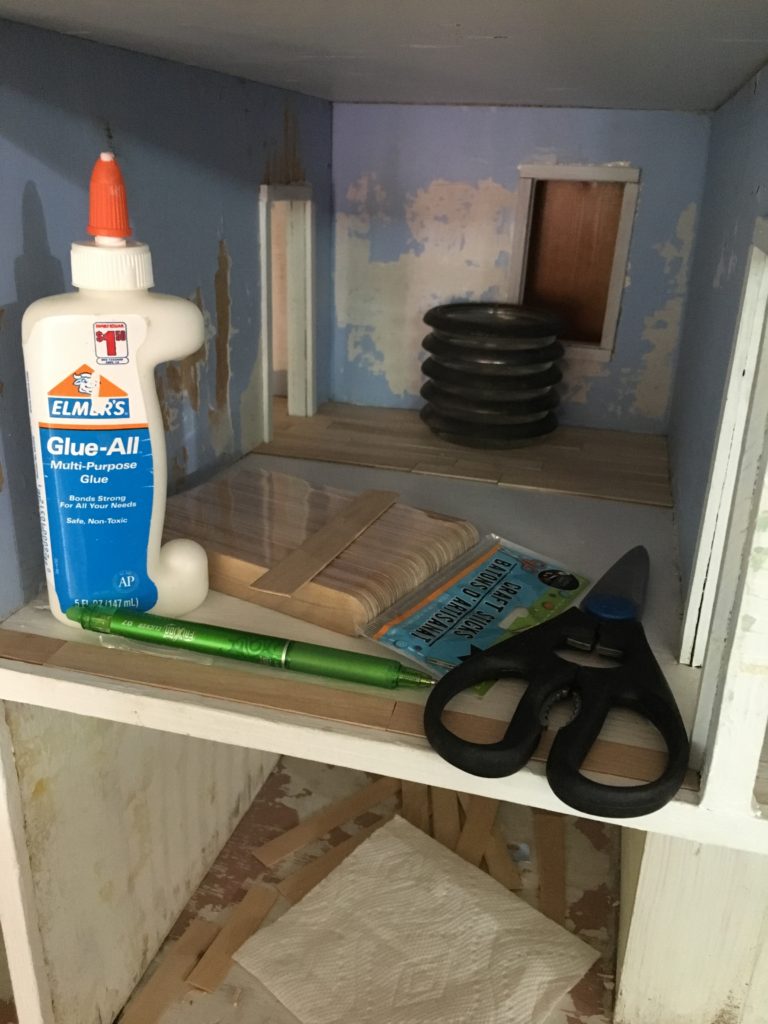
Using methods similar to those used in the farmhouse, I applied jumbo craft sticks to mimic real wood floors. I cut the rounded tips off the sticks with poultry shears and then applied them with glue, weighting them down in places that wouldn’t quite stay put. I used an xacto knife to trim around doorways and walls.
Next, I decided to work on the upstairs floors. I want to go with a pine board effect, similar to my farmhouse, but I would like the floors to look more weathered and stained. I plan to score the wood lightly with an xacto knife, to add wood grain, and then lightly stain them before varnishing.
Update:
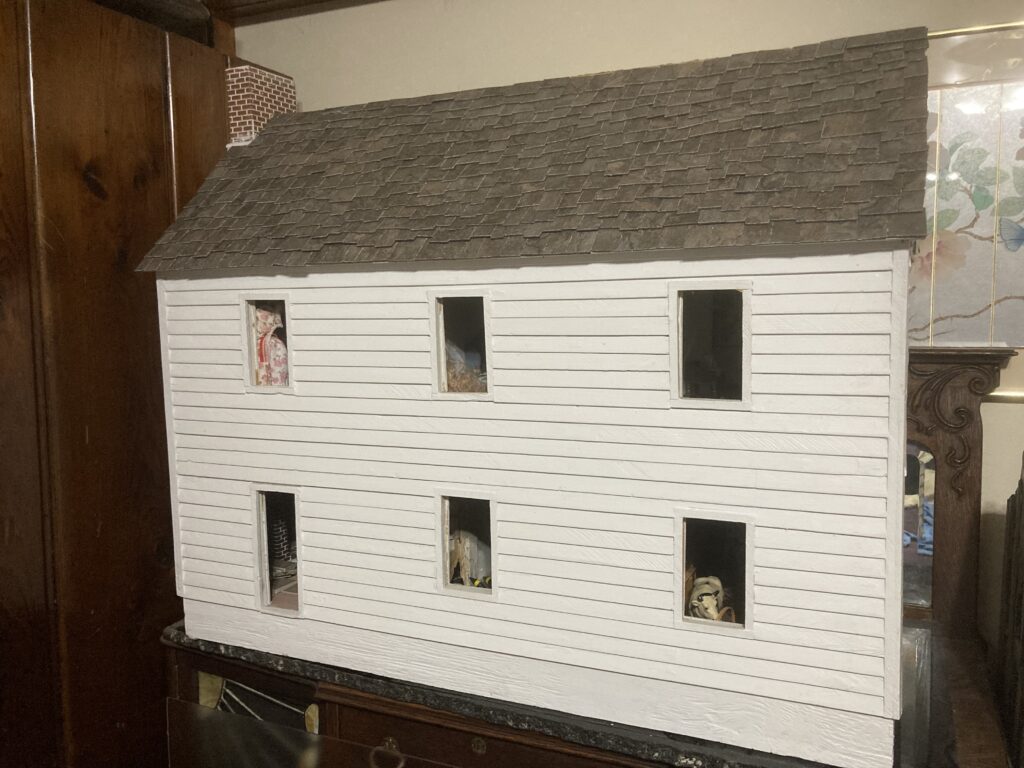
This is the updated roof! After removing the paper shingles that were in poor shape, I made slate-like shingles (described in another post) out of vinyl floor tiles.
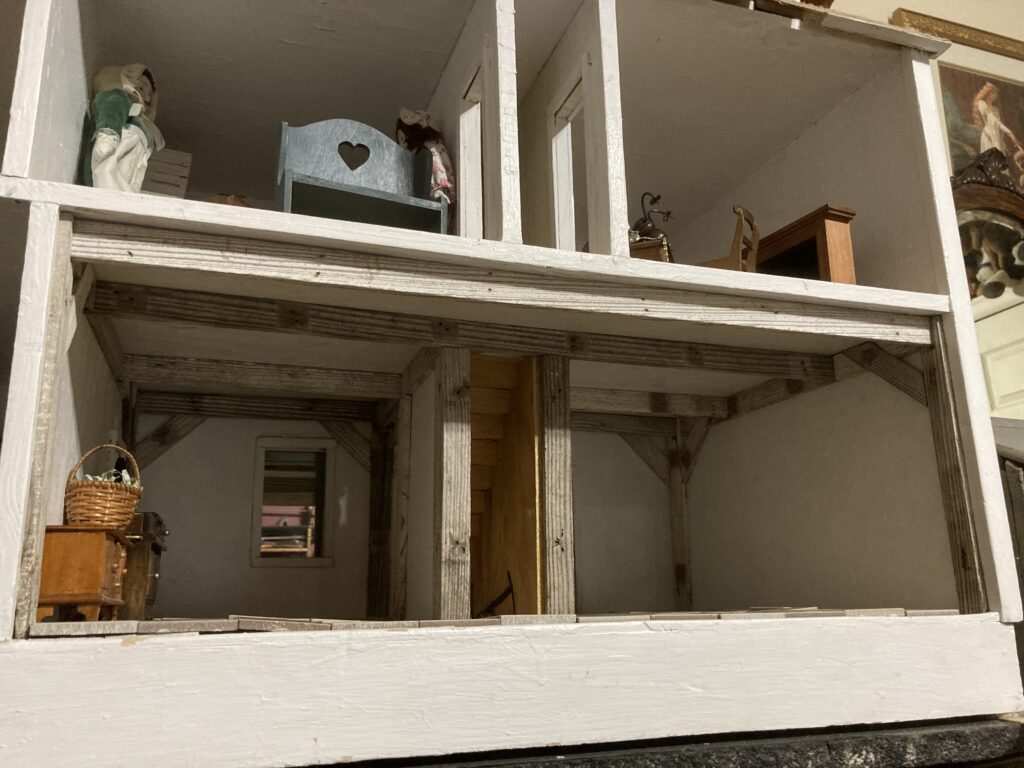
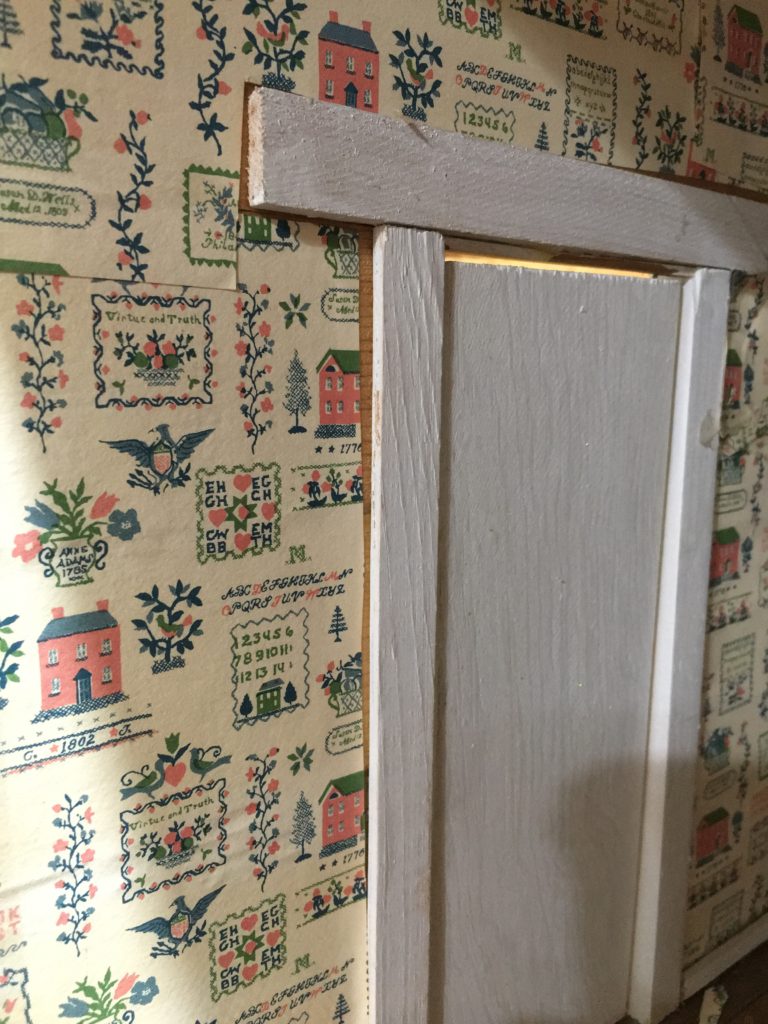
Next, I painted the walls white, using a thick paint so it looked like a thin coat of plaster. I took wood from an old flowerbed border fence, so it would have some nice weathering to it, and used that to make some wooden support beams for the lower floor. I carefully opened up the area under the stairs, so I can use it as a storage closet (I will eventually make a door for it).
A current photo of the lower floor. I have been experimenting with different flooring in the main room, and at the moment have settled on a combination of small ceramic tiles and leftover pieces of linoleum. I have tiny candle bundles hanging from the wooden beams, as well as baskets and a lantern. The fireplace is a ceramic walk-in style that I found on ebay.
Several months ago, I happened upon a photo of an antique dollhouse on Pinterest. I’d never been particularly interested in dollhouses, although my mother was (and still is) interested in miniatures while I was growing up.
That photo sparked my interest. The more I thought about it, the more I wanted, no NEEDED an old-fashioned-looking dollhouse that I could decorate for the holidays, especially Halloween and Christmas.
I looked online for ideas. I read about different dollhouse styles. I discovered that many people, much to my delight, would buy or build a dollhouse, keeping in mind a specific era in which to decorate it.
So, in essence, you could use your hobby to research a certain era in history and try to recreate it in your own little world? How awesome!
It happened that one day while at work, a coworker reminded me of a large, work-related box that I was expected to bring home that night, and instructed me to keep this in mind during our lunch hour, as the town we worked in was having its annual garage-sale event. Of course, I accepted the challenge and decided to stop at a couple of sales during our break.
For some reason, I was drawn to a particular road that I passed on occasion, and it so happened that the second sale I stopped at had exactly what I was looking for.
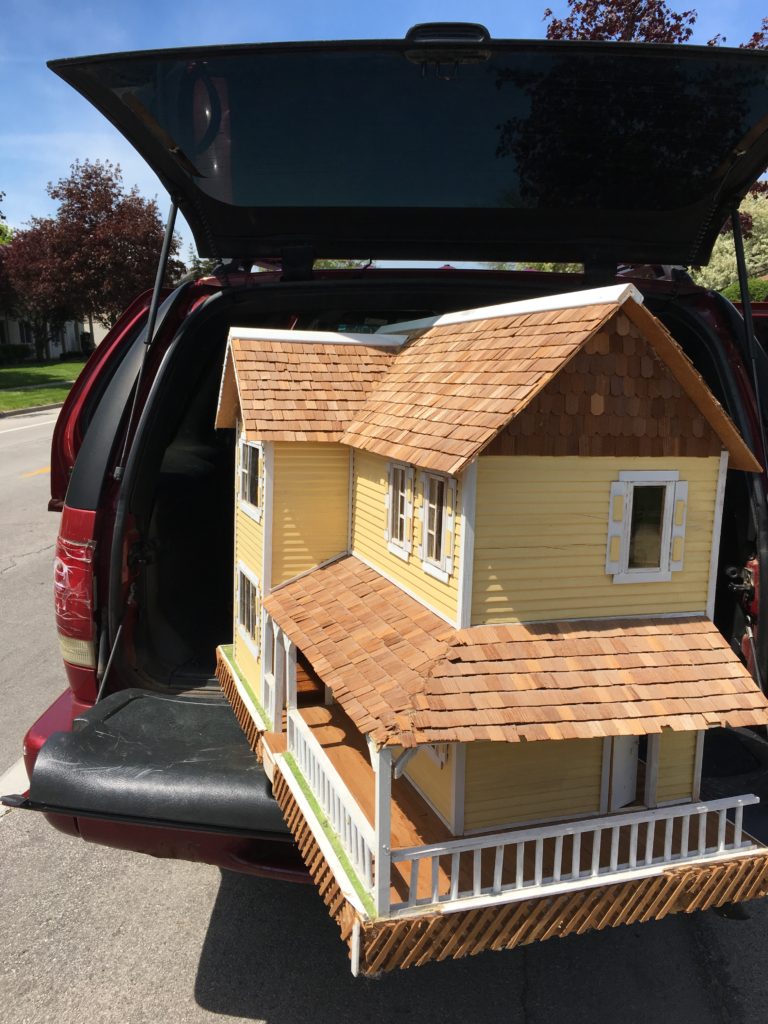
This farmhouse was purchased on the last day of the sale, for half off its original asking price of $65.
It barely fit in the back of my small SUV!
It was the last day of the sale, and everything was half off, including this not-quite-so-little gem. For $32, which was all the money I had on me, I acquired something that took up the whole back end of my vehicle, and a lot more of what little free time that I have.
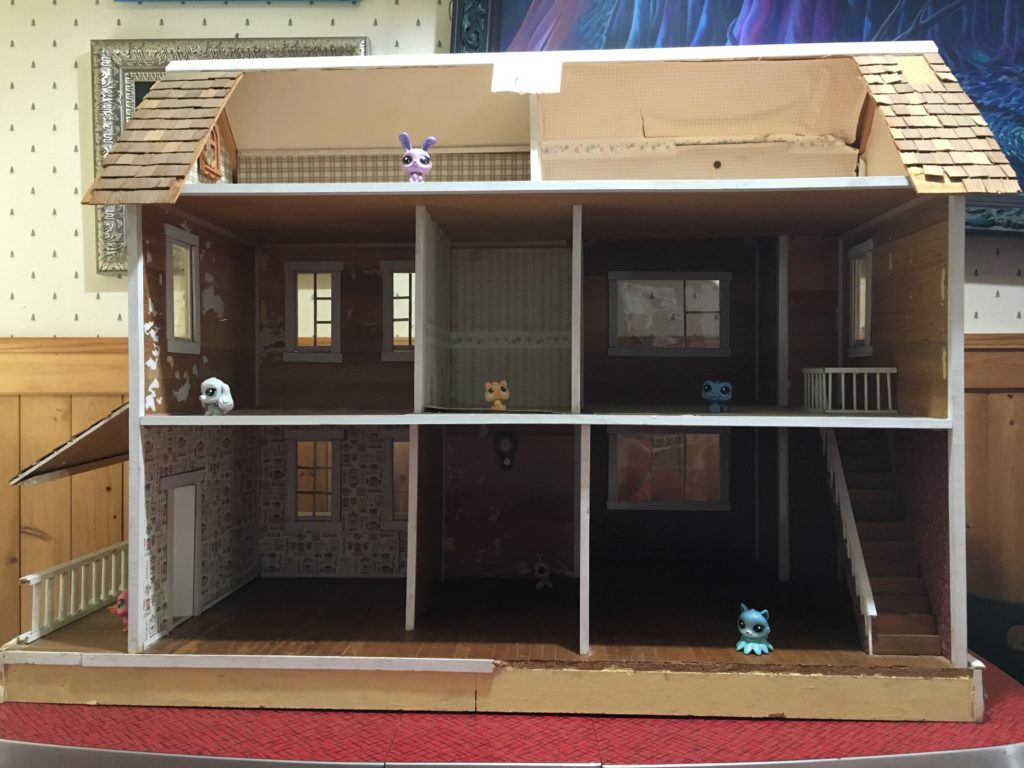
My 6 year old daughter quickly took to filling it with toy dragons, puppies, and kitties.
Inside view, shortly after acquisition (and after my daughter’s toy animals took possession.)
I’m still deciding on an exact time frame in which to decorate, but am leaning toward it being a rural farm that hasn’t quite gotten electricity, yet.
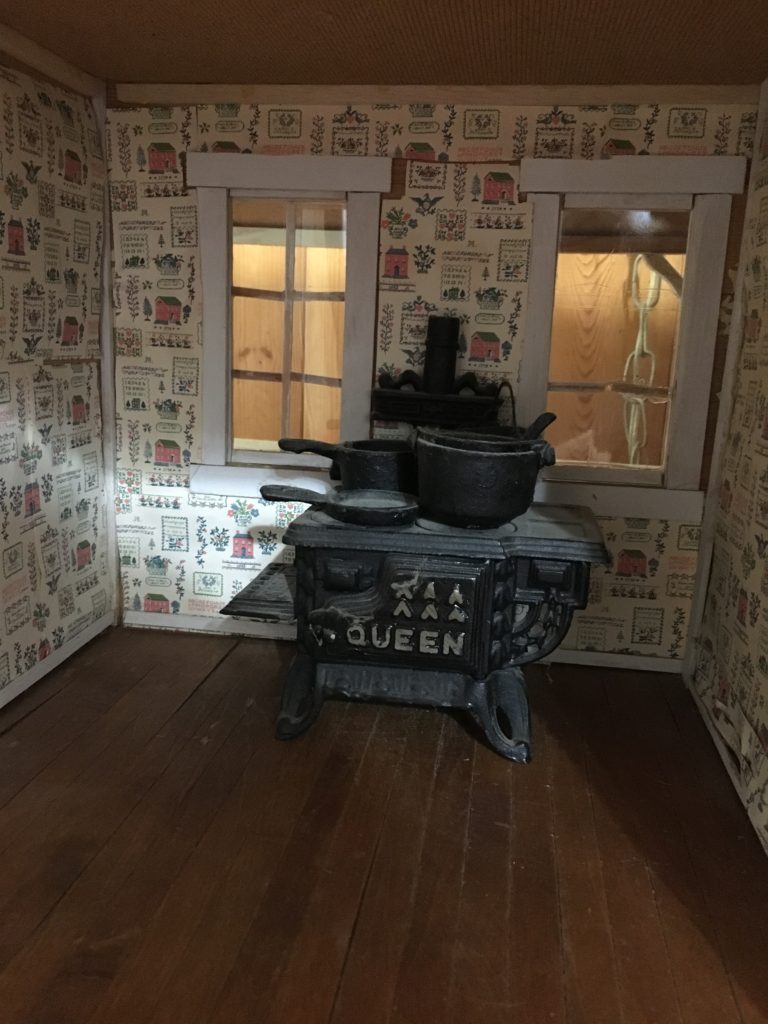
My mini cast iron stove fits in pretty well, except it does take up a lot of room in the small kitchen. I may have to re-think this in the future. The original wallpaper in the kitchen. I just love this pattern! It reminds me of something that my mother used as a border in her kitchen for a while. Unfortunately, this paper is poorly applied, and the adhesive that they used has stained it considerably over the years.
One of the first things I did was to rip out some of the old wallpaper that I didn’t like. It wasn’t too difficult to remove with a warm hair dryer, and a vinegar-wetted sponge for the more stubborn areas. As you can see in progress photos, I’m still not done with that task.
Bathroom Floor
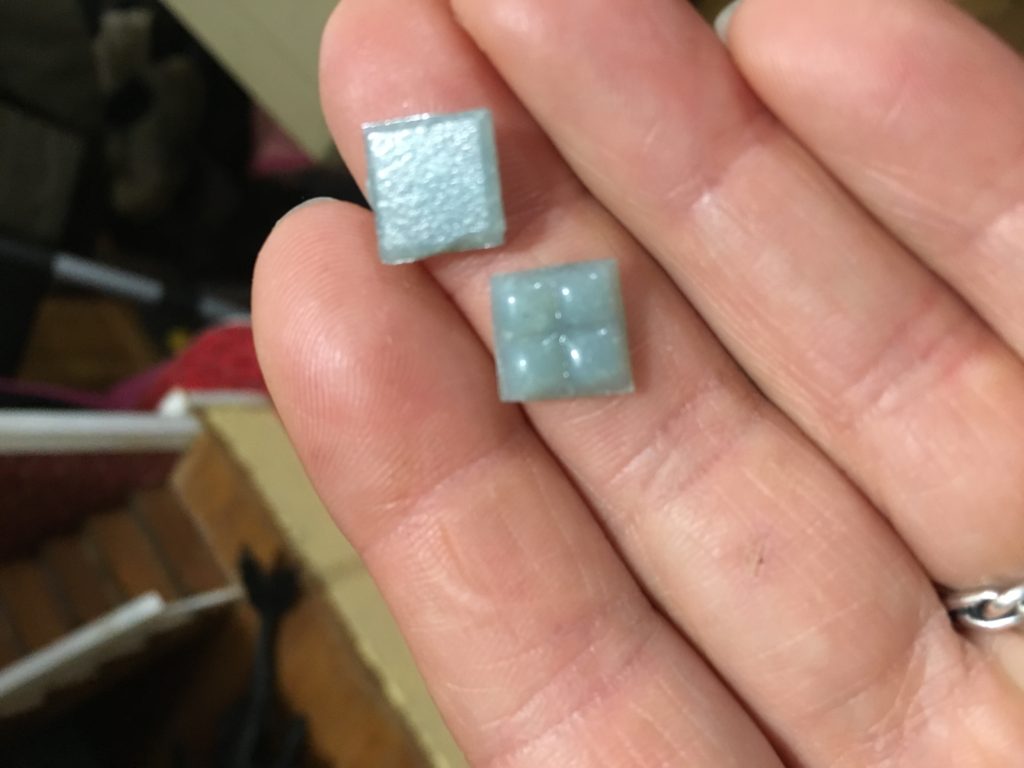
I acquired, through Amazon, some mosaic tiles of real glass to use for my bathroom floor! I plan to order a few more sheets of them to add to the walls, also.
The individual tiles are made of real glass, and come in a sheet mounted on paper. You cut the paper to the size you need, and then glue the tiles down with paper-side up. Then, you use a wet sponge to pull the paper off the tiles.
The individual glass tiles (ordered from Amazon.com, from seller Melody Jane) come mounted on a sheet of paper. You trim the paper to the size you want, and can also nip the tiles to fit. I didn’t need to nip them, fortunately for me, as they fit the space I needed perfectly. I then glued the tiles face down (so the paper side is up).
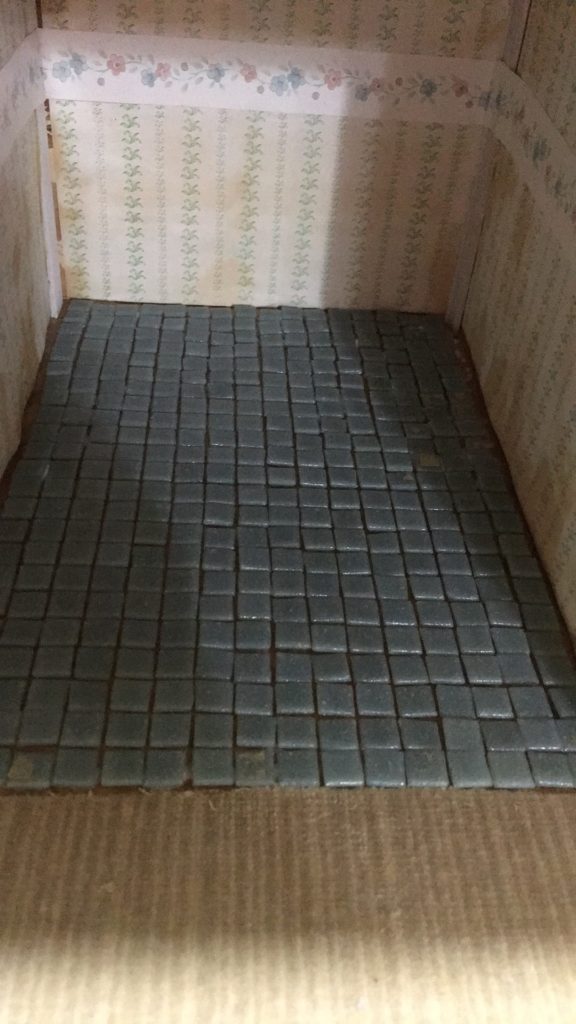
Tiles glued down. Note that some pieces of paper backing still have to be washed off.
After the glue dries, you next use a wet sponge to break up and wash away the paper backing. Unfortunately for me, I didn’t glue my tiles well enough, and some popped off, so I had to also use this step to re-glue loose tiles.
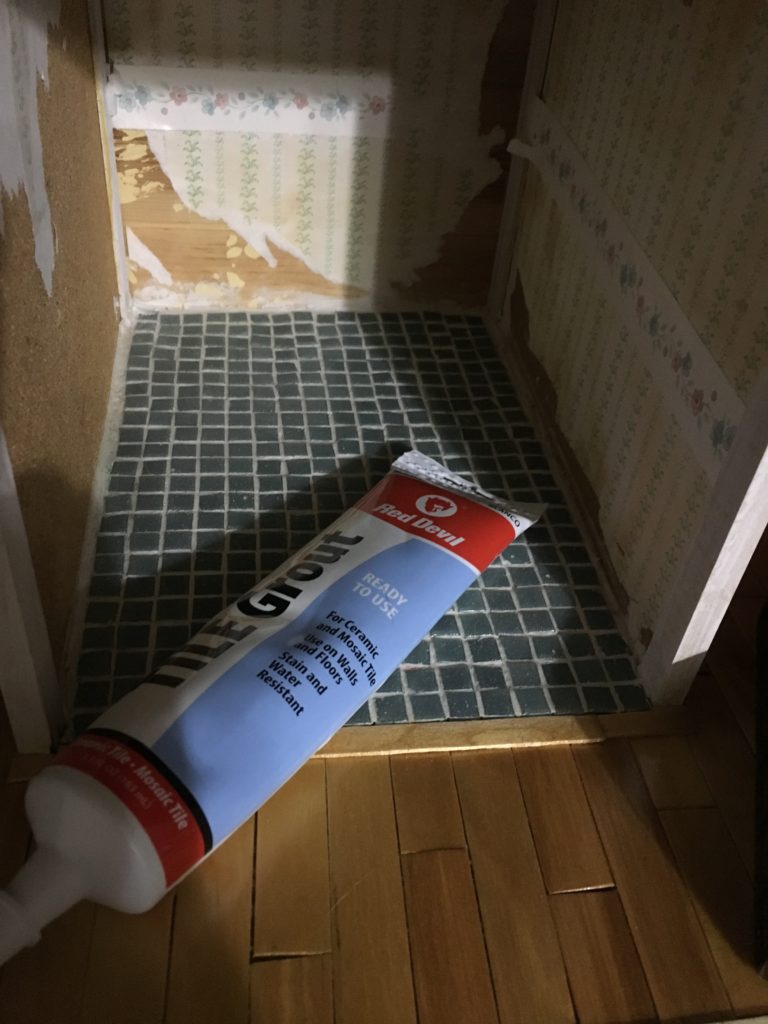
After removing the paper backing and making sure all of the tiles were glued securely, I bought a tube of mosaic tile grout.
Tile grout, after the tiles have been grouted.
I followed the directions on the tube, and filled in the cracks between the tiles with white grout. It was easy-just cut the tip off the tube per directions, then gently squeeze out the paste along the cracks in the tiles. I used a small square of cardboard as a squeegee, pushing the grout deep into the cracks and smoothing it around the tiles. When I was sure that the cracks were filled, I used a damp sponge to gently wipe the wet grout from the tops of the tiles, without pressing so hard that it washed the grout out of the cracks. All in all, I am very pleased with the final result. I plan to eventually purchase more sheets of these tiles to use as backsplash on the walls and around where the tub will be.
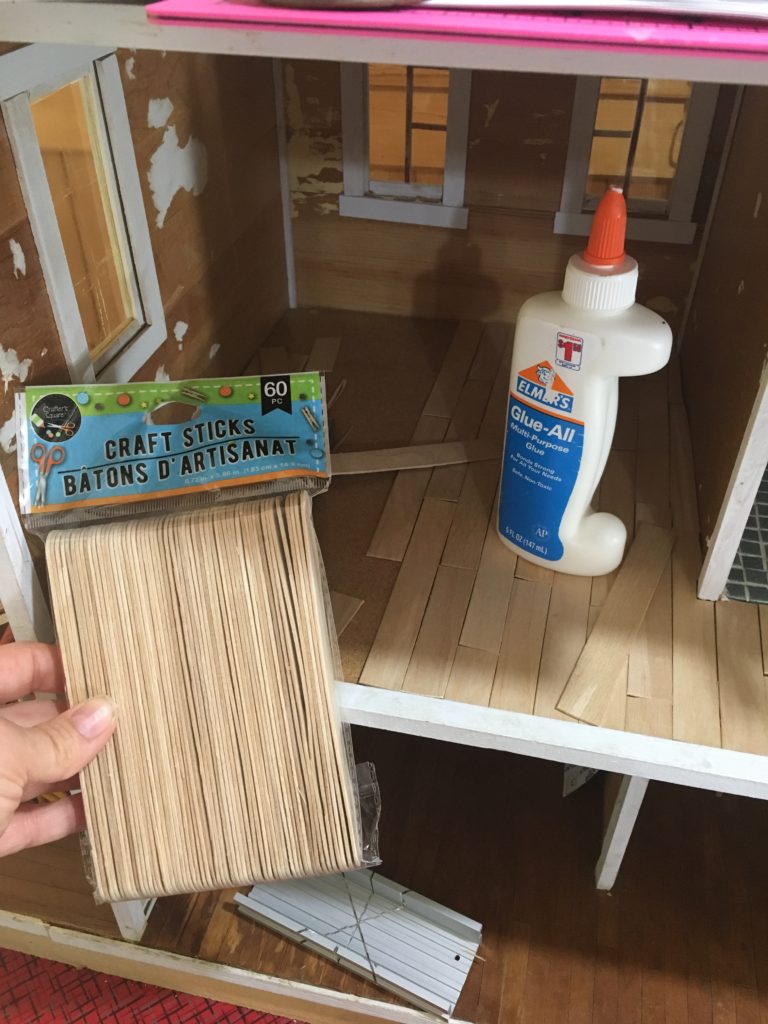
Second Level Flooring
The flooring on the second level was pretty rough-outdated scraps of dingy carpet. I made quick work ripping that out. Leftover glue and/or material was easily removed with a damp sponge and vinegar in a spray bottle.
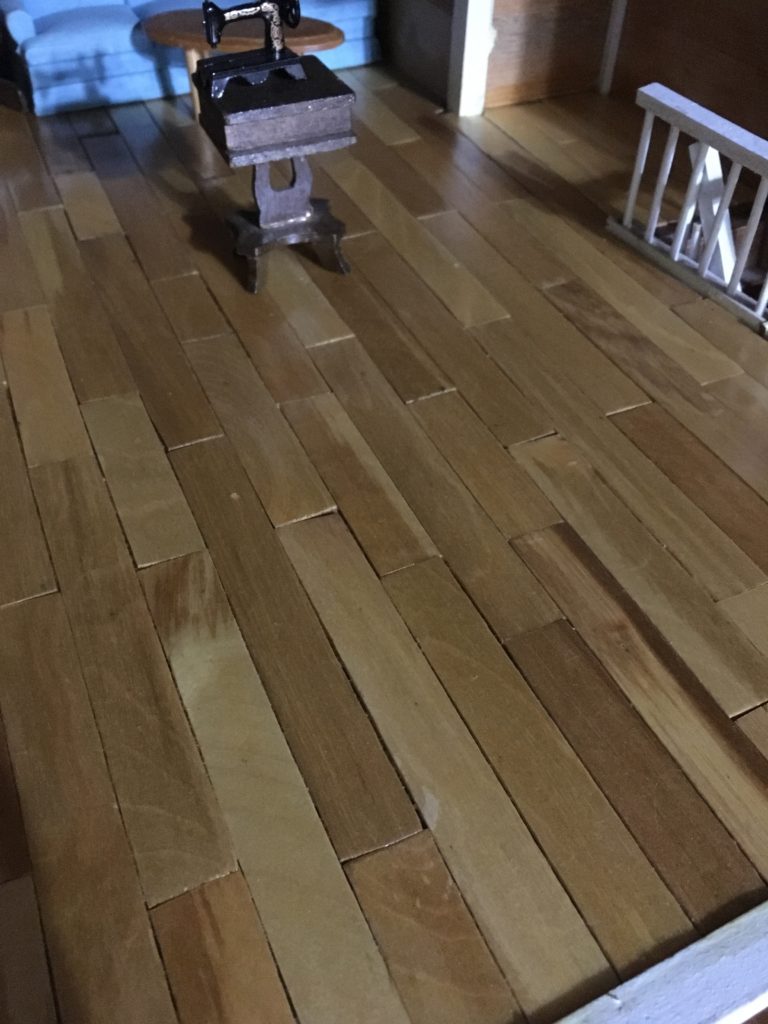
These jumbo craft sticks worked well for flooring, and also for many other miniature crafts.
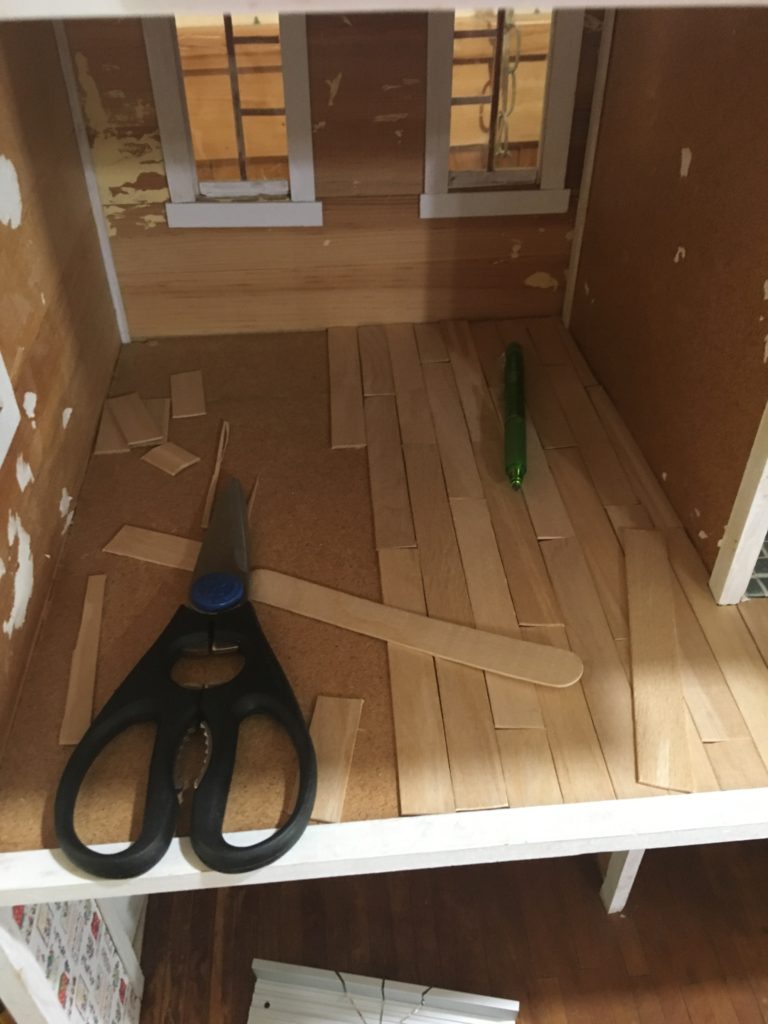
I decided on a pine plank look for these floors, as I have seen plenty of older homes with simple pine boards on the floors. To achieve this look, I found some jumbo craft sticks at the local Dollar Tree. I cut off the rounded ends using poultry shears, so they would be more board-like, and then staggered them across the floors to make the board ends more random. (Side note-a previous owner of our house installed the wood floor in our kitchen in such a way that the board ends are almost all lined up, and it looks awful. It’s really torture to an OCD person. Please, don’t do this to people).
I staggered the sticks to make the board ends more random.
I used an xacto knife to cut the pieces to fit around doors and corners. I used elmer’s glue to glue all of the pieces down, and set heavy glassware on top of troublesome boards to keep them flat (I tried to avoid warped boards as much as possible).
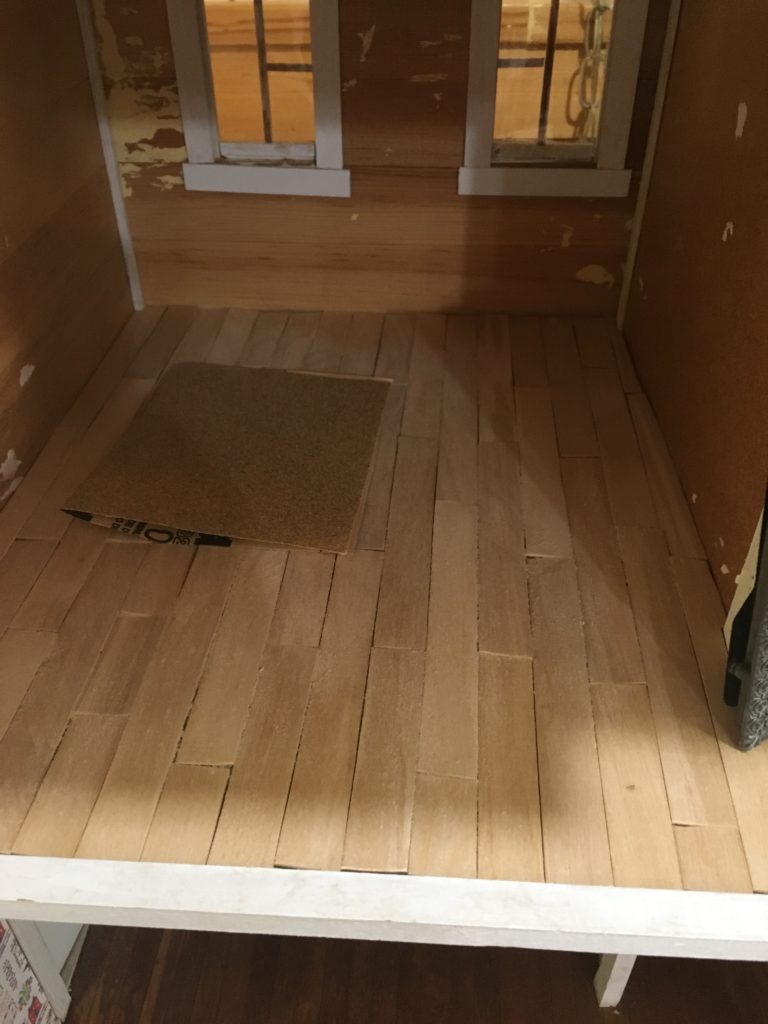
I sanded the floorboards after the glue was dry, to smooth out rough edges and fill some of the cracks between boards with a little sawdust.
After the glue dried, i took some sandpaper and sanded with the grain of the wood, trying to level out rough edges and get a little sawdust into the cracks between boards.
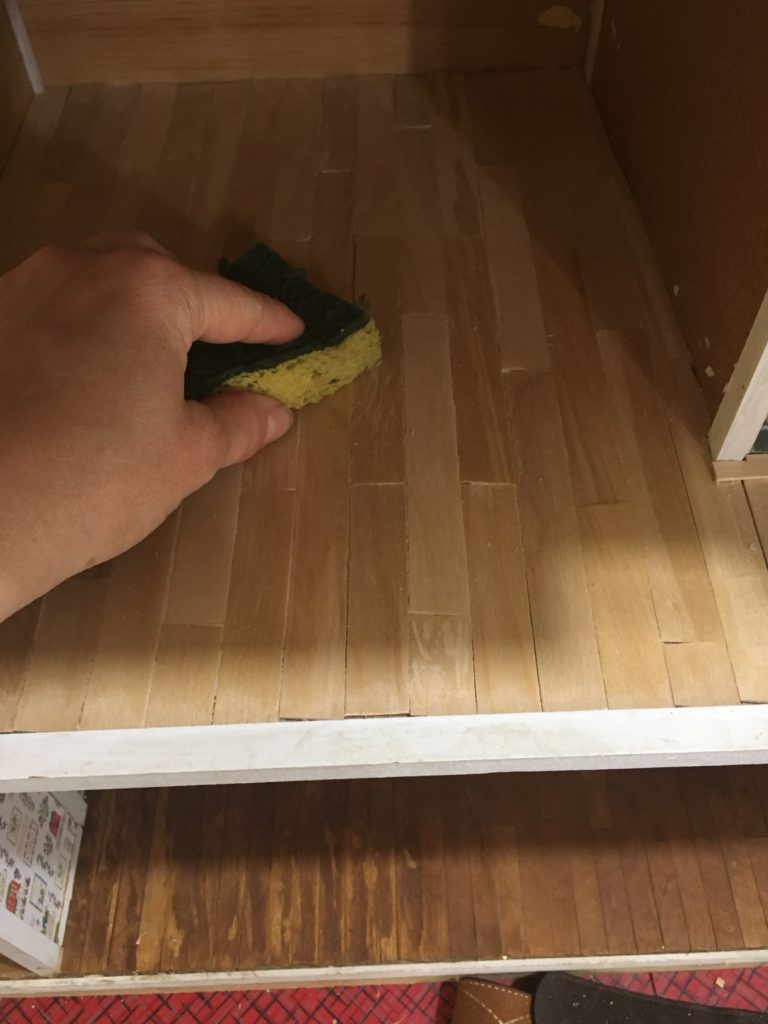
After sanding, wipe the boards with a damp sponge to clean sawdust off the surface before varnishing.
After sanding, I wiped the boards with a damp sponge to remove excess sawdust and prep the surface for varnishing. If you decide to use stain, now would be the time to do it, before varnishing.
After several coats of varnish.
I applied varnish according to instructions on the can- putting it on with a brush, letting it dry, sanding lightly (I used a torn piece of paper to sand, as it doesn’t take much), and then applying another coat. I applied several coats until I was satisfied. Now, my first-level flooring is jealous!