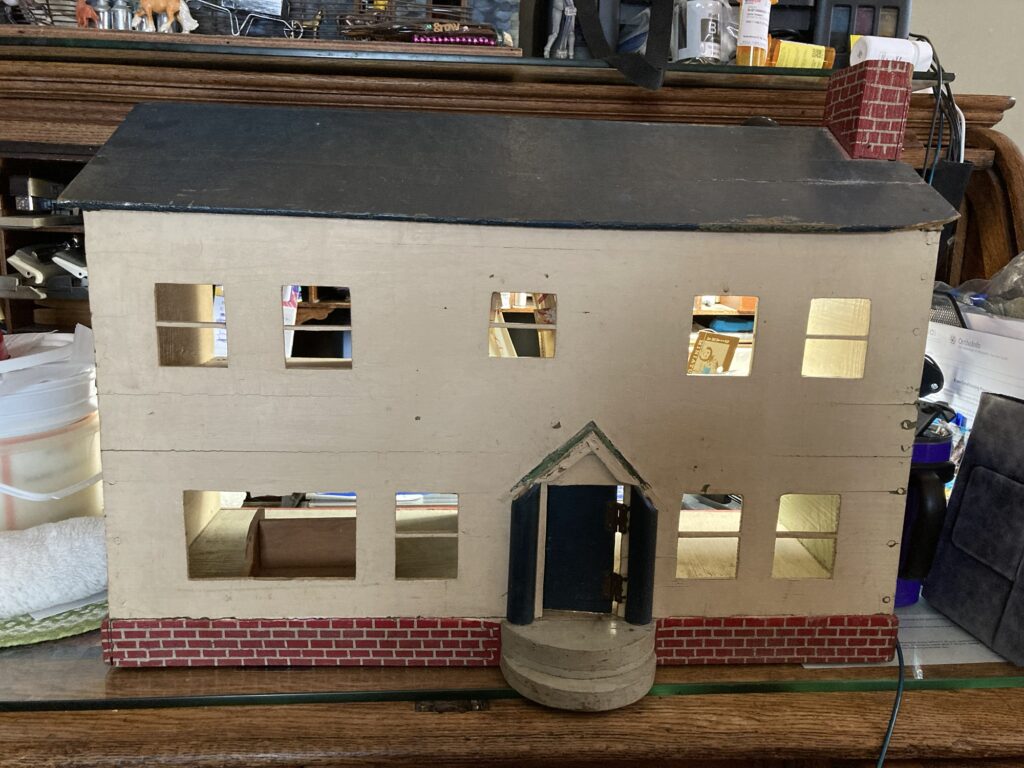
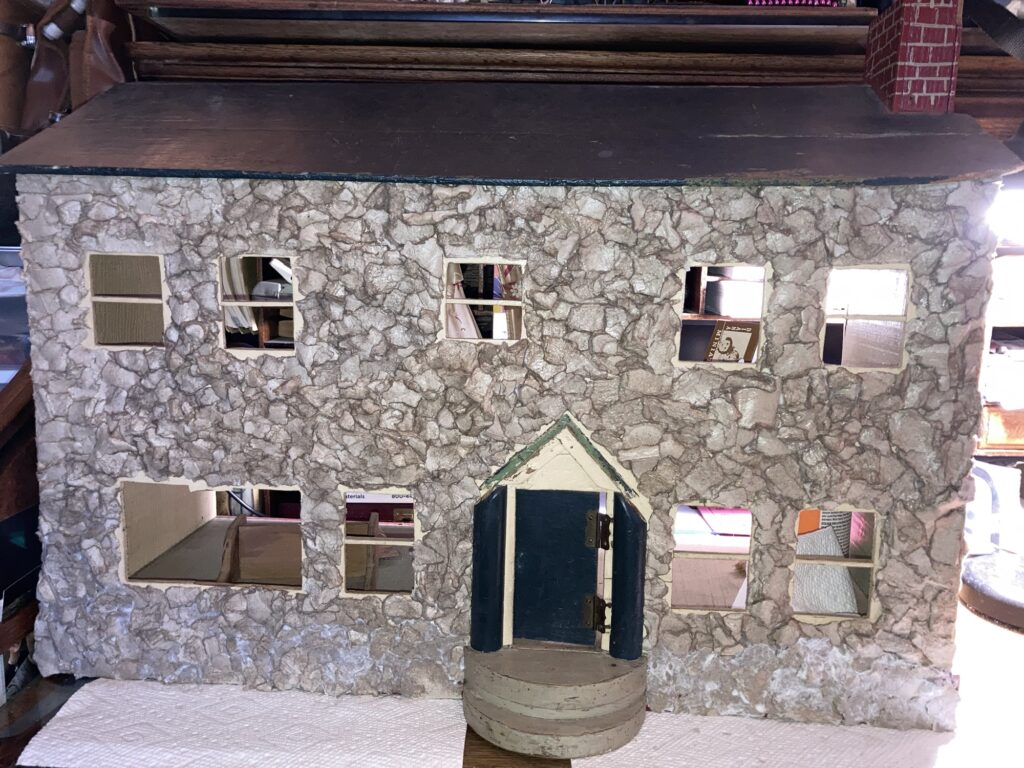
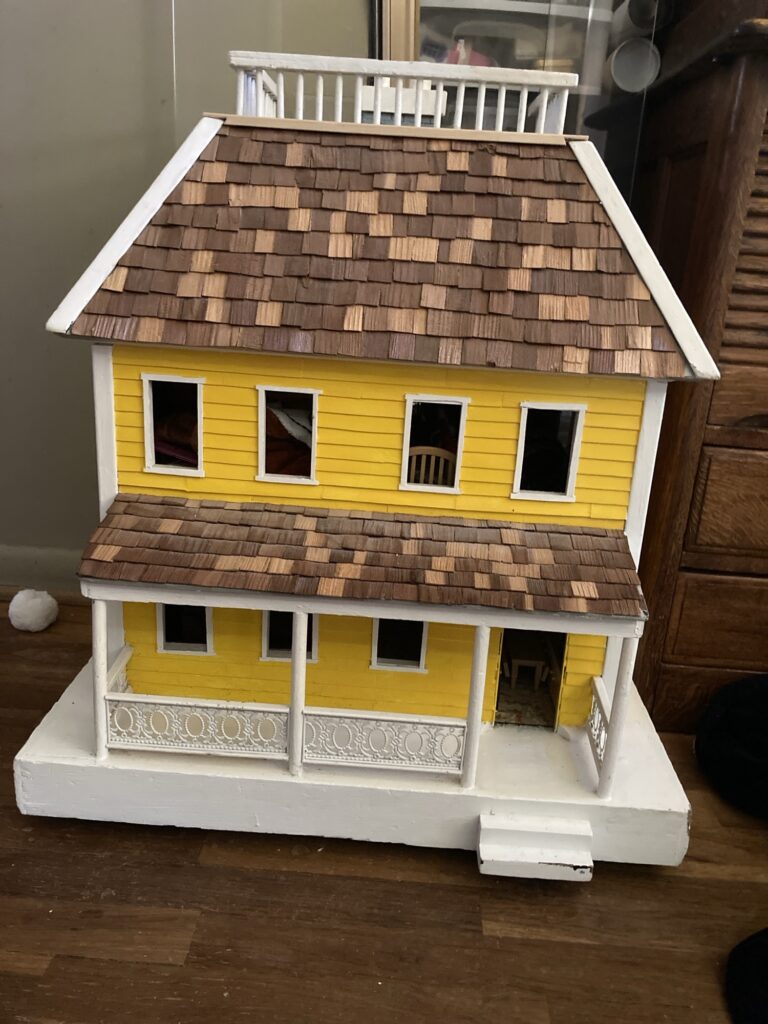
This dollhouse was purchased on Facebook marketplace. It is older and I believe home made probably in the 1950’s. I liked the tall, narrow shape of it for my medieval plans.
First off, I decided to take photos of the exterior for my own personal records. I feel bad altering this 75-ish year old house, but I feel that if I ever feel like changing it back to original condition I think I could without too much trouble.
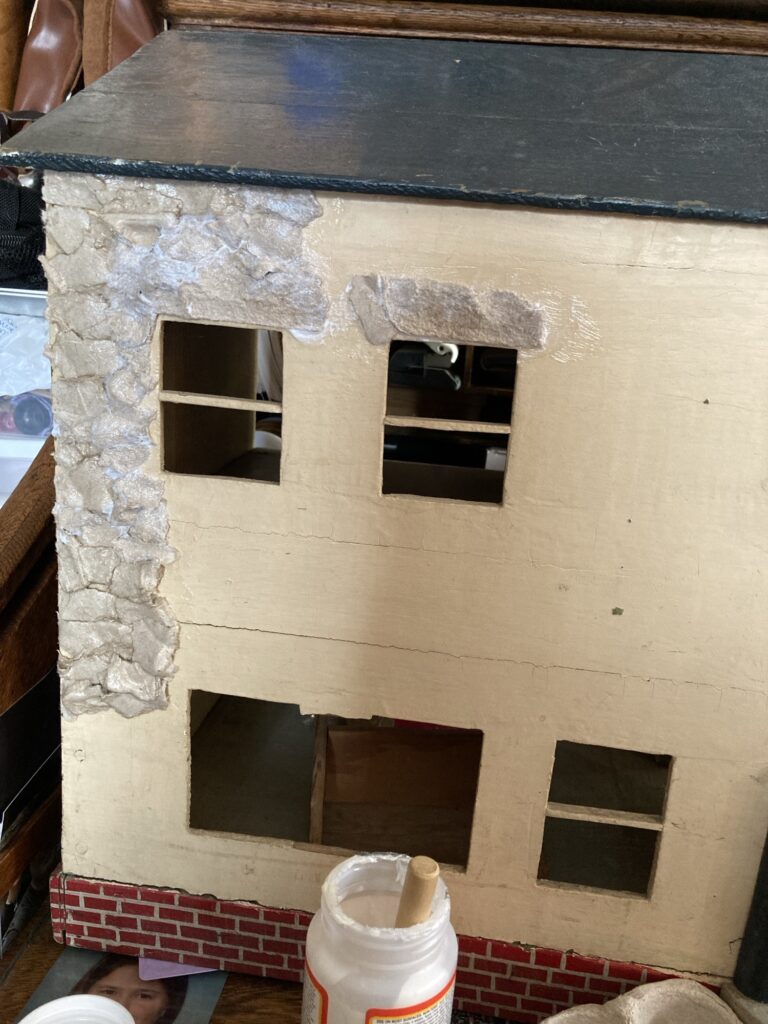
What I am starting off with. This house would need a bit of restoration if I wanted to make it like new. Instead I plan on adding stone siding and eventually a thatched roof.
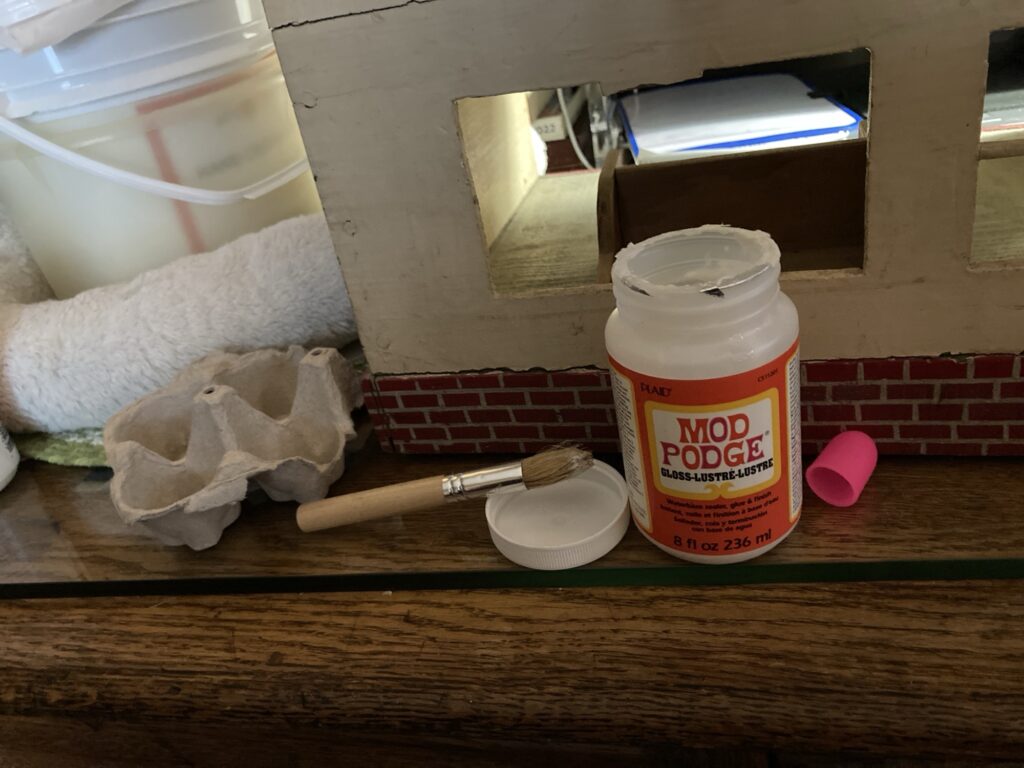
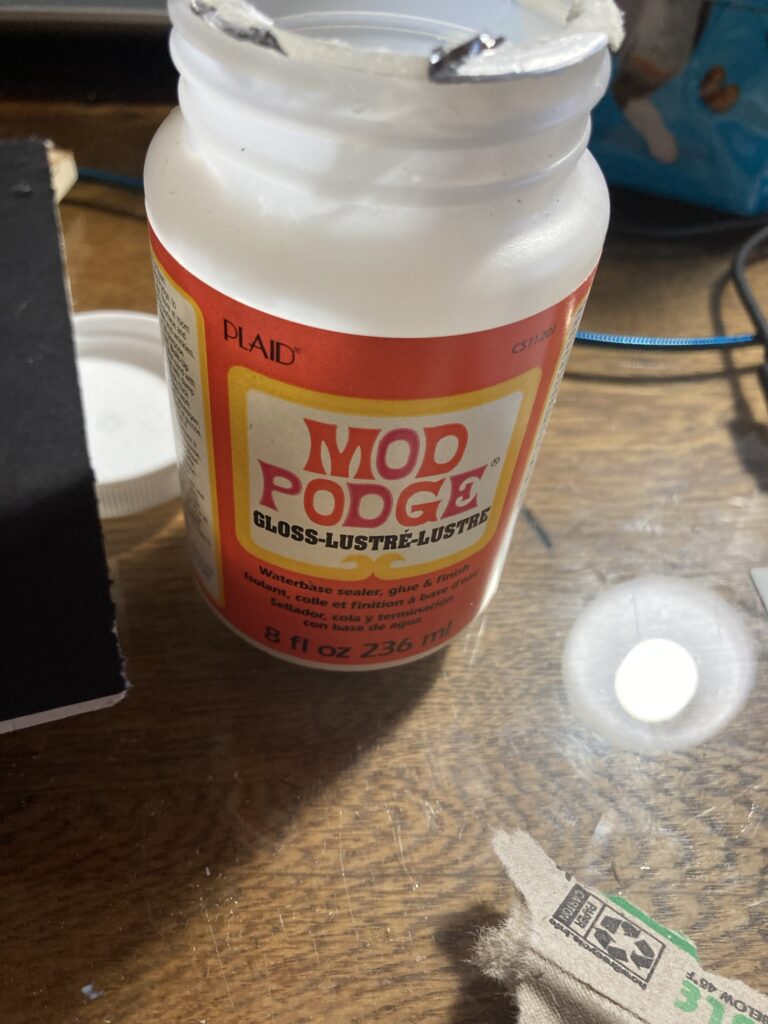
Next I am going to add egg carton stonework to the exterior. I start with cardboard egg cartons and mod podge adhesive.
I am using Mod Podge and a stenciling brush with my cardboard egg cartons.
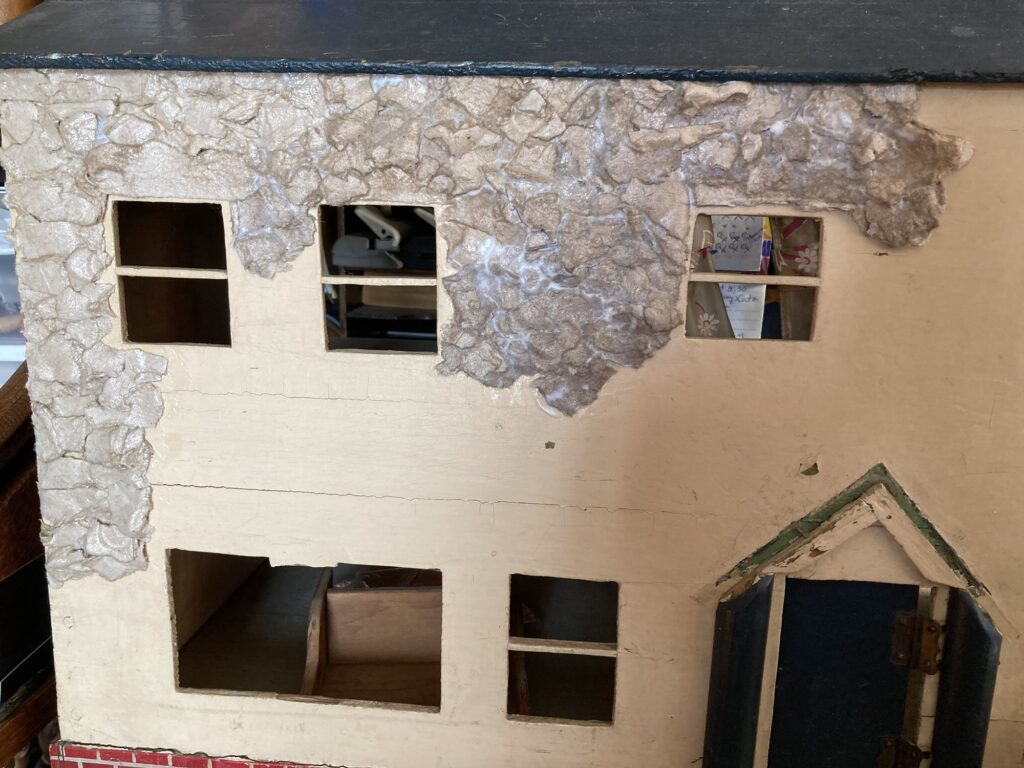
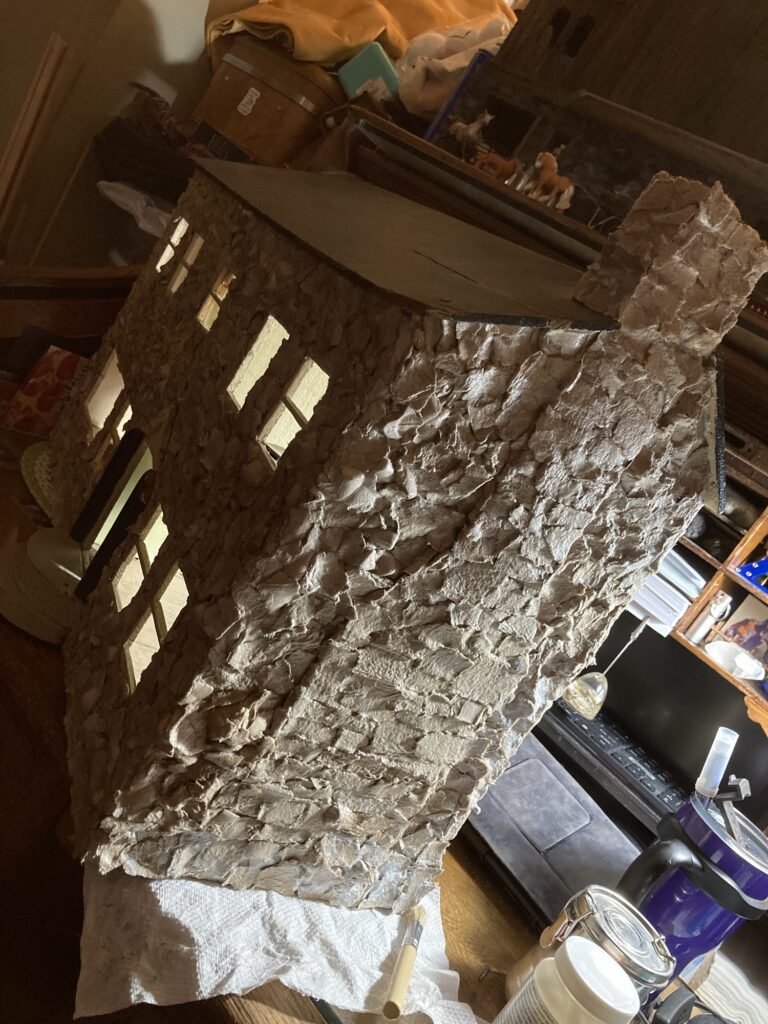
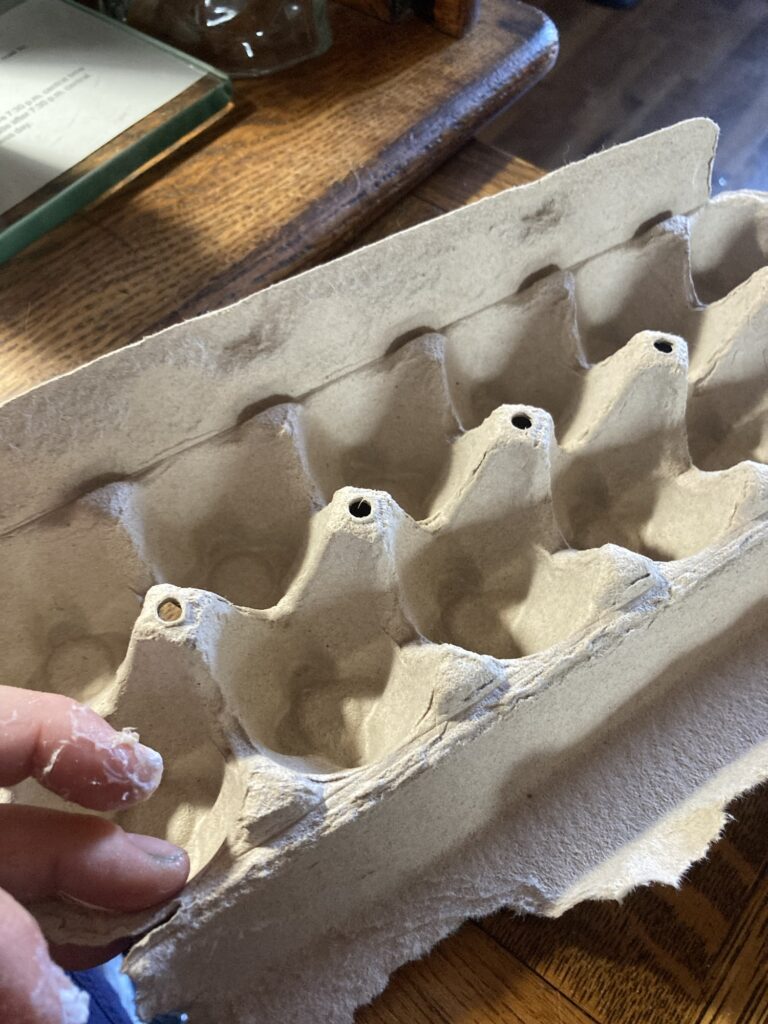
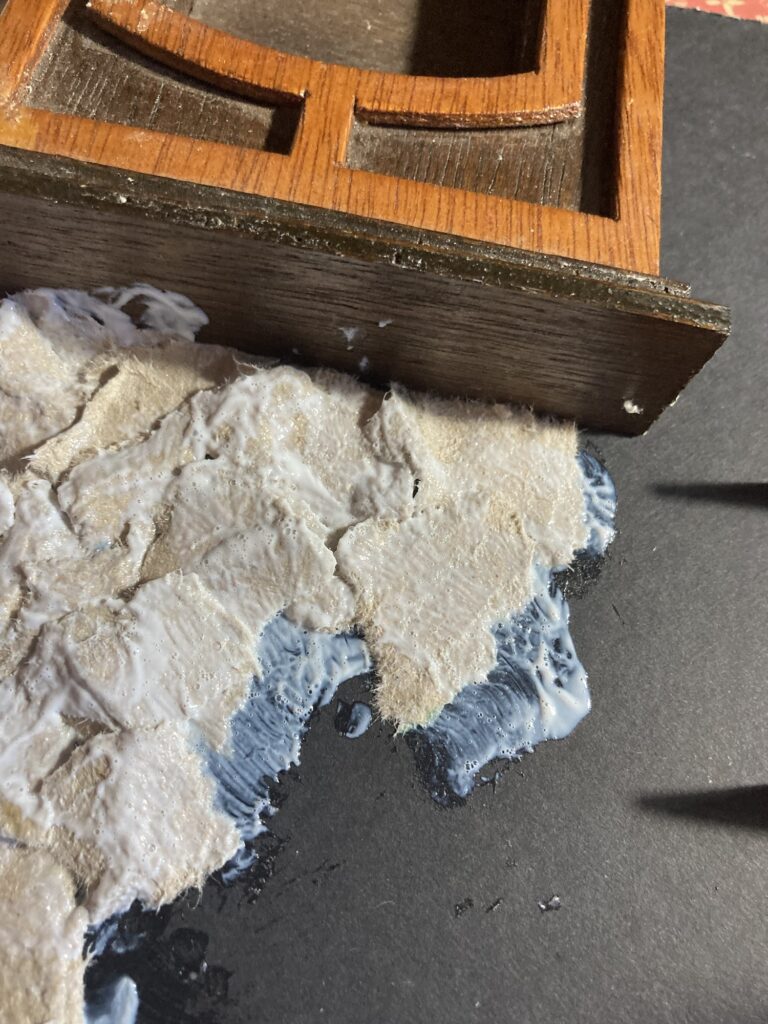
I rip off little pieces of egg carton and, makingsure any writing is on theback of the piece so it won’t be noticed, I glue it with the Mod Podge so it will eventually have a brick texture. I build the pieces up so they are thicker in areas. I cover the front and back with the glue.
I rip the cardboard egg containers into pieces and then use the Mod Podge to cover both sides of it with glue. I am placing them to cover the whole surface of the house siding to get a stone-like texture. I am layering the pieces to get the best texture I can.
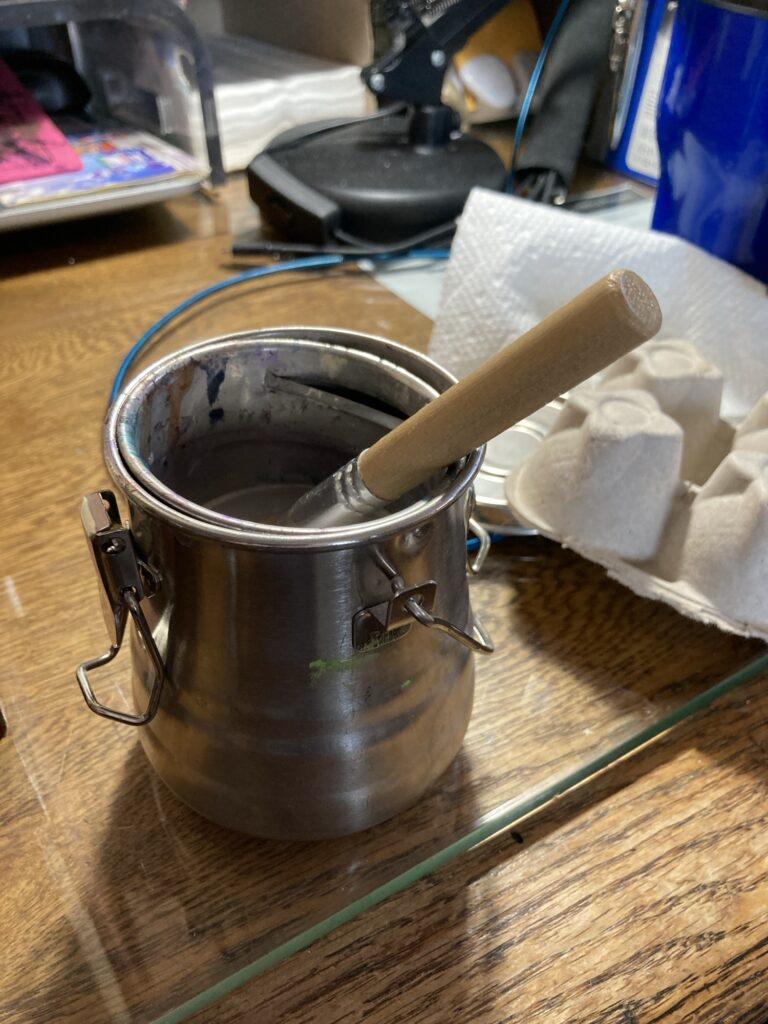
I am also keeping a paint brush can of water nearby to clean the bristles of my brush occasionally so the glue doesn’t dry to it. I wipe off excess water from the bristles on a paper towel so i don’t thin out my glue.
Keep the glue from drying on your brush by cleaning it in water occasionally, and then wiping off excess water to keep the glue from being thinned.
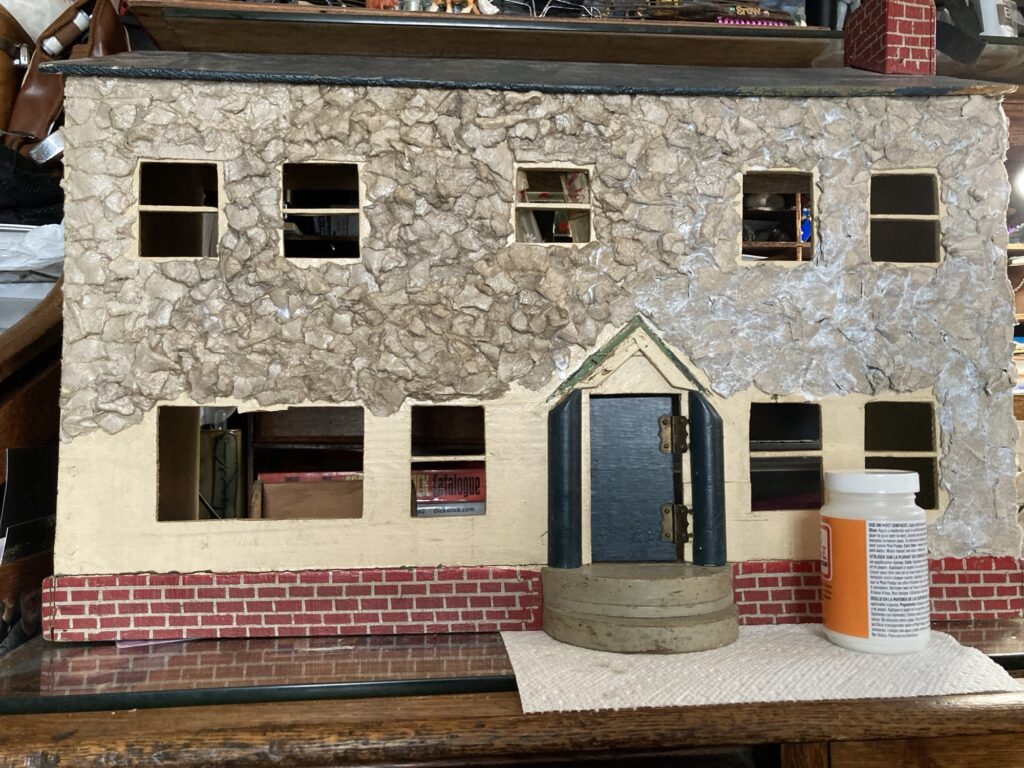
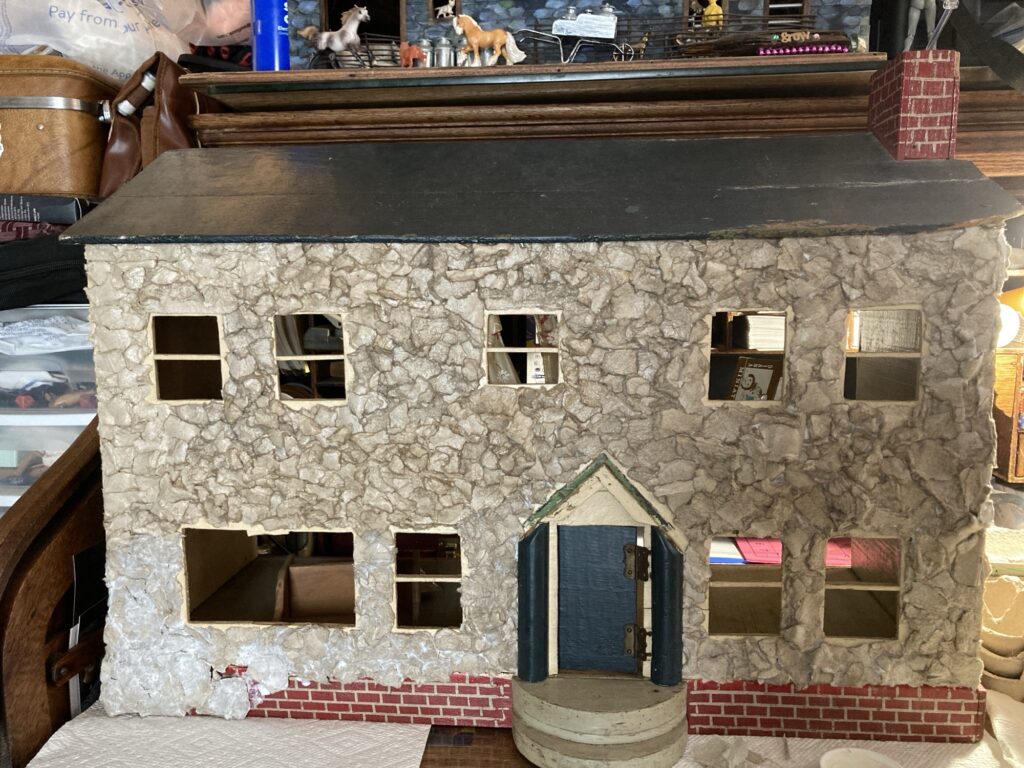
My plan is to possibly paint them to resemble individual stones when it is all dry, depending on how it looks.
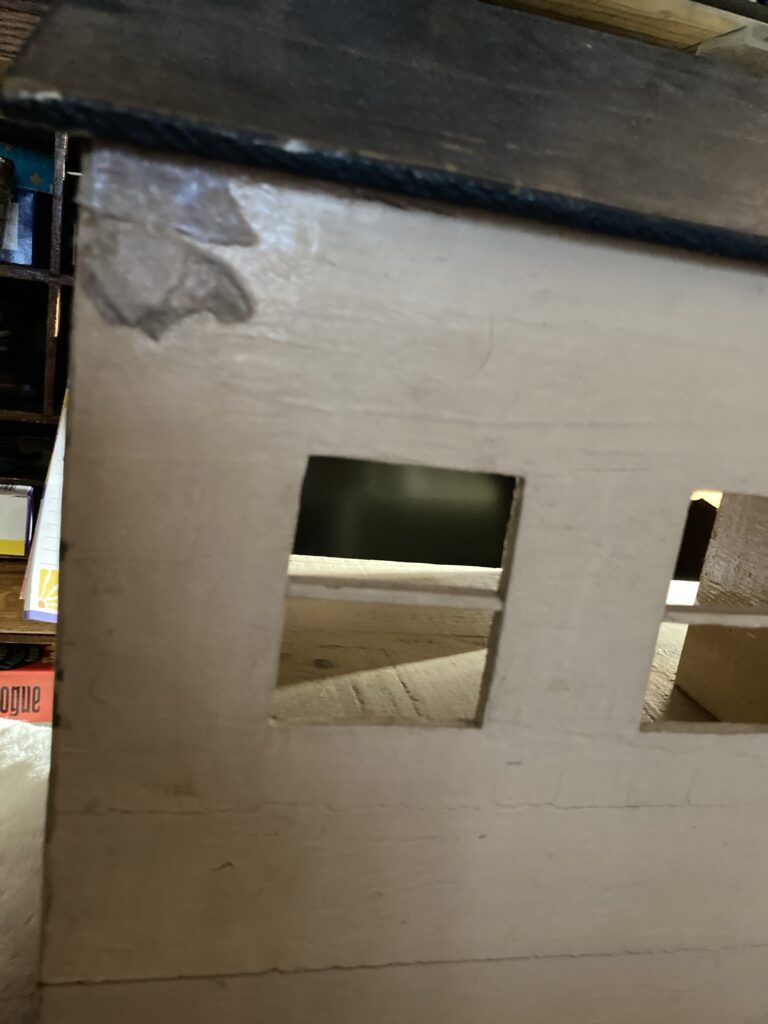
I am keeping a little space to the window’s edge for trim to be added later. It shouldn’t be difficult to carefully trim away excess cardboard if I need to in order to make room for the window trim.
One side pretty much done for now. Still have to do around the doorway better. Another side done. I chose to make the chimney ‘blocks’ more uniform to have a distinction between siding and chimney.
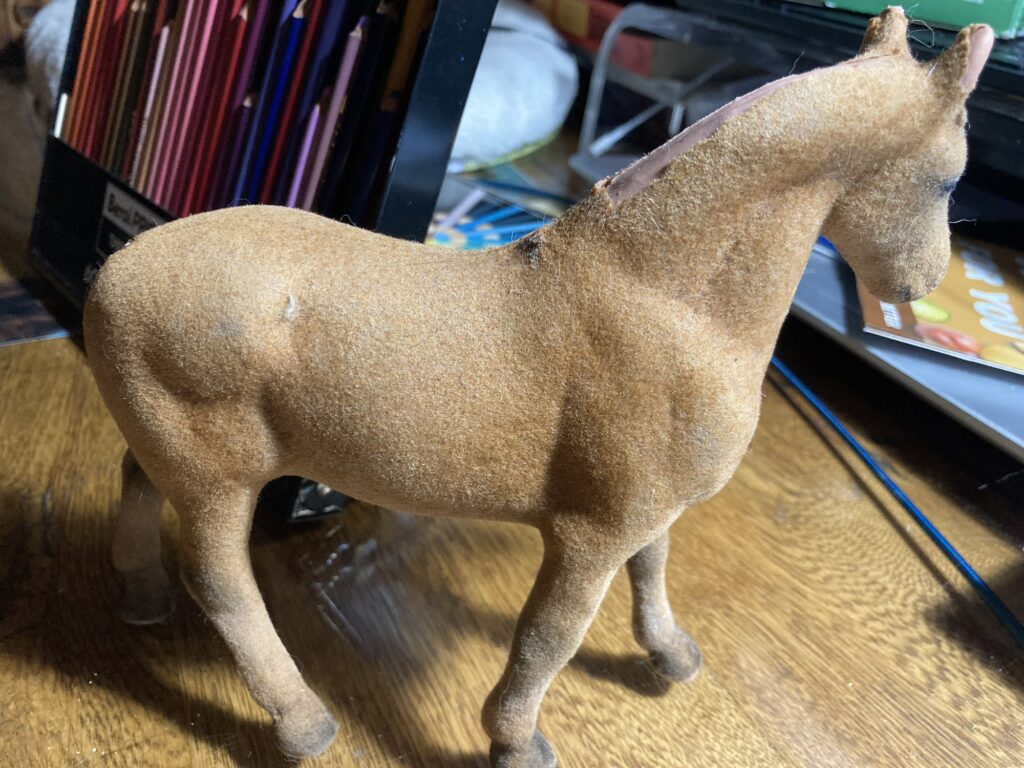
I have been wanting a donkey for my dollhouse livery stable, and decided to try updating another flocked horse toy.
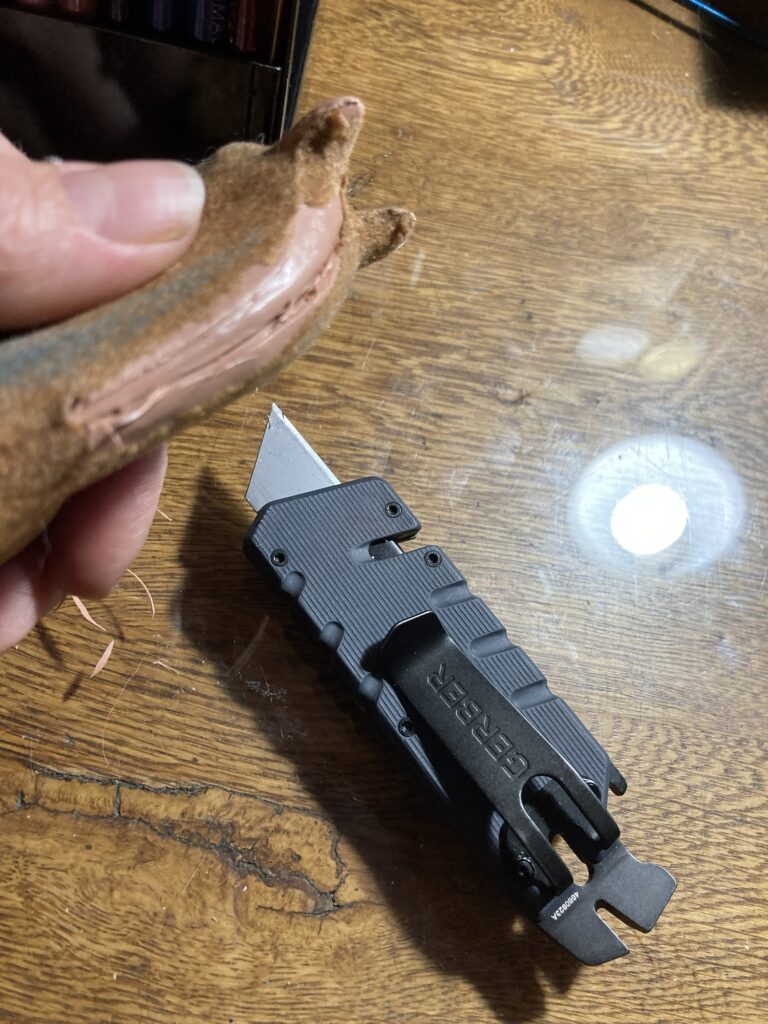
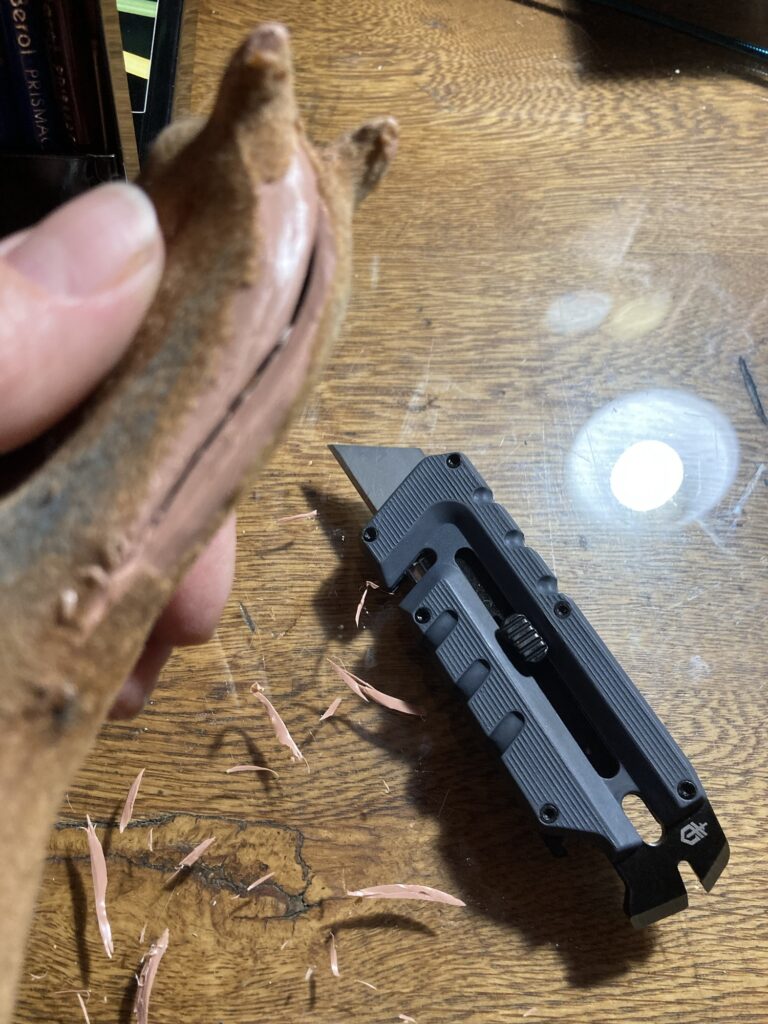
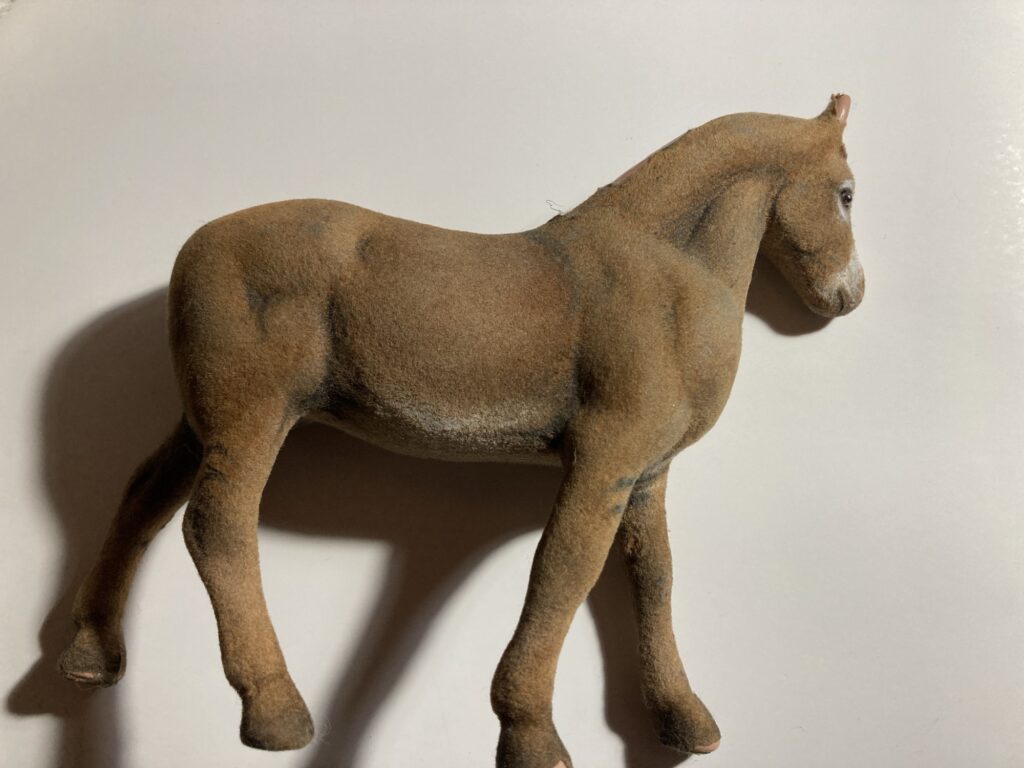
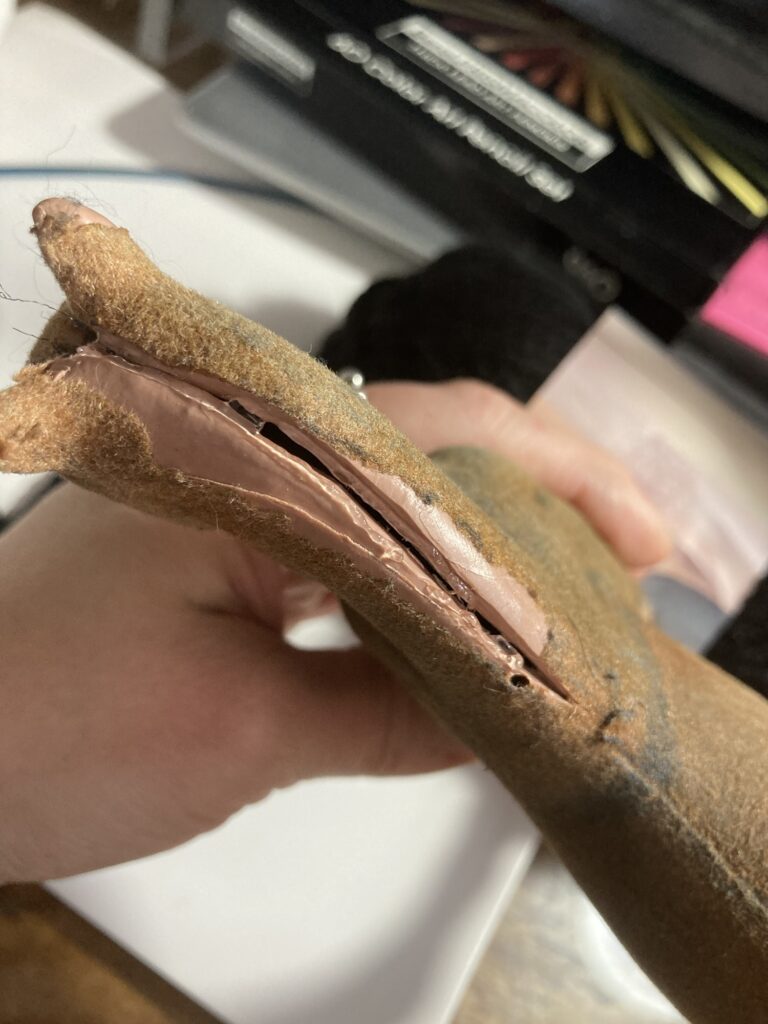
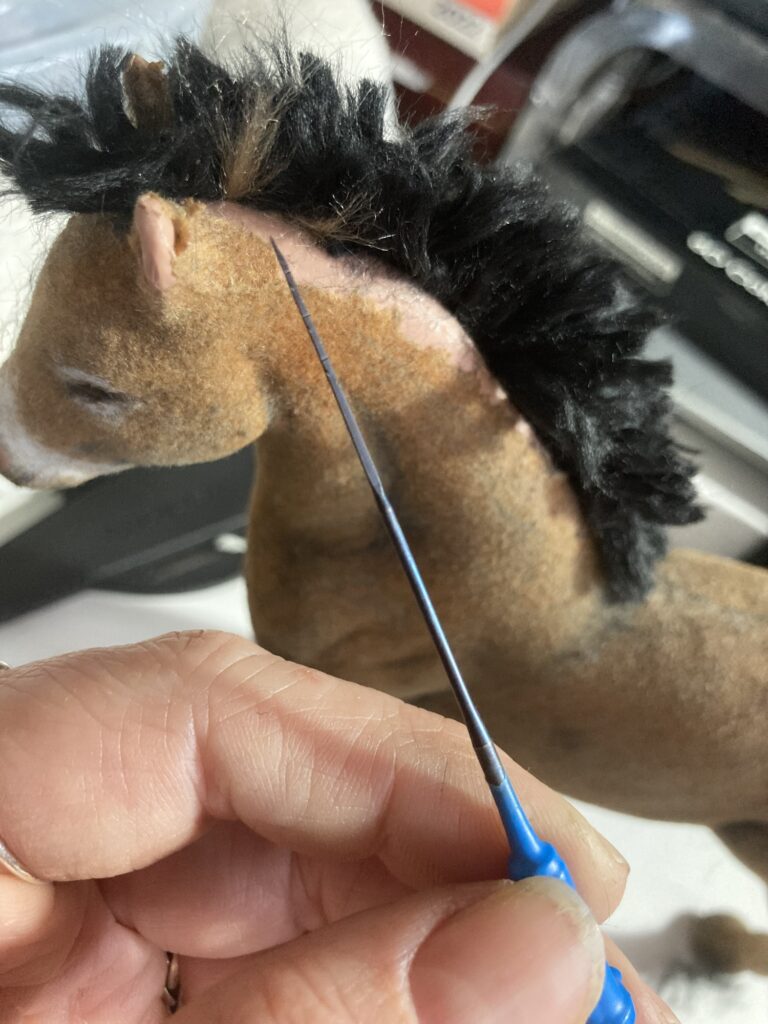
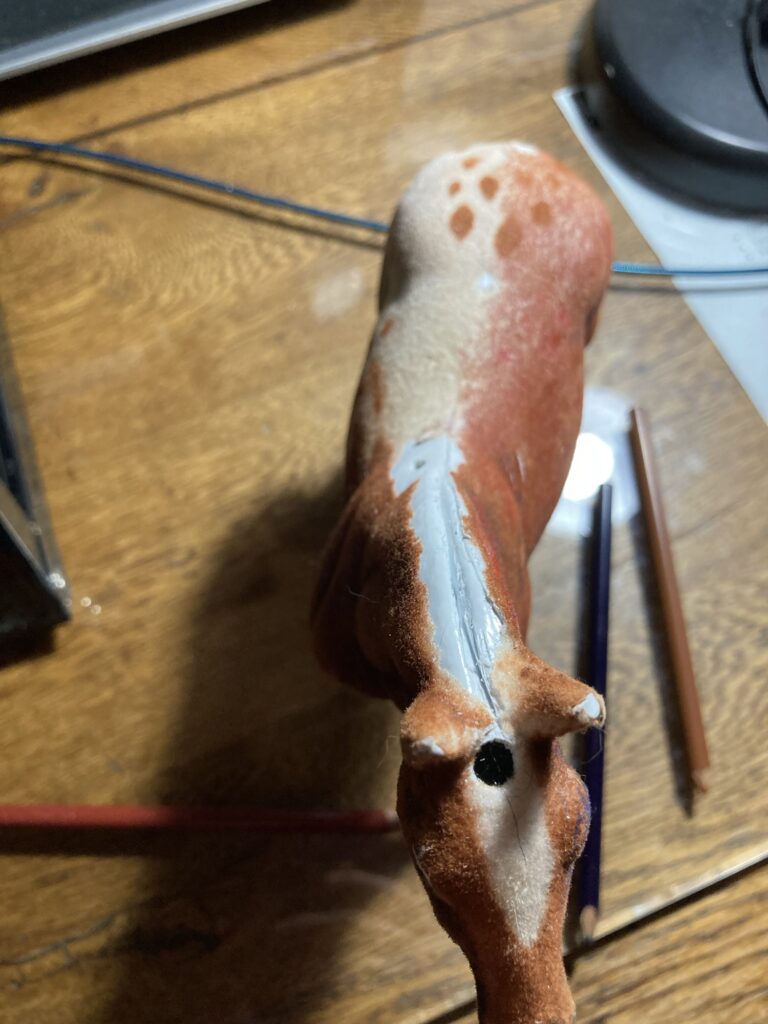
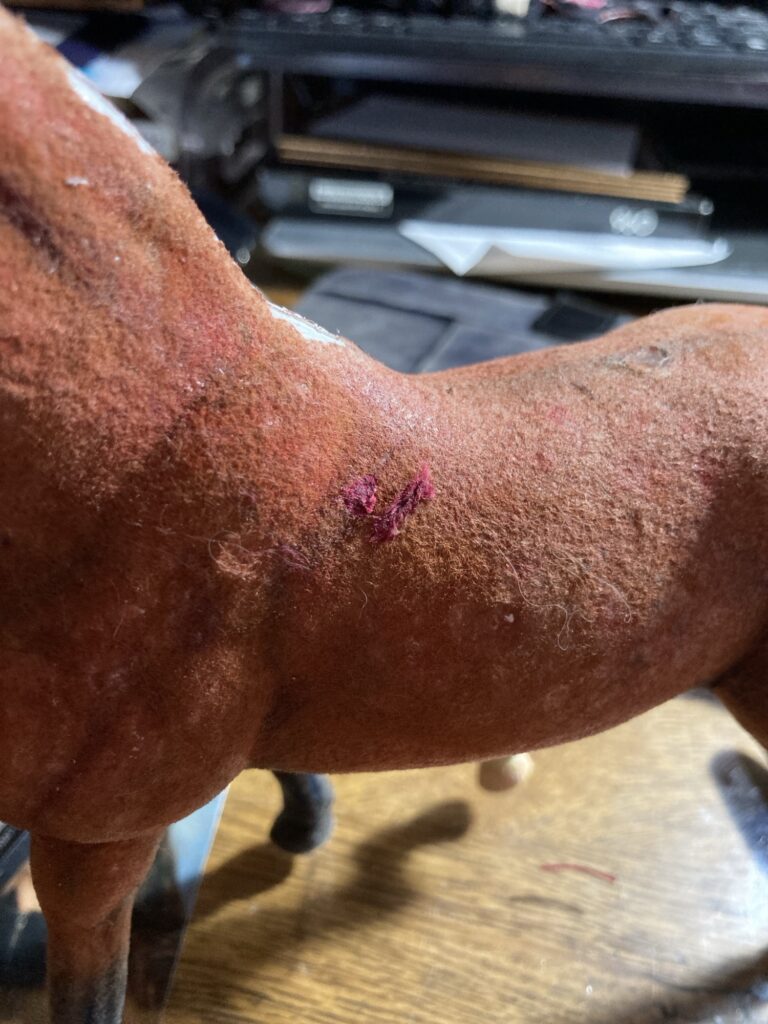
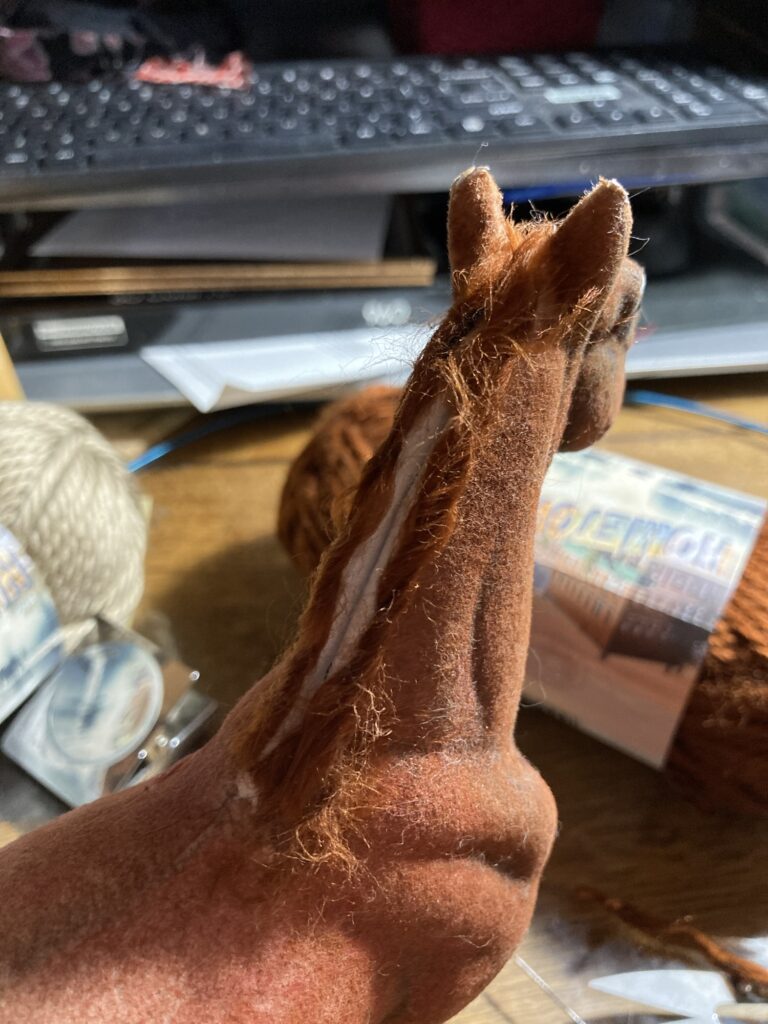
Here is the horse I started out with. I had already removed his mane and tail as they were in pretty bad shape.I used a box cutter (or you could use a craft knife or something similar) to hollow a groove down the back of his neck where the mane will be.Deepened the groove so it goes down into the hollow area of his body.Working on colors.
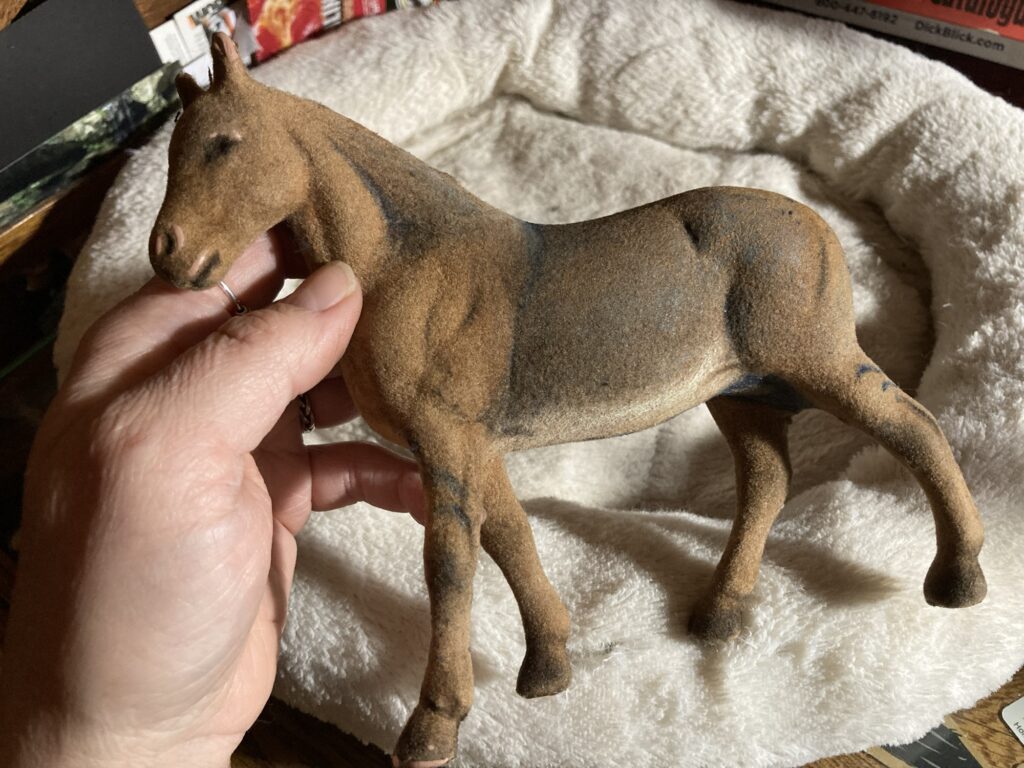
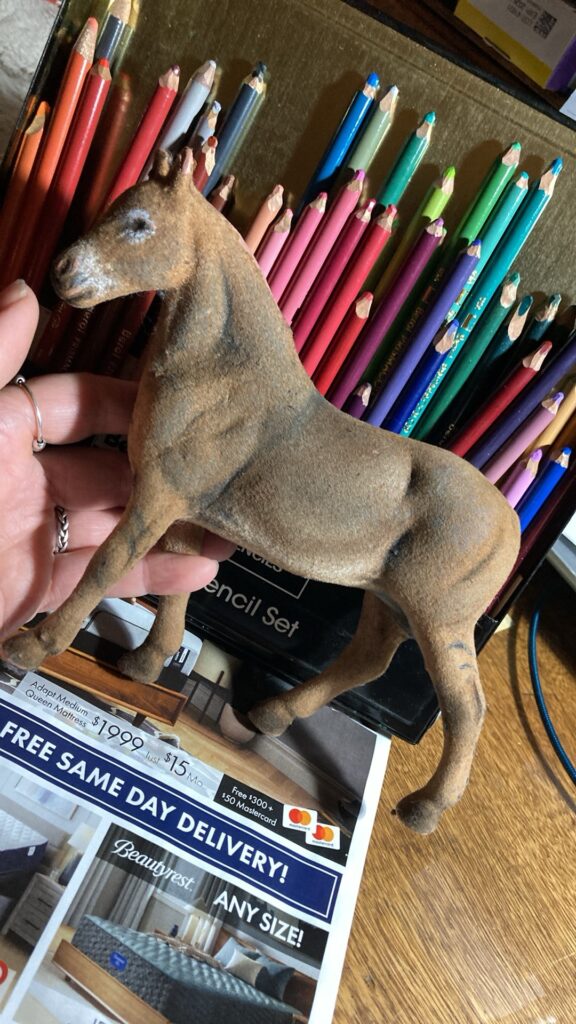
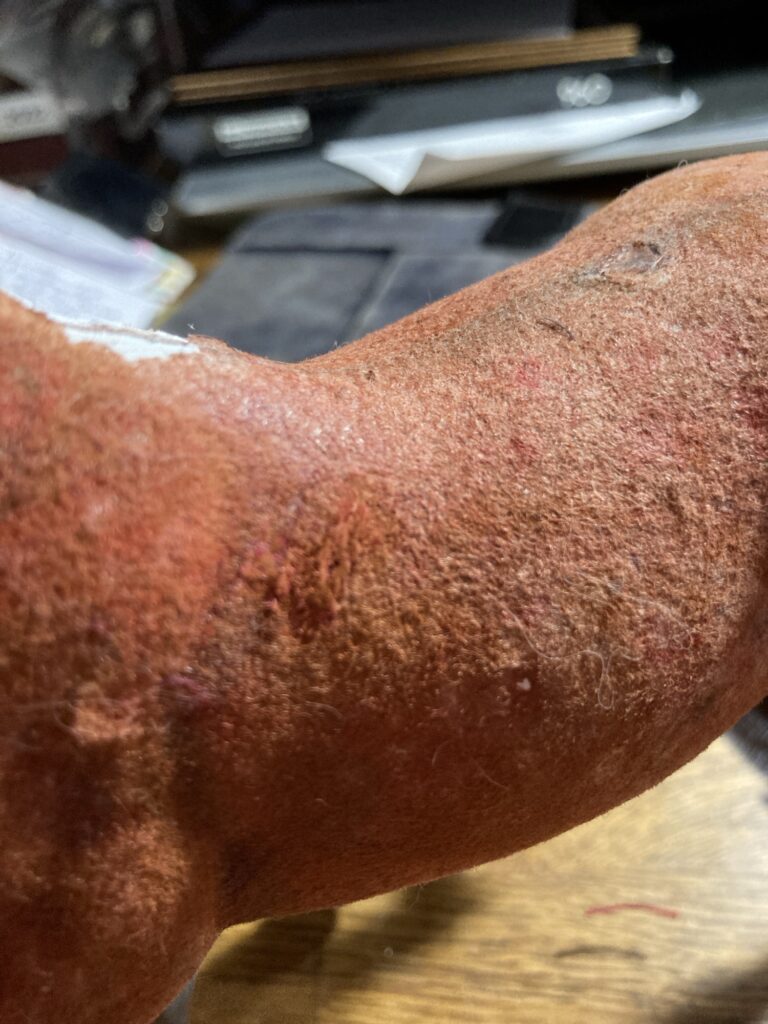
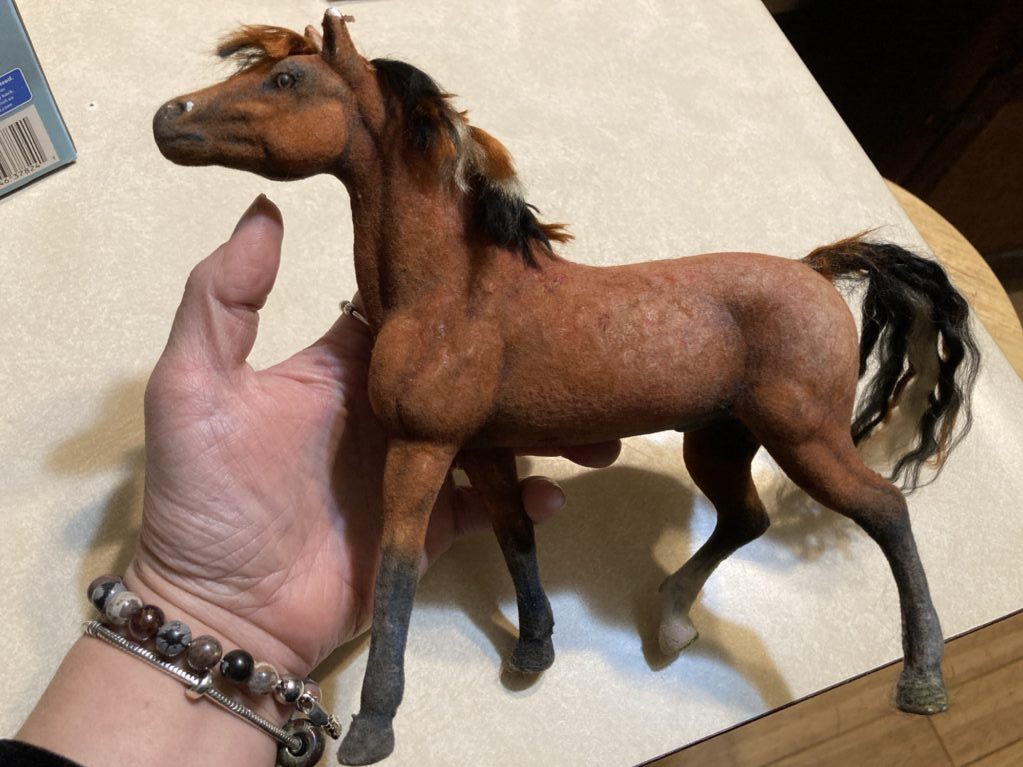
I used different colors of Prismacolor art pencils to highlight areas and darken lines so he has a more contoured feel even though his body isn’t very anatomically correct. I even added some lines and shading in flat areas that I know would have certain wrinkles or grooves.
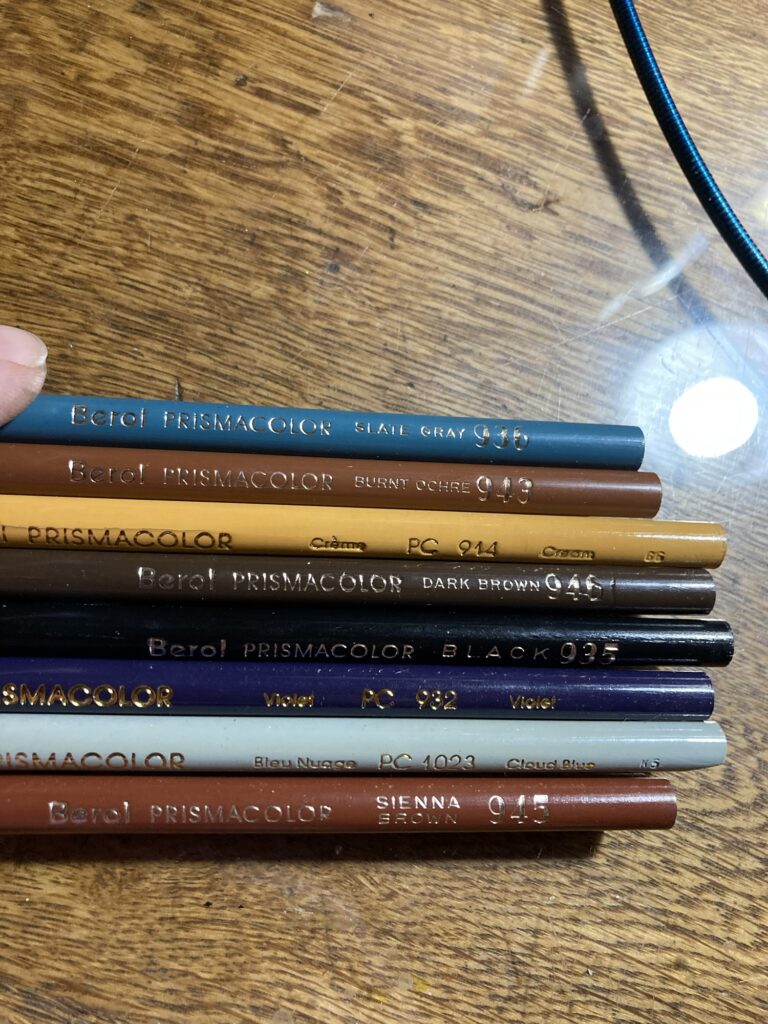
Different colors of pencils that I used on his body.Looking better! I will eventually have to find a replacement eye, or just have him be disabled.His other side
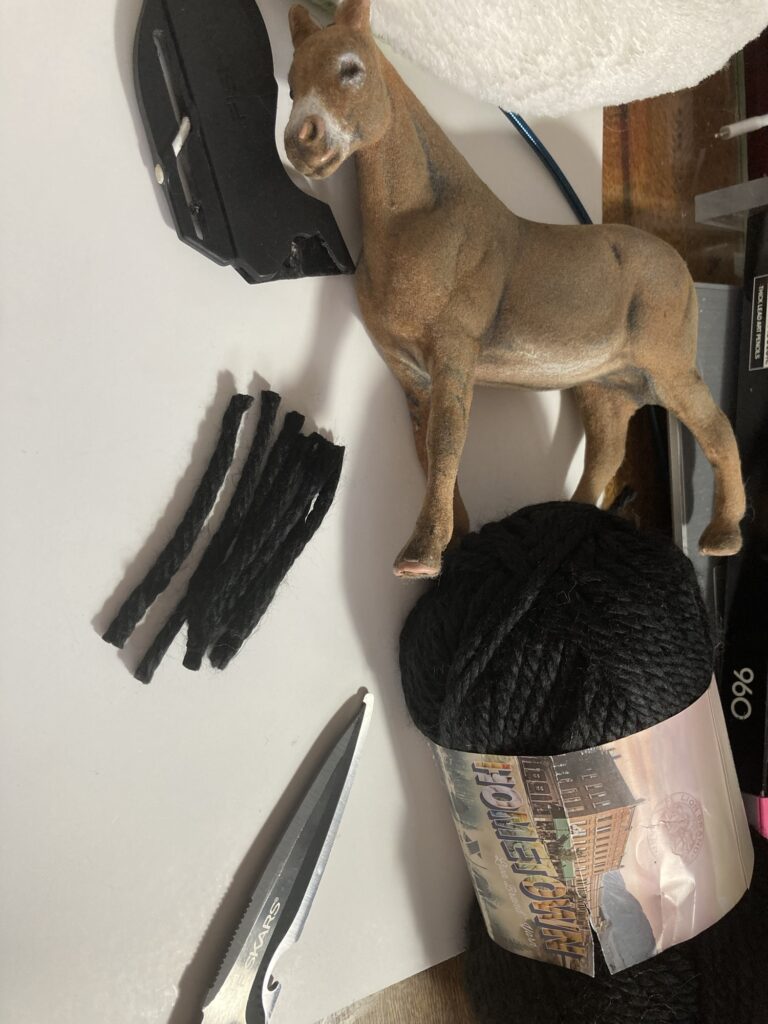
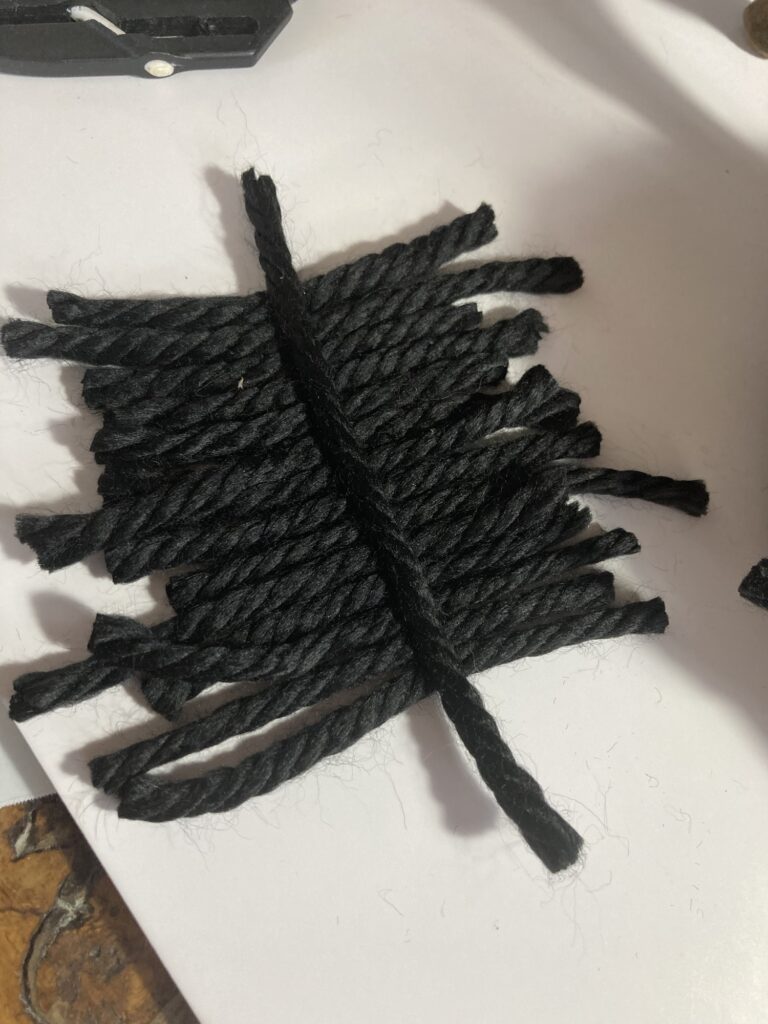
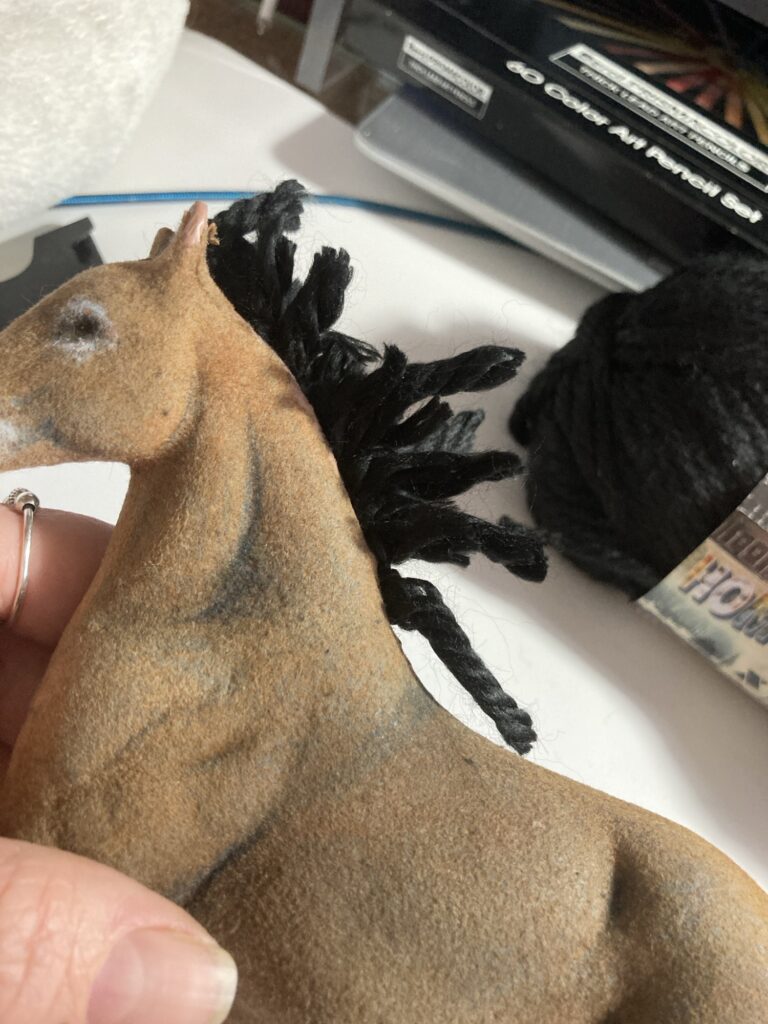
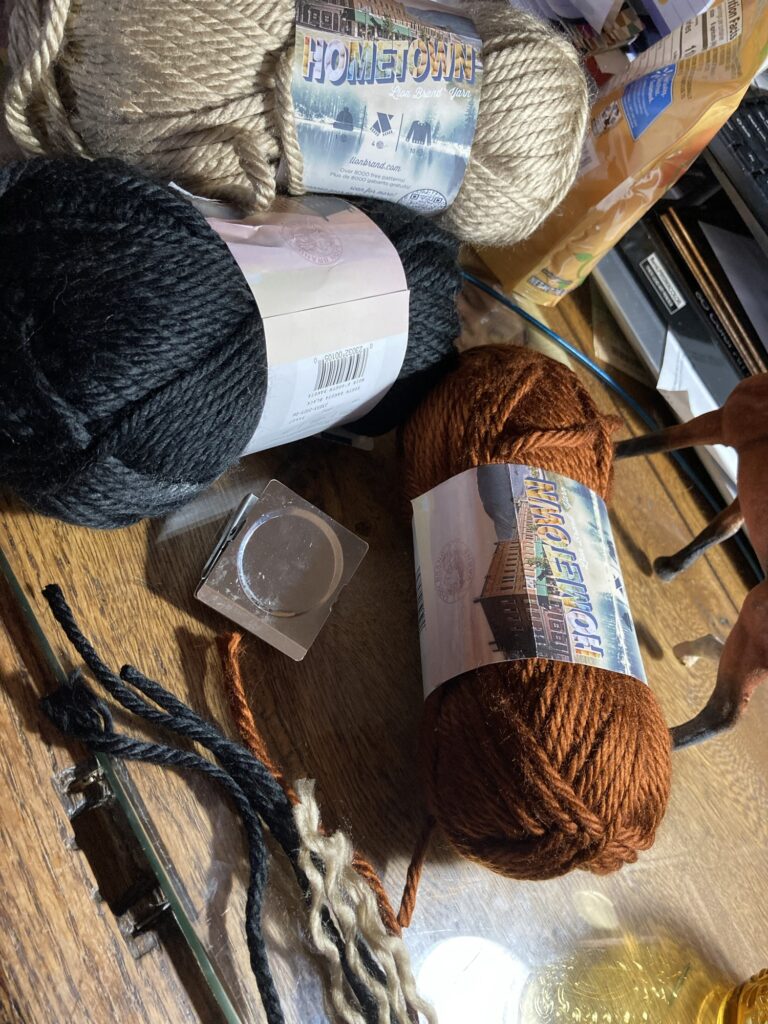
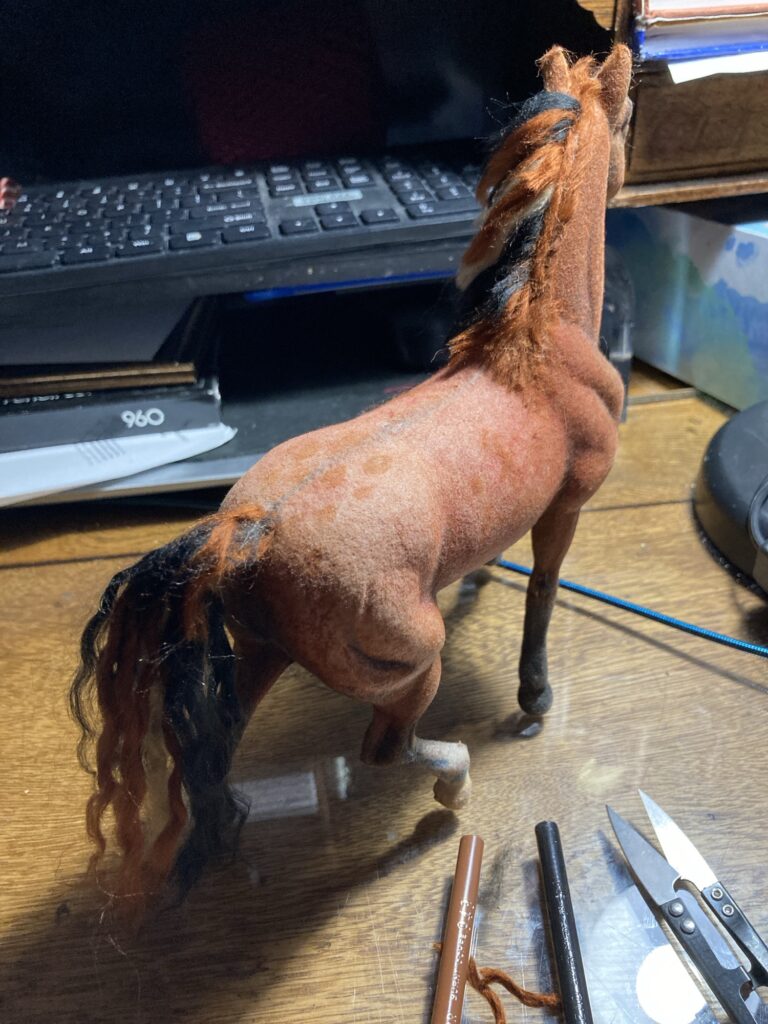
I decided to work on the mane, next. I cut small sections of soft, black, acrylic yarn.
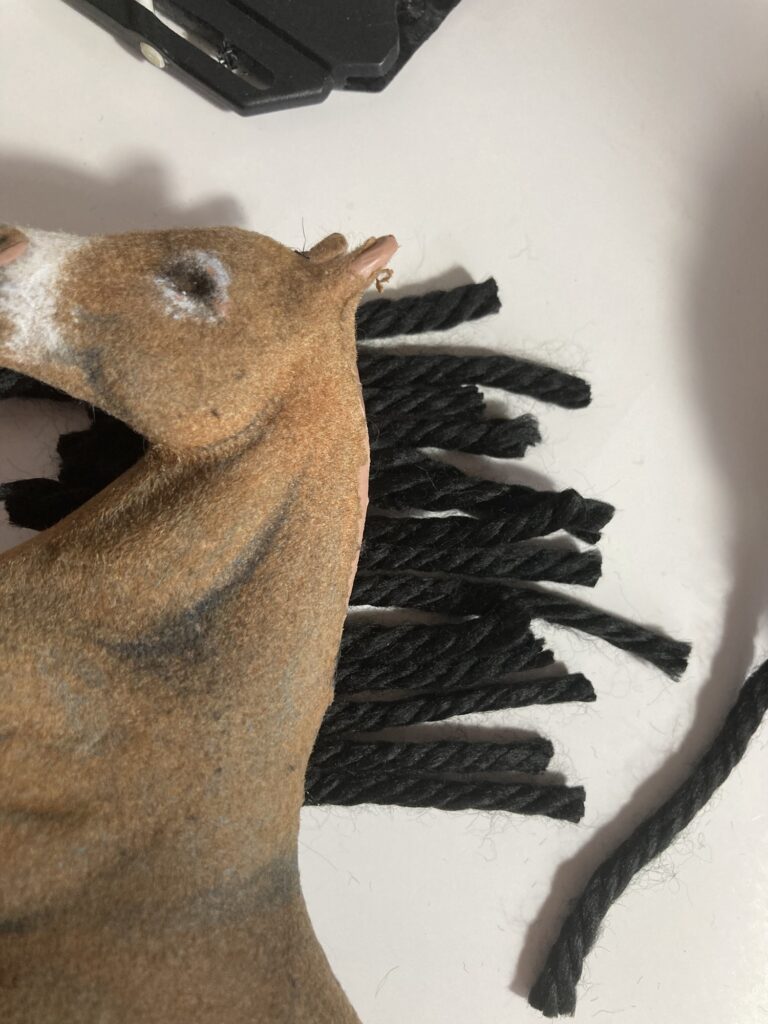
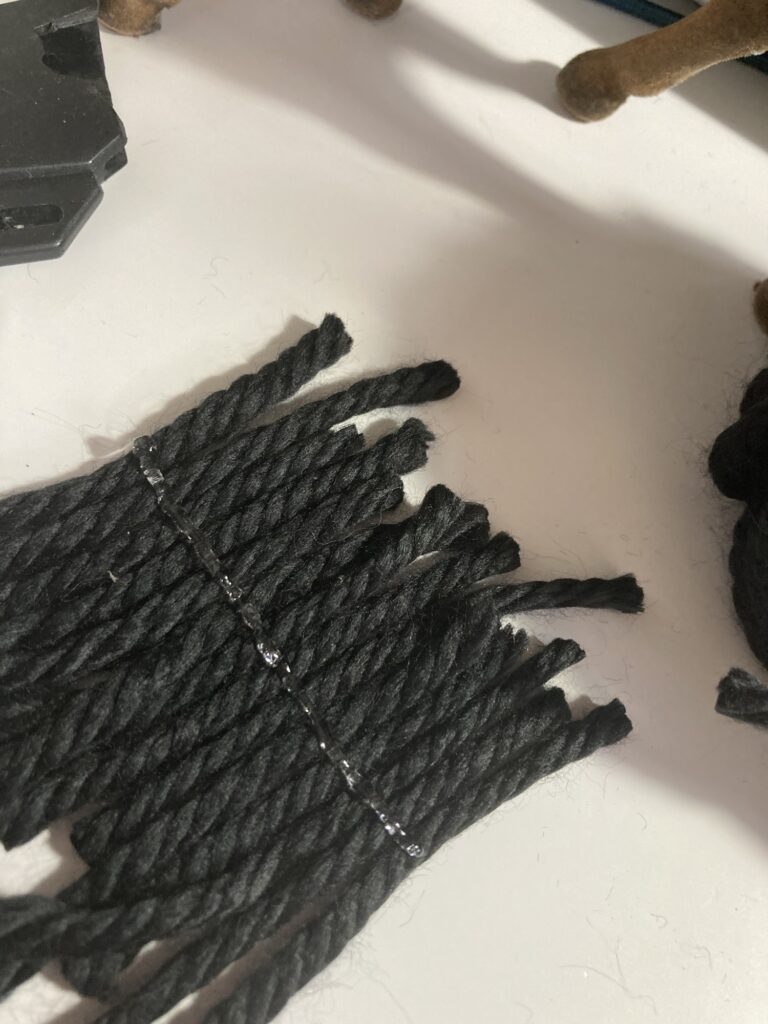
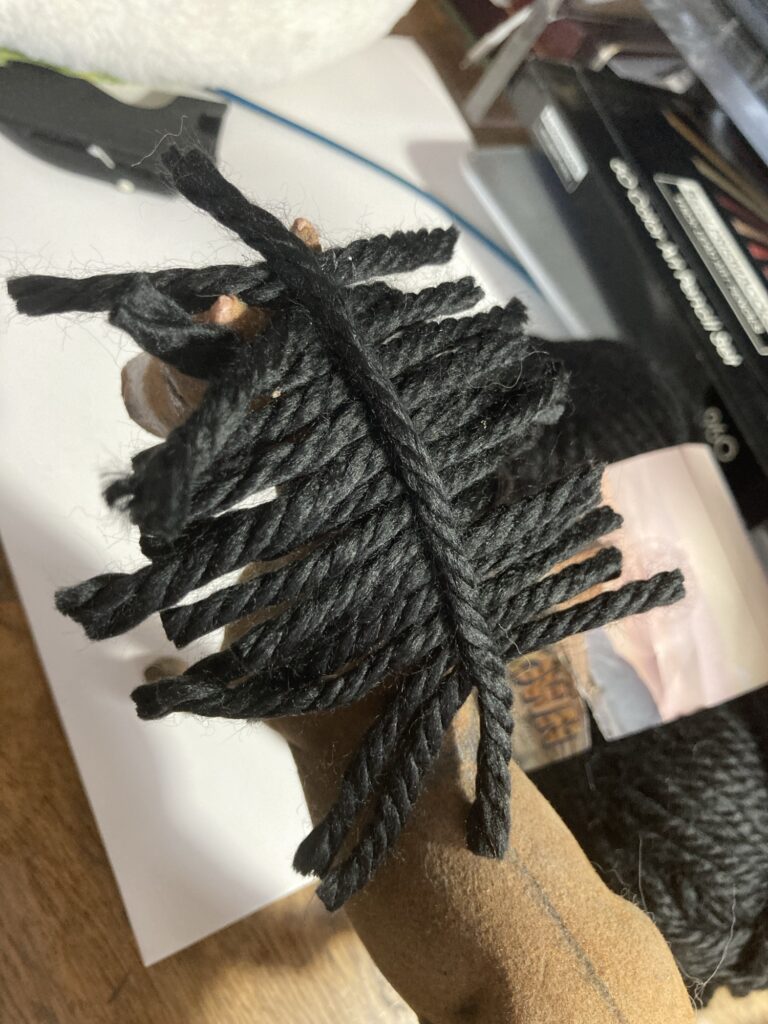
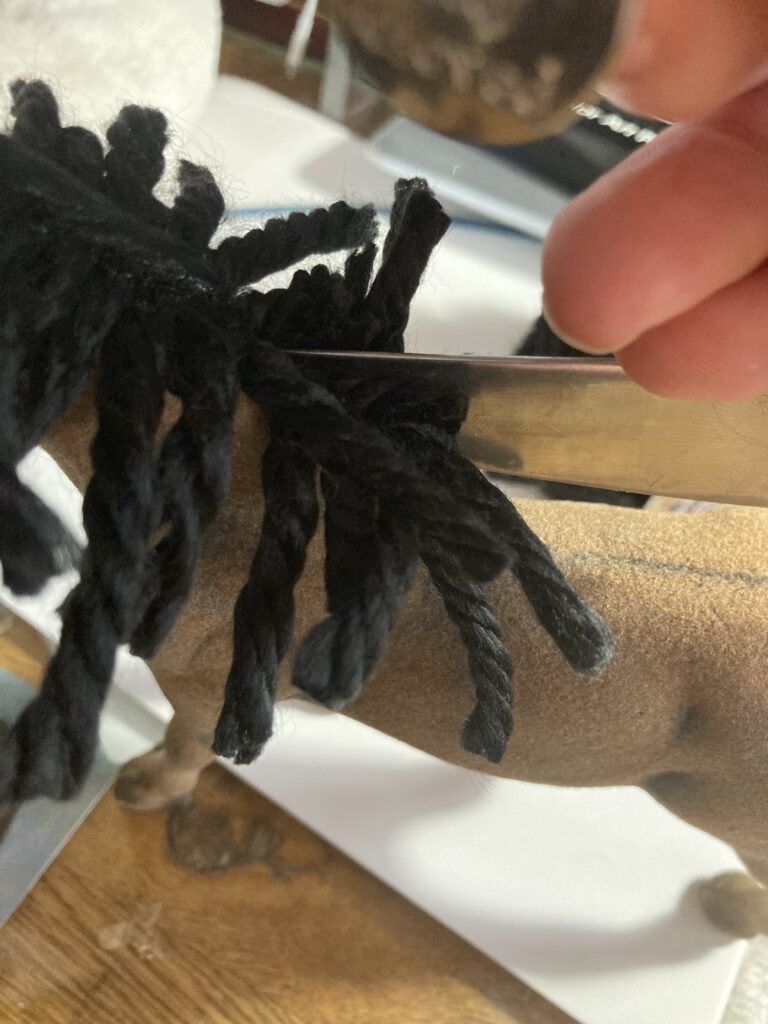
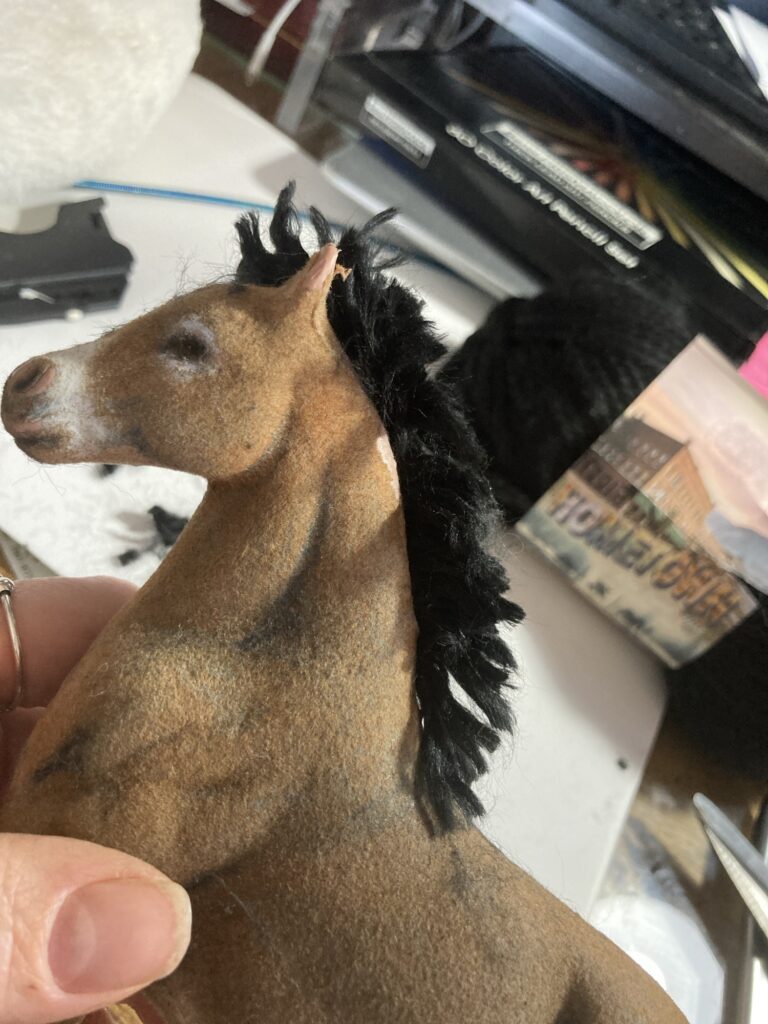
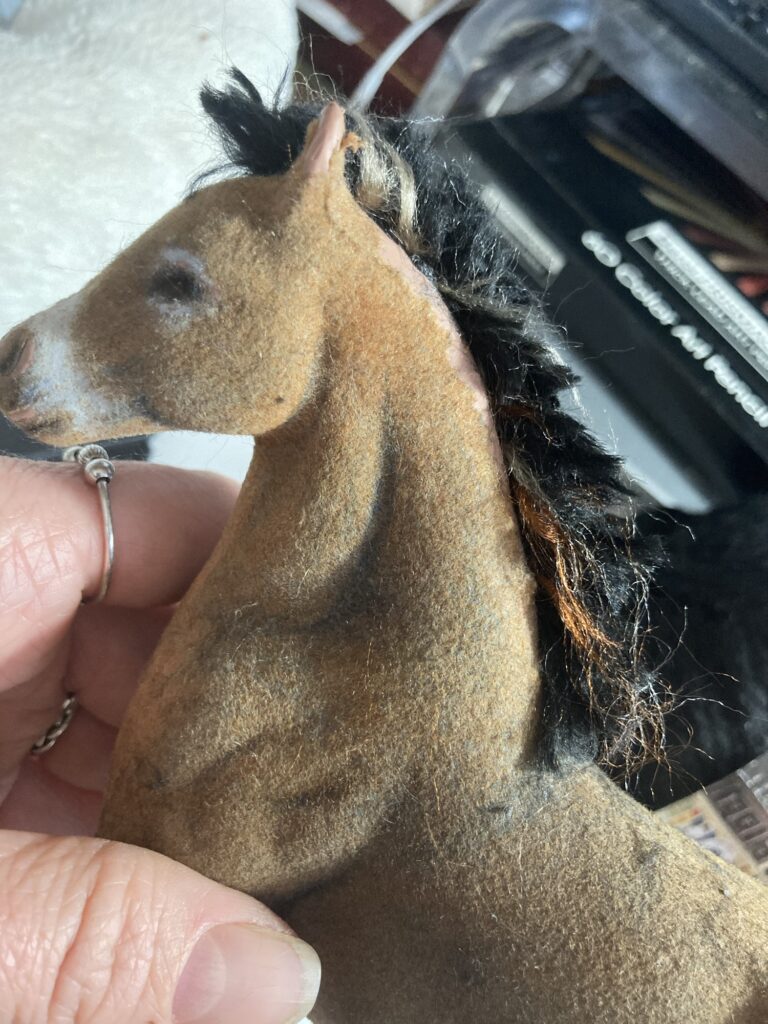
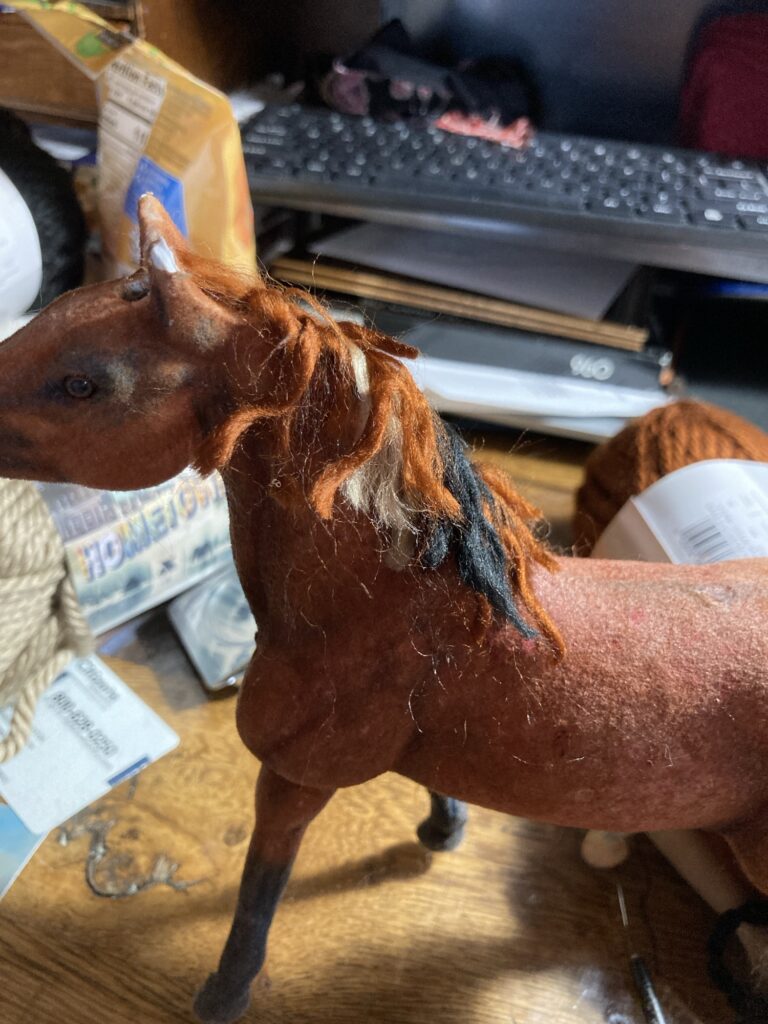
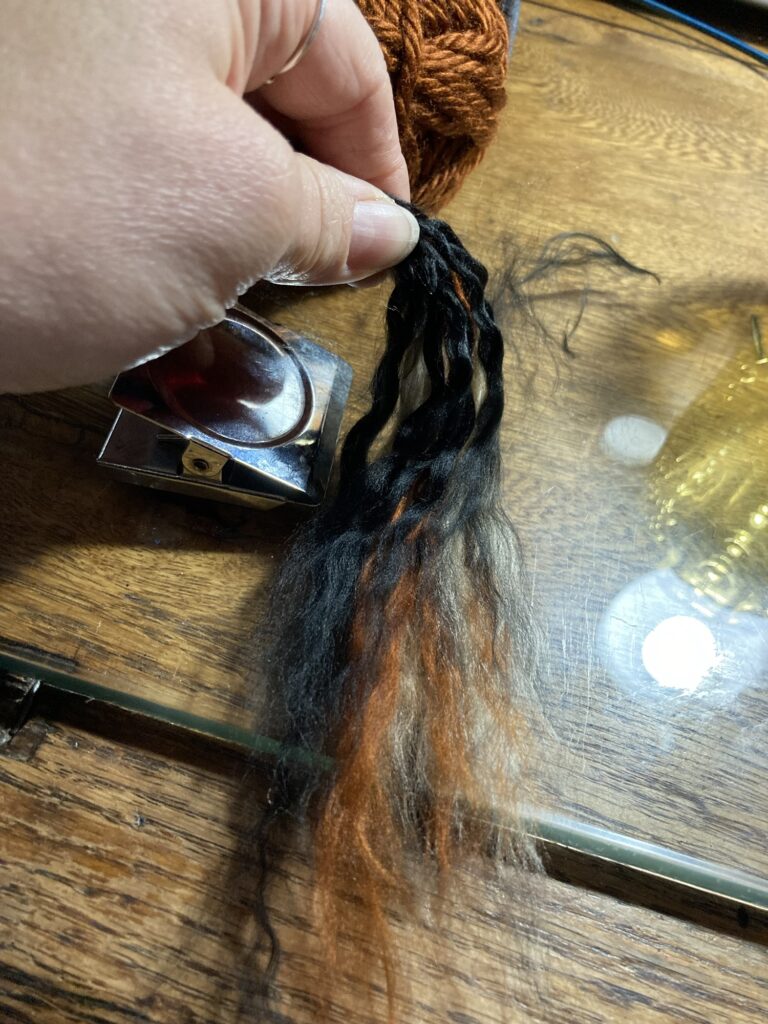
I used Hometown brand acrylic yarn. It is soft, thick, and unravels well.I cut enough pieces so that, when laid out alongside each other, they should be enough to cover his whole neckline.I Lined up the yarns so they were close together, and then made a line of superglue going down the middle.Next I added a longer string over the line to hopefully glue all of the yarns together in a more easily managed section.After the glue on my mane has dried for a while, i put a little glue around the trench on his neck where the mane will be added. It should help keep the mane in place once i push it in.I carefully place the hair on his neck so that the middle strip is centered over the trench.Using an old butter knife, i gently push the ‘hair’ into the trench.Now I gently arrange and trim his hair to be more ‘donkey like.’I decided to add a little more color to his hair, so I took a very few fibers of tan and brown and placed them over the mane where i wanted them to be, and used a felting needle to gently tuck them into the trench with the rest of the hair.After some more colors have been added. I can trim these to match the rest of the hair. I eventually used a little black marker to shade the colored areas to darken them and make them more subtle.Feeling good about how it is turning out for now. I can always come back and alter it later.
In this post, I experimented with an old flocked or velveted horse toy and altered it to be more realistic by adding new mane and tail, changing the colors to be more realistic, and fixing minor blemishes in the flocking. My plan is to use him in a dollhouse setting.
I recently acquired some inexpensive toy flocked horses, and decided to upgrade them for my dollhouse projects.
Flocked horses (or any other toy animal) are ones that have had a fuzzy velvet-like coating applied, so they look like they have real fur. I remember having some as a kid, and I also remember that the flocking can be easily damaged, so they need to be handled carefully. The ones I acquired are not in the best of shape, which is fine for me since I am doing this as an experiment, anyway.
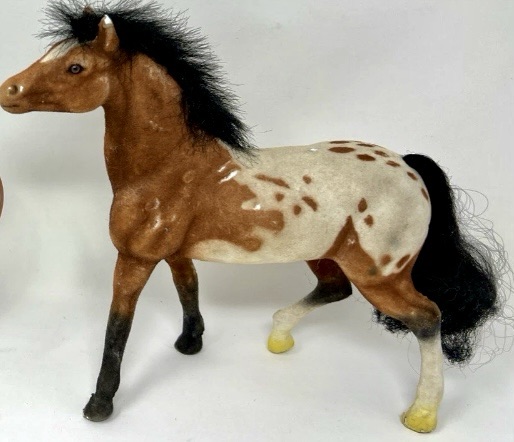
This is a photo from the listing of one of the horses i bought
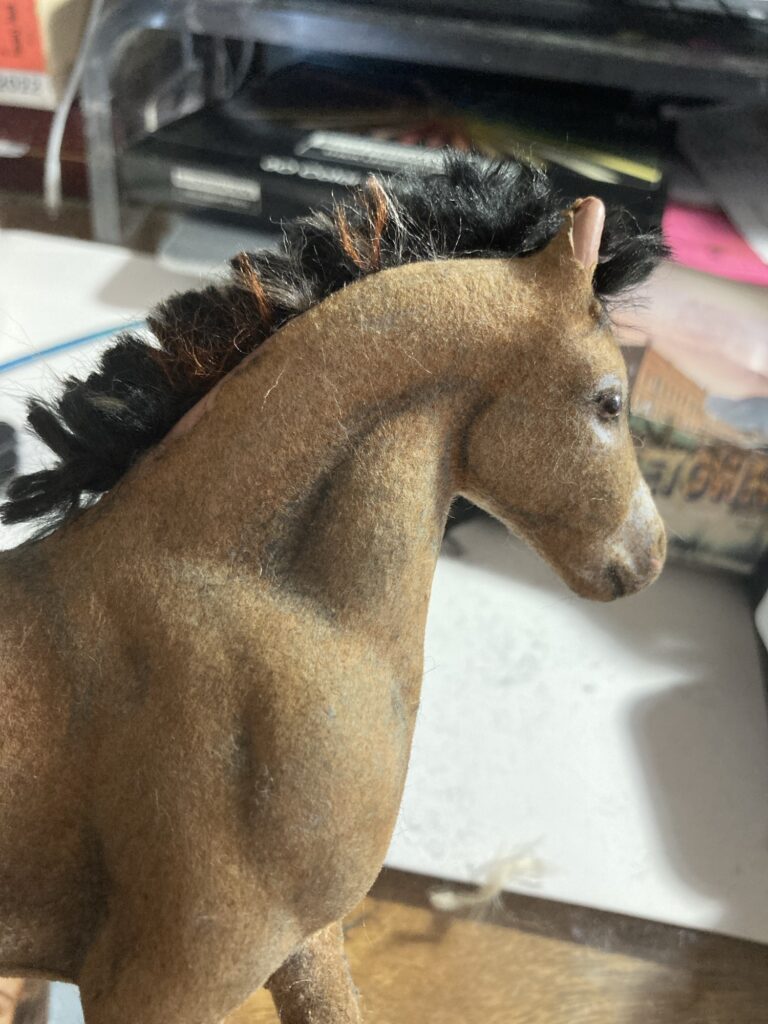
The first thing I did was remove the mane and tail (i just carefully pulled it off, but discovered that, especially with the mane, you should be more careful as it is glued on and can pull off some flocking skin if you are not careful). I didn’t like the old hair and plan to replace it with something different, so decided that removing it would get it out of the way so I can work more easily.
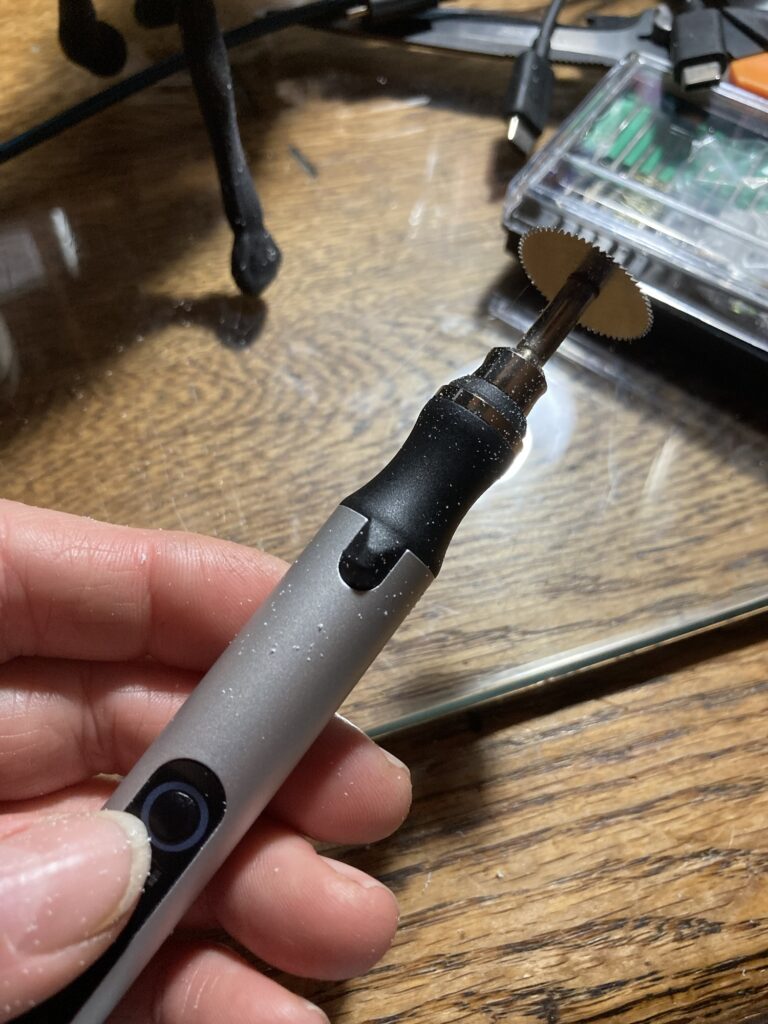
Next I took a small engraving tool with a saw attachment (a dremel type tool would work better, I am sure) and I sawed a small groove along the top of the horse’s neck where the mane will be.
The groove I made. I discovered as I went that it works best to cut right through the plastic into the hollowness beneath, which will help hold the hair better.My little engraving tool with saw attachment. You could even carefully carve it out with an exacto knife.
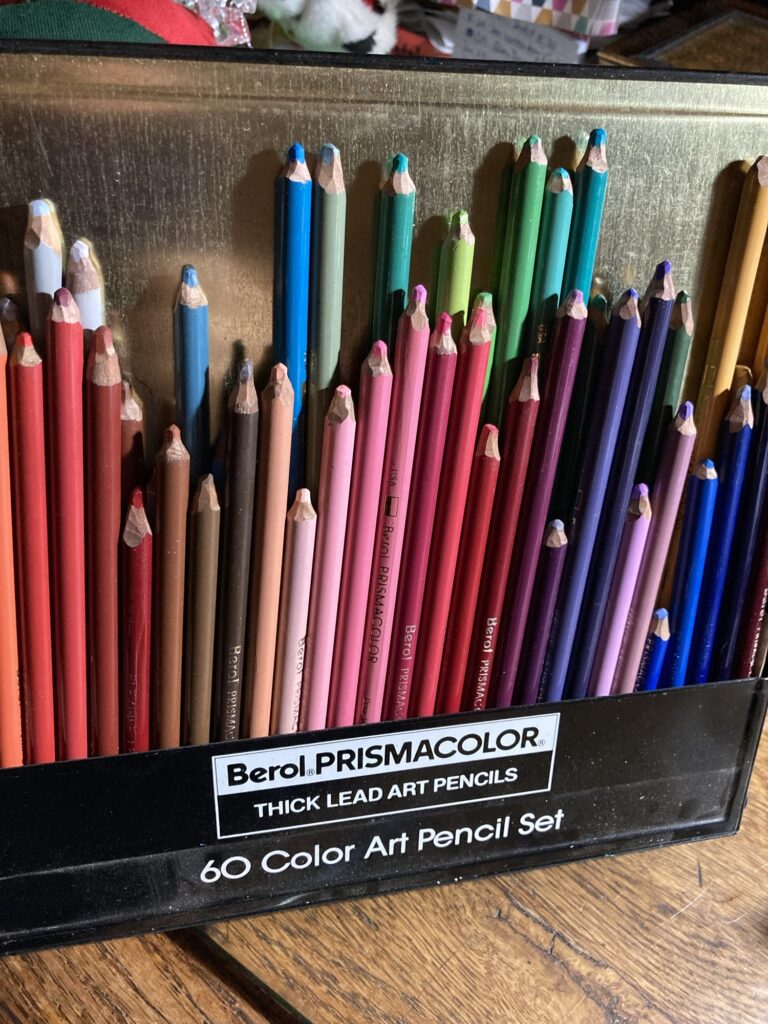
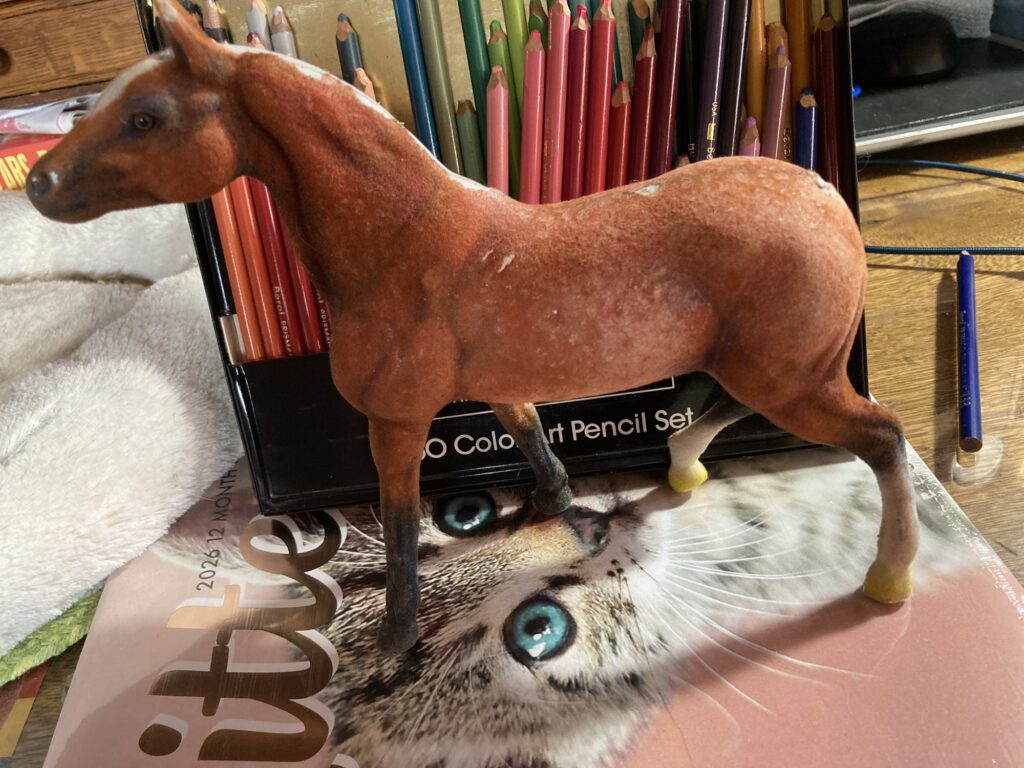
After making a groove, I moved on to experimenting with color. I decided to make this horse more of a roan color, and discovered that my colored pencils worked well. NOTE: I keep my colored pencils sharpened with a knife so that the tips are pretty blunt. I think that if a sharp pencil were used it might damage the fur on the horse. Also, don’t push too hard while coloring as it also may damage the finish. I am shading with light circular pencil strokes and it is working well for me.
These pencils are great! They are soft enough that they give off enough color without damaging the flocking.A few experimental marks turned out well
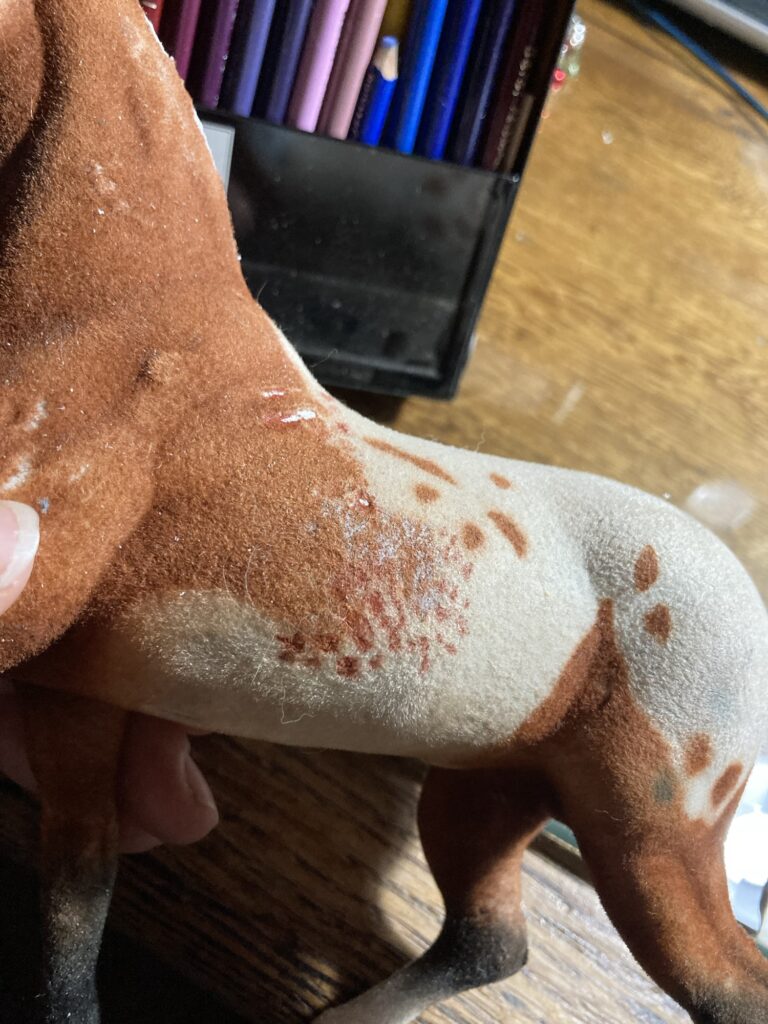
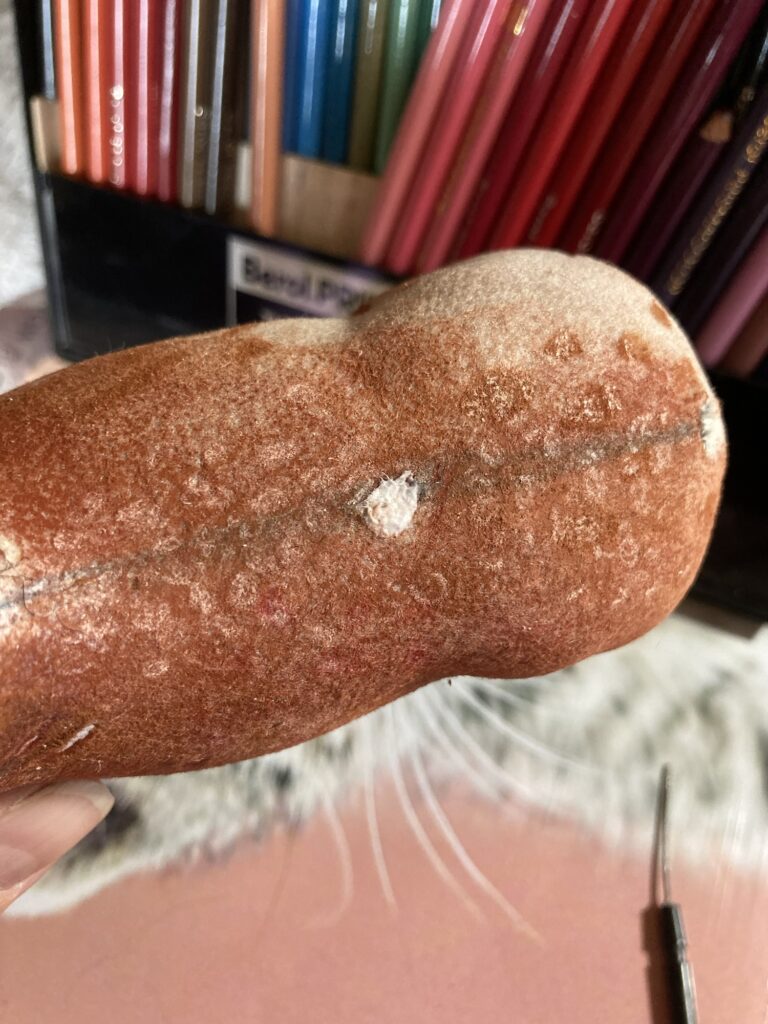
I quickly discovered a color that matched the brown of the main body pretty decently, and now can use that to blend the other colors in better. I found a dark grayish blue that works well for shading, to highlight the muscle tone, add dark patches around the mouth, eyes, undercarriage, ears, etc. There are still some areas that have scratches in the flocking. i have a few ideas in mind for simple repairs. I know that Amazon (and probably some hobby stores) sell flocking kits that could be used to repair my horses, but I think I can make do. We’ll see.
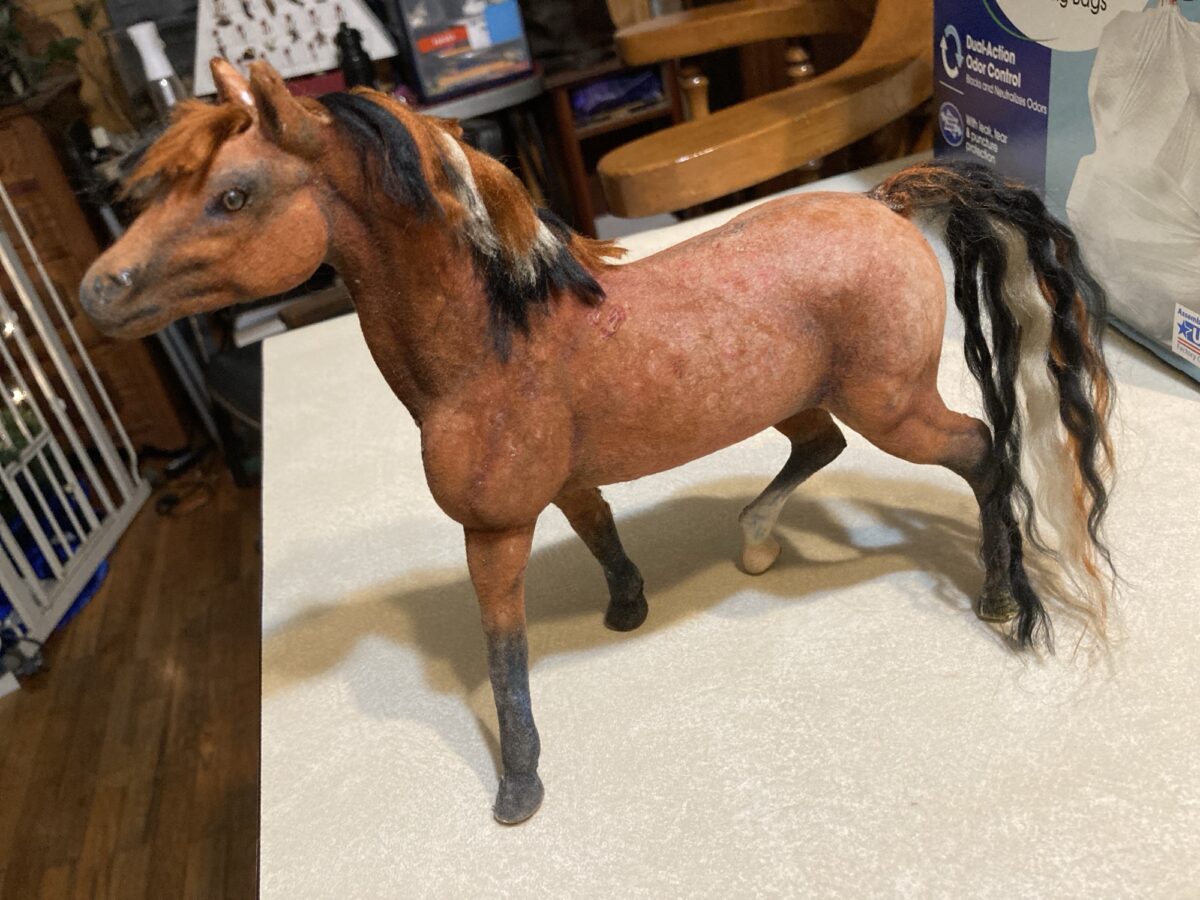
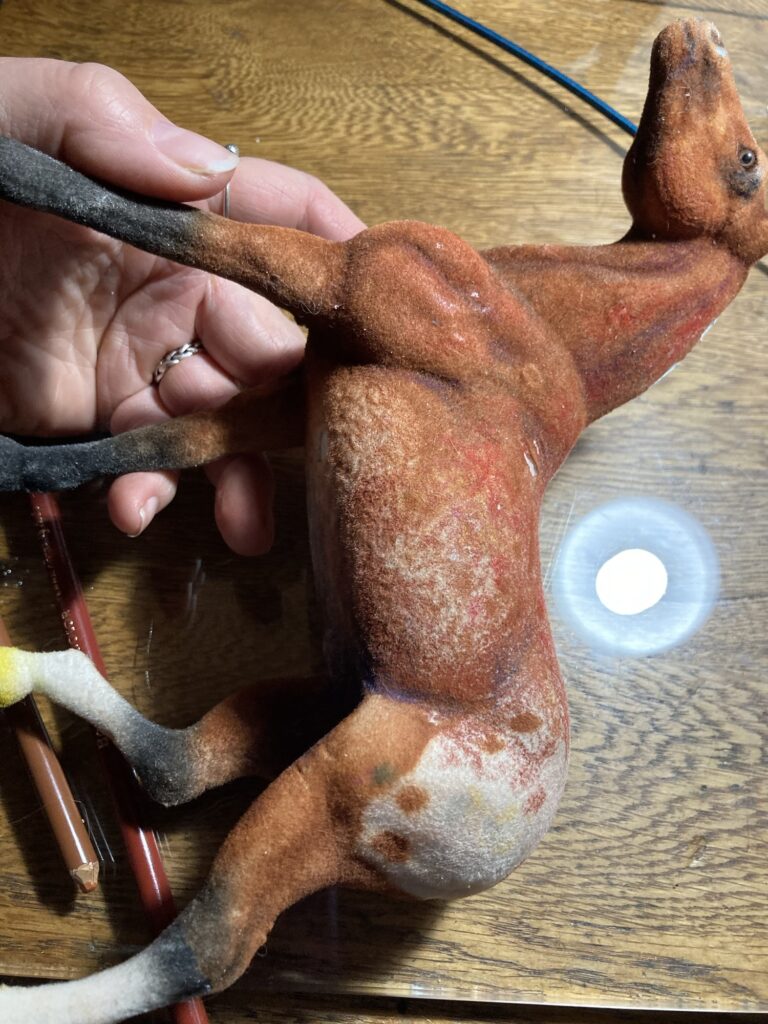
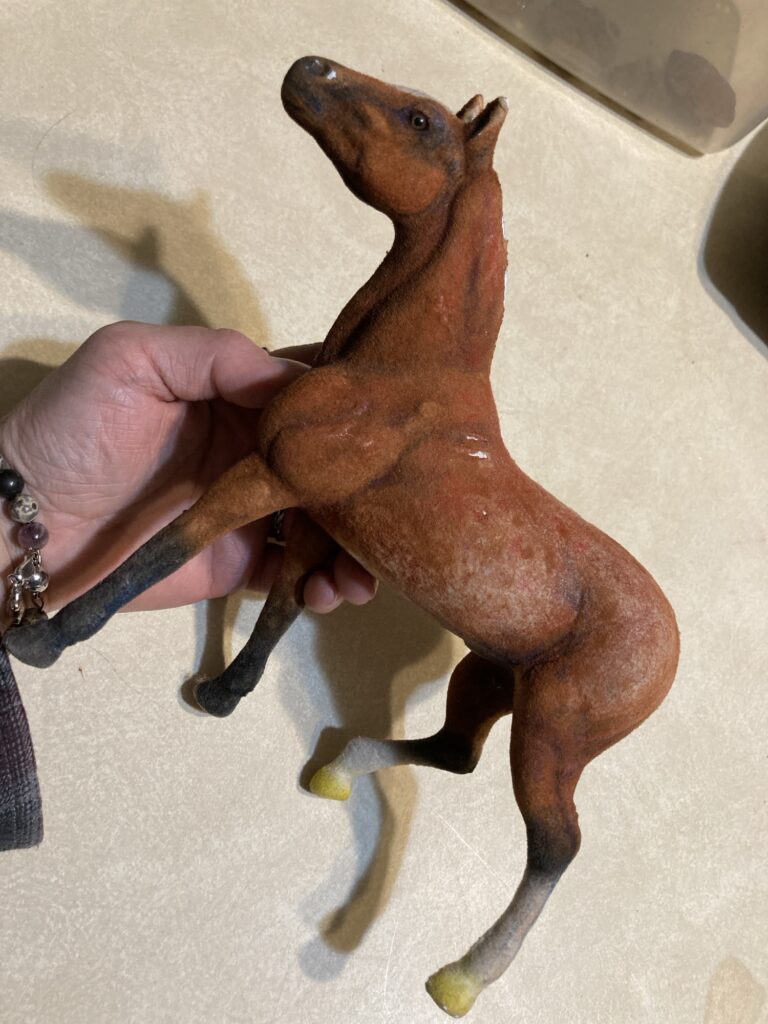
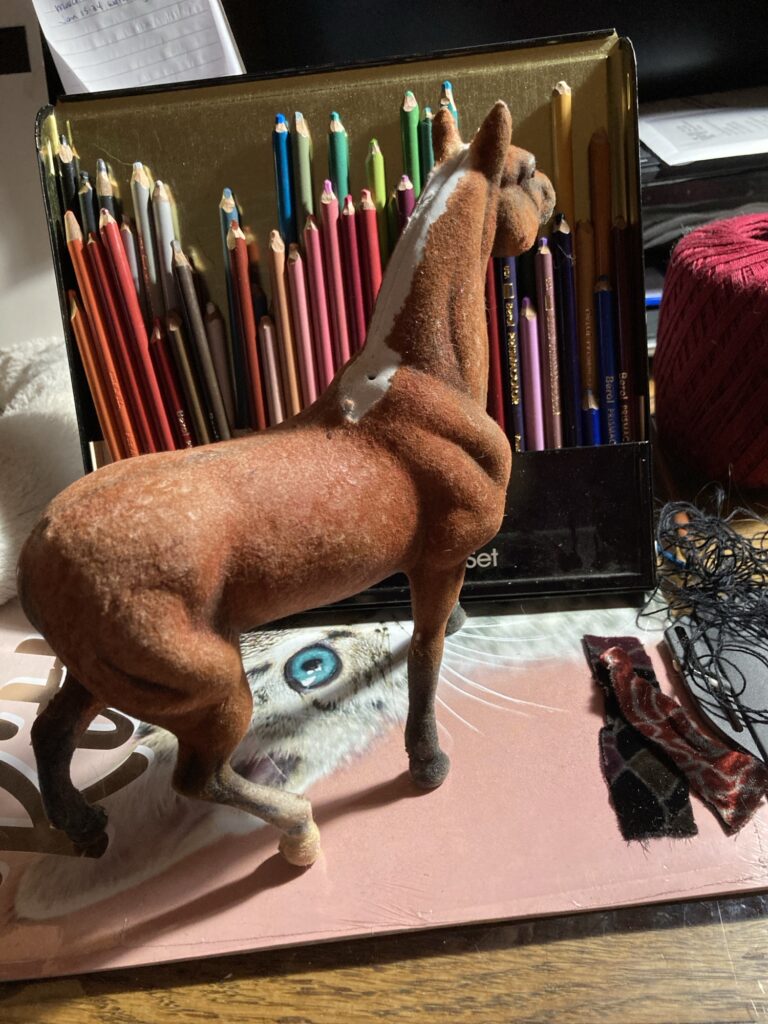
Here he is after a bit of work. I am using several shades of brown, a little blue, some red, and even bits of purple. A top view
I am trying to use shading to bring out or even draw in more of his better details, and also to hide some of the more terrible ones 😆. I tried to find some of the better looking flocked toys that were still inexpensive. Unfortunately they do have some wonky confirmation but it isn’t too bad. Ultimately it would be fun to get some Breyer horses and try flocking and coloring THEM, but it is safer right now to start on the cheap stuff. Also kind of fun!
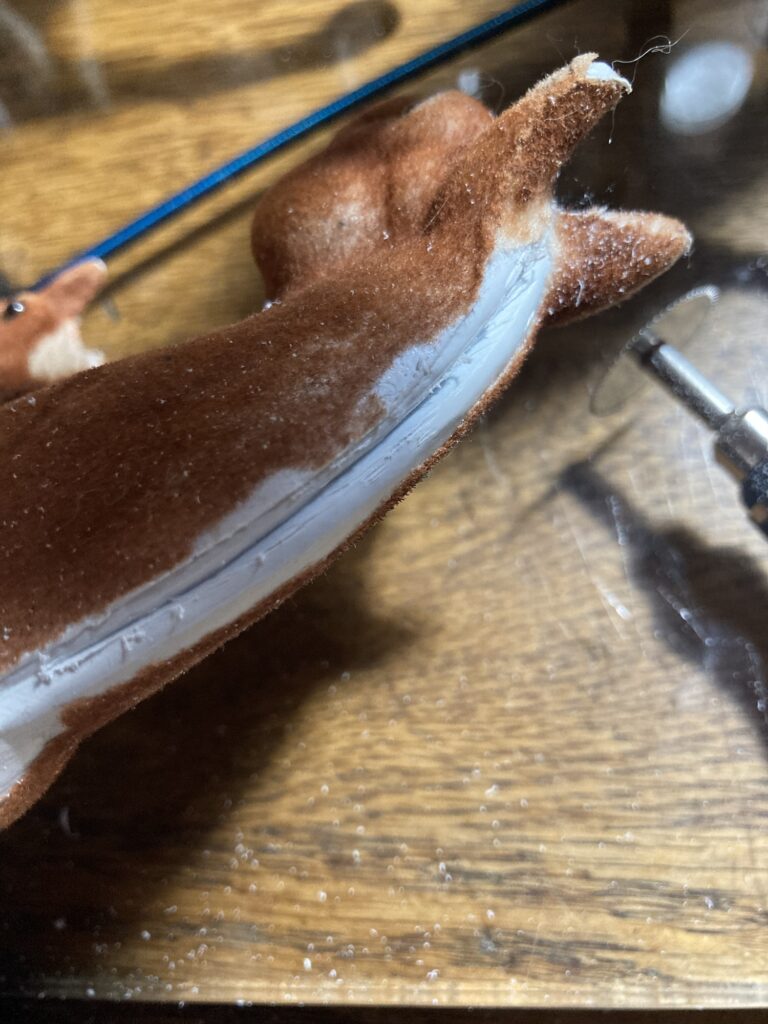
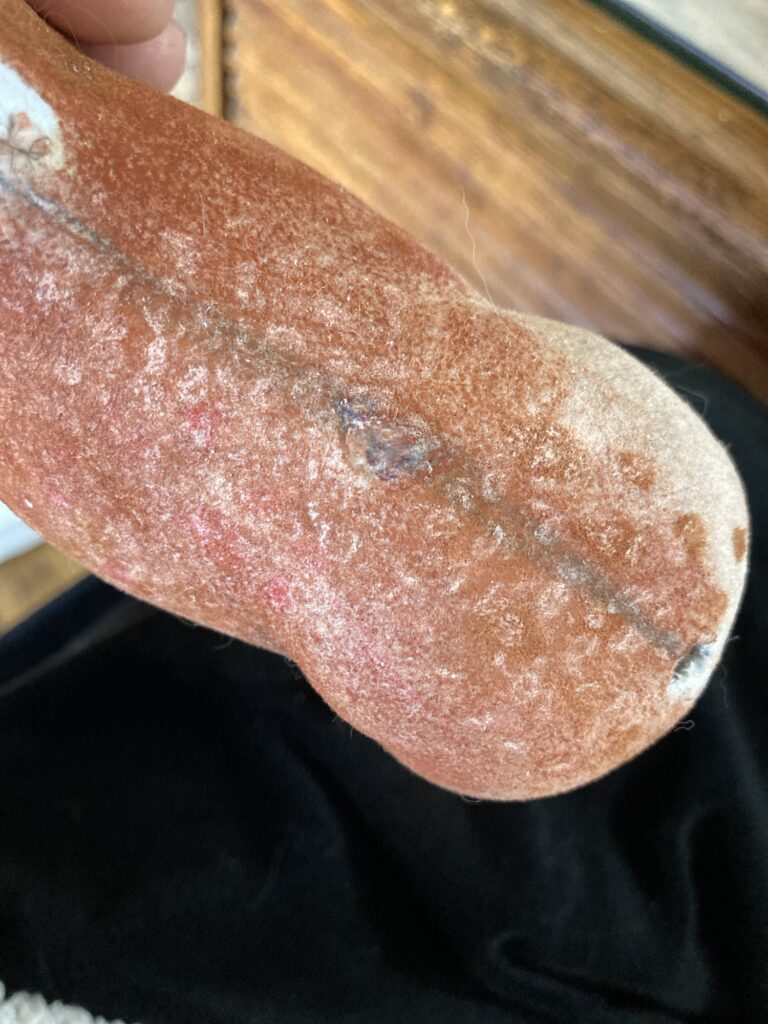
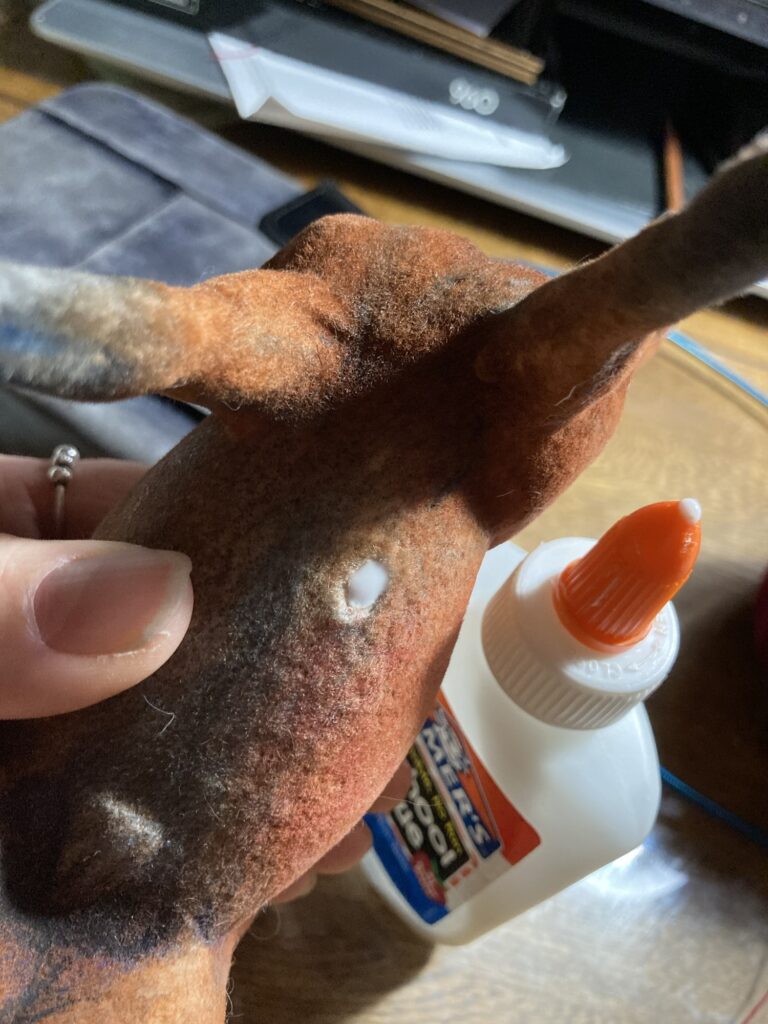
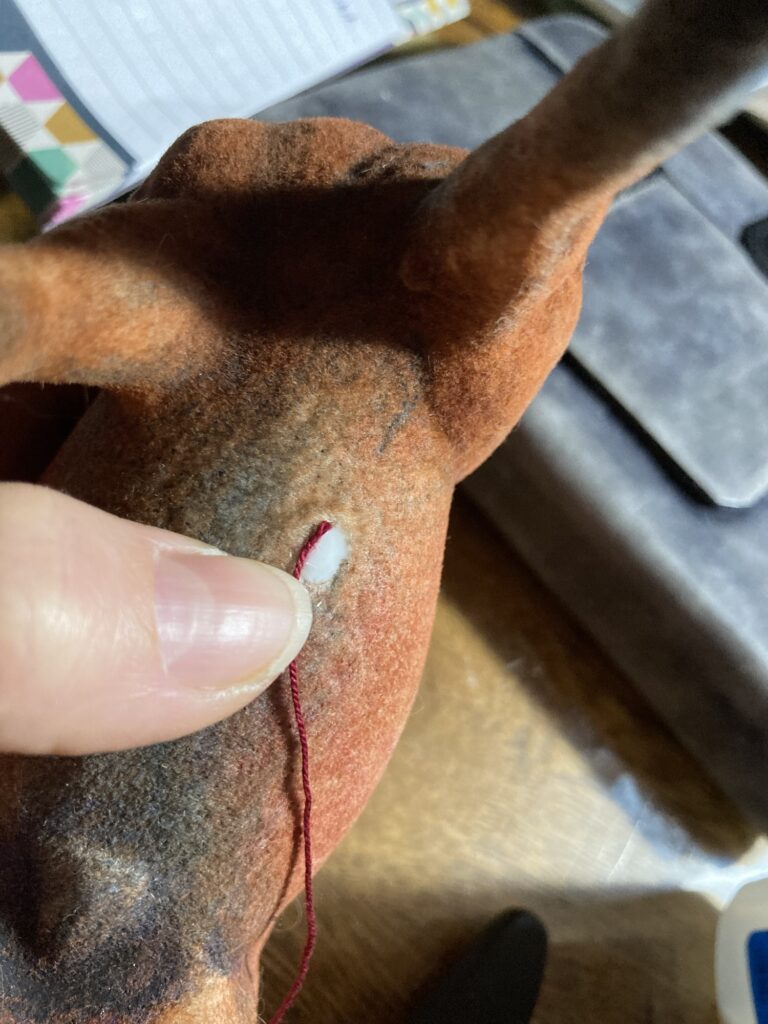
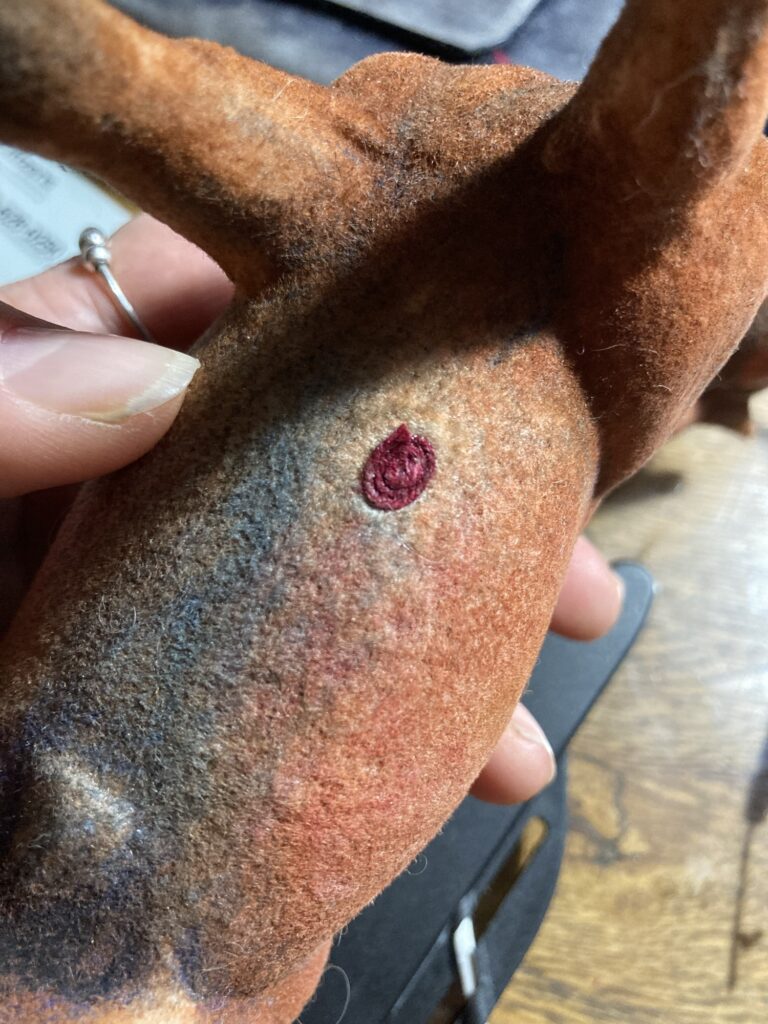
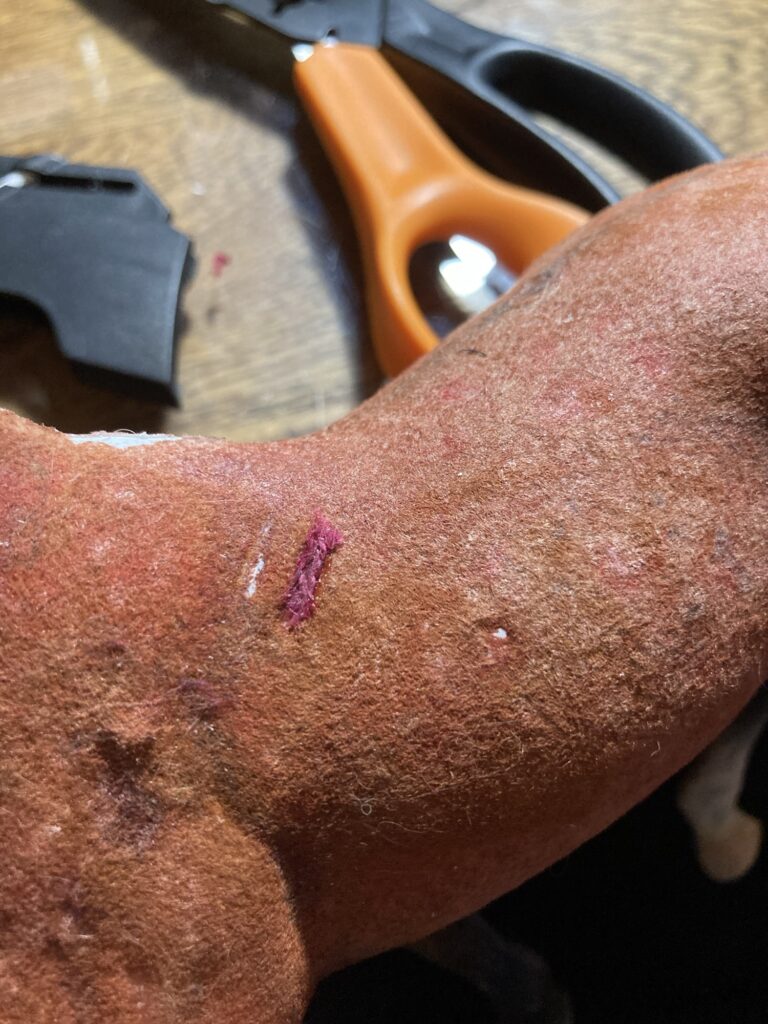
For one of the areas of damaged flocking, i tore off a little piece of paper towel, wet it thoroughly with elmer’s glue, and patted it into the damaged area. While far from perfect, once dried it holds the colored pencil markings enough to not be as noticeable. I have the feeling that too much glue might interfere though. I will probably try small pieces of fabric next.Next I need to fix his scratches and add some hair.Time to focus on this boo-boo. I decided to try string for this fix (it IS an experiment, after all). I filled it with glue. I started out with elmers, but decided that the glue wasn’t strong enough, as the string kept coming back out. I then switched to SUPER GLUE.Still in the process of adding hair.I used crochet string to wind a spiral to fill the hole.Here it is, super-glued in place. Still not sure how this will look, as it is a bit more textured than I thought it might be. Perhaps, if I try this one again, I might break up the fibers of the string a bit before attaching it to the horse. For the next small repair, i took a tiny length of string and pulled the fibers apart a bit before attaching.String glued in place to repair a small scratch in the flocking. I used super glue to attach it, and pushed it down with the butt end of a tool.A few more fibers added to the tiny bare patch above it. Once I color it with my pencils I think the texture will even out more.The same patches colored over with pencil. Not bad!
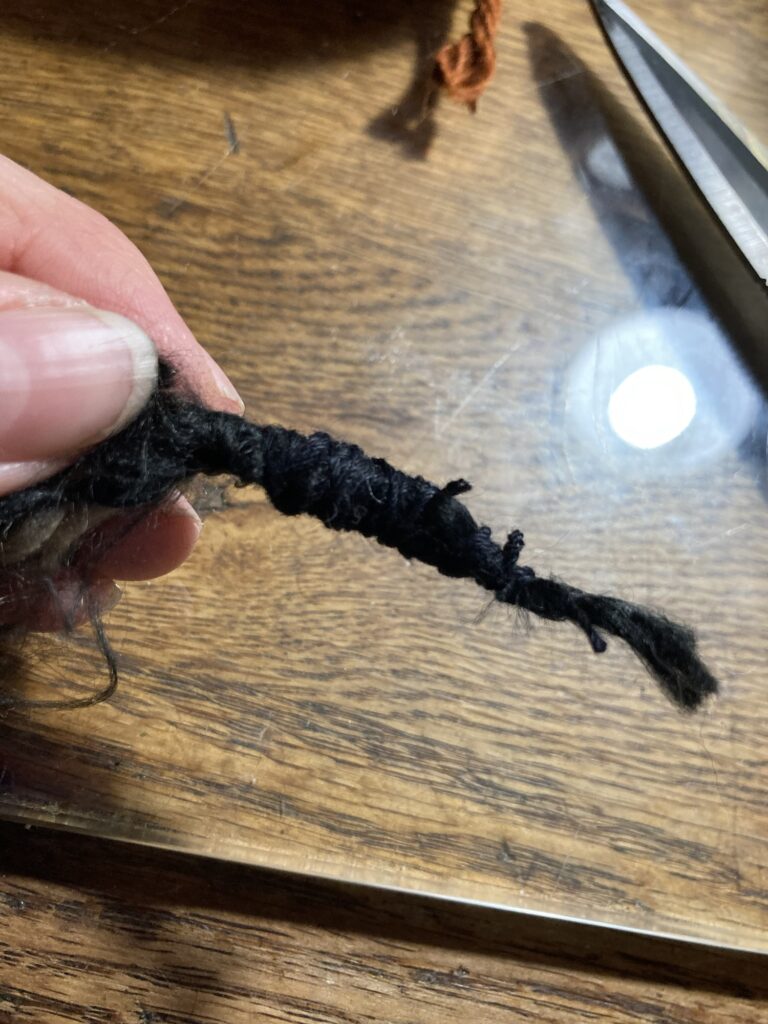
For a tail i decided to use a fluffy acrylic yarn.
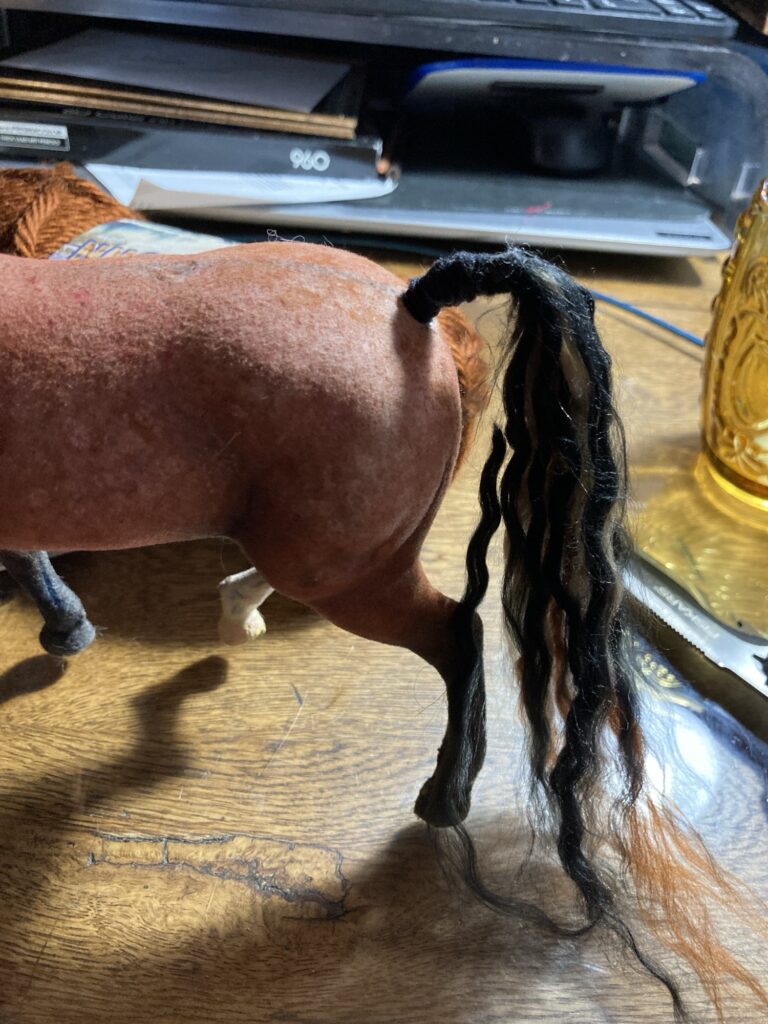
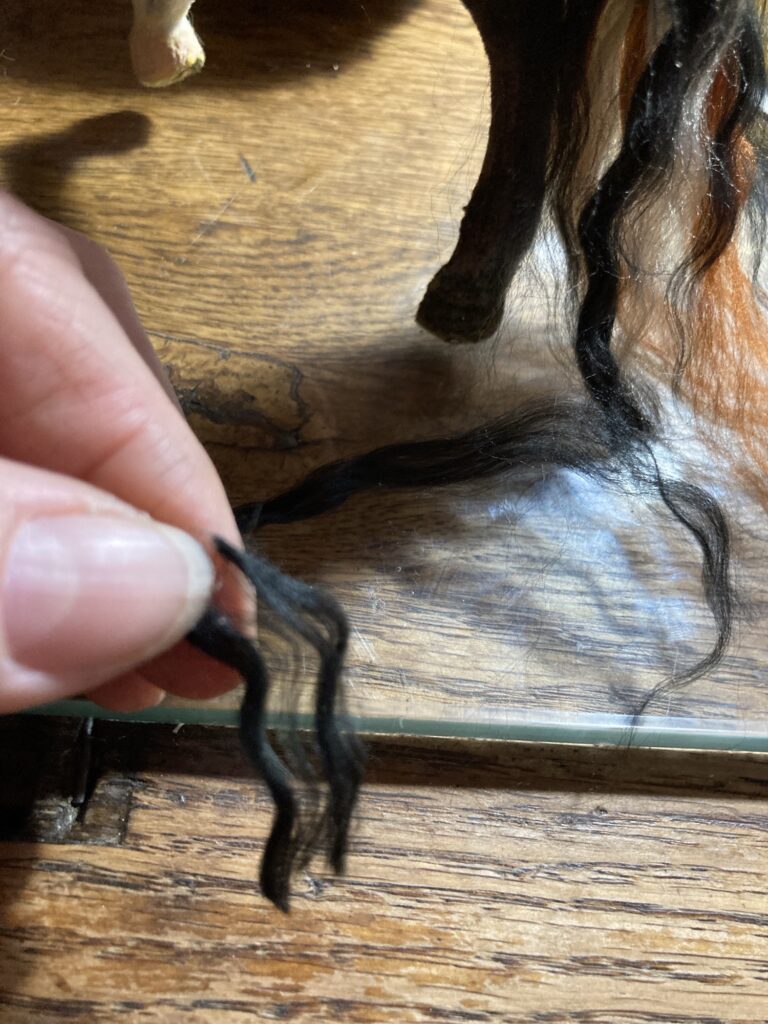
I cut a few strands of different colors that I thought might look well together, and then separated the strands.After giving them a quick little brush out. Don’t overbrush, as it will pull the yarn apart. I wrapped thread around the base of the tail and glued it down to hold. Most of this is going to be inserted into the horse’s body.I used a felting needle to push the tail base into the hole, but I left a bit of the stiff area protruding to give the tail some spine like a real horse’s tail.Next I cut a few shorter fibers for the top of the tail base. I discovered that my felting needle worked well for attaching these fibers to the base of the tail.For the bald areas where the mane was pulled off, I cut and unraveled lengths of yarn that is close to the body color and glued them in place alongside the neck. The body hair alongside the mane is usually a bit longer, anyway, and maybe i can blend it in with colored pencil afterwards.
I cut a bunch of yarn fibers and unraveled them, and made a line of superglue along the trench I cut along the top of the neck. Now I am going to use the back of a knife to push the yarn into the trench.
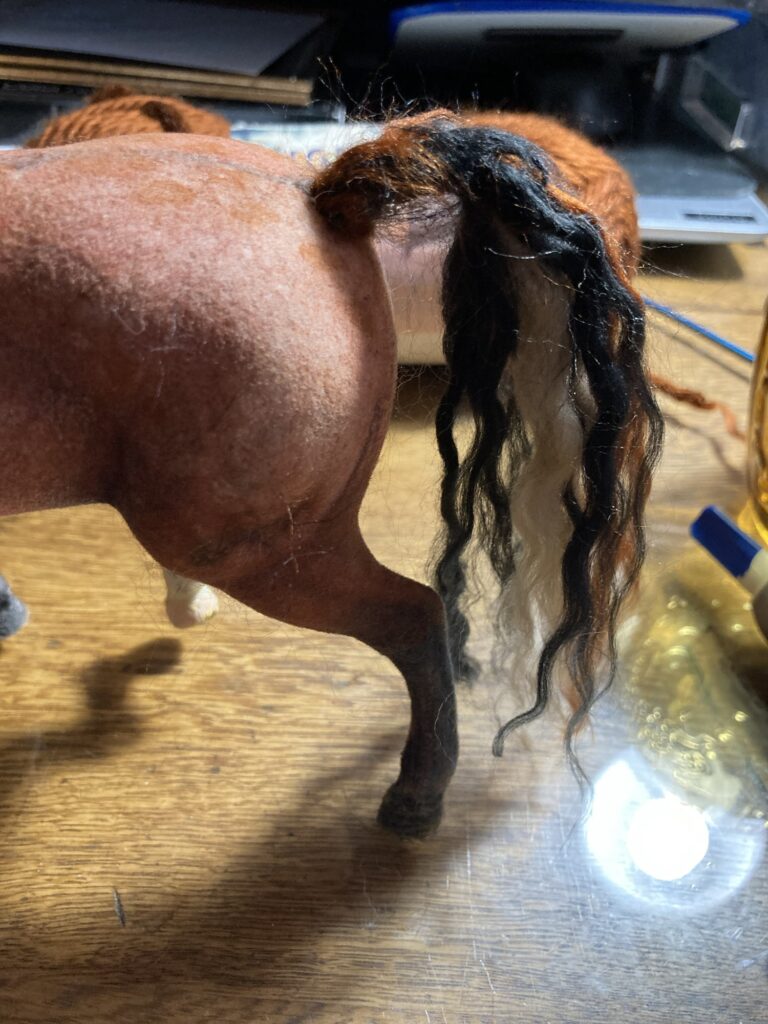
Now he just needs a few more areas of flocking to repair. I discovered that in areas where it isn’t as important to have fuzziness, like around the eyes and nostrils, I can dab a tiny bit if super glue, allow it to dry, and color right over it with colored pencil. It seems to give it just enough texture for the color to stick.While far from perfect, he does look a lot better than when I started, and I am learning different techniques to fix the flocking and make hair that I can use on the next ones.
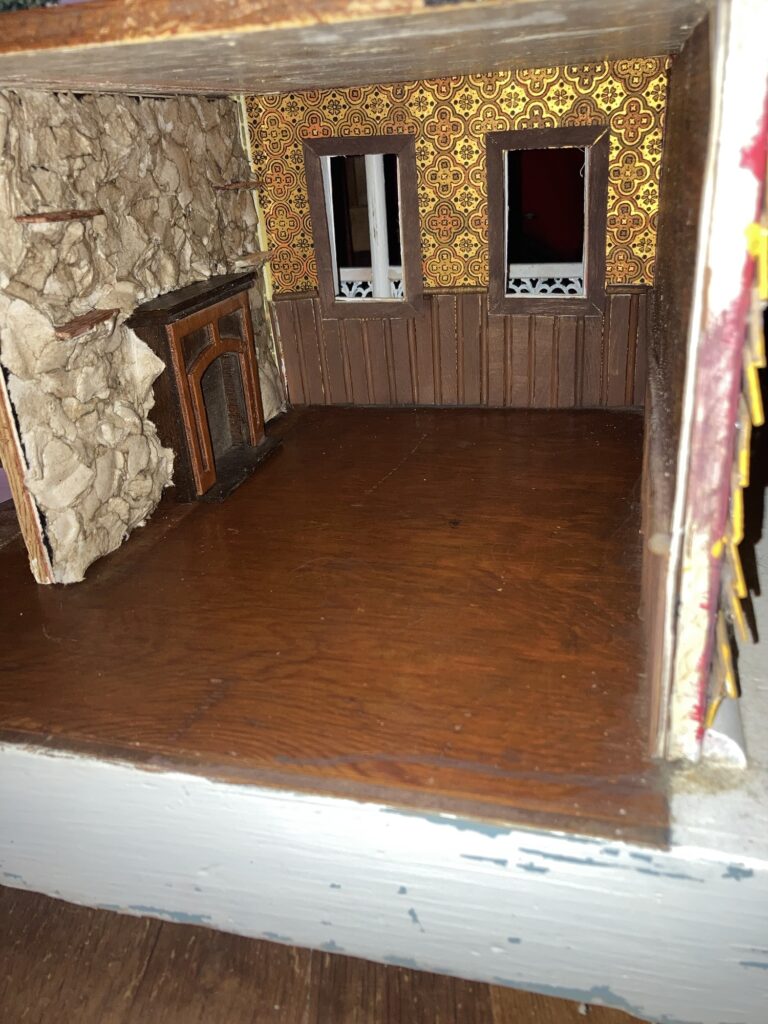
I decided to work on the living room of my 1970’s themed dollhouse. This house was basically gutted when I got it, so I am starting from scratch. I started out with a list of things I wanted in my 1970’s themed house, narrowed that list to what was actually do-able, and then decided on what projects for the house would be going in what rooms.
For the living room, i wanted a stone wall with a fireplace, wainscoting, and some authentic vintage wallpaper that we salvaged from my grandparents’ house before it was unfortunately torn down.
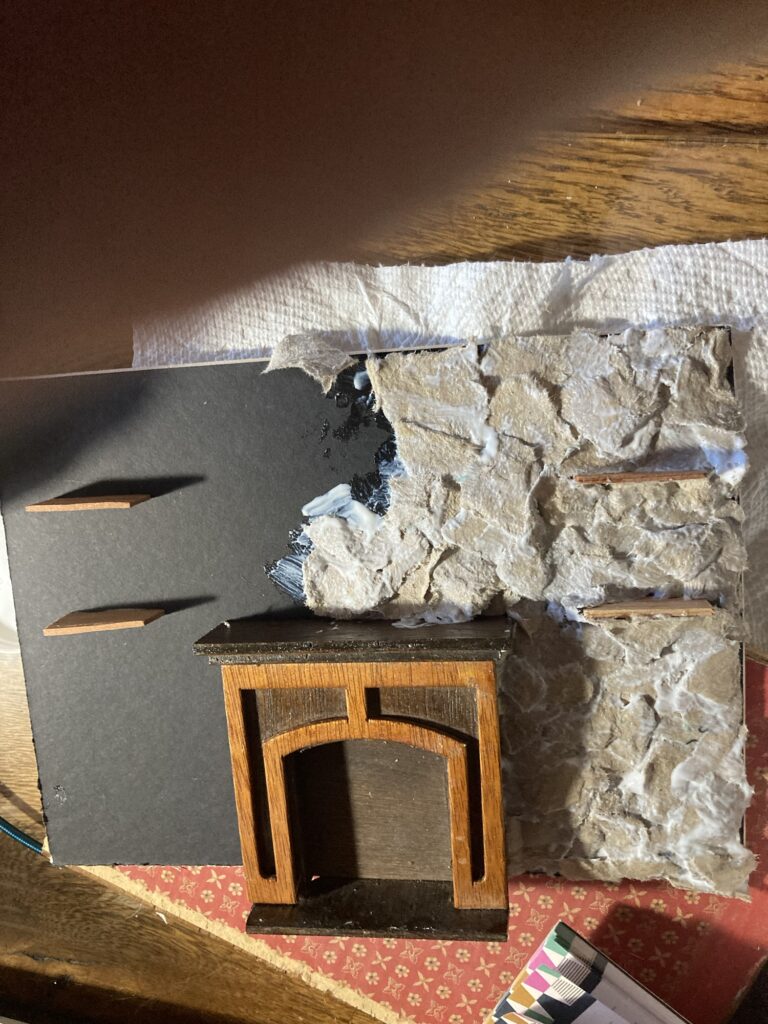
For the stone wall and fireplace, I first cut a piece of sturdy mat board to fit the wall it was going on. After double checking the fit, i attached the ready made fireplace that I chose for it.
I used mod podge to flue the egg carton
Next I used mod podge to glue little pieces of torn off egg carton (the cardboard type) onto the wall, layering it to form a stone texture. Note- keep the printed side pointed against the wall so it won’t have to be painted over later).
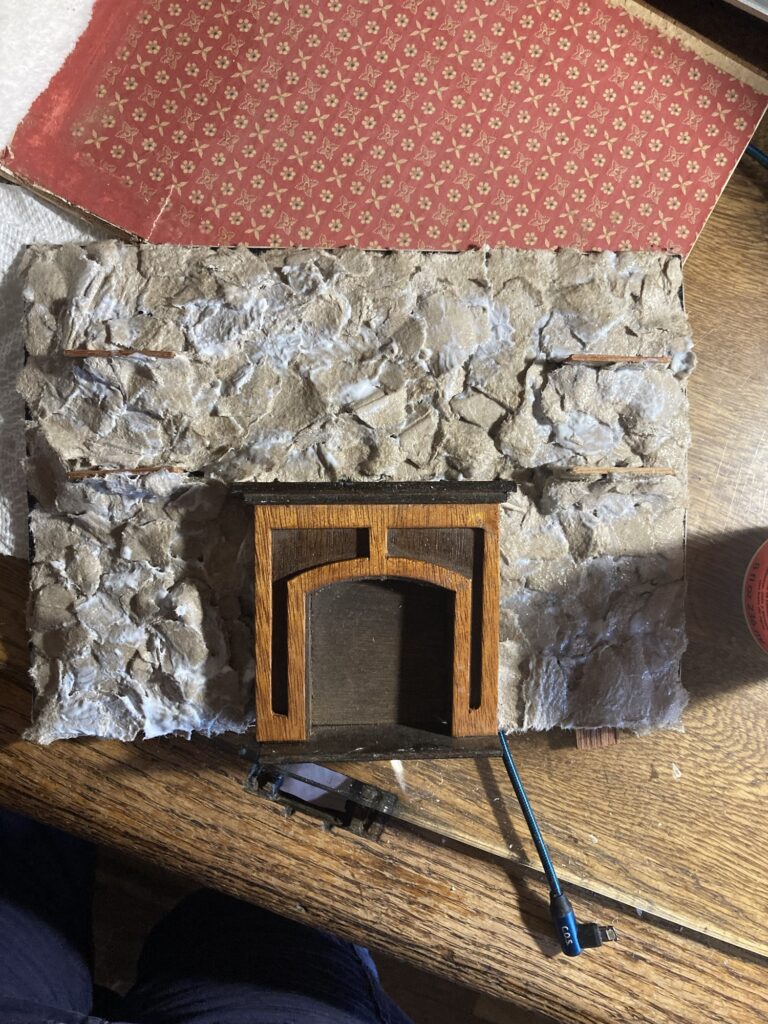
Tear off pieces of cardboard egg carton to use for the stone textureLayer the cardboard to form rough, rock-like texture, glueing it down and coating it with mod podge.I glued little pieces of craft stick on the wall to form shelves before placing the egg cardboard. What it looked like as it was drying.
When it was dry, I slid it into place on the wall of the dollhouse, made sure all fitted as it should and looked the way i wanted, and then glued it in place with just a dab of glue.
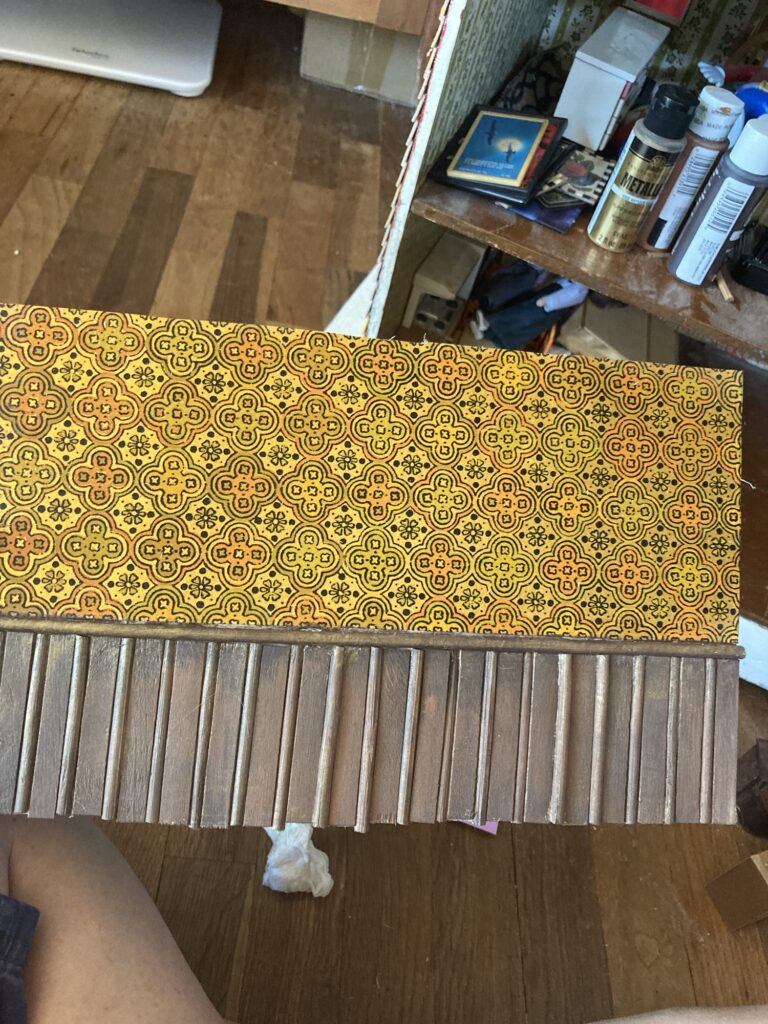
Next I cut another piece of mat board to fit another wall, and glued on a piece of my wallpaper. I cut pieces of popsicle stick and split dowels to create a pattern of wood for the bottom section of the wall, to form wainscoting.
I tinted the wood with thinned out paint so it looked like stain, and made a rail with a long split dowel.
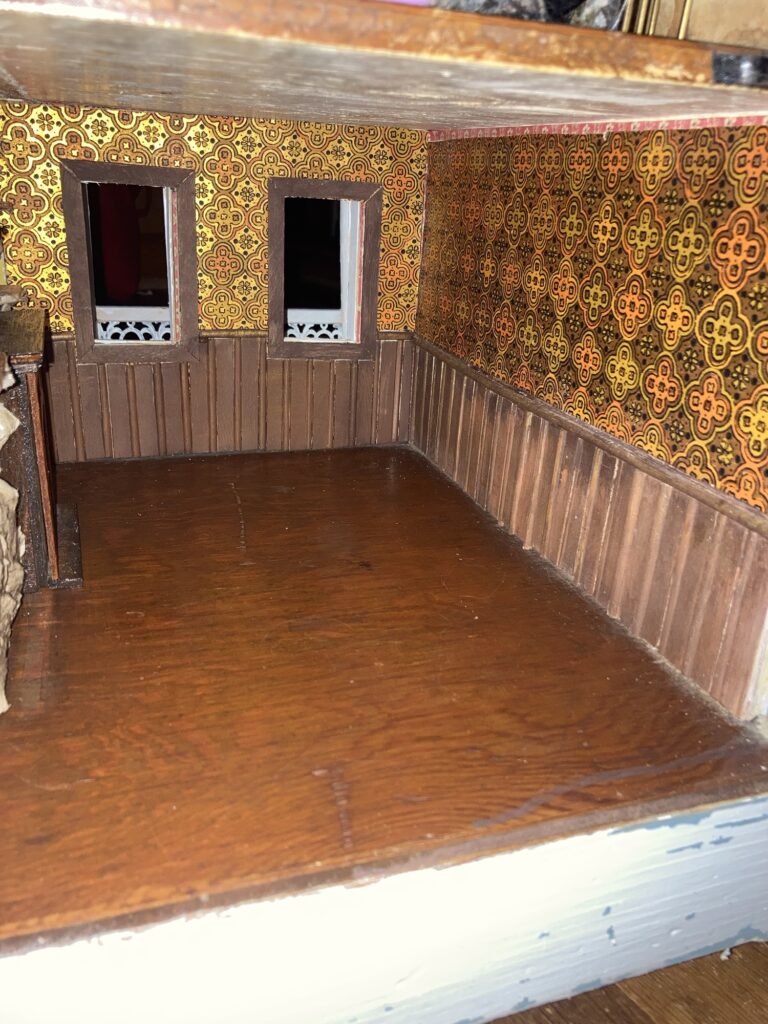
I made sure it fit where i wanted and then glued it to the wall, then did the same for the other wall.
Eventually there will be trim along the ceiling, which will cover the little piece of old wallpaper peeking through.Another view
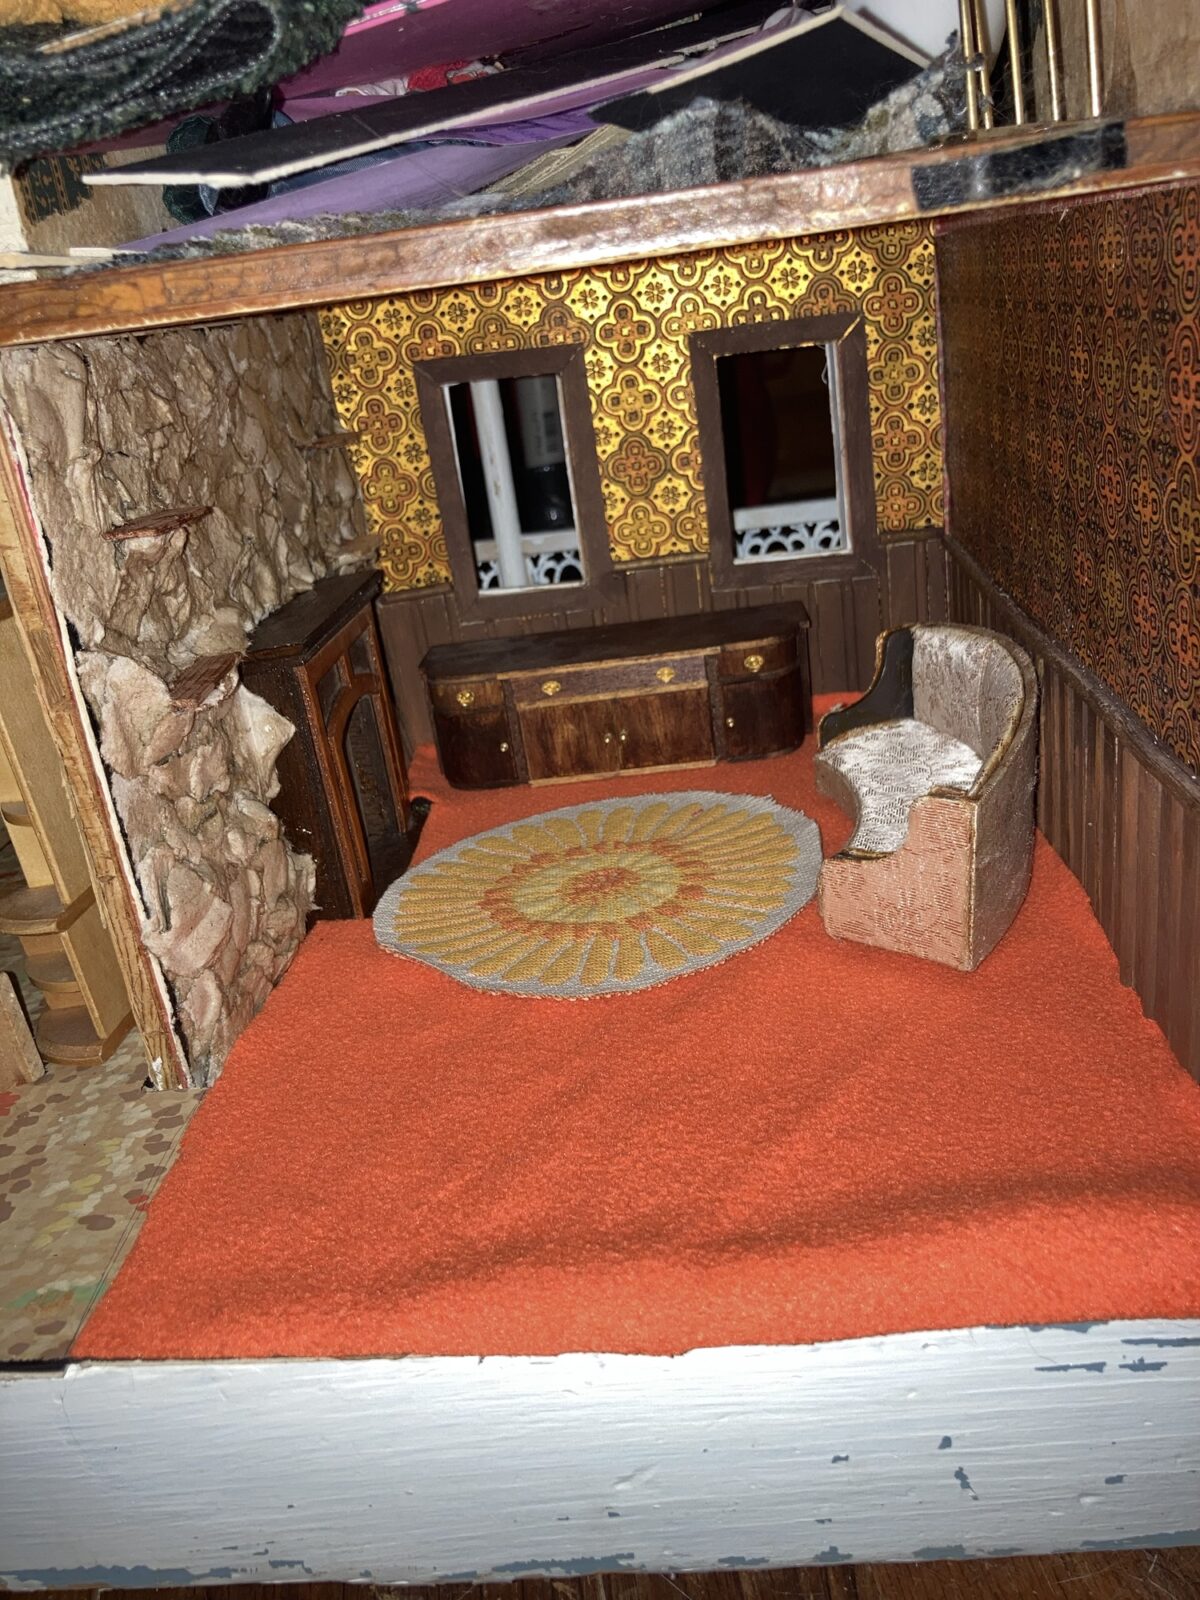
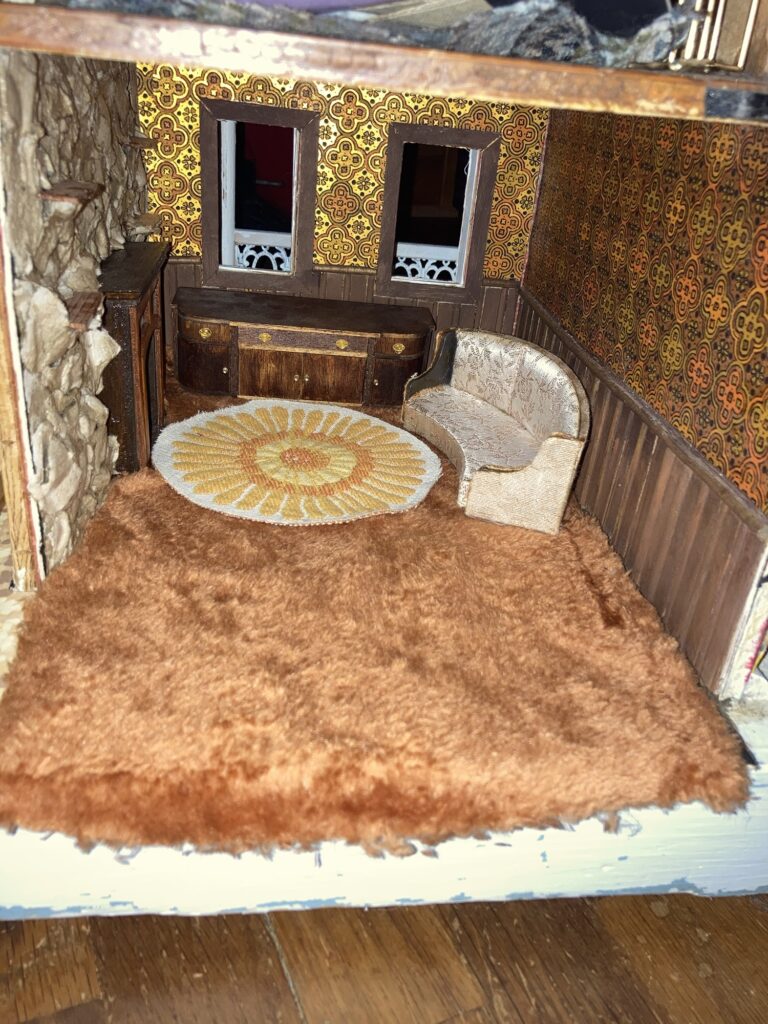
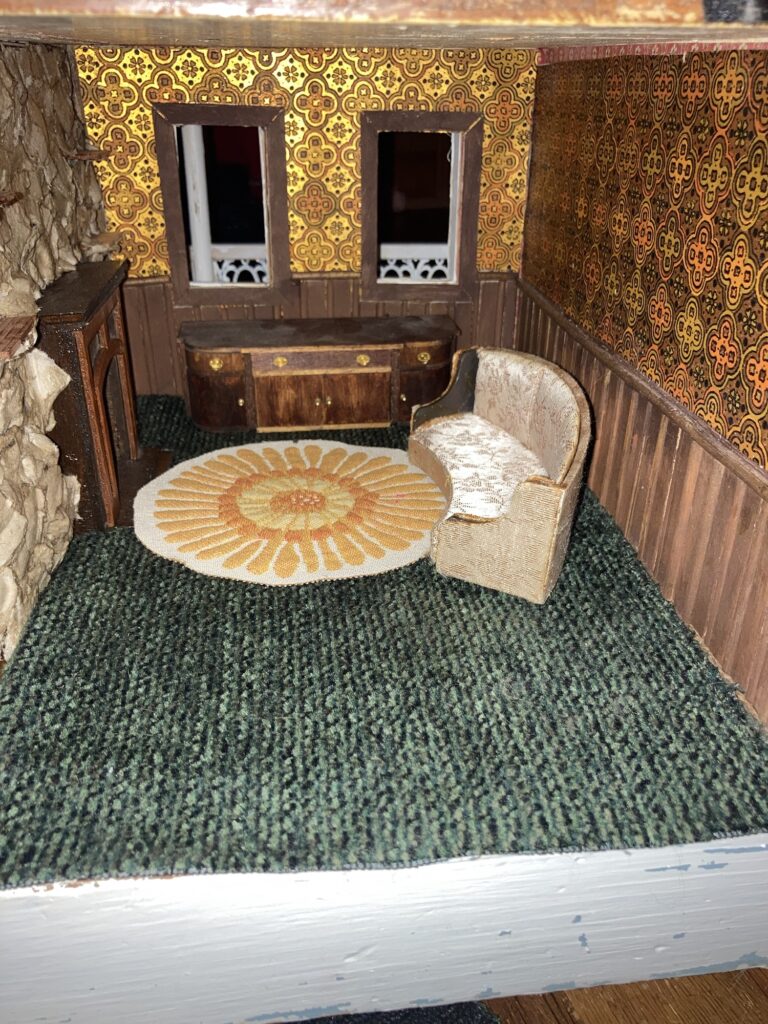
I haven’t been able to decide on a floor color, so I have tried several different colors of “carpet.”
Brown shag. I was hoping this would be a similar shade to the wood of the floor, as I like the rich warm hues, but it seems a little washed out to me now. (This is part of an autumn themed fuzzy pillow from a thrift store)Orange fuzzy (it’s the inside of an old sweatshirt, so it has that worn fuzzy carpet look to it 😆)Green (this is an old carpet sample)
I also tried a puke yellow but it definitely didn’t look good with the wallpaper. I am thinking of sewing an orange trim around my flower rug, and i would love to reupholster my couch to something like the orange flower velvet I used to see all the time, but haven’t found a good material for that, yet. Any thoughts? Which carpet do YOU think would look best? Leave a comment with your thoughts!
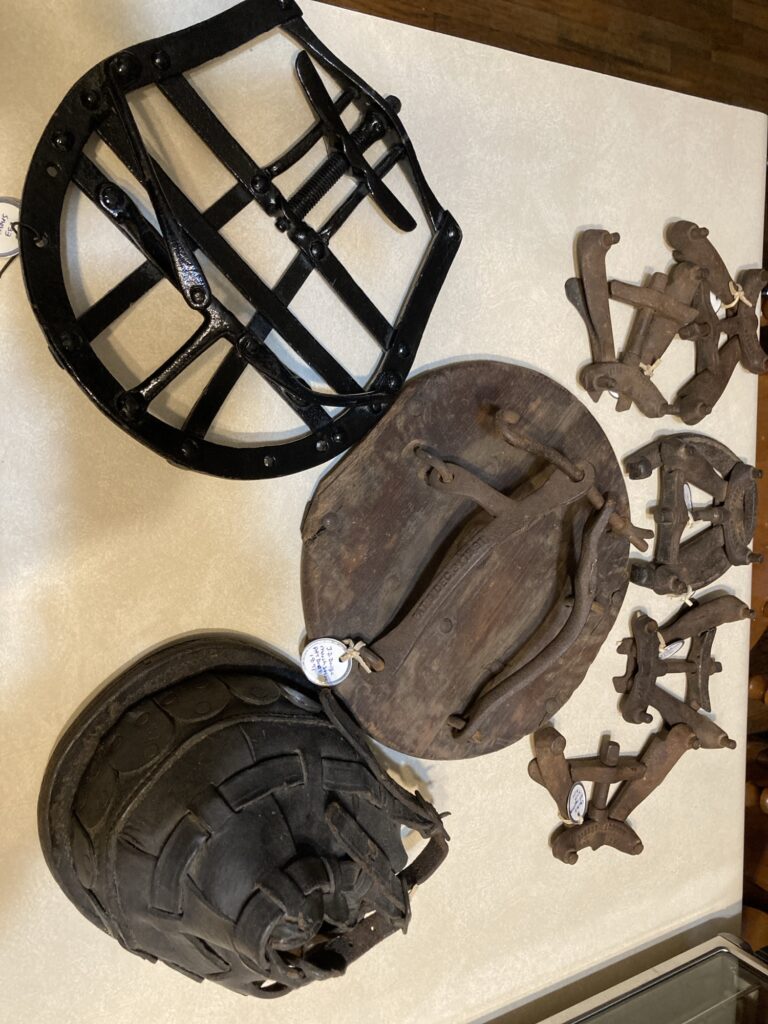
Today I am going to share some specialty horseshoes from my collection. These are all products that can be attached to a regular horseshoe for special purposes. I currently have a bog shoe, a snow shoe, a lawn boot, and ice cleats.
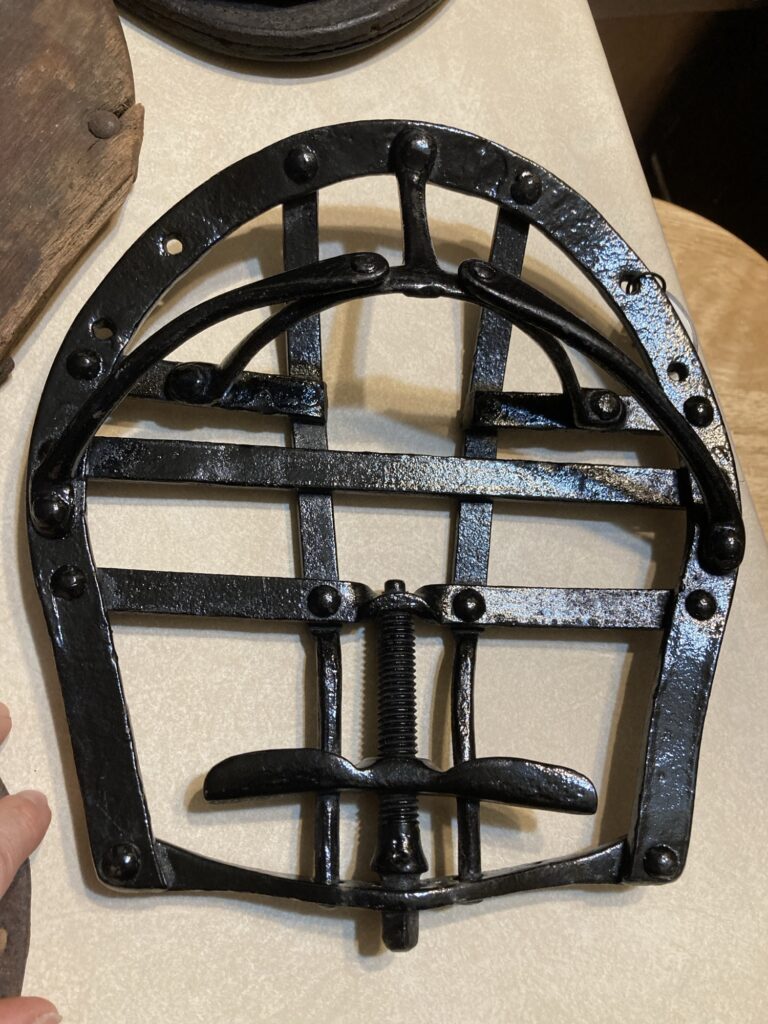
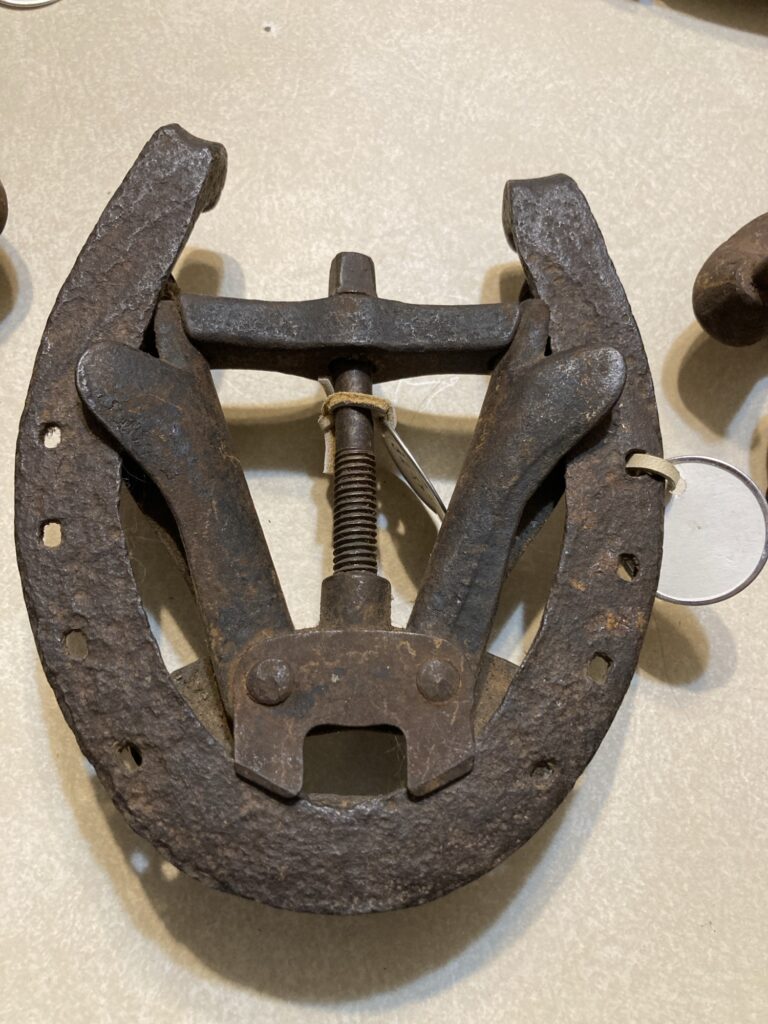
A snowshoe
The snowshoe I have is made of steel. They can also be made of wood or even rope and wood. The shoe I have is made for the horse to set their hoof in place, then a screw is tightened at the bottom so it clamps onto the horse’s shoe that is nailed to their hoof.
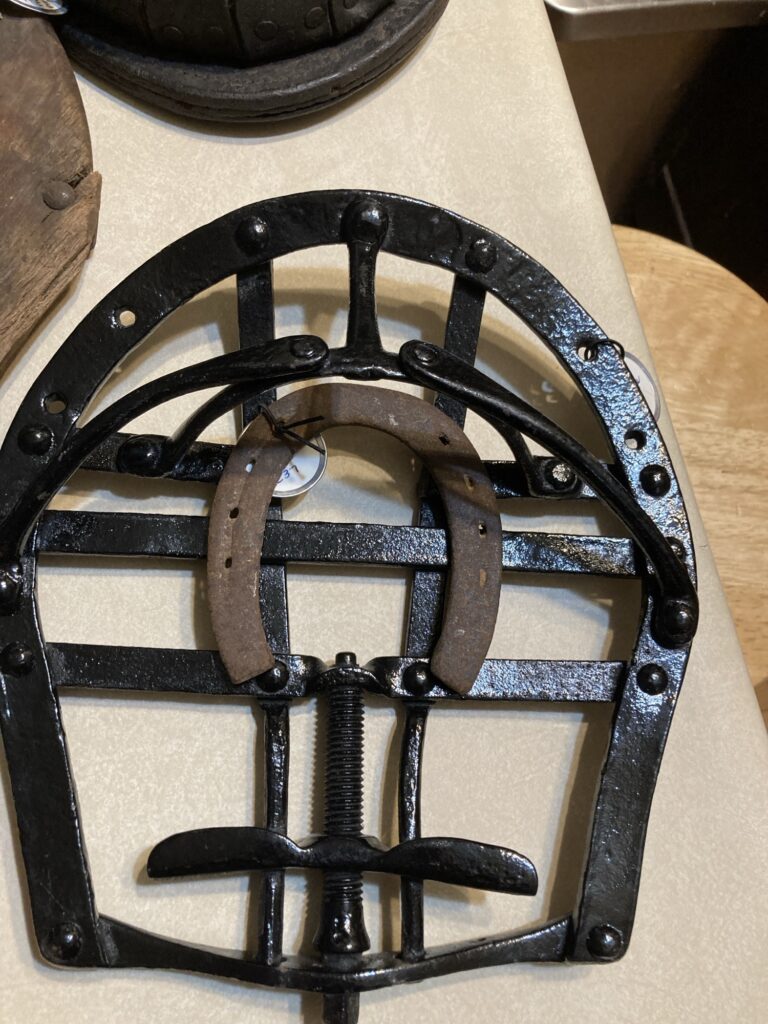
This is approximately where the hoof would go. Of course, my lovely pony shoe is way too small for this snowshoe, but it was what I had on hand at the moment.
The metal cage at the bottom of this horseshoe would help distribute the horse’s weight on the snow to help them from sinking as far. This shoe could probably be used on muddy ground, as well.
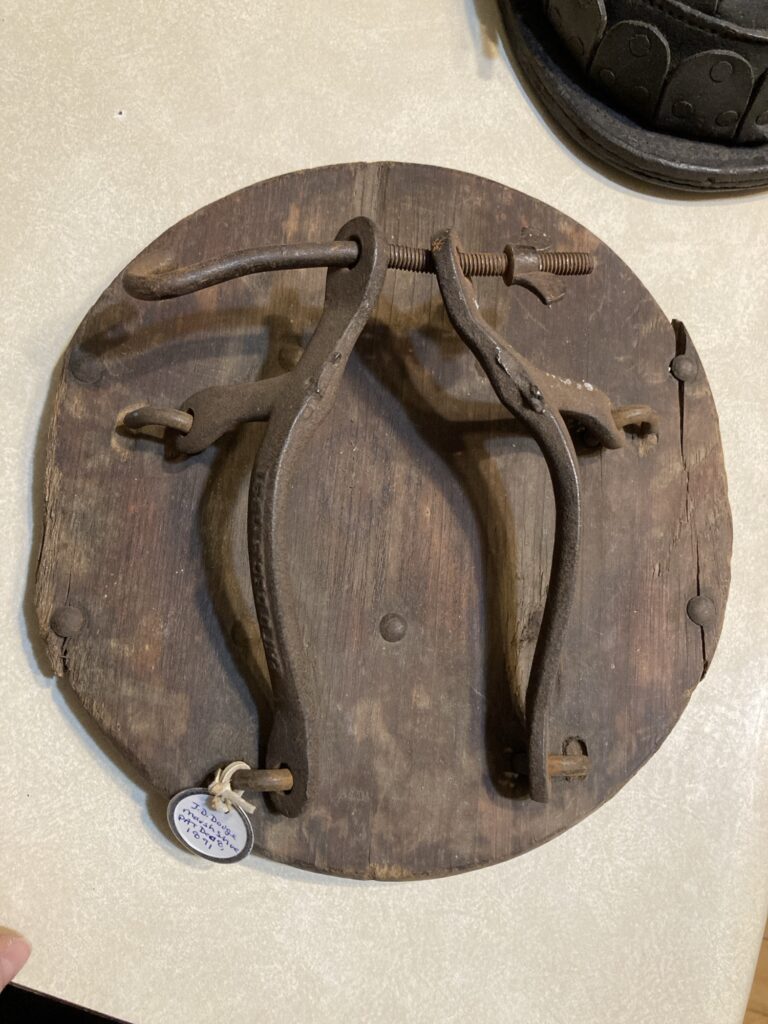
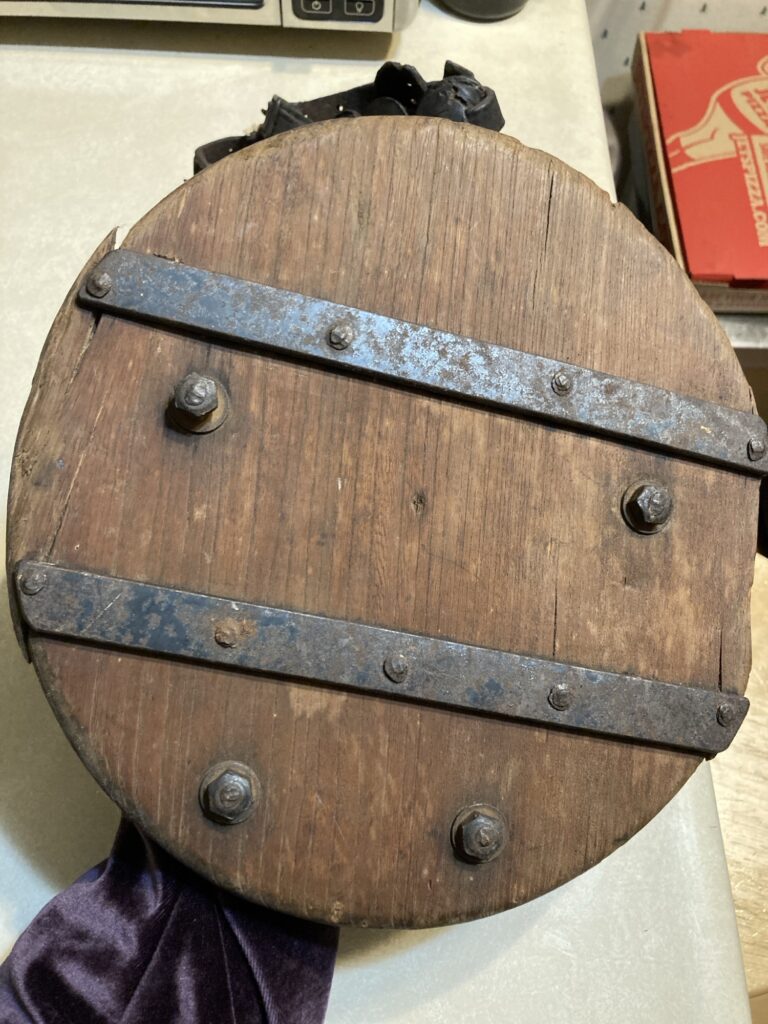
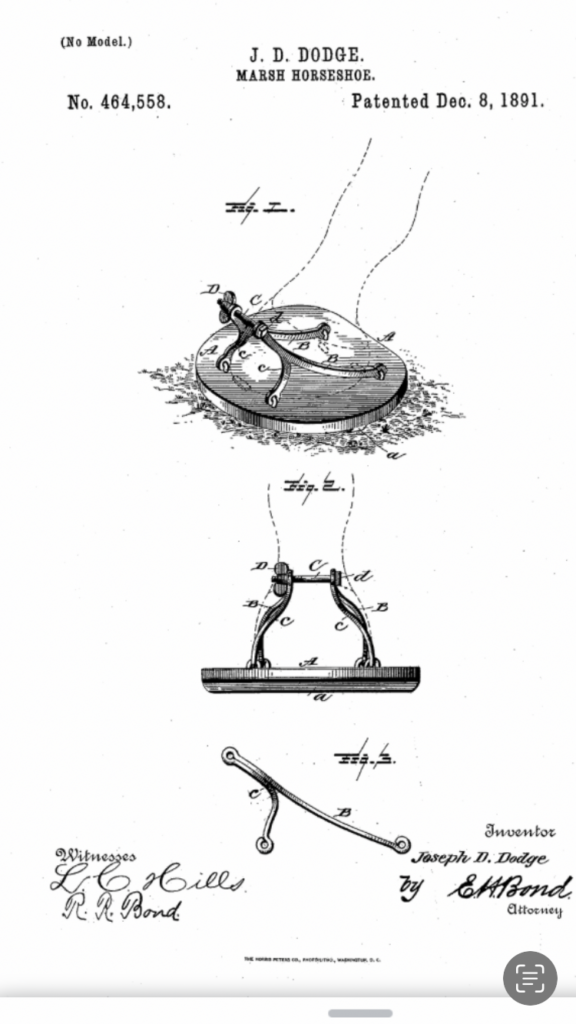
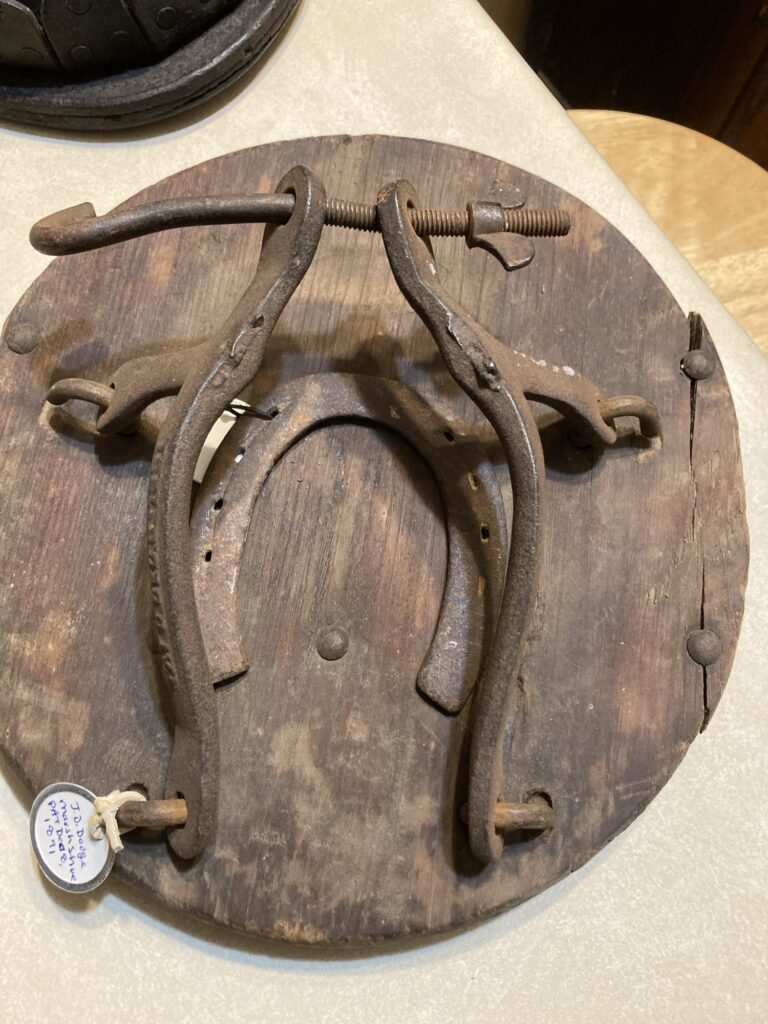
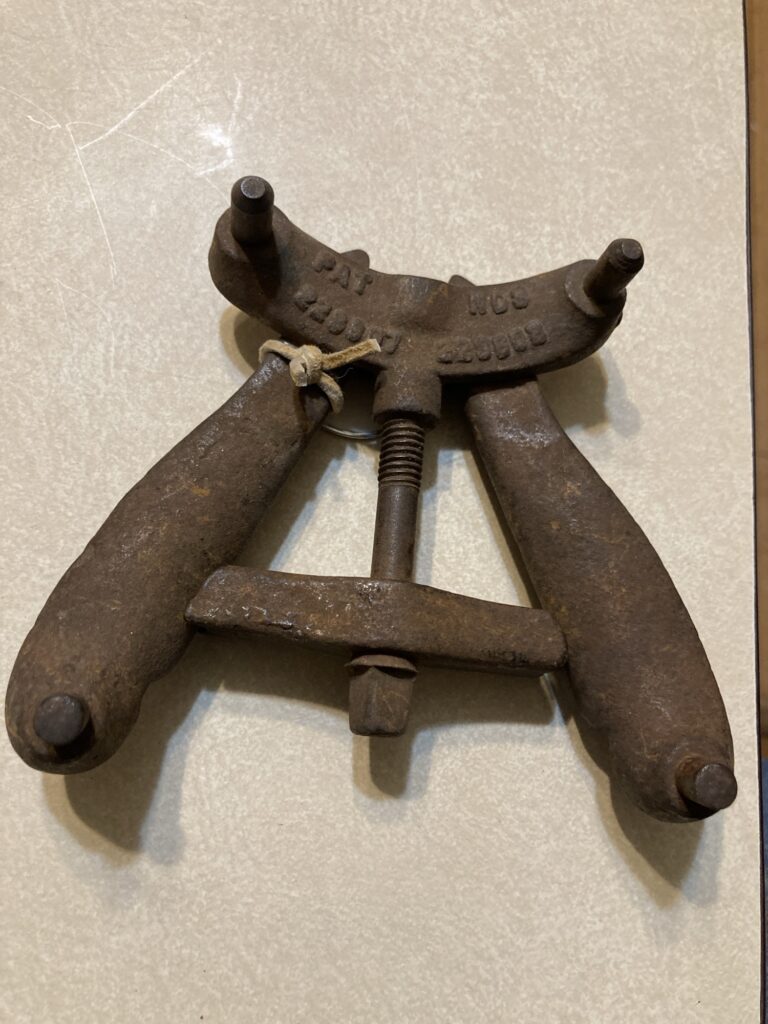
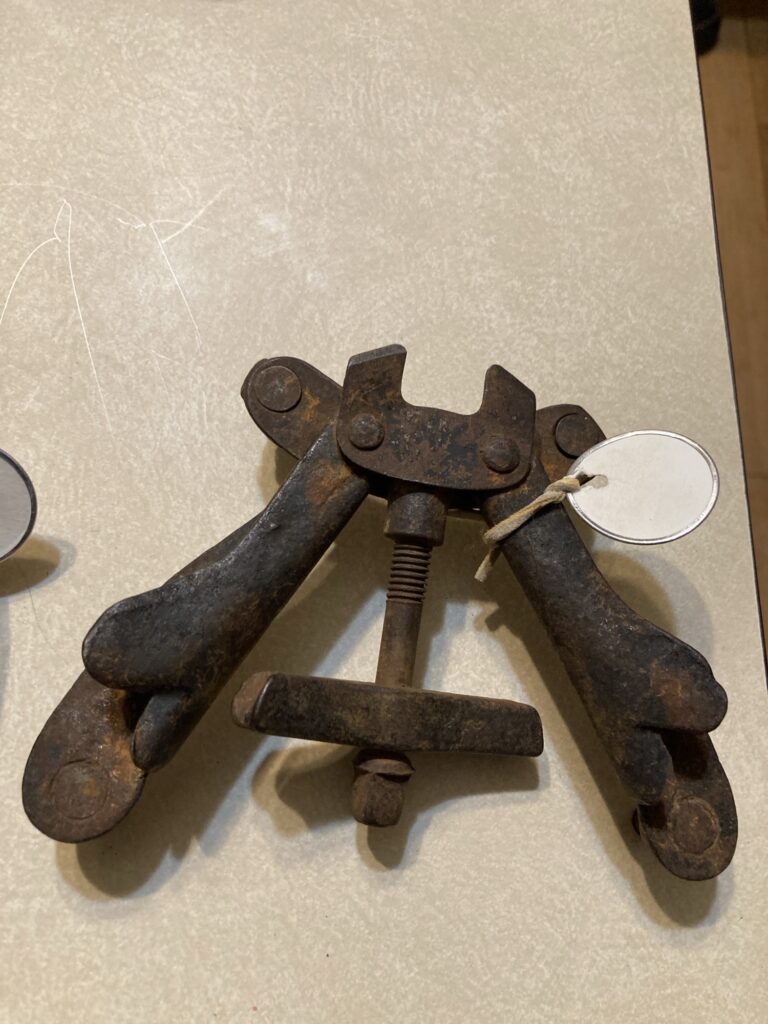
A bog (or mud) shoe
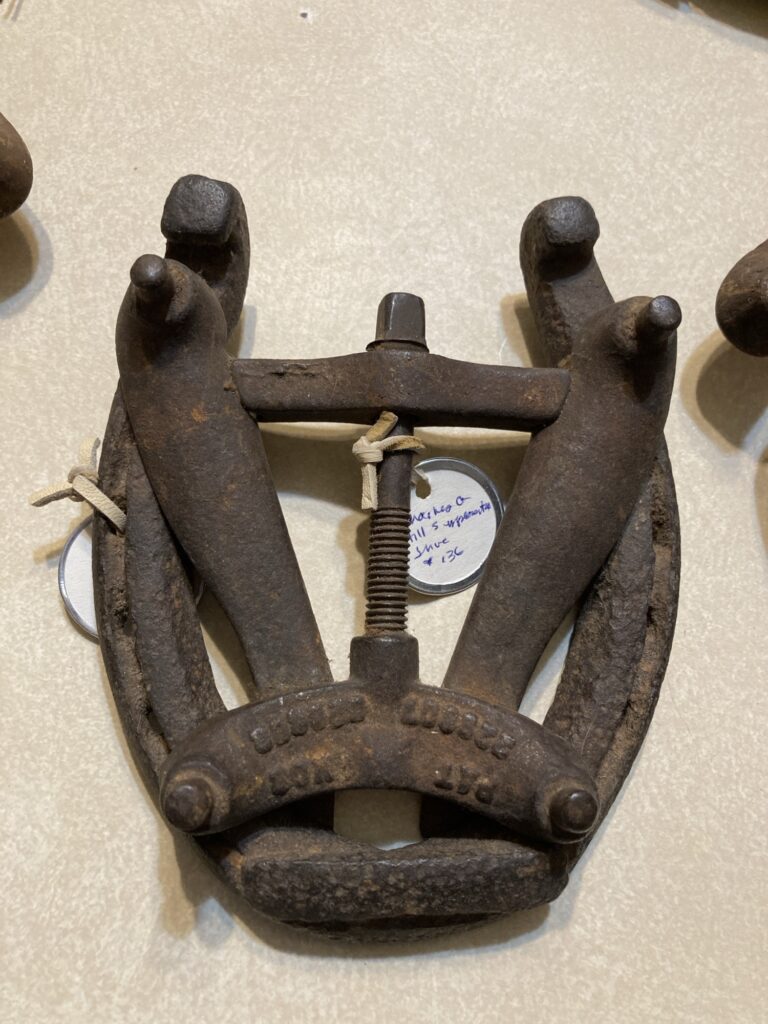
The bog shoe (also called a mud or marsh shoe) works similarly to the snowshoe, in that it makes the hoof surface bigger to distribute the horse’s weight so it doesn’t sink down as easily in mud or even snow. This shoe is made of wood and steel. The hoof is positioned in the center of the shoe and a metal rod with a screw is tightened on it with a wing nut to hold the hoof in place. This particular shoe was patented December 8, 1891 by J.D. Dodge.
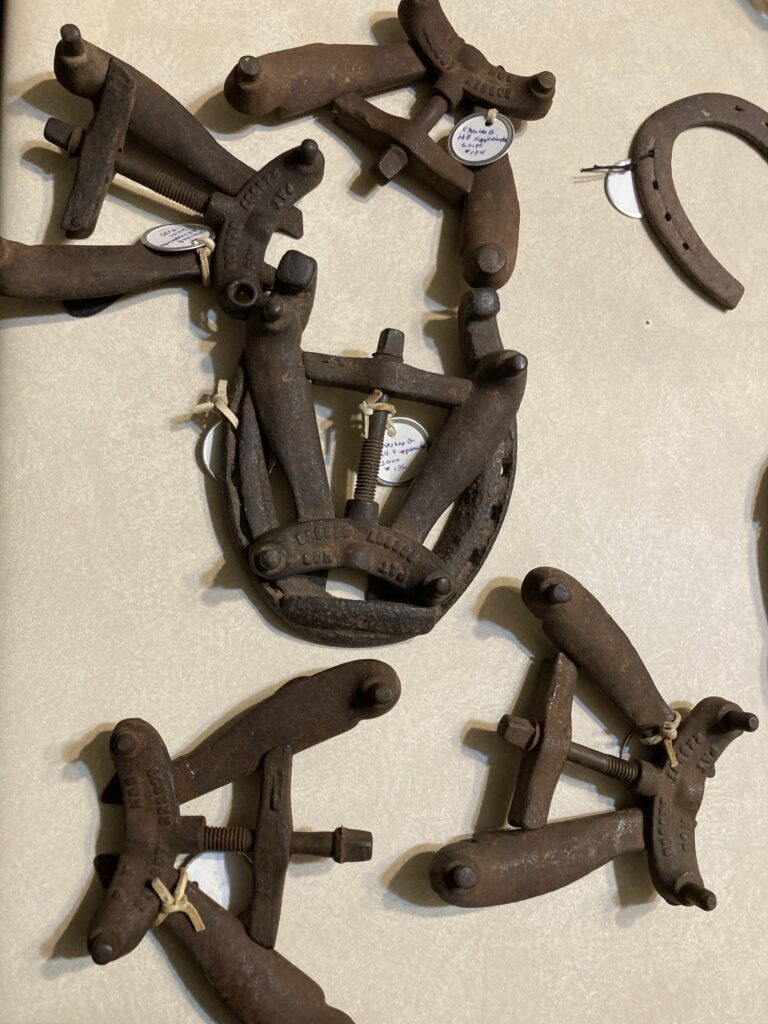
The underside of the marsh shoe.With my little horseshoe in place.A set, plus one, of removable ice cleats.
My antique removable ice cleats were patented July 6, 1880 by Chas. G. Hill.
One of the ice cleats attached to a shoe (this is the side that would contact the ground).Attached to a shoe. This is the side attached to the bottom of the horse’s hoof.
These attachments have a large screw-tightened piece that helps it clamp onto the shoe. There are metal cleats on this attachment that help give the horse traction on ice.
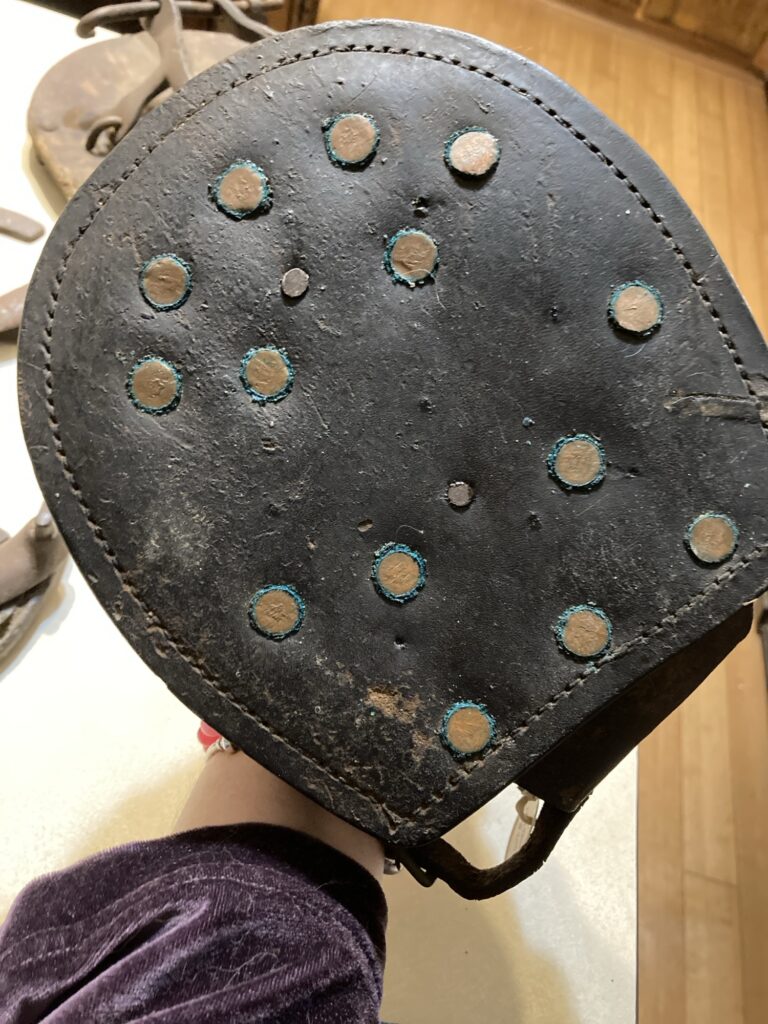
Unattached to a shoe. This is the side that touches the ground.Unattached to a shoe. This is the side that slips onto the horse’s nailed-on shoe.This is a lawn boot.
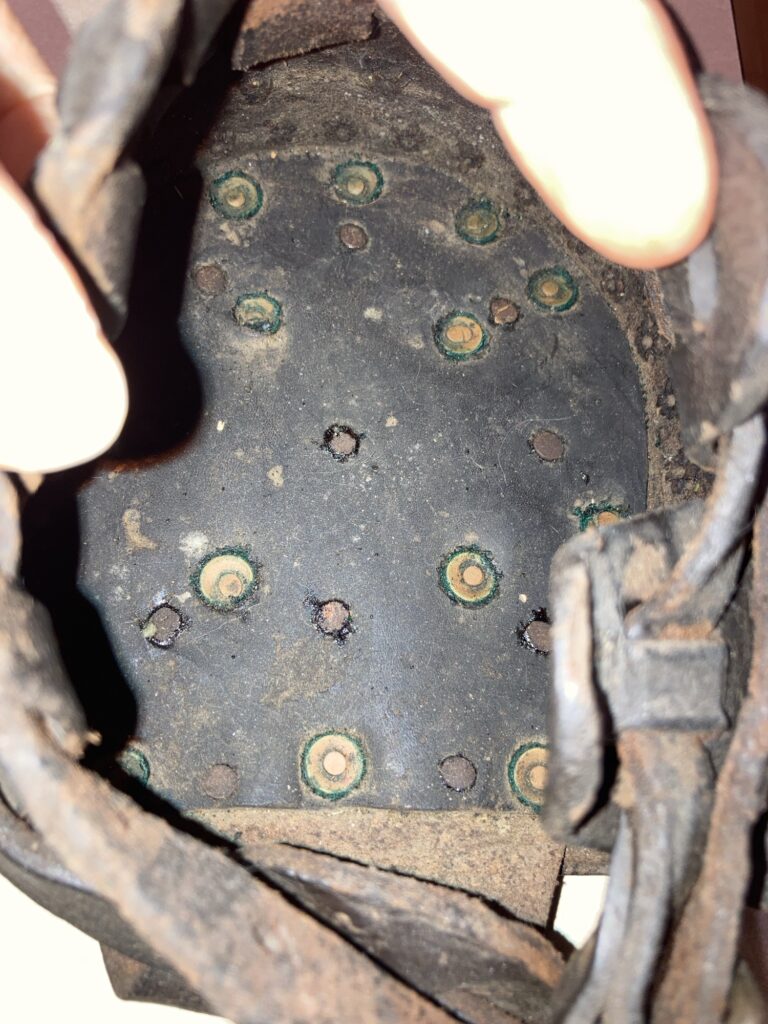
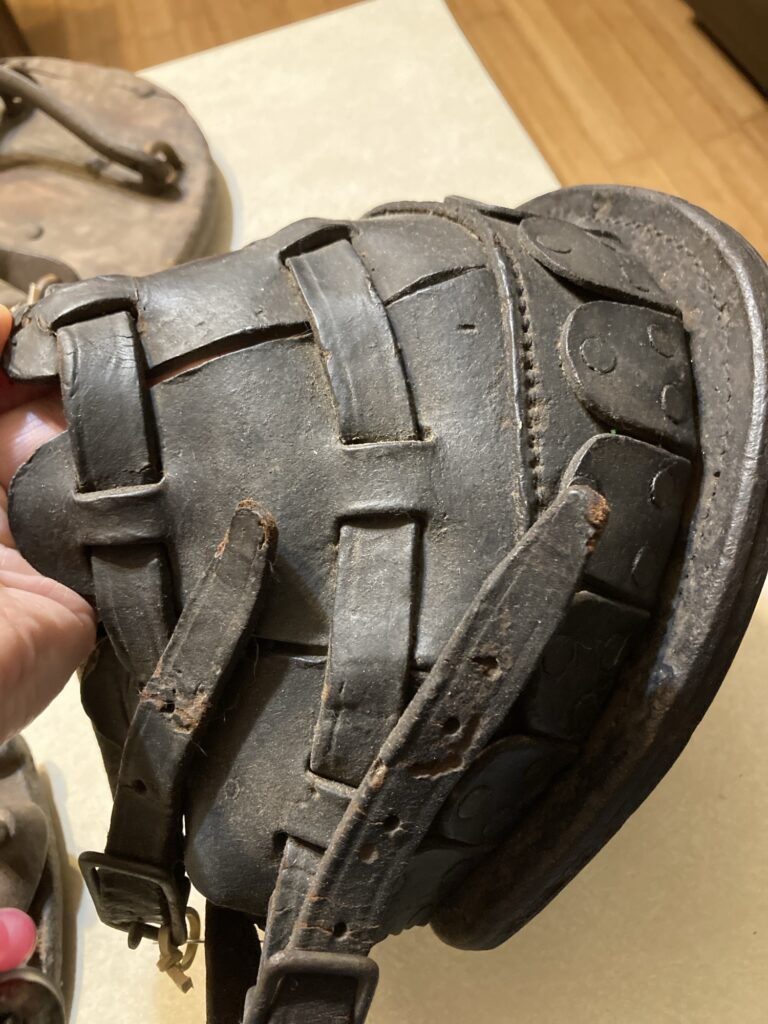
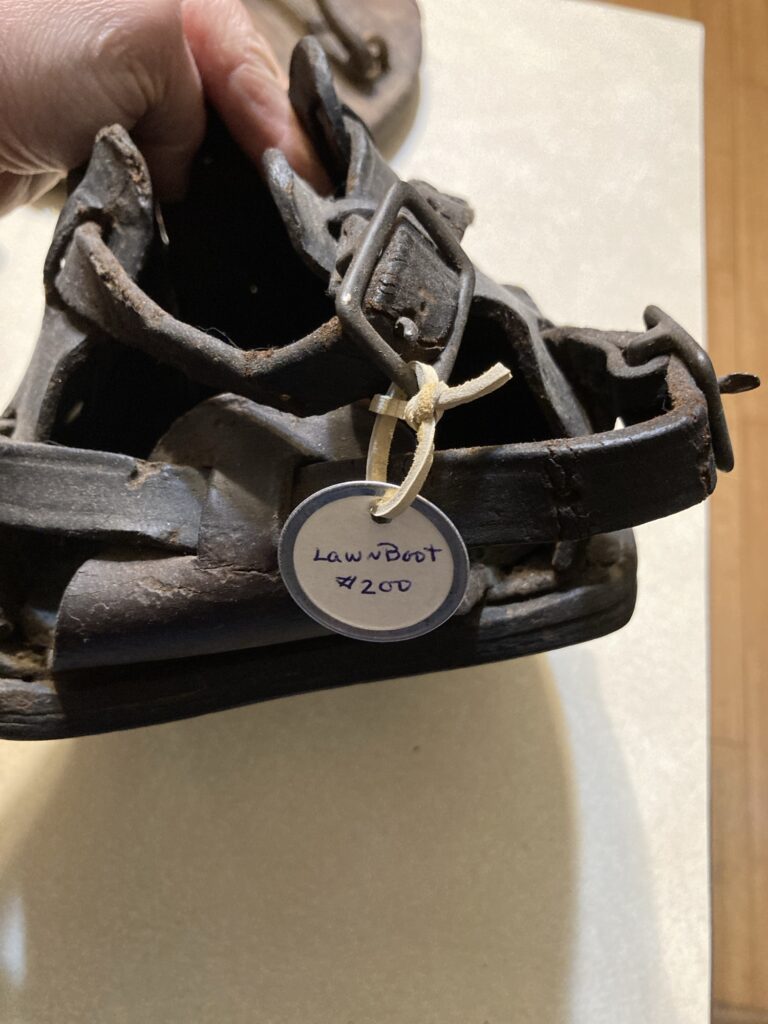
The lawn boot is a thick leather boot that buckles over a horse’s hoof and regular shoe. These boots were used to keep the horse’s hooves from churning up pieces of sod while pulling a lawn mower, back in the day when horses were needed to pull lawn mowing equipment on large estates.
The inside of the boot. The bottom is held together by copper rivets.
The bottom of the boot, which is in contact with the ground.
The back with its buckles.
Of course, this is just a small selection of what is out there. There are many different varieties and types of shoes and attachments that have been invented over the years to help improve footing or to better care for lame horses.
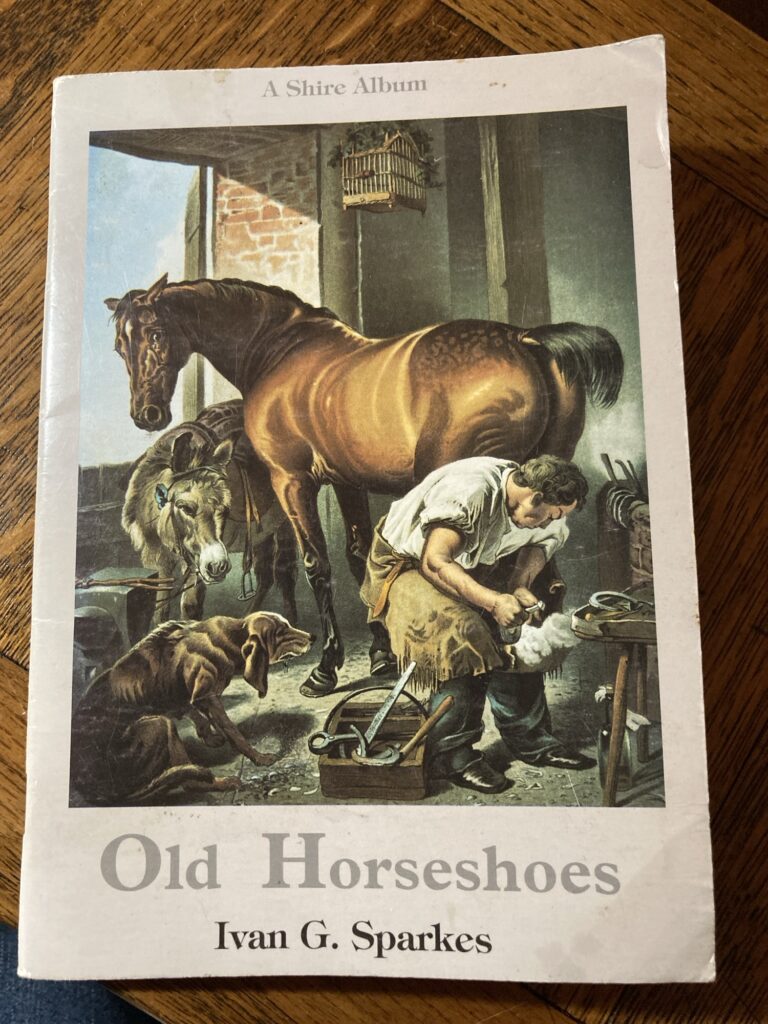
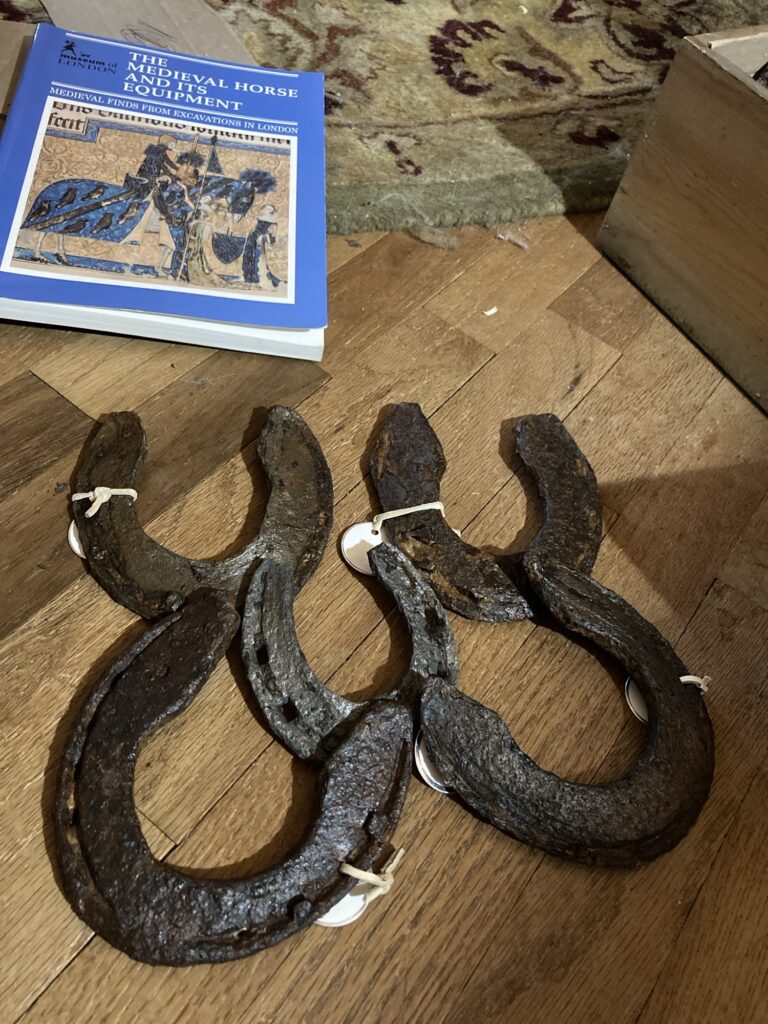
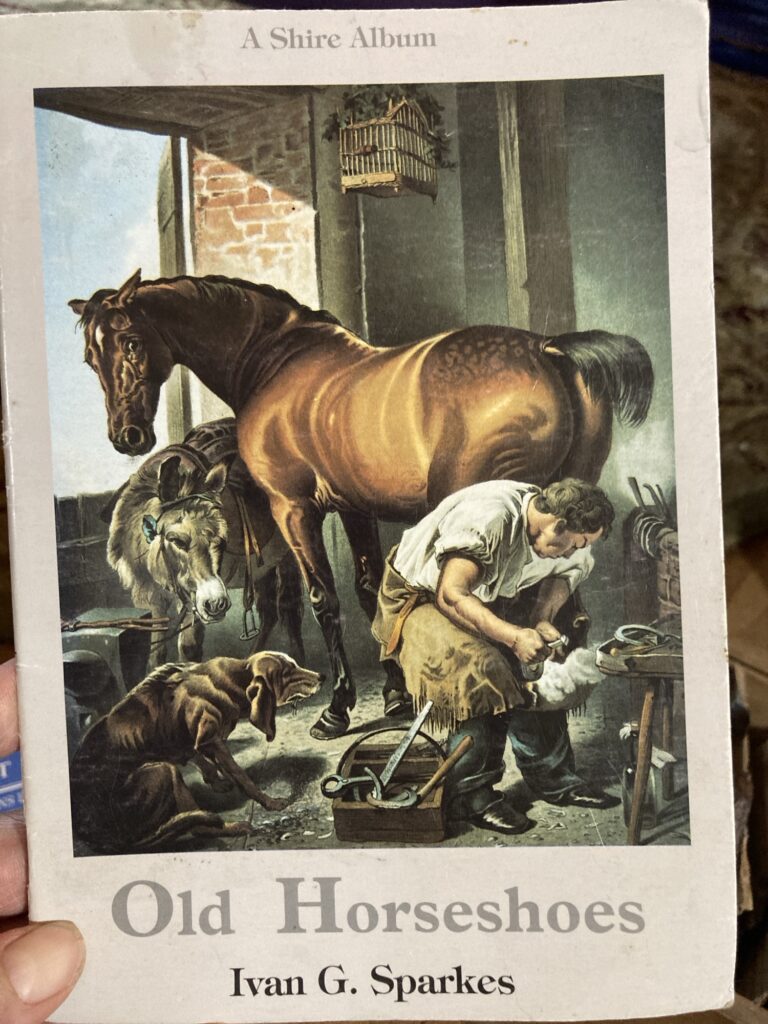
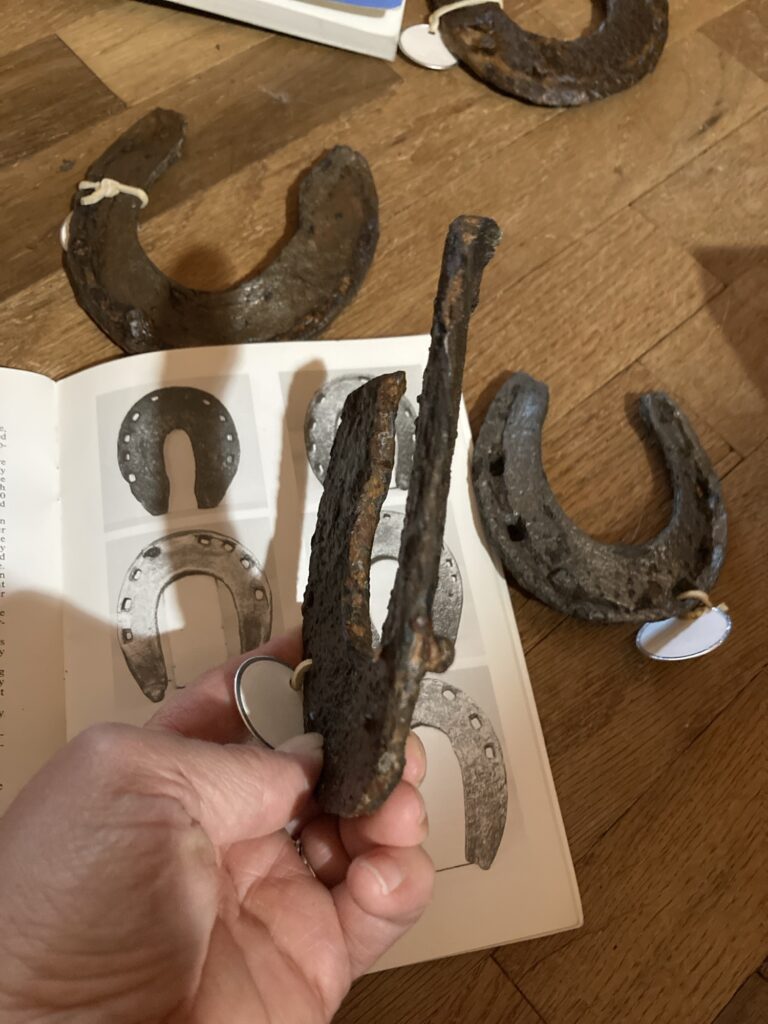
I have been collecting horseshoes all of my life, and have a decent amount from Great Britain. The shoes from this area are much easier to date for me, as there is more written documentation about shoeing practices, much more research has been done, and I have a couple of excellent research books on them. One of the books that I have found is ‘Old Horseshoes’ by Ivan G. Sparks.
This is a great book! It is small but filled with good information!
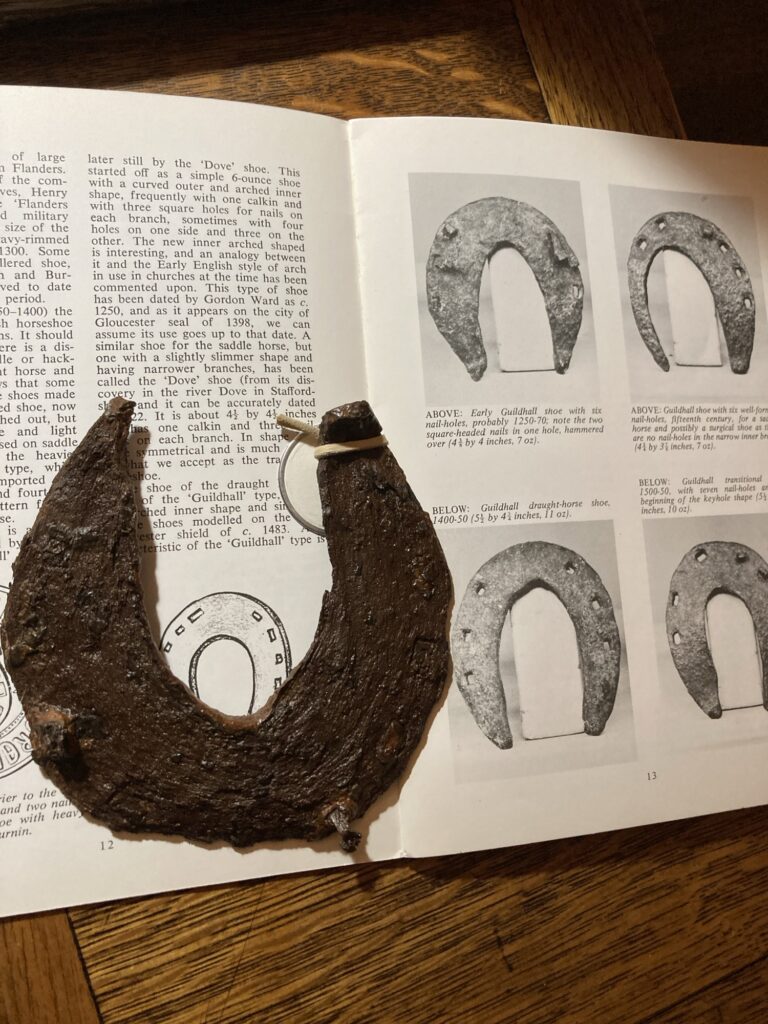
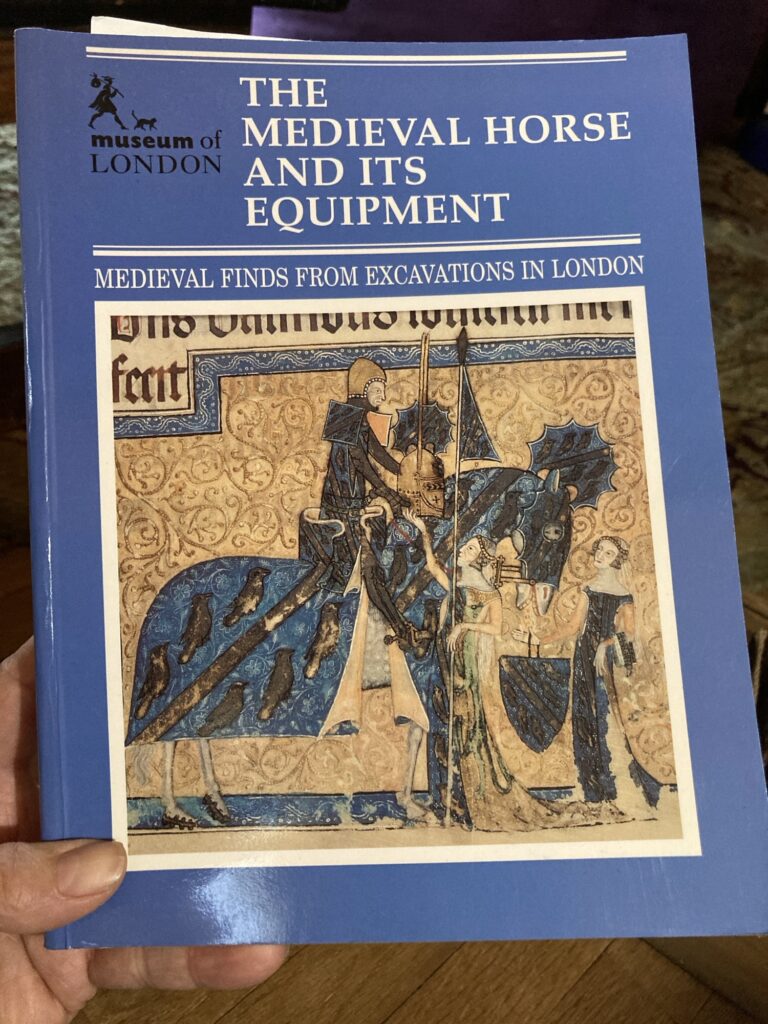
Another excellent book is ‘The Medieval Horse and its Equipment’ by the Museum of London. The Editor, John Clark, categorizes the different types of shoes a little differently than Ivan Sparks, but gives them roughly the same time periods. Today I am going to focus on the Guildhall shoe (according to Ivan Sparks) or Type 4 (according to John Clark).
Another great source is the Museum of London’s website. They have many photos of medieval shoes and their approximate dates. I often quiz myself on trying to date them according to what I have read in books, and use their shoes to help identify some of my own more puzzling examples.
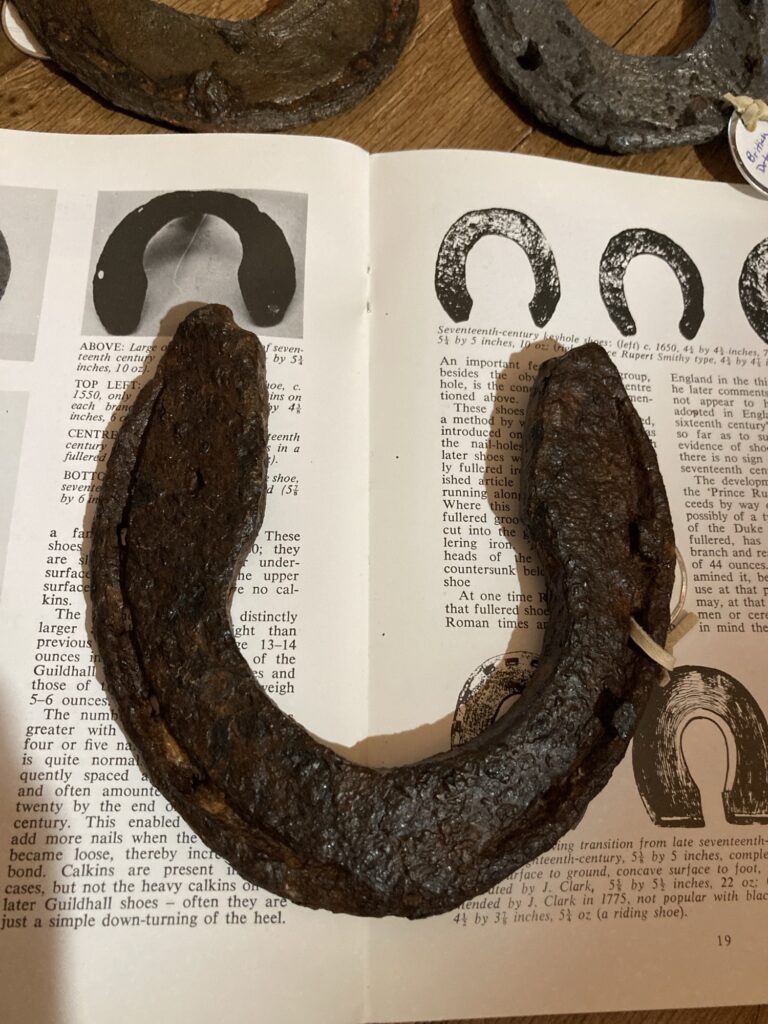
The Guildhall shoe, according to Ivan Sparks, has a rounded outer edge and an arched inner edge. This shoe is a good example:
These shoes gained popularity around 1350 AD to accommodate the larger breeds of horses being imported to the area. They gradually were replaced by keyhole shoes by around the 1600’s. According to John Clark, they were often found in the 14-15th centuries (around 13-1400’s).
They tended to have just one calkin, but they could have two as well. They sometimes had 6 nailholes, and sometimes 7 (3 on one side and 4 on the other). The shoes are fairly small, maybe about the size of today’s average riding horse. Certainly not as large as today’s drafts!
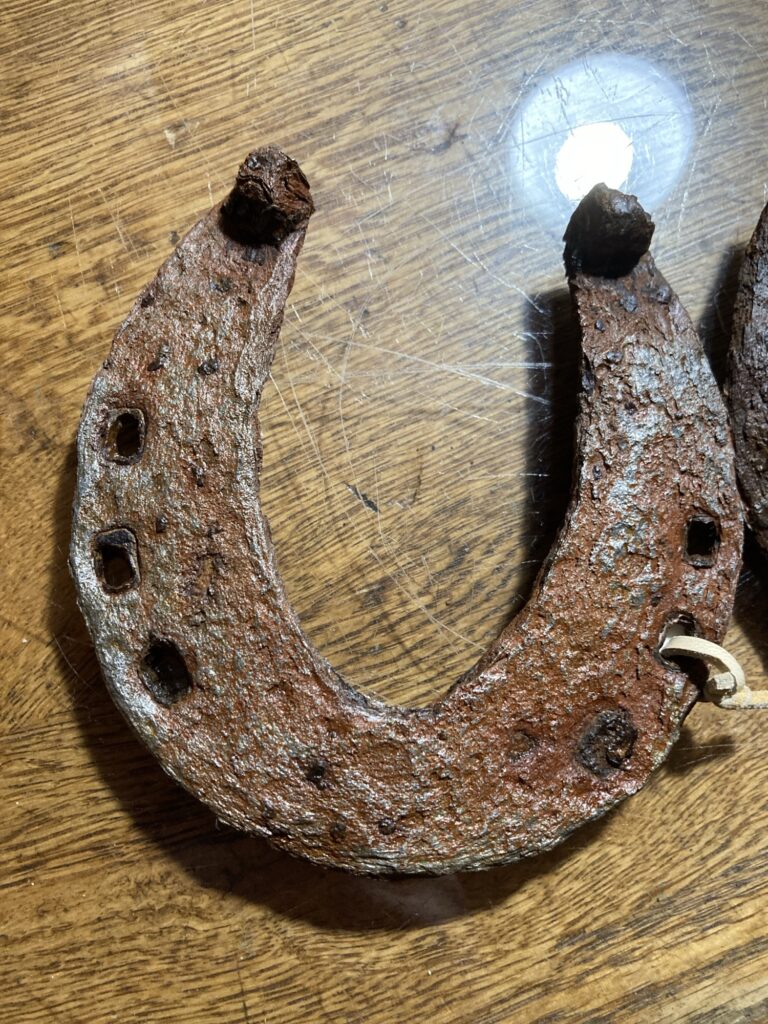
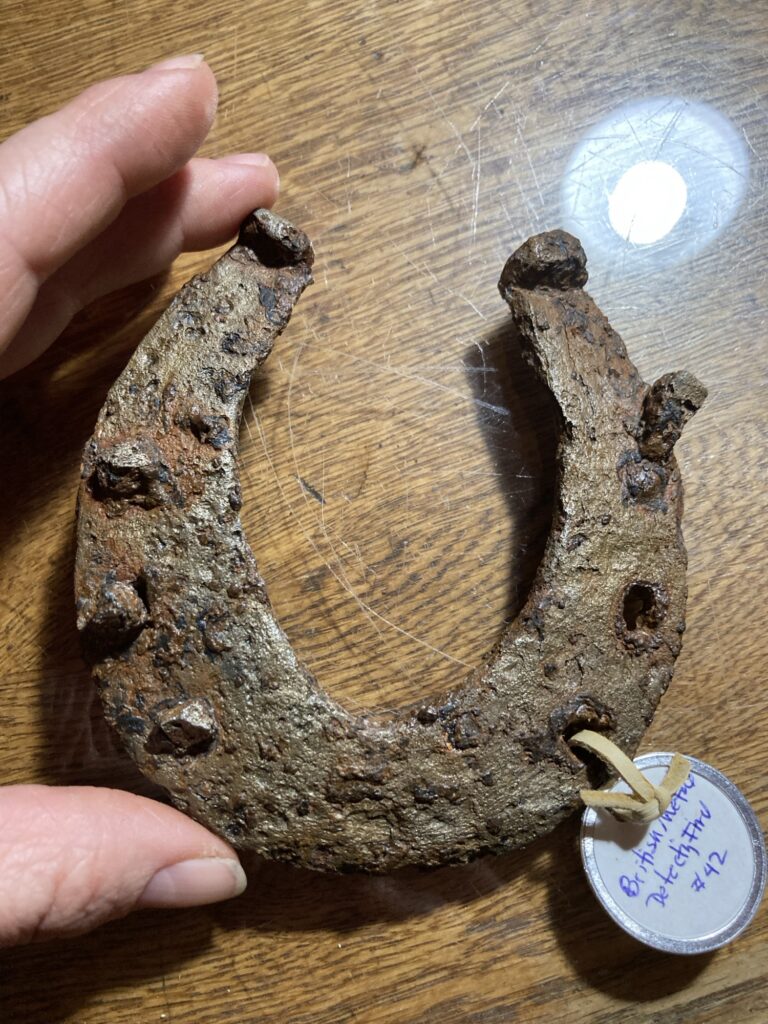
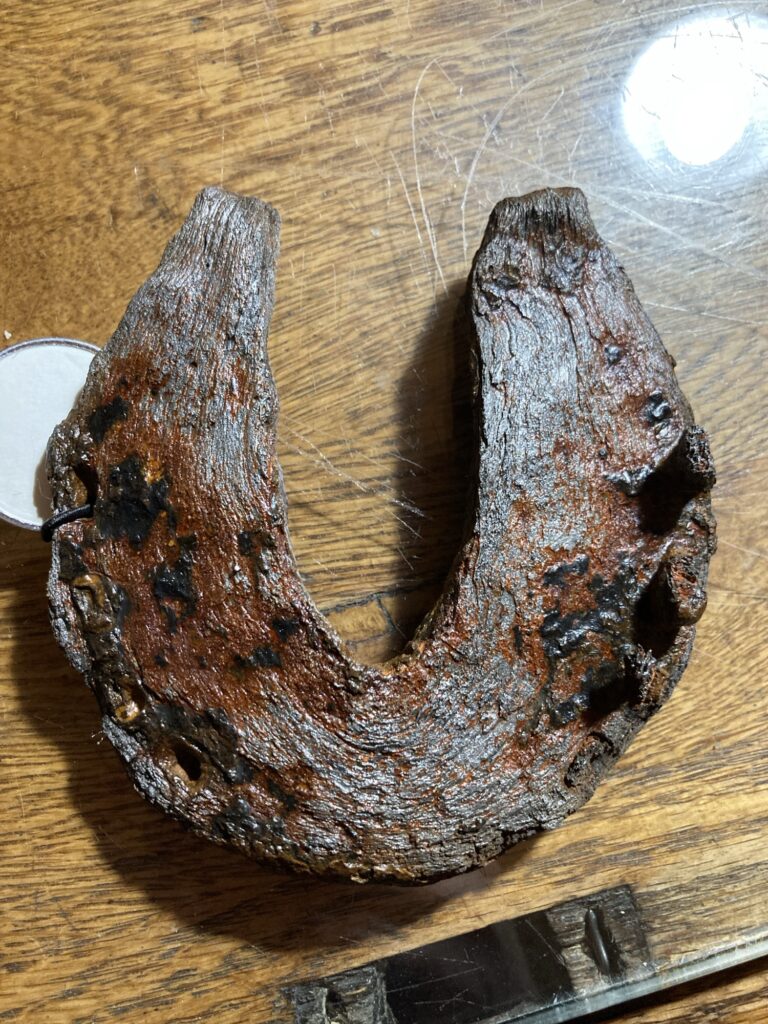
Below are some samples from my own collection. They have been cleaned so I can more easily identify the number of nailholes, special features, etc.
As you can see, these shoes are fairly small.This shoe is quite thick and heavy! I left a rusty patina on it, but they are all coated with clear Rustoleum paint to stop further rusting. Another photo of the shoe above, to show just how thick it is!I believe this is a later shoe, possibly getting a little closer to the keyhole variety. It is a bit larger than the others, and the squared off heel on the right seems to remind me of the keyhole heels.This shoe has a great angular inner profile! It is a bit larger than the others. It also has a lot of damage to the right side.This shoe is also a bit larger. Notice how the heels are getting a bit of an angular cut to them? I think it is getting closer to the age of the keyhole shoe. It still has its angular inner edge, though. I like to think of it as being on the verge of change.
Wouldn’t it be wonderful if these shoes could talk? To hear all of the stories of the horses that once were, what their lives were like, and all that occurred in the hundreds of years that these shoes were under ground!
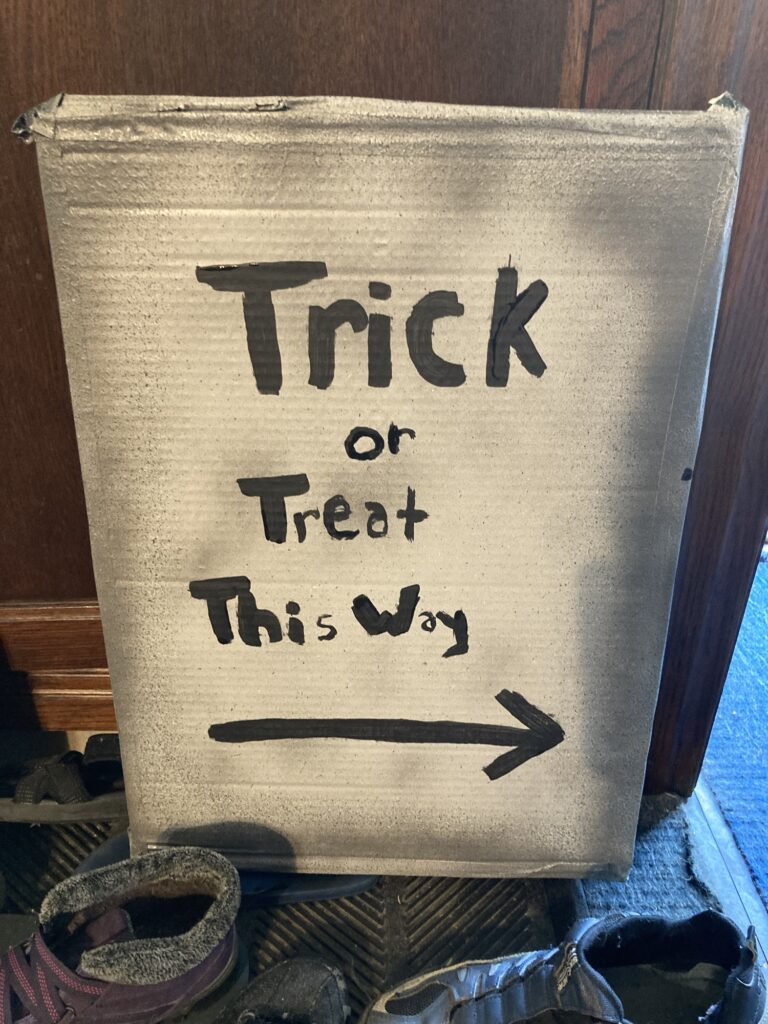
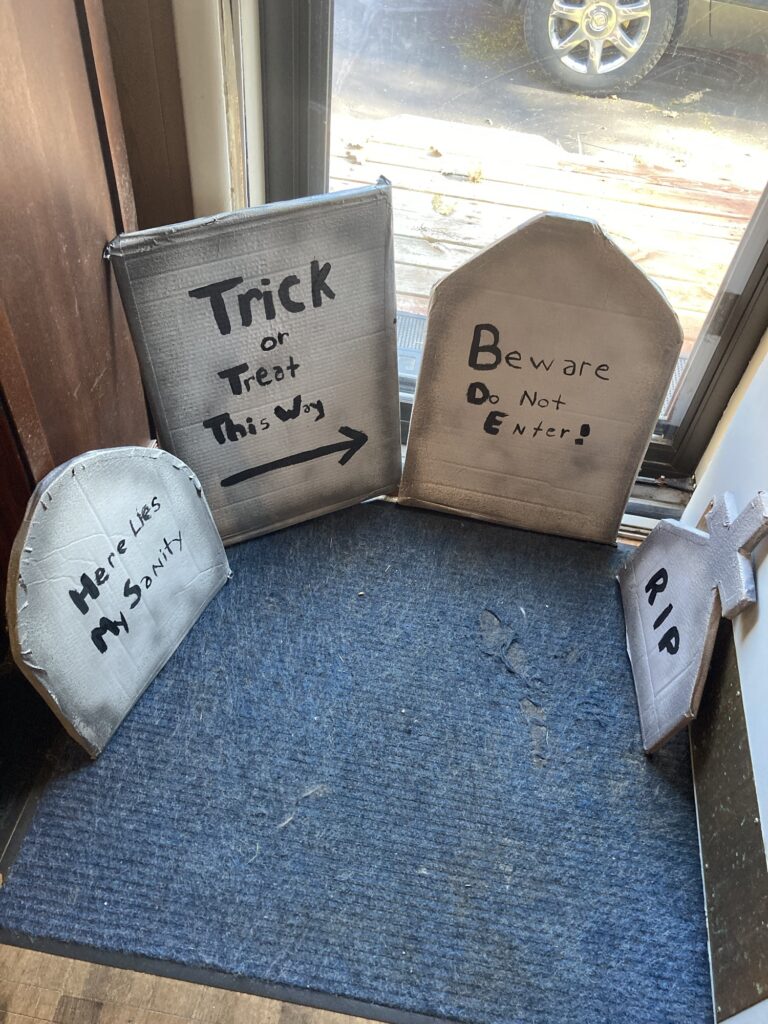
I decided this year to make some gravestones that we will set out in our yard for trick or treaters. I wanted something easy and inexpensive that I could do with my child.
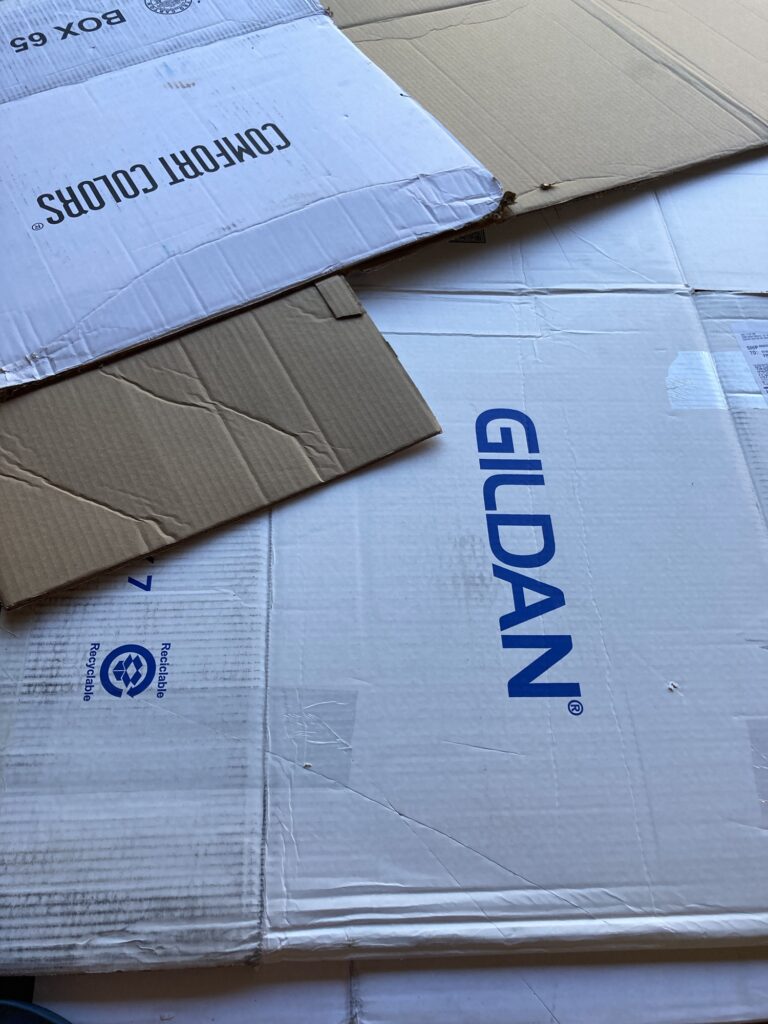
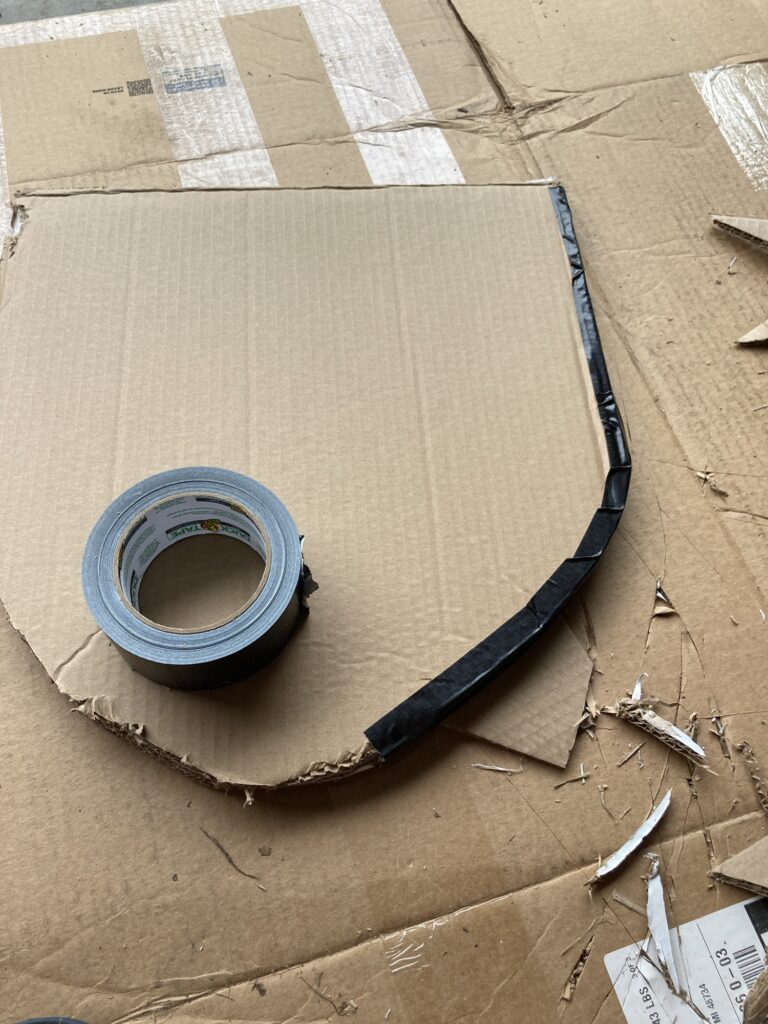
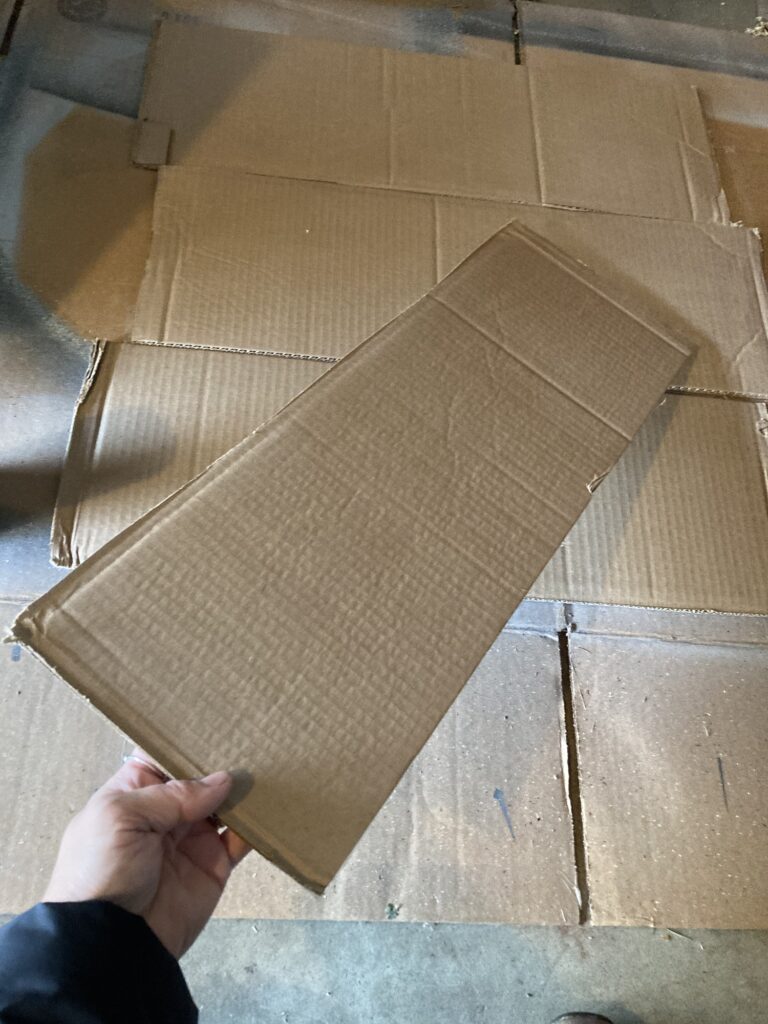
We started out with big pieces of cardboard cut from old boxes.
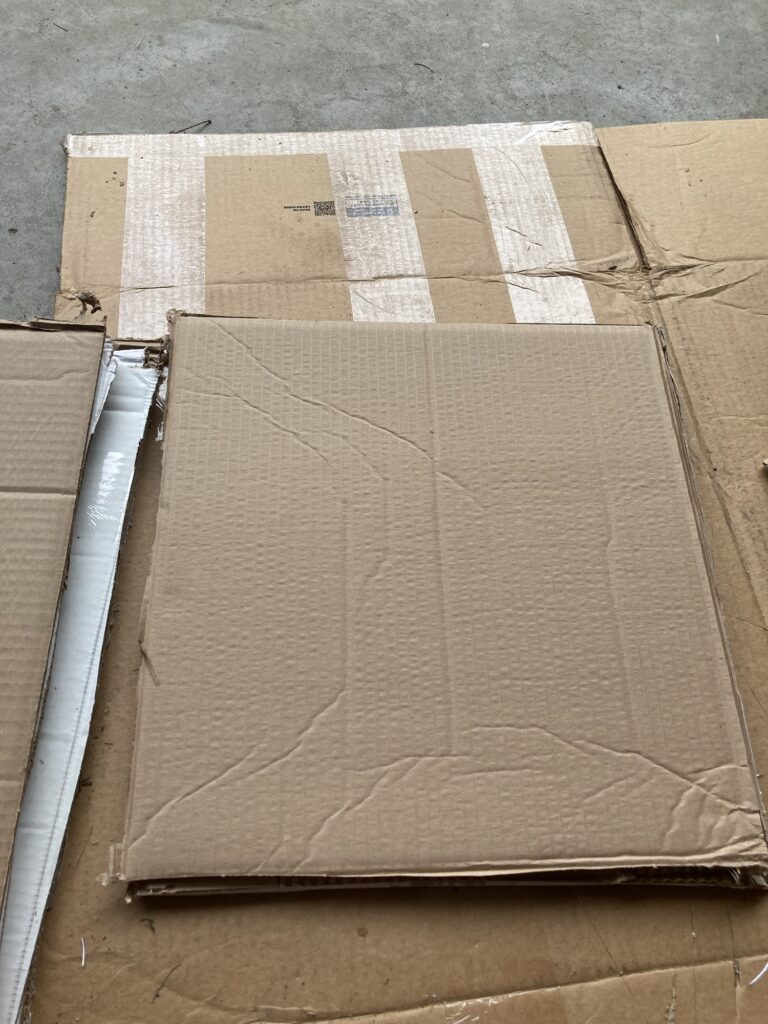
I cut out the shapes I wanted with a box cutter, cutting 3 duplicate pieces per headstone, so I can make them thicker.
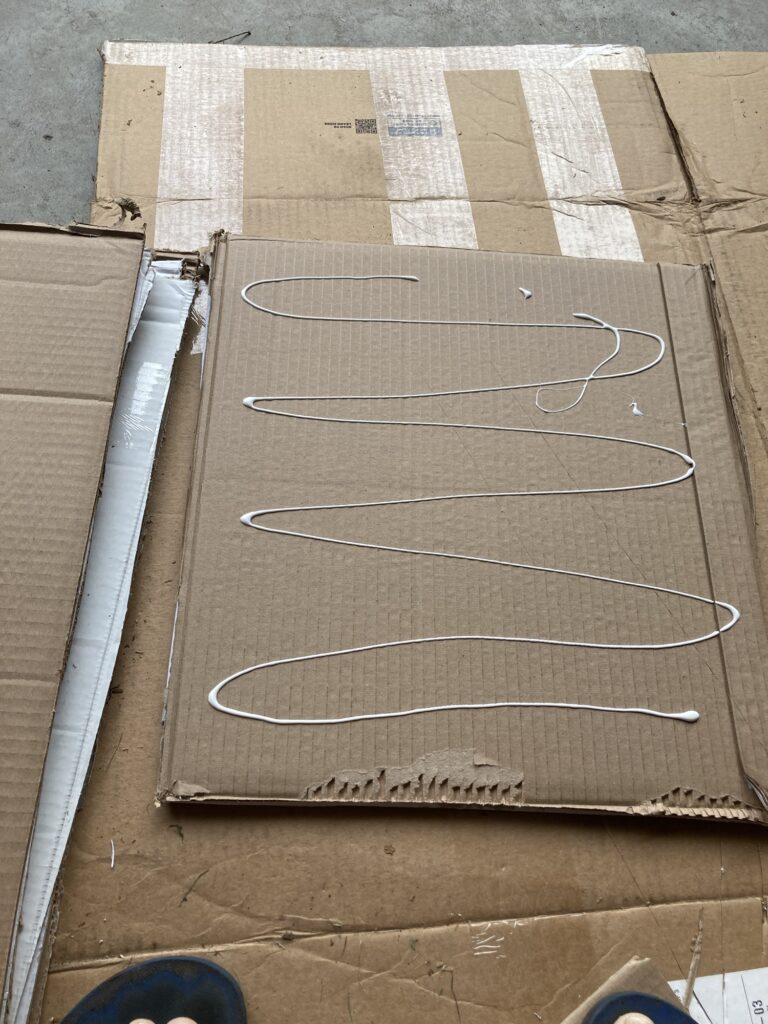
Applying glue
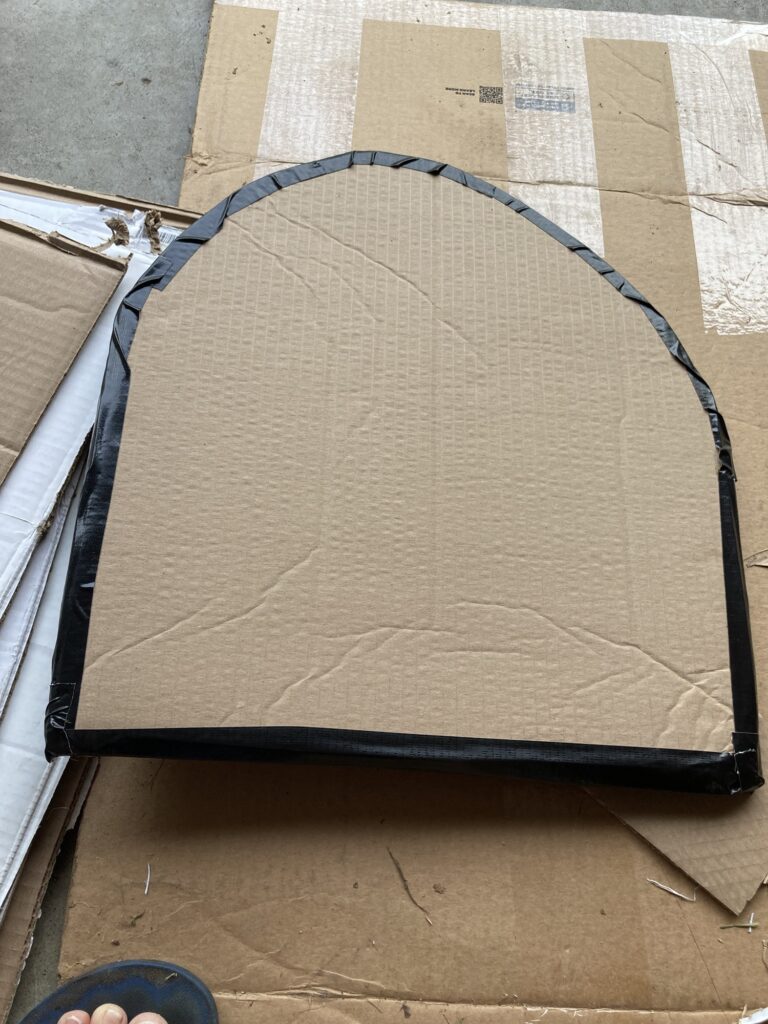
Next i glued the 3 pieces together. Then I used duct tape to seal off the edges of each stone, as I would like for them to last a while without falling apart or getting bugs inside.
Applying duct tape.Duct tape applied to edges
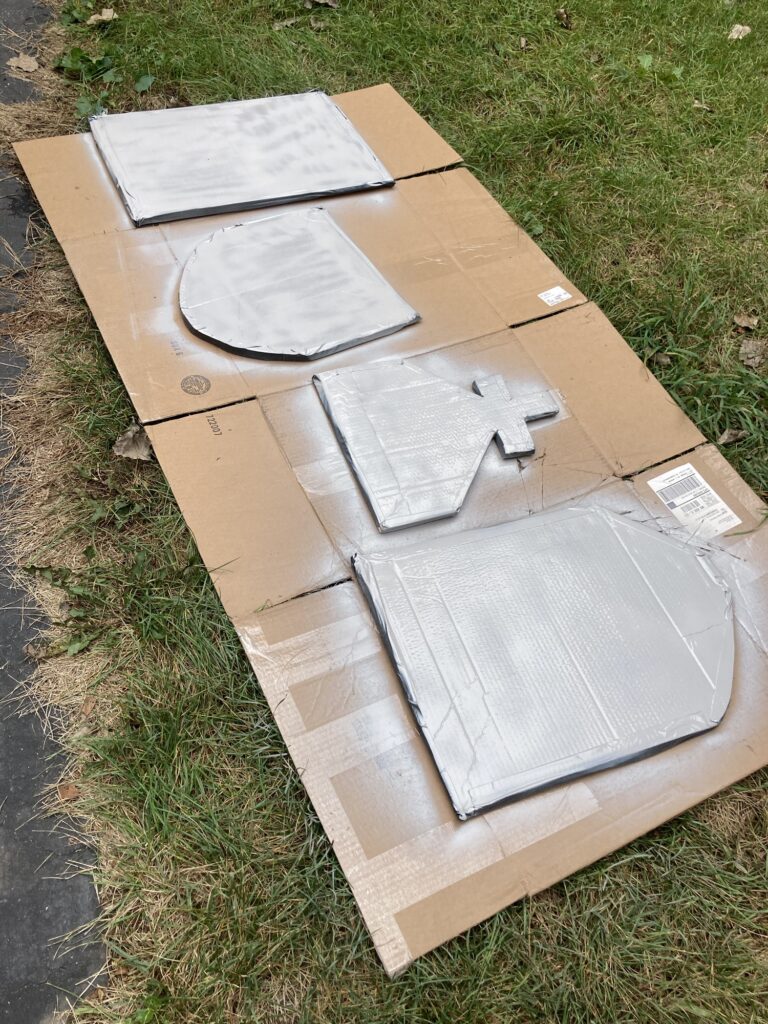
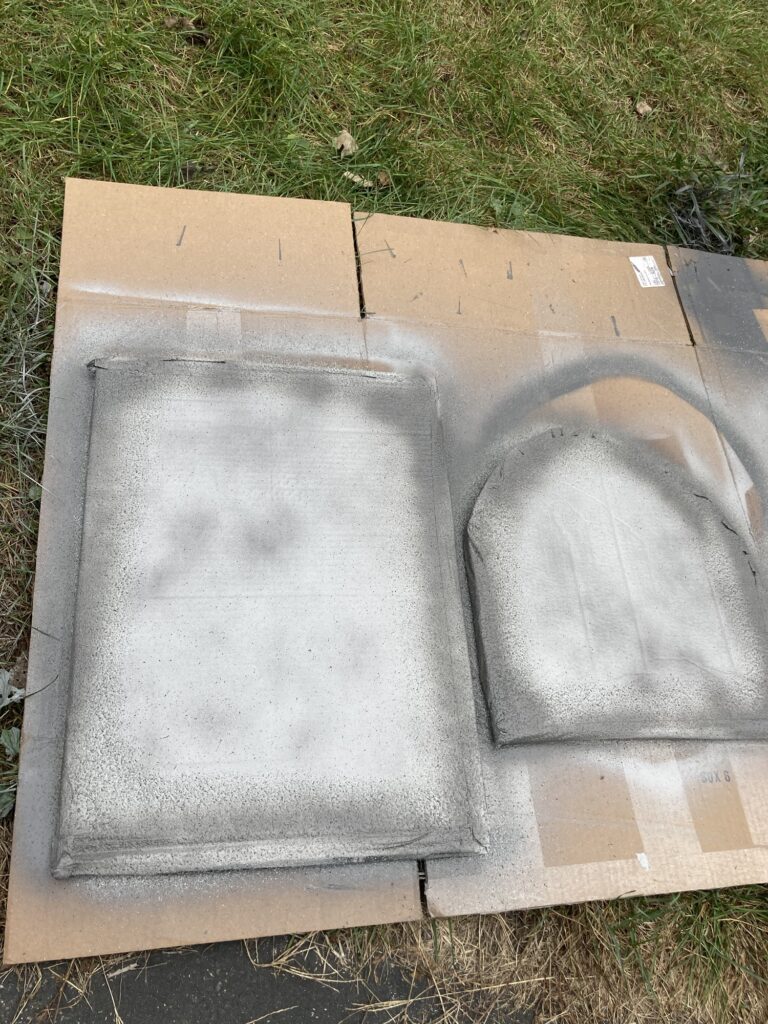
After all of my stones are prepared, I need to paint them. I used Rustleum paints.
My base coatBase coat applied.
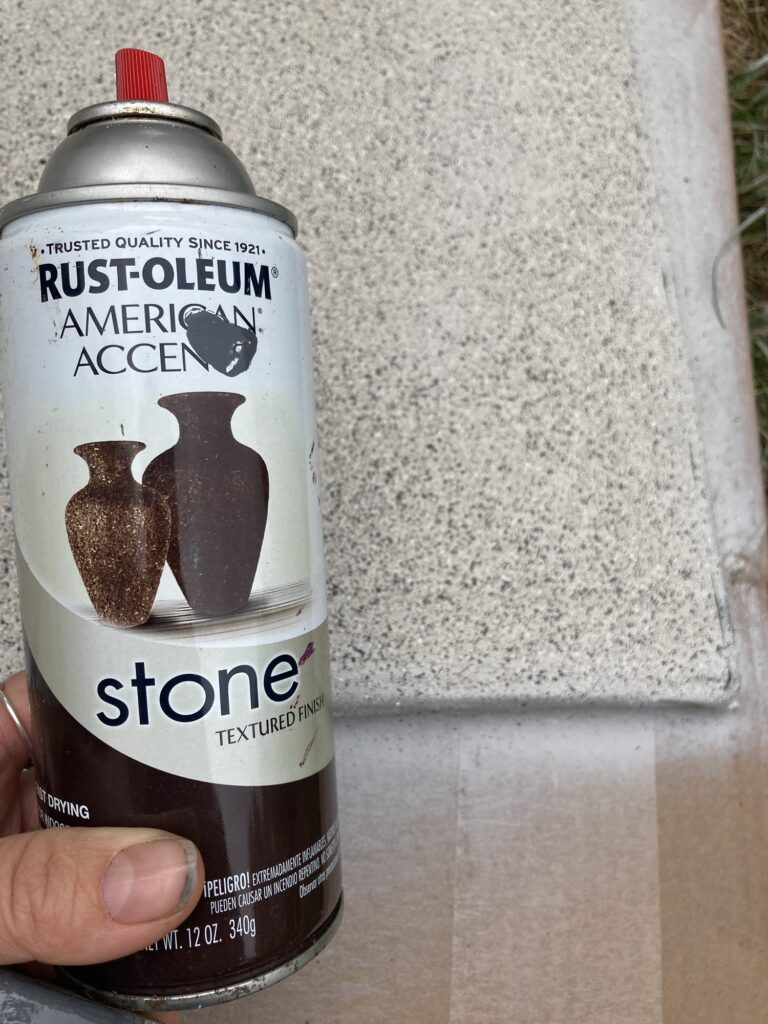
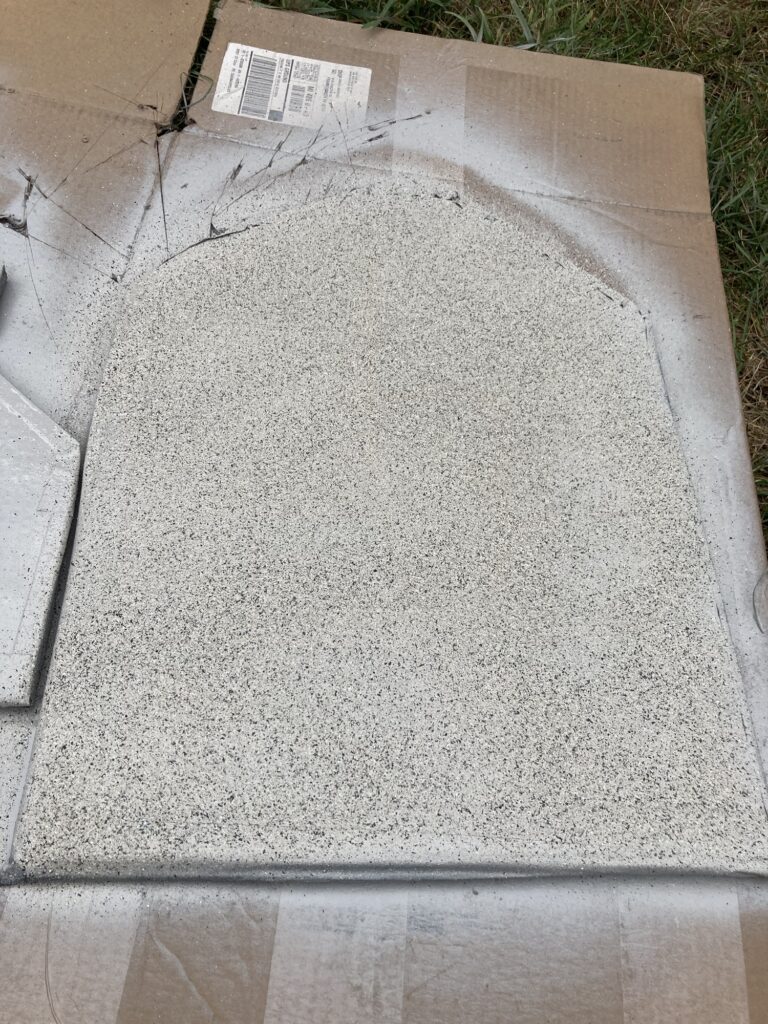
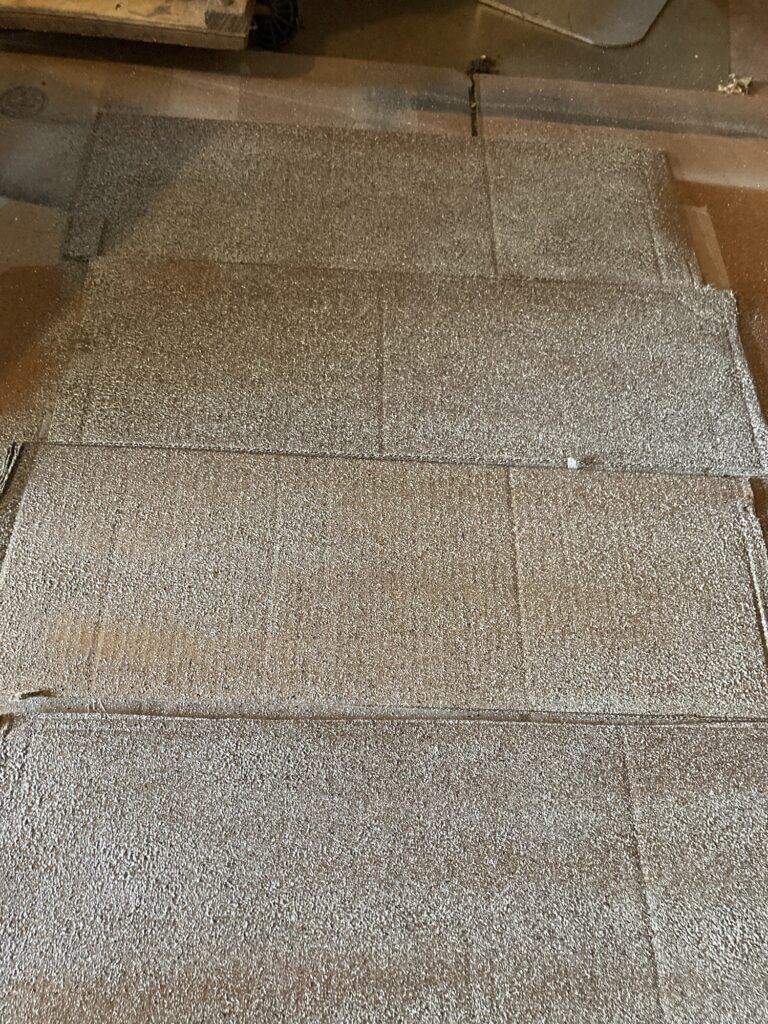
Next I used a stone texture paint.
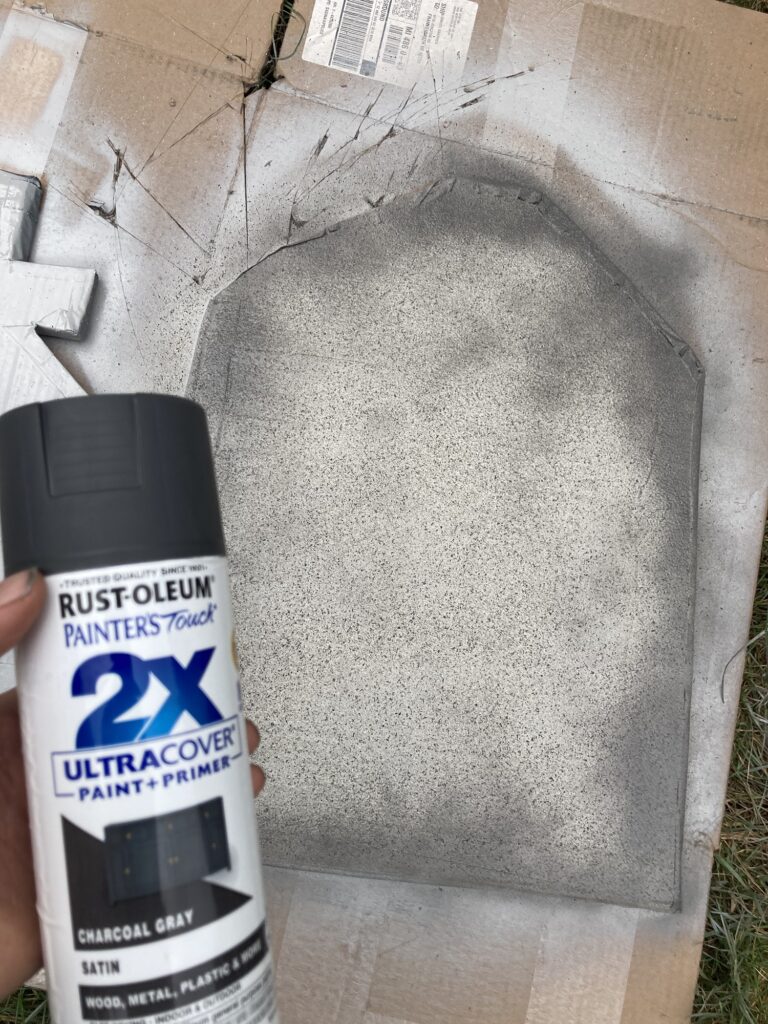
I painted the backs completely with the stone textured paint, as I don’t plan on adding words to this side.Adding some shadows to the back, over top of the stone texture.
I added a darker gray to the edges of the back so it looks more spooky and aged.
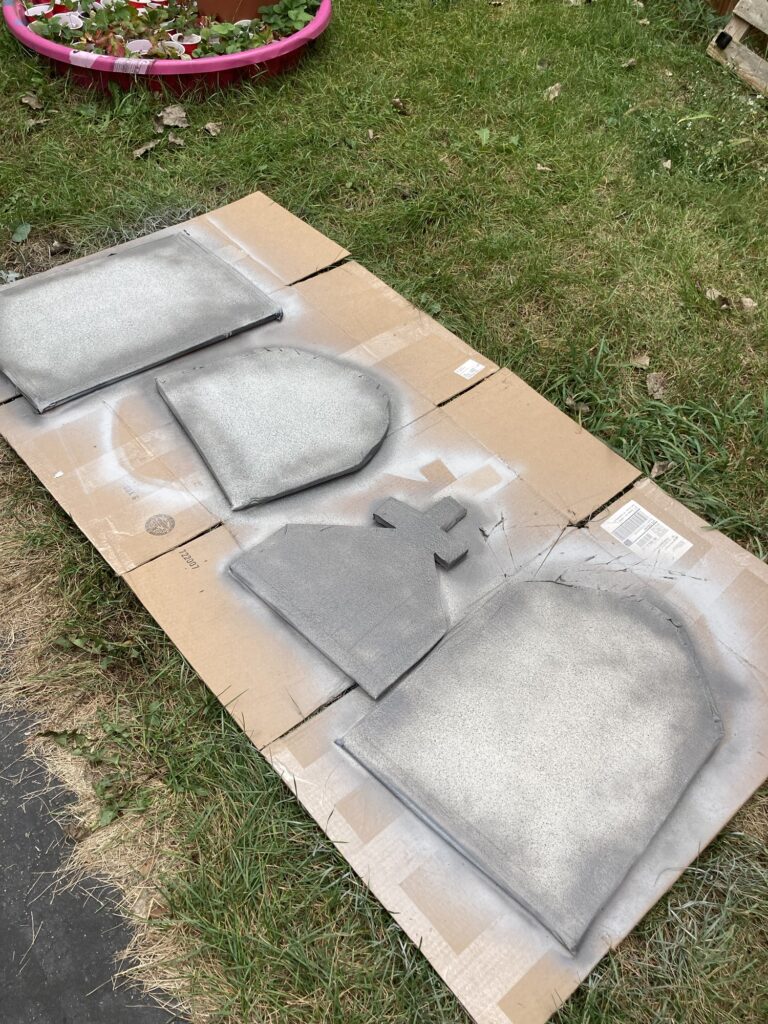
All of the backs done! Now I wait for the paint to dry completely before moving on to the fronts.
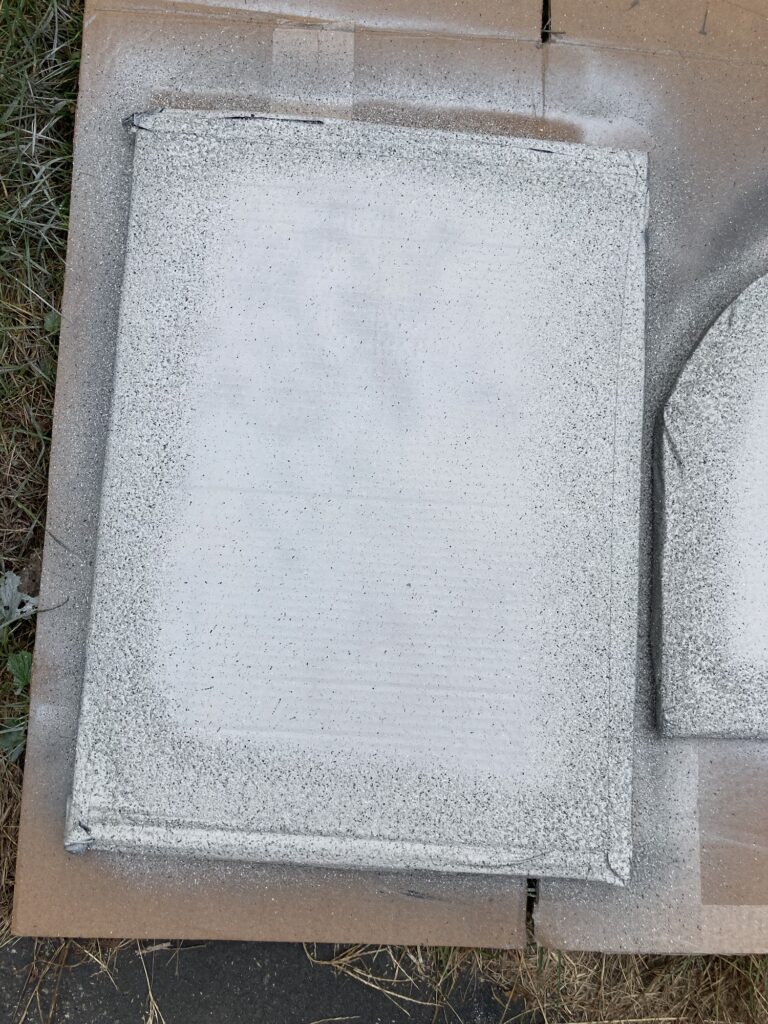
For the fronts I painted just the edges with textured paint so it is easier to write our words on.
And some shadow.
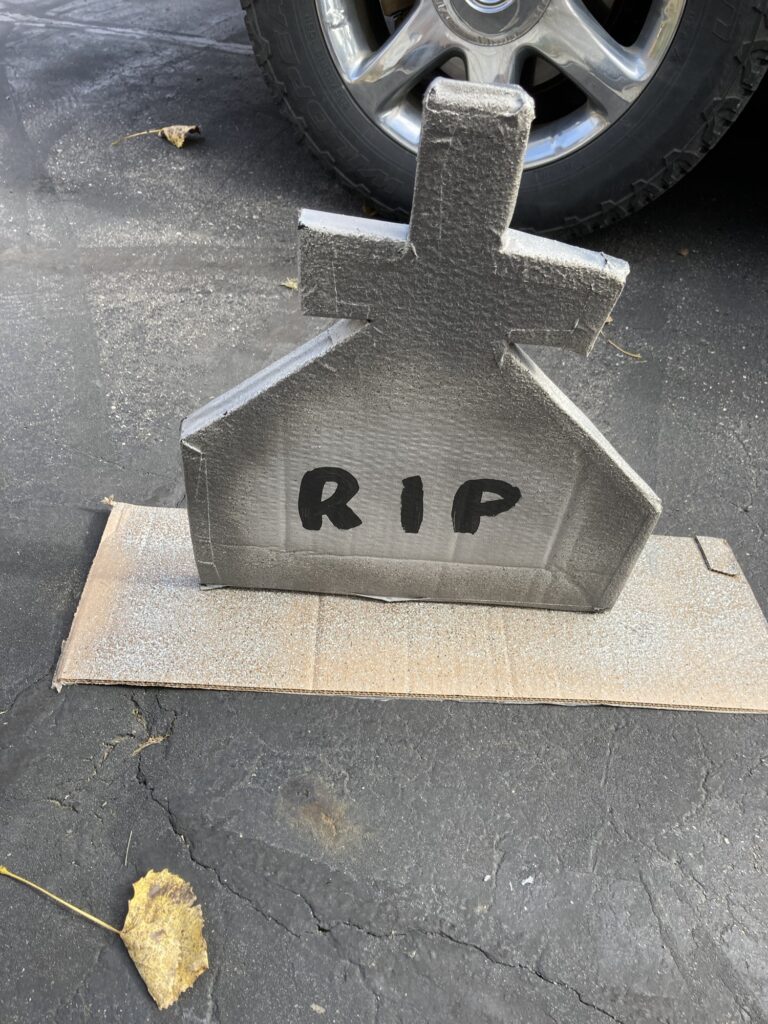
After the front is completely dry it is time to add words. I chose to let my child paint the words on as a fun project. I wrote the words and she painted over them.
In order to make these gravestones stand up, I decided to make a base for them.
I took the folded flaps of the boxes I cut up.
I gave them a quick coat of paint. You can be more elaborate if you want, but I just put some stone texture on them so they look a bit like dirt.
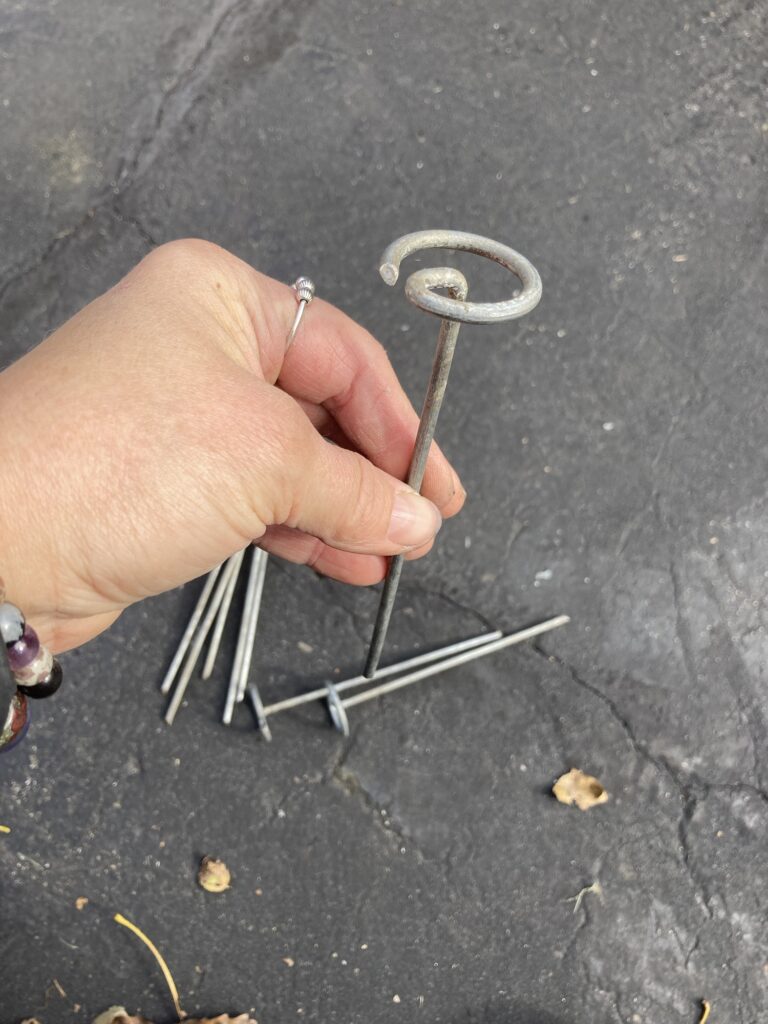
I found some landscape staples that I had for my garden. These are really nice staples but you could use any kind.
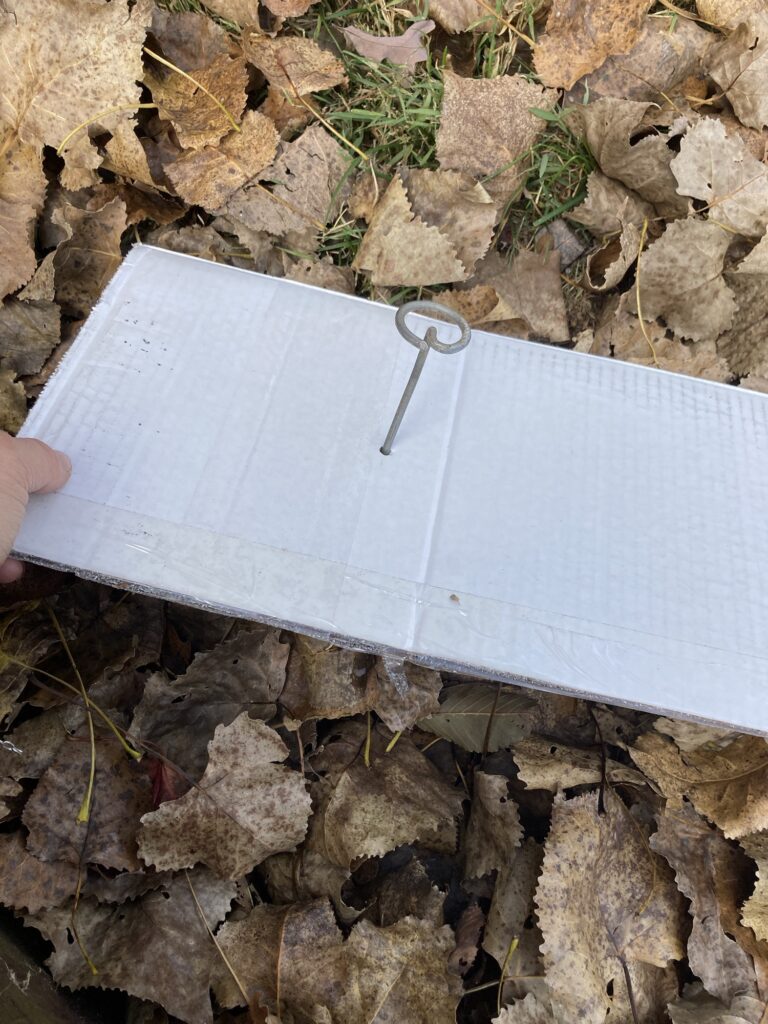
I inserted the staple into the UNDERSIDE of the base, so that the pointed part is going to be coming up on top.
I inserted two staples on either side, so that the gravestone can be carefully pushed onto the staple. Keep a hard surface underneath so that the staple stays in place.
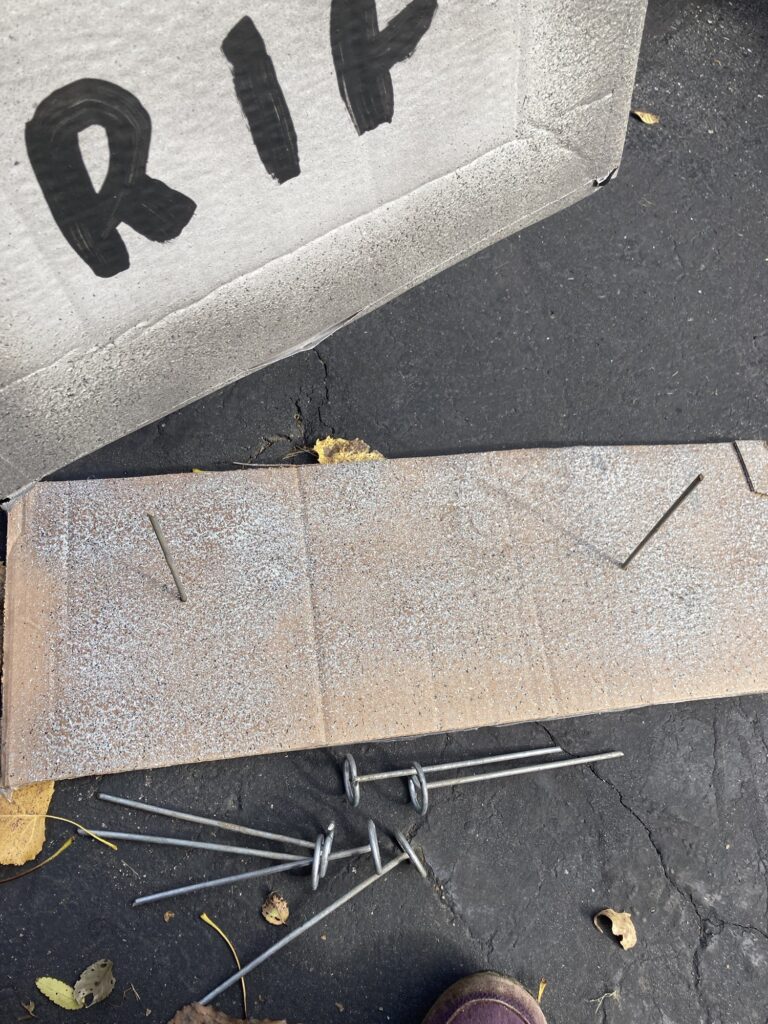
I gently pushed the gravestone so that the staple points go into the middle of the cardboard.
Now I have a more stable base to hold the stones upright! If it gets windy on Halloween, I can set a heavy stone on the base to hold the gravestone in place, or I can put some landscaping staples into the base to pin it to the ground.
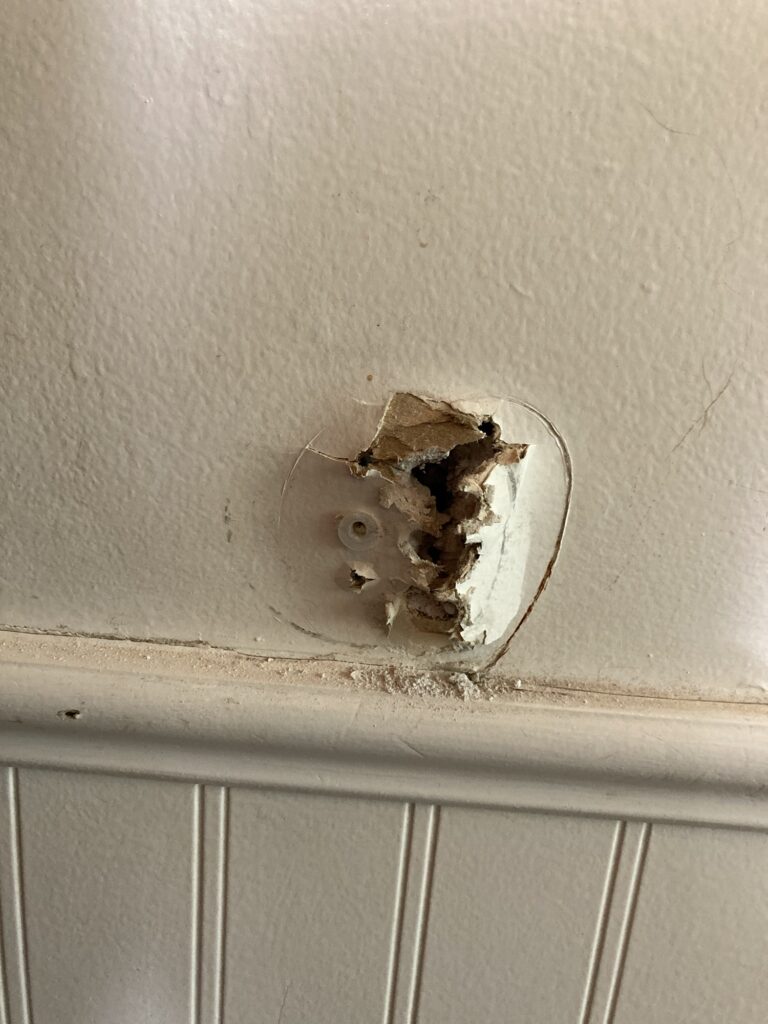
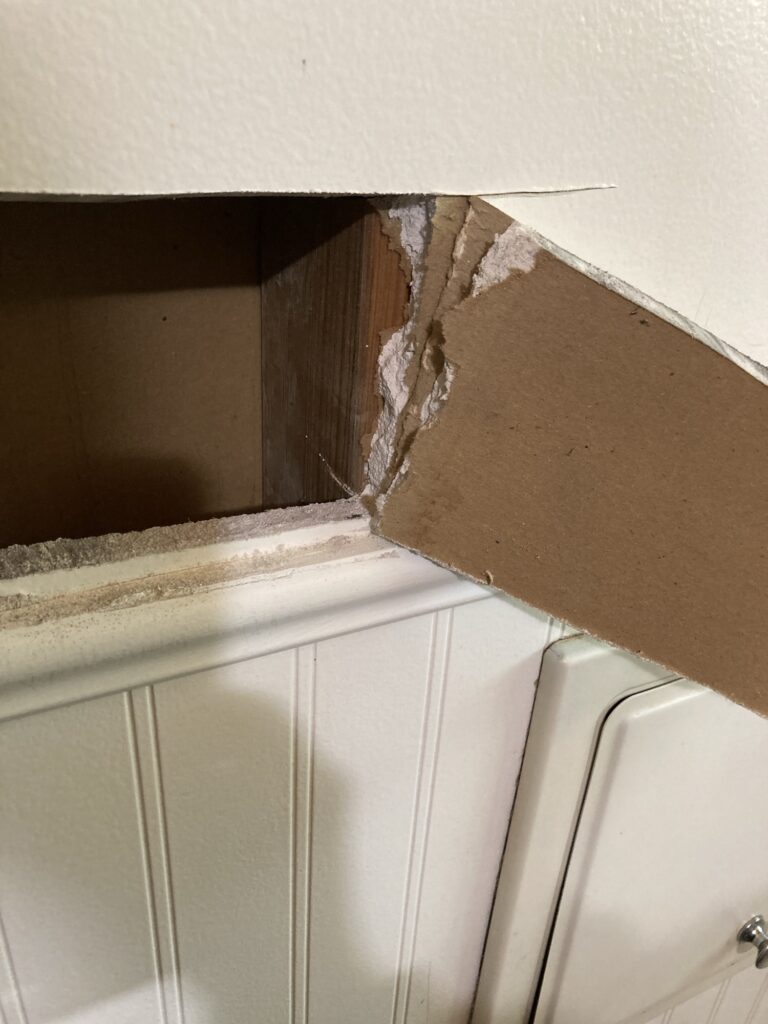
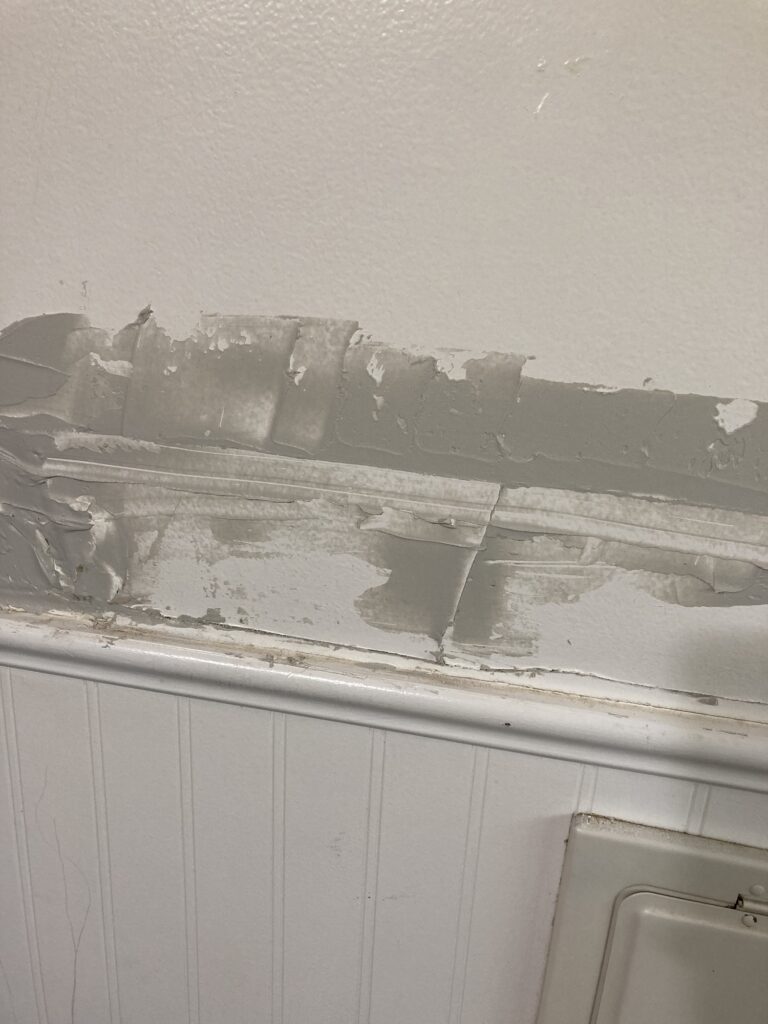
So this is an unexpected post. I had a guest use my shower recently and they apparently yanked the towel off of our towel bar, pulling one end of the bar, drywall anchor and all, out of the wall. Suffice it to say, I am not pleased. While I don’t have a photo of the towel bar in situ, this is what I am working with.
Not a pretty sight.
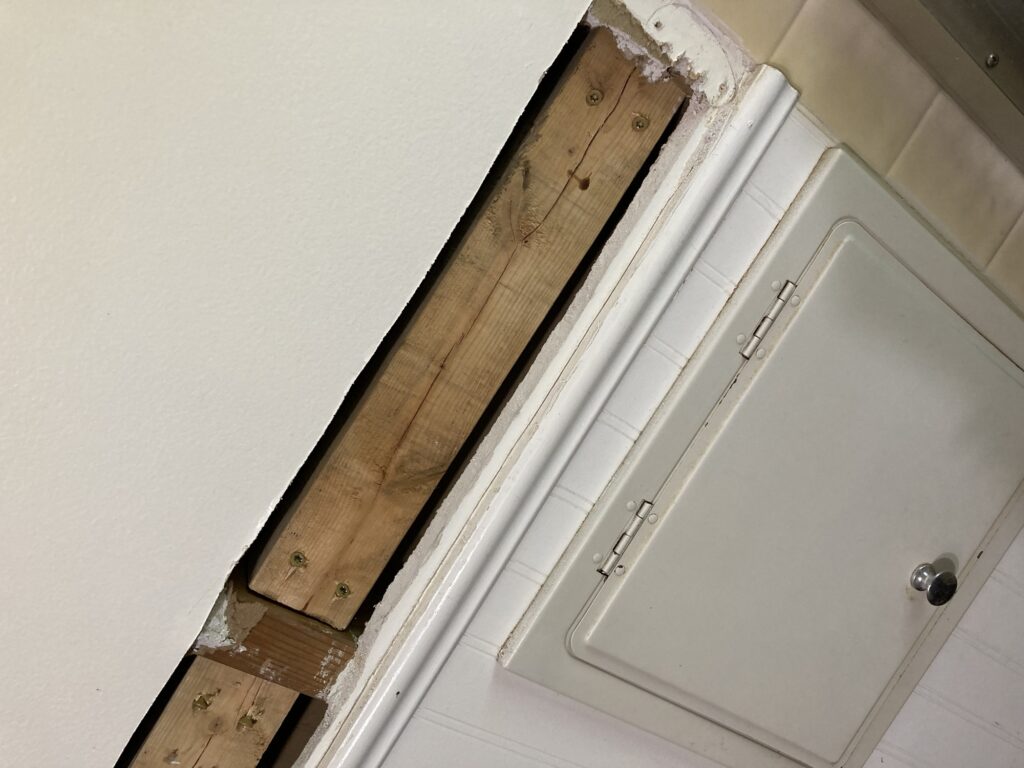
After some youtube reviewing, I have decided to cut a hole in the drywall to expose the studs on either side of the towel bar and insert a 2×4 to use as a new stud to anchor the towel bar to. Then I will have to patch the drywall and put the towel bar back on, screwing it into the new stud so this doesn’t happen again.
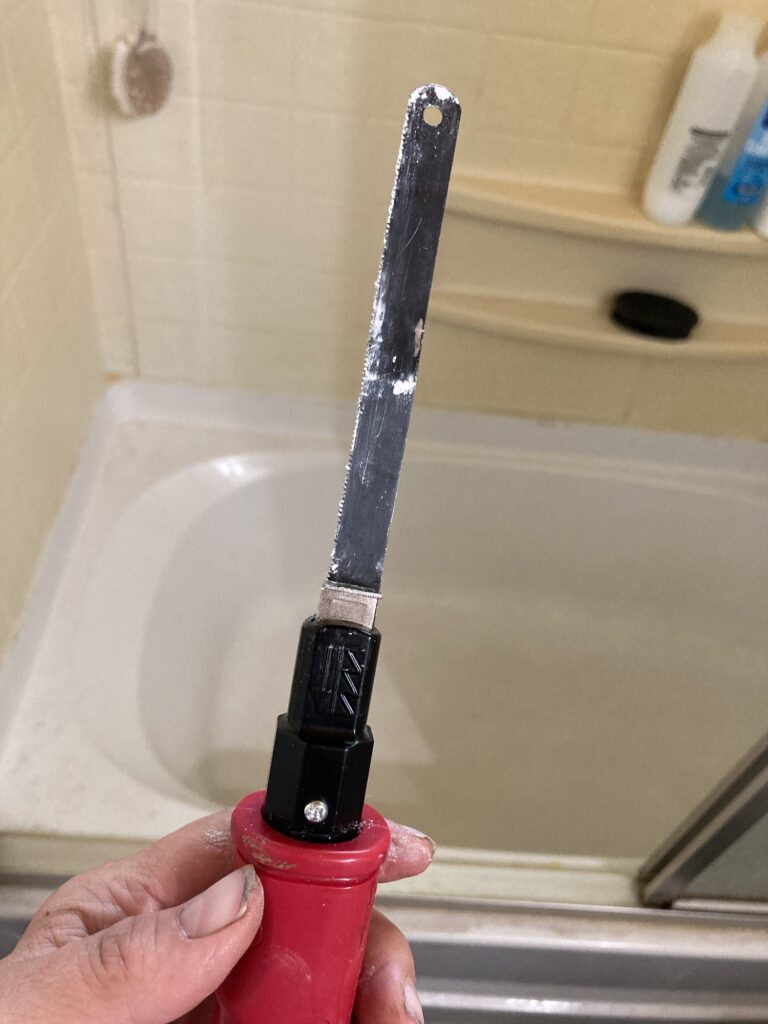
This is a handled device that holds a saw blade so you can use it as a one-sided saw. It is working for now but i have to be careful to cut slowly and not cut in long strokes or the blade will bend. I am using a hacksaw blade because that is what I had on hand, but they do make saws specifically for drywall and I am sure they work better than this one.
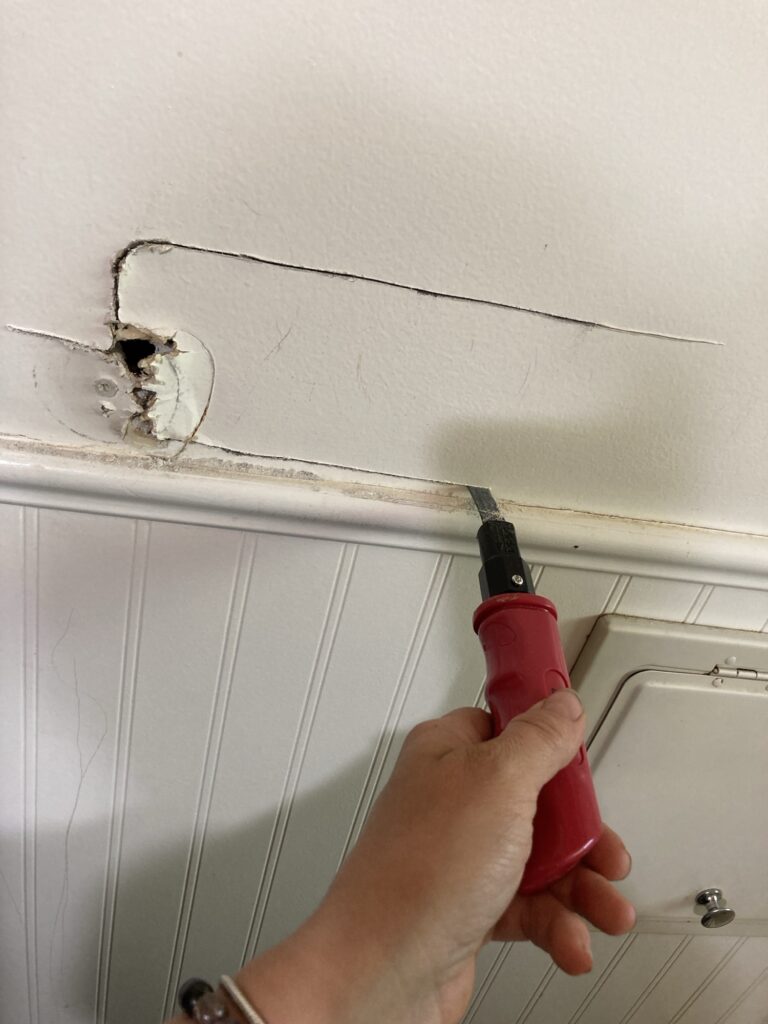
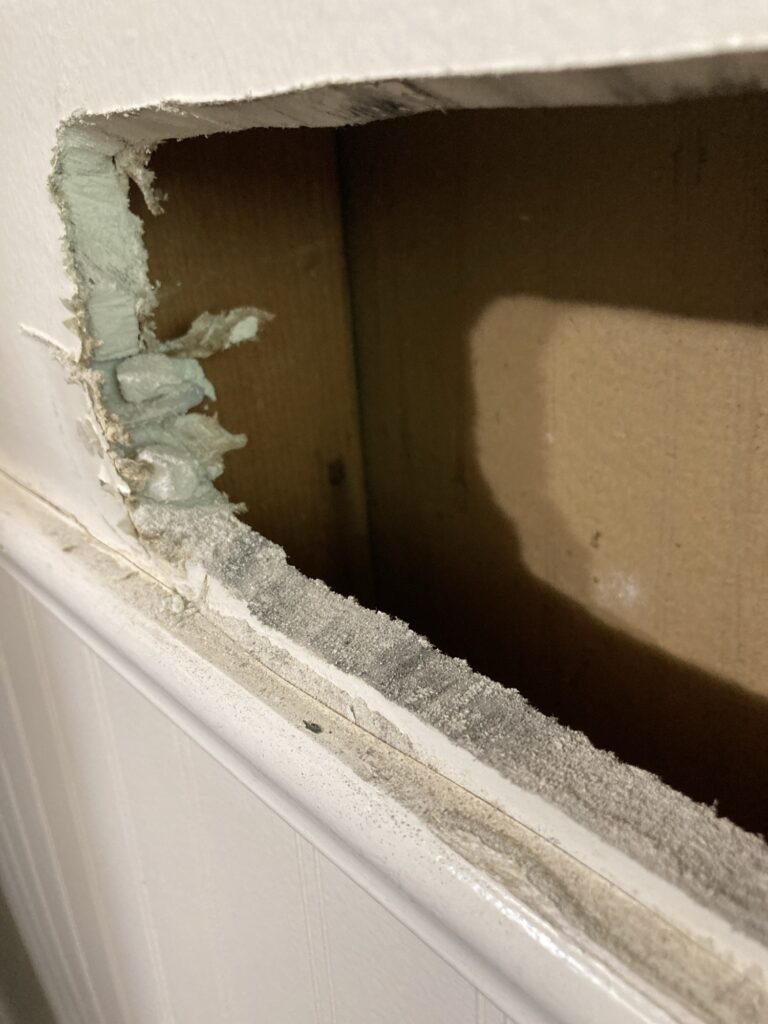
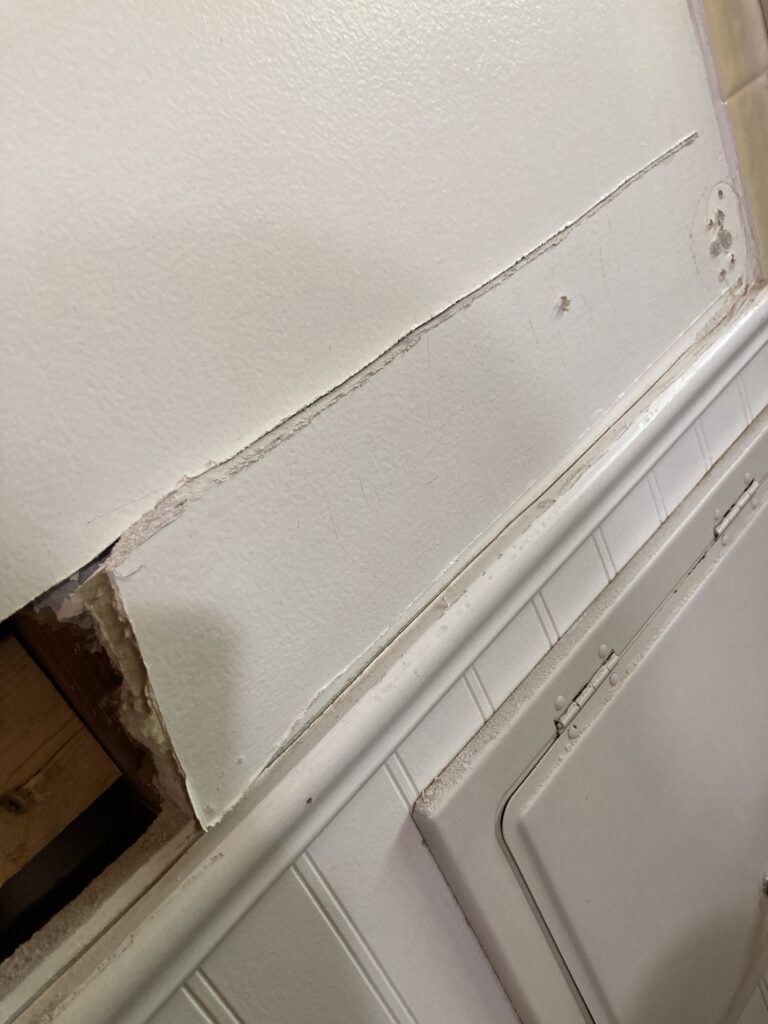
To start out, I tapped around on my wall to discern where the existing vertical studs are. This isn’t a very scientific approach, but I don’t have a stud finder. Then I inserted my little saw into the big hole left over from the towel bar and slowly cut a hole between the two vertical studs in the area I need the towel bar to be. I am trying to cut the drywall at an angle so I might be able to pop it back into place when I am finished, like a big patch, although this little saw is difficult to control without bending the blade.
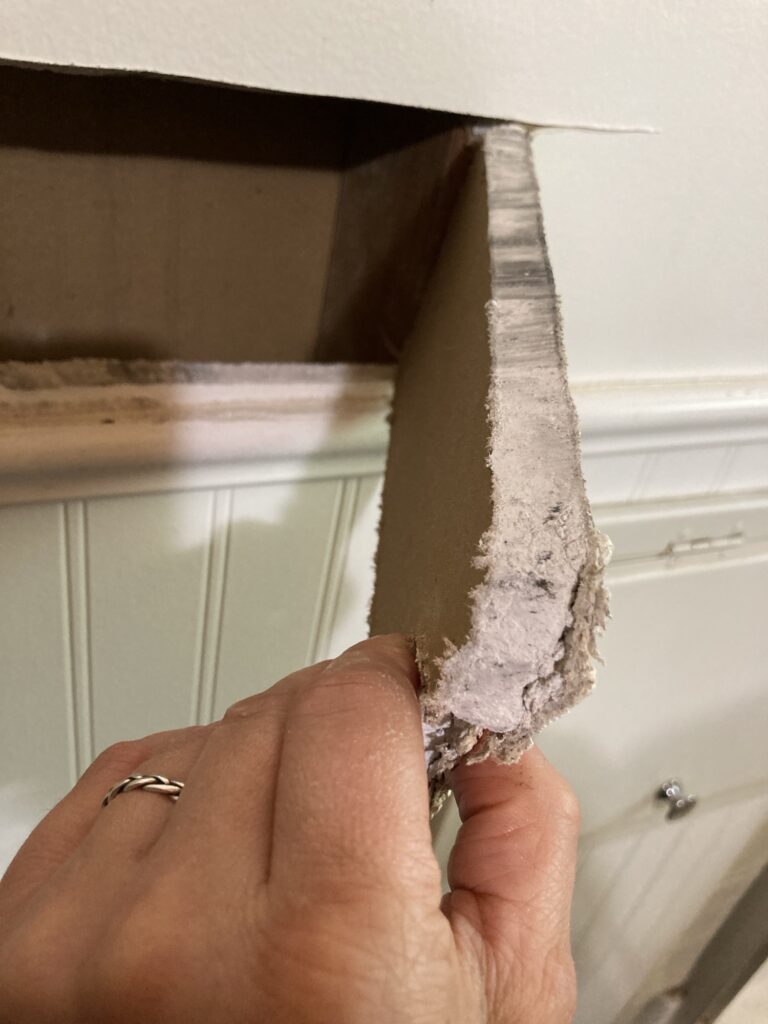
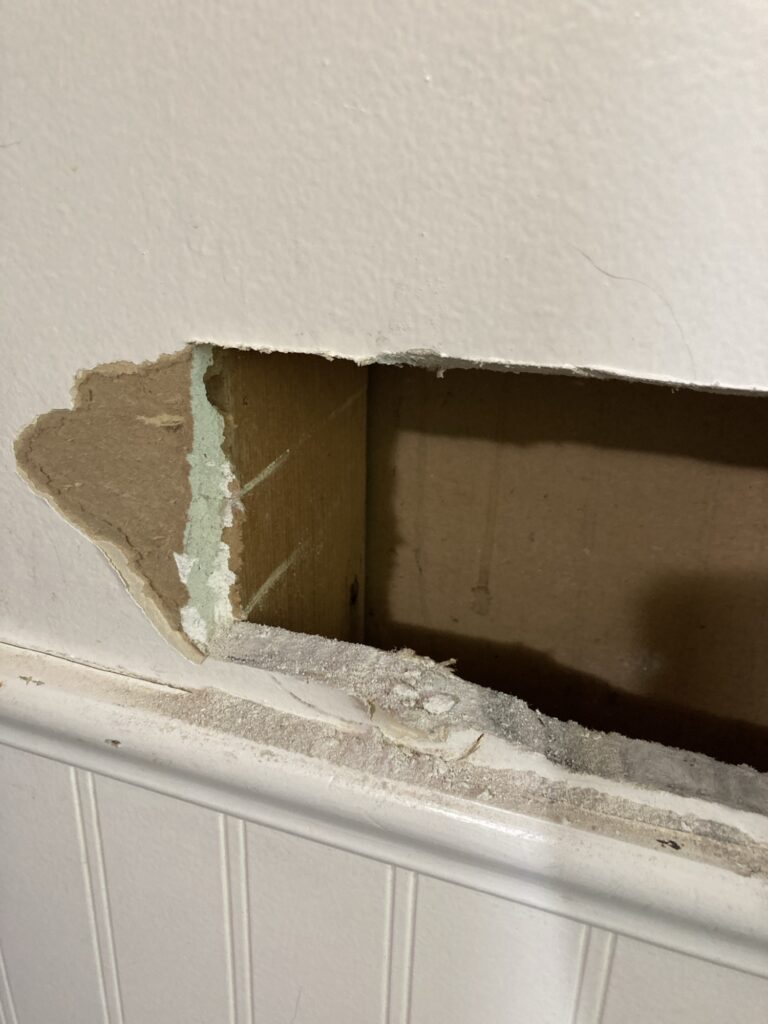
Once I had sawn to the edge of the vertical stud, I gently pulled on the drywall until it popped up.
This stud is in the middle of my towel bar area.The stud to the left. I will have to cut farther than my hole on that side. Other stud exposed.
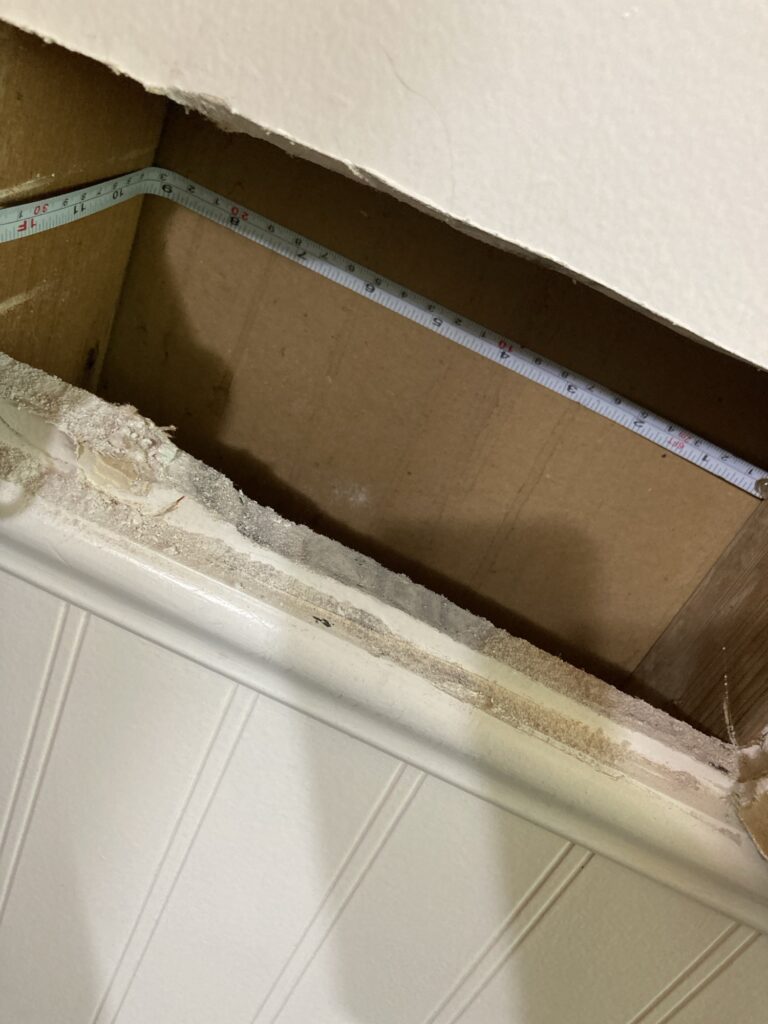
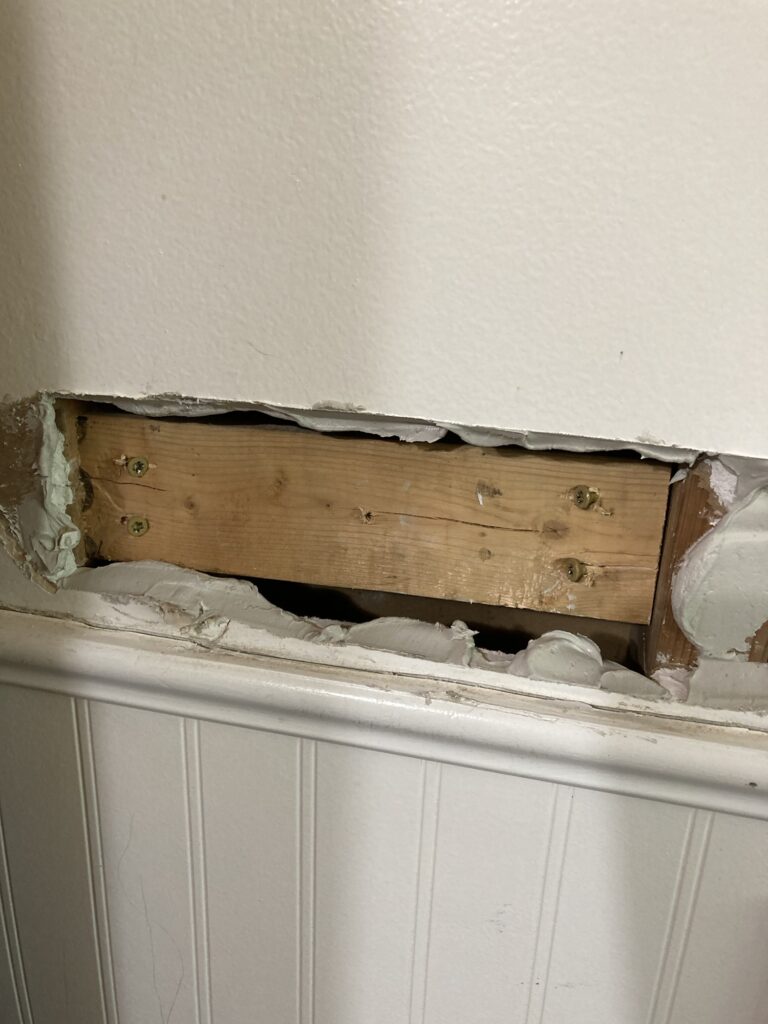
Next, after both vertical studs are exposed, I have to measure the space between them so I can cut a piece of wood to fit across.
Measuring the space between the studs.
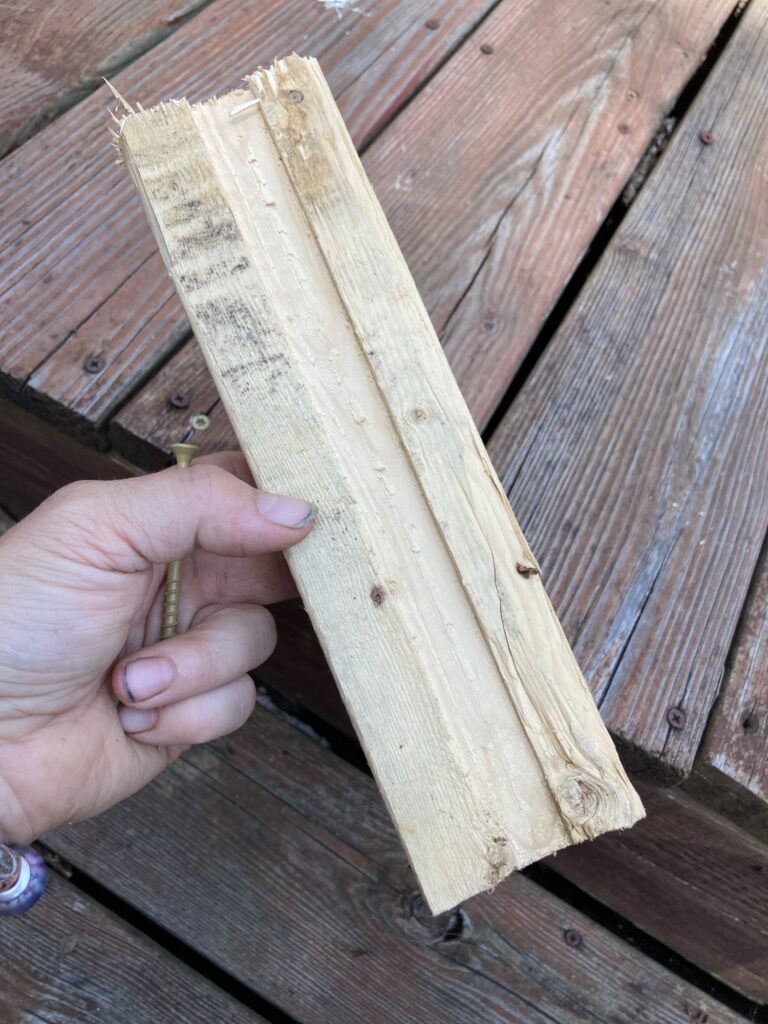
Next I cut a piece of wood to fit the space. It’s not quite a 2×4 but should work.
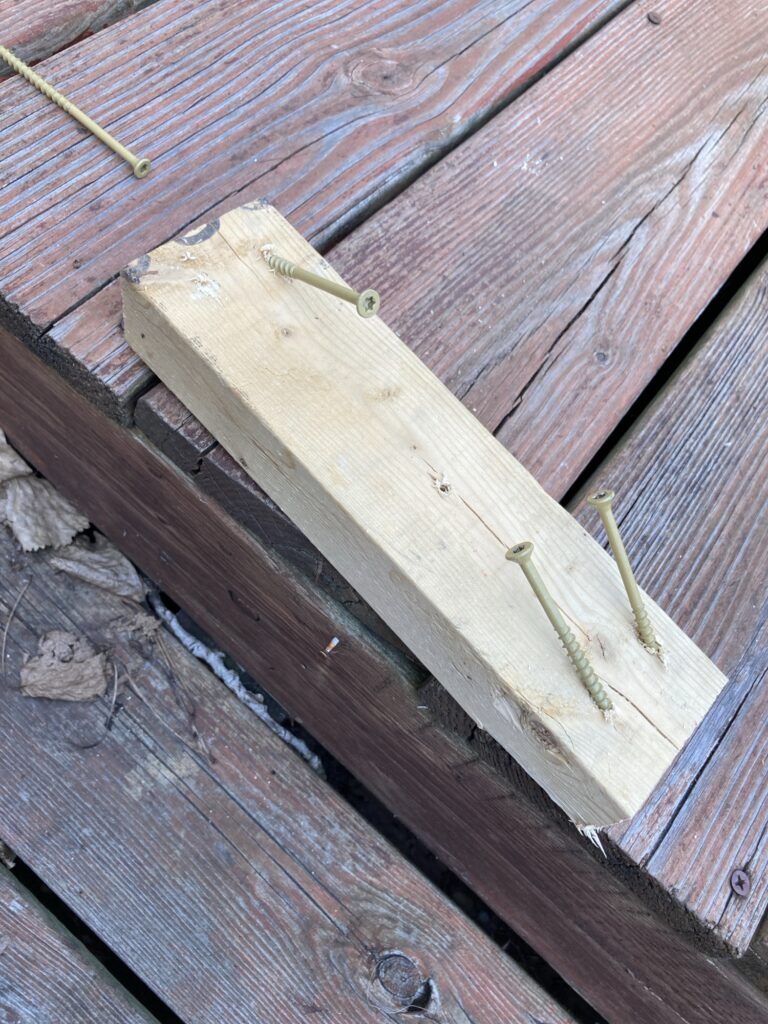
Then I found some long screws that I had available and pre-screwed them into the ends of the board, unscrewing it just enough that they don’t protrude on the ends.
Predrilling screws to make it easier to install.
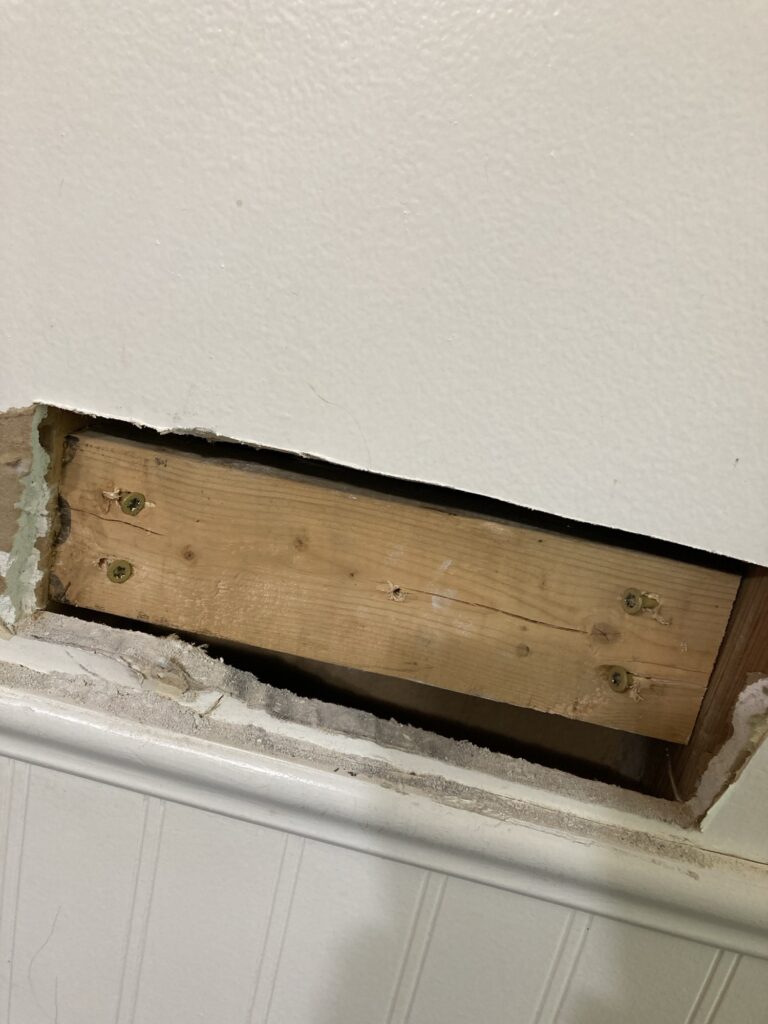
Then, very carefully so as not to drop our hard earned wood into the wall, I shoved it into the wall space and screwed it in. I was careful to leave enough space between the edge of my new stud and the inside edge of the drywall to allow for the edges of my screws, which will stick out slightly from the board’s surface.
It’s not pretty, but it should hold the towel rack as long as I use long enough screws on the towel rack. I will also have to be careful not to over tighten the screws on the towel rack, as I don’t want my drywall to crack because of the gap between drywall and wood.Cutting for the second sectionSecond stud installed.
Now that both studs are installed, it is time to clean up and prepare for patching the drywall.
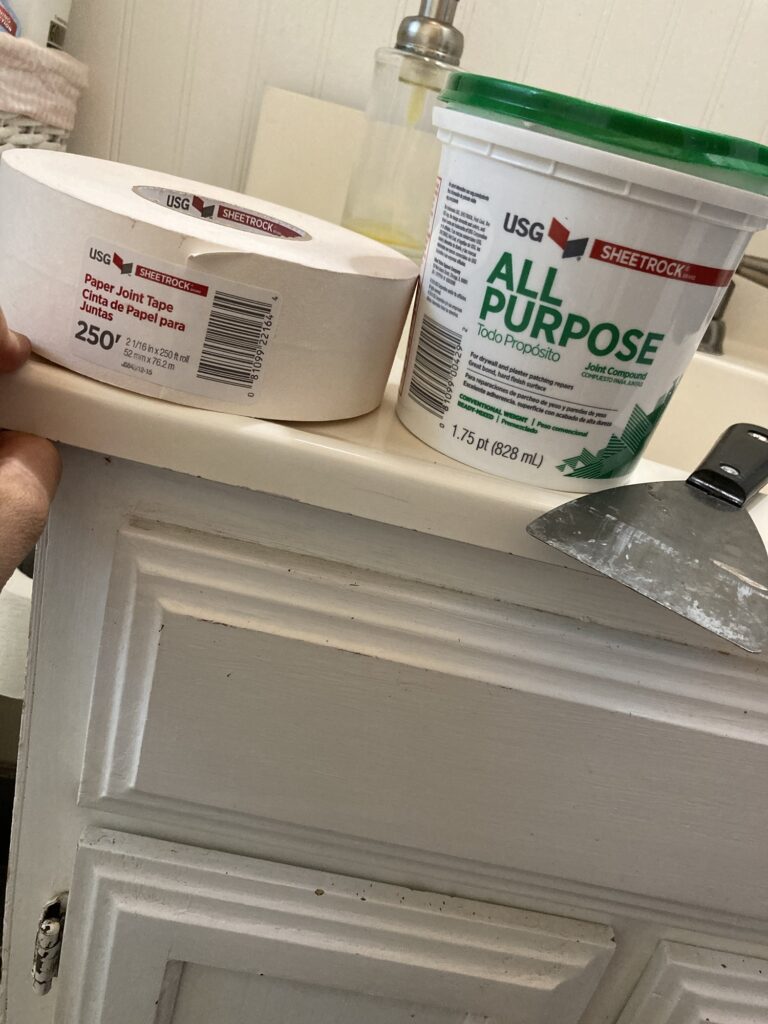
This is what I plan to use for my patch job, along with the pieces of drywall that I cut out.
First, I used the all purpose compound to mud the edges of the hole. I figure this will act as a glue.
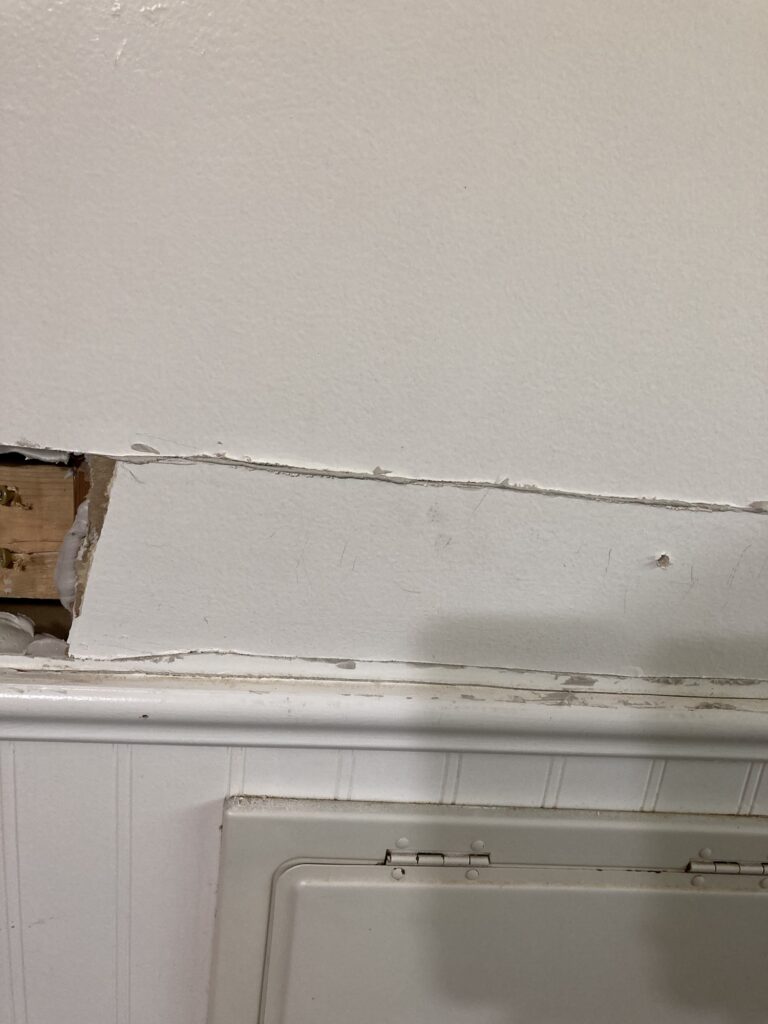
Then i shoved the pieces of drywall back in place, carefully piecing them into the same locations, making sure not to push them too far into the hole.
Next i used the mudding spatula to put a thin layer of mud around the edges of the cuts.
Then i cut off pieces of the mudding tape to push into the mud so they are glued in place. I taped them over the cracks so the cracks won’t be as noticeable.
With a few pieces of tape over the cracks.
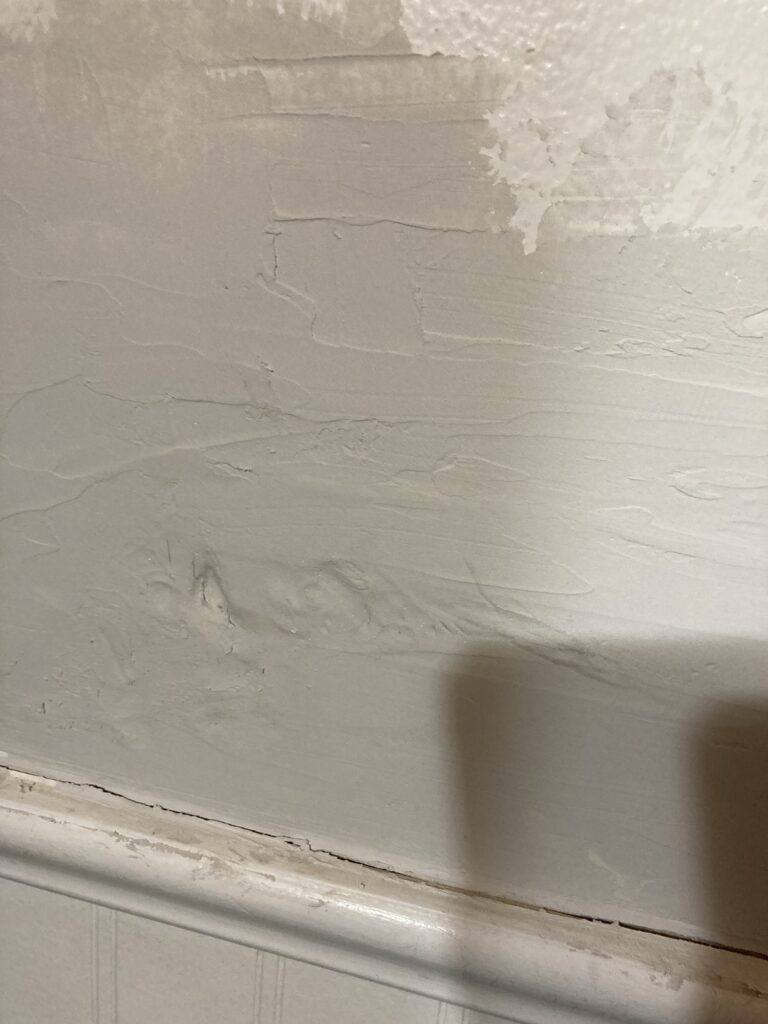
Once the tape is where i want it, I put another thin layer of mud over the tape to hide it. Then I used the spatula to make the compound mixture as flat and smooth as I can. I will sand it once it is dried, but it will be helpful not to have mounds of uneven compound to sand off.
With all of the tape on, plastered over with the mudding.
Now I let it dry for at least 24 hours, per the compound instructions.
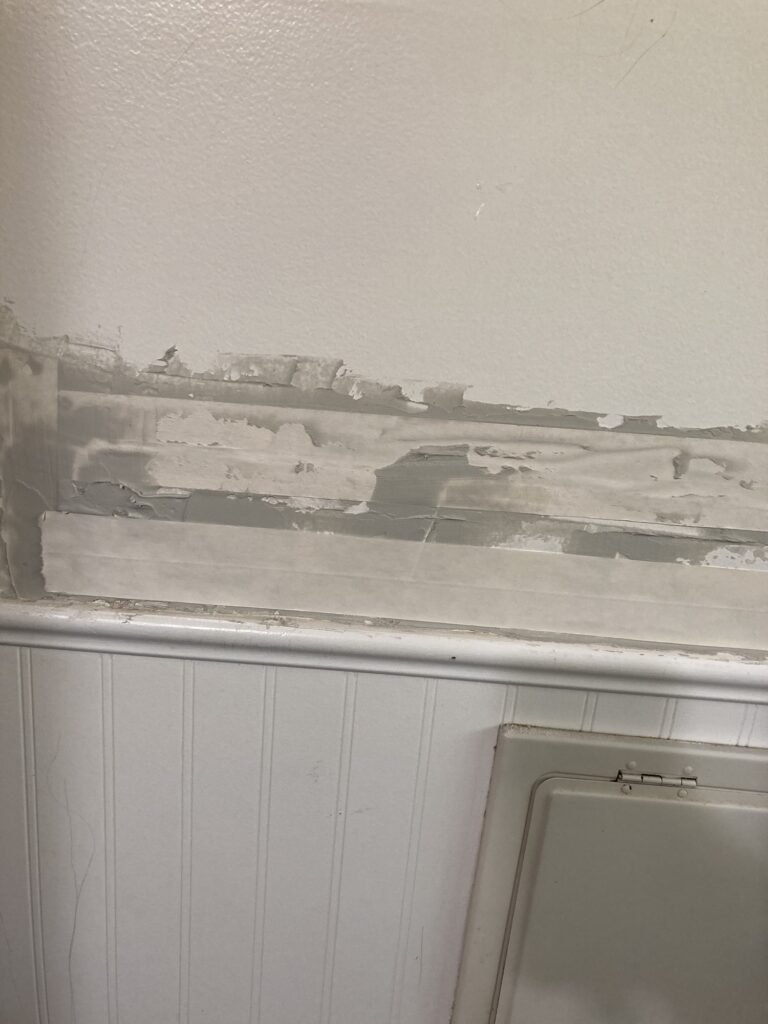
It is lightening as it dries.
After the patch dried completely, I found a few shallow areas where it shrank into a hole. I skimmed another thin coat of plaster patch over those areas.
A small depression where the patch shrank into the hole. A fresh coat skimmed over the depression and smoothed out.
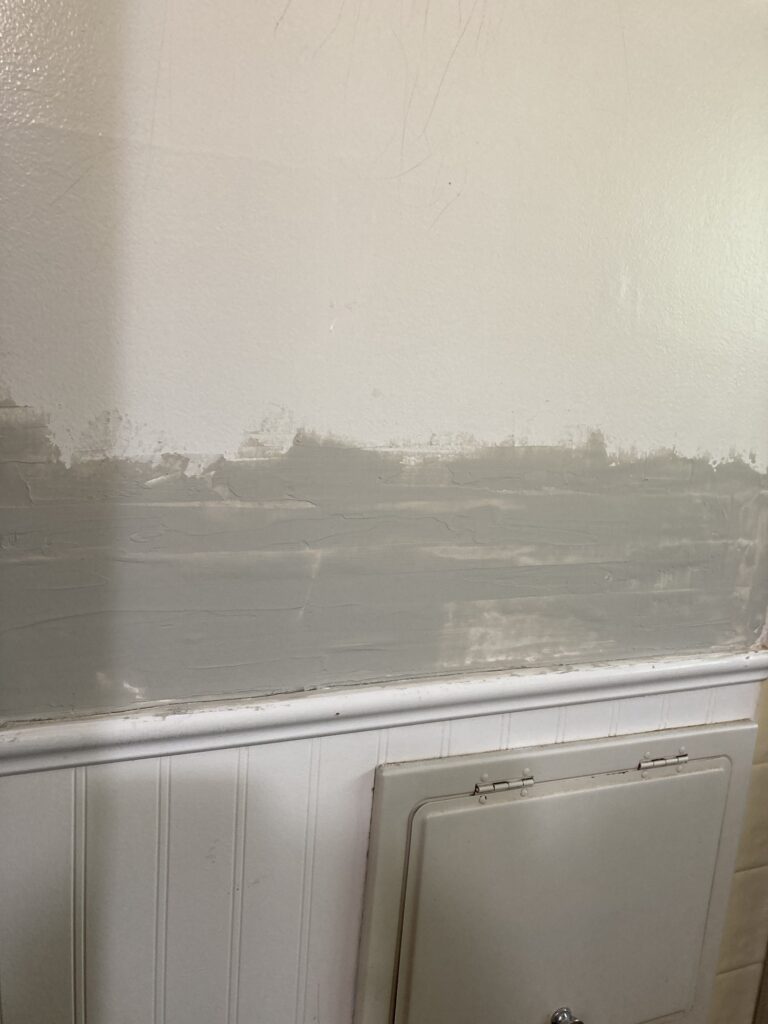
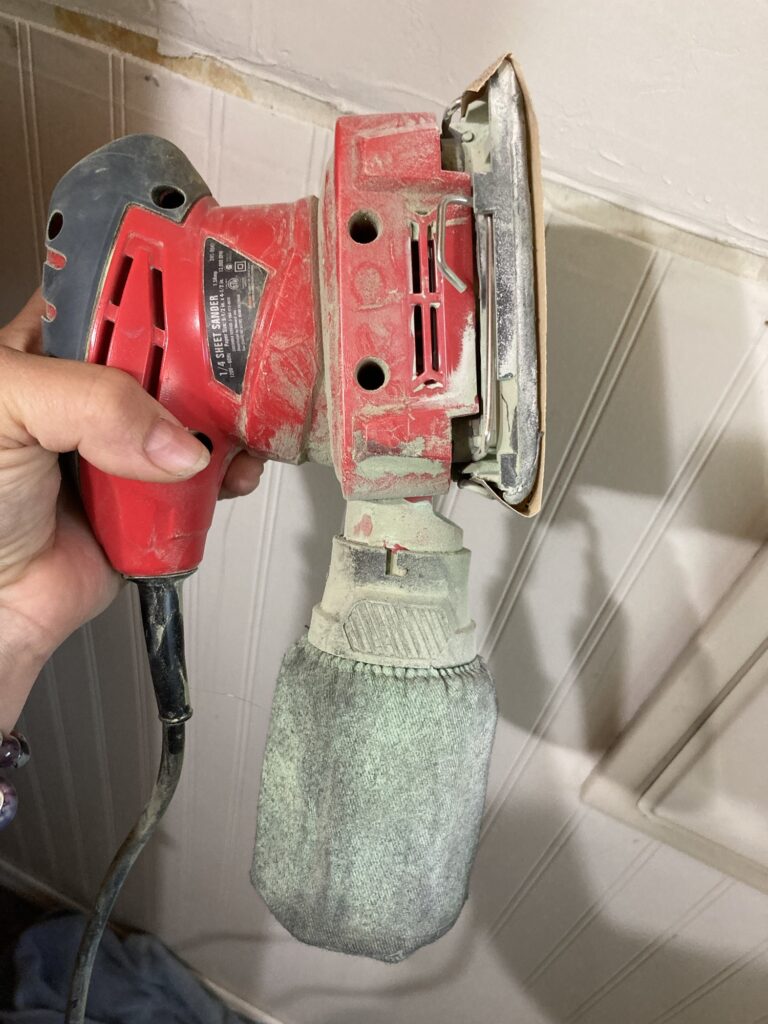
After the plaster is smoothed to your liking and has completely dried out, it is time to sand. I used an electric sander because I have one handy, but it was messy and also sanded some areas more than I would have liked.
This electric sander got dust all over my bathroom and over sanded some areas because it isn’t as easy to control as a hand sander.
Ideally I should have used a hand sanding block or a sanding sponge. Anyway, this is the result.
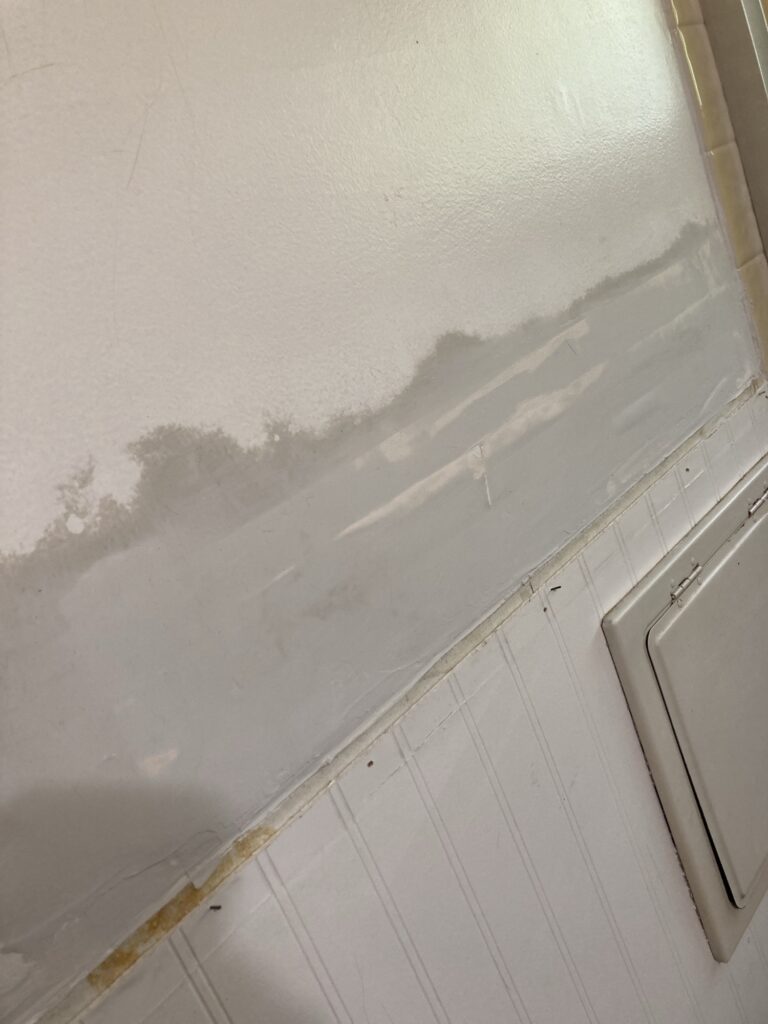
Oversanded. There are a few areas where the paper tape is showing.
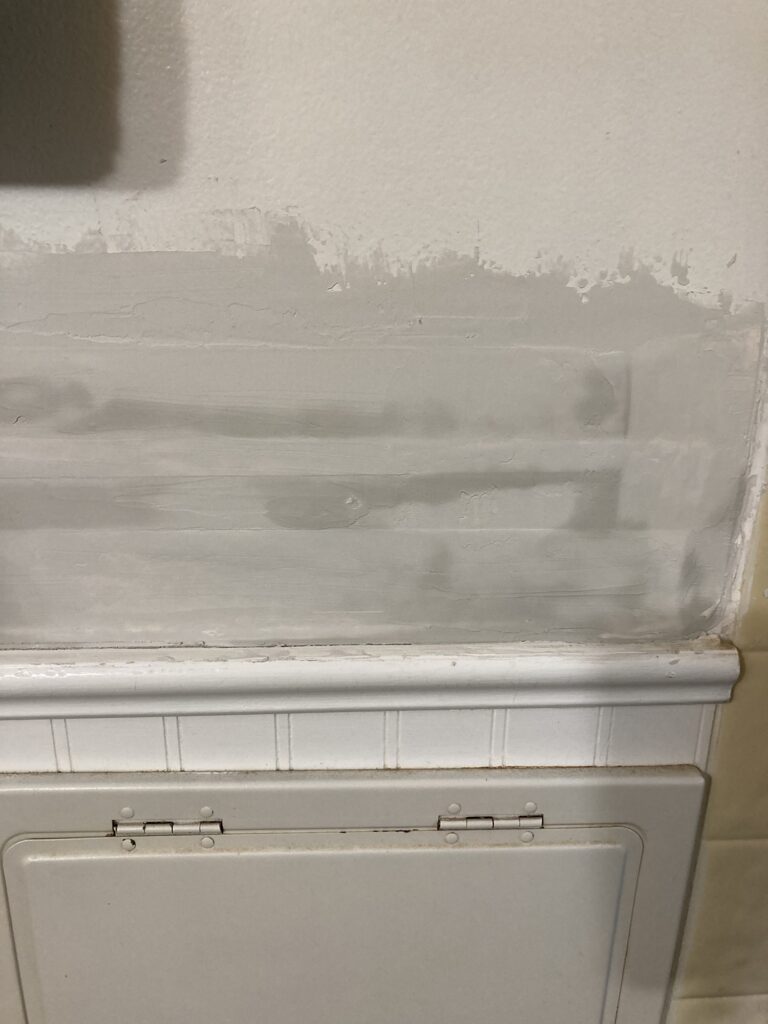
After sanding, I vacuumed off the dust, and then wiped it down with a damp cloth. As far as the exposed tape is concerned, I am hoping that my paint will cover most of it.
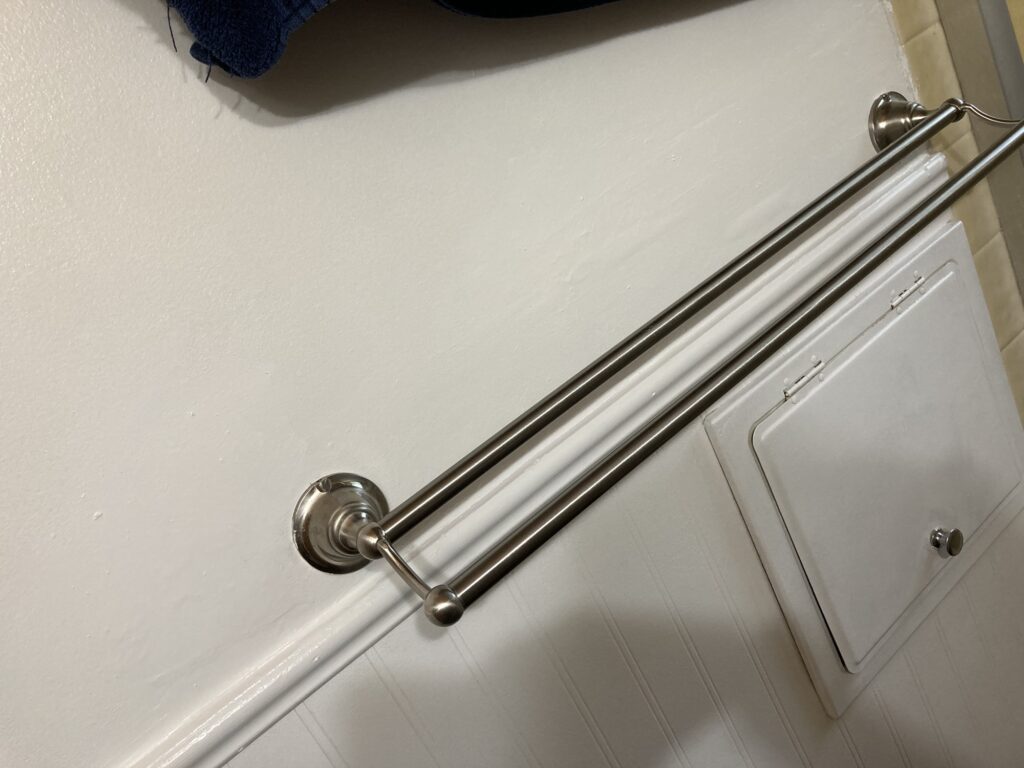
It may take a couple of coats of paint to cover the dried plaster, but once it is done you can proceed to rehanging your towel bar.
My paint job isn’t as beautiful as it could have been, but it is so much better than it was!
In retrospect I should have put another skim of the plaster patch on after sanding to properly cover the tape, as there is now a small bubble under the paint where the tape is. I can live with it, however, as I have always been more about function as far as these things are concerned, as long as it doesn’t draw my eye (I am only noticing the bubble now in the photos as it isn’t that obvious otherwise).
As a passive collector of horseshoes, I decided one day to attempt to discern the ages of several shoes that I felt were older. I live in the United States. Most shoes in my area aren’t much more than 150-200 years old, with anything older than that a fine treasure, indeed! Ironically, good information about aging the shoes of horses in the United States is very hard to come by. I did, however, find some good articles and even books on horseshoes from Great Britain.
It seems that nail-on horseshoes have been around for centuries—almost a thousand years, even. During that time, changes in shoe-making evolved according to new discoveries in farriery and blacksmithing. It seems that every century or so saw a new style of horseshoe become popular for different reasons, such as altering the shape of the shoe to allow the frog of the hoof to make contact with the ground, adding more nail holes, alterations for traction, or adding an extra piece of metal to the hoof-side to keep the shoe from slipping and falling off. What is wonderful about all of this is that these discoveries and changes were usually documented in advertisements and journals.
I have discovered three great sources, so far, on dating English horseshoes. One is the Museum Of London, who has a website. They took photos of many old shoes and listed them online, along with their estimated dates. It has been enormously useful in testing myself on dating, and to discover possible dates for unusual shoes in my own collection.
Another good source is a book called ‘The Medieval Horse and its Equipment’ from The Museum of London, edited by John Clark
This book has excellent material on dating and categorizing the older shoes that were found in London.
A third excellent source is the Shire Album ‘Old Horseshoes’ by Ivan G. Sparks.
This book has a nice history of shoes found in England. The author categorizes them slightly differently than the Museum of London book, but I believe the dates that he uses are pretty much the same. This book also lists shoes that are post-medieval, which is nice.
Studying these sources I have learned a little about ancient horseshoes, at least in Great Britain.
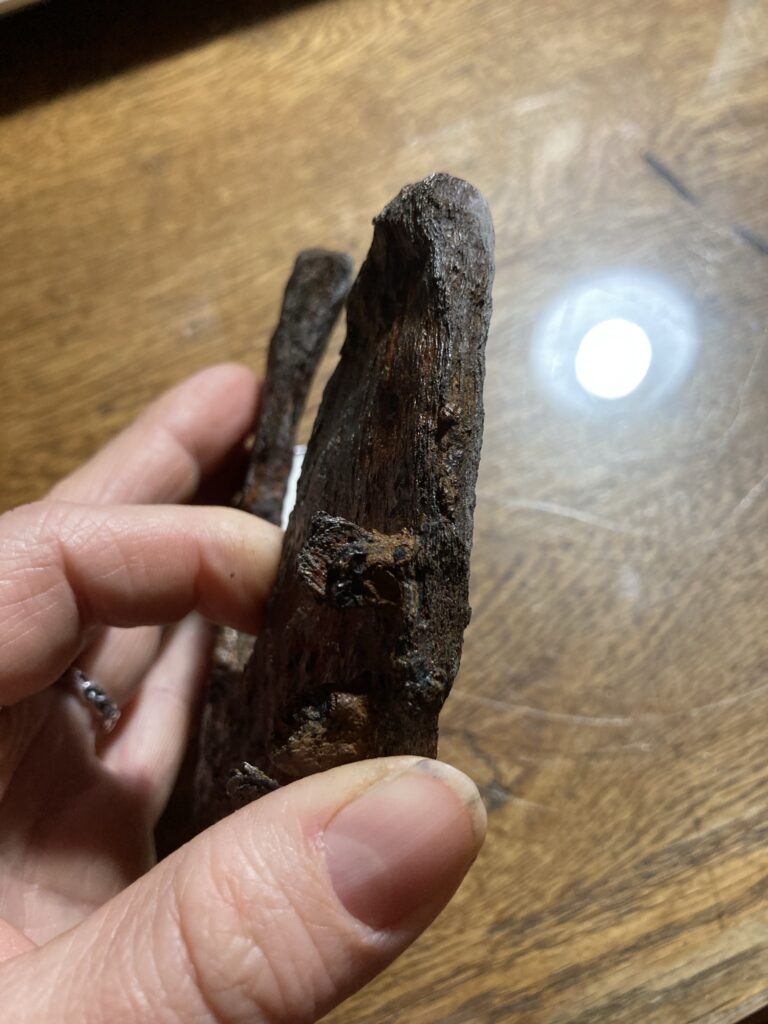
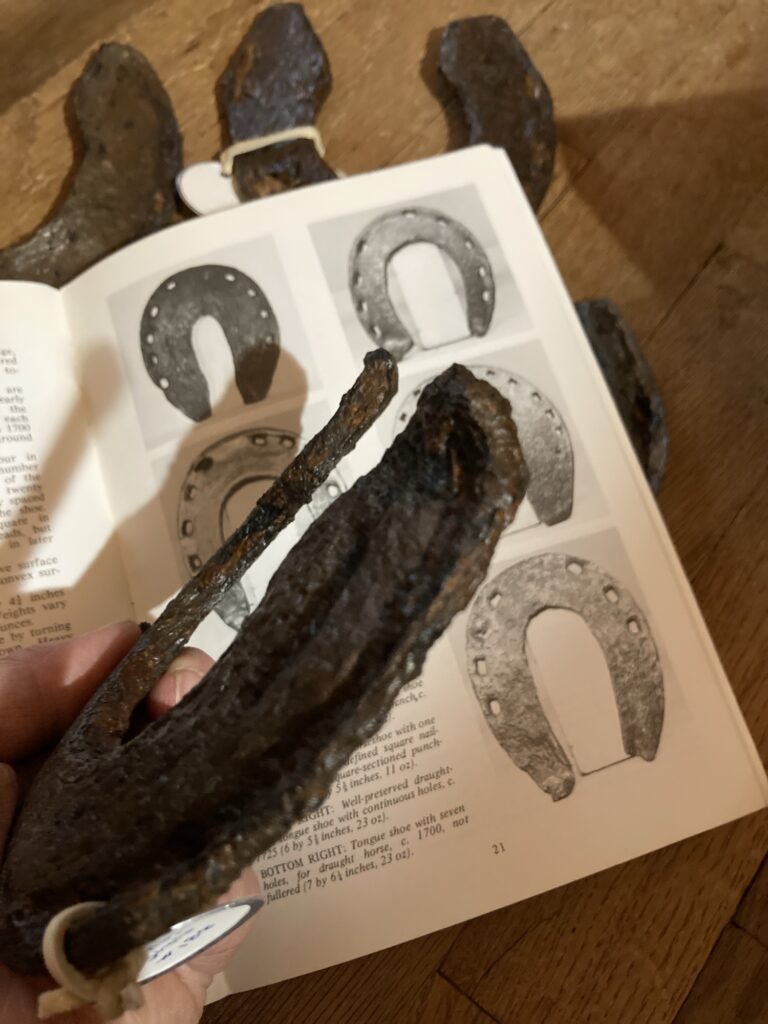
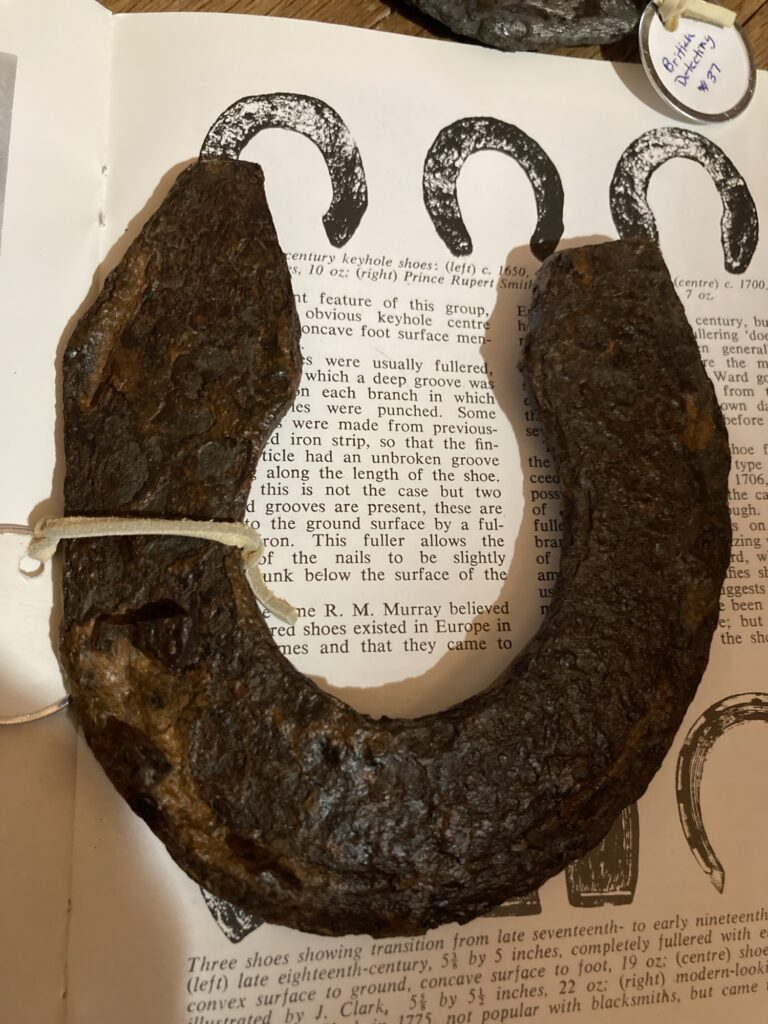
With this article, using these sources, I will show off some of the keyhole horseshoes I have in my collection. These shoes were bought from a metal detectorist in Great Britain.
One of my favorite examples of a keyhole shoe. The fuller doesn’t extend all the way around the shoe so it may be older.
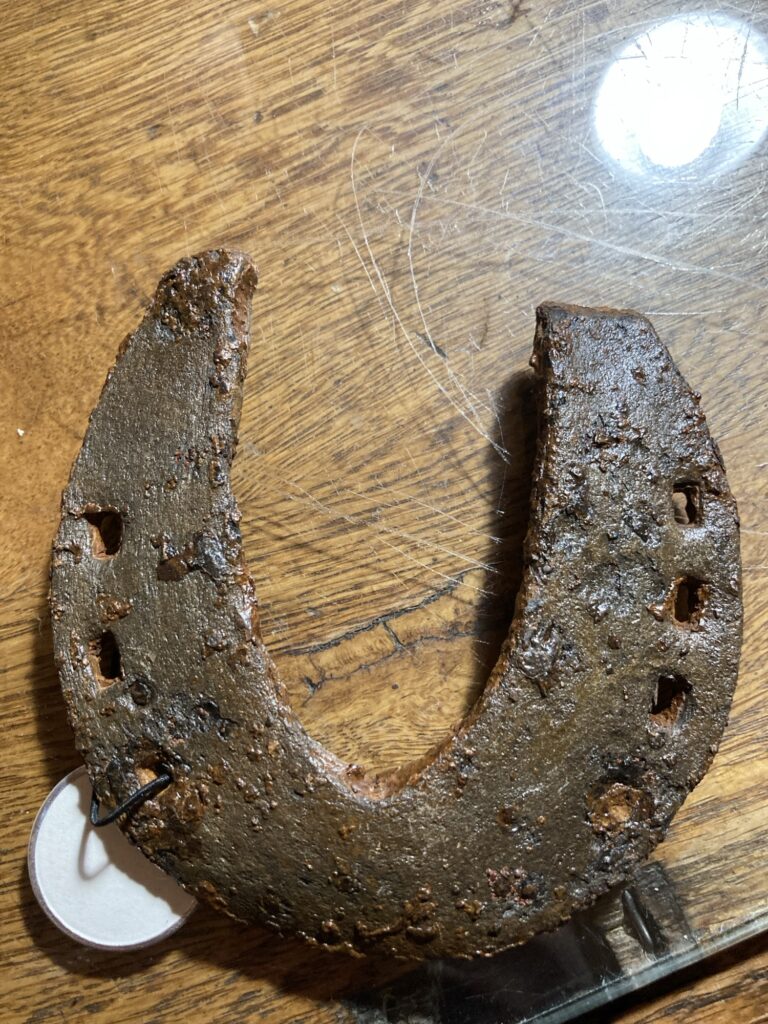
The keyhole shoe tends to be larger and heavier than its predecessors, and the thick branches and heavy heels form sort of a keyhole shape in the center, thus its name. It was mainly used on draft horses. Because the shoe is heavier, it tends to have more nail holes than previous shoes (older shoes tend to have 6 holes, 3 on each branch). Of the 5 keyhole shoes that I have, 3 of them have 8 holes (4 on each branch), 1 has at least 10 holes, and the smallest (which is pony sized) has only 6 holes (because it is a smaller shoe).
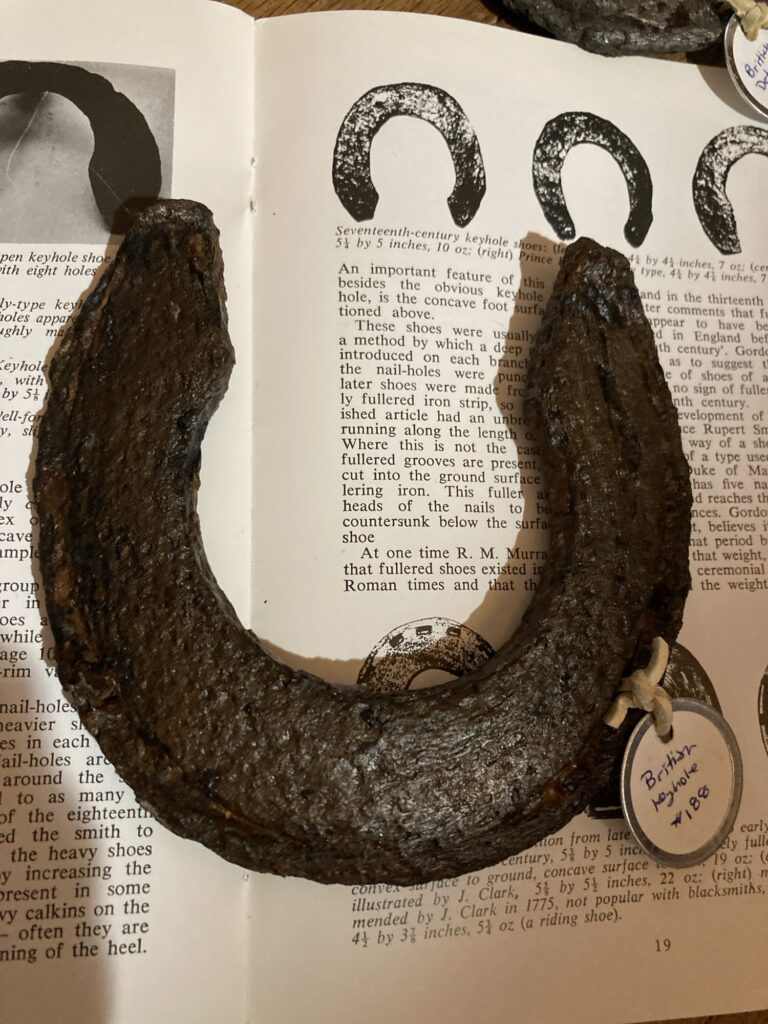
Notice the concavity. Also how thick this shoe is!As in the shoe above, apparently the calkins on keyhole shoes are a slight turning downwards of the heel. This is to add more grip on the ground surface.
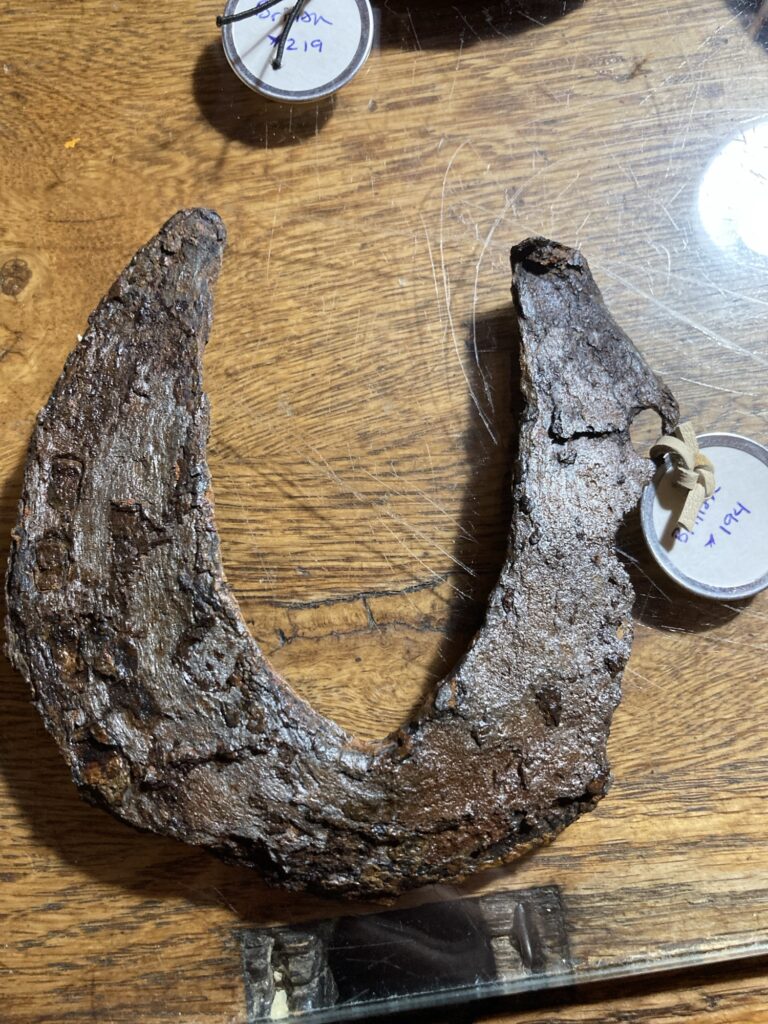
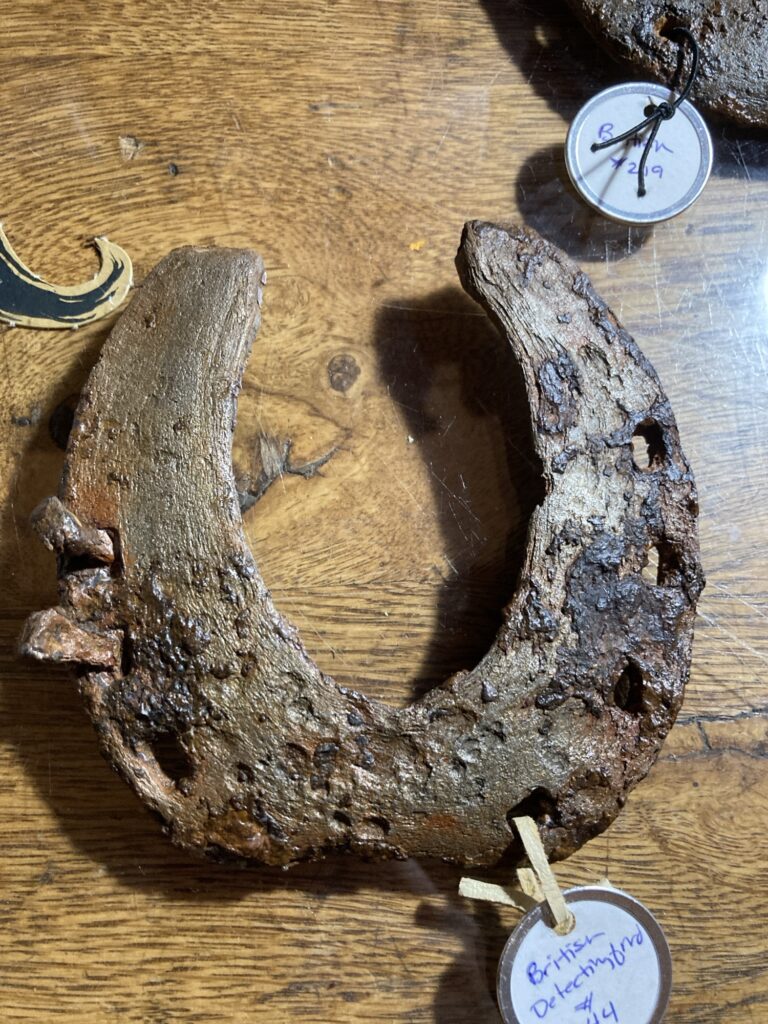
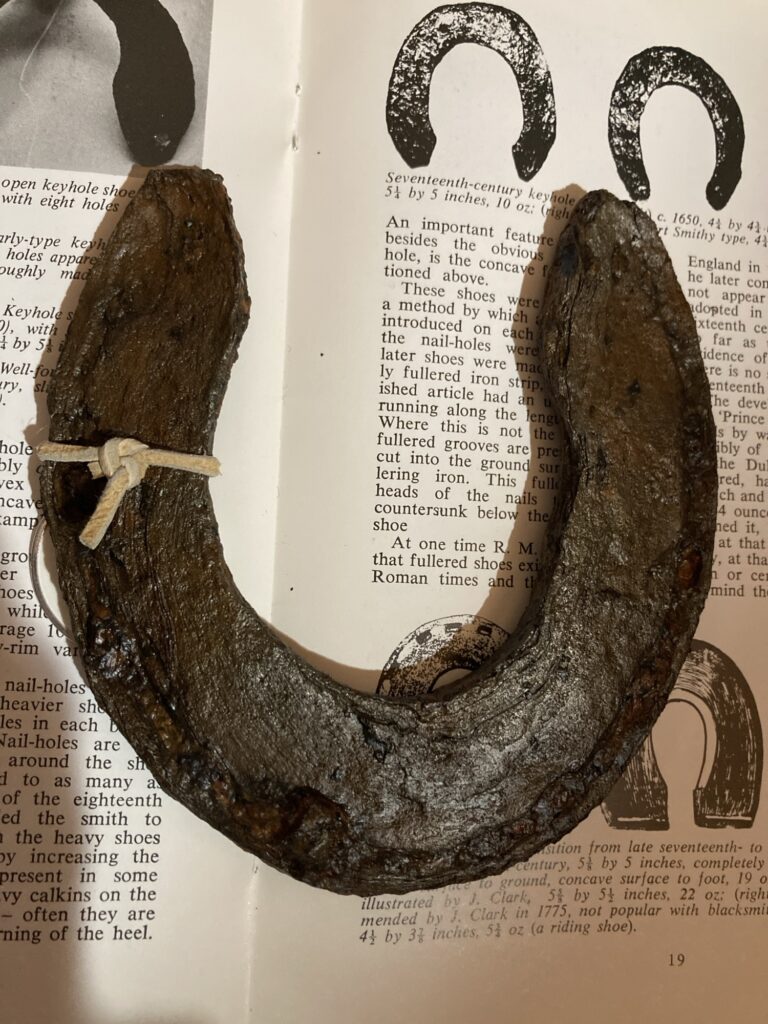
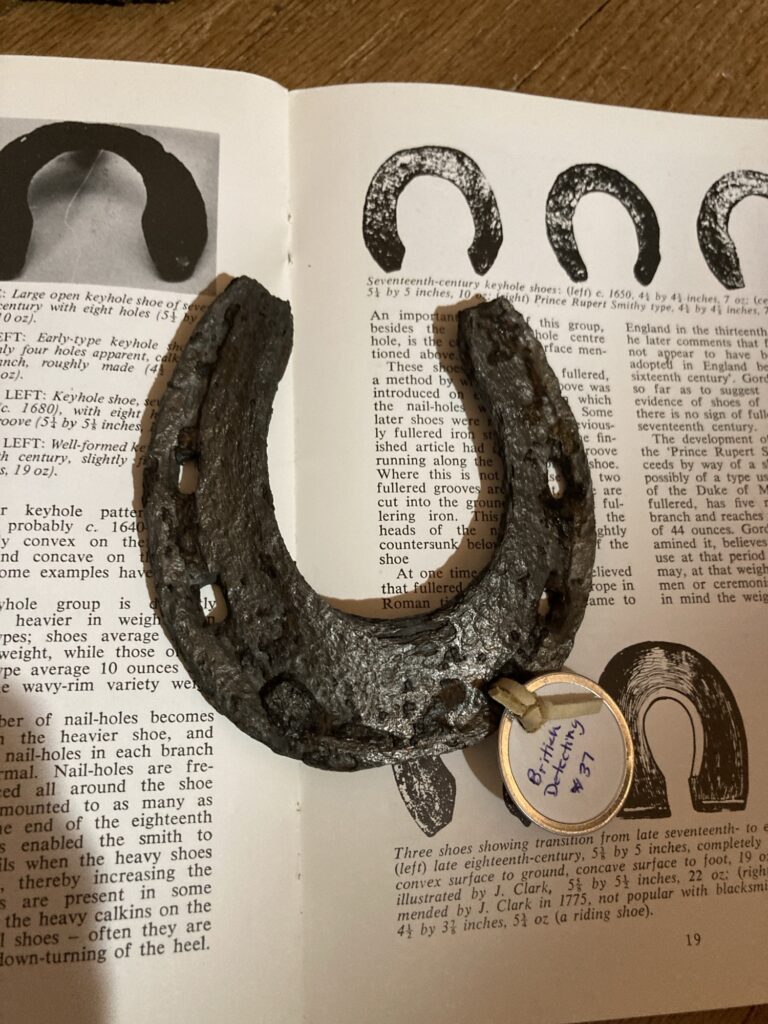
Keyhole shoes also tend to have a concave foot surface. Some have calkins on the heels as well, and some have a fuller (a groove that extends along the branches that the nail holes are in). Mine all have fullers, although some of the fullers are more pronounced than others. Apparently the keyhole shoes from 1700 and onward have a fuller that extends along the whole shoe, heel to toe, while older ones tended to only be fullered along the holes on each branch.
This shoe is fullered all the way around the shoe, so it may be 1700’s or later.
This shoe has a fuller all the way around, and may be from 1700 or later.
This shoe is fullered all the way around, and is probably from 1700 or later.
This one is pony-sized. Isn’t it cute??
The keyhole shoes were more popular from the mid 1600’s to the 1800’s.
I think one of the reasons I like these shoes so much is because they are so easily recognized by their distinctive shape, which is in sharp contrast to most of the shoes you see today.
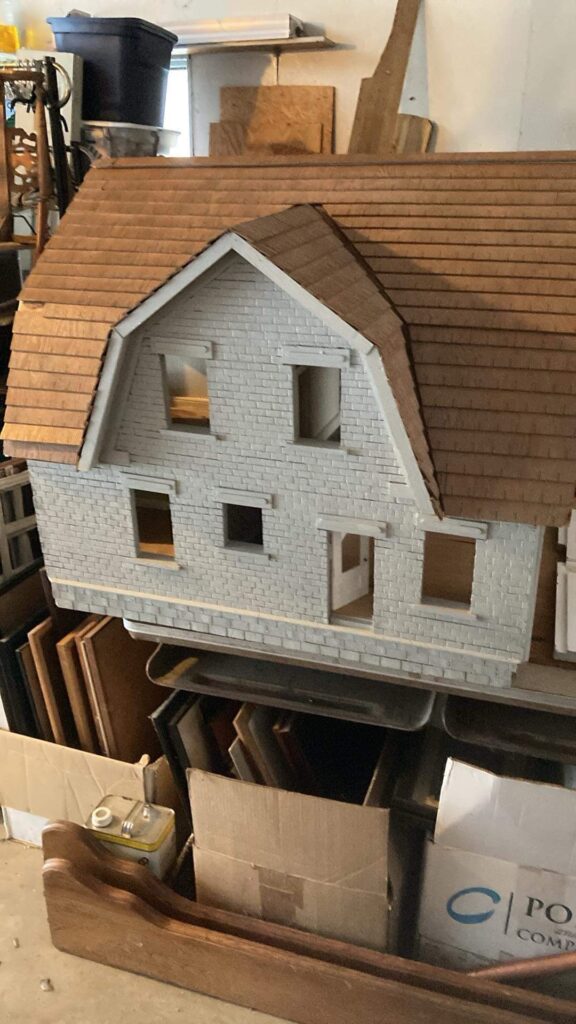
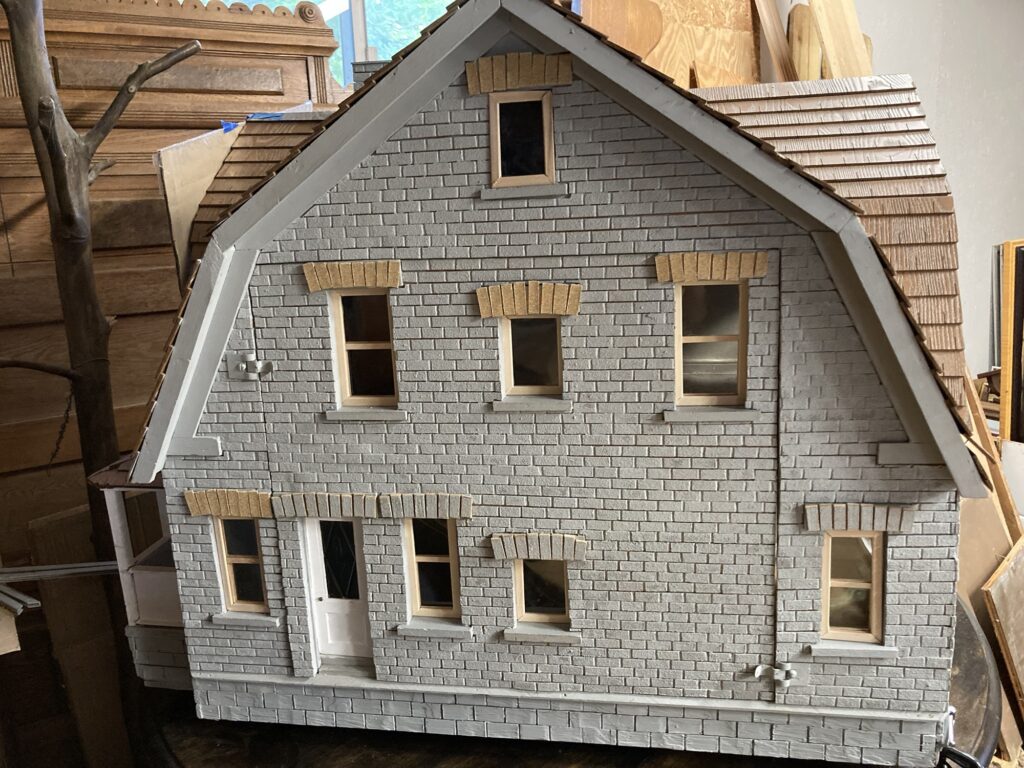
My newest acquisition. I was told that this dollhouse has been passed down through generations, and that it was made to resemble a family home. The previous owners decided that they didn’t have room for it and there was no longer an interest in keeping it, and so I purchased it.
Unfortunately my family recently lost the beloved real home of my grandparents, so this dollhouse came at a good time for me. It lost its family, and I lost a house. Maybe together we can find a little closure.
My ultimate plan is to turn this into my own family heirloom, as it slightly resembles my great-great-aunt’s house, which I have loved since childhood. It will only require new paint to emphasize the bricks, the addition of some small architectural details such as decorations in the roof peaks and some fancy brickwork, and replicas of a few family heirlooms.
Shortly after it arrived.
This house doesn’t fit in my real house-it’s about 3 feet square. As a consequence it resides in my garage until I can get a bigger house, or make the door bigger! It’s fine, though, as I spend a lot of time in my garage. Anyway…
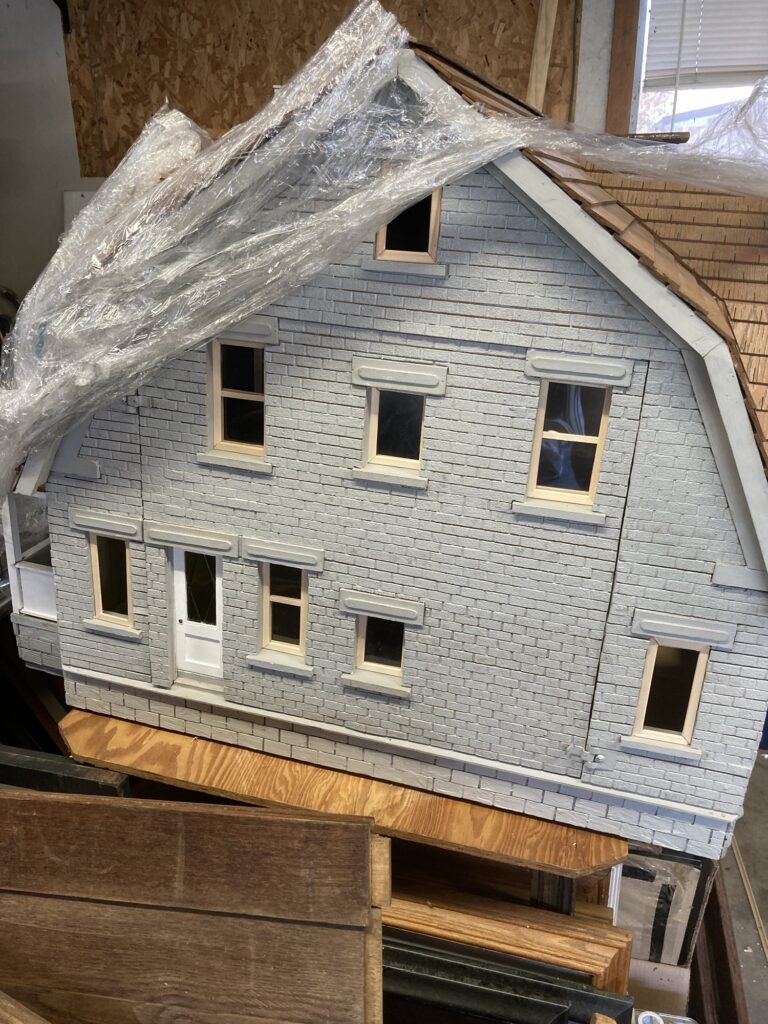
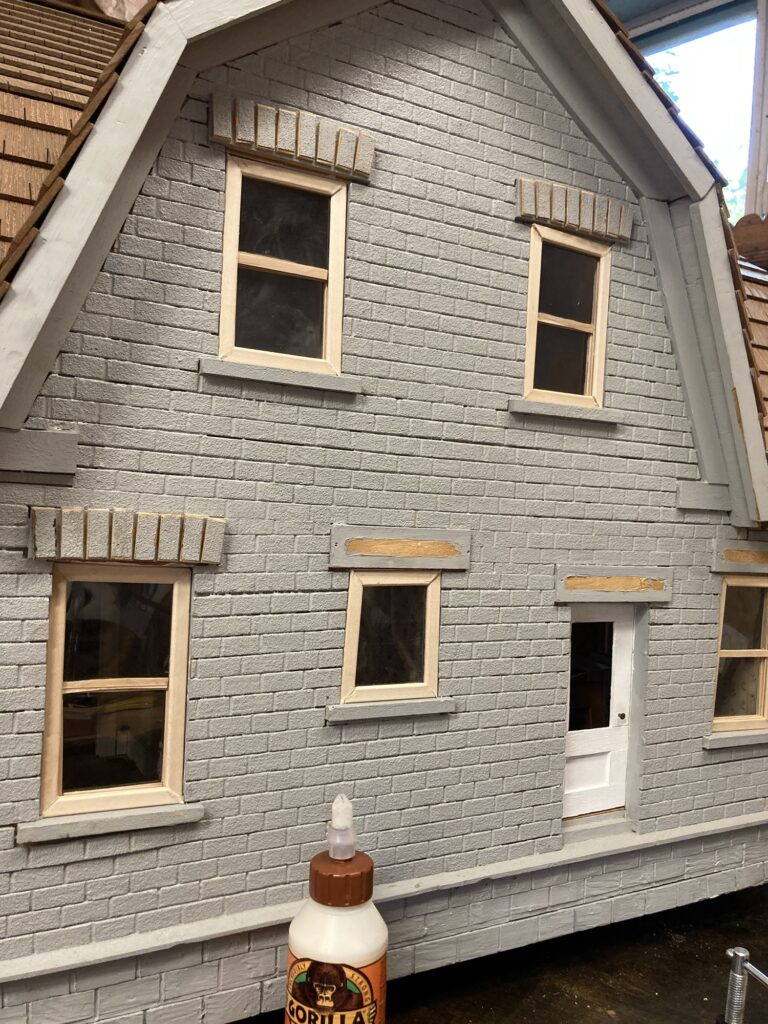
First things first, I decided that I need to get functional windows made and put in, to keep out any mice or insects.
I wrapped it in seran wrap over the winter to discourage pests. This is one wall of windows completed.
Using instructions posted in another article on this blog, I made all of the windows. Yay! Next, I wanted to make brick designs that go over the windows, to more closely resemble those found on my great-great-aunt’s house.
The bricks I added aren’t exactly the same as those on my aunt’s house, but I think with some creative painting I might pull off some similarity.
Fortunately for me, the house came with a few strips of wood with ‘bricks’ left over from the siding. It wasn’t quite enough to do the whole job, so I made more by gluing sandpaper to popsicle sticks, and then cut the sticks into brick-sized pieces.
Some of the old bricks and some of my ‘new’ ones made with popsicle sticks and sandpaper. They were virtually the same.
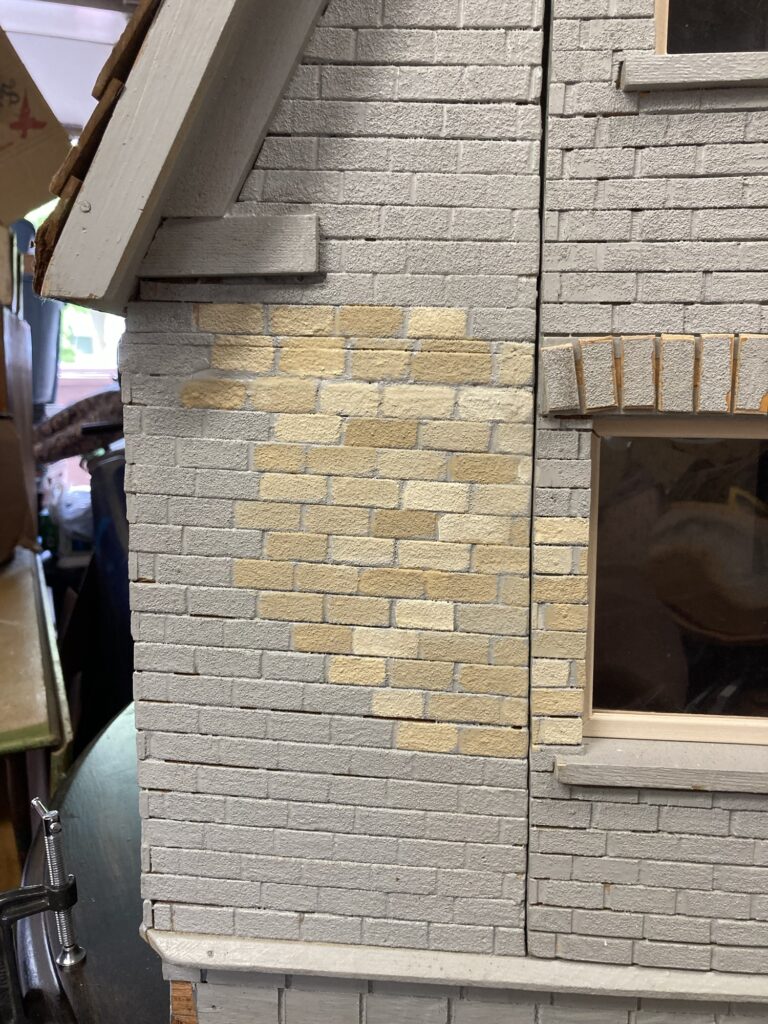
Now on to paint!
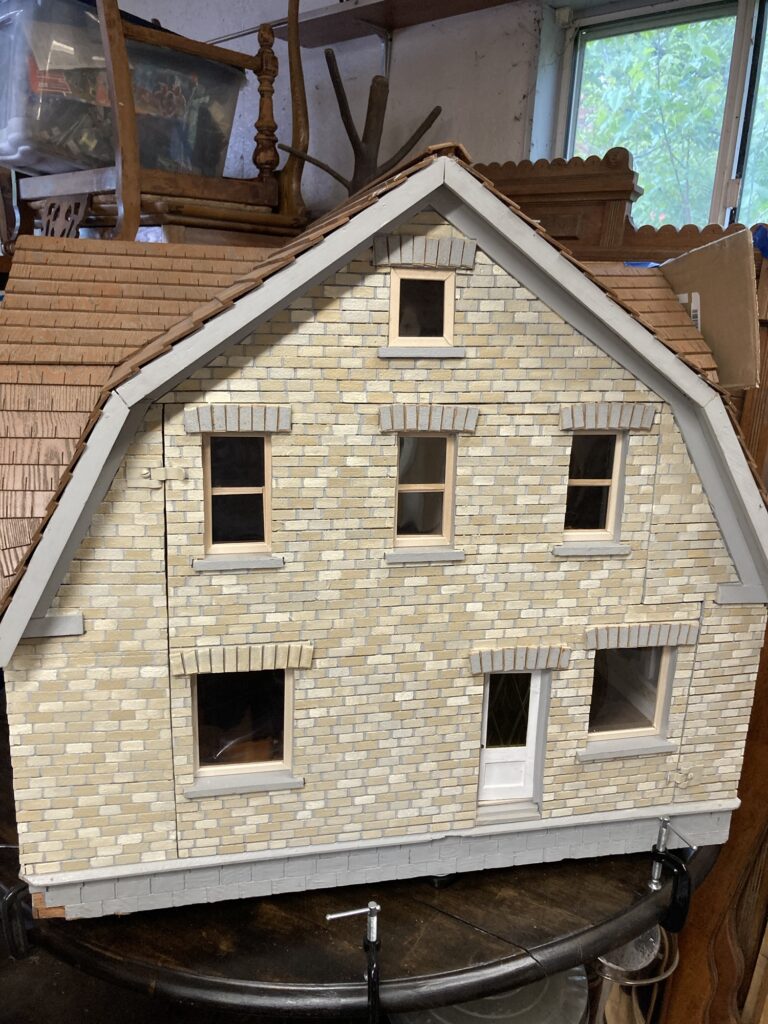
The paints I used. I used the paints right out of the bottle, plus mixed them together on a pallet to make new colors that are similar shades. I wanted them all to look like similar bricks but not all the same color.I wanted them all to look similar yet different. One side done. I will go back to the window bricks when the sides are all painted, and then, eventually, I will paint all of the trim.
When I am done with all sides plus the windows, my plan is to put a watered-down gray wash over the whole thing to add some weathering.
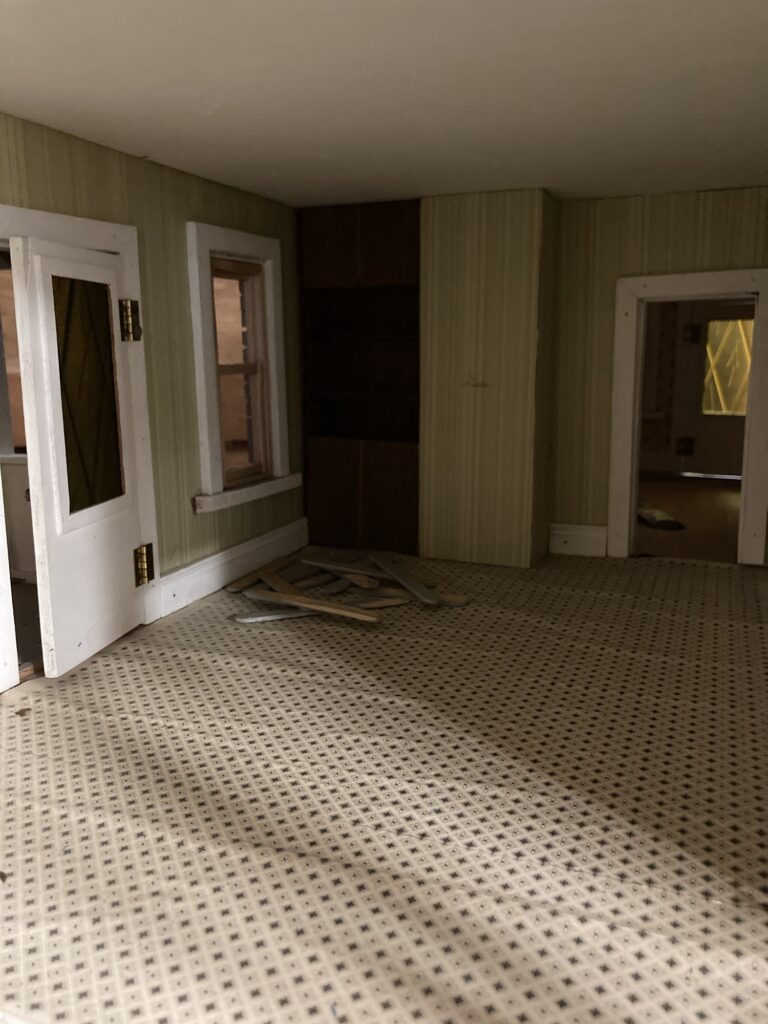
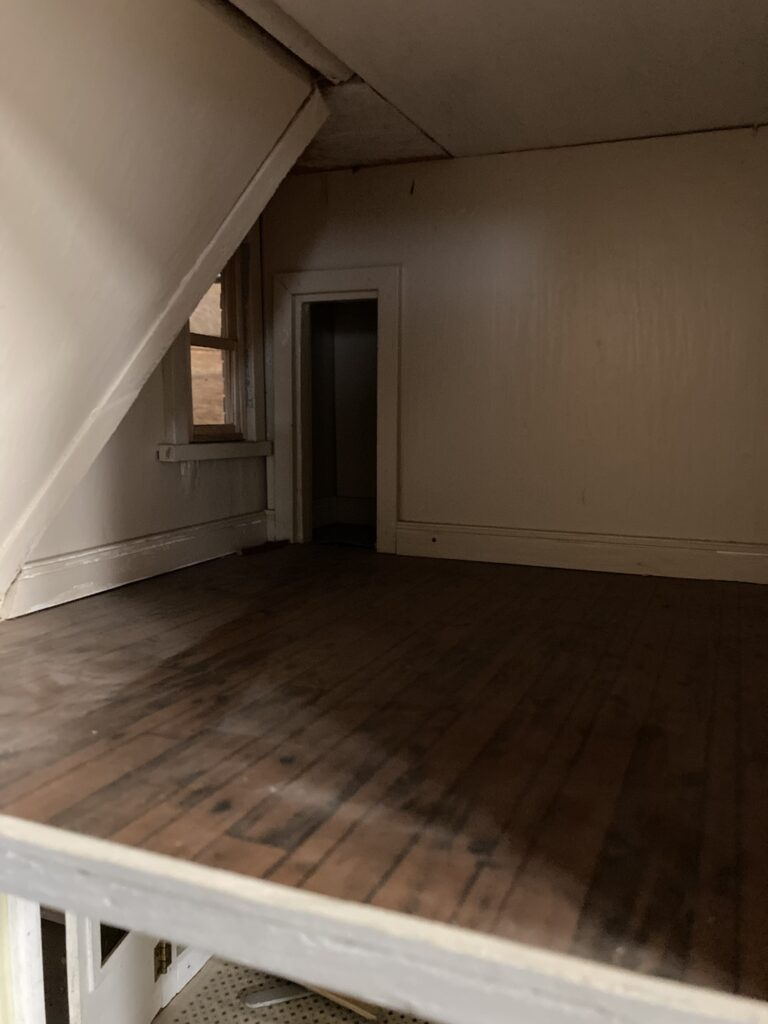
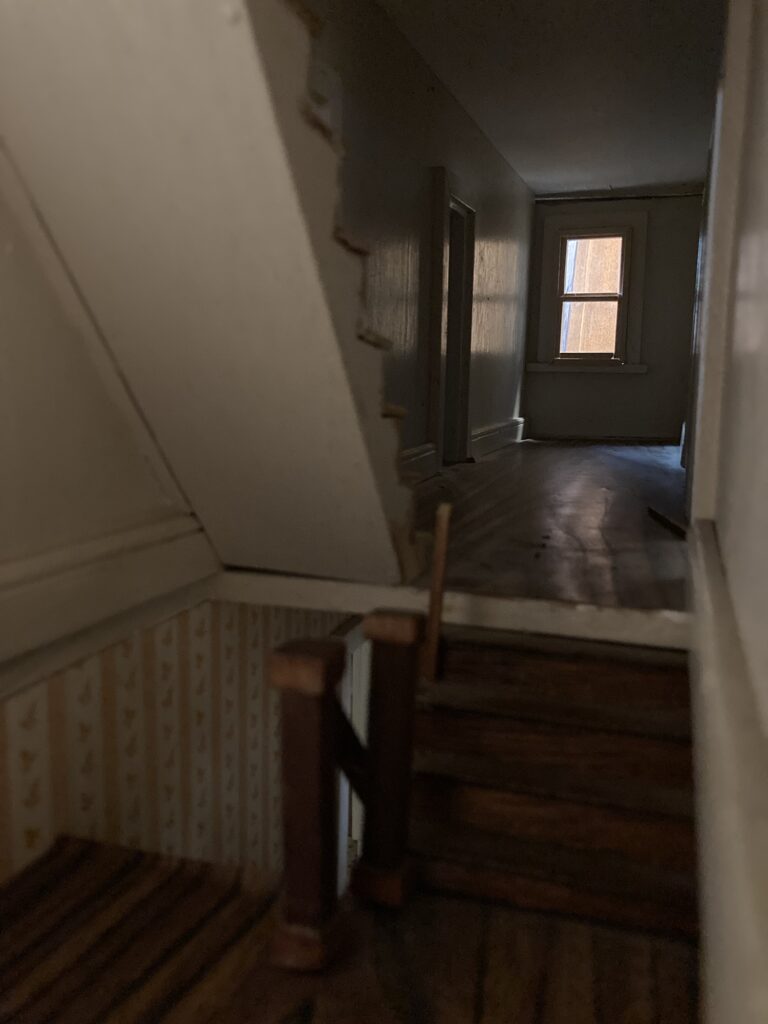
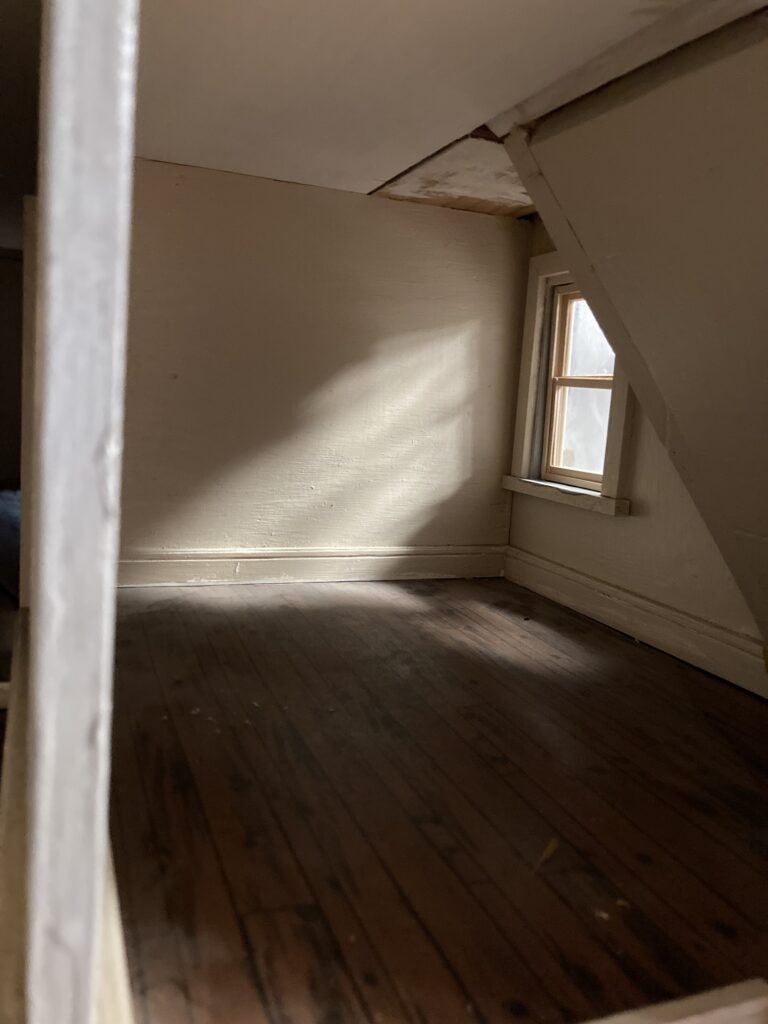
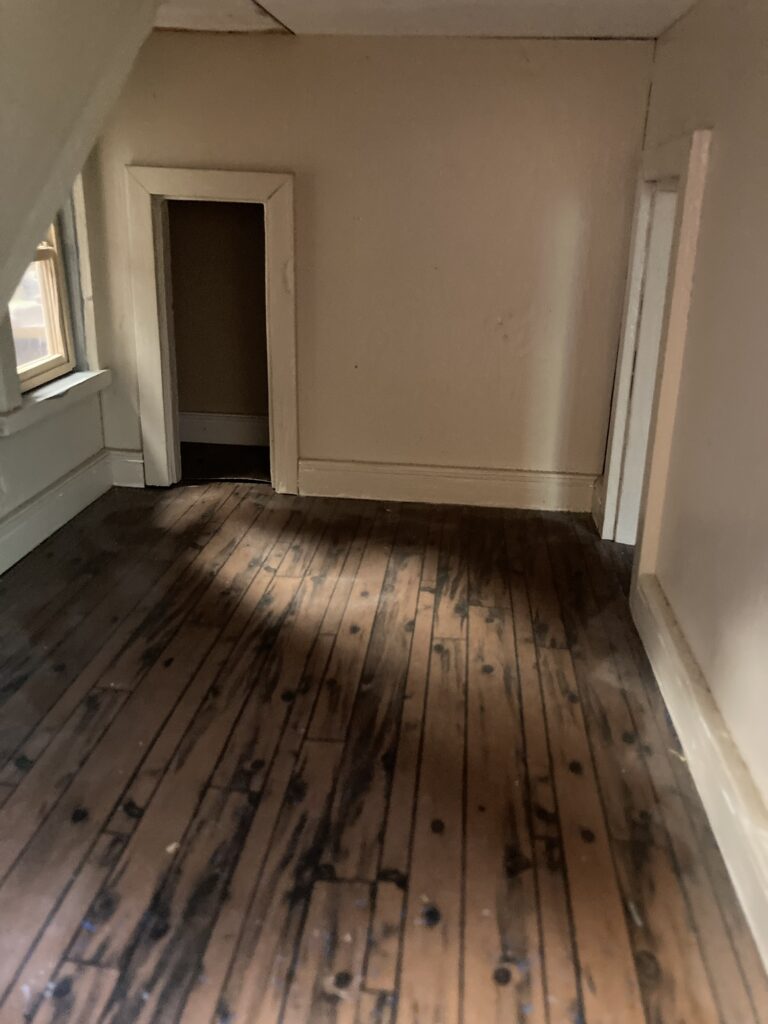
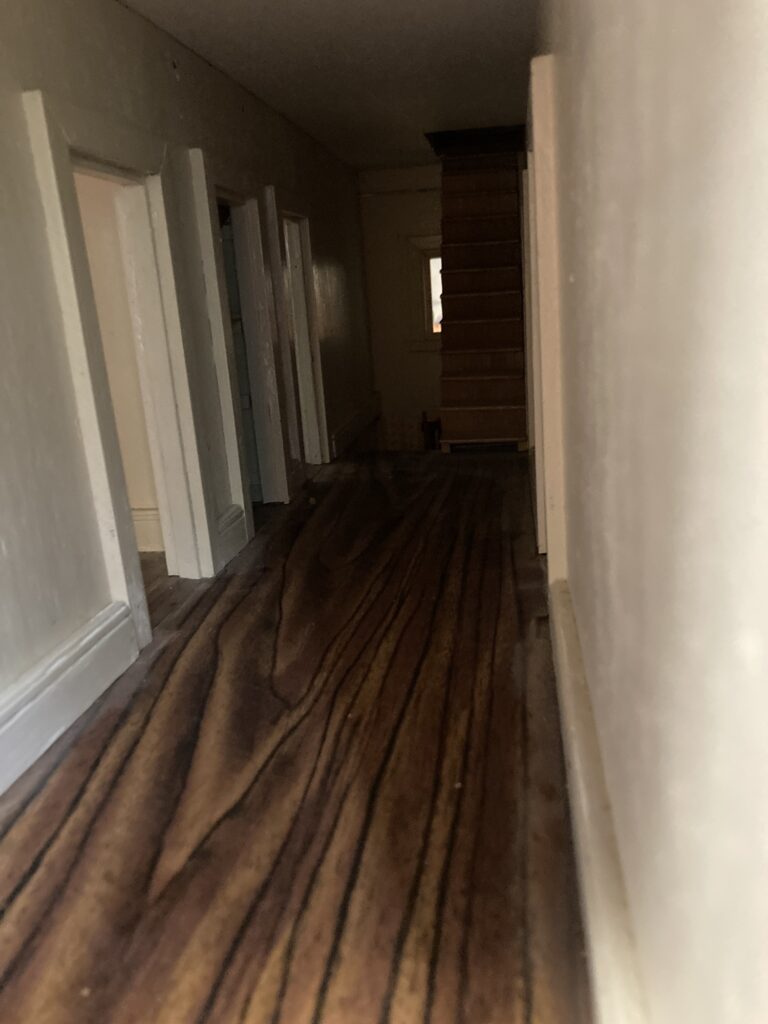
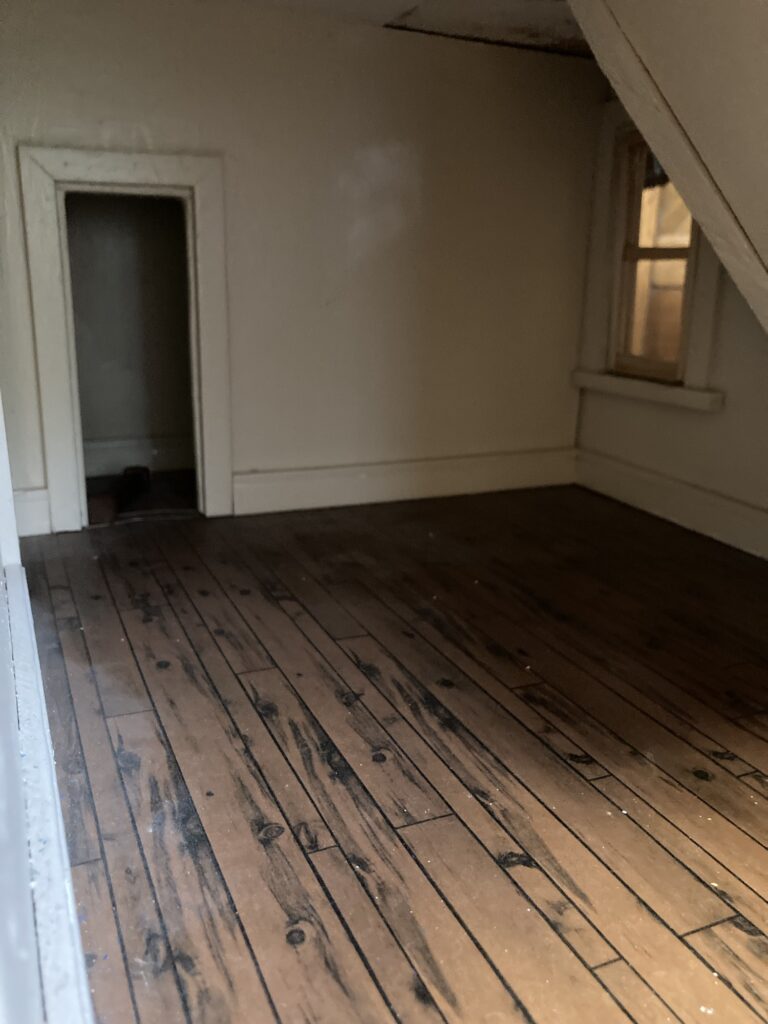
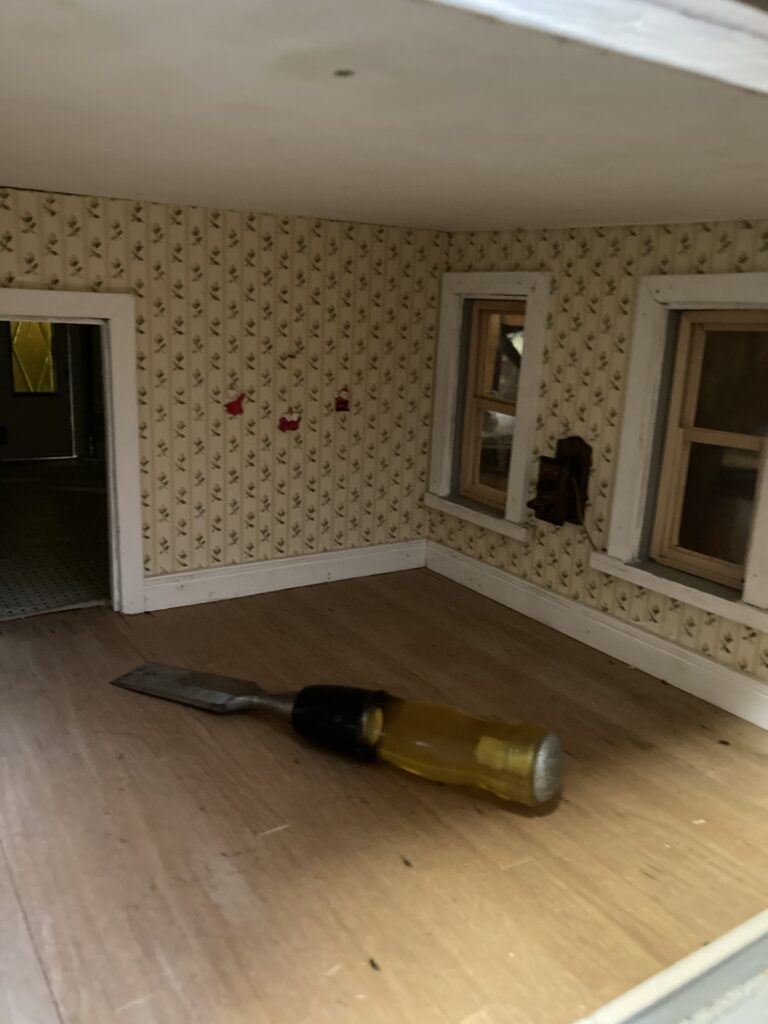
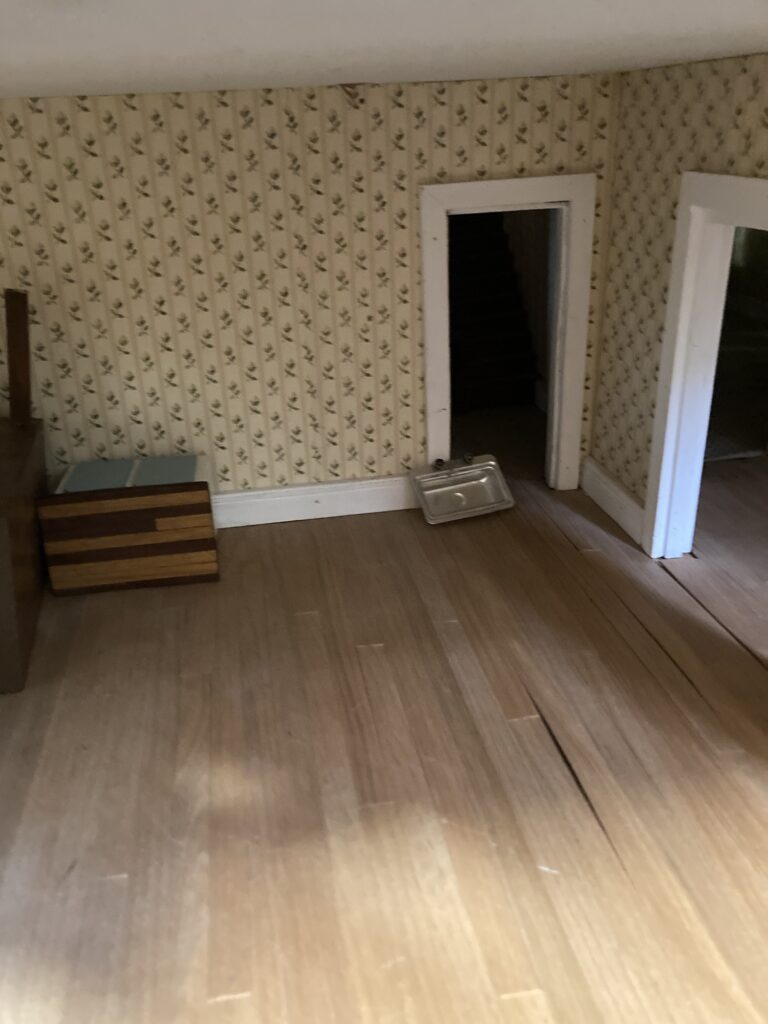
Here are some photos of the inside, which has not been touched (or unfortunately cleaned) yet.
A parlor or living room?A bedroomThe stairwayAnother bedroom. Love all of those angular ceilings!Another bedroom. It even has closets!!Upstairs hallway, with stairs to the attic.Another bedroomThe kitchenDining room
This house has lots of nice details, like closets and some built-ins, and the rooms are very big! The attic is only accessible by small windows. It does need some minor repairs, but it will be fun!
I am not sure how old this house is. When they say ‘generations’ it may just be made by grandma and given to grandchild. There is no real telling as I can see some updated items, and nothing points to this being an actual antique. It could be older, though, under its newer paint and flooring, as some houses are updated through the generations. I can say fairly confidently that it is one of a kind.
I can’t wait to get more done on this! This is my 13th dollhouse/structure. It’s nice because most of my houses have little projects that can be done on them, so I can pick and choose what I feel like working on on any given day. After the initial outside work, this house will be mostly a furniture-project house, as the inside is mostly decorated nicely already. Stay tuned for more updates!