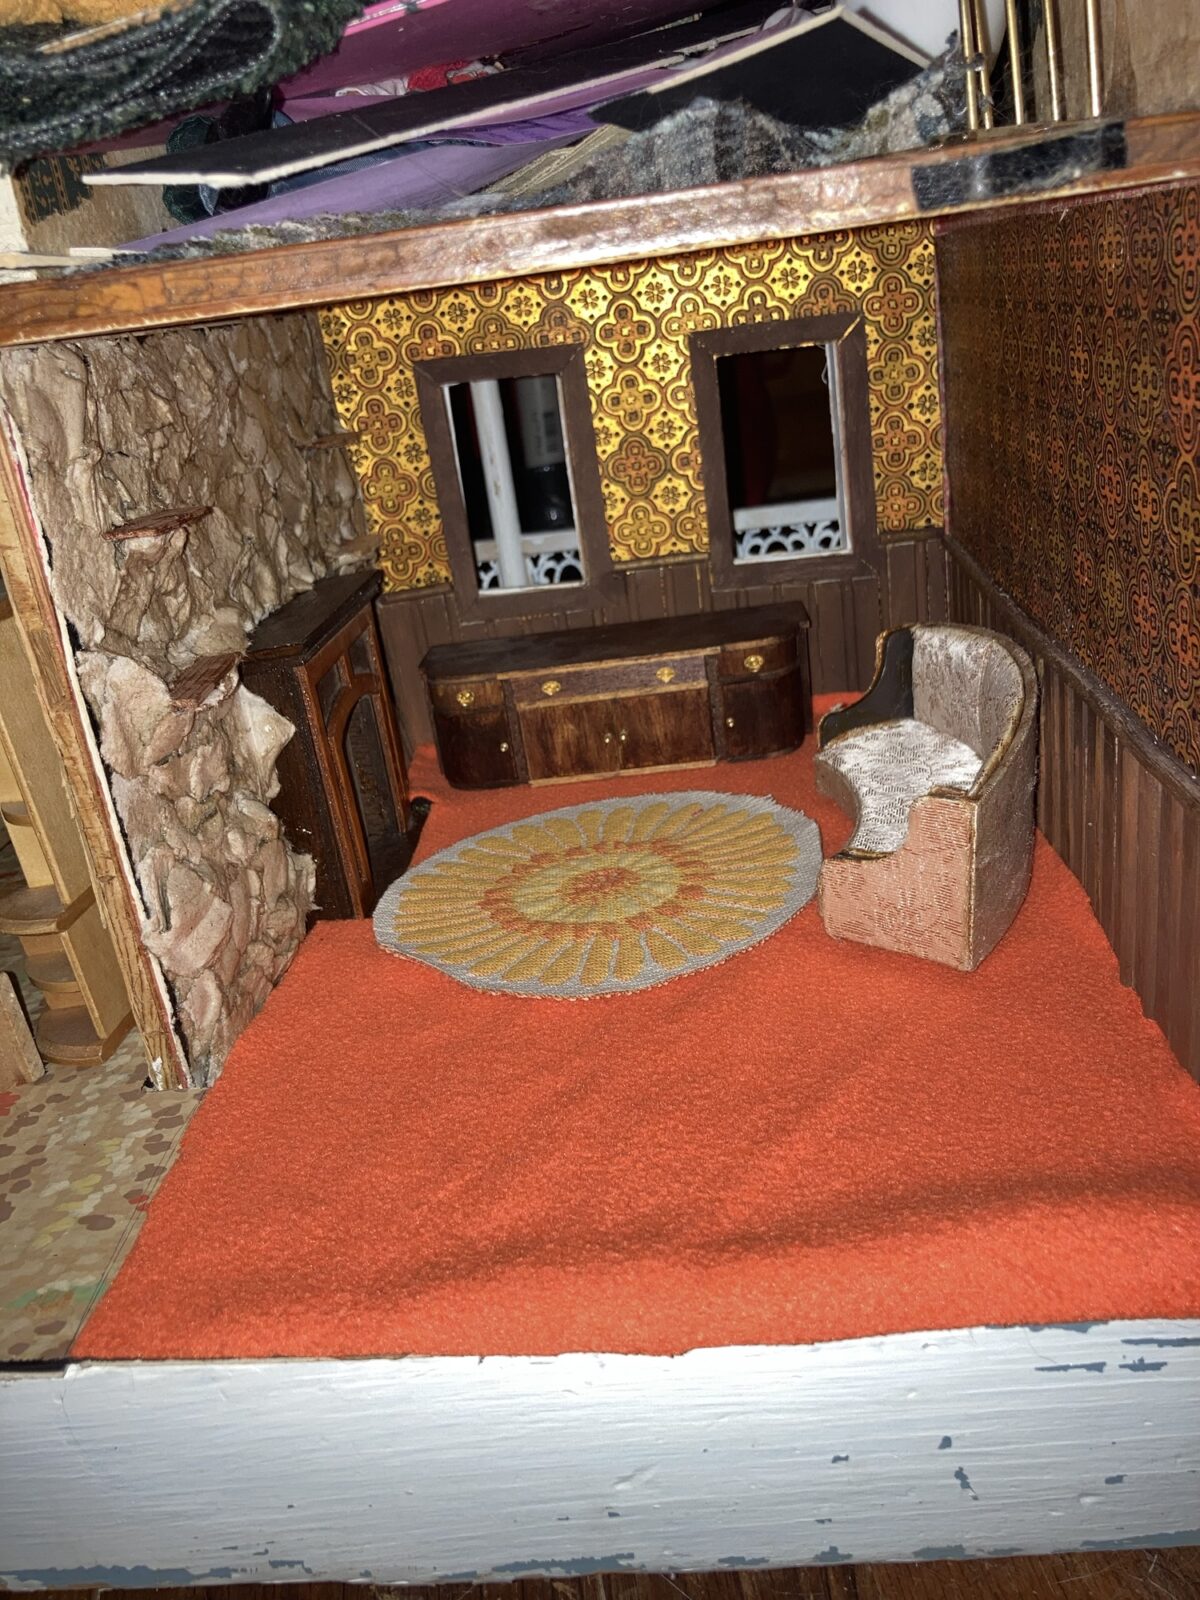
I decided to work on the living room of my 1970’s themed dollhouse. This house was basically gutted when I got it, so I am starting from scratch. I started out with a list of things I wanted in my 1970’s themed house, narrowed that list to what was actually do-able, and then decided on what projects for the house would be going in what rooms.
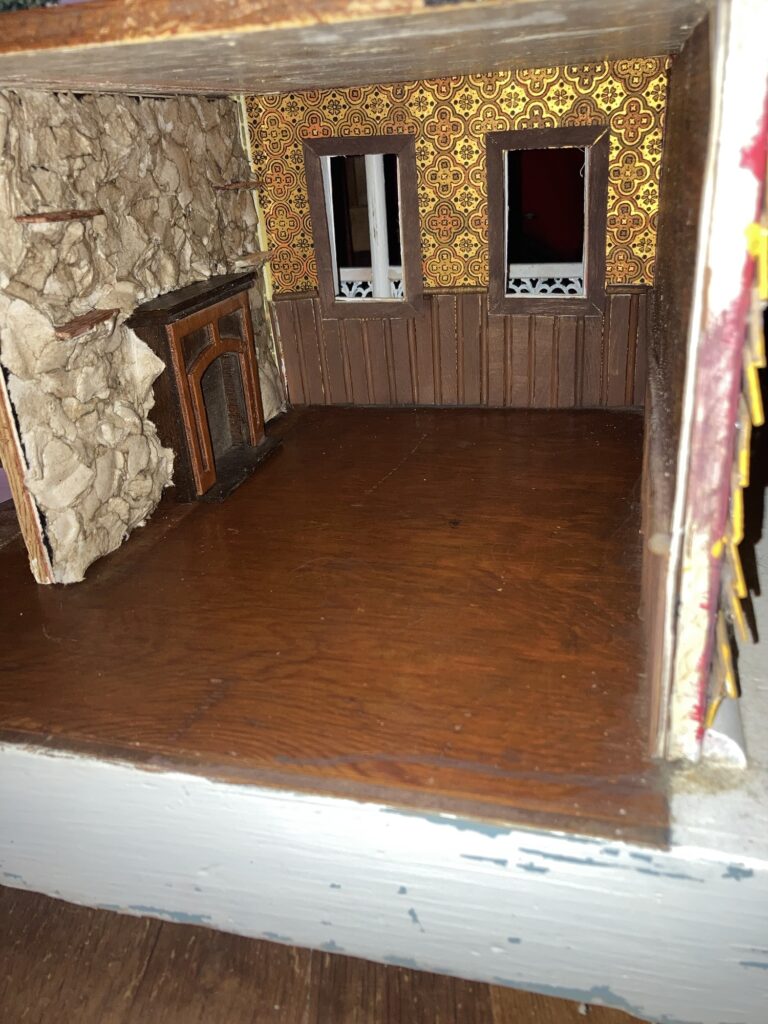
For the living room, i wanted a stone wall with a fireplace, wainscoting, and some authentic vintage wallpaper that we salvaged from my grandparents’ house before it was unfortunately torn down.
For the stone wall and fireplace, I first cut a piece of sturdy mat board to fit the wall it was going on. After double checking the fit, i attached the ready made fireplace that I chose for it.
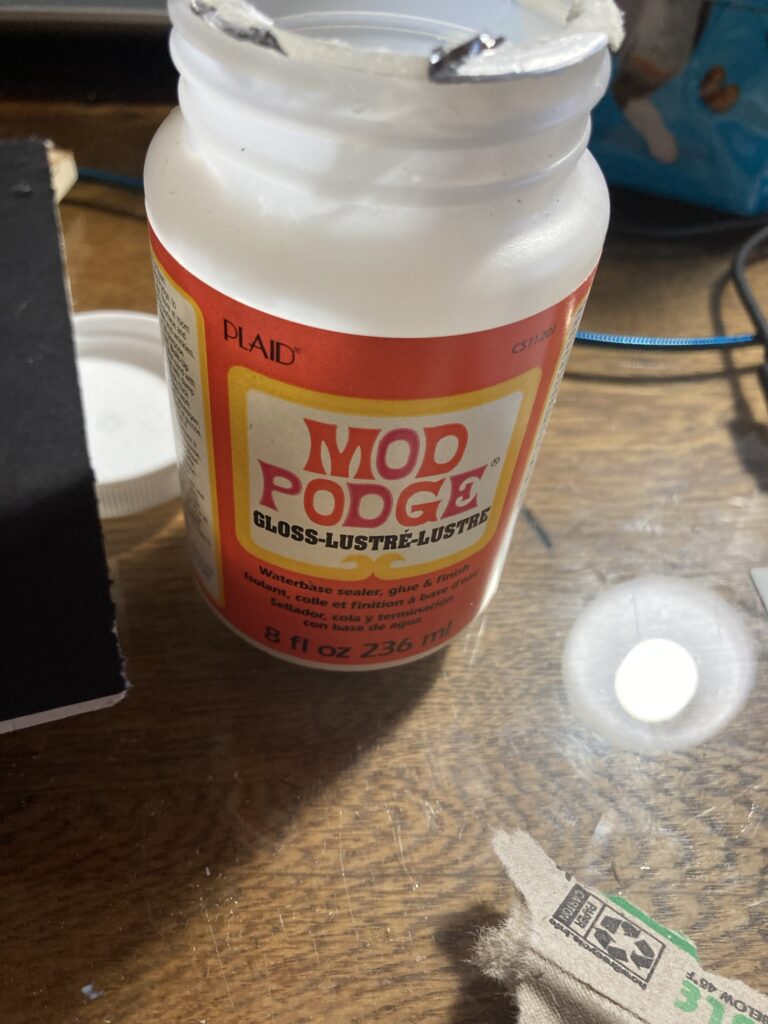
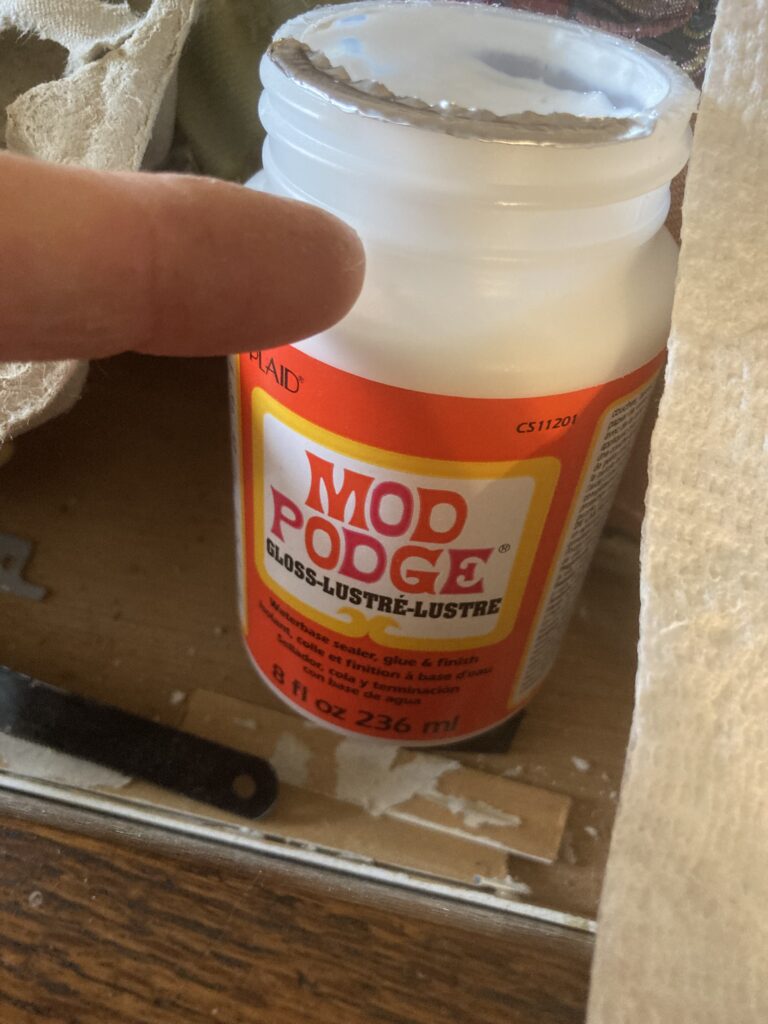
I used mod podge to flue the egg carton
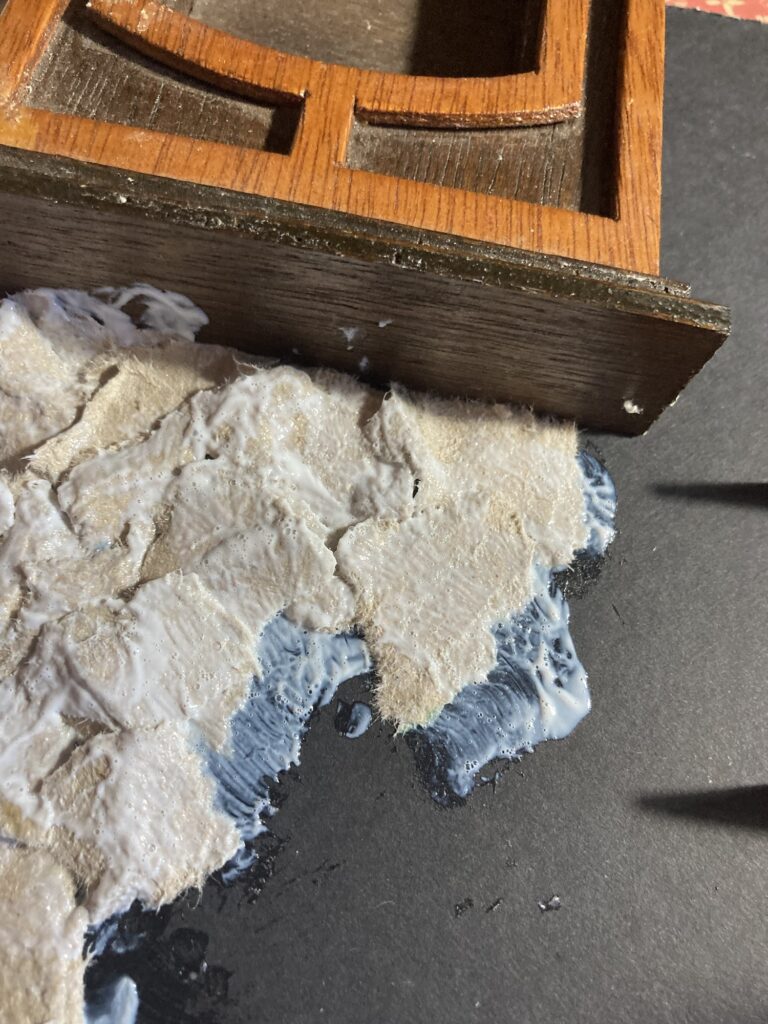
Next I used mod podge to glue little pieces of torn off egg carton (the cardboard type) onto the wall, layering it to form a stone texture. Note- keep the printed side pointed against the wall so it won’t have to be painted over later).
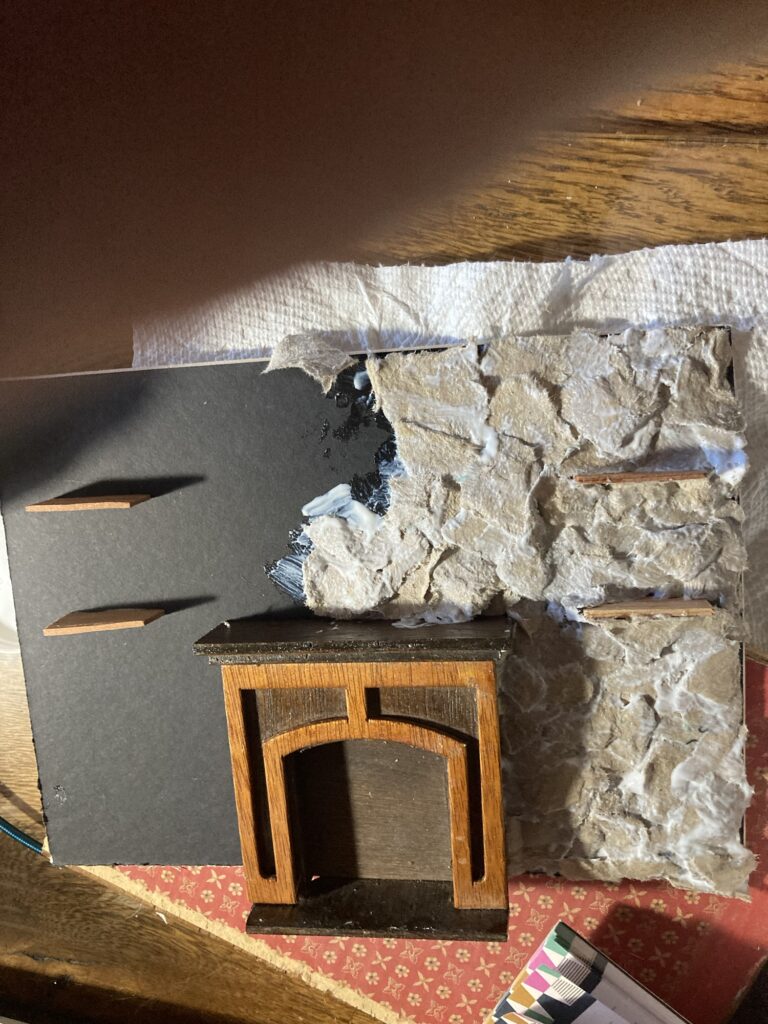
Tear off pieces of cardboard egg carton to use for the stone textureLayer the cardboard to form rough, rock-like texture, glueing it down and coating it with mod podge.I glued little pieces of craft stick on the wall to form shelves before placing the egg cardboard. What it looked like as it was drying.
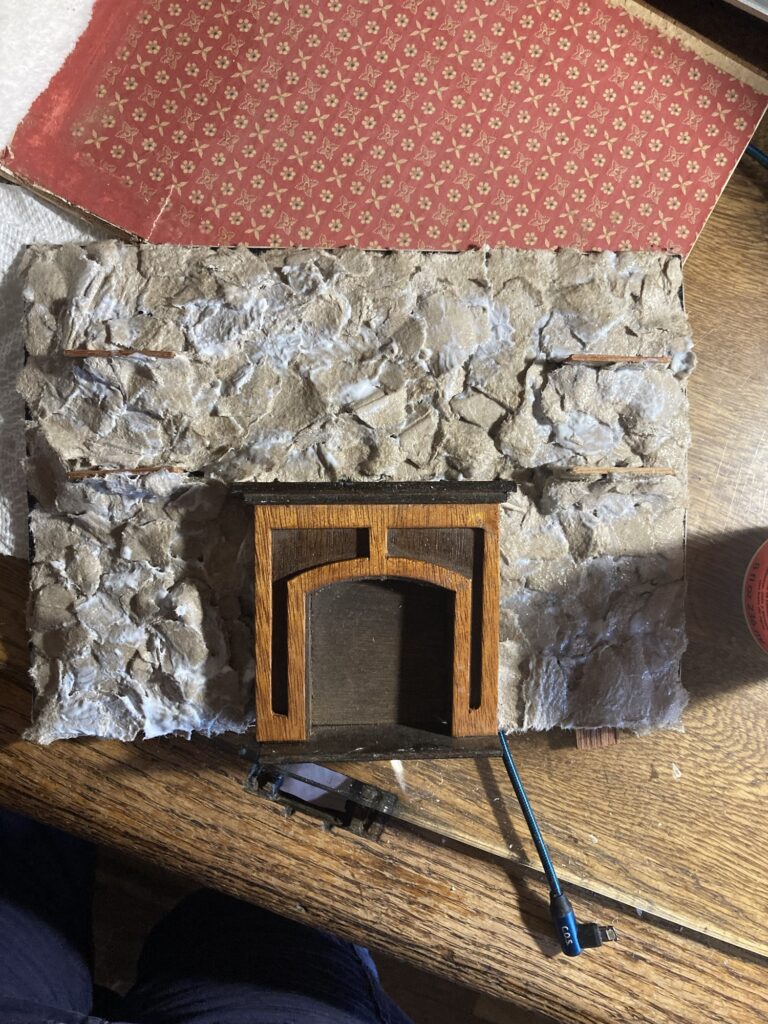
When it was dry, I slid it into place on the wall of the dollhouse, made sure all fitted as it should and looked the way i wanted, and then glued it in place with just a dab of glue.
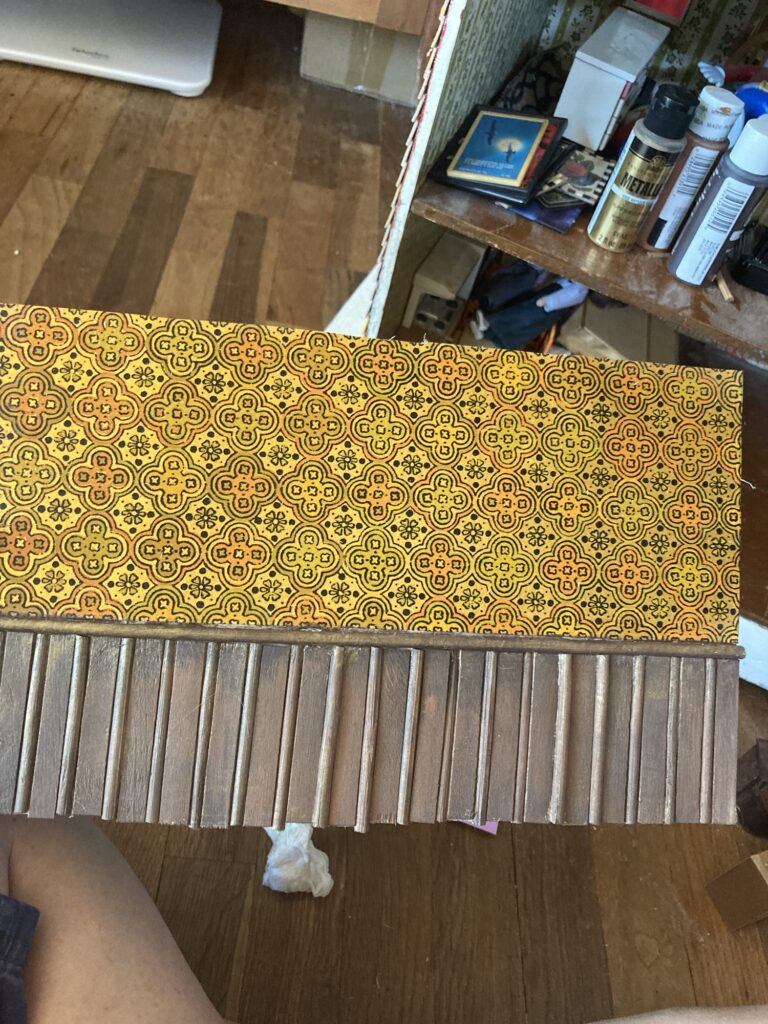
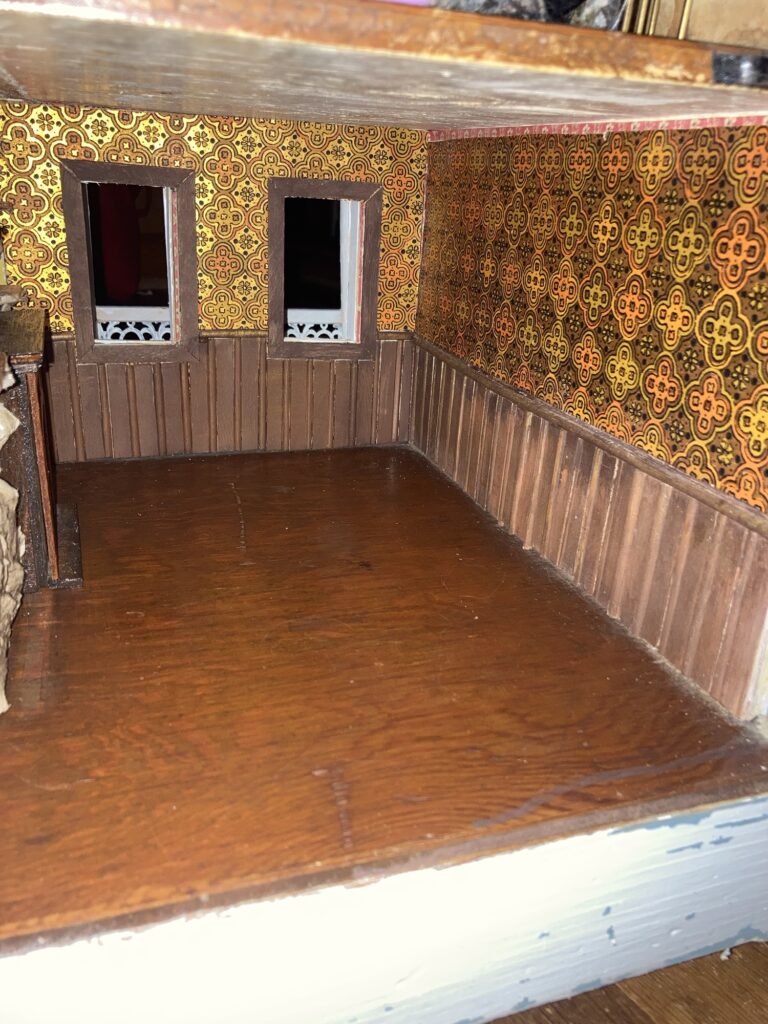
Next I cut another piece of mat board to fit another wall, and glued on a piece of my wallpaper. I cut pieces of popsicle stick and split dowels to create a pattern of wood for the bottom section of the wall, to form wainscoting.
I tinted the wood with thinned out paint so it looked like stain, and made a rail with a long split dowel.
I made sure it fit where i wanted and then glued it to the wall, then did the same for the other wall.
Eventually there will be trim along the ceiling, which will cover the little piece of old wallpaper peeking through.Another view
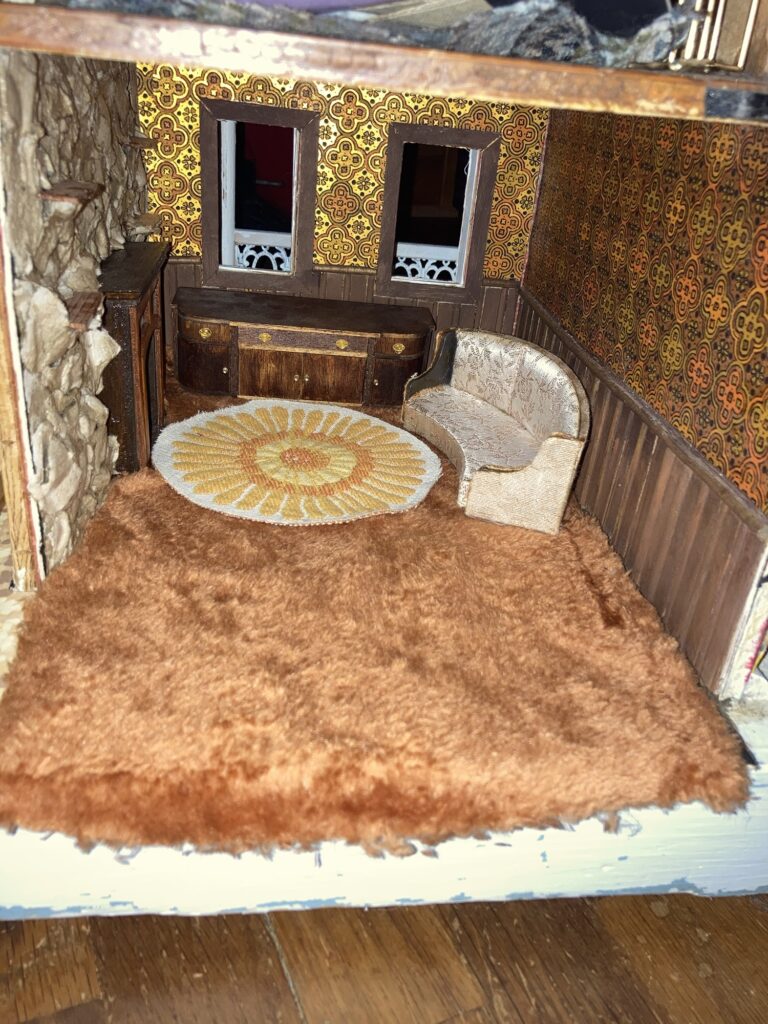
I haven’t been able to decide on a floor color, so I have tried several different colors of “carpet.”
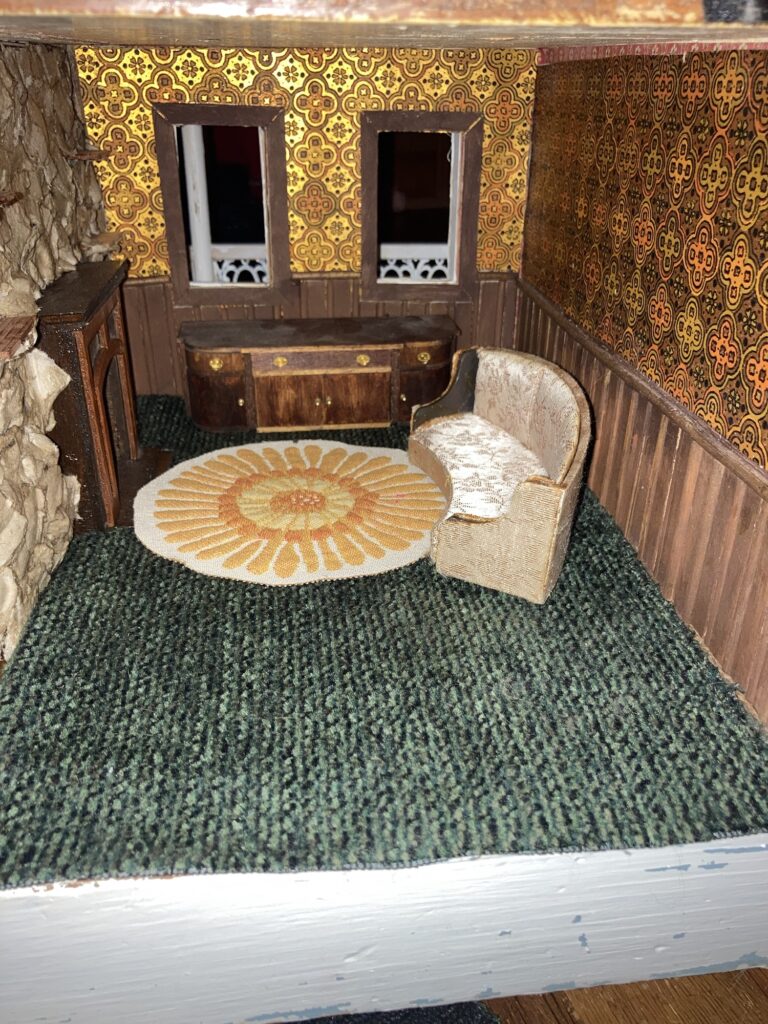
Brown shag. I was hoping this would be a similar shade to the wood of the floor, as I like the rich warm hues, but it seems a little washed out to me now. (This is part of an autumn themed fuzzy pillow from a thrift store)Orange fuzzy (it’s the inside of an old sweatshirt, so it has that worn fuzzy carpet look to it 😆)Green (this is an old carpet sample)
I also tried a puke yellow but it definitely didn’t look good with the wallpaper. I am thinking of sewing an orange trim around my flower rug, and i would love to reupholster my couch to something like the orange flower velvet I used to see all the time, but haven’t found a good material for that, yet. Any thoughts? Which carpet do YOU think would look best? Leave a comment with your thoughts!
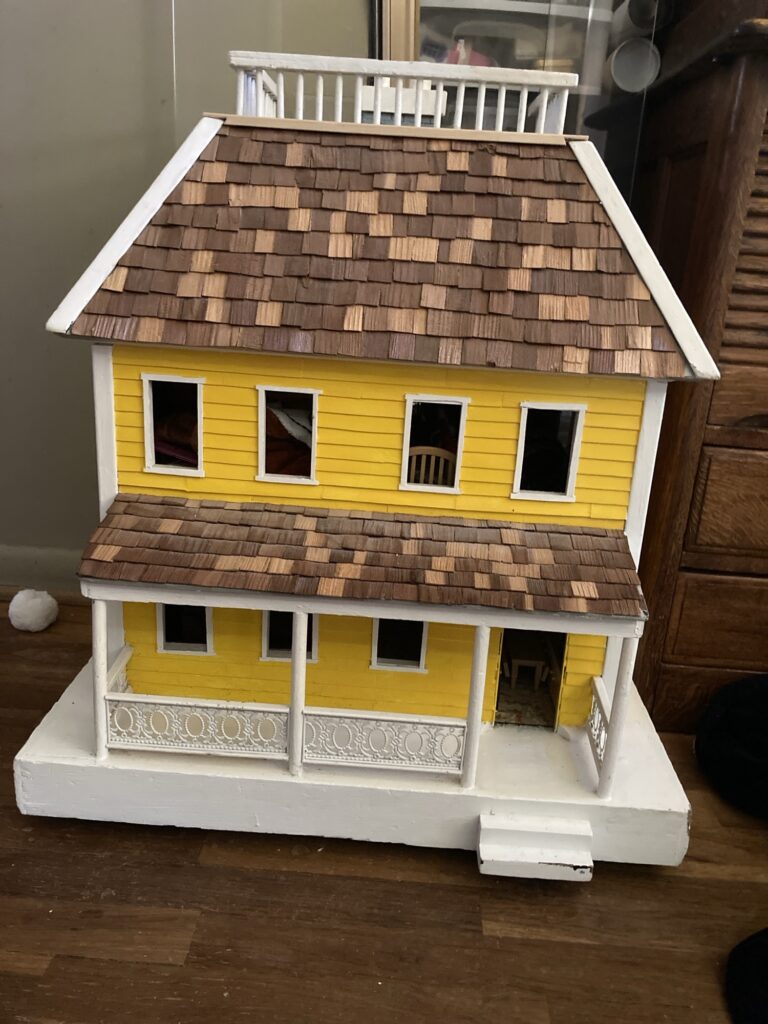
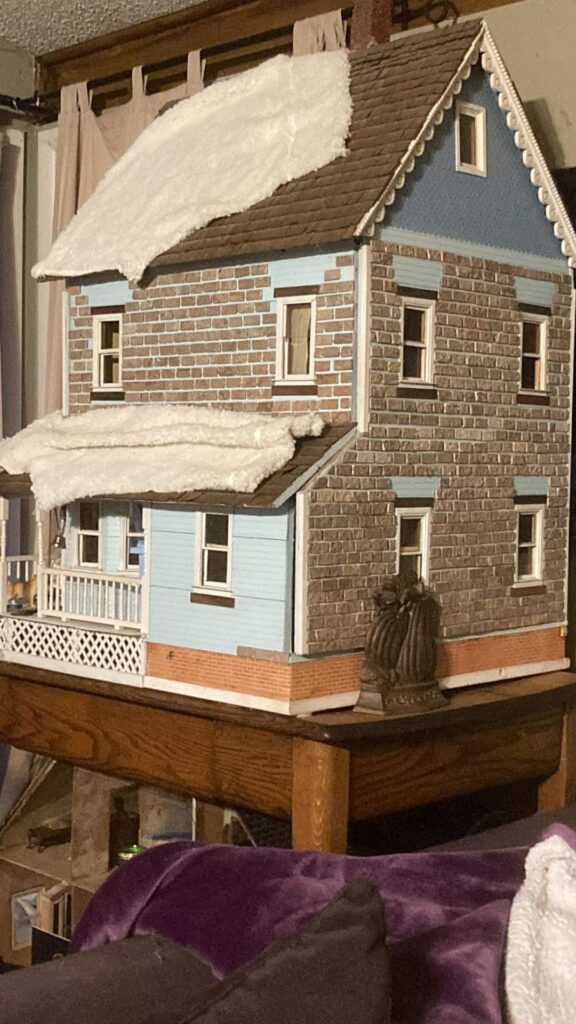
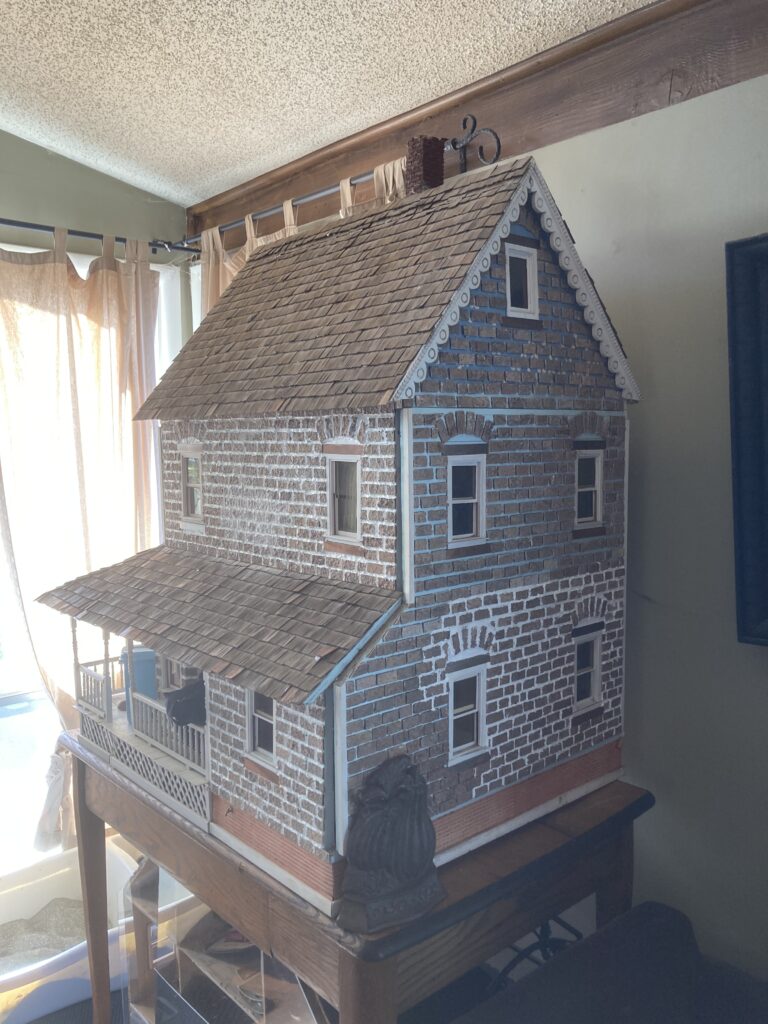
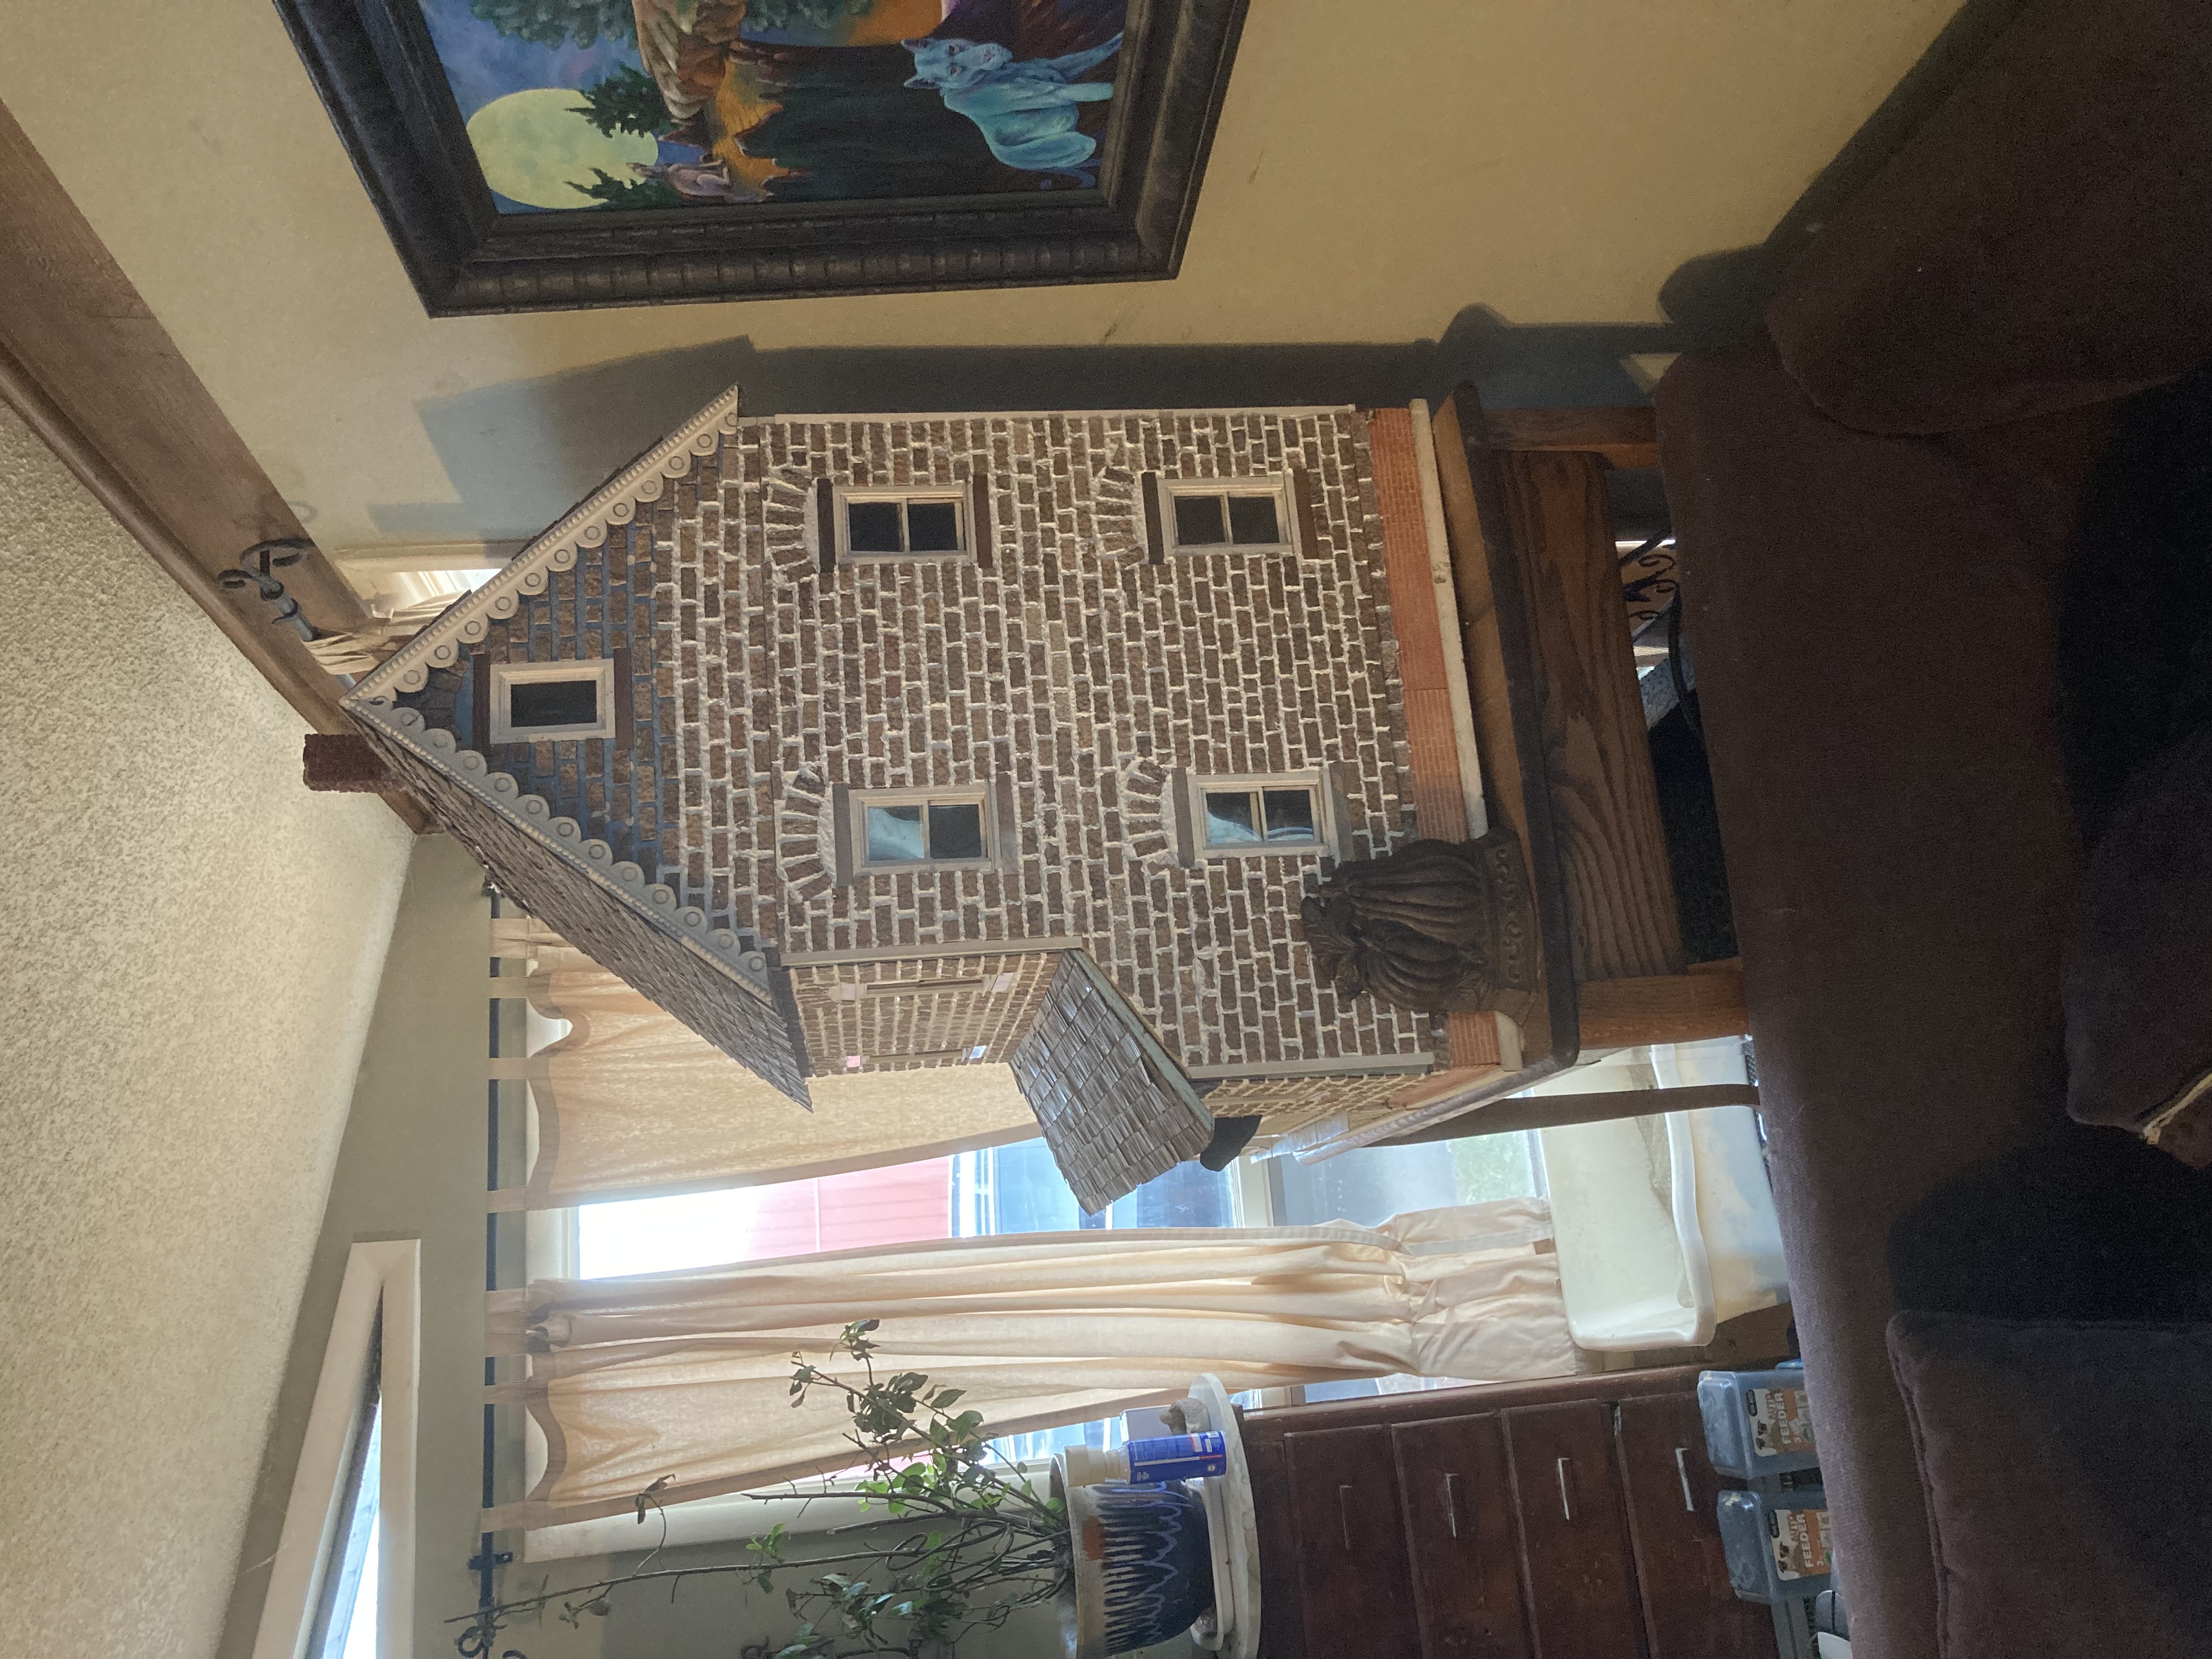
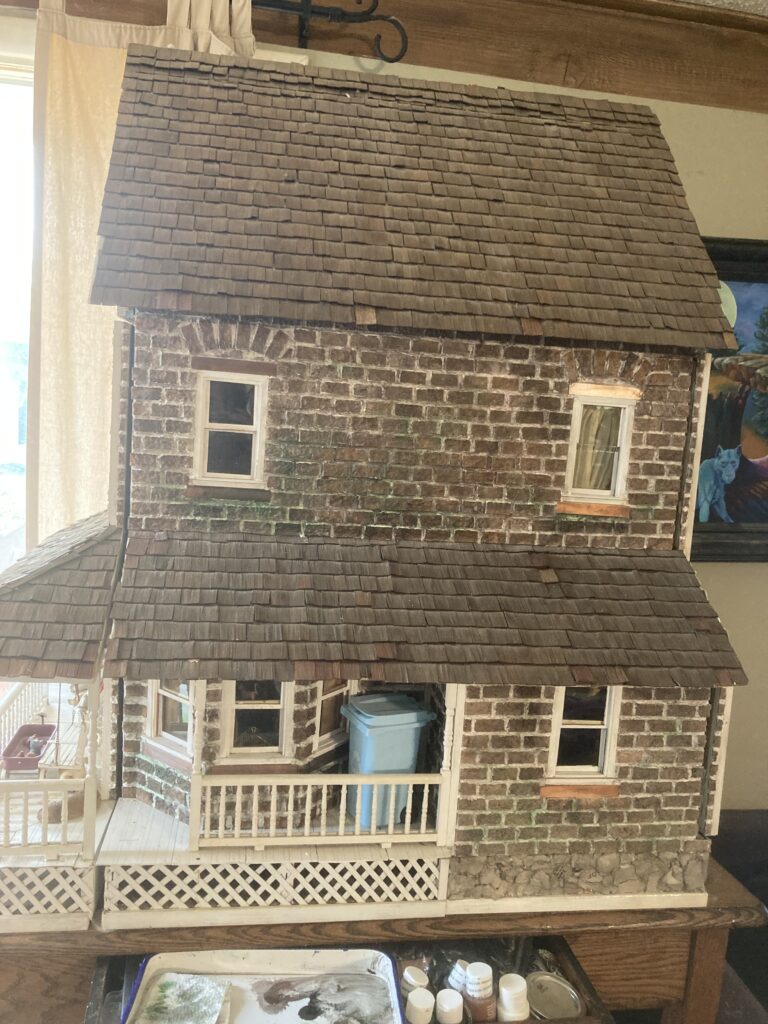
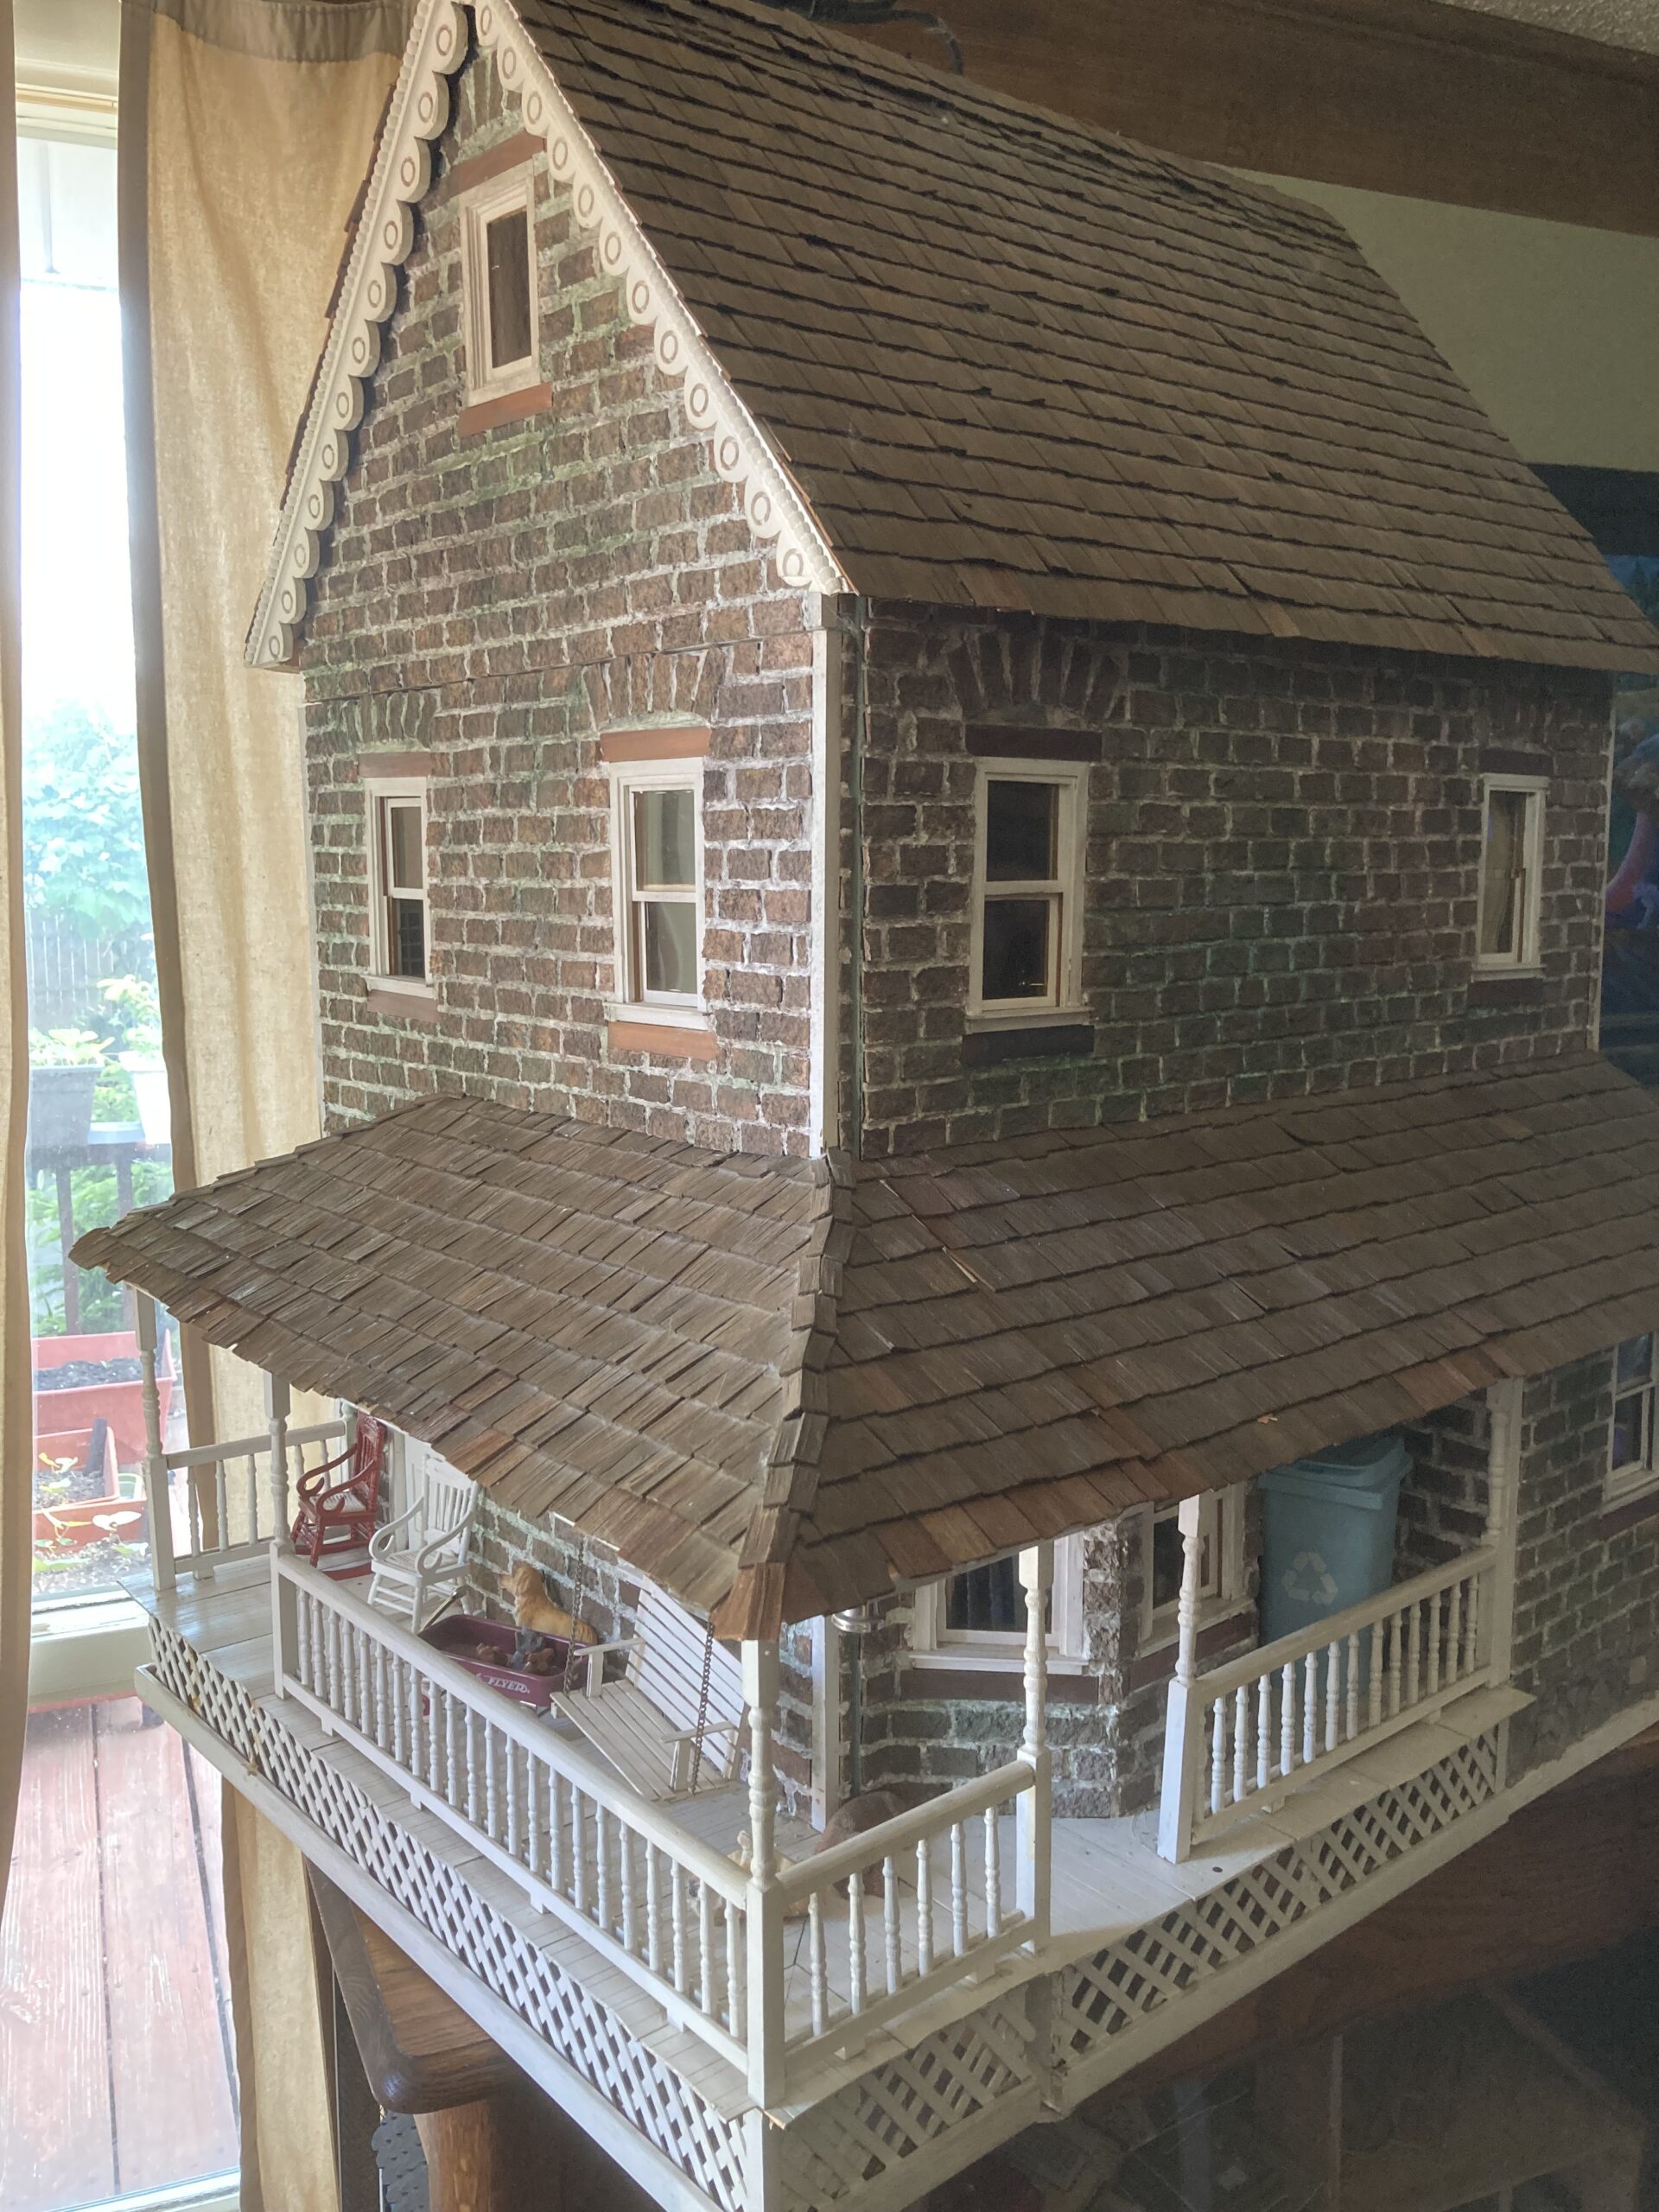
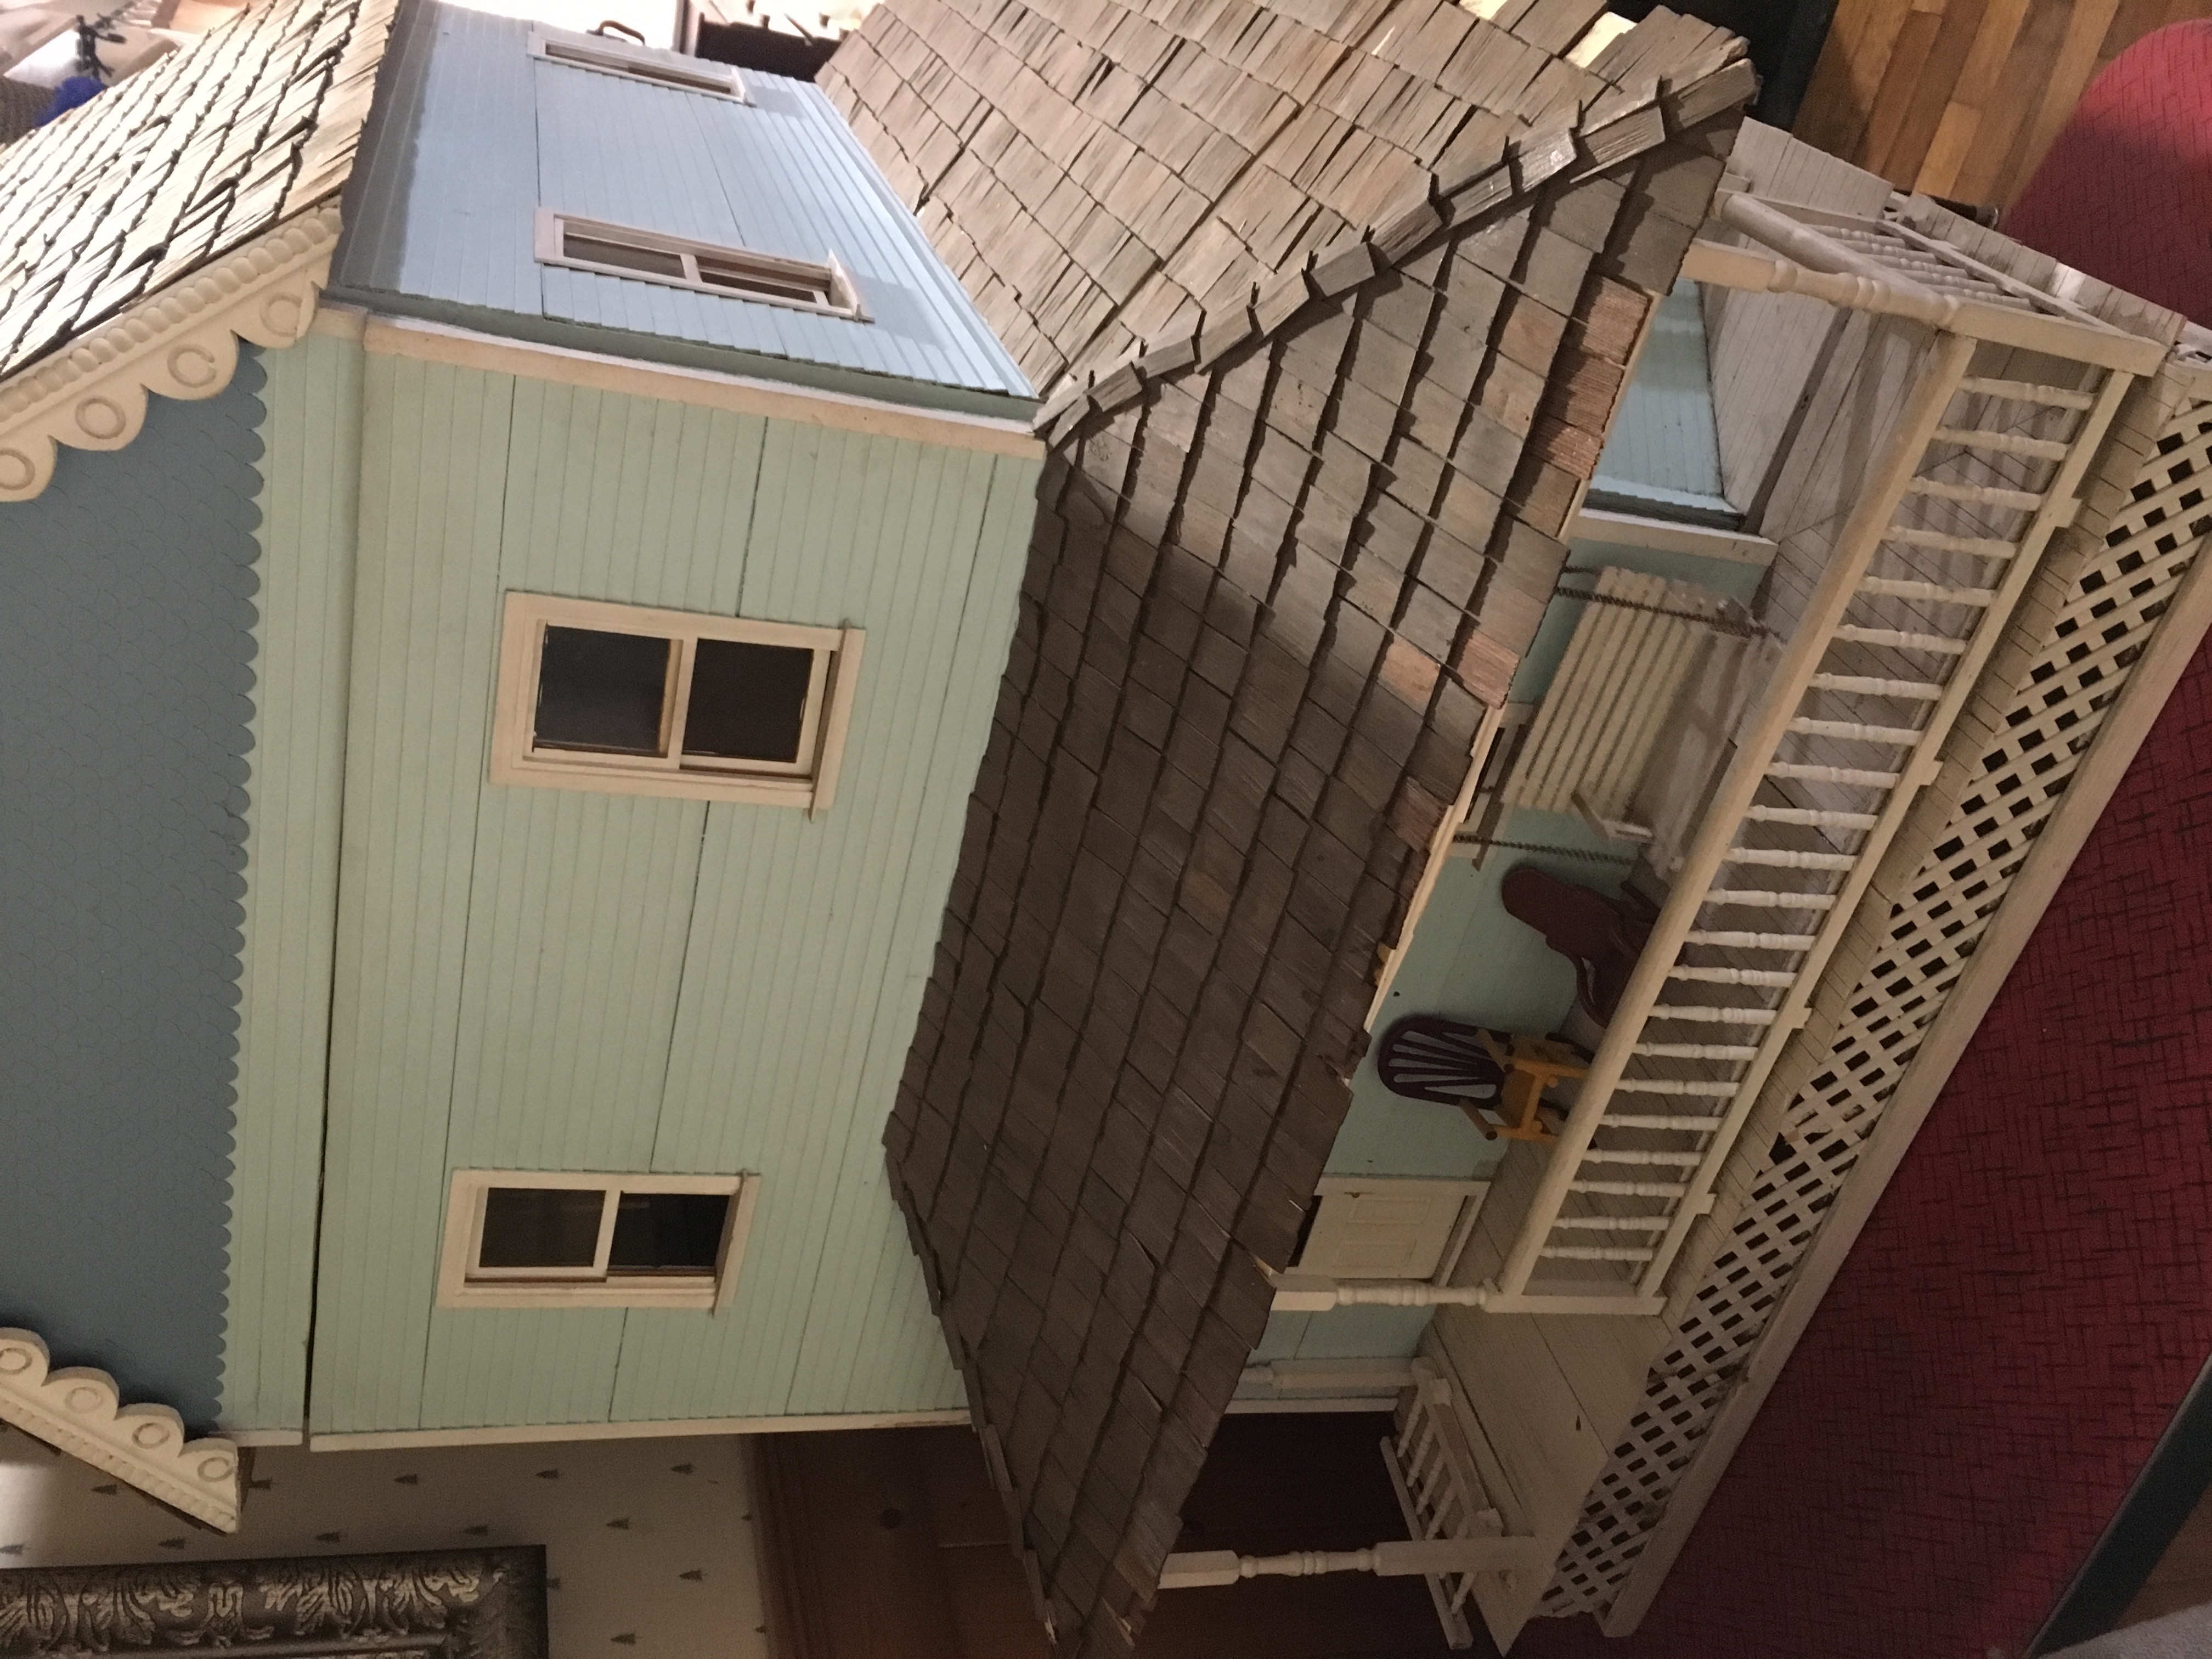
This is my Pepperwood Farm Dollhouse from previous posts, with an updated exterior!
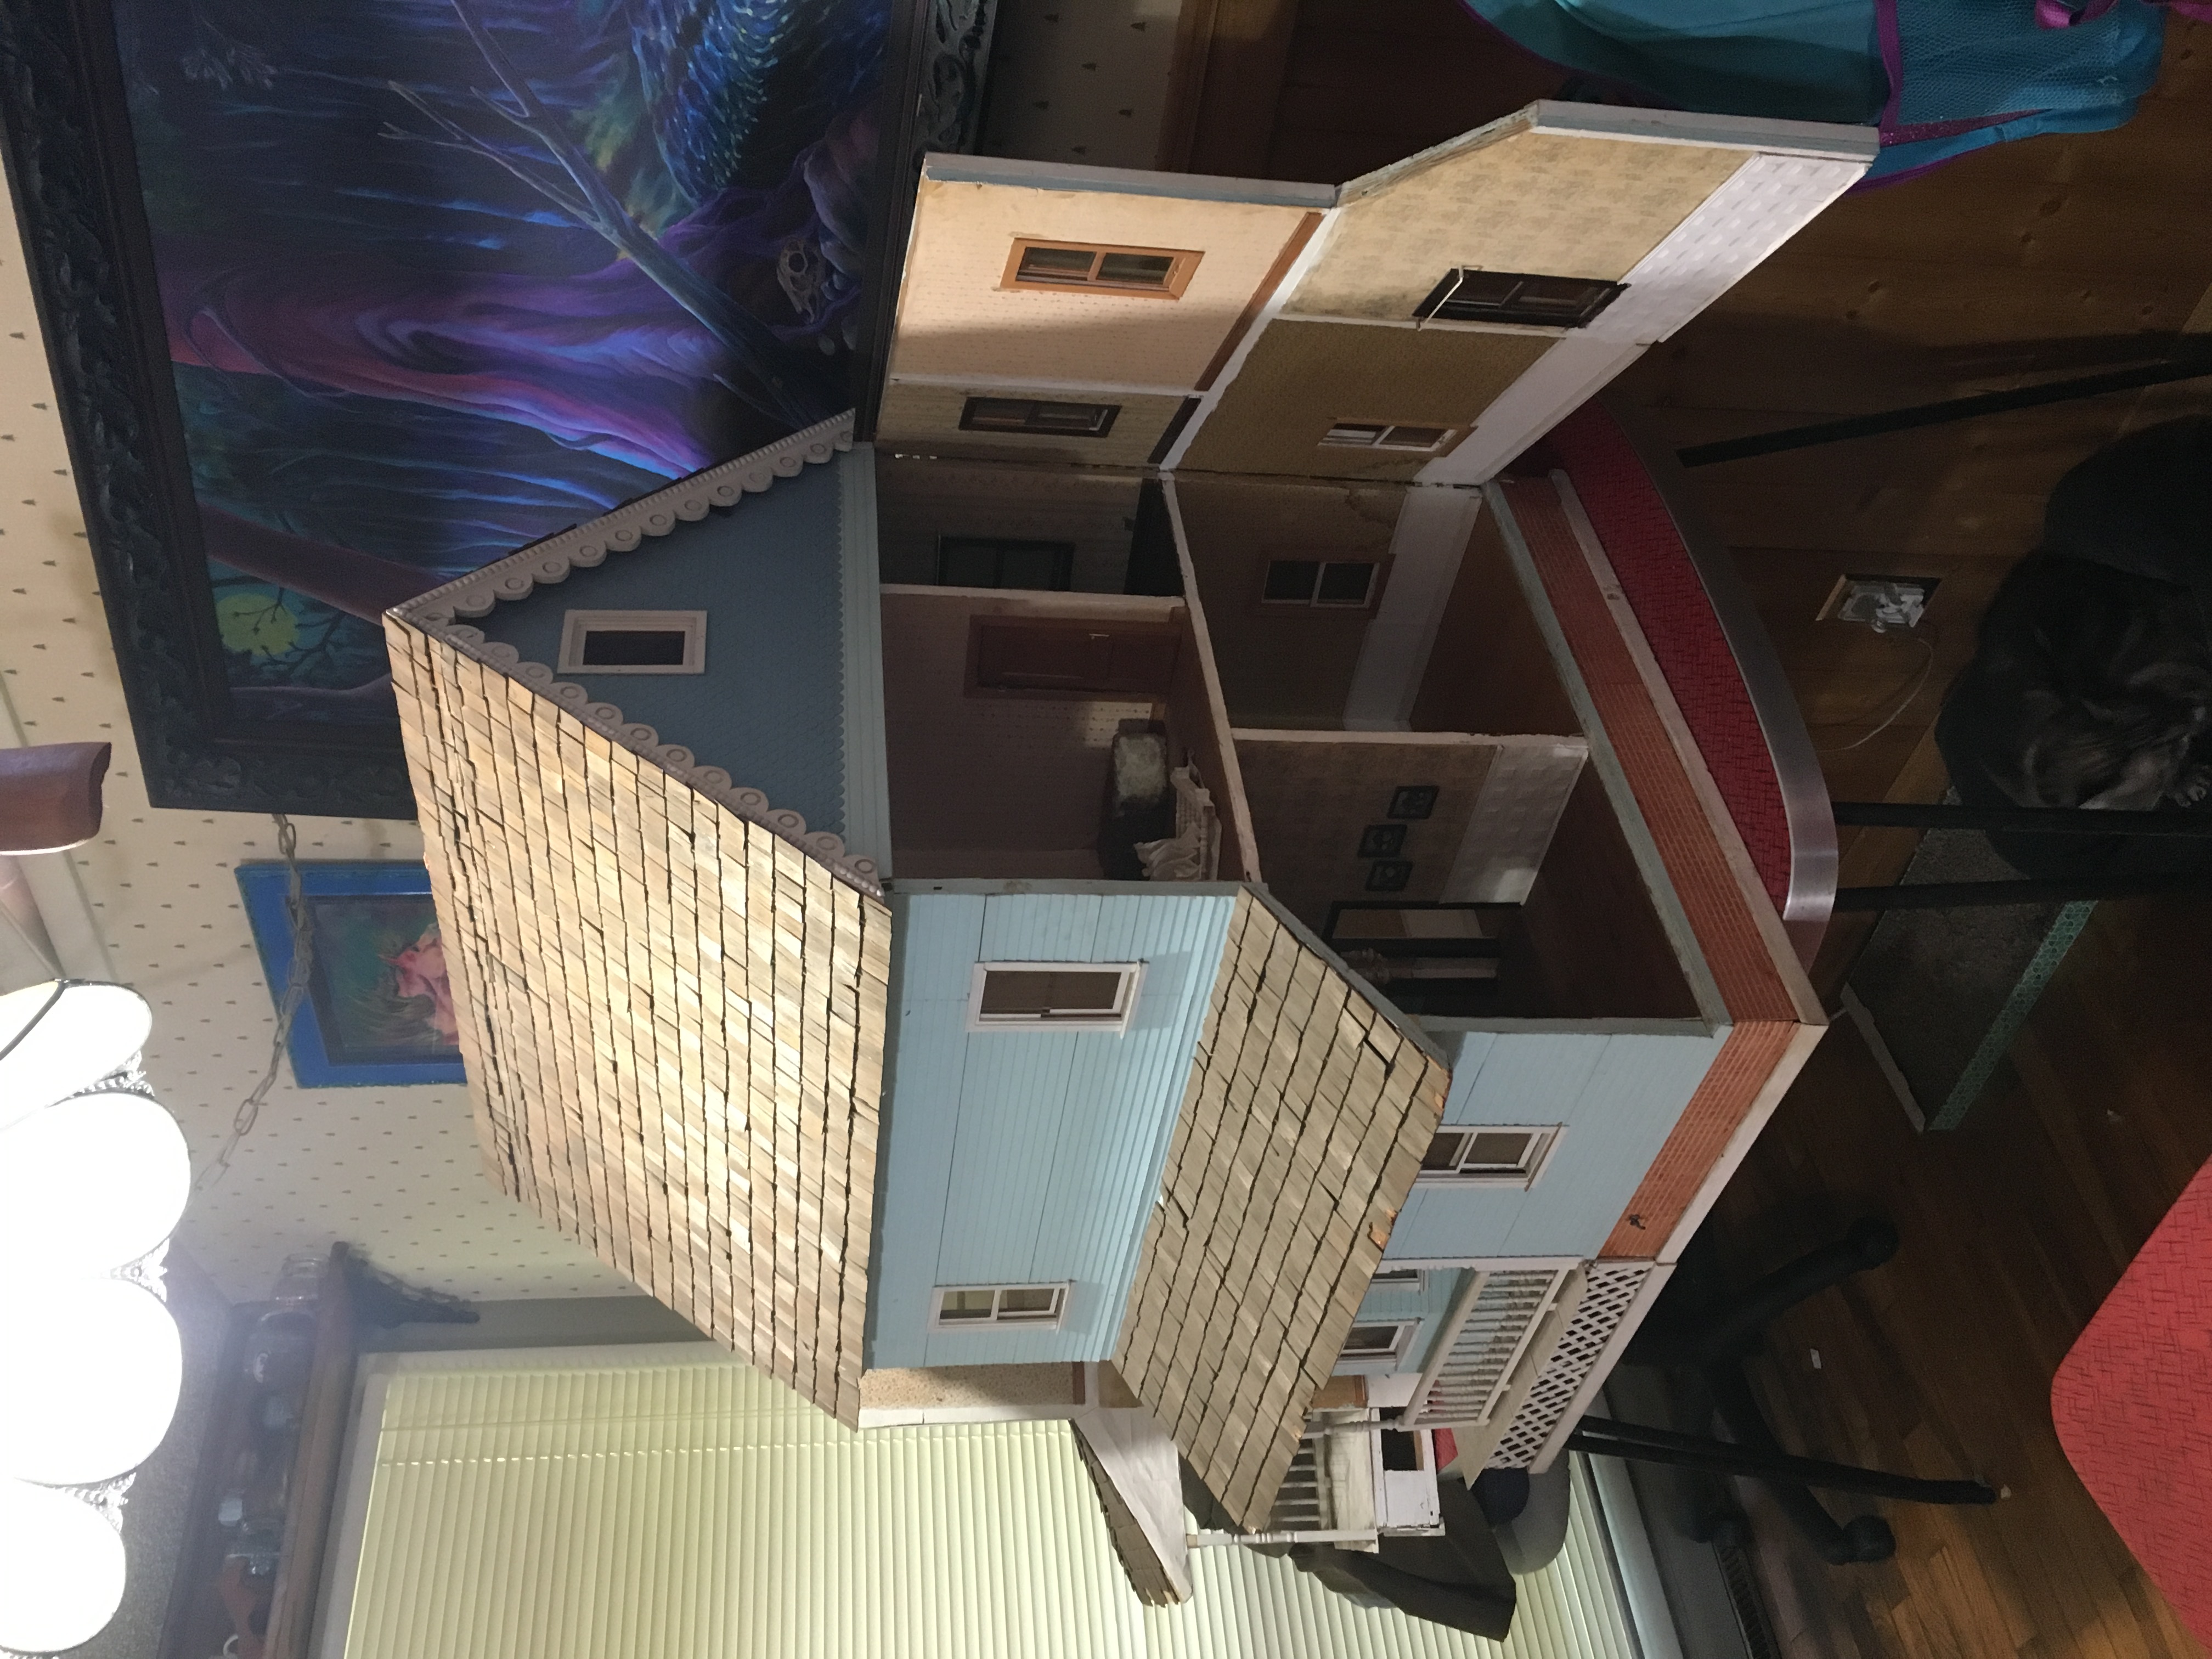
I have debated for a long time on the exterior of my Pepperwood Farm dollhouse–it had light blue siding on it from a previous owner, and the siding wasn’t done very well, or maybe it shrank over time, and had a lot of gaps. I have wanted a brick dollhouse for a while, and when my husband said ‘no more dollhouses,’ (which is reasonable, I guess, as I have 13 in our small house), I decided to update my Pepperwood with some bricks!
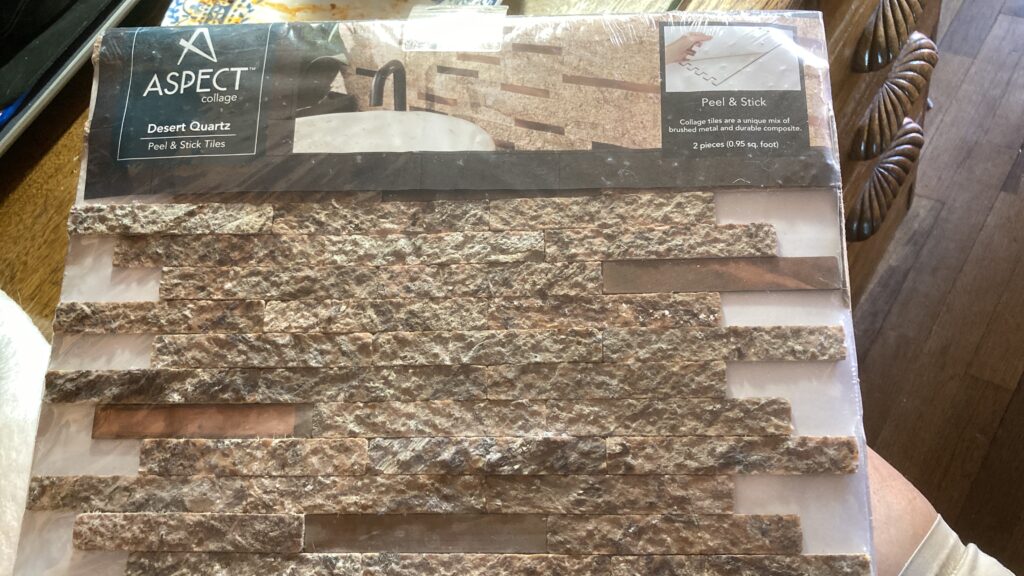
It all came about as I wandered the aisles of our local Menards hardware store and stumbled on a pile of stone-like backsplash on clearance.
The backsplash. It is very rough and stone-like.
The backsplash came as strips of stone-like material, all held together with a big sticker on the back. I needed to separate these strips and then cut them into bricks to attach to my dollhouse.
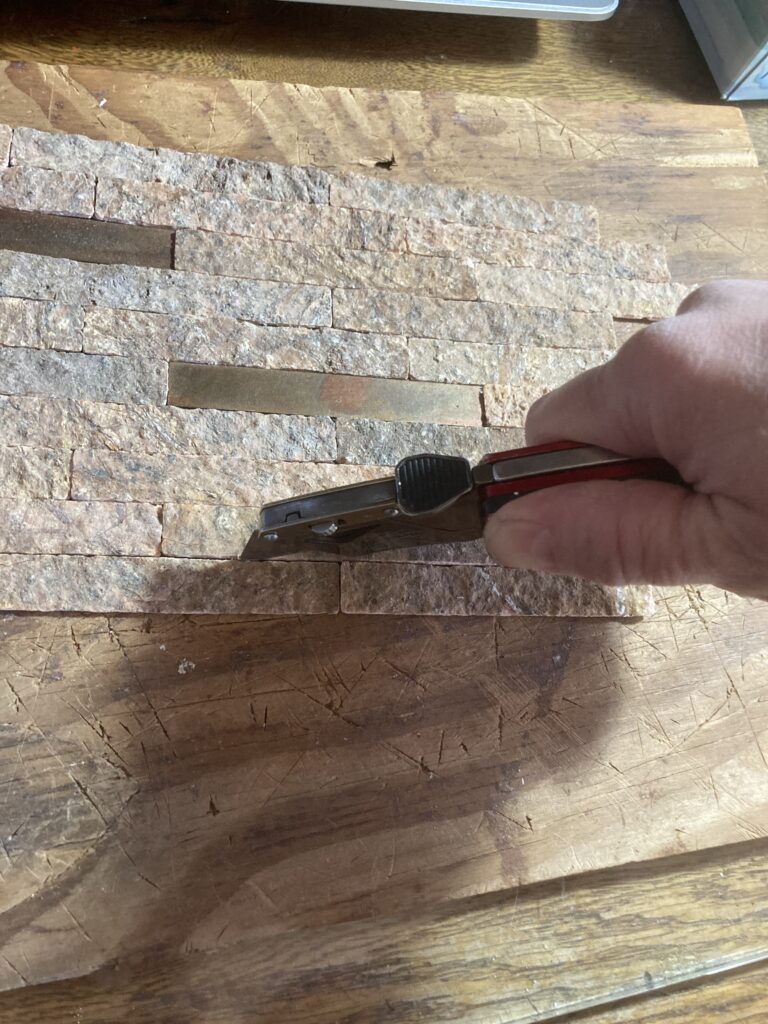
Step 1: Separating the strips.
I used my handy-dandy box cutter and an old piece of wood as a cutting board, and scored the underlying sticker between the strips of bricks.
Individual strips.
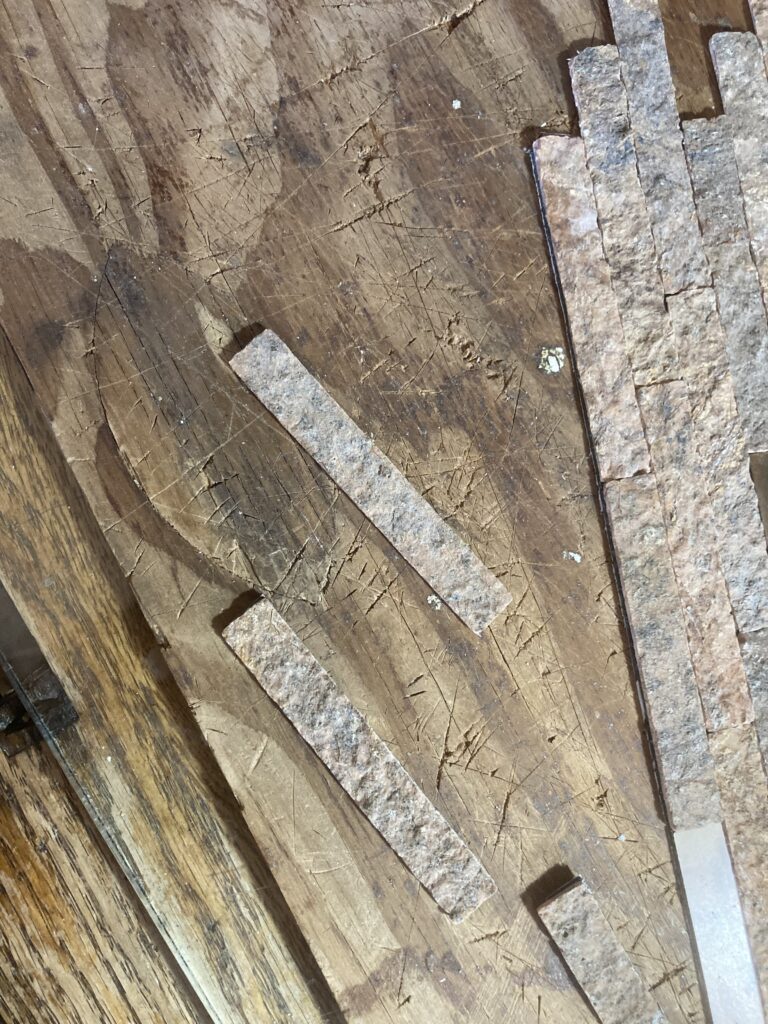
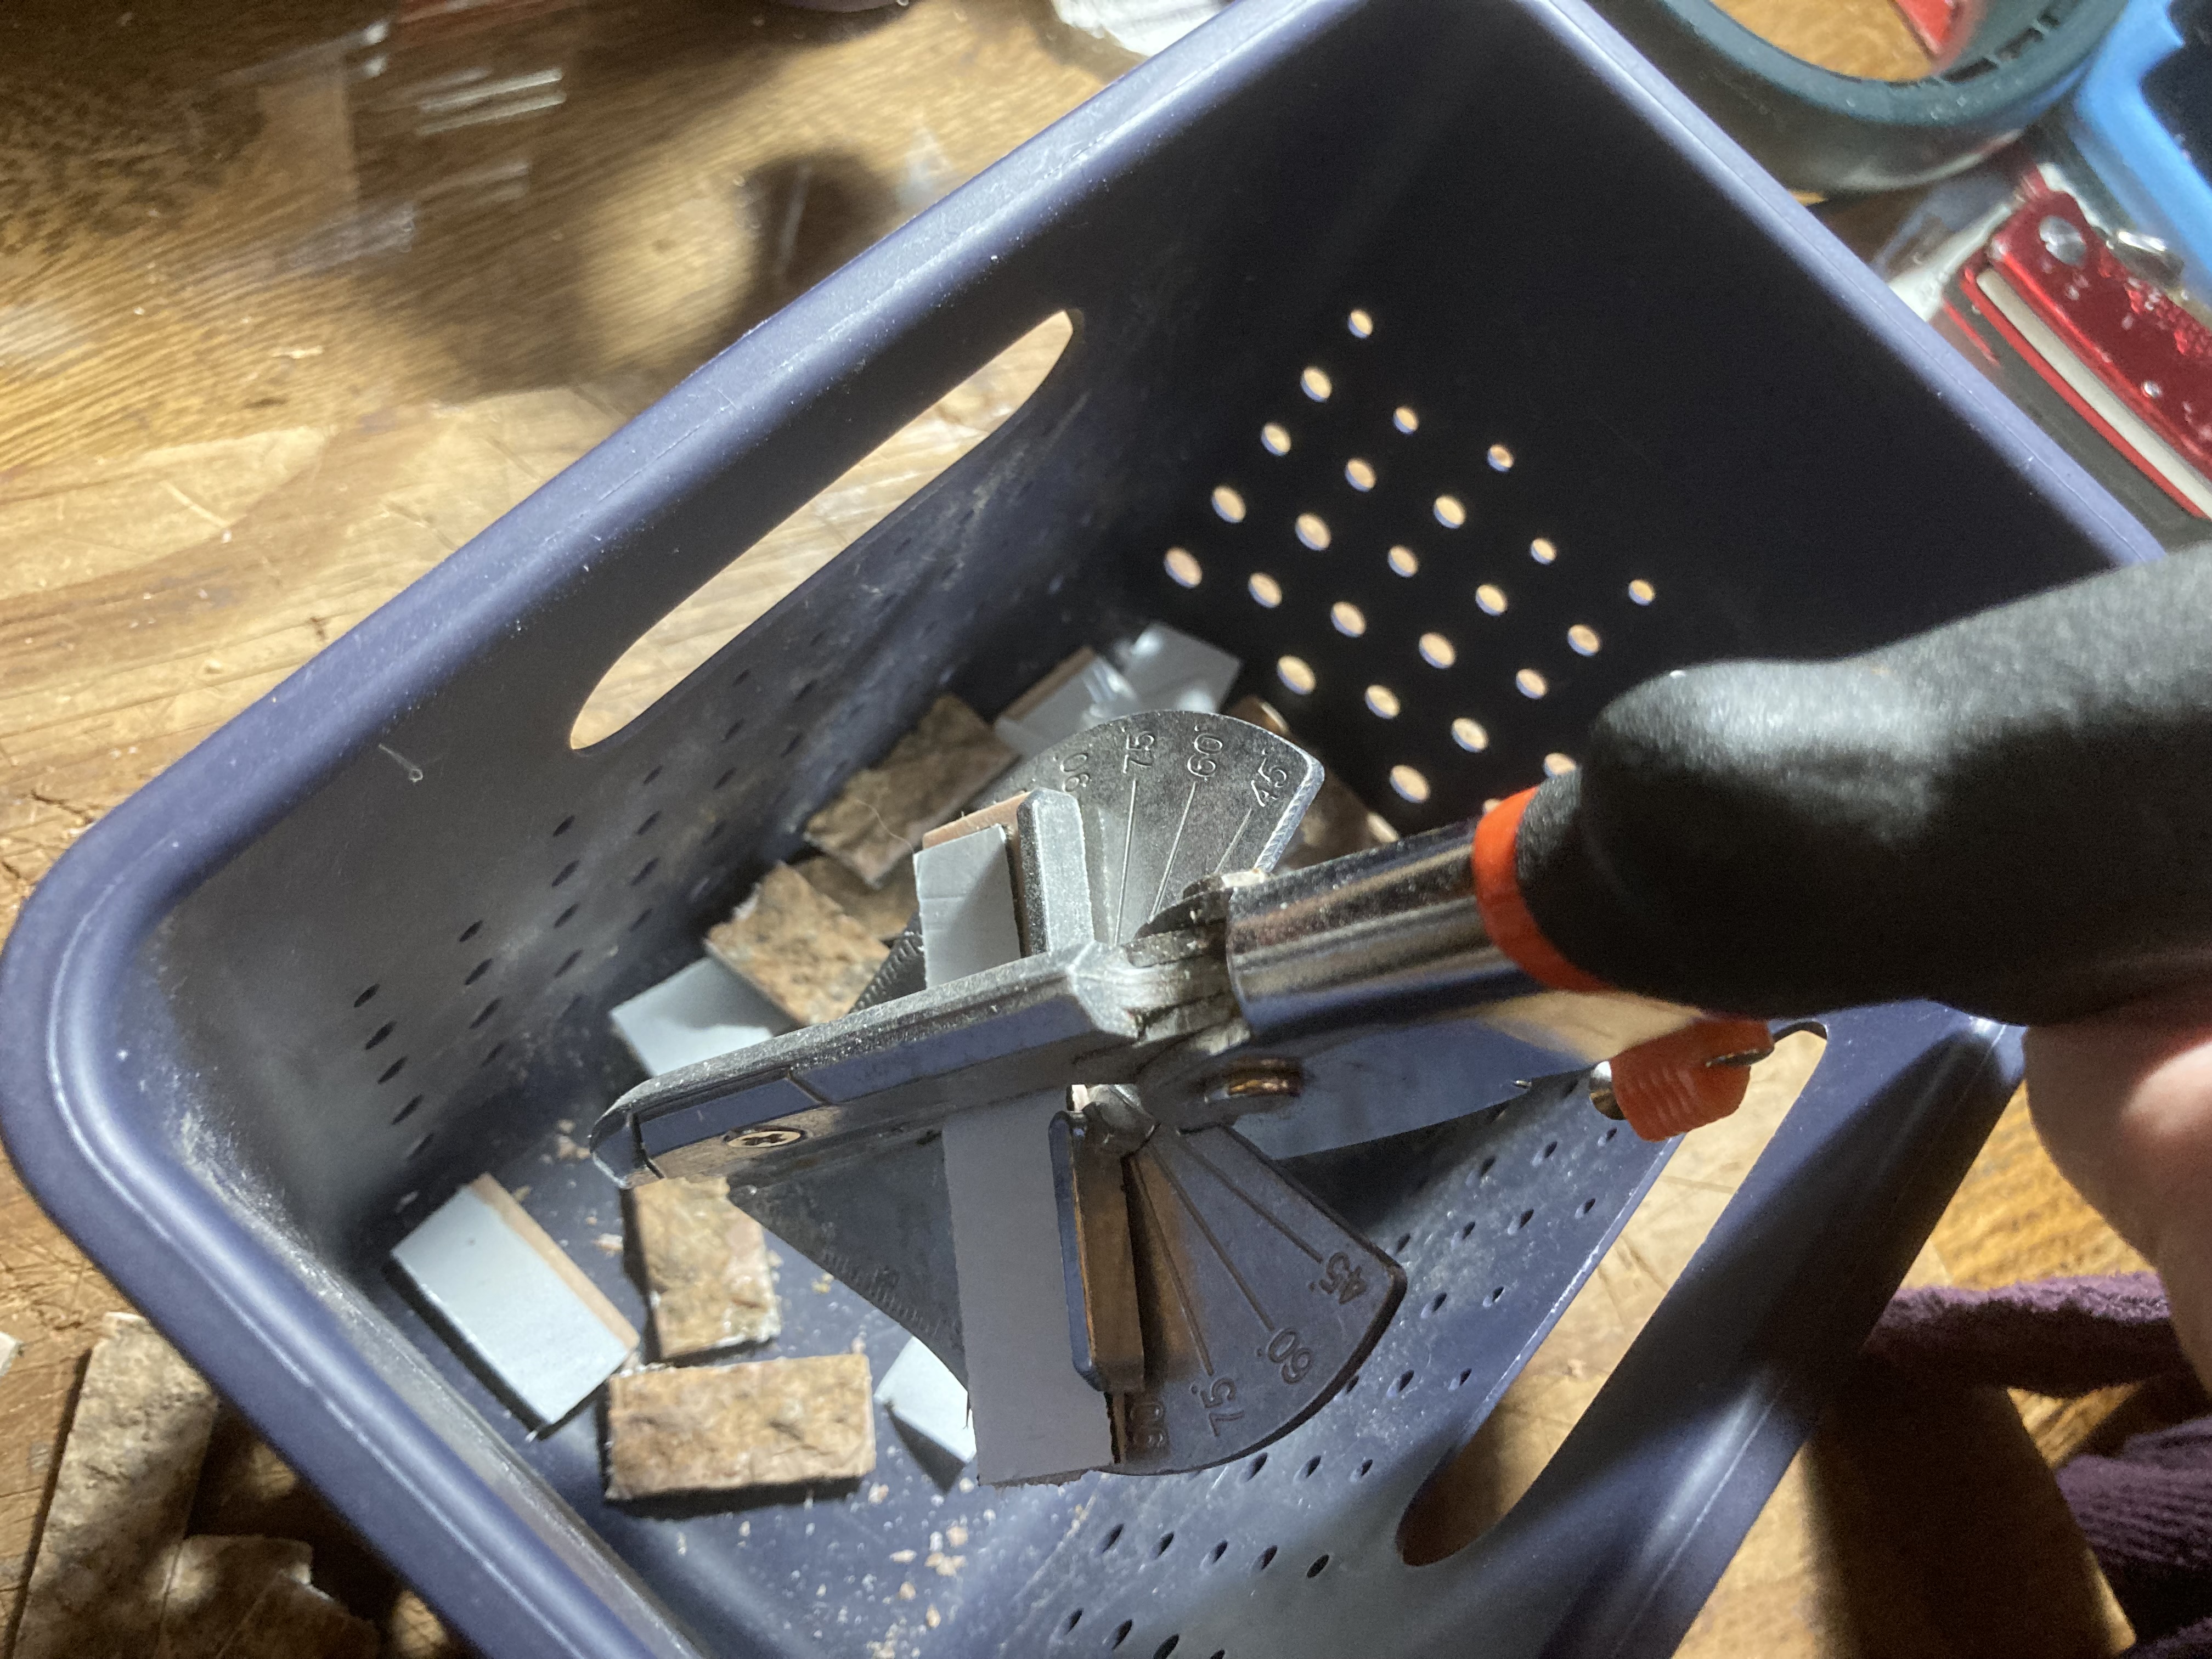
Step 2: Cutting the strips into bricks.
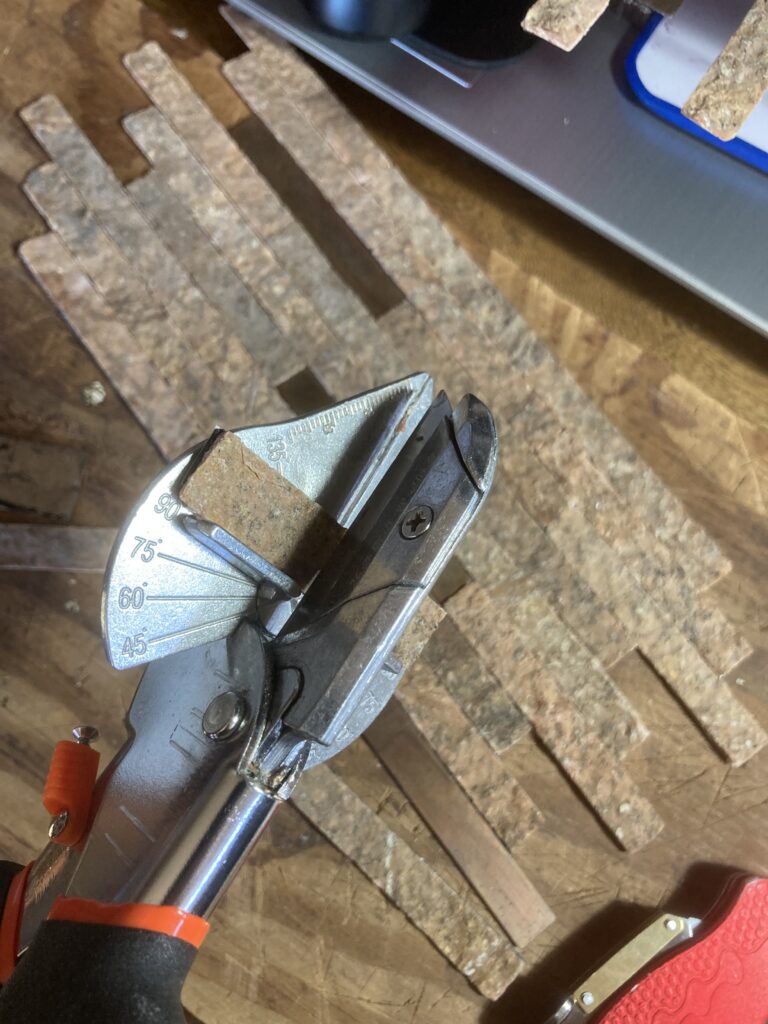
I used my miter shears to carefully cut the stone pieces into bricks. This was very difficult work, but worth it in the end. I eventually discovered that it was to my benefit to point the shears inside a box to catch the bricks, to prevent them flying all over the place after being cut.
Using a box to catch the bricks.
Step 4: Placing the bricks.
Placing the first bricks. These have an adhesive back, so I just peeled the paper backing and stuck them in place! The grout mortar I will add afterword will help seal them to the house better.
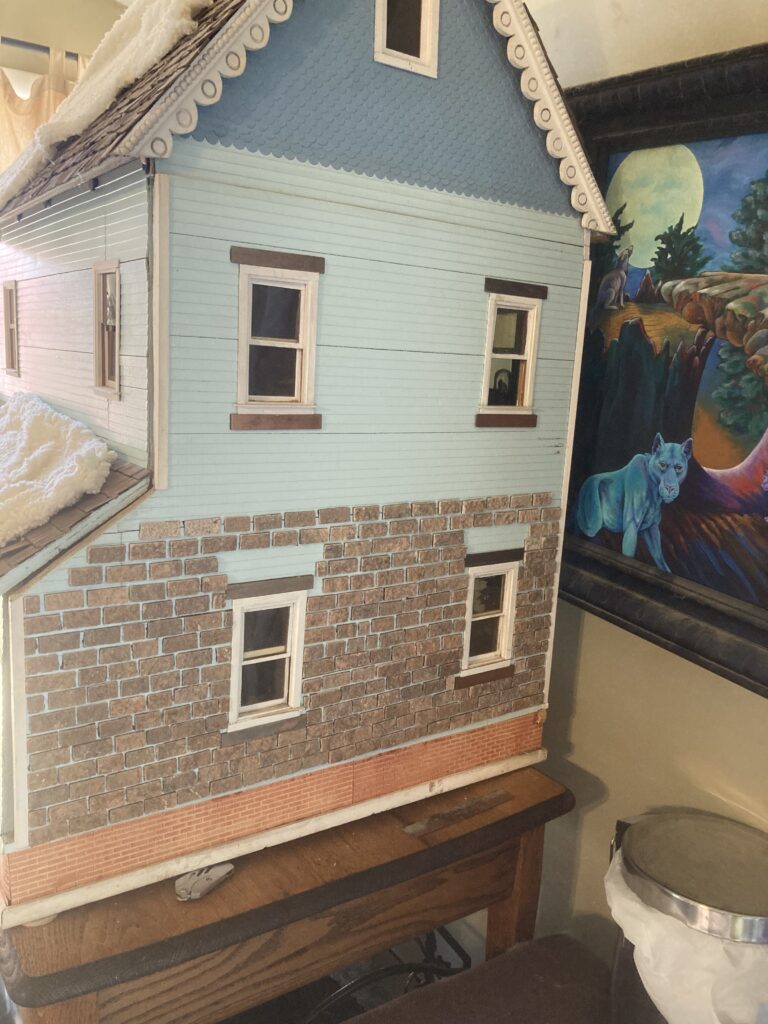
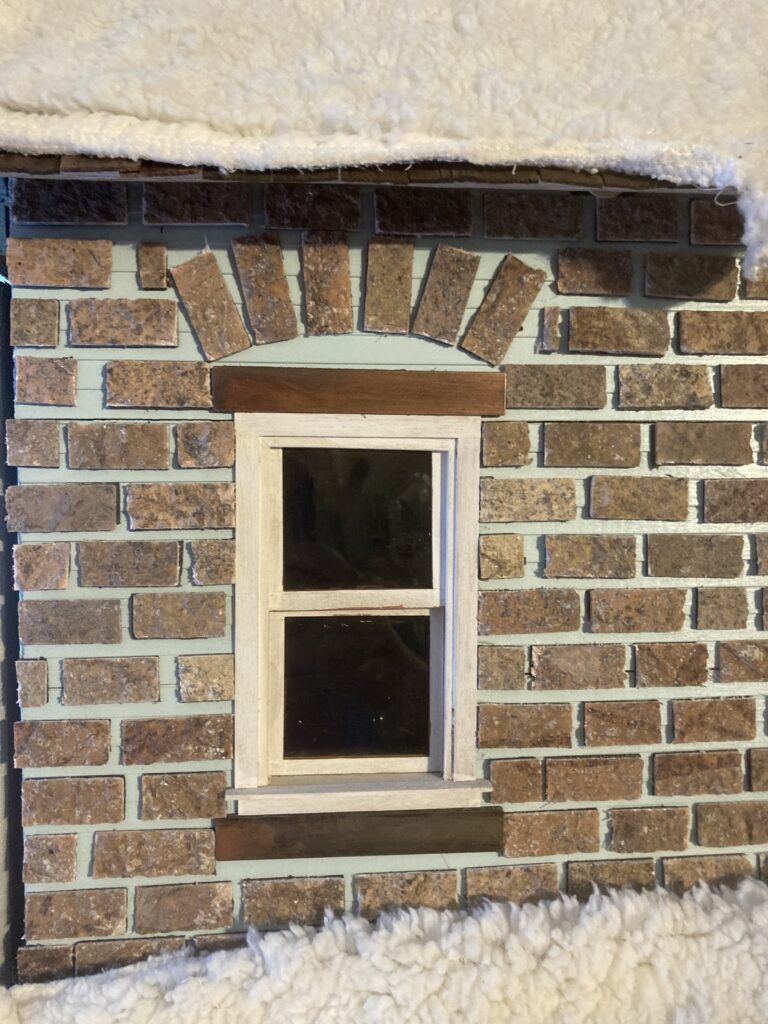
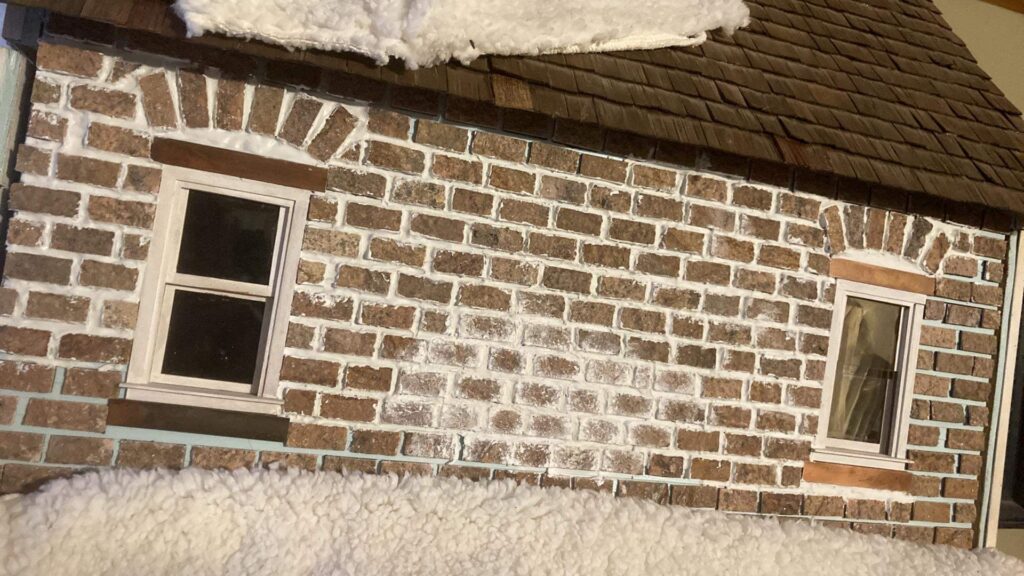
More bricks! I used the copper strips that were in the backsplash to make ‘supports’ for the windows. I left space above the windows to make fancy brickwork later.
And more bricks.
Most of the bricks placed.
Brick arches above windows. I wanted it to be somewhat reminiscent of the brick farm houses common in my area.
Step 5: mortaring between the bricks.
This step was probably the hardest, most time-consuming dollhouse project I have yet accomplished. I can not begin to add up all of the many hours I spent performing this task.
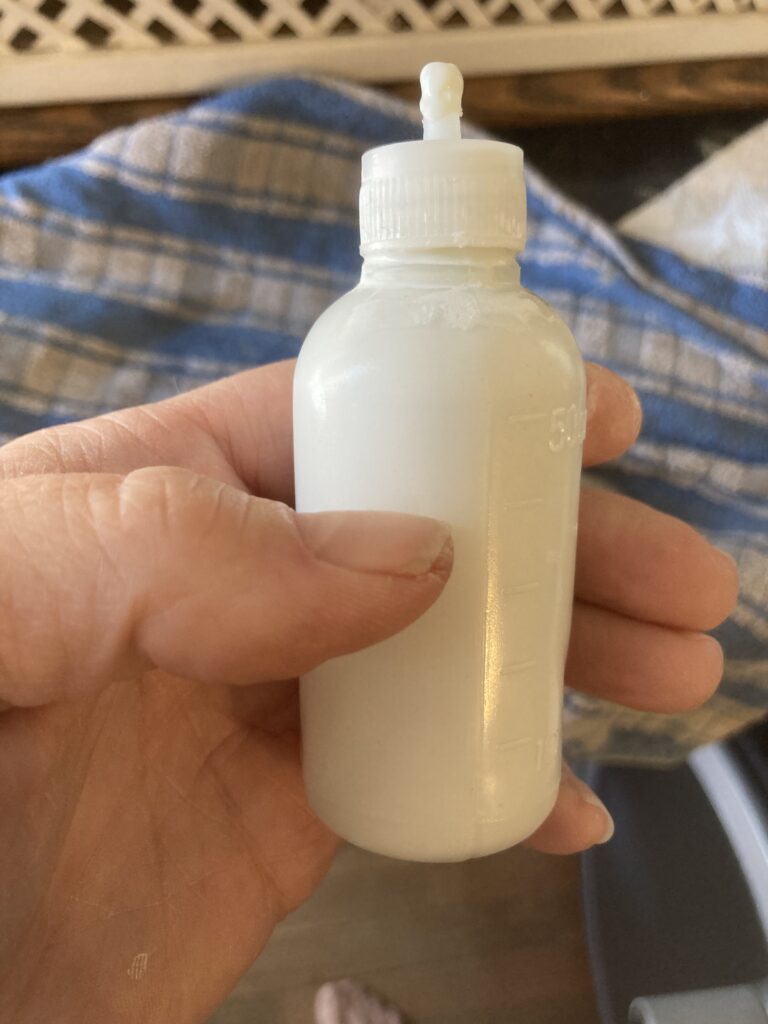
I ended up using un-sanded tile grout, mixing it into a thin paste, filling a tiny squeeze bottle, and squeezing it between the bricks. I had to used a thick piece of wire to push the grout around in between the bricks to fill any gaps.
This is the squeeze bottle I used. It came with many fine tips but this one worked best. The grout ‘mortar’ had to be mixed to just the right consistency to be easily squeezed from the bottle, but not thin enough that it runs when you squeeze it in place.
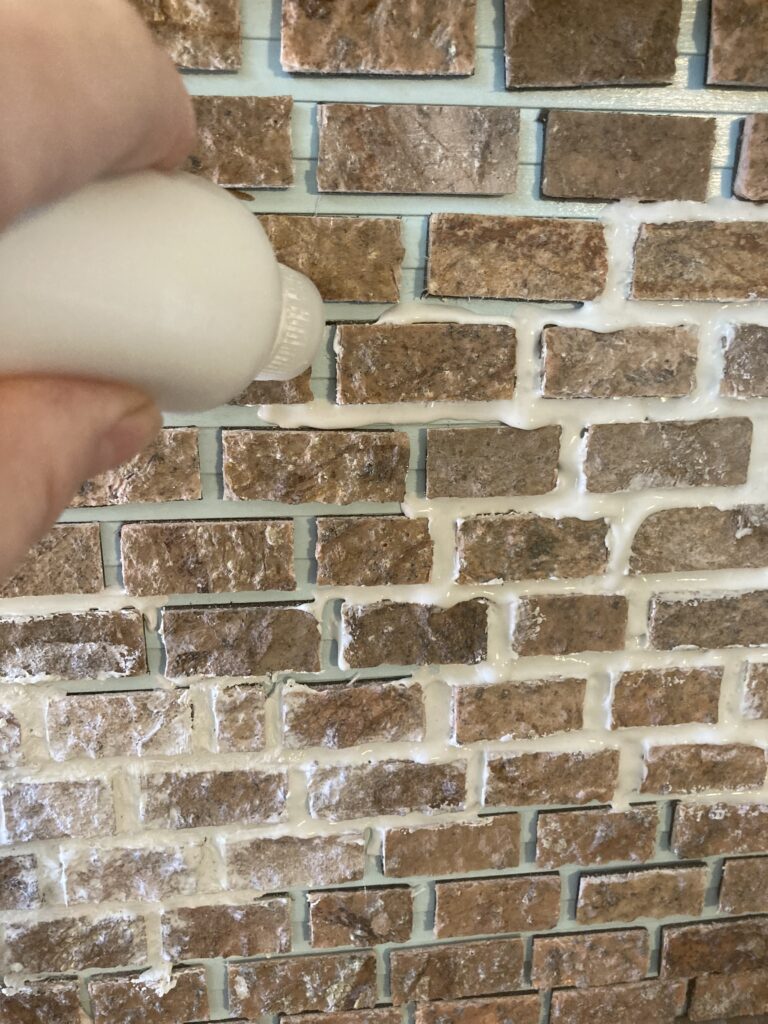
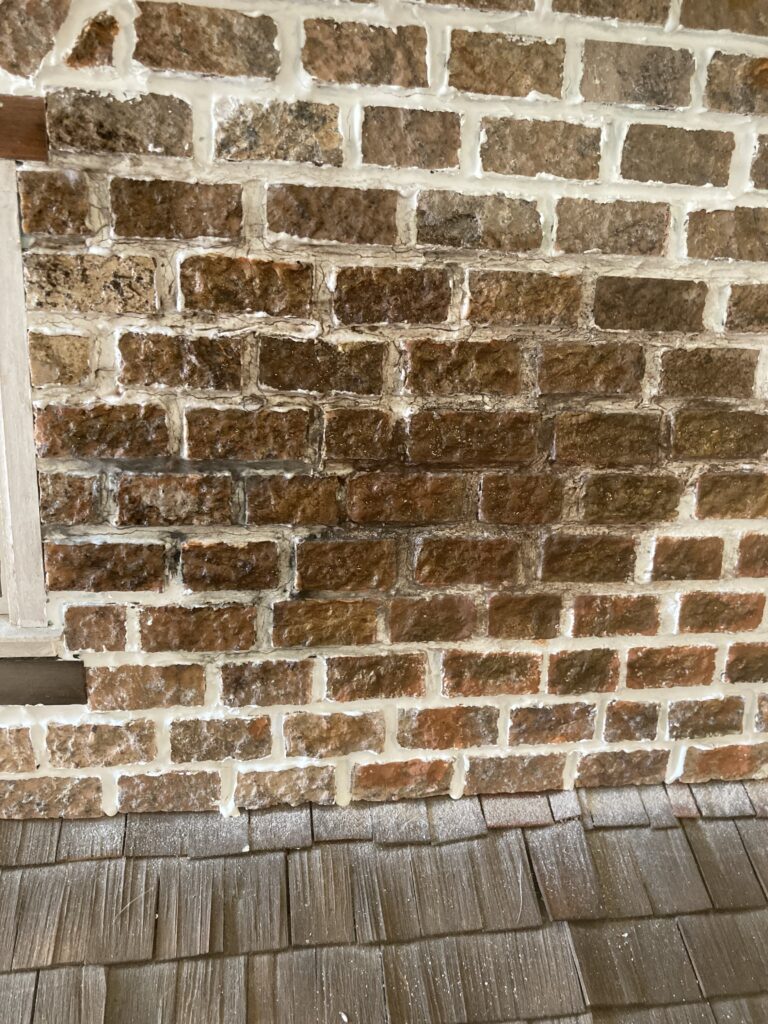
Squeezing mortar between the bricks. The white mess in the lower left was from when I first started, trying to get the hang of it. I eventually touched the bricks up with paint there.
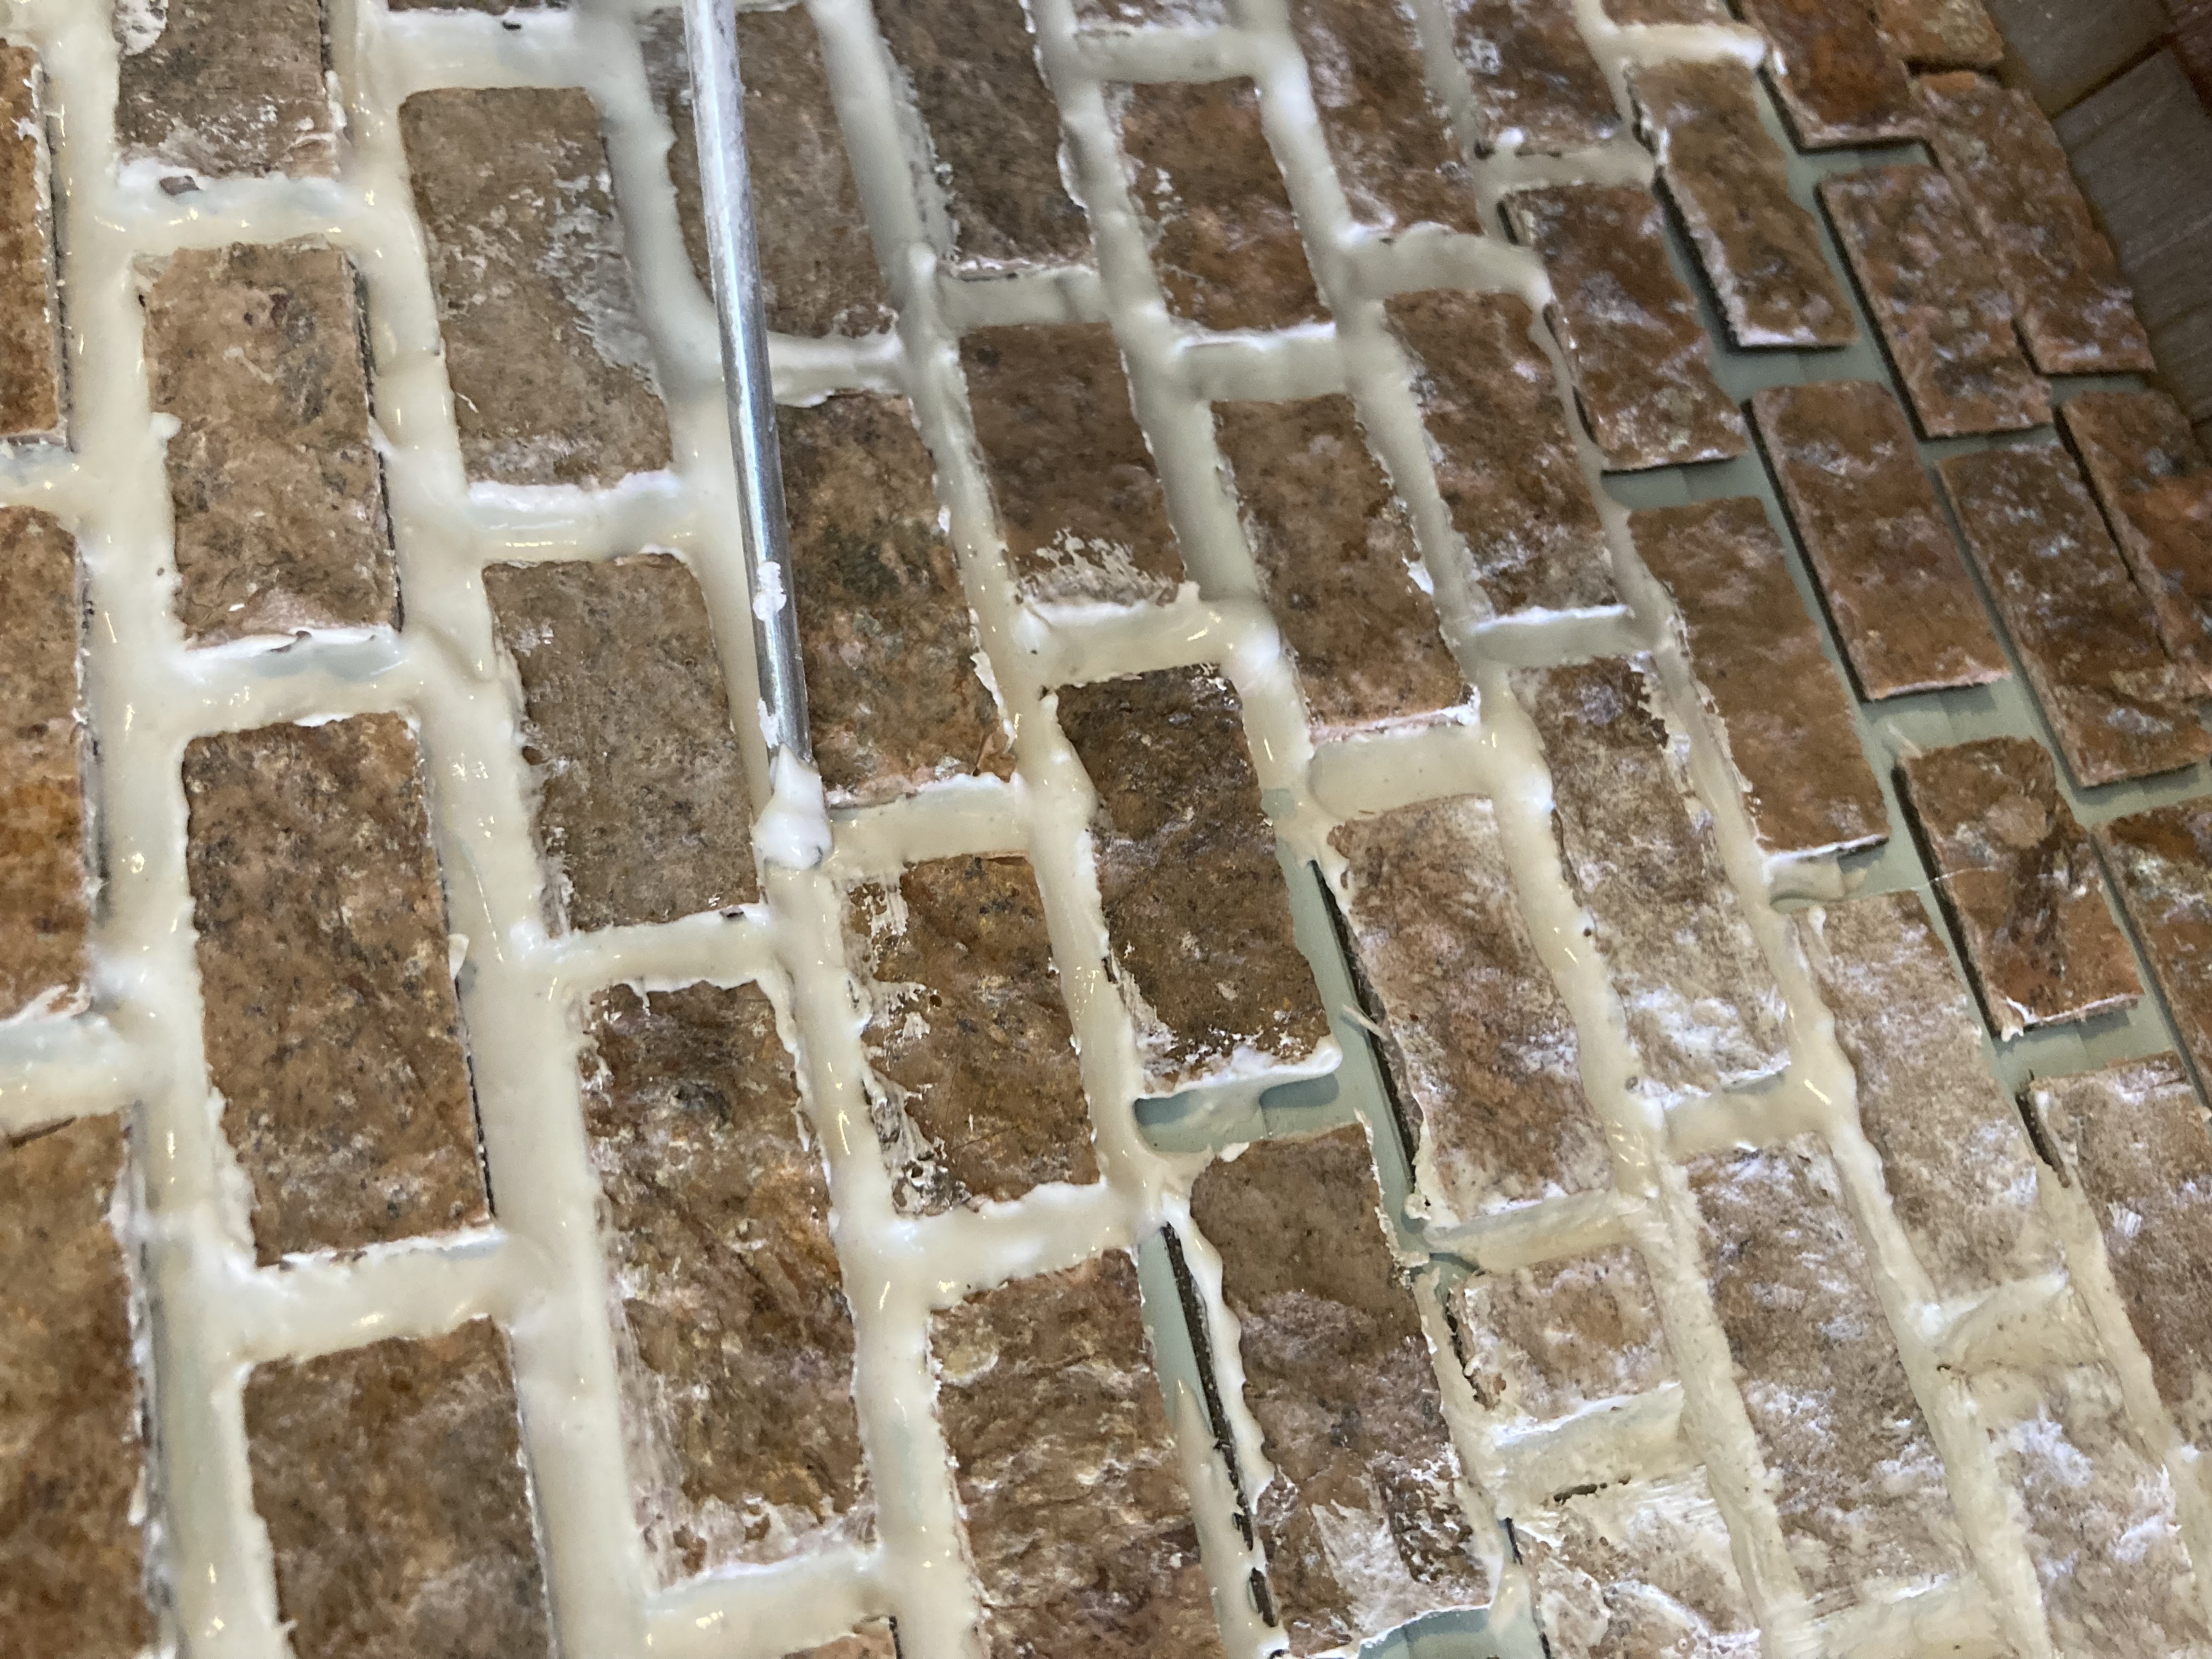
Using a thick wire ‘rod’ to push the mortar around to fill in gaps.
A little more progress.
More progress. Many hours of work. That is a cast iron door stopper holding the back of the dollhouse closed, so curious cats don’t sneak in and redecorate.
Almost done
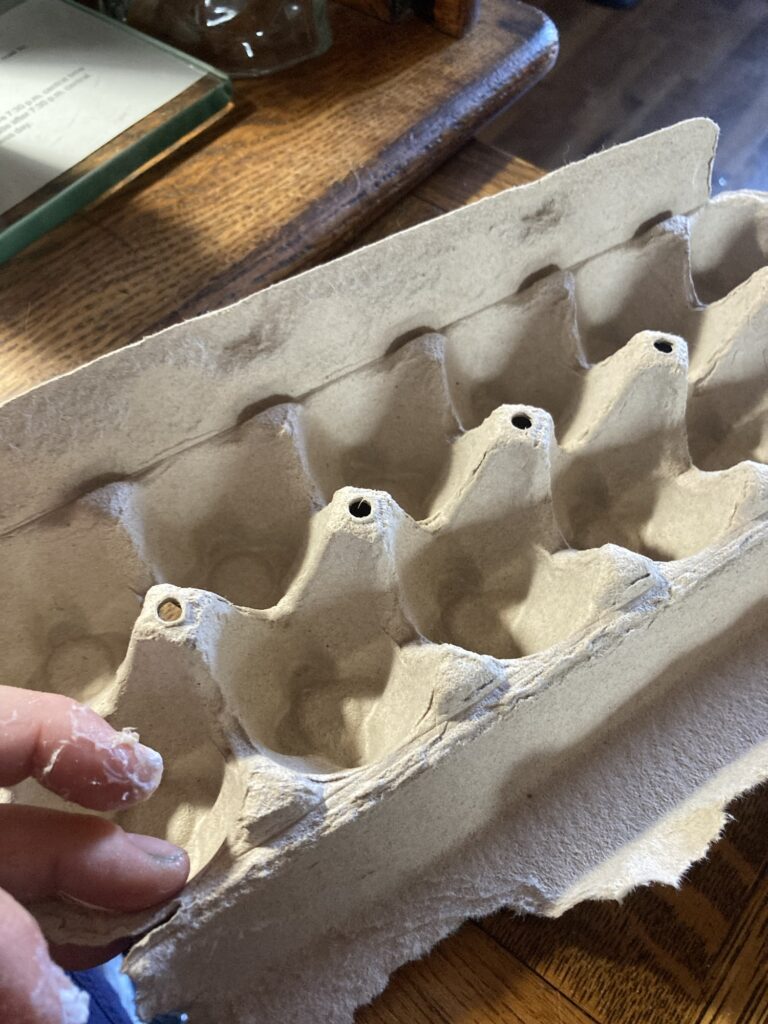
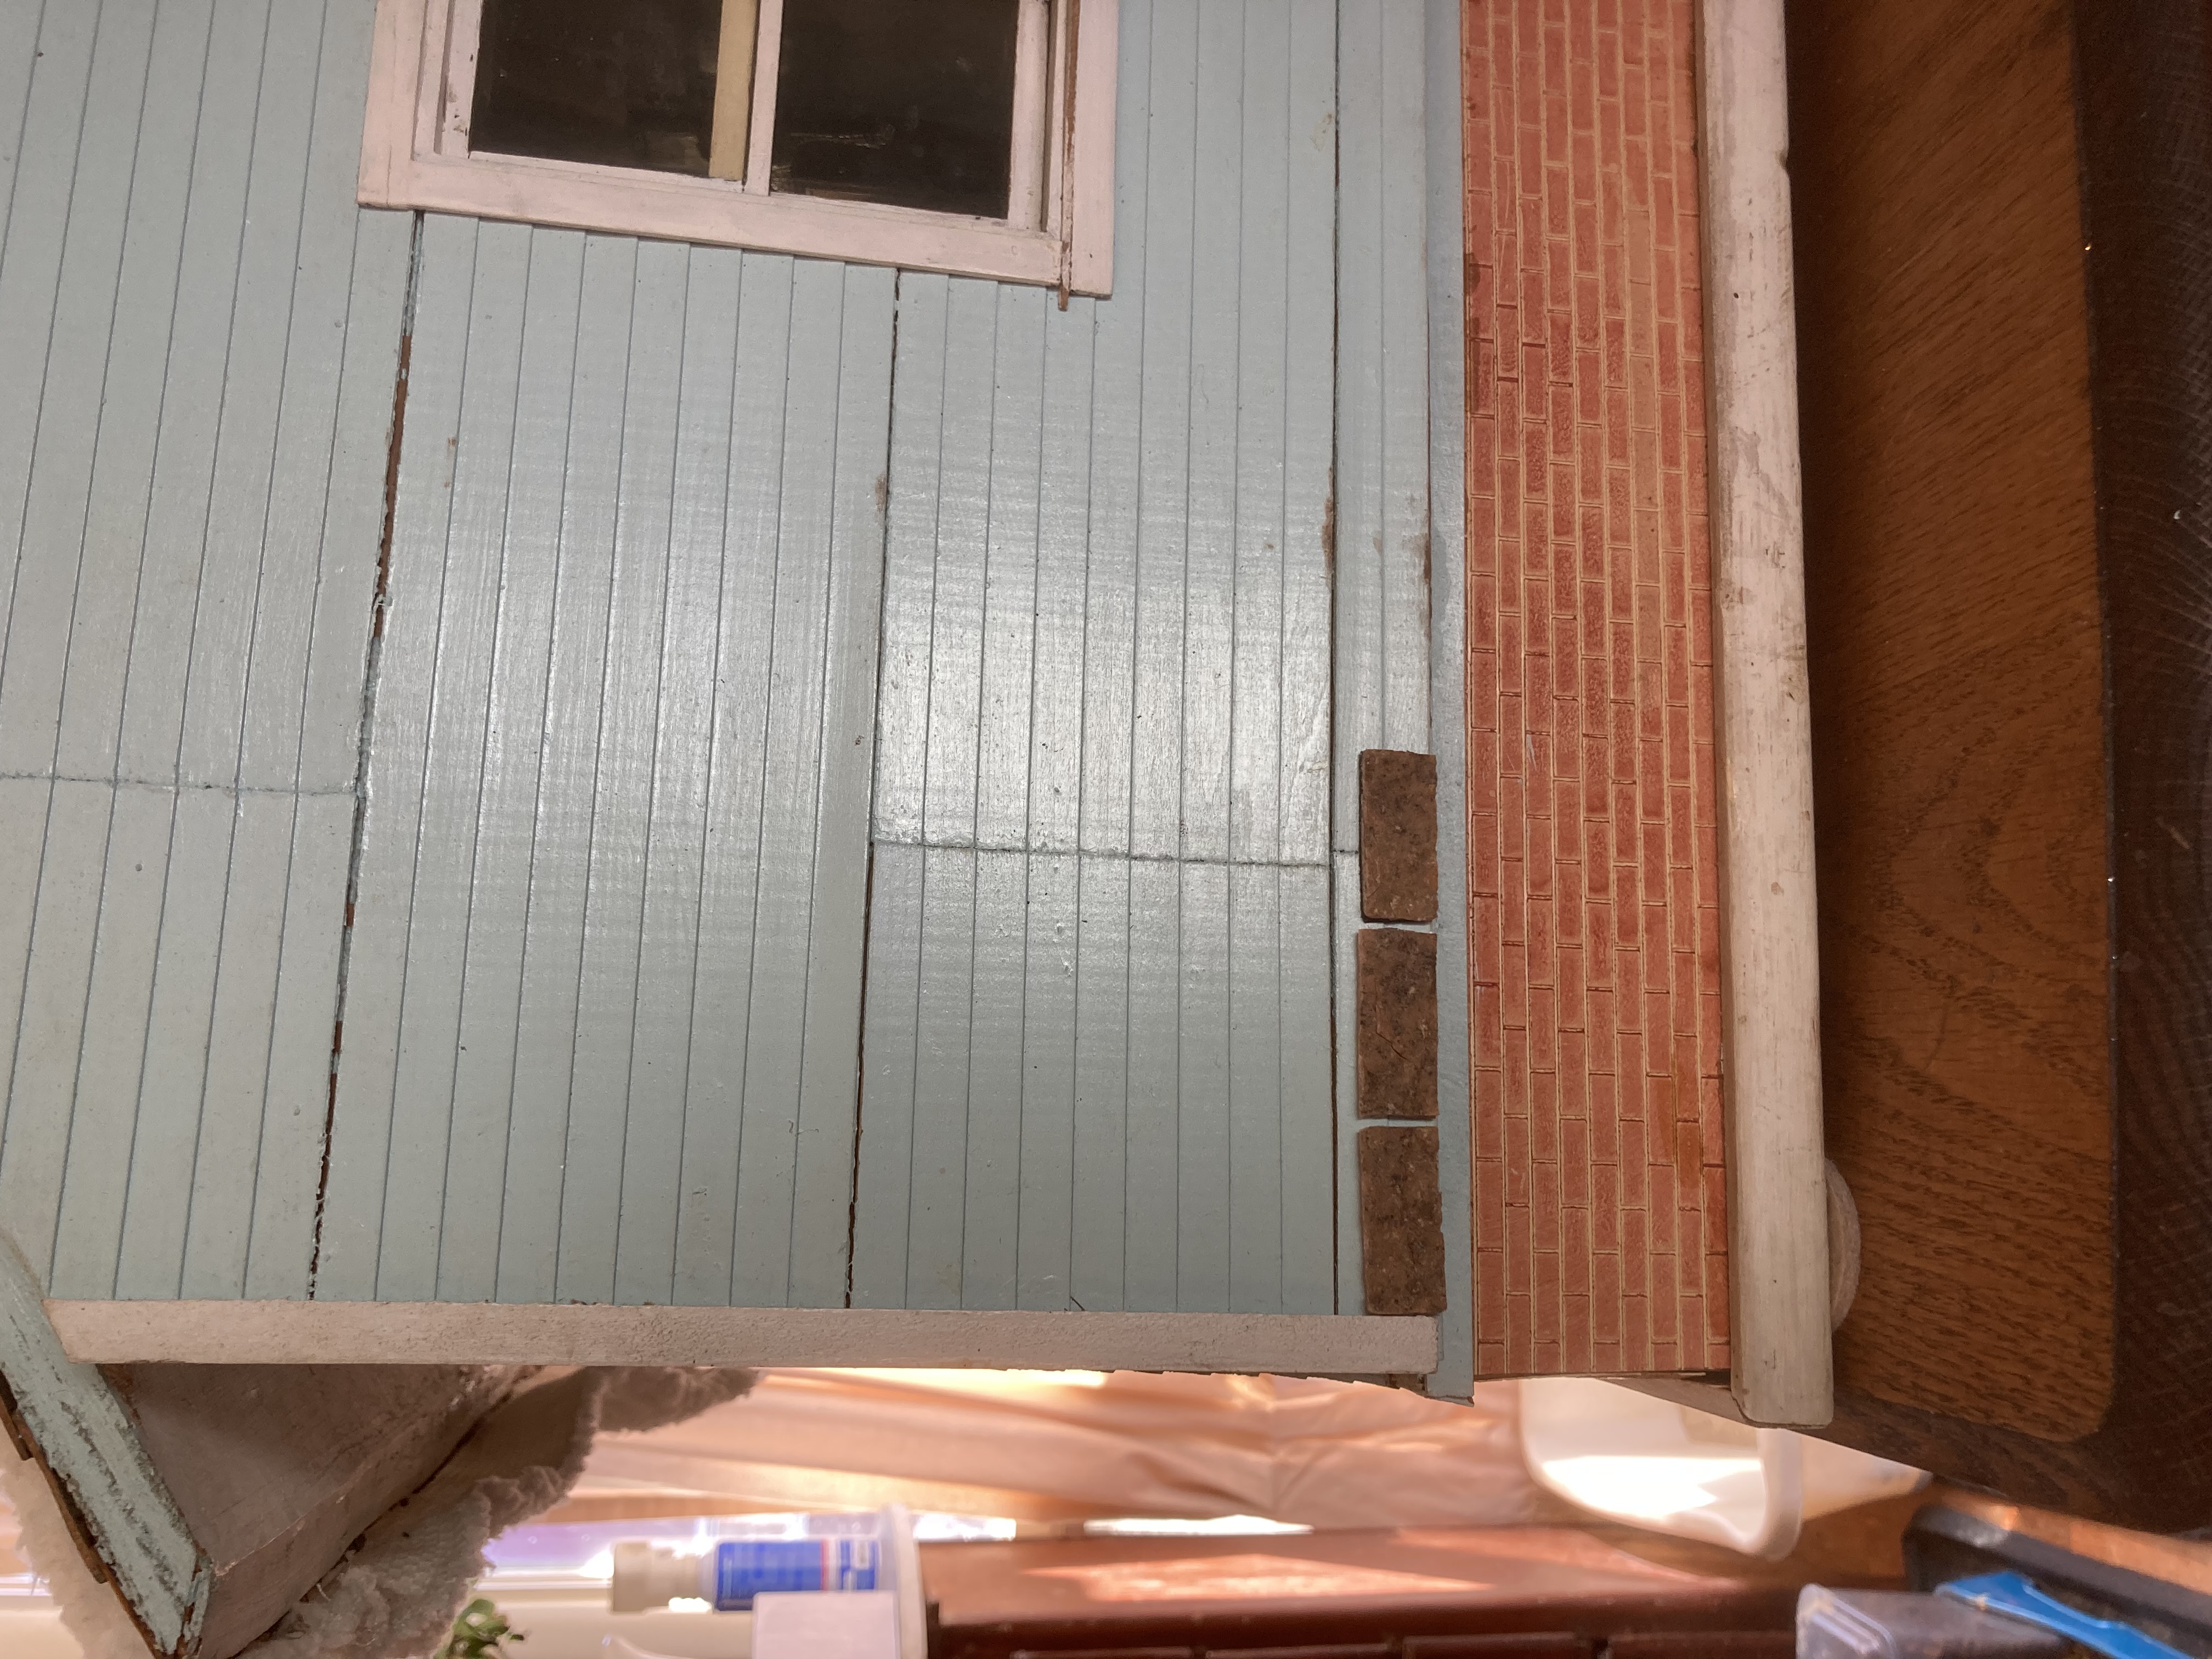
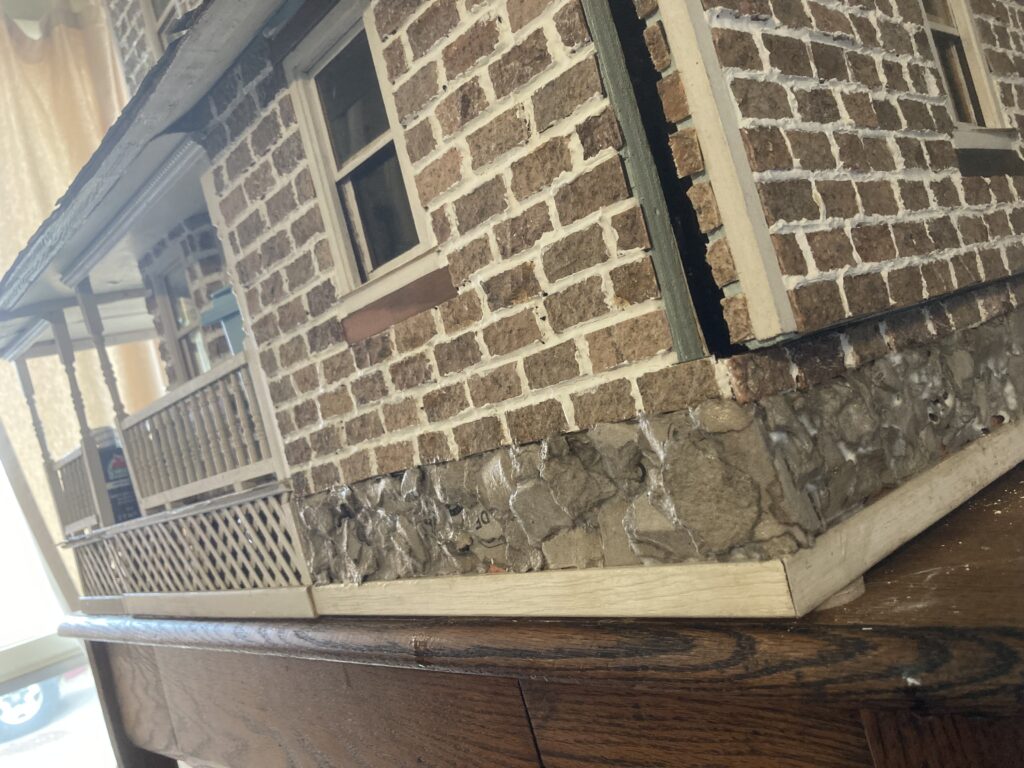
Step 6: a stone foundation. I wanted to add this before aging the bricks, so i could age the foundation at the same time.
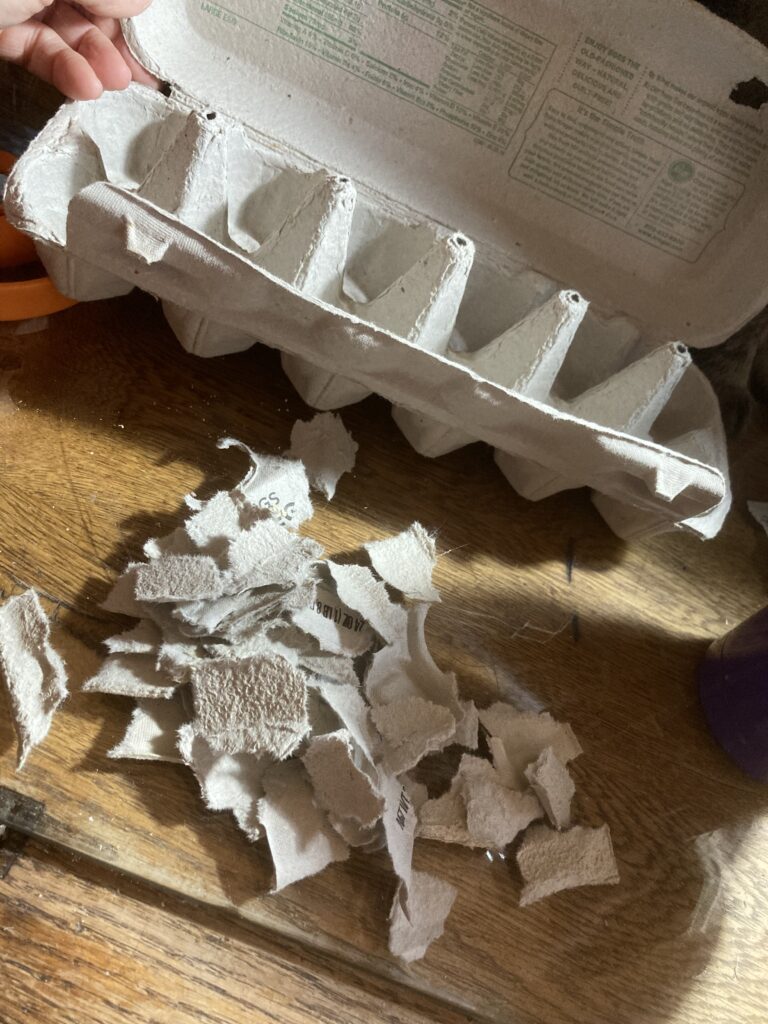
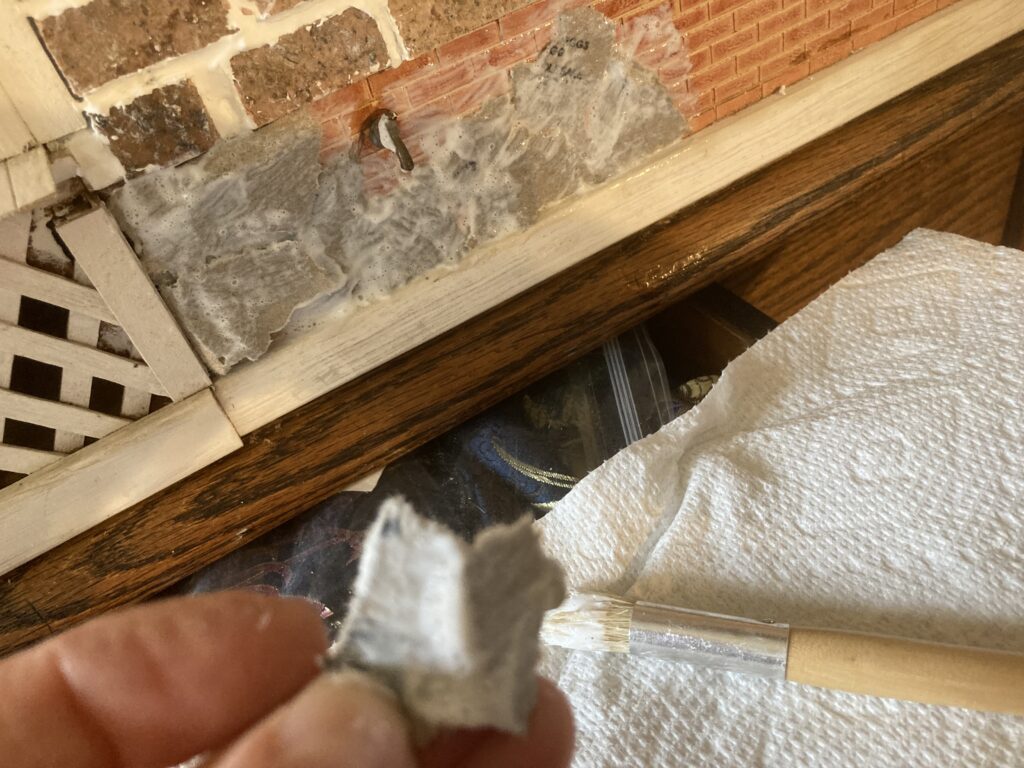
I wanted to make the bottom foundation more of a natural stone instead of bricks, so I thought I would try the egg carton/modpodge method. You start with a cardboard egg carton and break it into pieces (for this project I only needed one carton).
Egg carton
Then I used Modpodge and a cheap bristle paintbrush from DollarTree (I think it was a stencil brush).
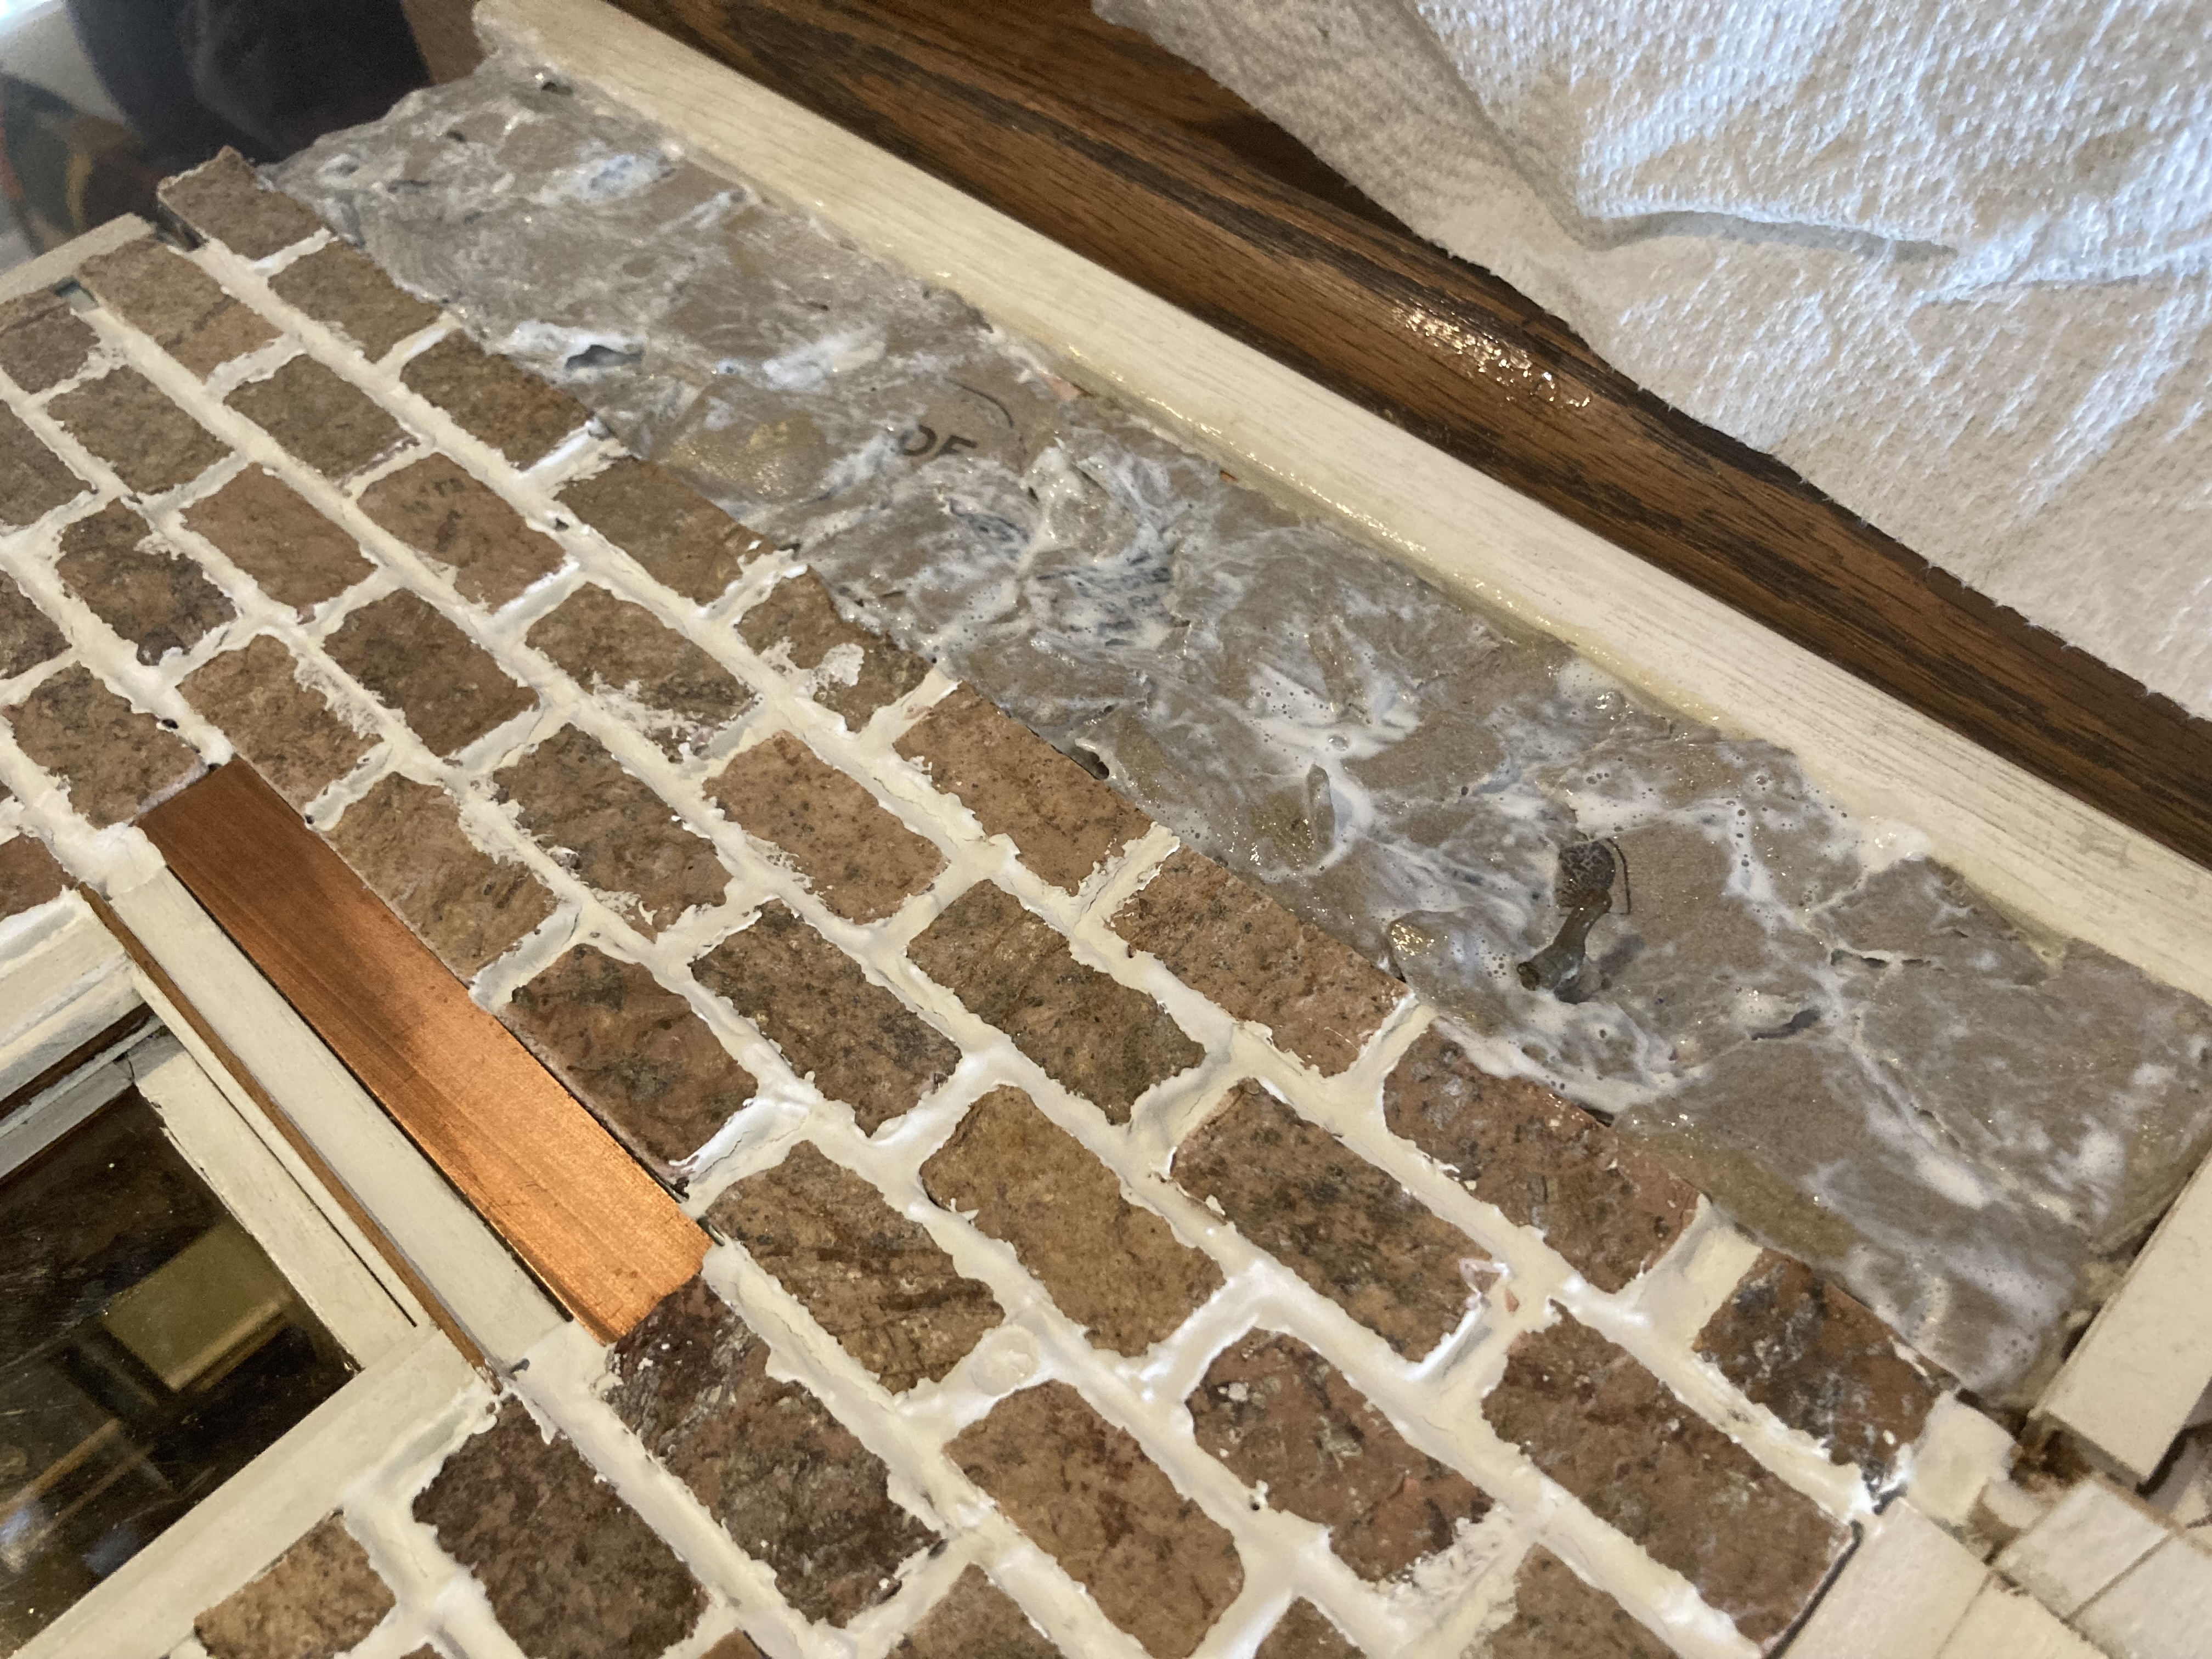
I basically just pasted the cardboard pieces all over the base of the dollhouse so it looked like stones. I built them up in layers to add depth.
Doesn’t look like much while it is wet, but when it is dry…
So satisfying.
I eventually decided to keep the ‘stone’ on the base as-is, without painting it, so I went back through and added a few more pieces to cover up any writing left exposed on the cardboard.
Step 7: Aging.
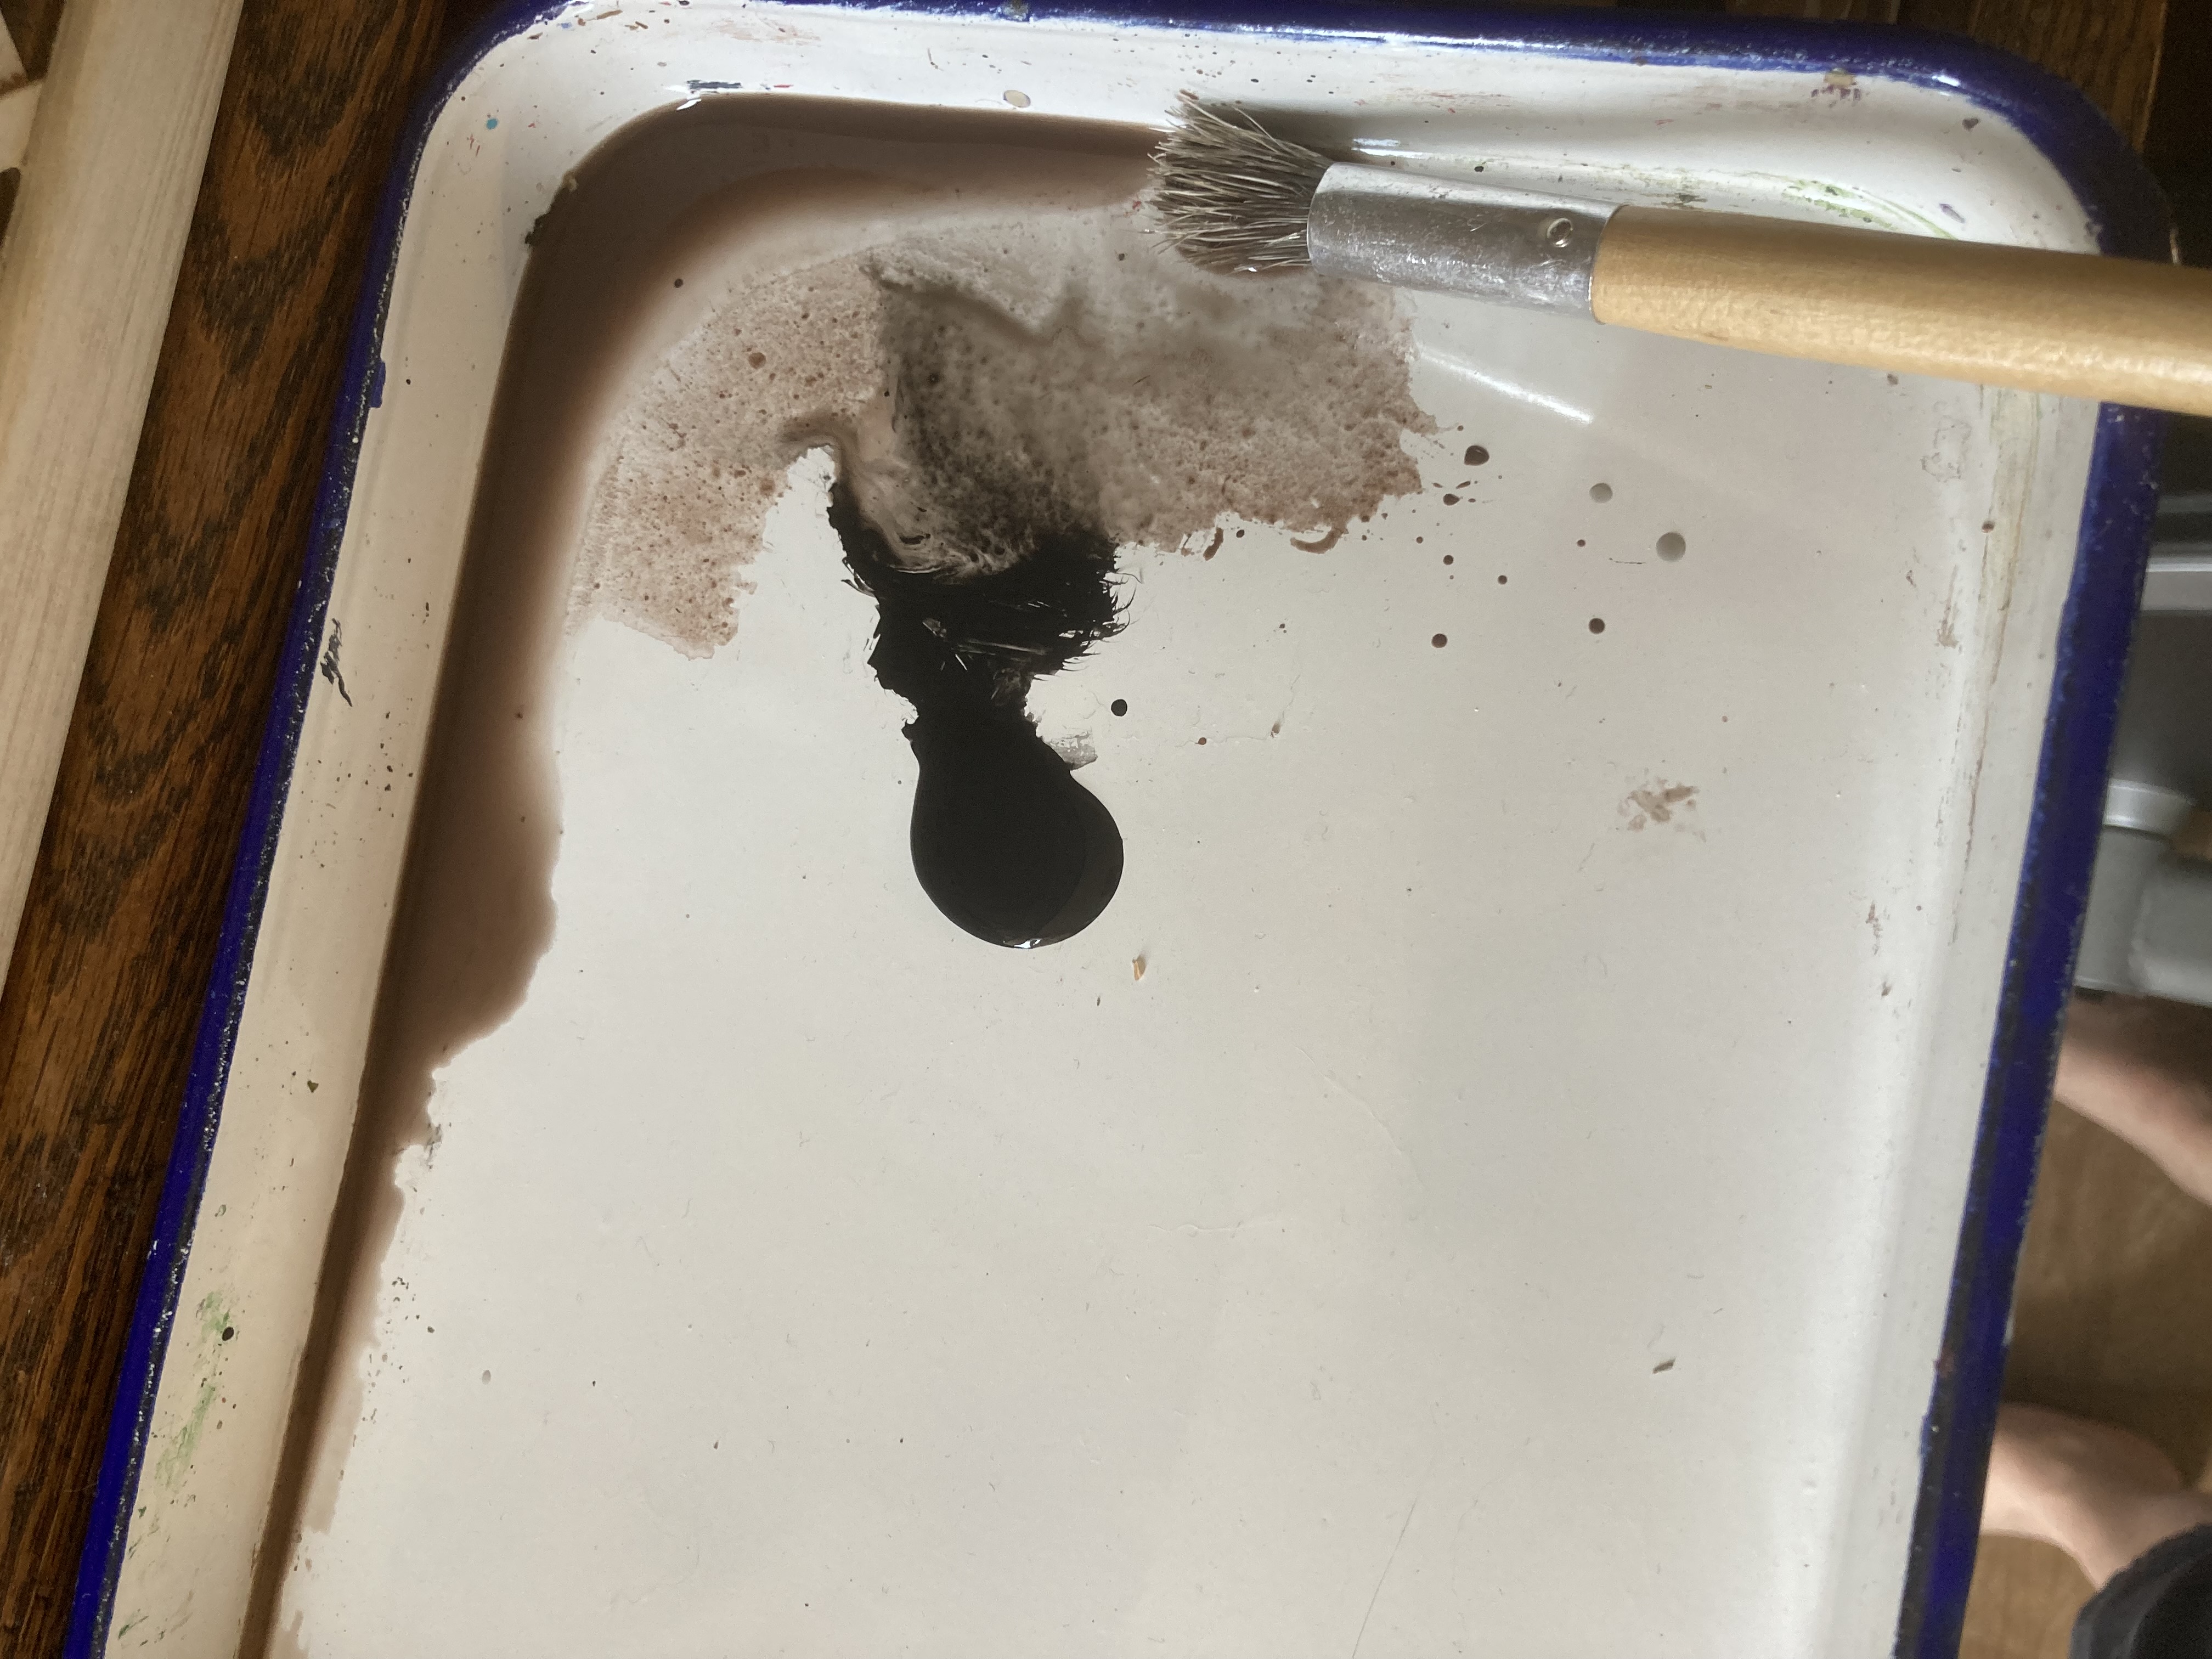
I didn’t want the stark white grout between the bricks to stay that color, as it just isn’t very natural looking, so I knew right away that I would age it with some watered down paints.
Watered down acrylic paints and my good old bristle stencil brush. The bristle brush is good for digging into crevices with your weathering paints.
I ended up using brown, a little green, and a tiny bit of black, making various washes over different areas of the house to make it look weathered. Just like any real house, the weathering will not be consistent through the entire finish, as variations in architecture, sun exposure, potential leaks, water runoff, etc will create different effects. I just varied it enough to make it interesting.
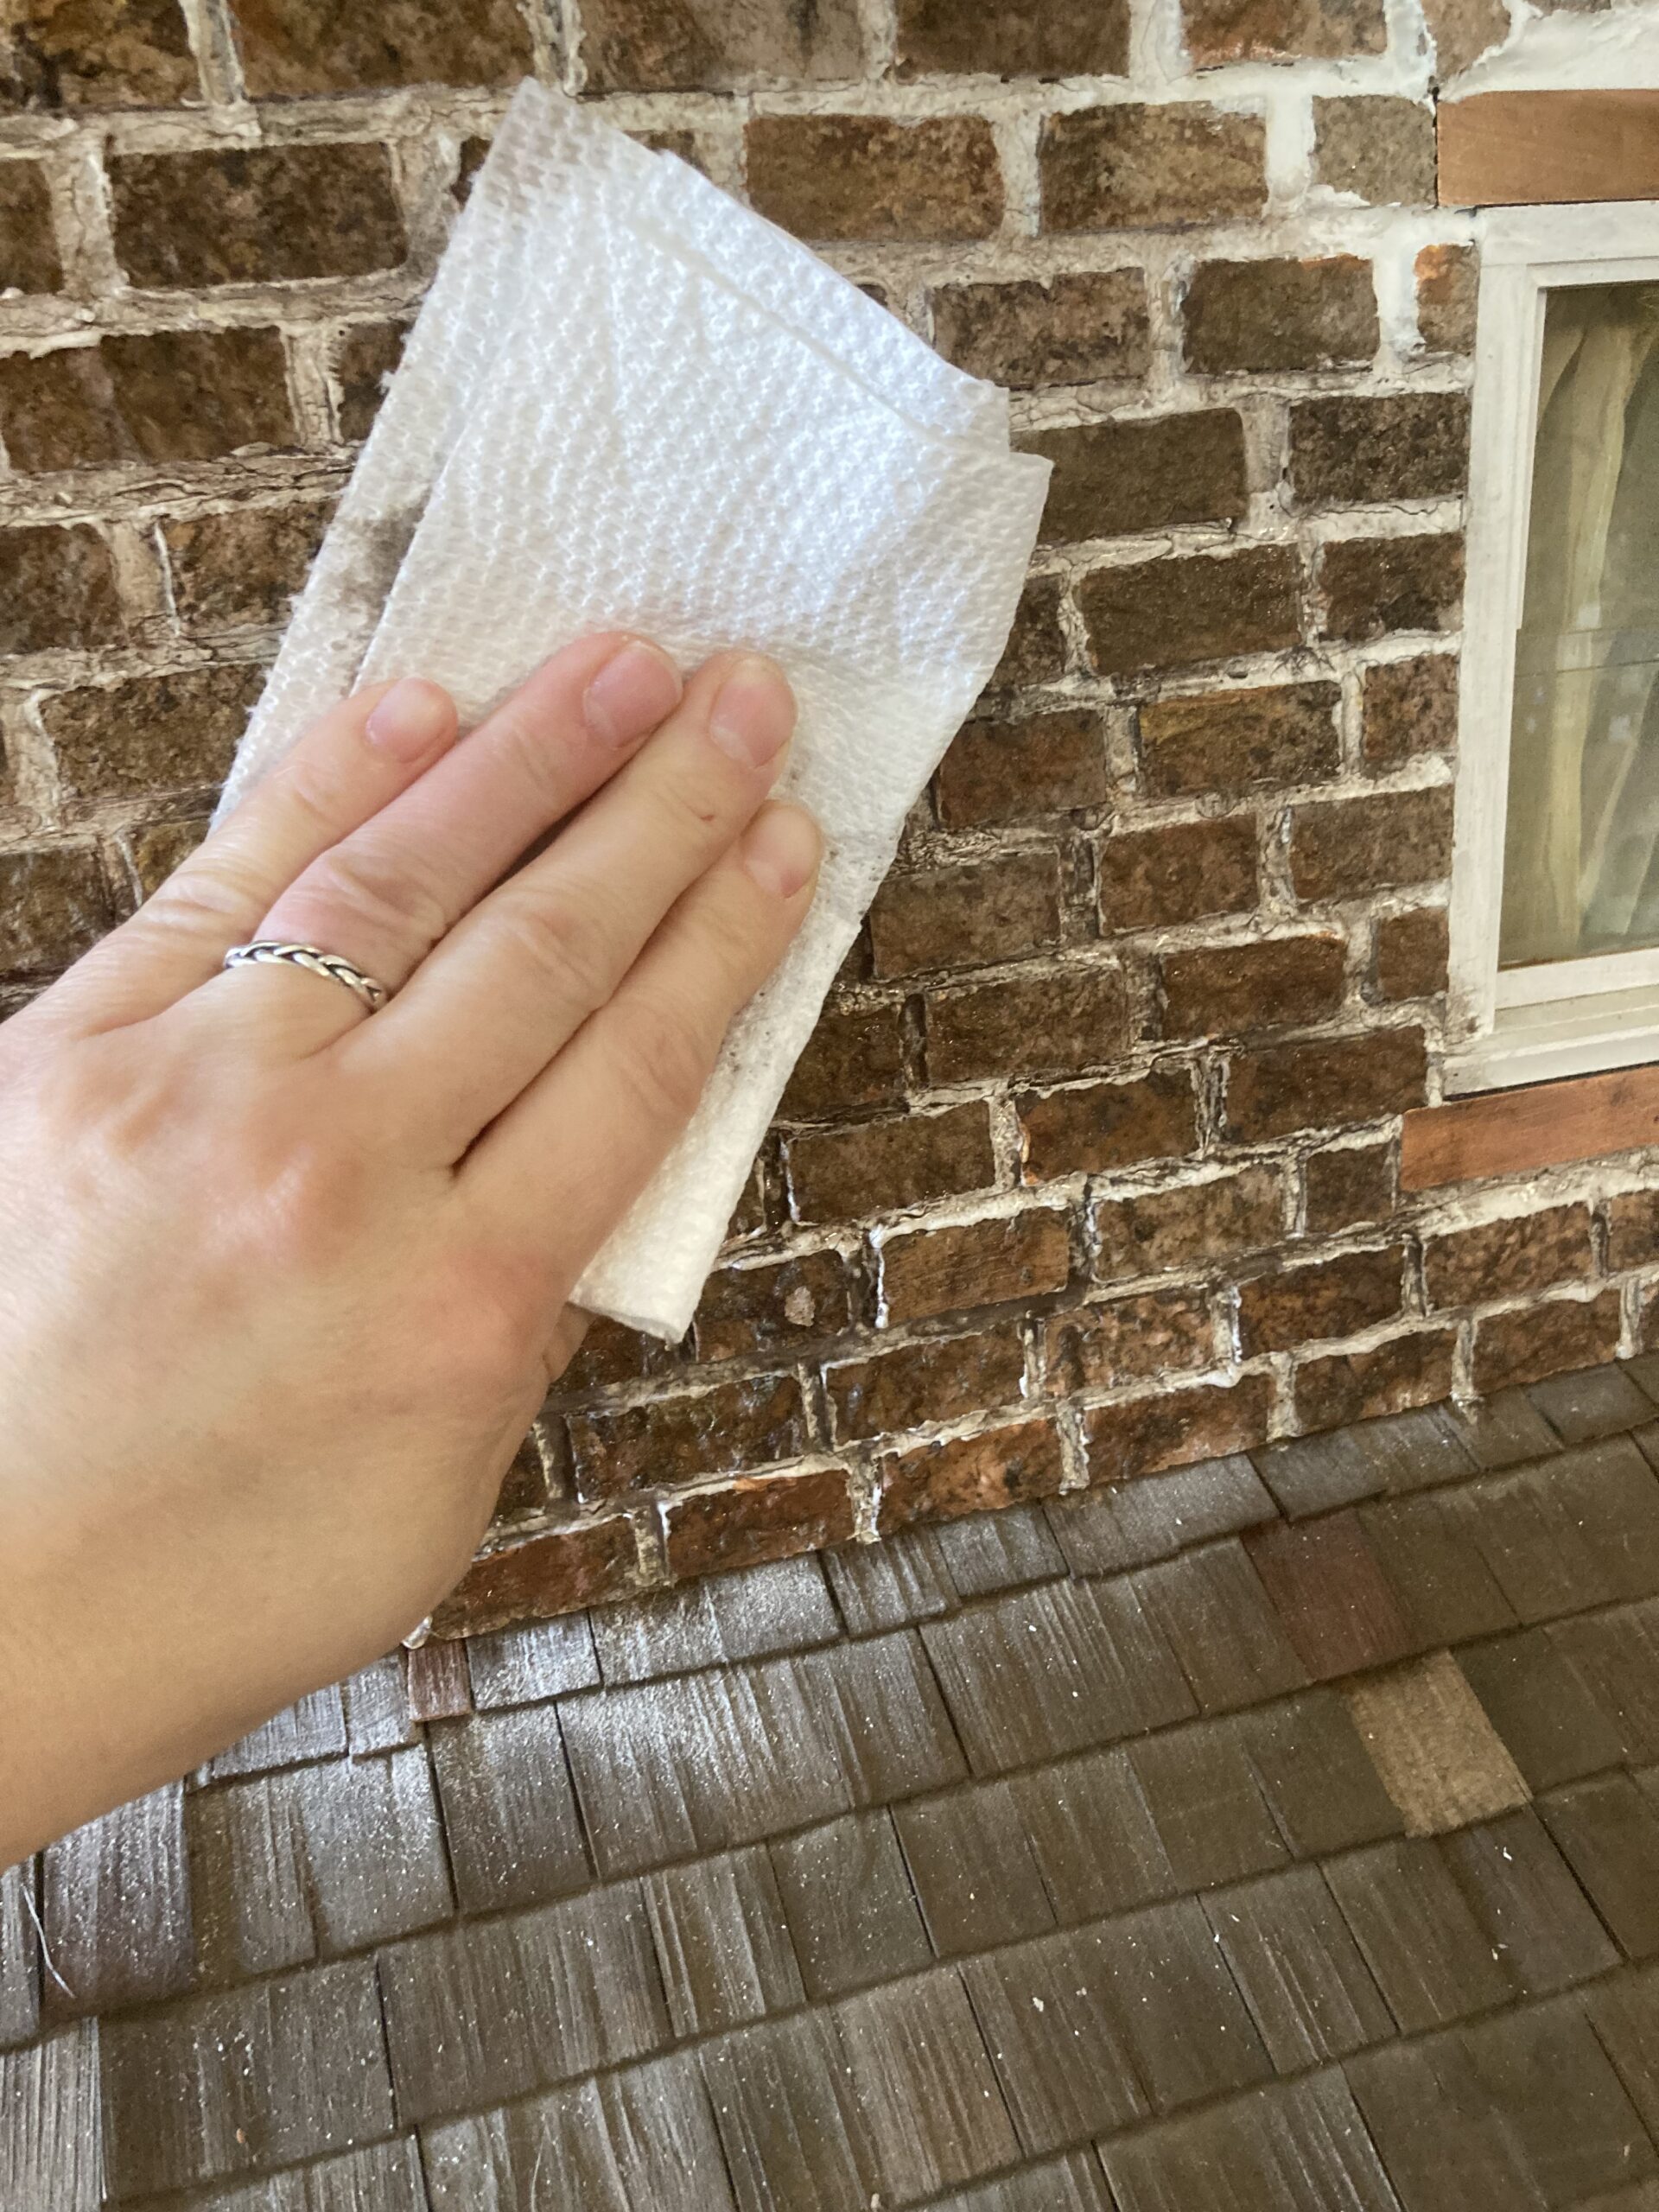
Patting off excess paint with a paper towel.
Working paint into those cracks and crevices.
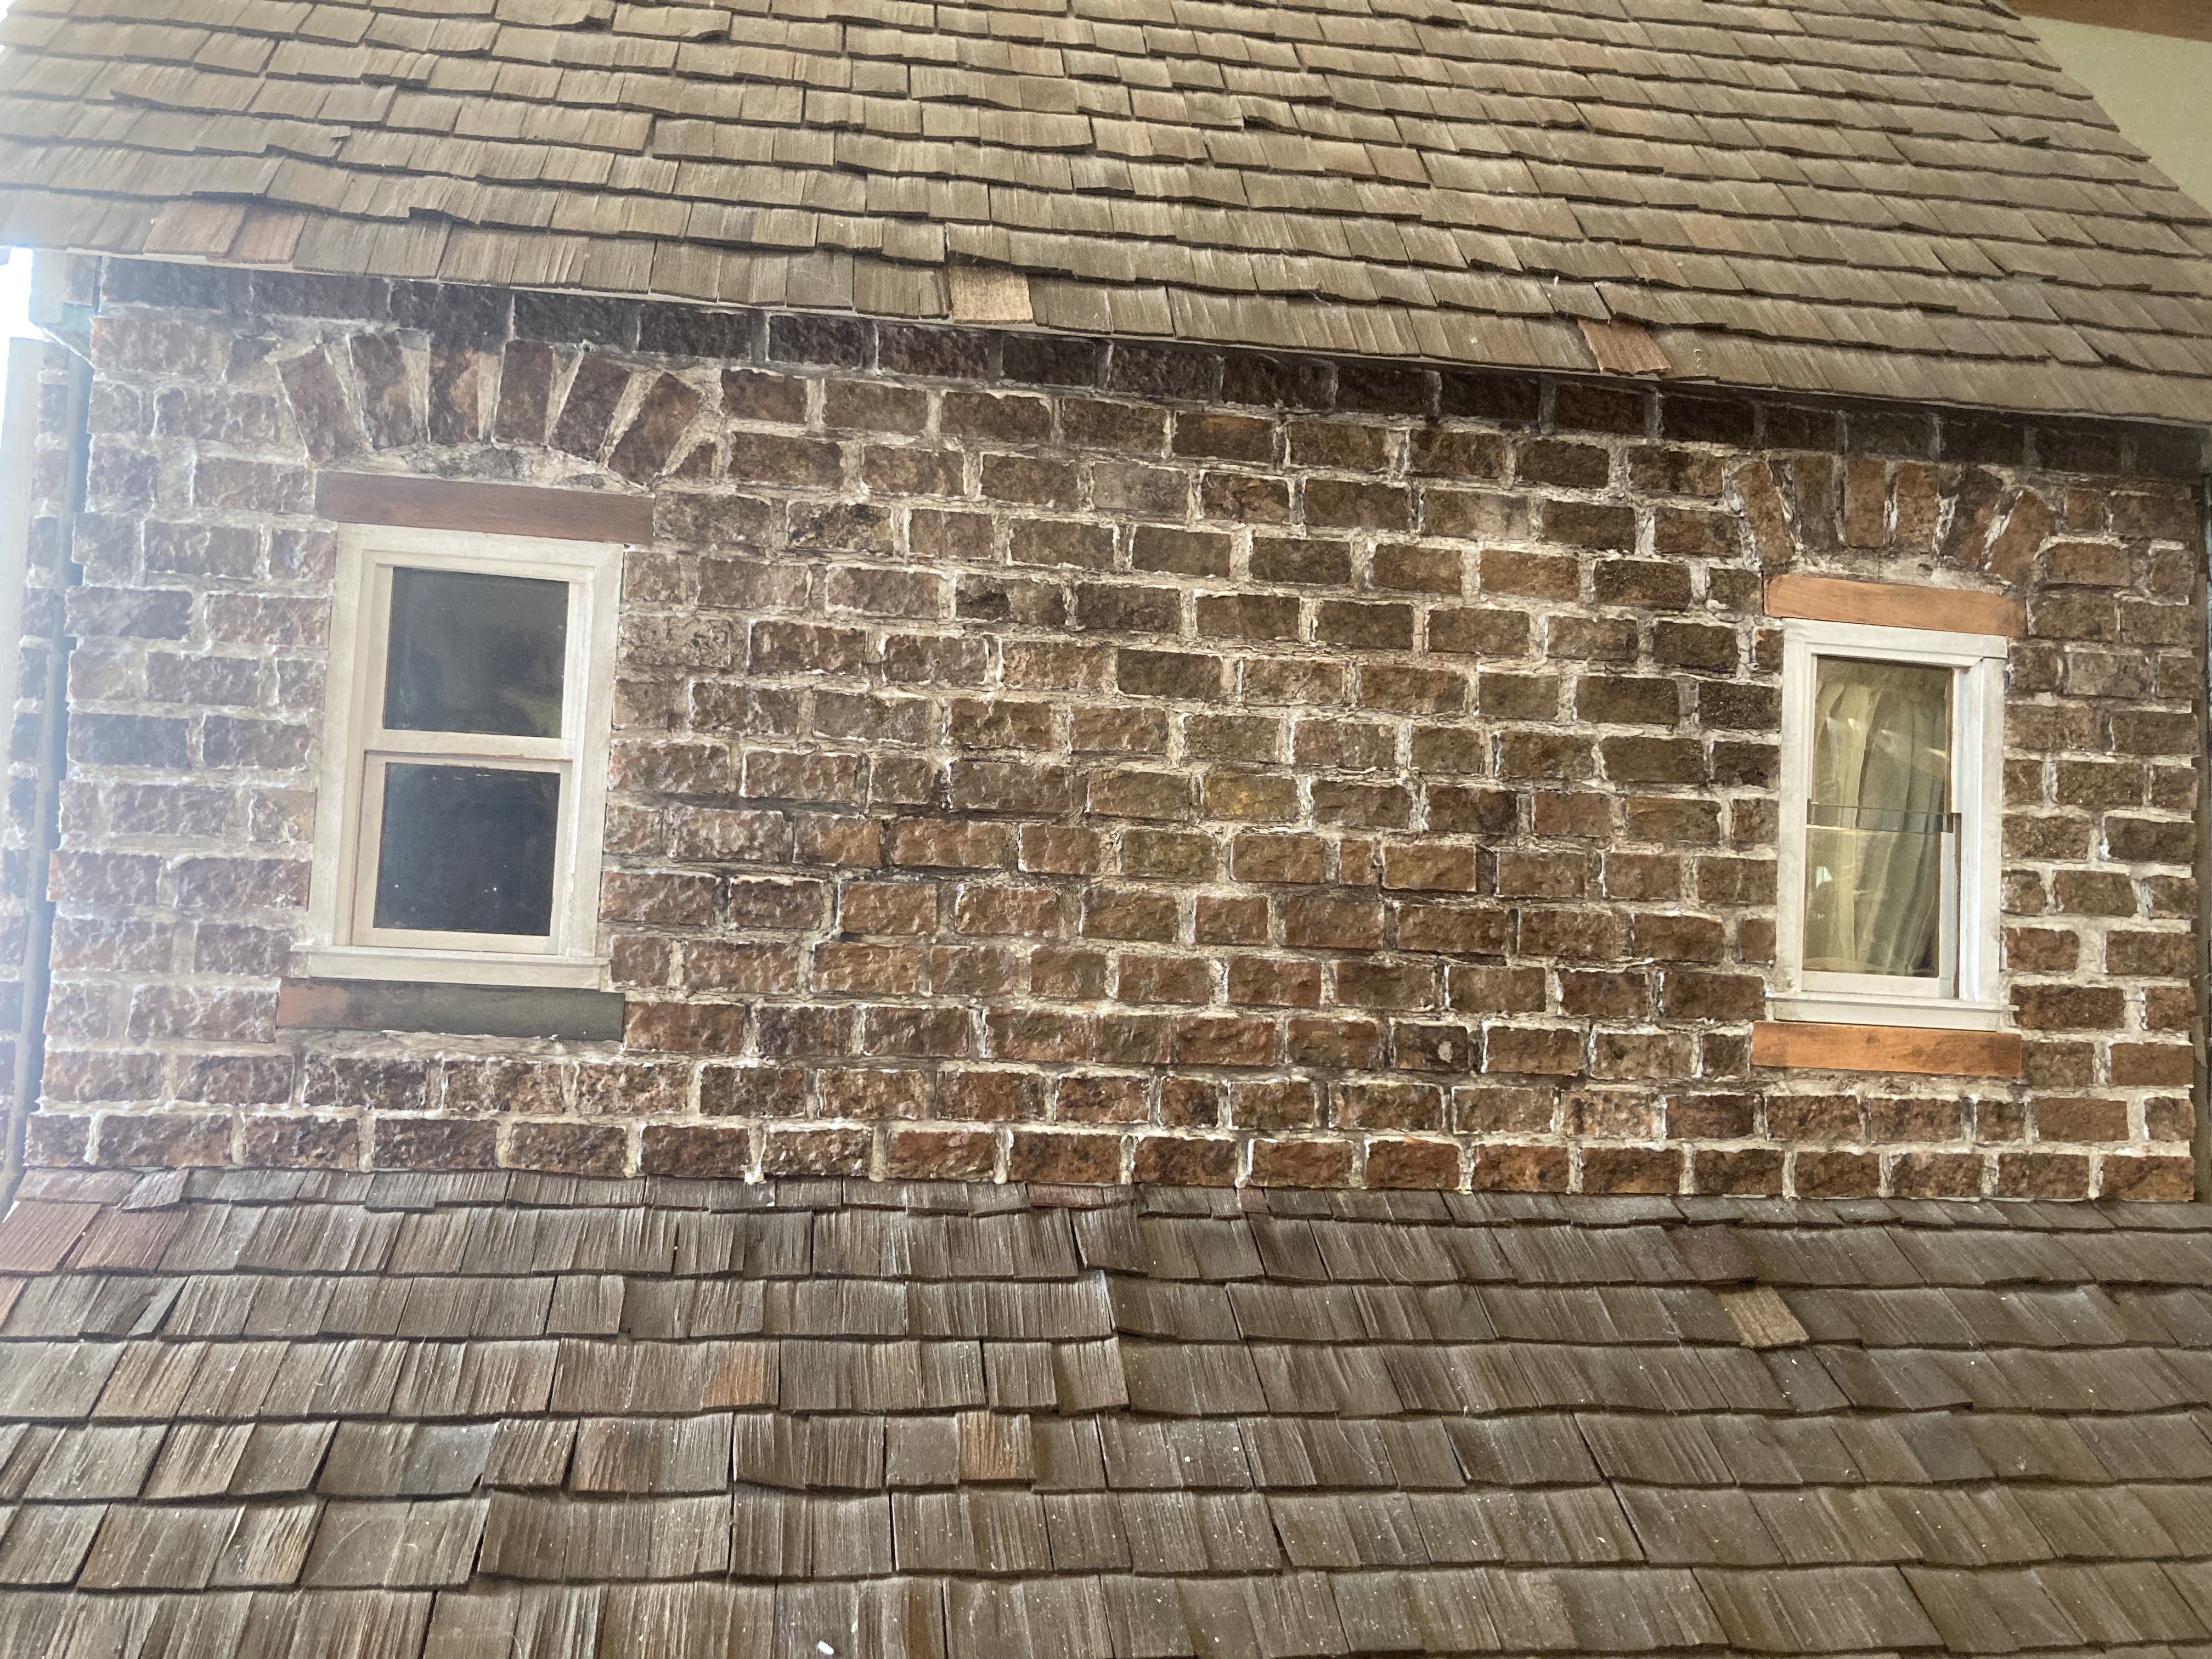
In a brighter light.
This house project took so MANY hours to complete, and my hands were so sore from squeezing that little squeeze bottle, but I am so pleased with how it all turned out. My next plans for this include making gutters to cover some of the white trim on the corners (I should have removed the trim before putting on the bricks, but hadn’t thought about it until it was too late). Also I have started remodeling the bathroom. Stay tuned for more!
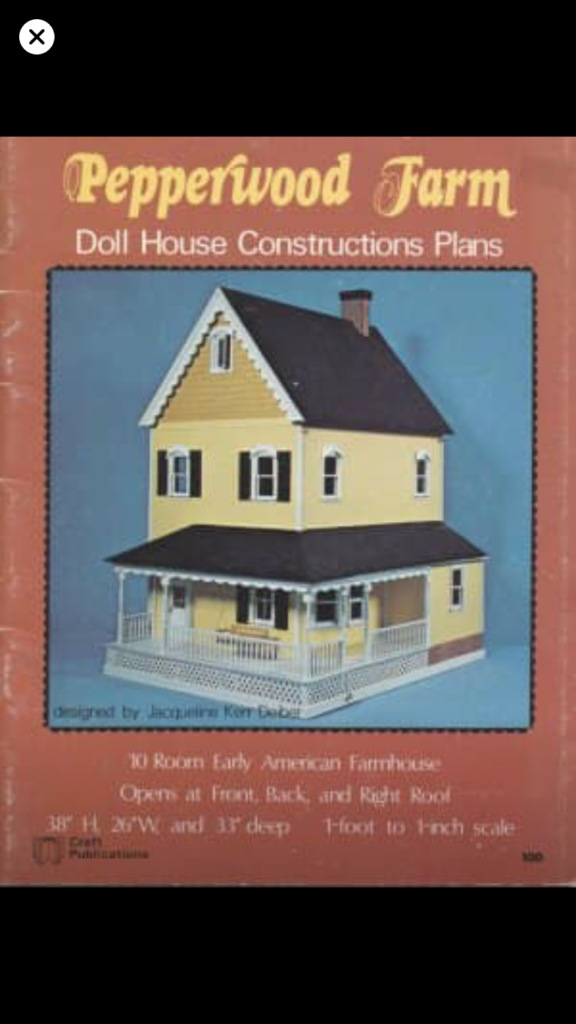
This is the Pepperwood Farm dollhouse. I was fortunate enough to acquire it from Facebook marketplace in September of 2019. We drove across the state on a 3 hour, one-way drive to get it. These houses were made from plans that were sold in a book. It was built by hand with thick plywood, so it is very heavy!
I believe that this particular house was built in the late 1970’s-early 1980’s. The wallpapers are a bit brittle and faded from age (but I love them). The older couple who had inherited it from their friend decided to pass it on to another who would enjoy it just as much, so I was fortunate to come across it.
There isn’t much that I plan on changing with this house at the moment. The inside has been decorated wonderfully, with trims and papers that I adore, but could use a few finishing touches, along with some light restoration. Mostly I have been having fun with making and collecting furniture for it.
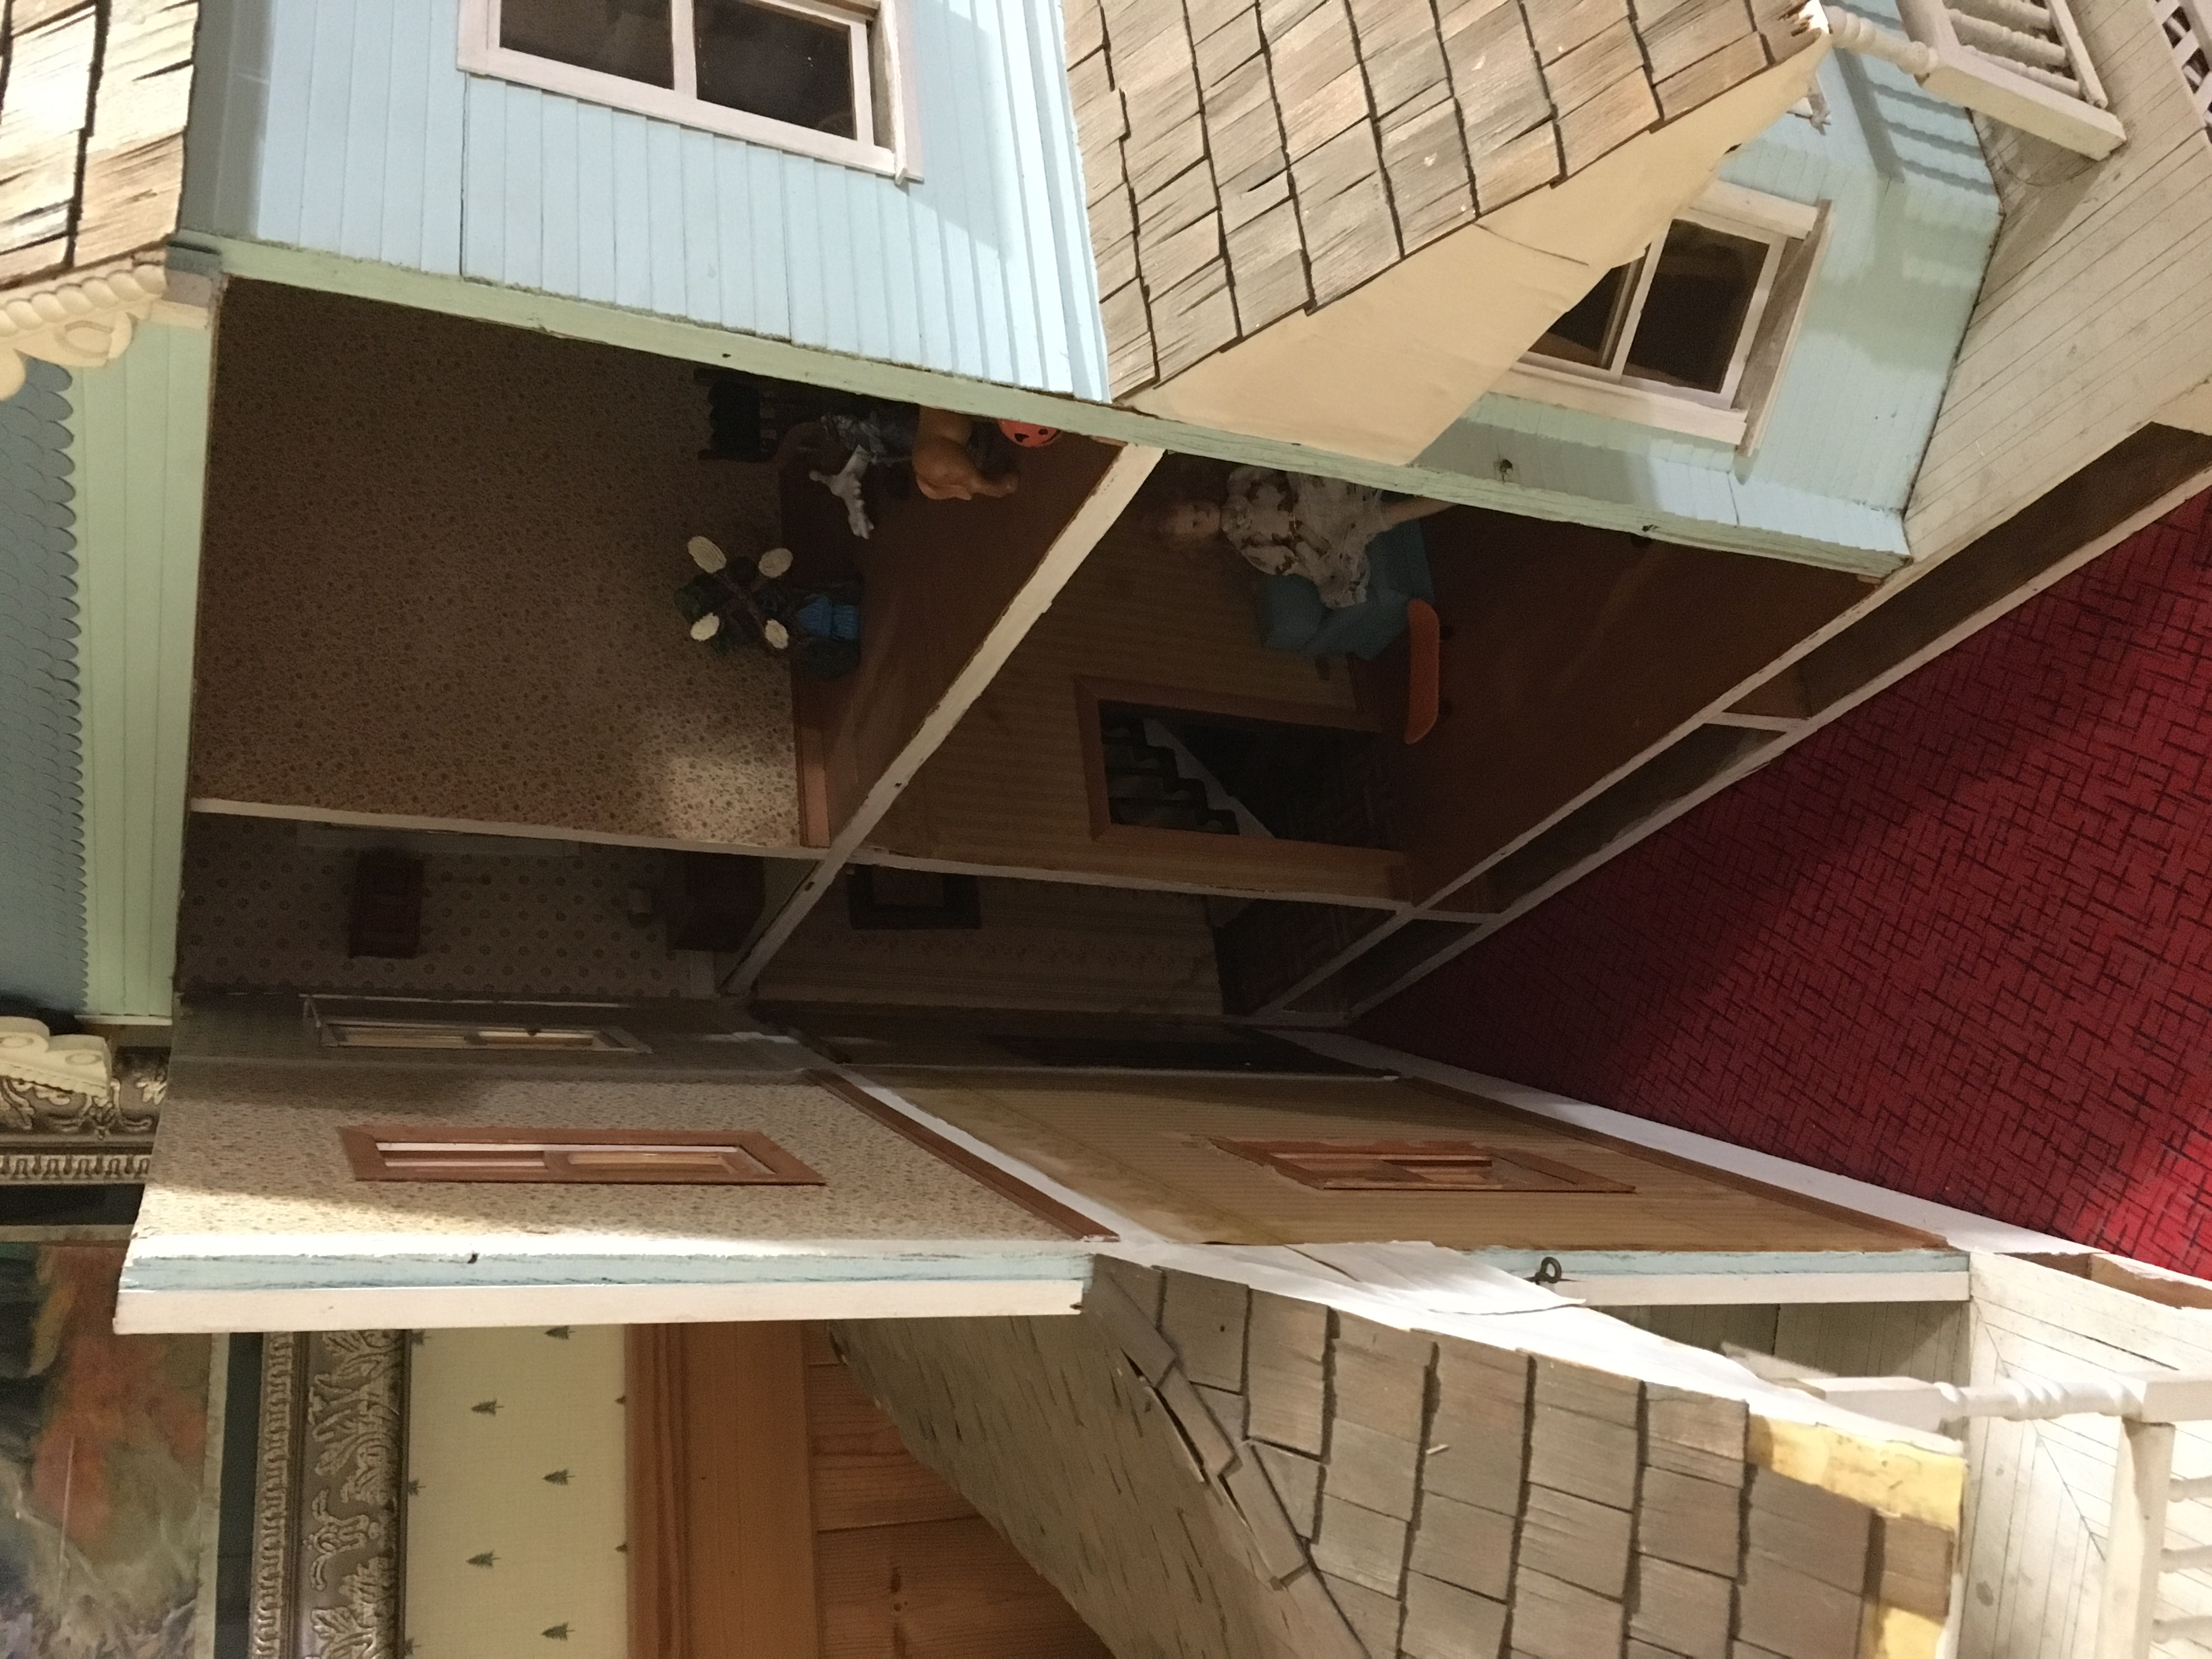
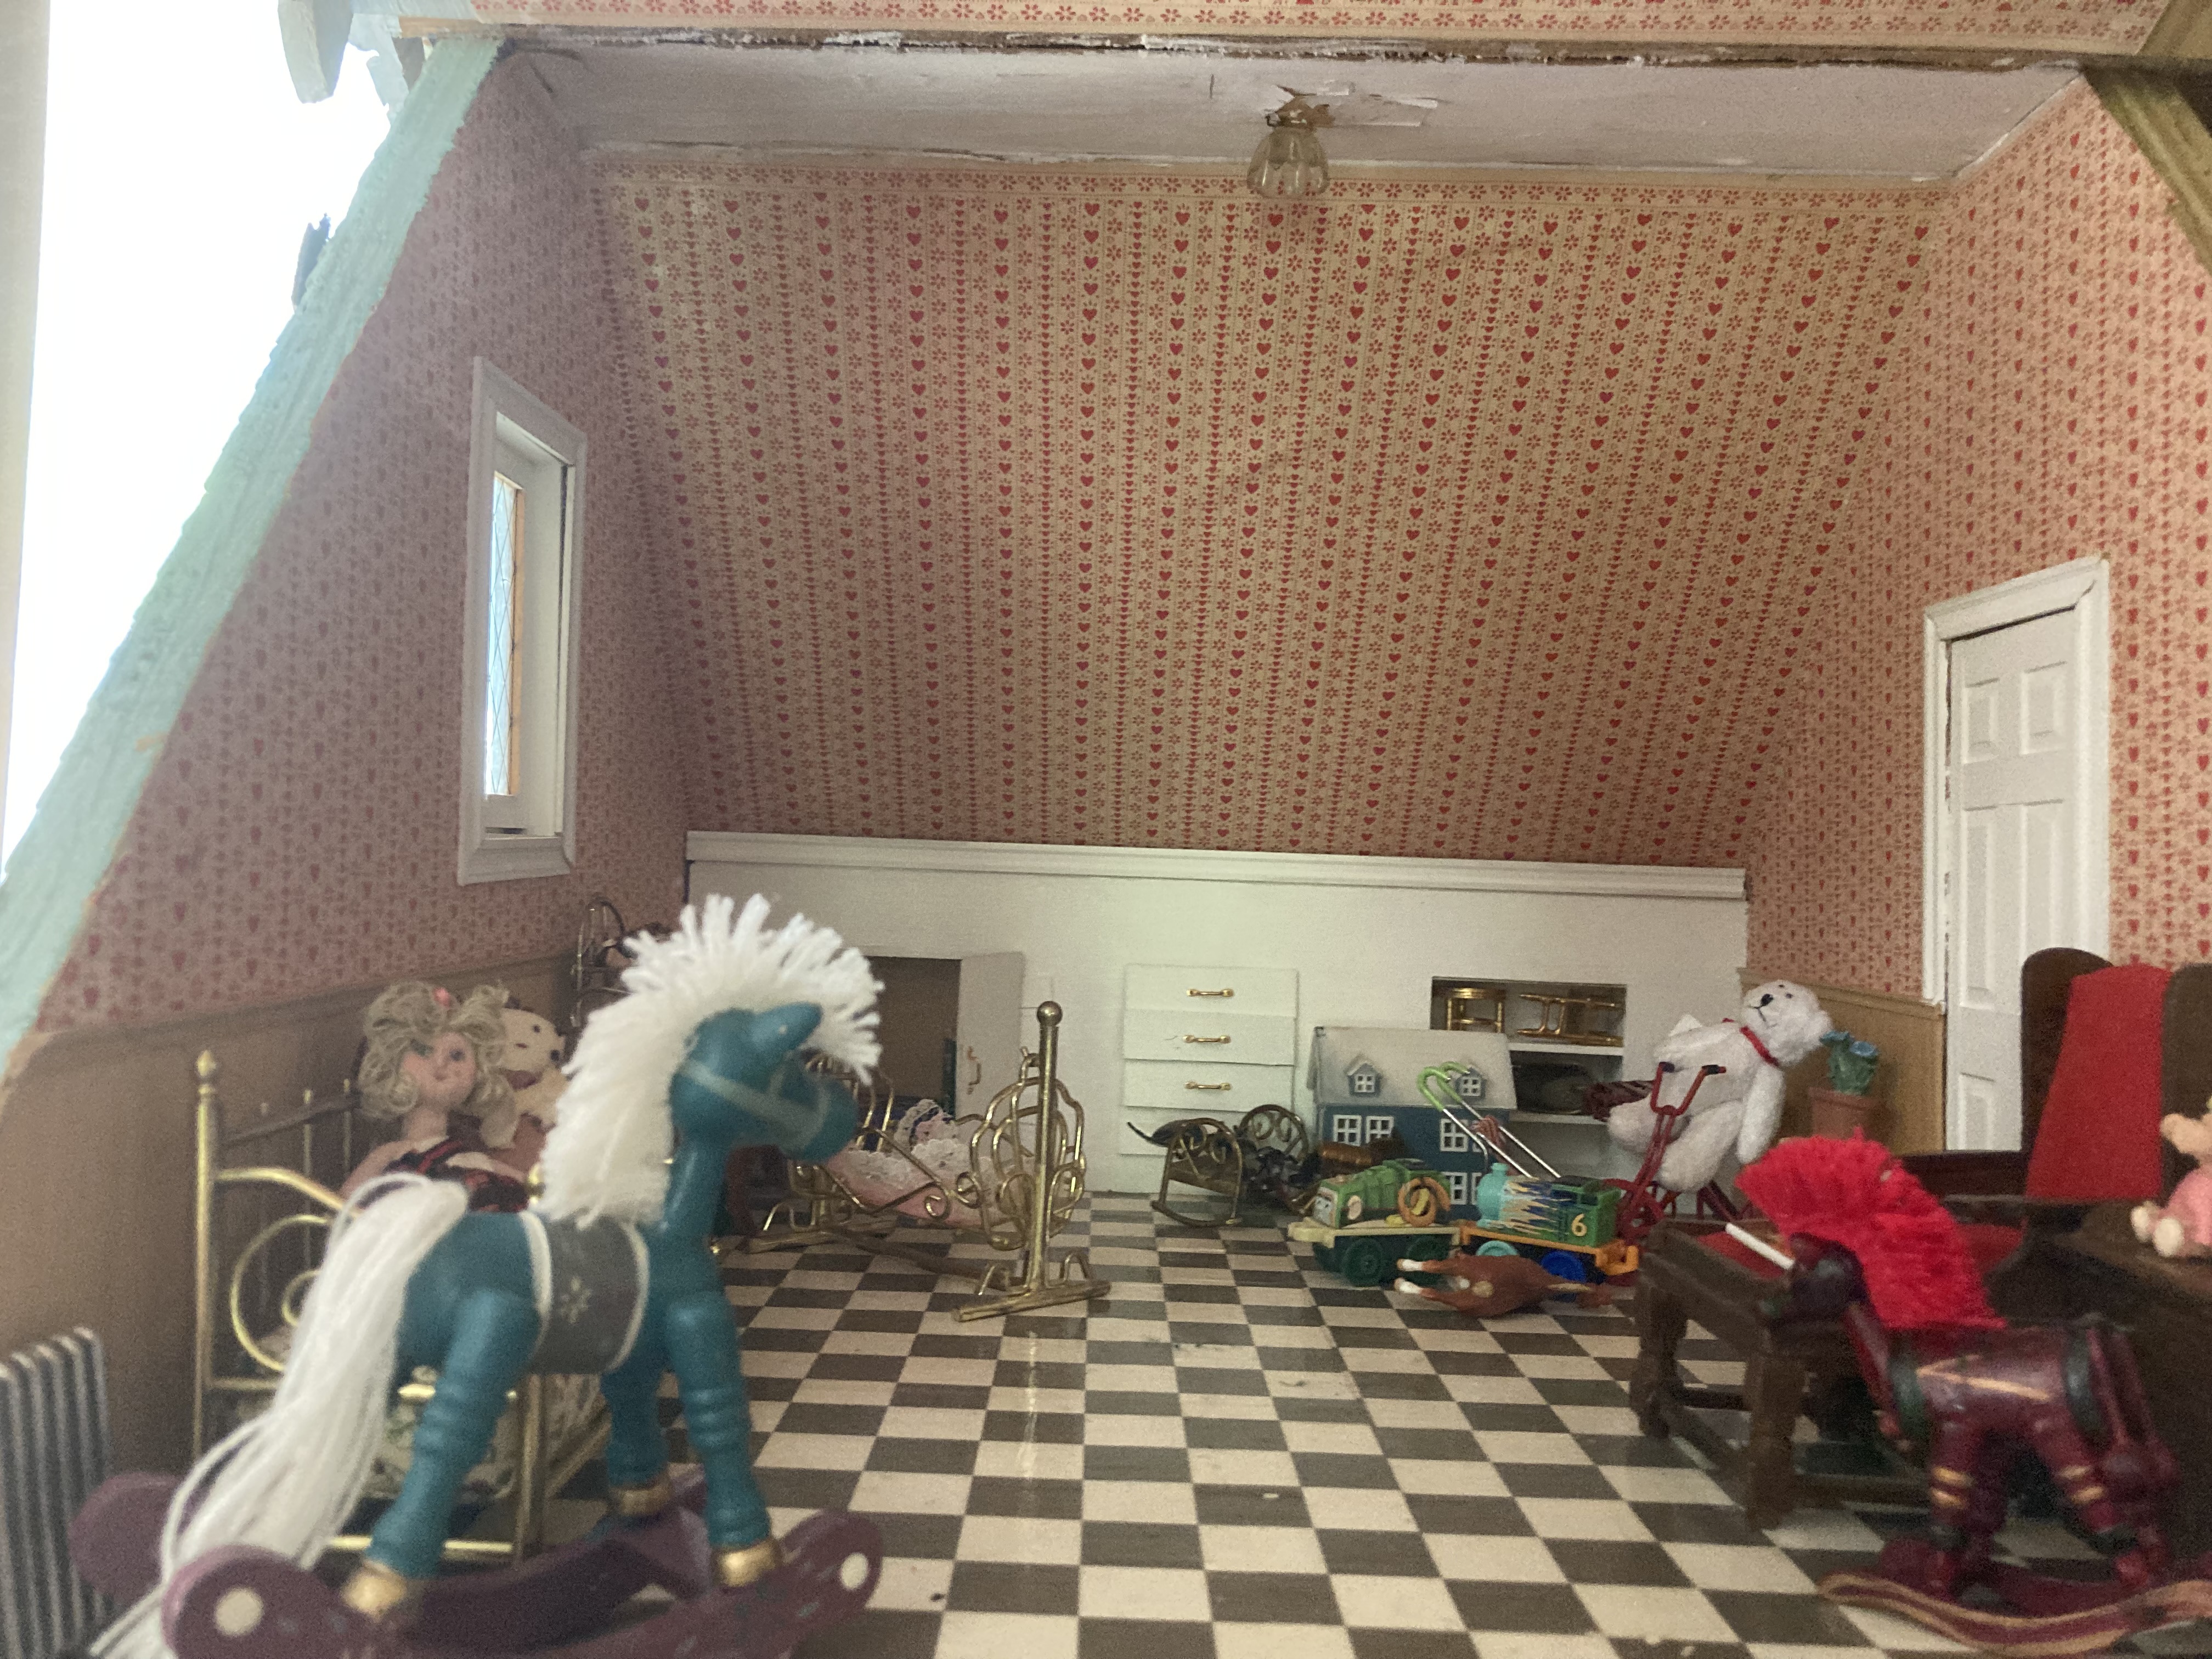
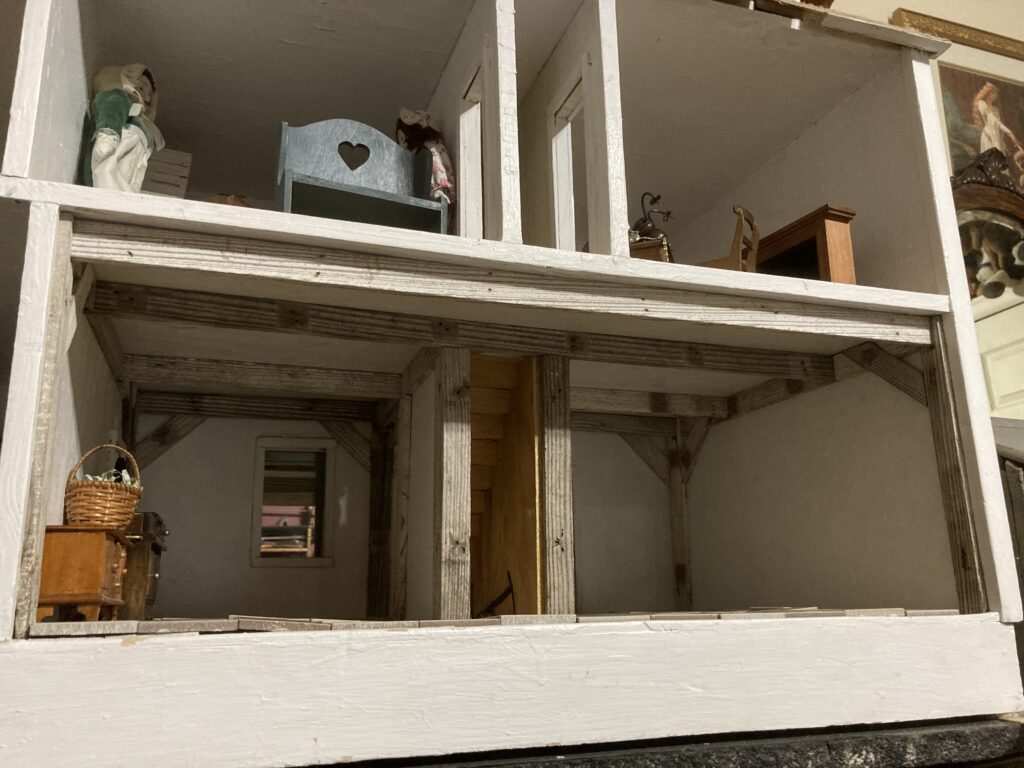
The windows open like real windows, the attic has studs in the storage room, the attic bedroom has a few built-ins. It’s such a quaint little home, and my daughter and I have fun playing in it together.
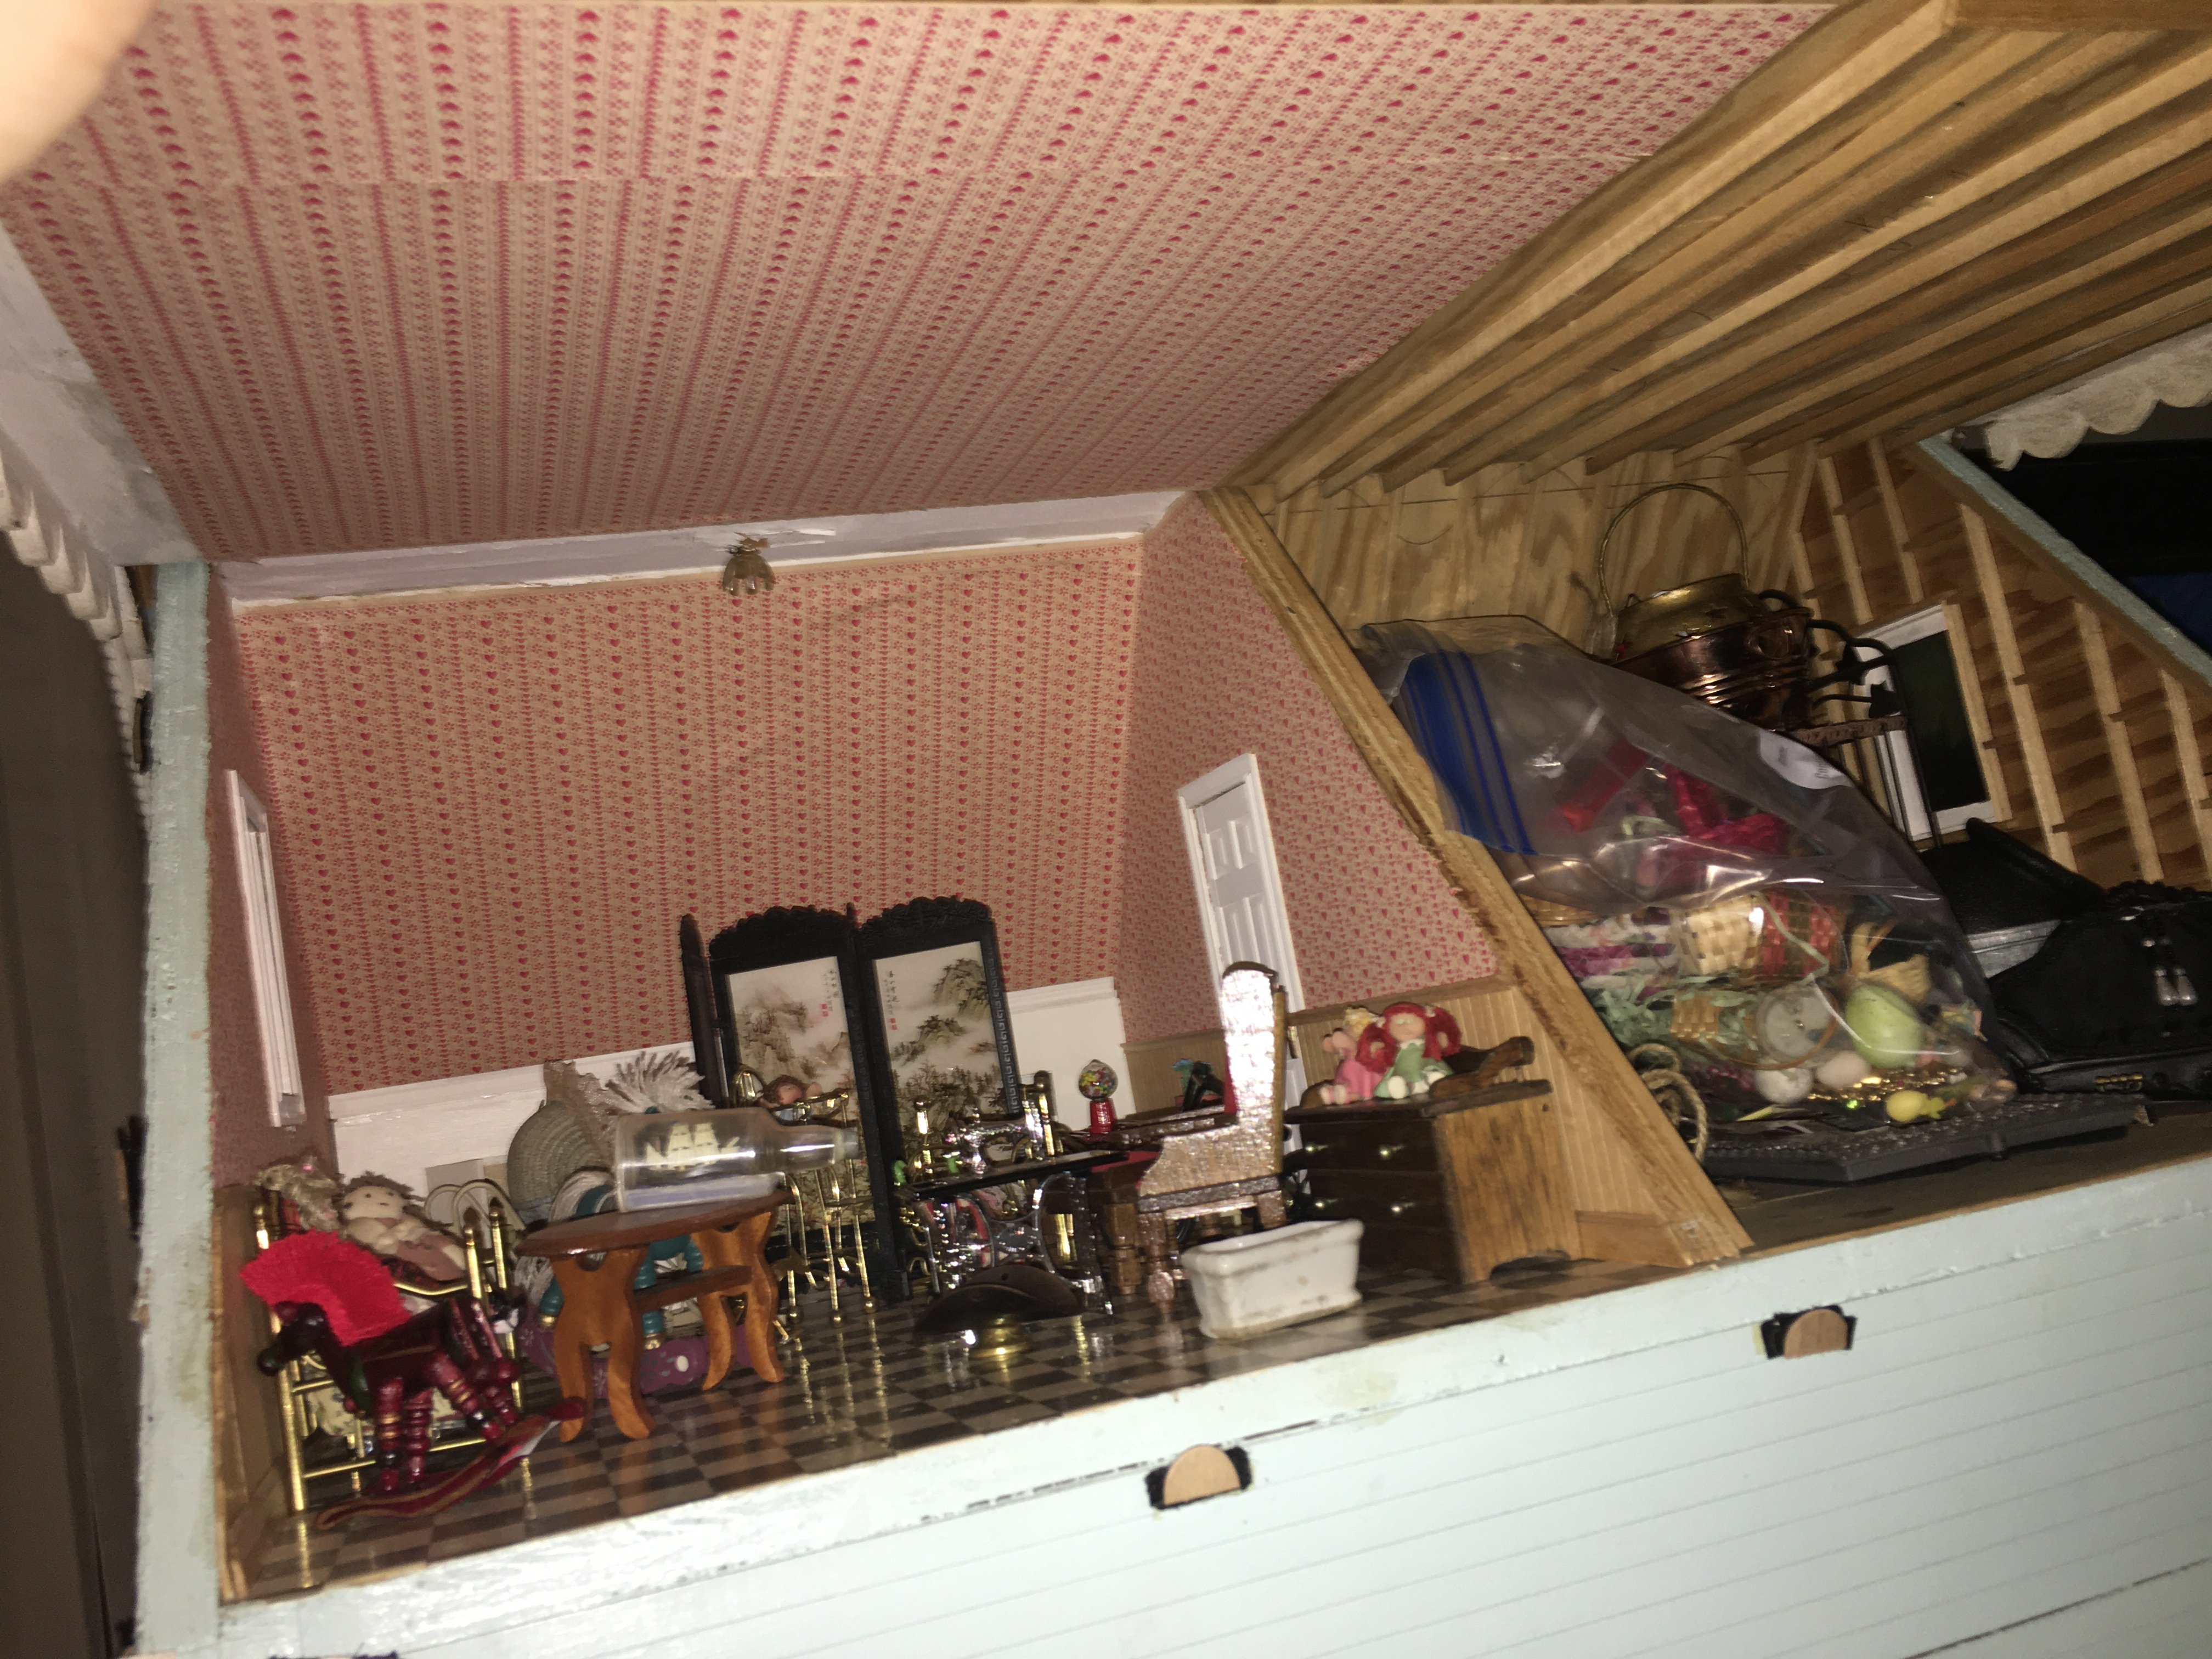
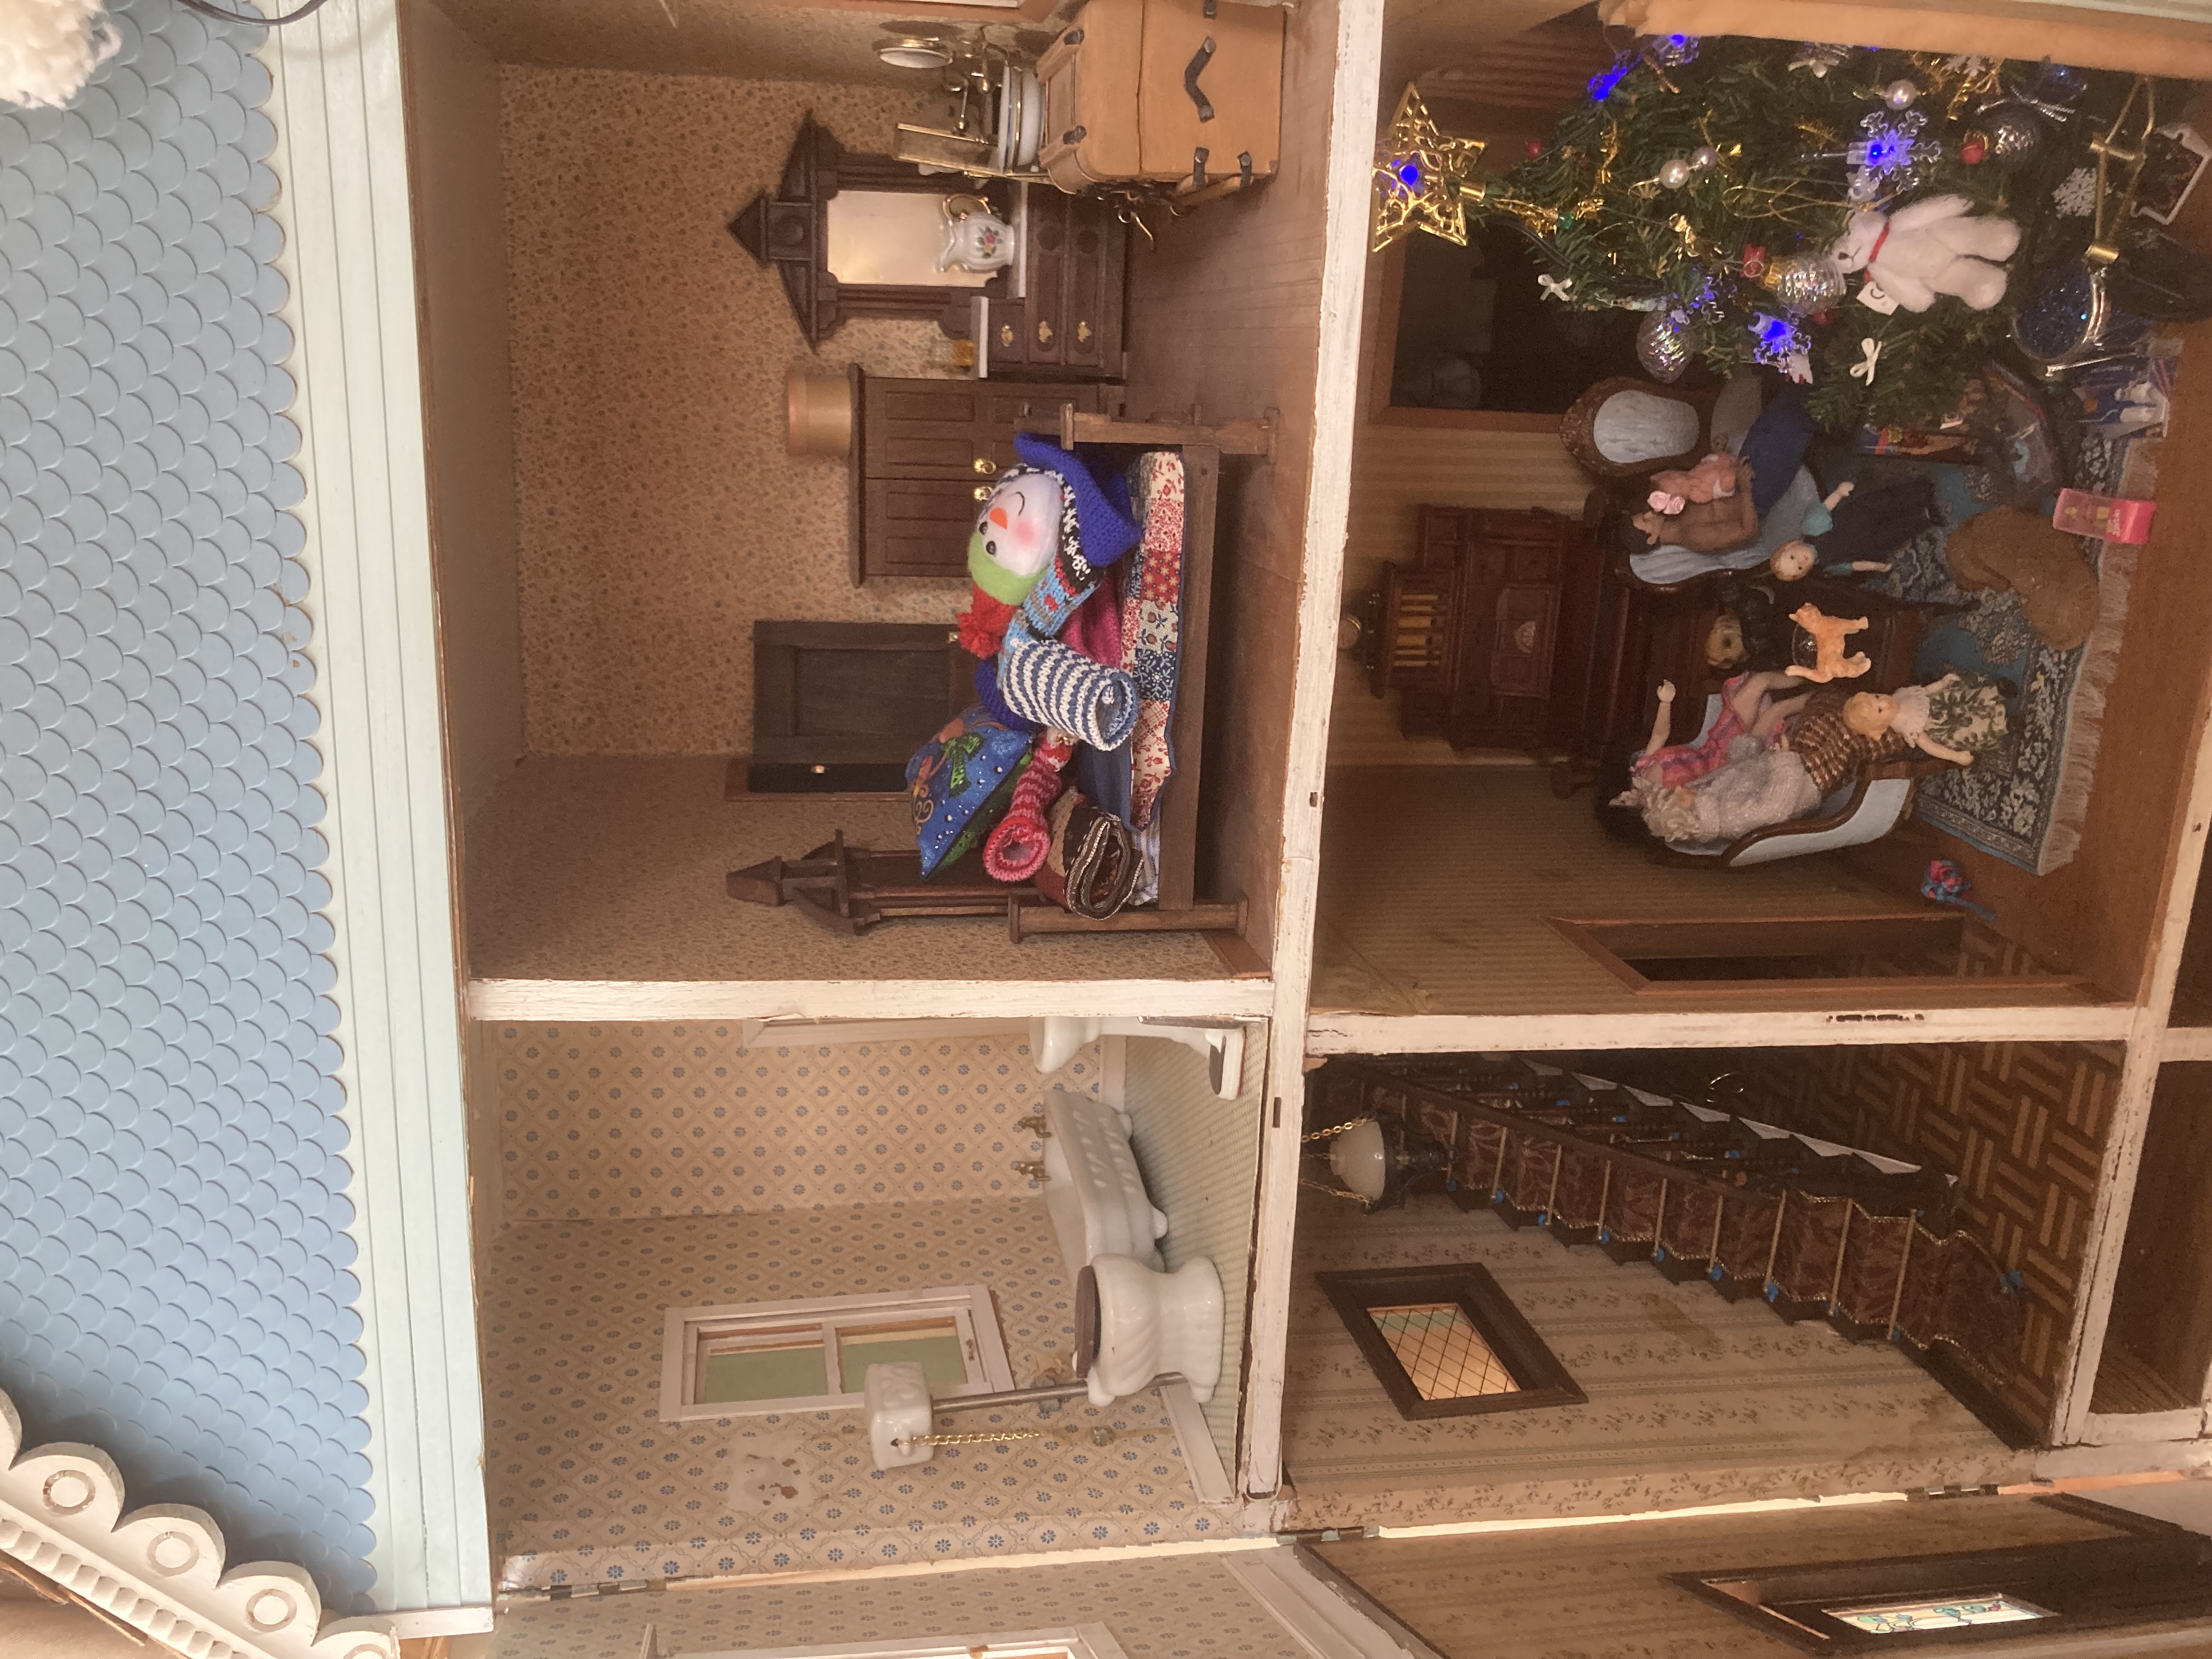
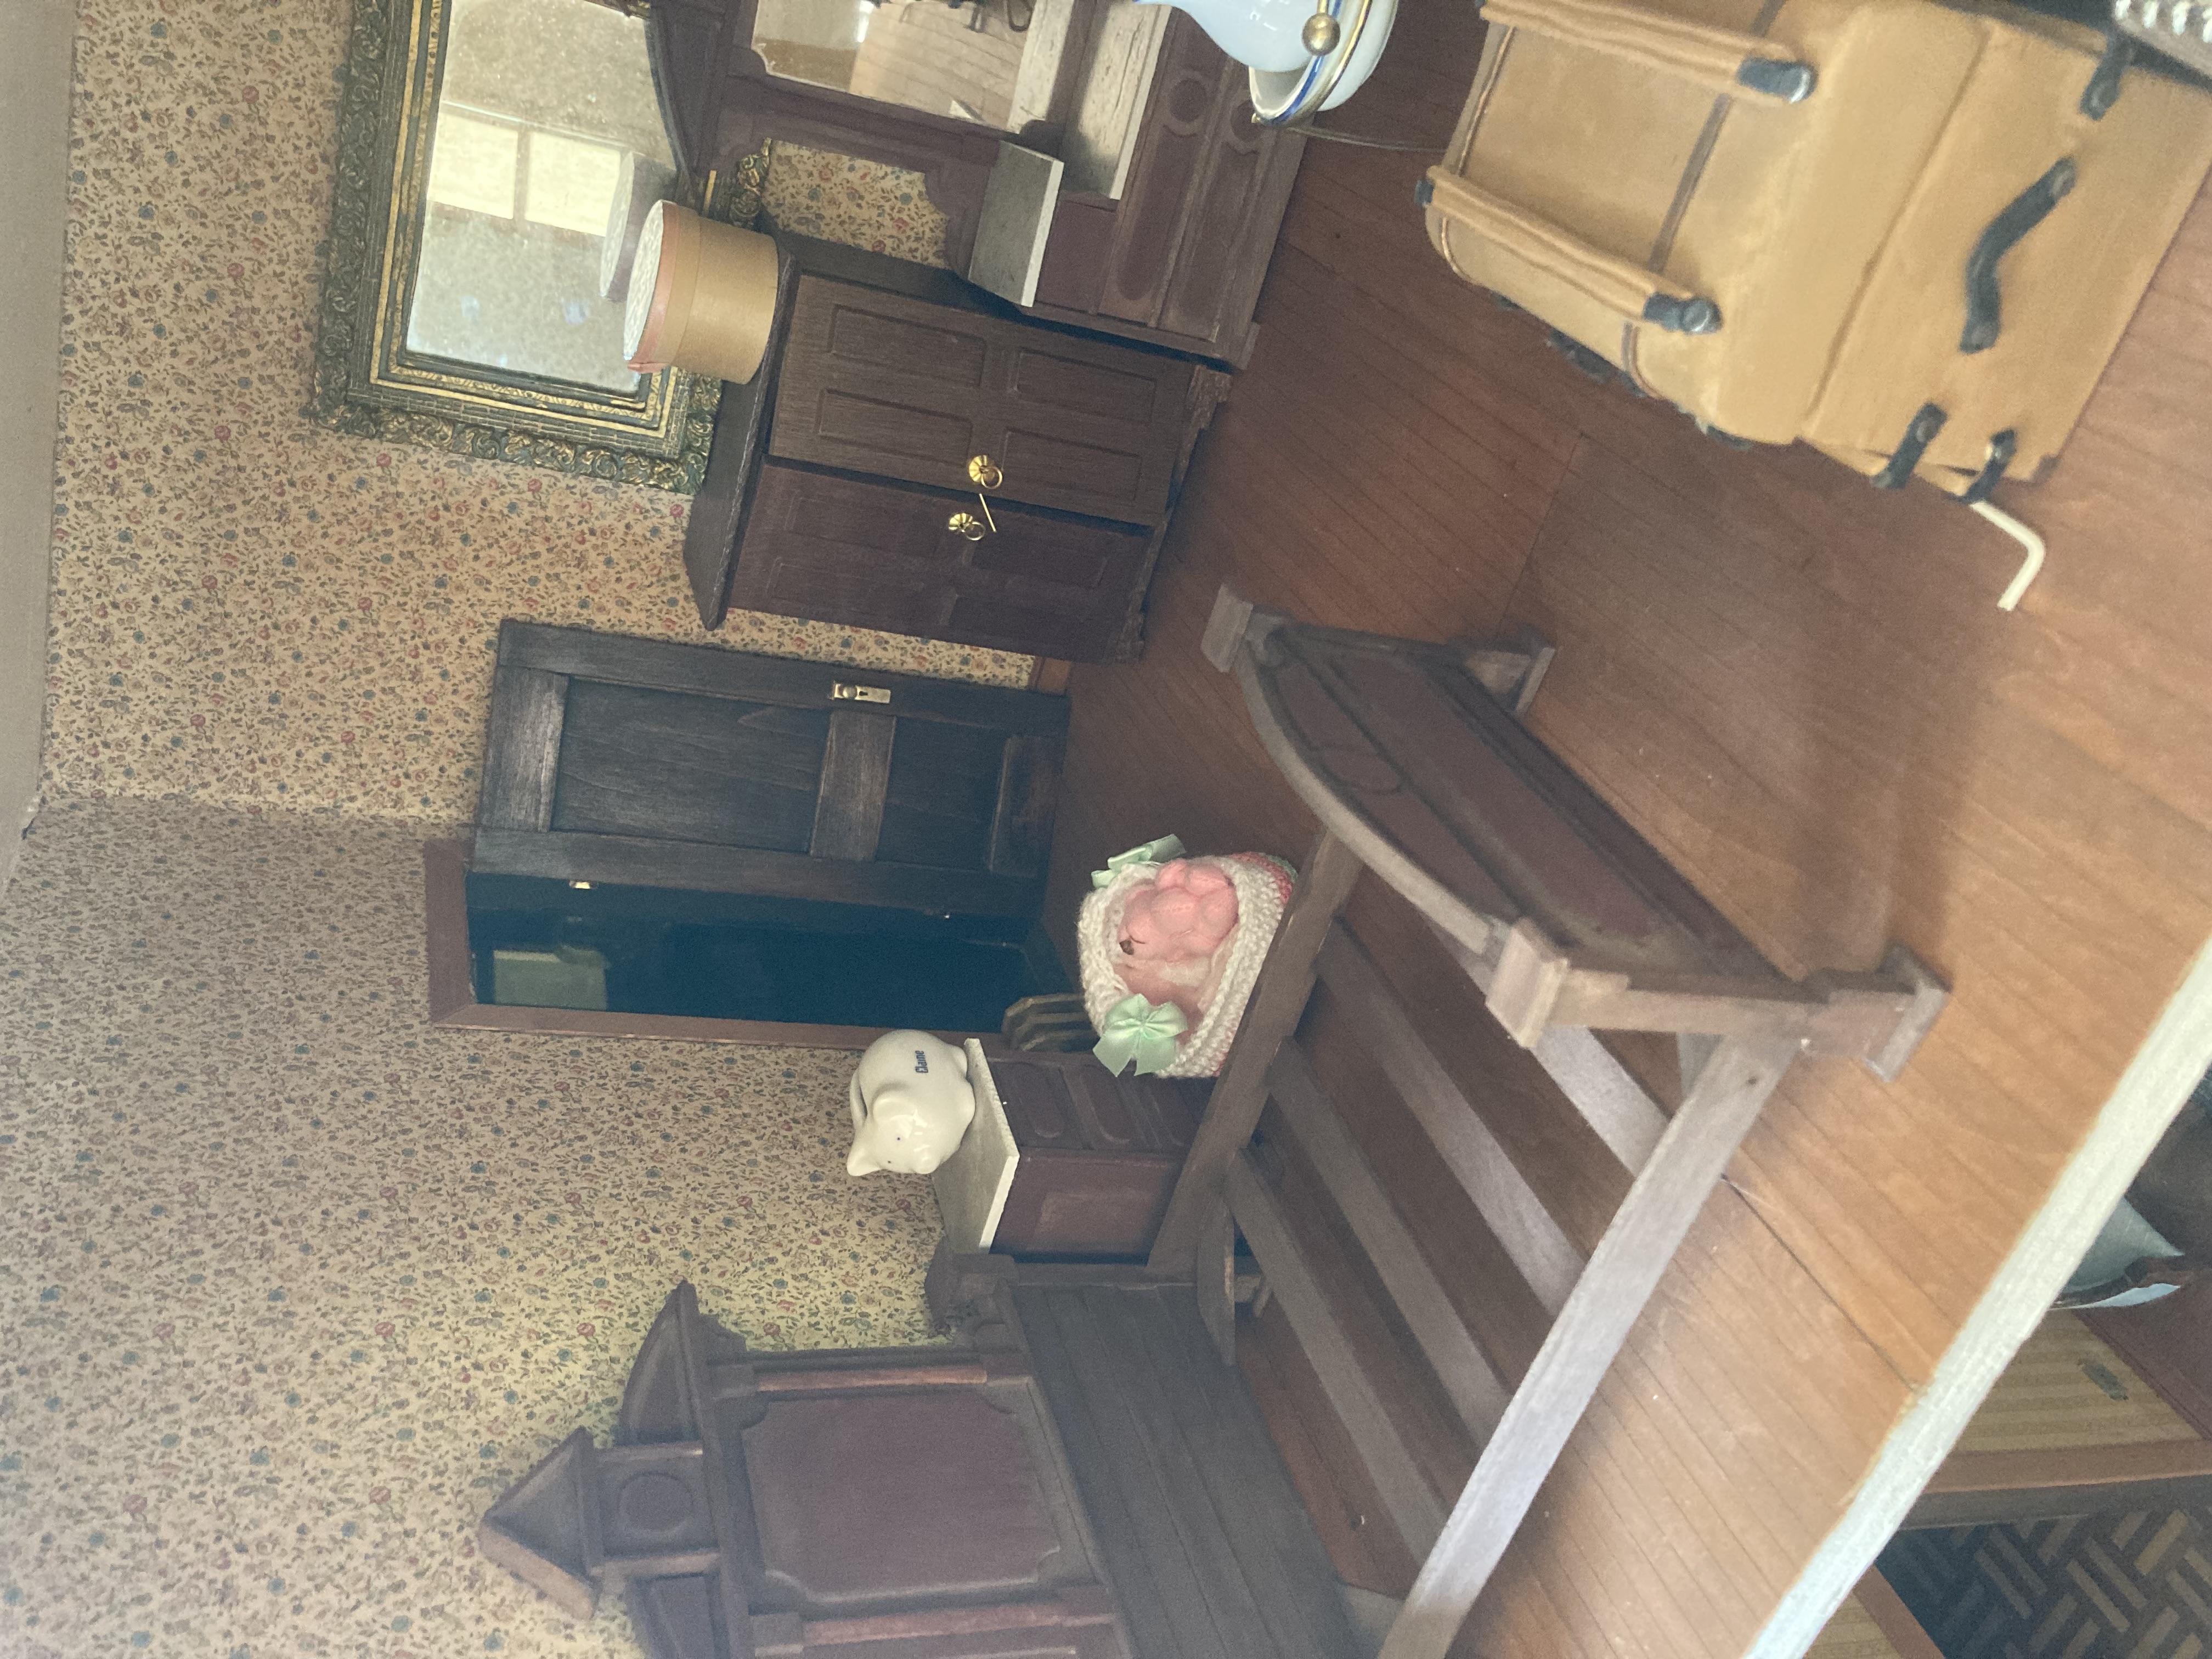
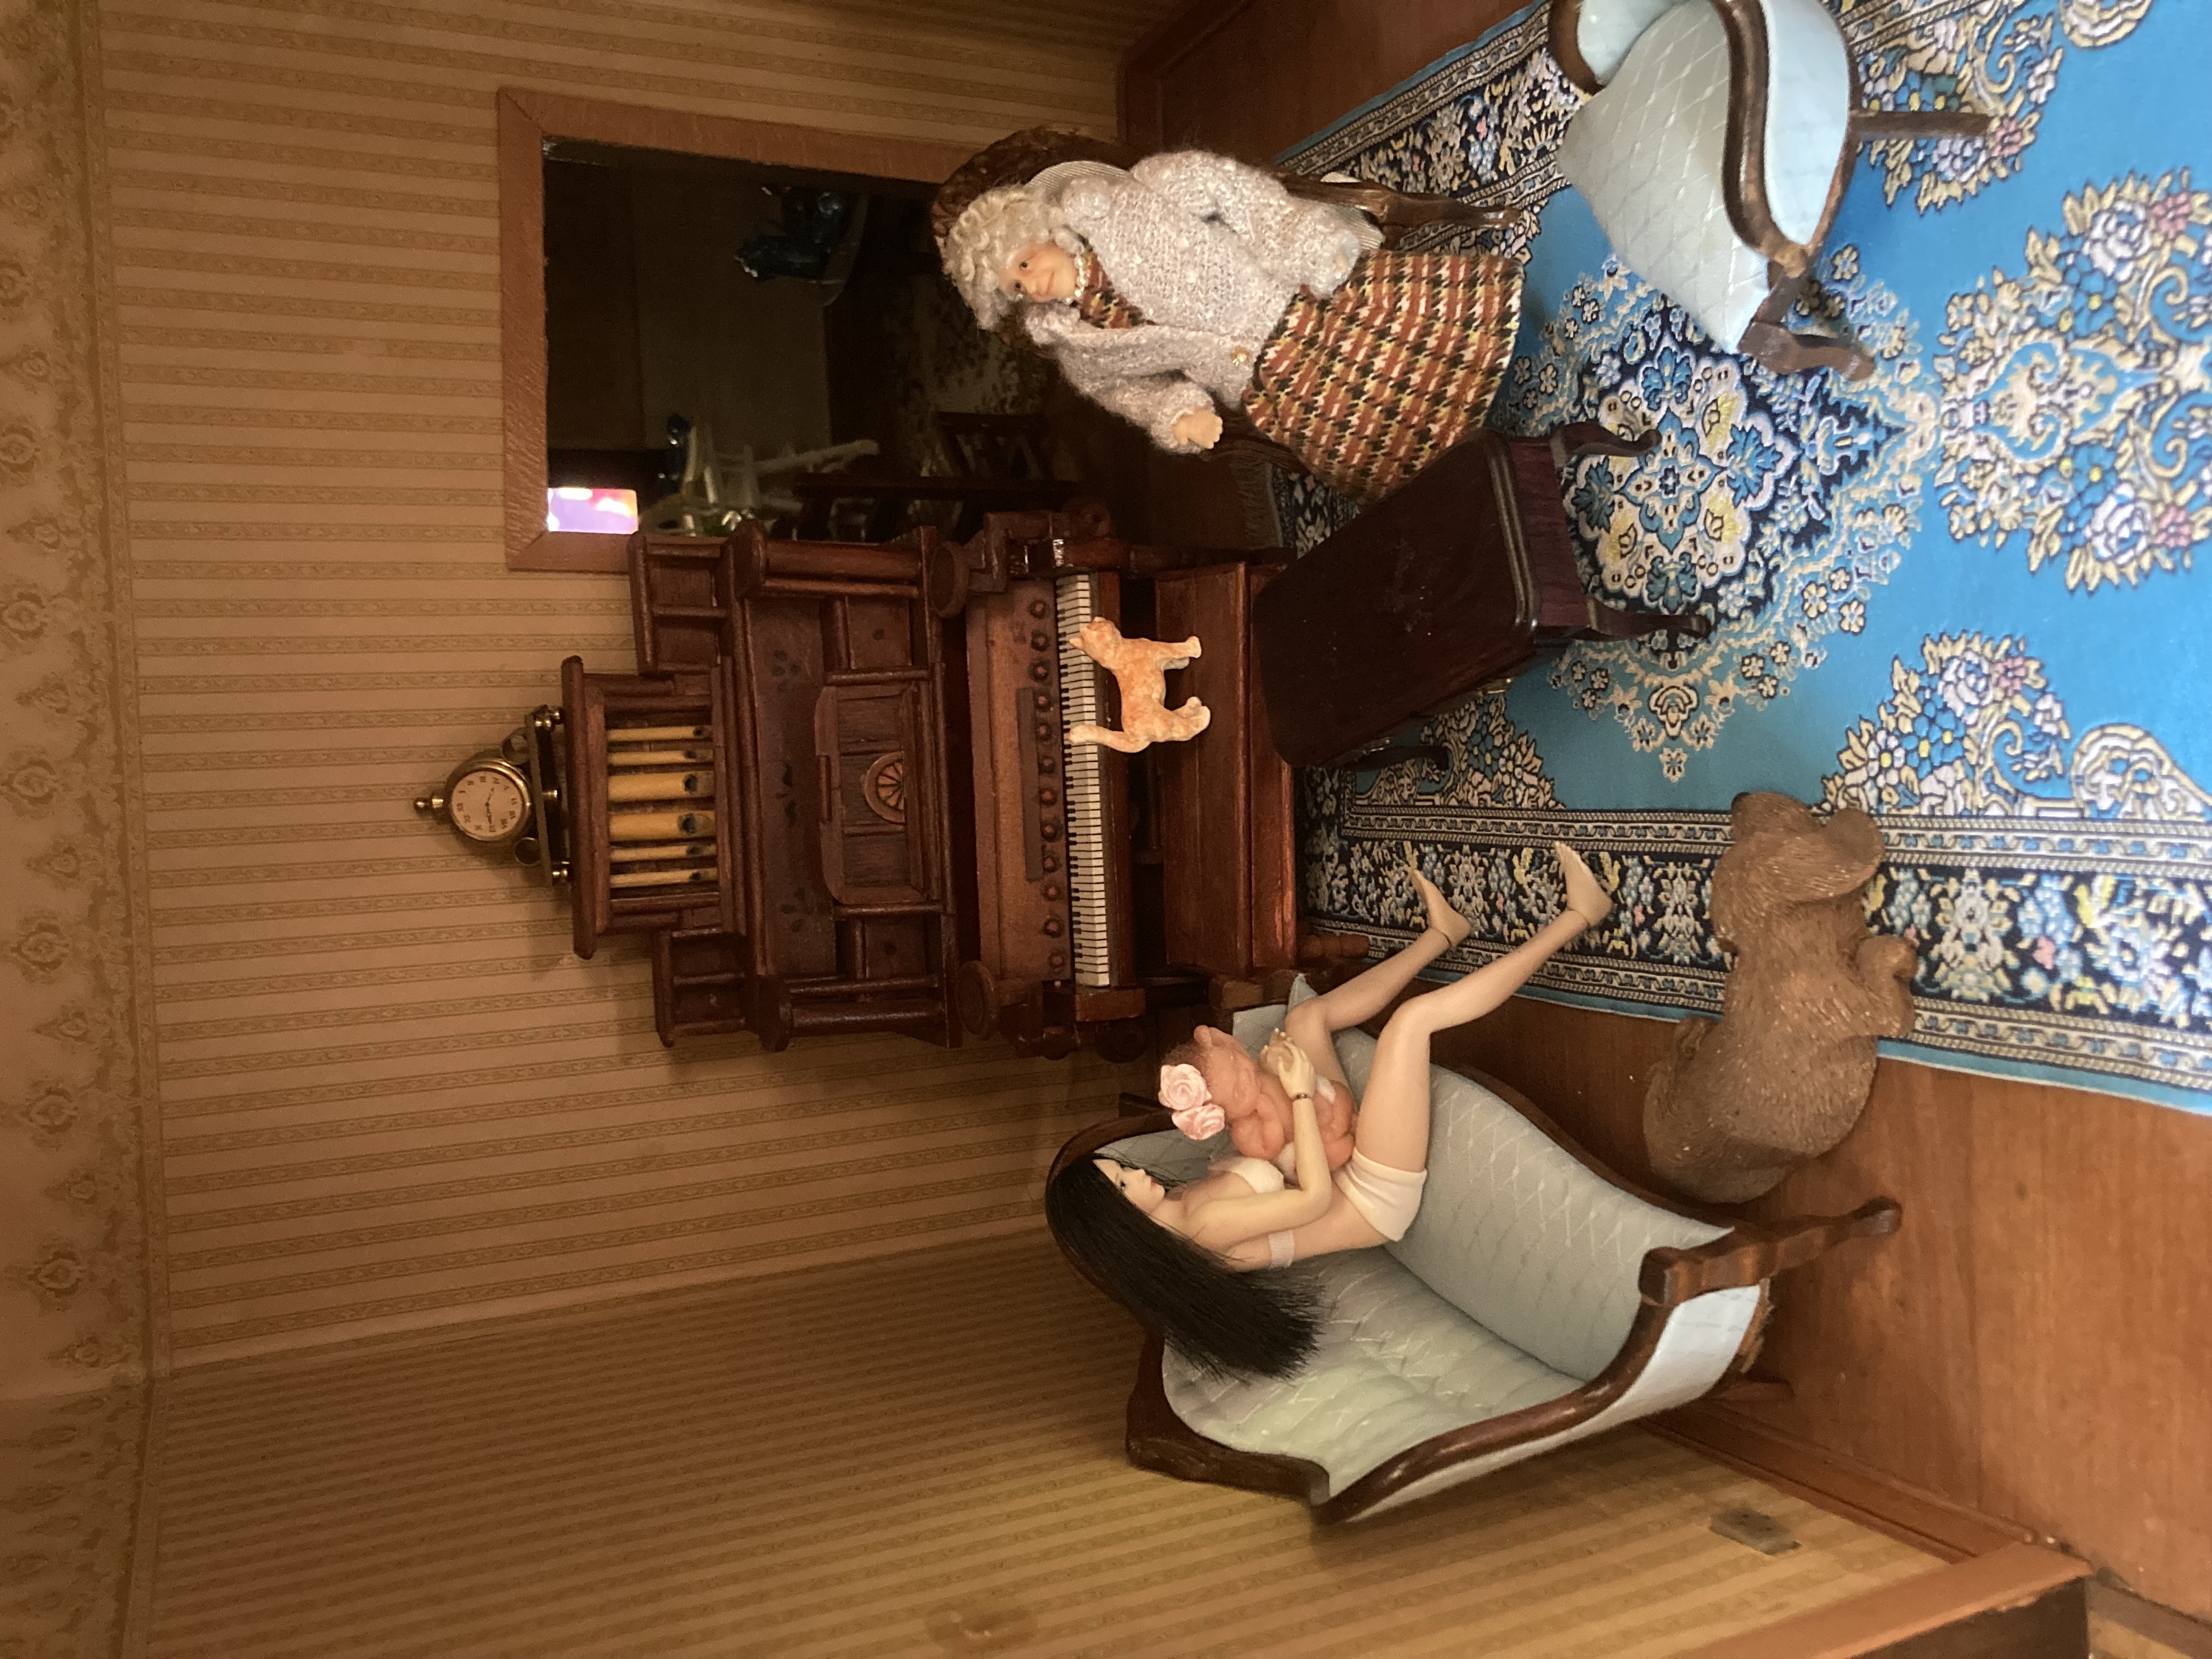
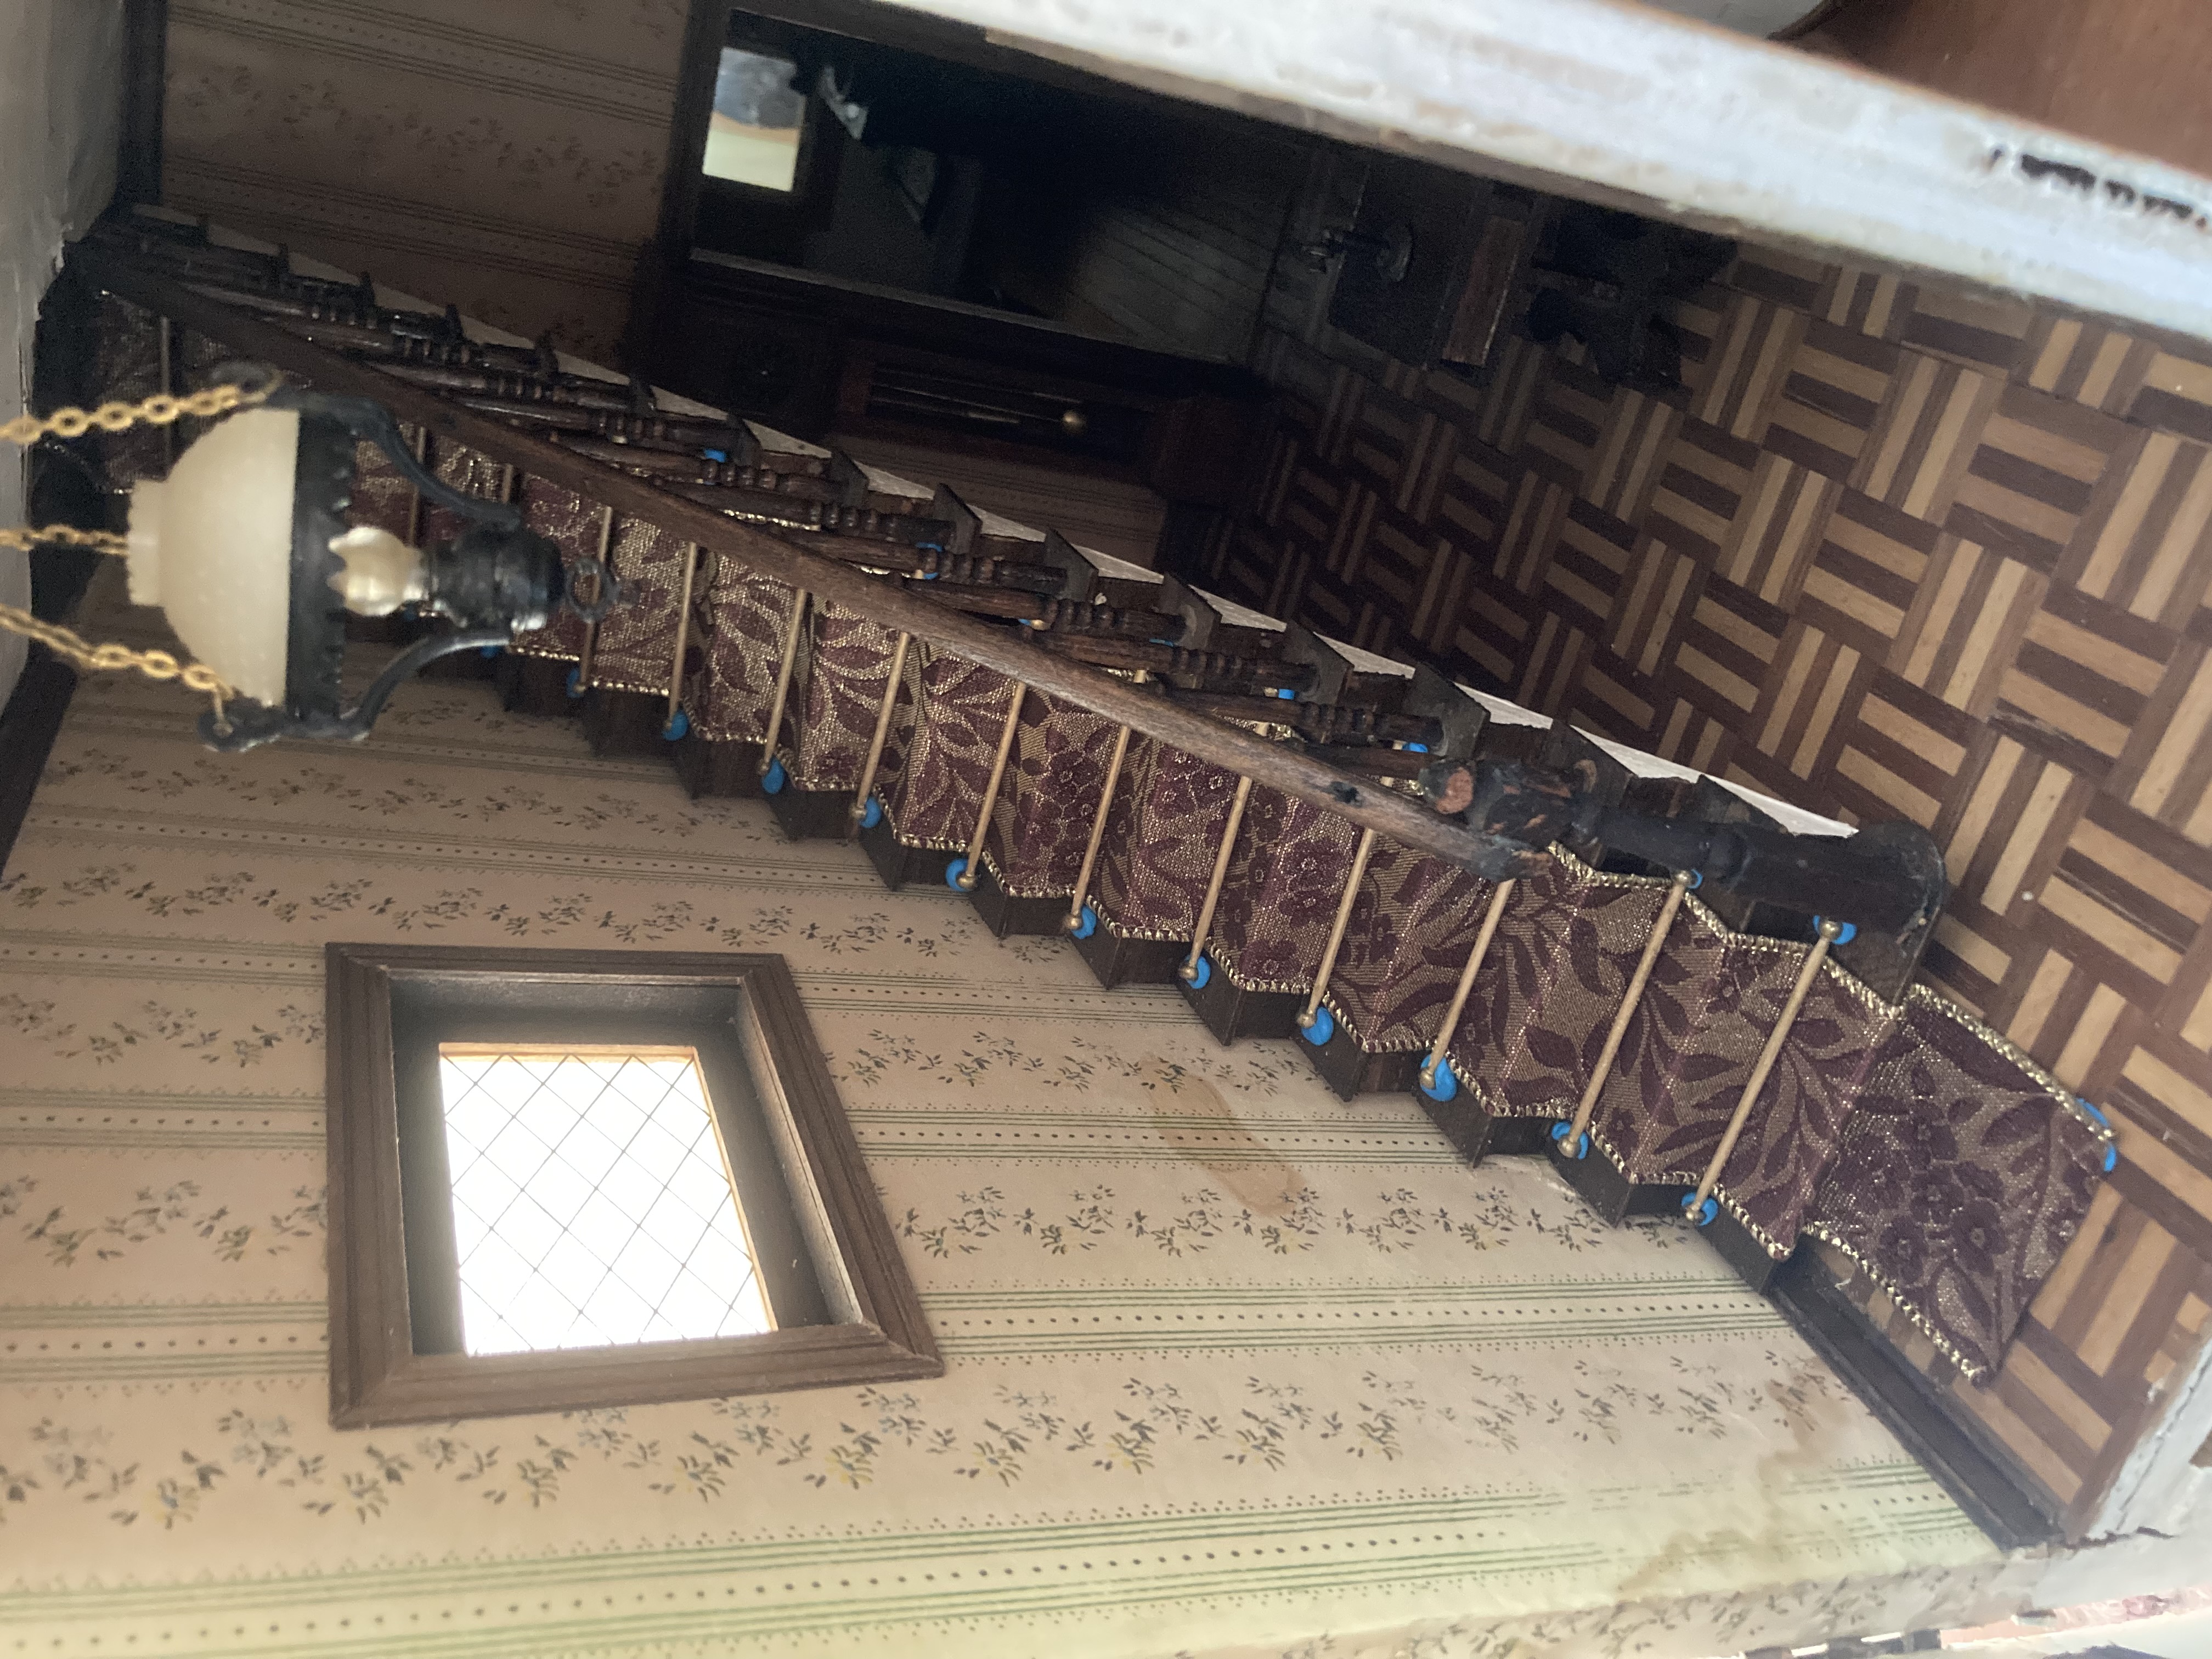
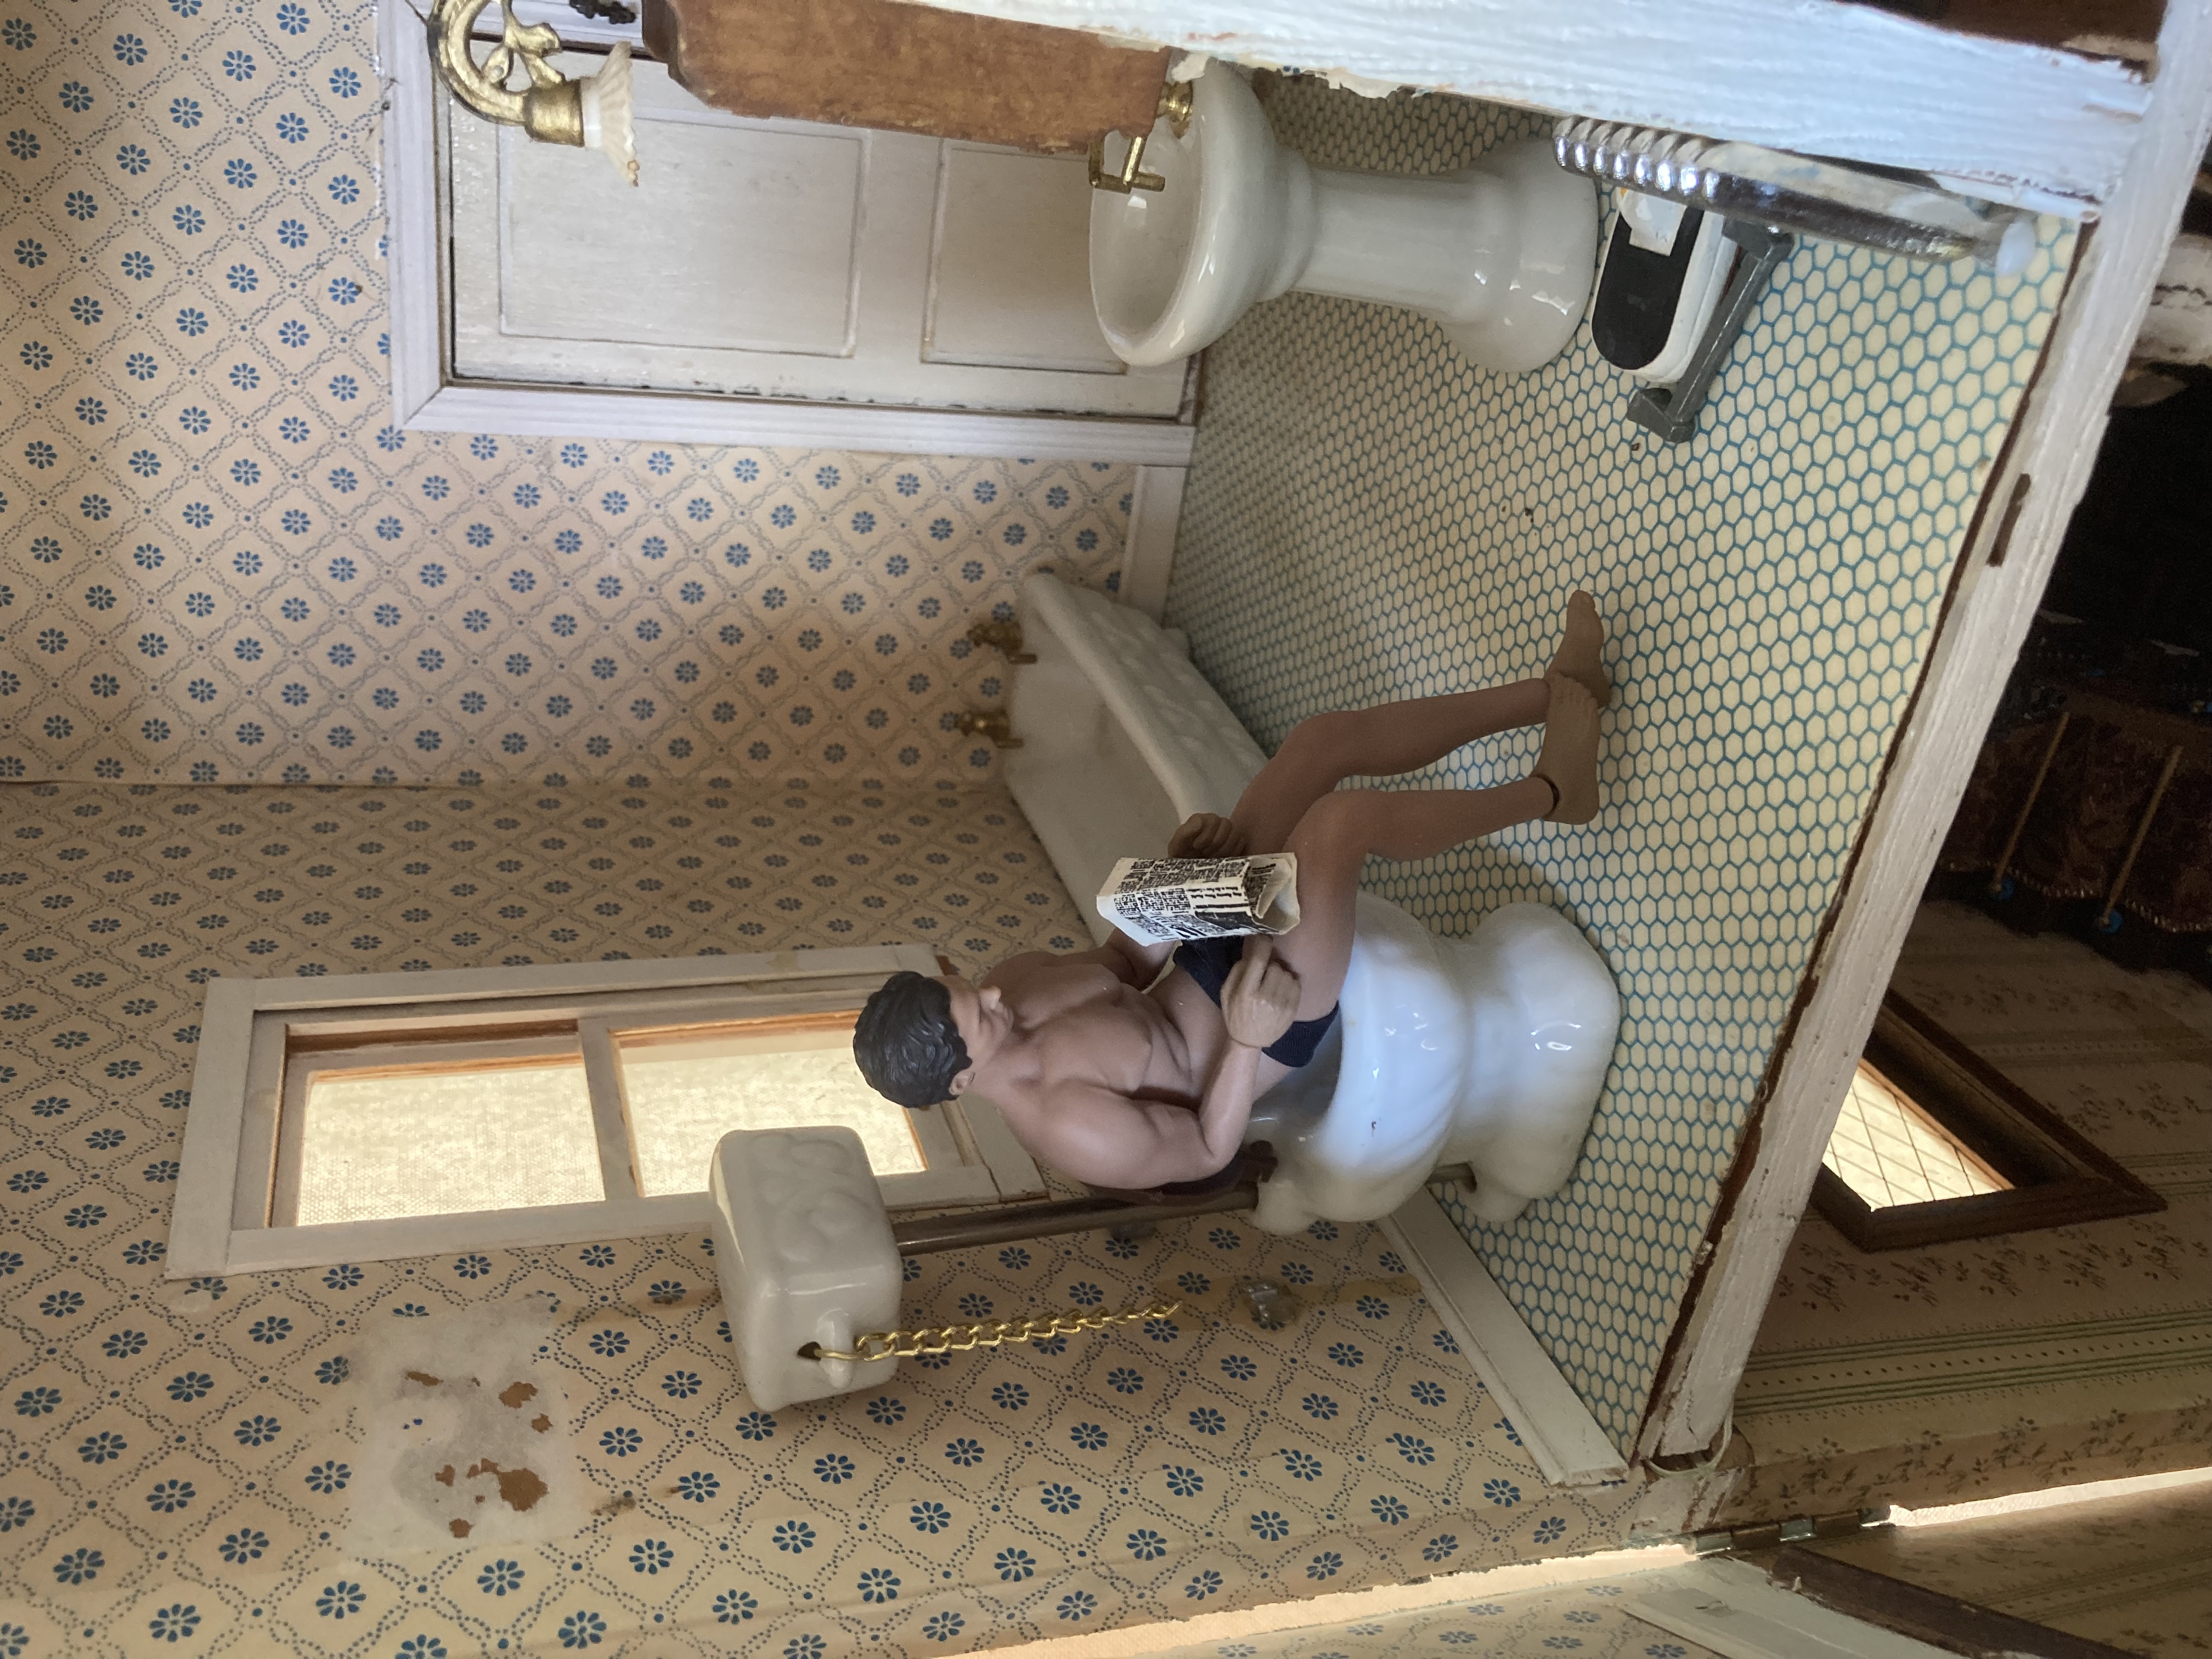
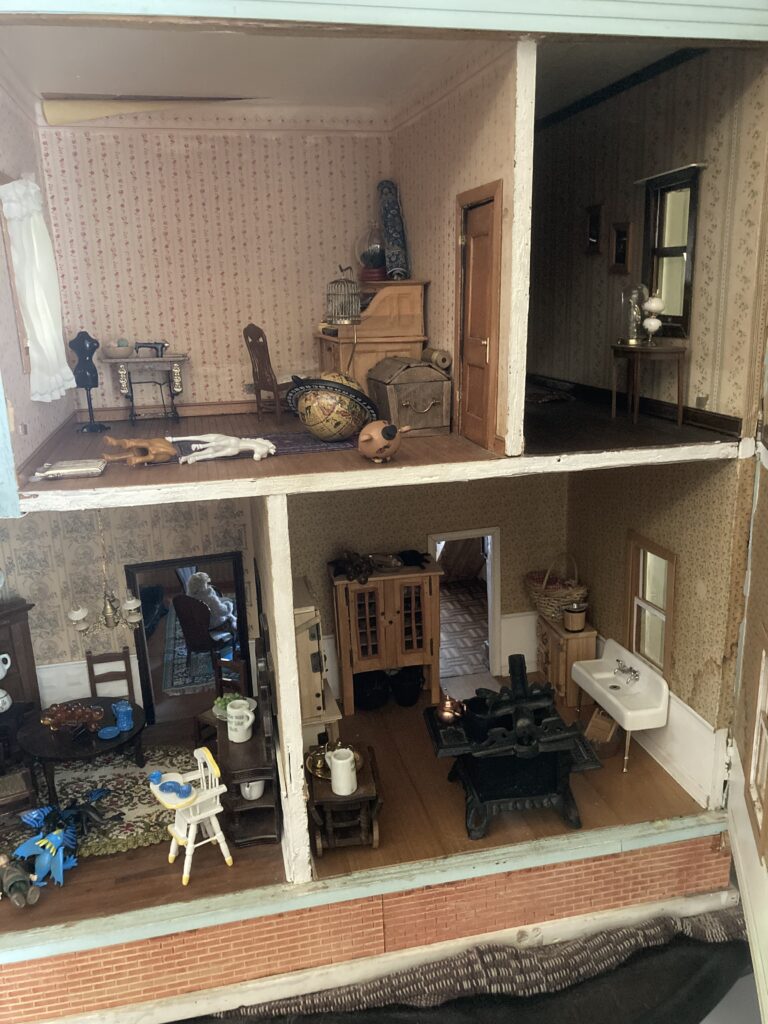
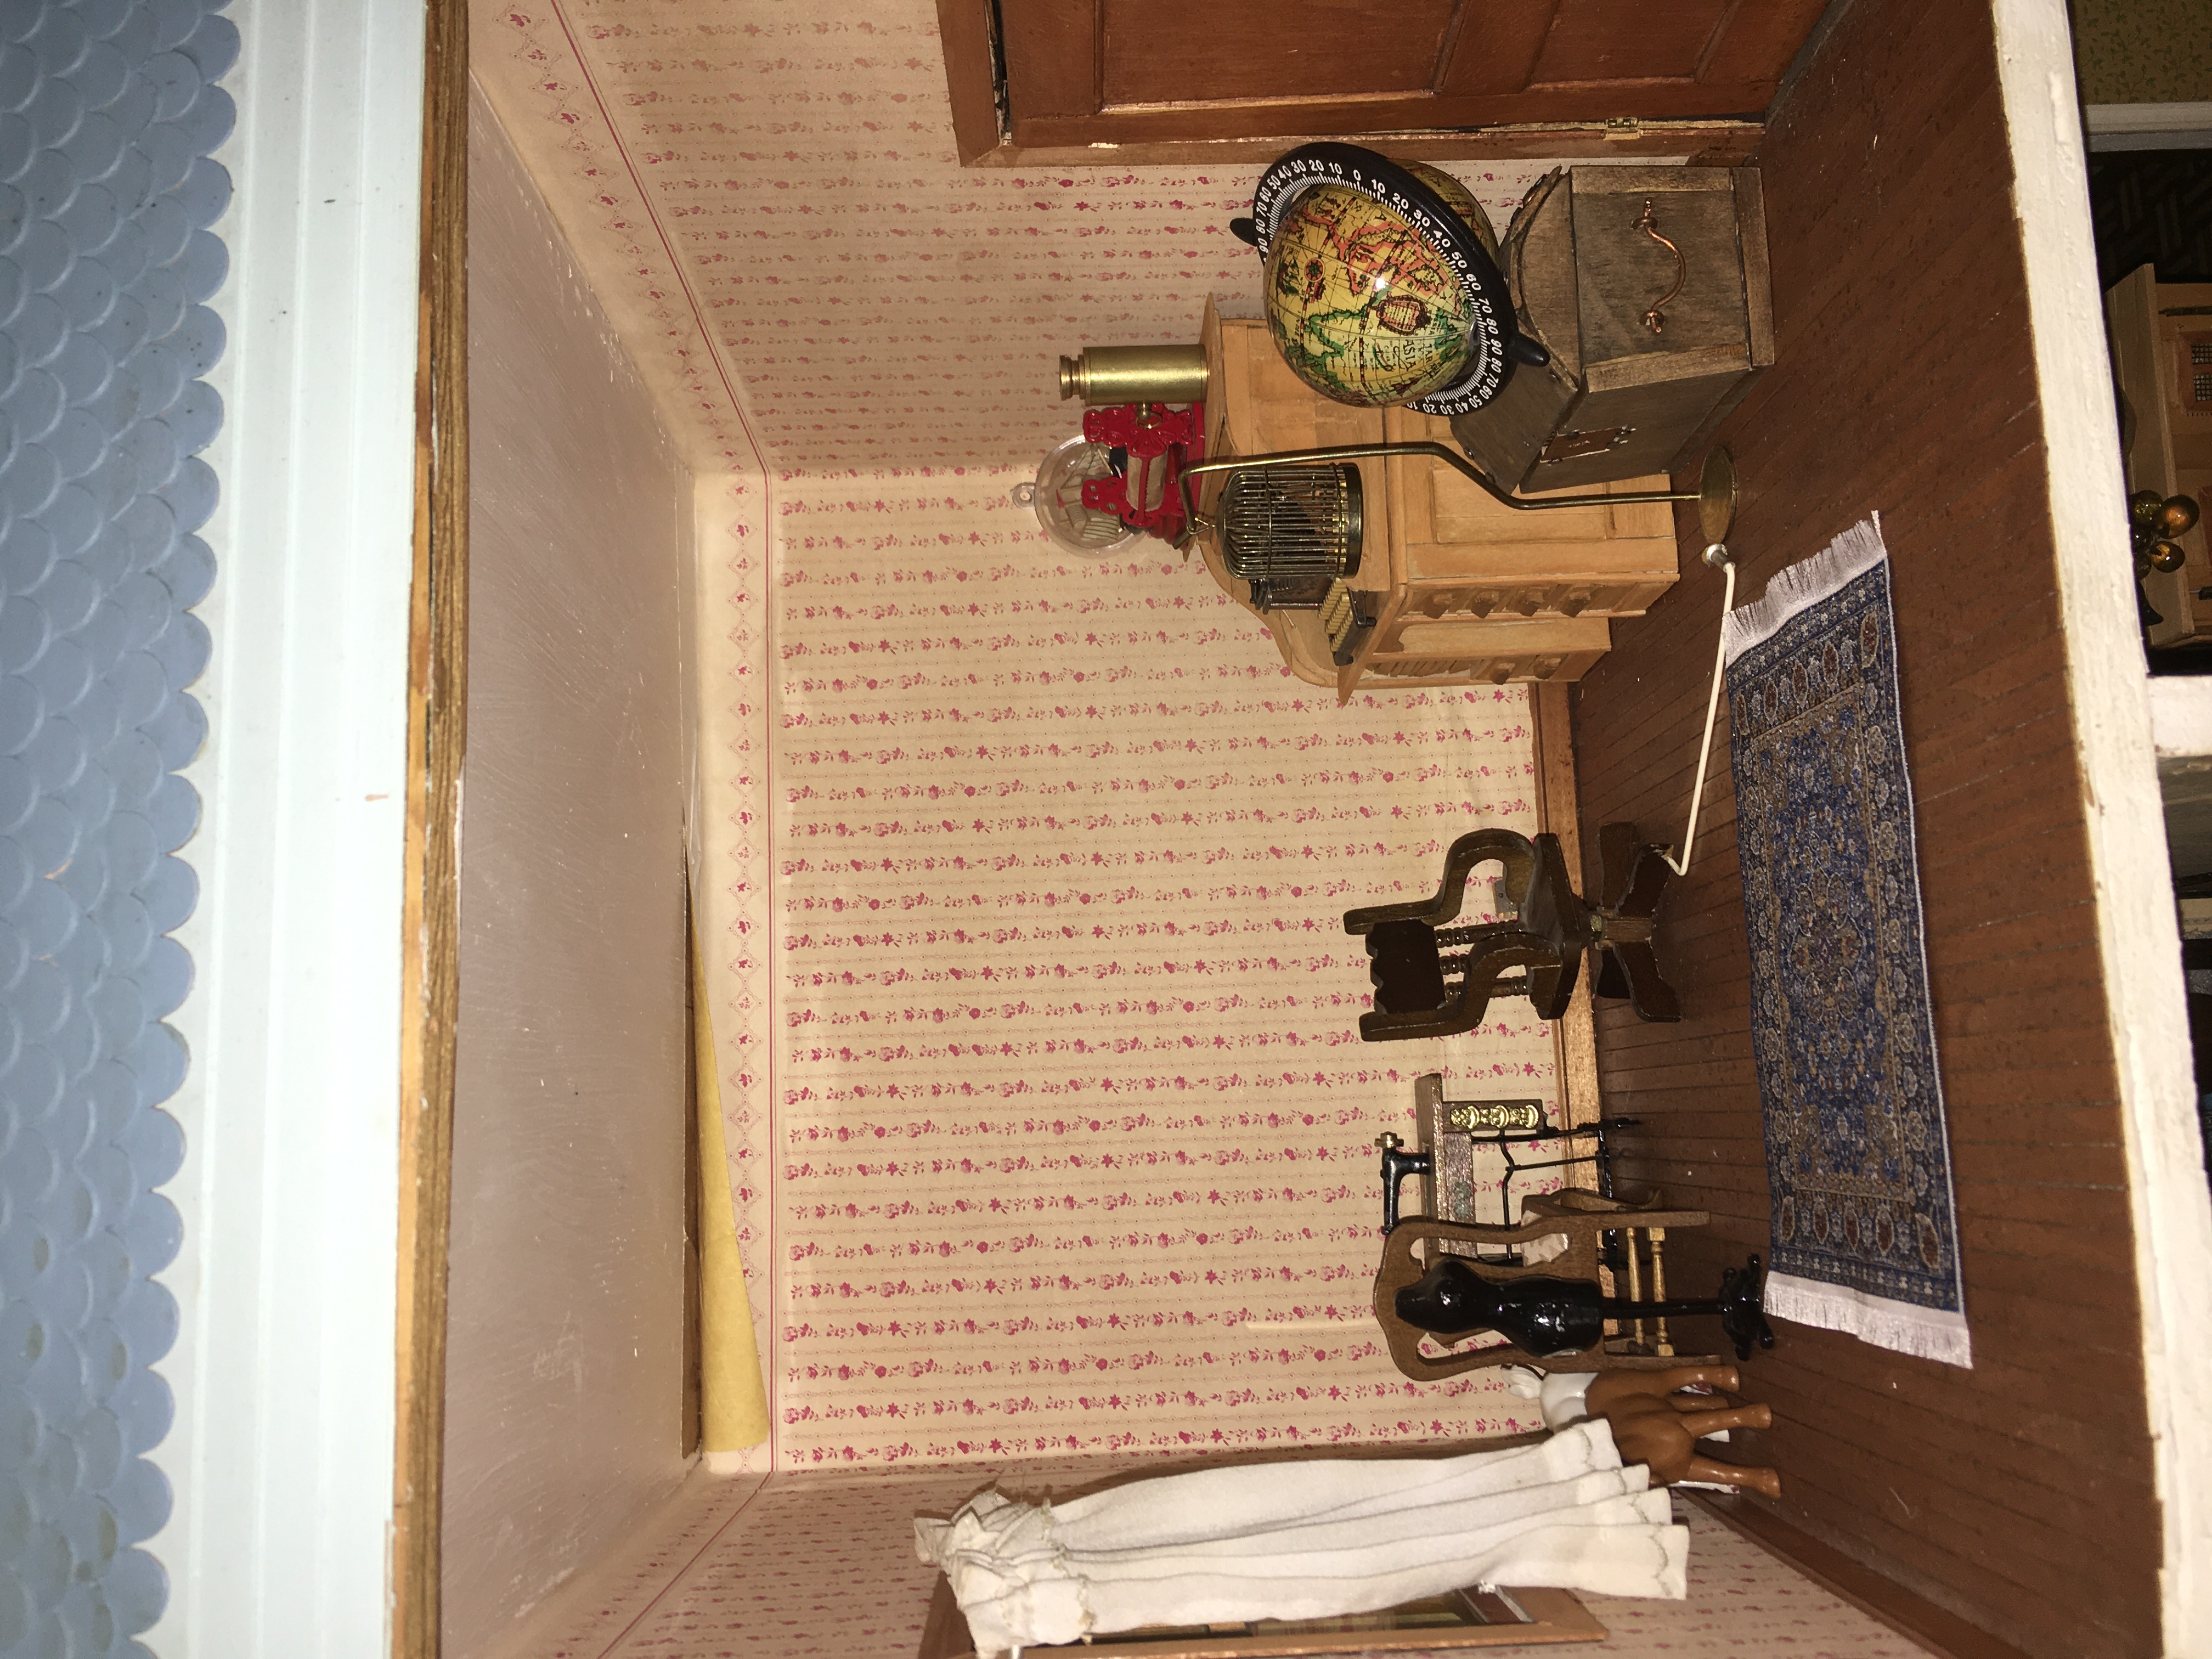
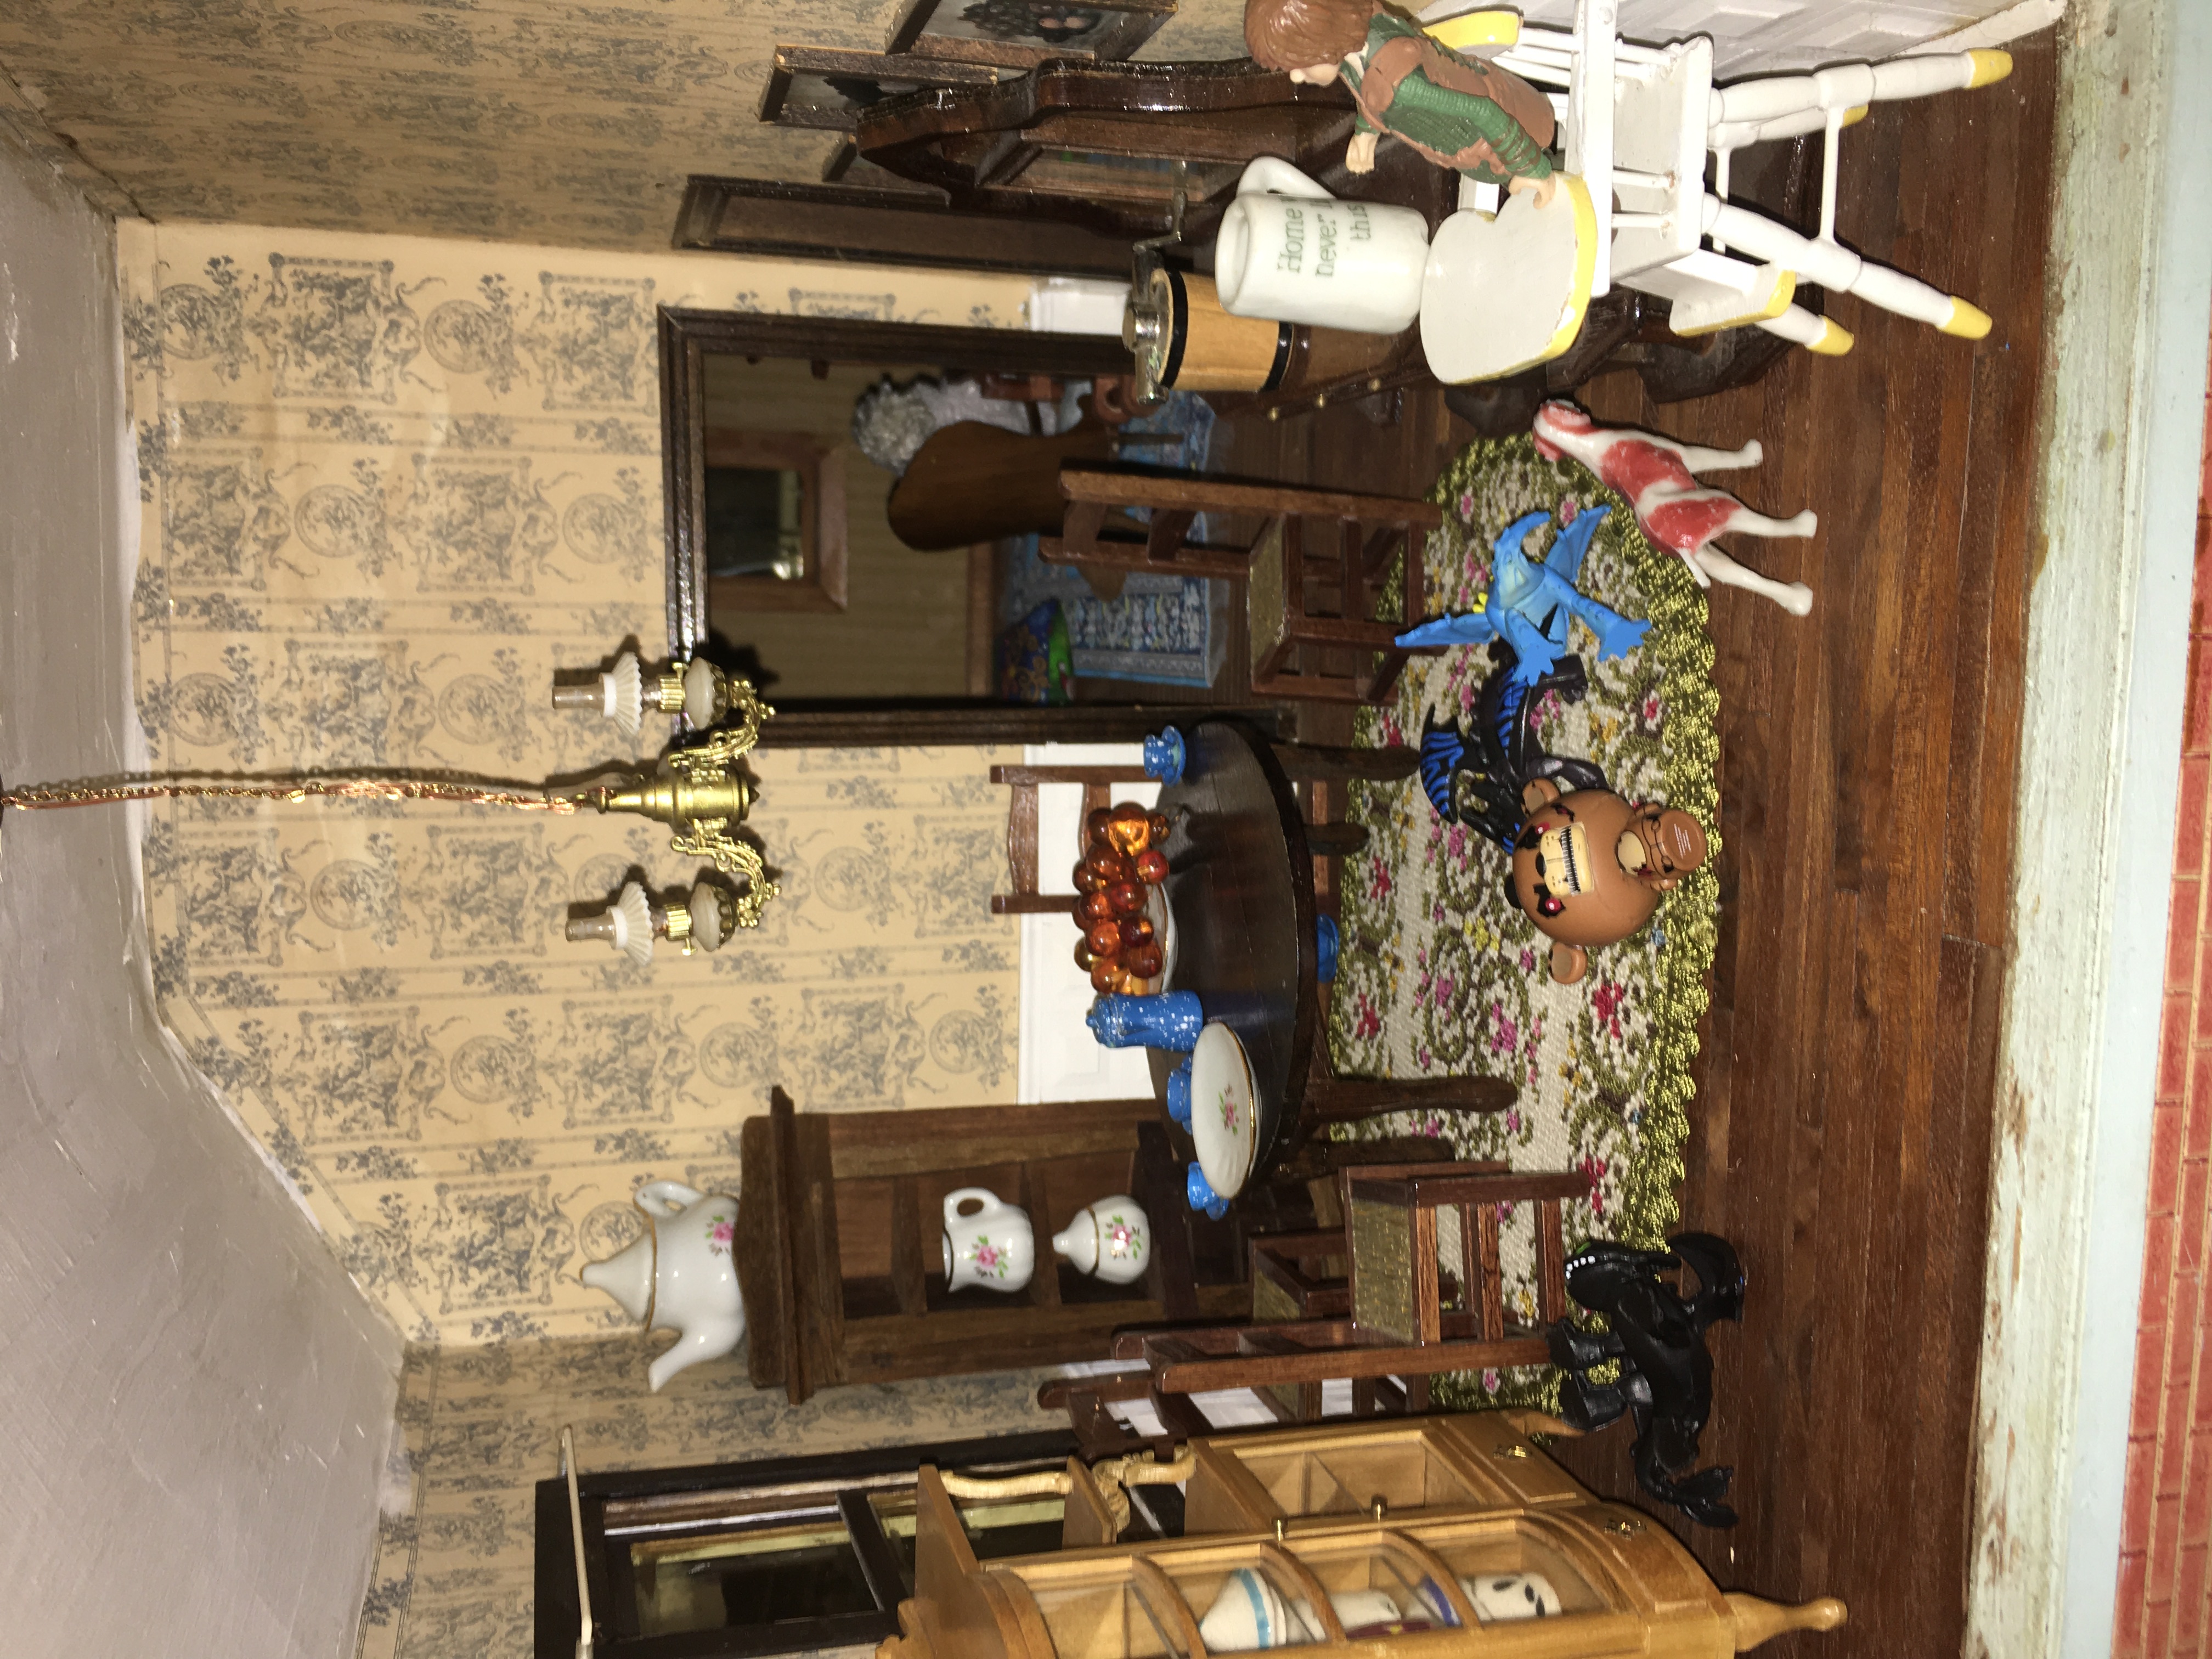
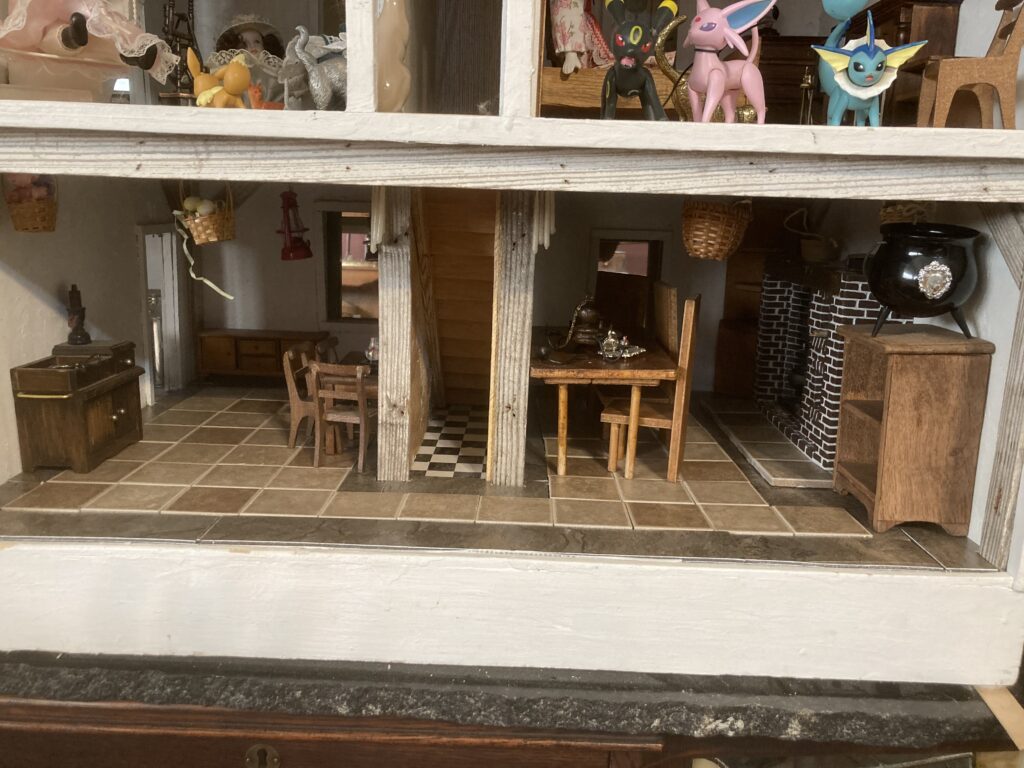
Here is an image of the space under the hinged roof. On the left is the untidy nursery, and on the right is the untidy attic. Note the studs in the walls, like an unfinished space. I love the details that the maker put into this house.A closeup of the nursery. Note the built-in cupboards/drawers in the back. These appear to be made of thin wood. This is the side with the front door and porch opened up. It has the stairwell, the bathroom, the main bedroom, and the parlor. This is during Christmas. A closeup of the main bedroom, before I got the mattress made for the bed. The trunk was something I made as a teenager and the bedroom set was a vintage victorian bedroom kit from Realife Miniatures.A closeup of the parlor. The parlor organ was a windup music box that I altered to resemble a Reed Organ, using wood, popsicle sticks, and dowels. The stairs. The rug is a wide strip of ribbon, with stair rods made of toothpicks capped with beads, held in place with blue sticky putty (until I switch it to museum wax).The bathroom. I found some glass mosaic tiles that I eventually plan to install. I think I will attach them to matboard and piece it in along the walls and floor so I can just cover up the existing stuff without damaging it. The doll is a Ficen, with a Tom Holland head added. This view is with the other side opened up. It shows the kitchen, dining room, second bedroom, and upstairs hallway.The second bedroom. I plan on making this the grandmother’s room. I would like to make a murphy bed to put in here. I did make the rolltop desk as a miniature of my own desk, and the trunk is one I made as a teenager. This is an older photo, as I now have a nicer Heidi Ott sewing machine.The dining room, with my daughter’s toys in residence. The kitchen. I made the piesafe out of popsicle sticks. I would like to make a decent hoosier cabinet to put in here, also. There is one that I made (out of view on the wall opposite the sink) but I wasn’t very happy with it and want to replace it.
The insides of this house are constantly changing and evolving as I find different pieces of furniture or as I decorate for the seasons. Lately I have found myself wondering what new siding would look like, or even bricks? In my area of Michigan, I see a lot of old brick farmhouses, and they are breathtaking! I haven’t seen any photos of a brick pepperwood farm before. Perhaps someday I will try it out, even if it’s just printing some bricks on paper and taping them to the siding to see what it might look like.
Have any questions or comments? Want to see more photos of anything specific? Just leave a comment in the comment section!
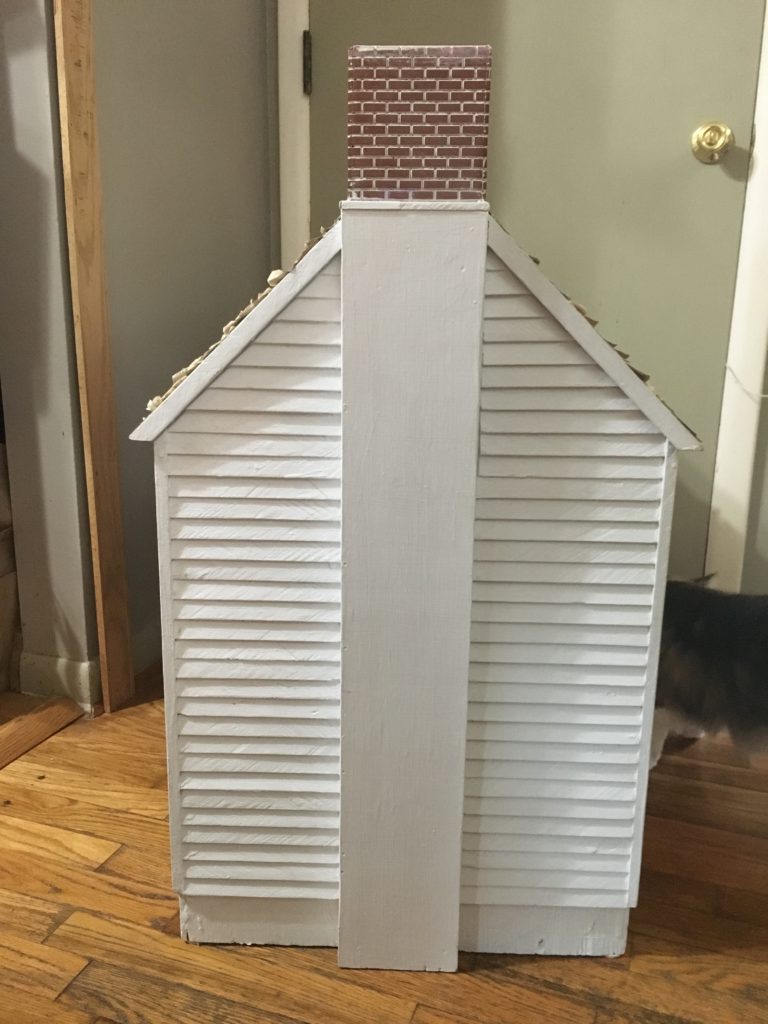
I found this dollhouse on Marketplace for $20, and I just love the simple design! It reminds me so much of a 1700’s colonial, that I am going to decorate it for that era, as well as I can.
When I found this dollhouse on Markeplace for $20, I just had to have it! It reminds me of a 1700’s colonial (first period home), with its simple design and nice wood siding.
Wouldn’t this be awesome with a walk-in fireplace?The inside needs some definite updating.
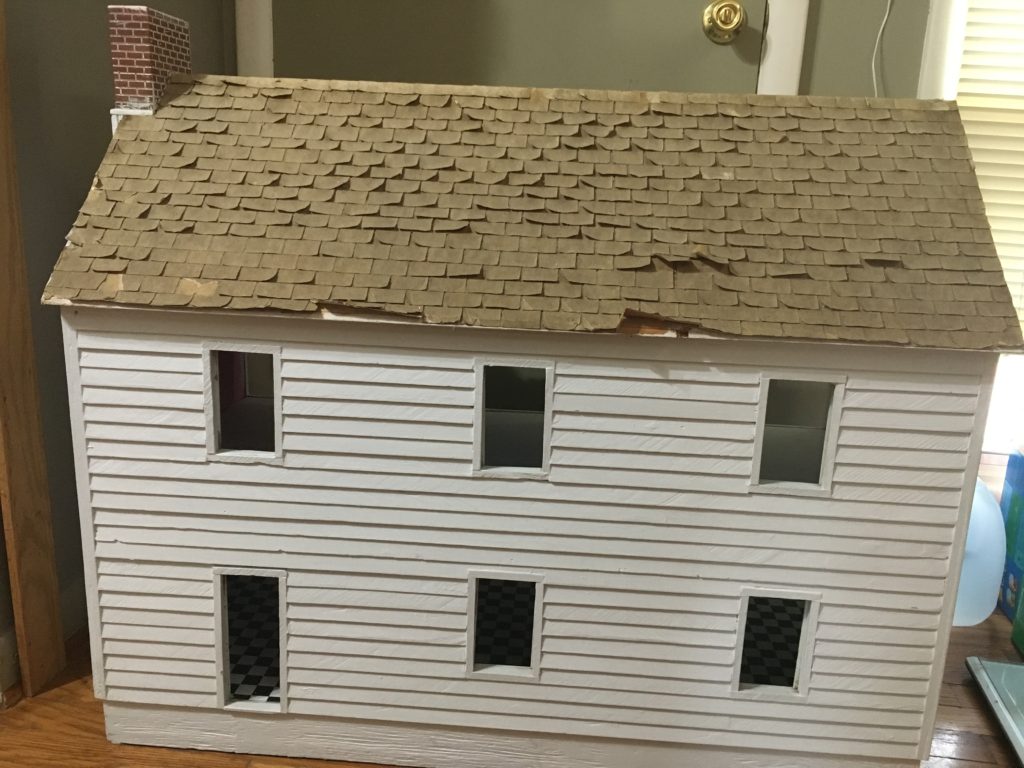
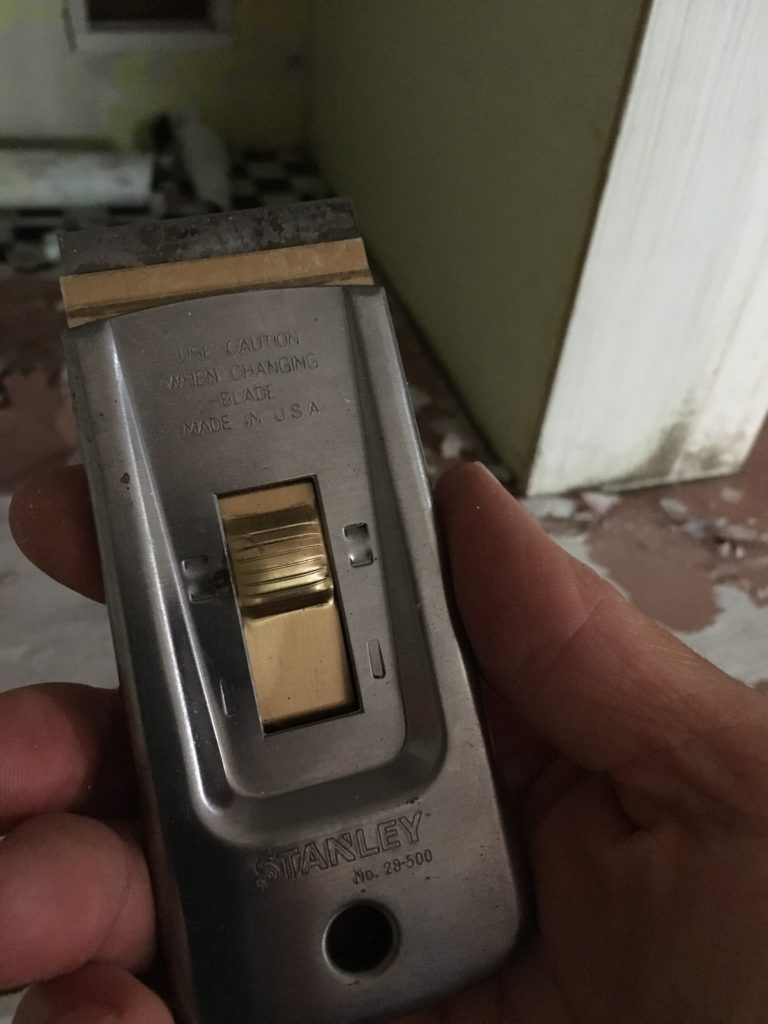
The first thing I did when I brought this huge, heavy dollhouse home was to scrape off the old shingles. They appear to have been made out of sandpaper, which seemed to have worked well enough, but they were in such poor, water-damaged shape that I felt I needed to wash my hands thoroughly after handling it.
This handy tool holds a razor blade that I can use for scraping paint and whatever.
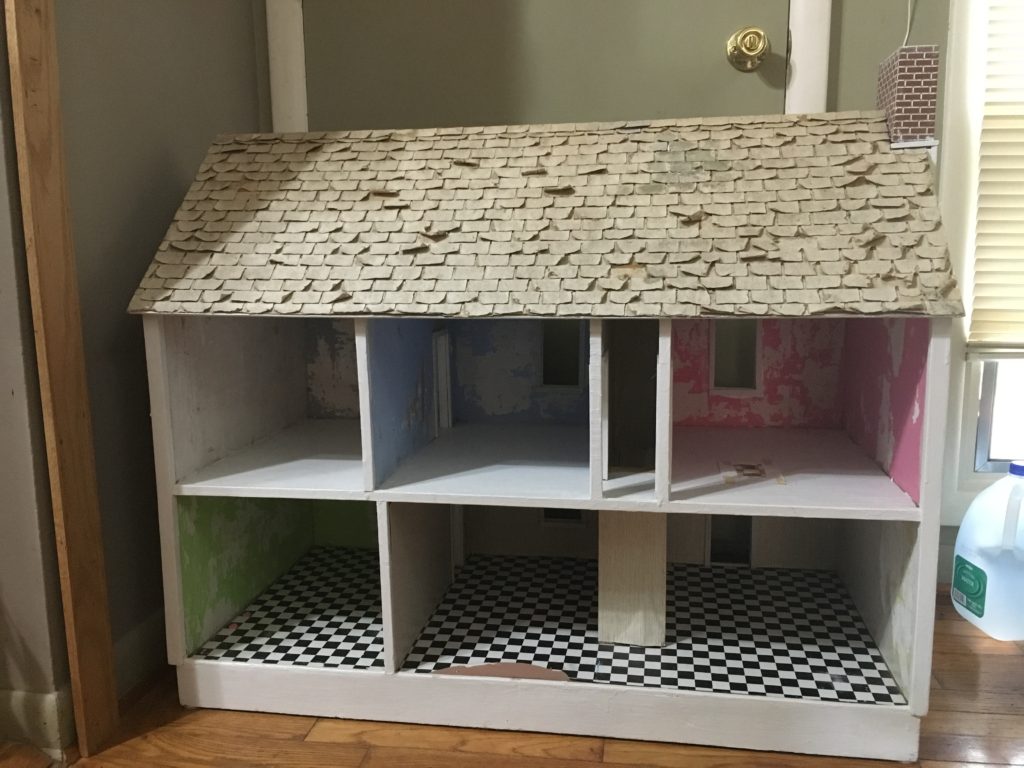
Next, I used a handy-dandy paint scraper, and went to work scraping off some of the peeling paint from the floors, walls, and ceiling.
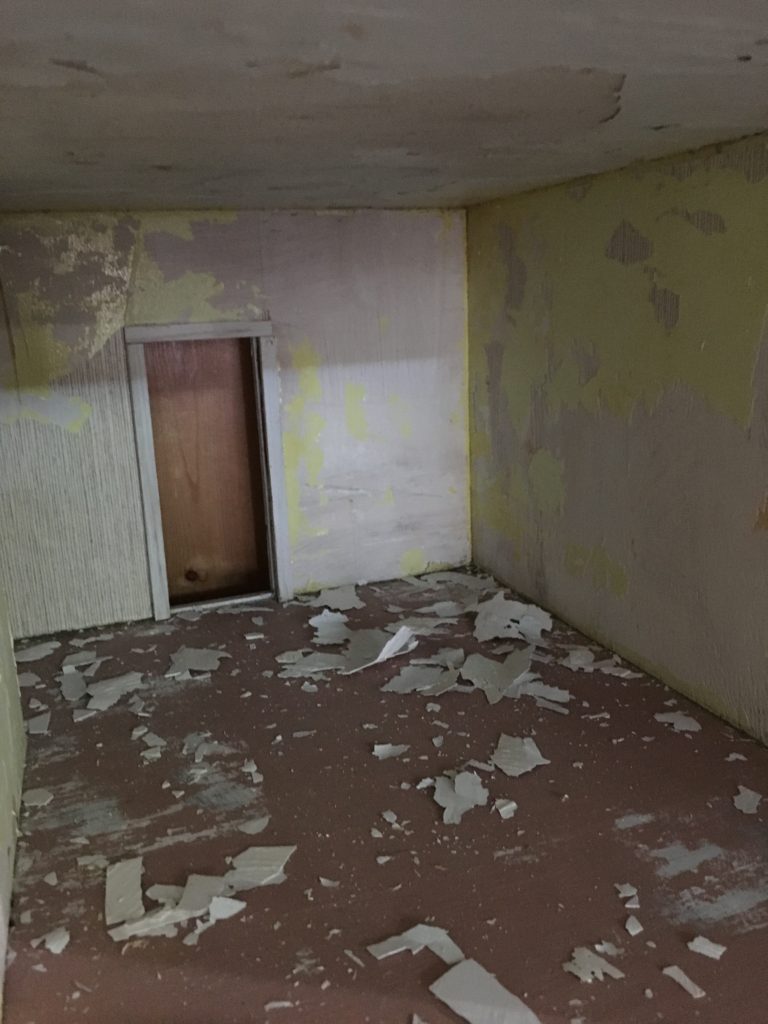
While scraping the paint off. I focused more on removing any peeling paint, as I plan to put a thin coat of plaster on the walls, with some thin wood supports in walls and ceiling, to give it a more primitive effect.
So far, I plan to apply a thin coat of plaster to give the walls a more uneven white texture, with thin pieces of wood applied to walls and ceilings to suggest supports that I can hang things like dried herbs and baskets from. Because of this, I was only interested in removing flaking paint (which there was a lot of).
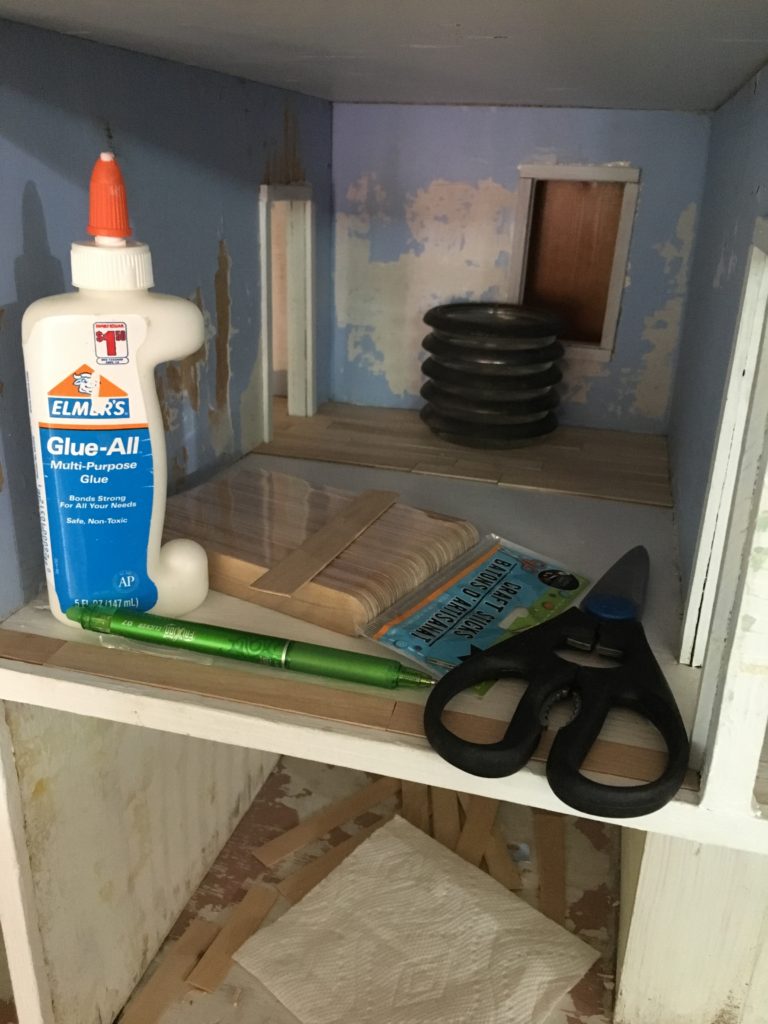
Using methods similar to those used in the farmhouse, I applied jumbo craft sticks to mimic real wood floors. I cut the rounded tips off the sticks with poultry shears and then applied them with glue, weighting them down in places that wouldn’t quite stay put. I used an xacto knife to trim around doorways and walls.
Next, I decided to work on the upstairs floors. I want to go with a pine board effect, similar to my farmhouse, but I would like the floors to look more weathered and stained. I plan to score the wood lightly with an xacto knife, to add wood grain, and then lightly stain them before varnishing.
Update:
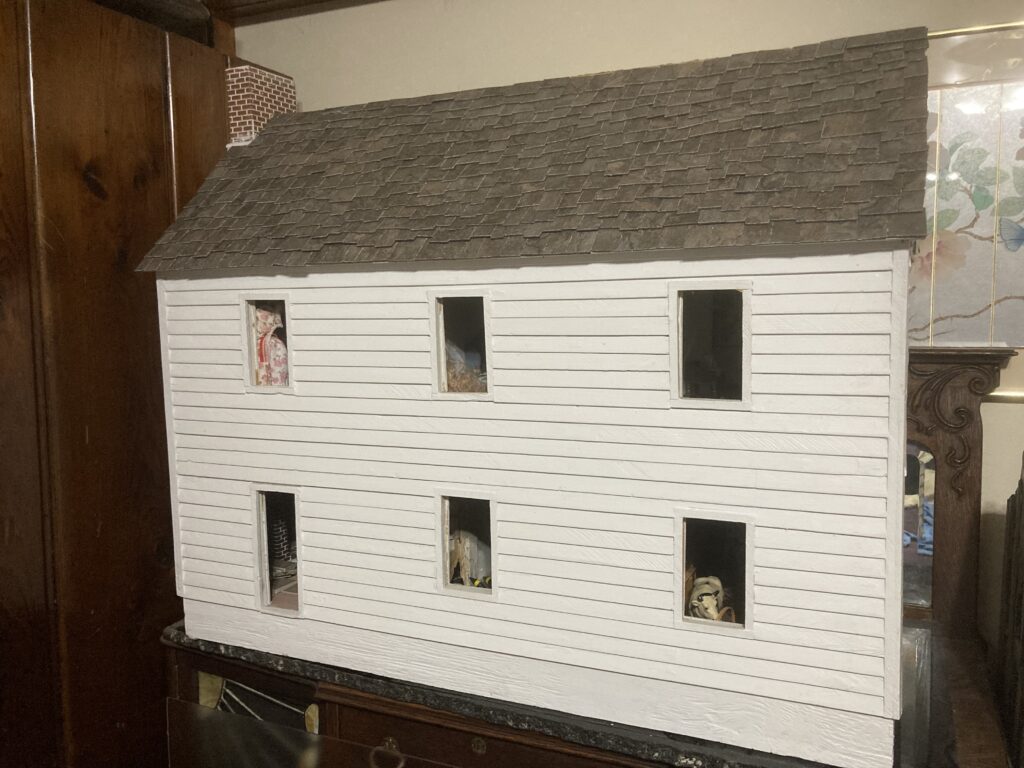
This is the updated roof! After removing the paper shingles that were in poor shape, I made slate-like shingles (described in another post) out of vinyl floor tiles.
Next, I painted the walls white, using a thick paint so it looked like a thin coat of plaster. I took wood from an old flowerbed border fence, so it would have some nice weathering to it, and used that to make some wooden support beams for the lower floor. I carefully opened up the area under the stairs, so I can use it as a storage closet (I will eventually make a door for it).
A current photo of the lower floor. I have been experimenting with different flooring in the main room, and at the moment have settled on a combination of small ceramic tiles and leftover pieces of linoleum. I have tiny candle bundles hanging from the wooden beams, as well as baskets and a lantern. The fireplace is a ceramic walk-in style that I found on ebay.
Several months ago, I happened upon a photo of an antique dollhouse on Pinterest. I’d never been particularly interested in dollhouses, although my mother was (and still is) interested in miniatures while I was growing up.
That photo sparked my interest. The more I thought about it, the more I wanted, no NEEDED an old-fashioned-looking dollhouse that I could decorate for the holidays, especially Halloween and Christmas.
I looked online for ideas. I read about different dollhouse styles. I discovered that many people, much to my delight, would buy or build a dollhouse, keeping in mind a specific era in which to decorate it.
So, in essence, you could use your hobby to research a certain era in history and try to recreate it in your own little world? How awesome!
It happened that one day while at work, a coworker reminded me of a large, work-related box that I was expected to bring home that night, and instructed me to keep this in mind during our lunch hour, as the town we worked in was having its annual garage-sale event. Of course, I accepted the challenge and decided to stop at a couple of sales during our break.
For some reason, I was drawn to a particular road that I passed on occasion, and it so happened that the second sale I stopped at had exactly what I was looking for.
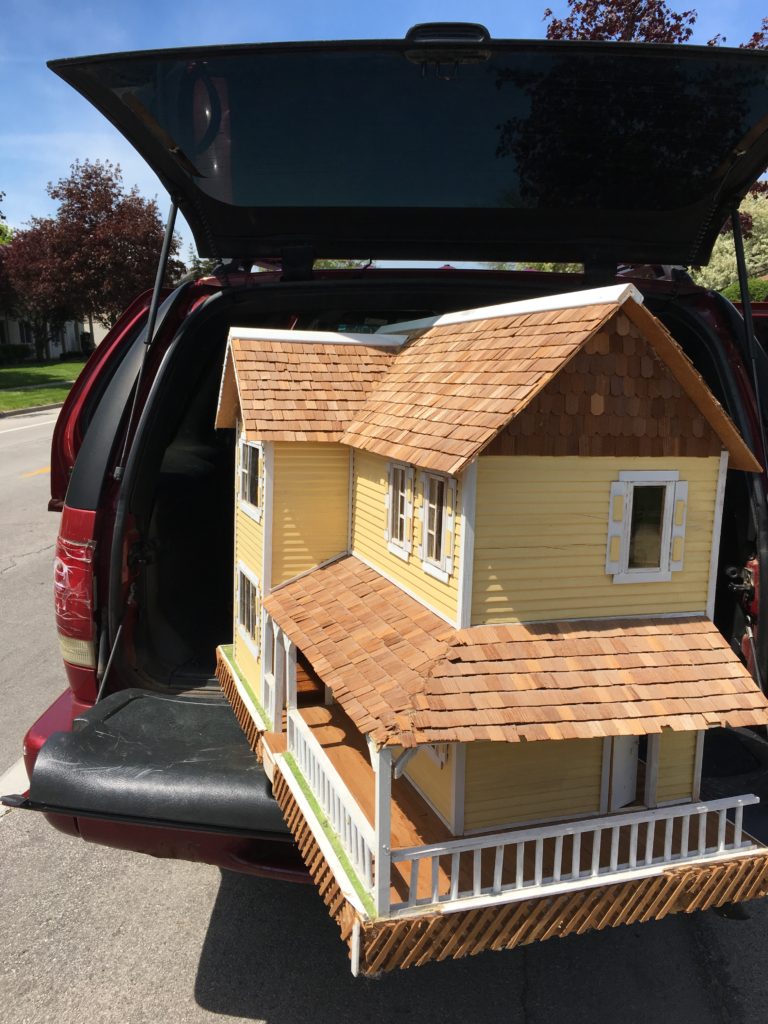
This farmhouse was purchased on the last day of the sale, for half off its original asking price of $65.
It barely fit in the back of my small SUV!
It was the last day of the sale, and everything was half off, including this not-quite-so-little gem. For $32, which was all the money I had on me, I acquired something that took up the whole back end of my vehicle, and a lot more of what little free time that I have.
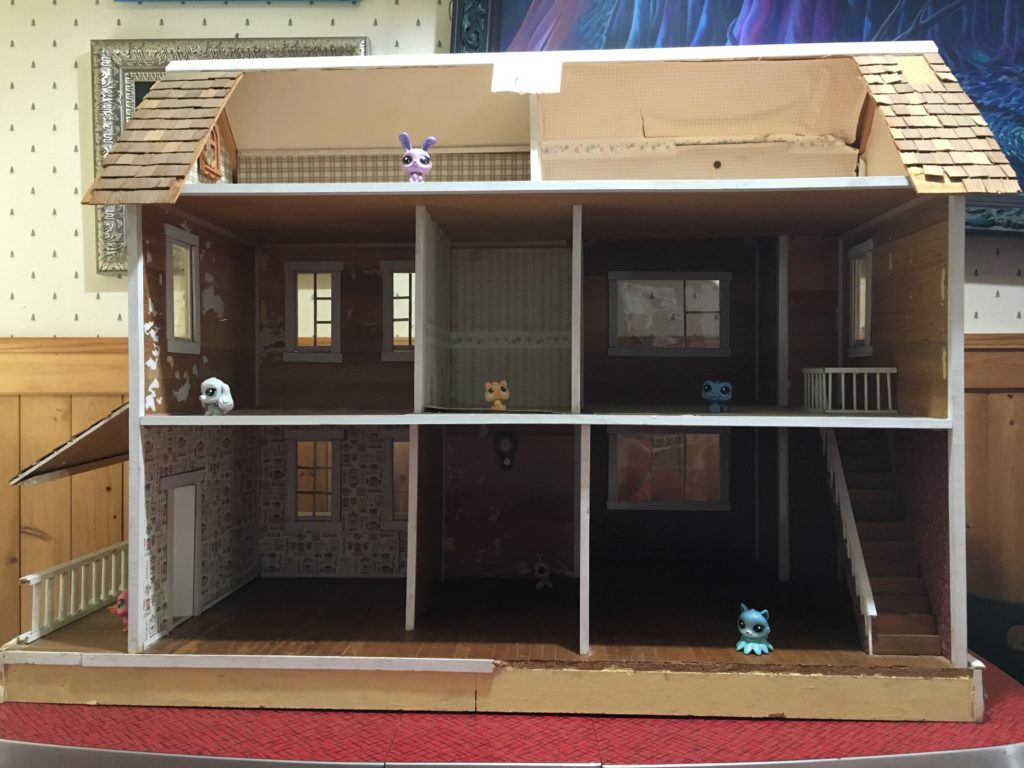
My 6 year old daughter quickly took to filling it with toy dragons, puppies, and kitties.
Inside view, shortly after acquisition (and after my daughter’s toy animals took possession.)
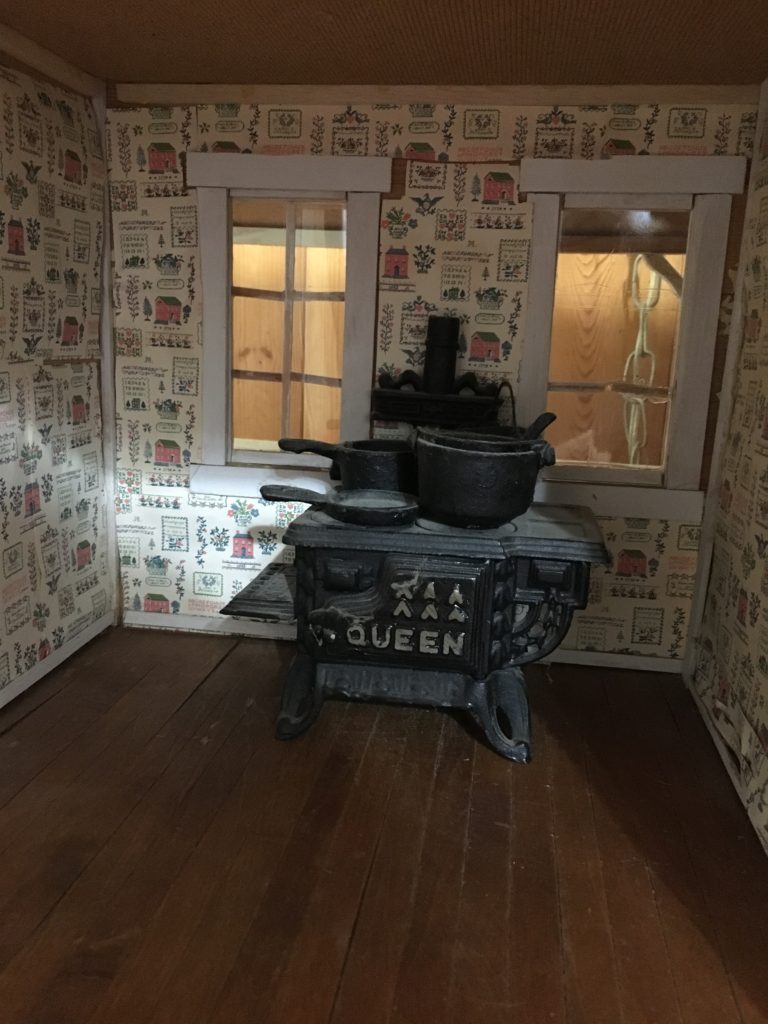
I’m still deciding on an exact time frame in which to decorate, but am leaning toward it being a rural farm that hasn’t quite gotten electricity, yet.
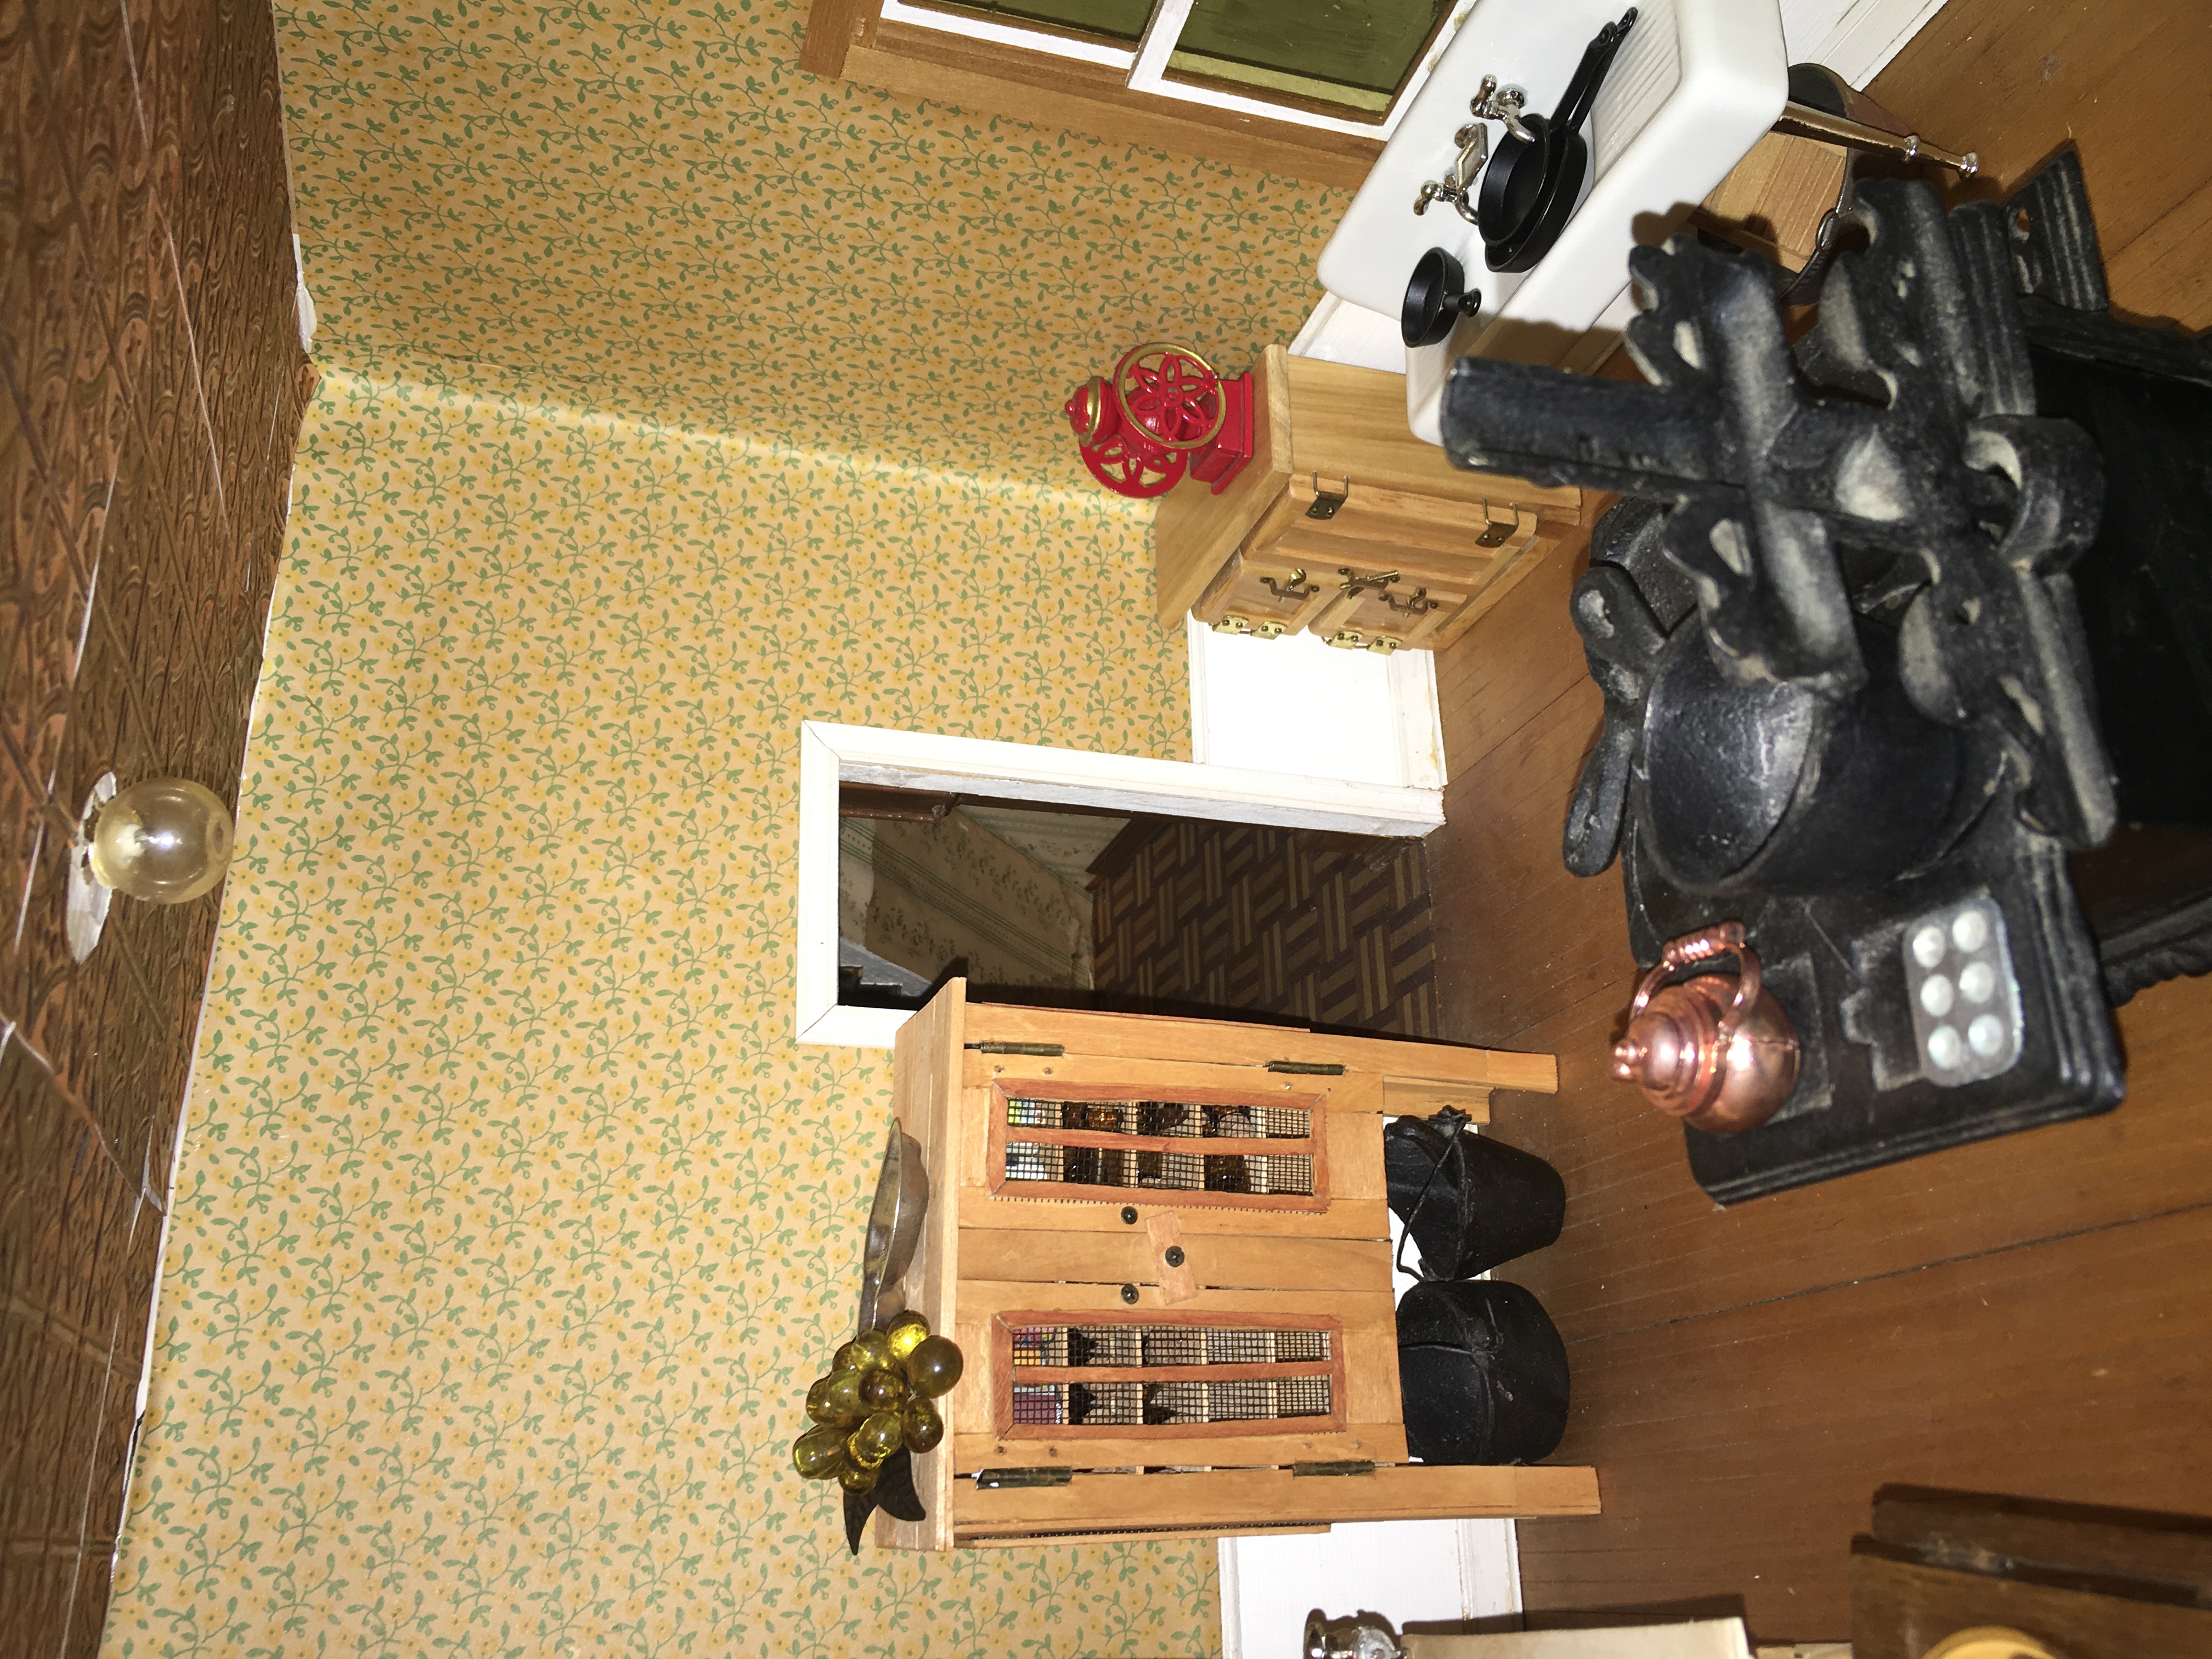
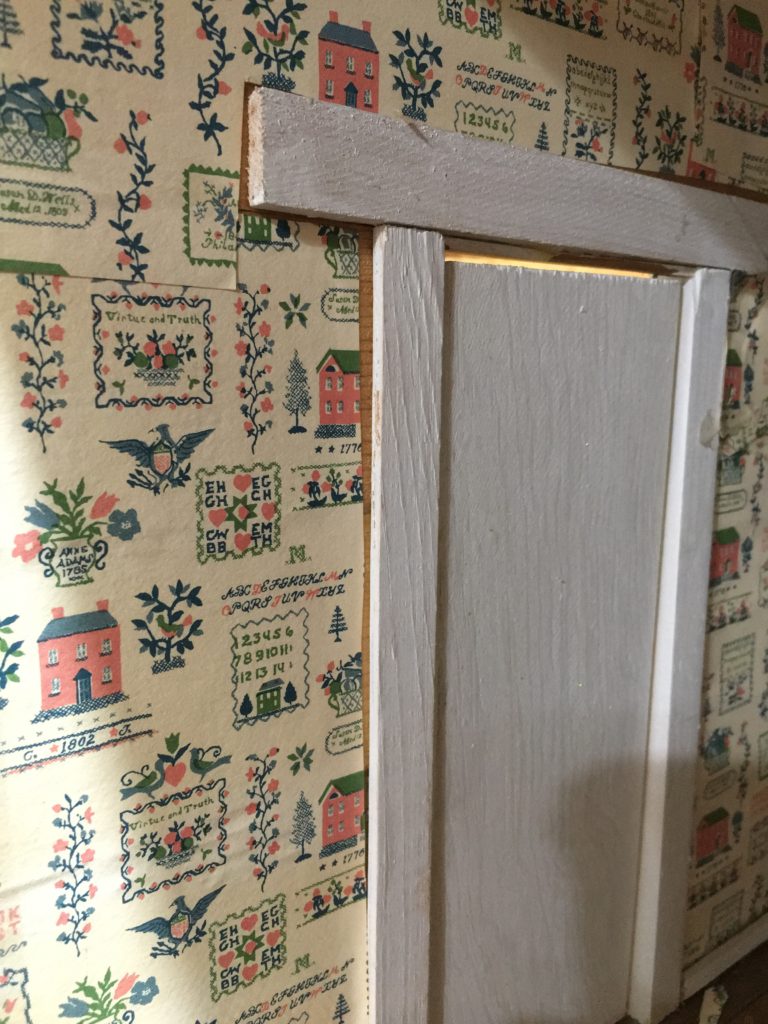
My mini cast iron stove fits in pretty well, except it does take up a lot of room in the small kitchen. I may have to re-think this in the future. The original wallpaper in the kitchen. I just love this pattern! It reminds me of something that my mother used as a border in her kitchen for a while. Unfortunately, this paper is poorly applied, and the adhesive that they used has stained it considerably over the years.
One of the first things I did was to rip out some of the old wallpaper that I didn’t like. It wasn’t too difficult to remove with a warm hair dryer, and a vinegar-wetted sponge for the more stubborn areas. As you can see in progress photos, I’m still not done with that task.
Bathroom Floor
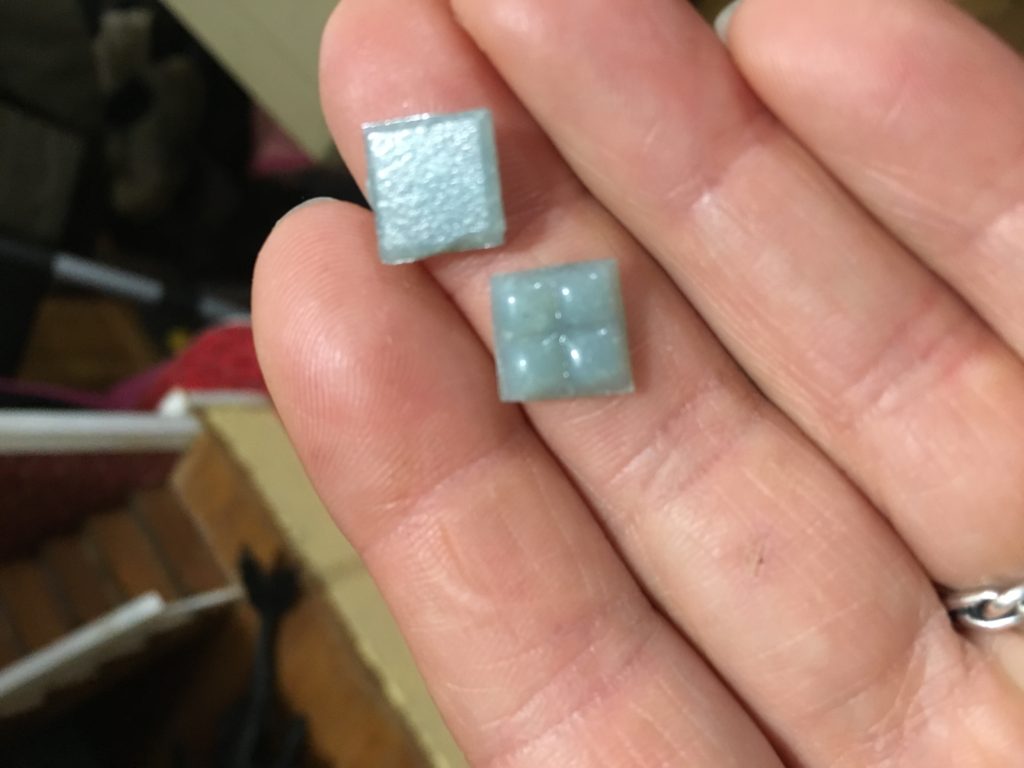
I acquired, through Amazon, some mosaic tiles of real glass to use for my bathroom floor! I plan to order a few more sheets of them to add to the walls, also.
The individual tiles are made of real glass, and come in a sheet mounted on paper. You cut the paper to the size you need, and then glue the tiles down with paper-side up. Then, you use a wet sponge to pull the paper off the tiles.
The individual glass tiles (ordered from Amazon.com, from seller Melody Jane) come mounted on a sheet of paper. You trim the paper to the size you want, and can also nip the tiles to fit. I didn’t need to nip them, fortunately for me, as they fit the space I needed perfectly. I then glued the tiles face down (so the paper side is up).
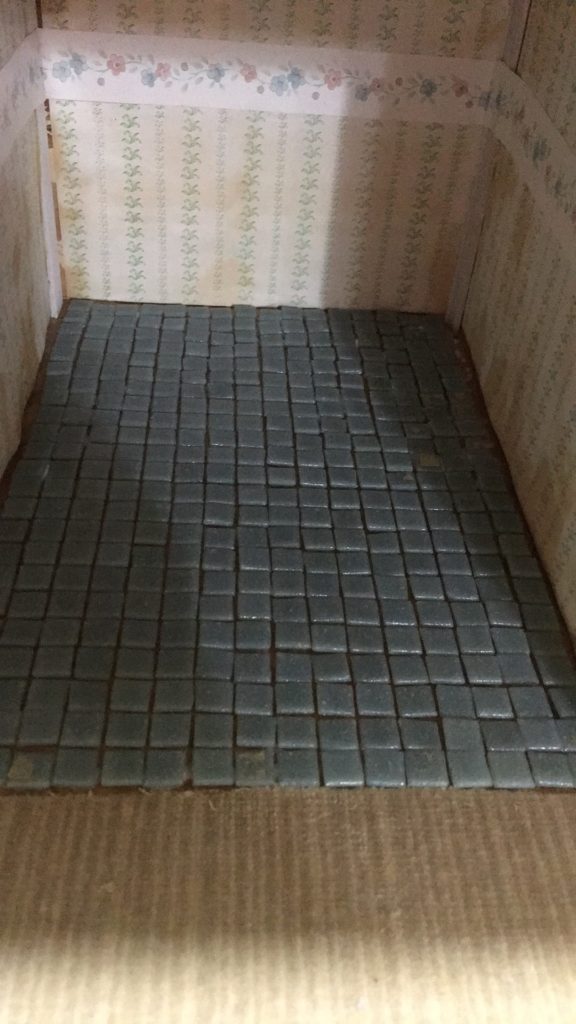
Tiles glued down. Note that some pieces of paper backing still have to be washed off.
After the glue dries, you next use a wet sponge to break up and wash away the paper backing. Unfortunately for me, I didn’t glue my tiles well enough, and some popped off, so I had to also use this step to re-glue loose tiles.
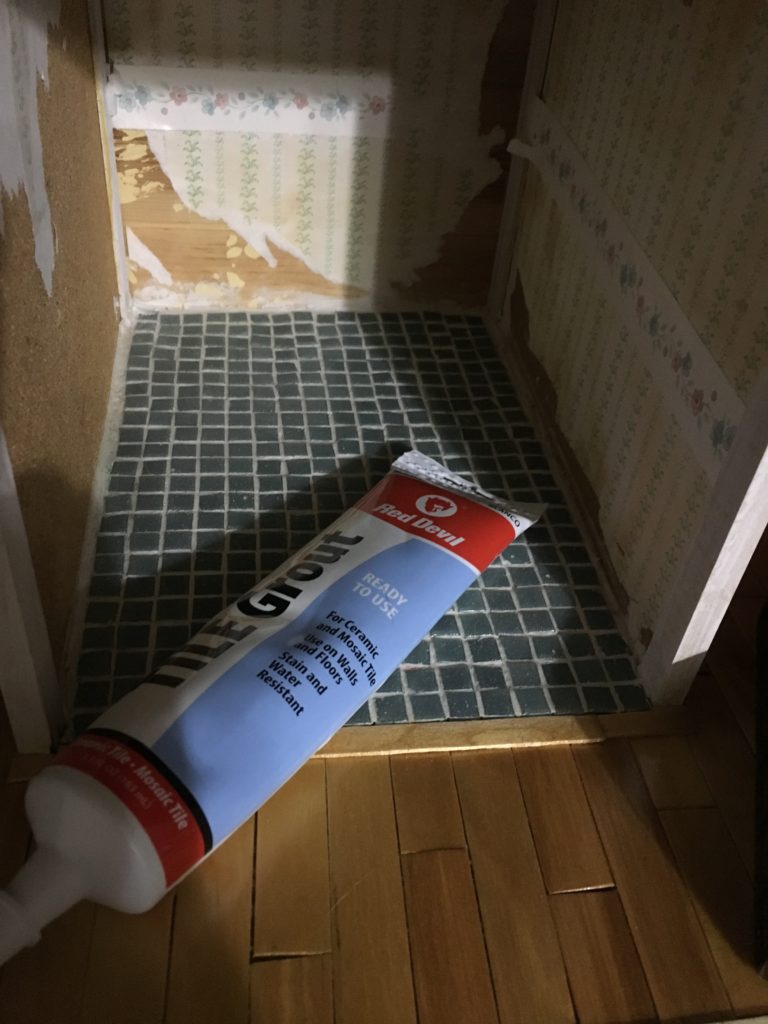
After removing the paper backing and making sure all of the tiles were glued securely, I bought a tube of mosaic tile grout.
Tile grout, after the tiles have been grouted.
I followed the directions on the tube, and filled in the cracks between the tiles with white grout. It was easy-just cut the tip off the tube per directions, then gently squeeze out the paste along the cracks in the tiles. I used a small square of cardboard as a squeegee, pushing the grout deep into the cracks and smoothing it around the tiles. When I was sure that the cracks were filled, I used a damp sponge to gently wipe the wet grout from the tops of the tiles, without pressing so hard that it washed the grout out of the cracks. All in all, I am very pleased with the final result. I plan to eventually purchase more sheets of these tiles to use as backsplash on the walls and around where the tub will be.
Second Level Flooring
The flooring on the second level was pretty rough-outdated scraps of dingy carpet. I made quick work ripping that out. Leftover glue and/or material was easily removed with a damp sponge and vinegar in a spray bottle.
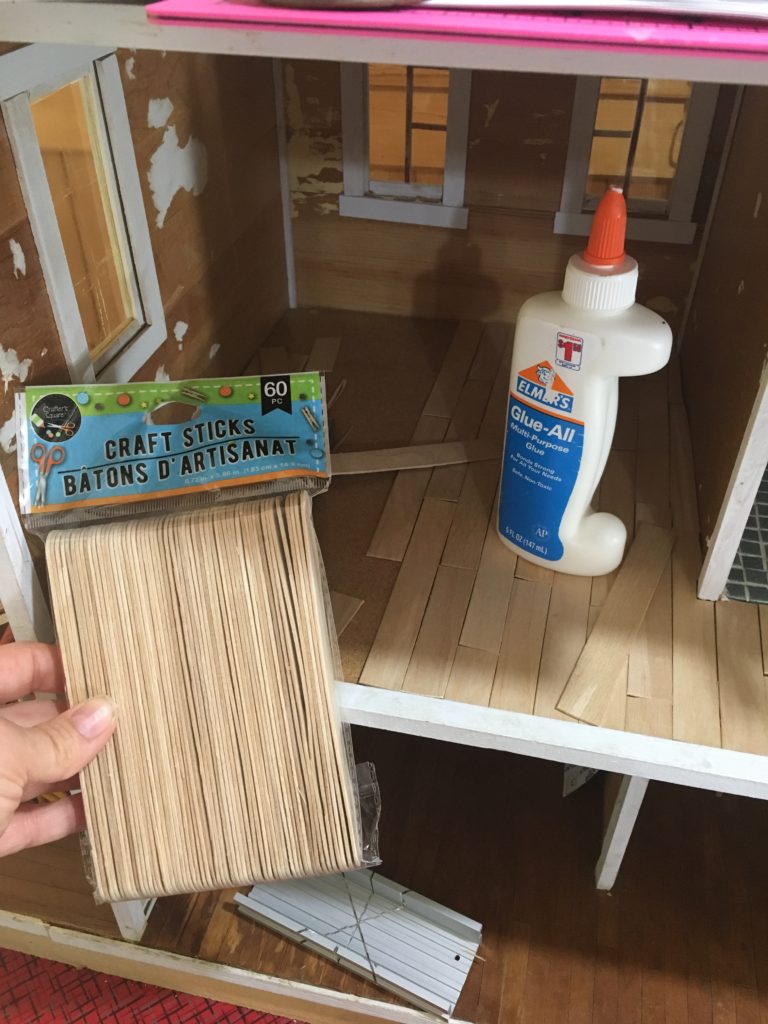
These jumbo craft sticks worked well for flooring, and also for many other miniature crafts.
I decided on a pine plank look for these floors, as I have seen plenty of older homes with simple pine boards on the floors. To achieve this look, I found some jumbo craft sticks at the local Dollar Tree. I cut off the rounded ends using poultry shears, so they would be more board-like, and then staggered them across the floors to make the board ends more random. (Side note-a previous owner of our house installed the wood floor in our kitchen in such a way that the board ends are almost all lined up, and it looks awful. It’s really torture to an OCD person. Please, don’t do this to people).
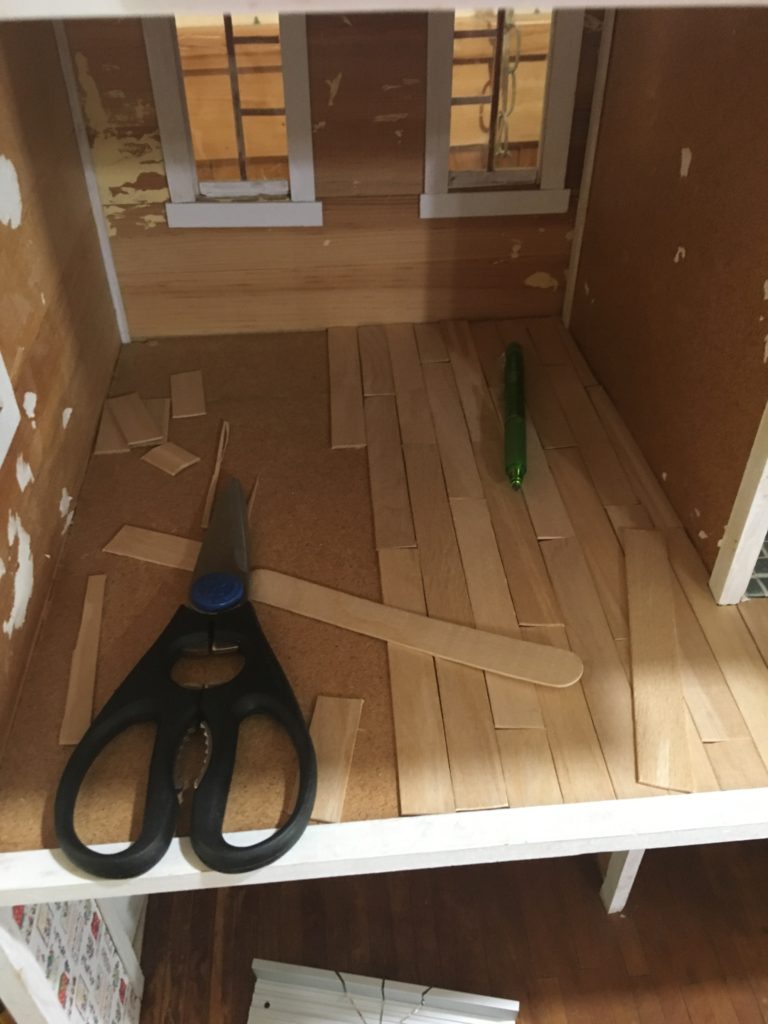
I staggered the sticks to make the board ends more random.
I used an xacto knife to cut the pieces to fit around doors and corners. I used elmer’s glue to glue all of the pieces down, and set heavy glassware on top of troublesome boards to keep them flat (I tried to avoid warped boards as much as possible).
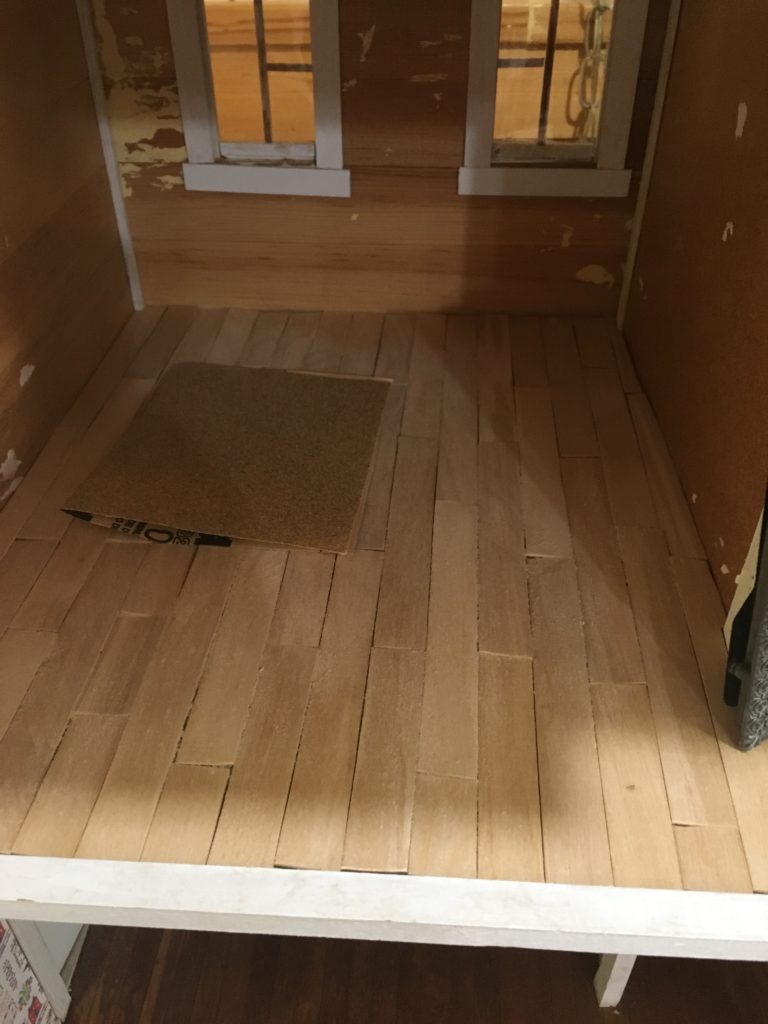
I sanded the floorboards after the glue was dry, to smooth out rough edges and fill some of the cracks between boards with a little sawdust.
After the glue dried, i took some sandpaper and sanded with the grain of the wood, trying to level out rough edges and get a little sawdust into the cracks between boards.
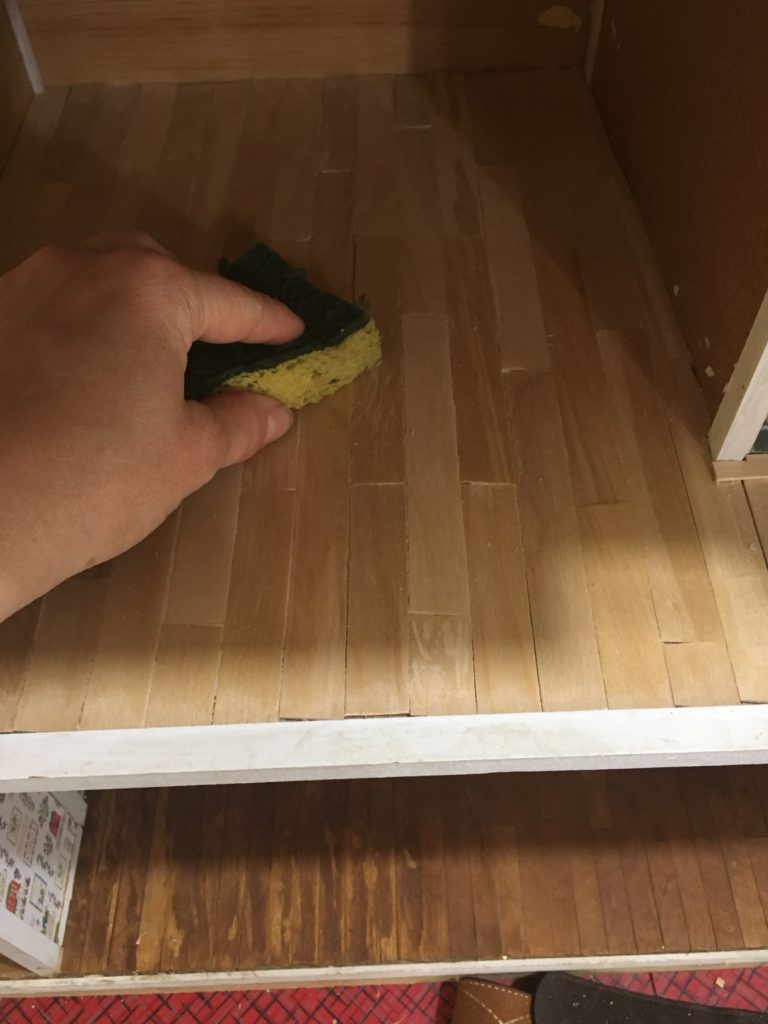
After sanding, wipe the boards with a damp sponge to clean sawdust off the surface before varnishing.
After sanding, I wiped the boards with a damp sponge to remove excess sawdust and prep the surface for varnishing. If you decide to use stain, now would be the time to do it, before varnishing.
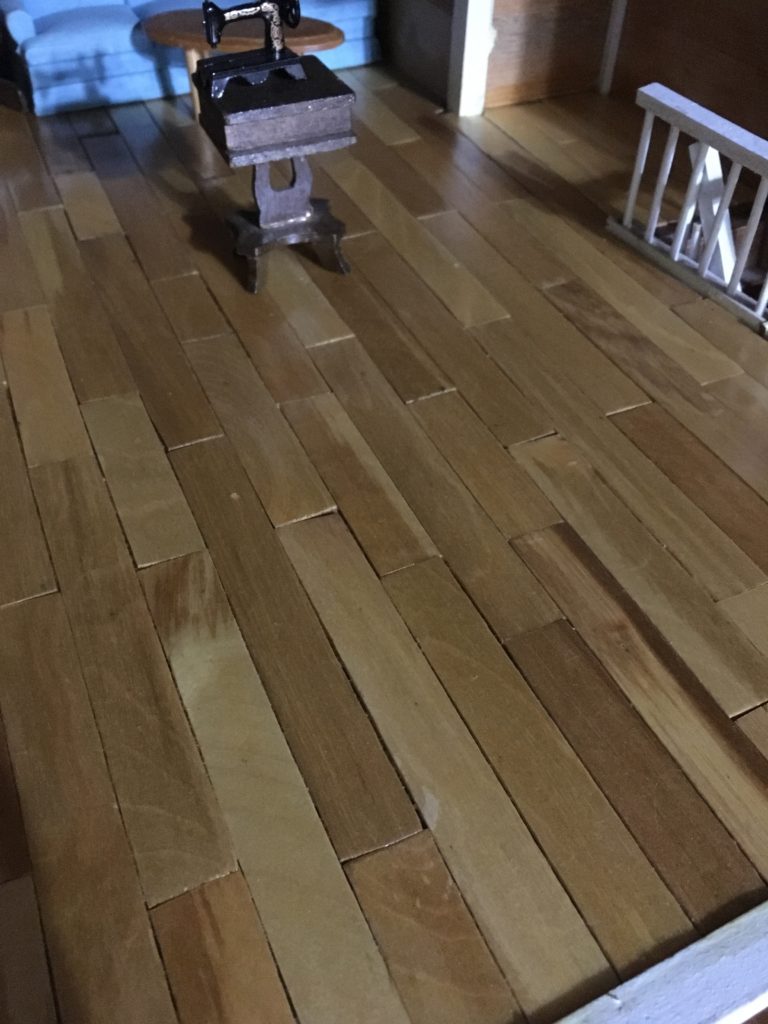
After several coats of varnish.
I applied varnish according to instructions on the can- putting it on with a brush, letting it dry, sanding lightly (I used a torn piece of paper to sand, as it doesn’t take much), and then applying another coat. I applied several coats until I was satisfied. Now, my first-level flooring is jealous!