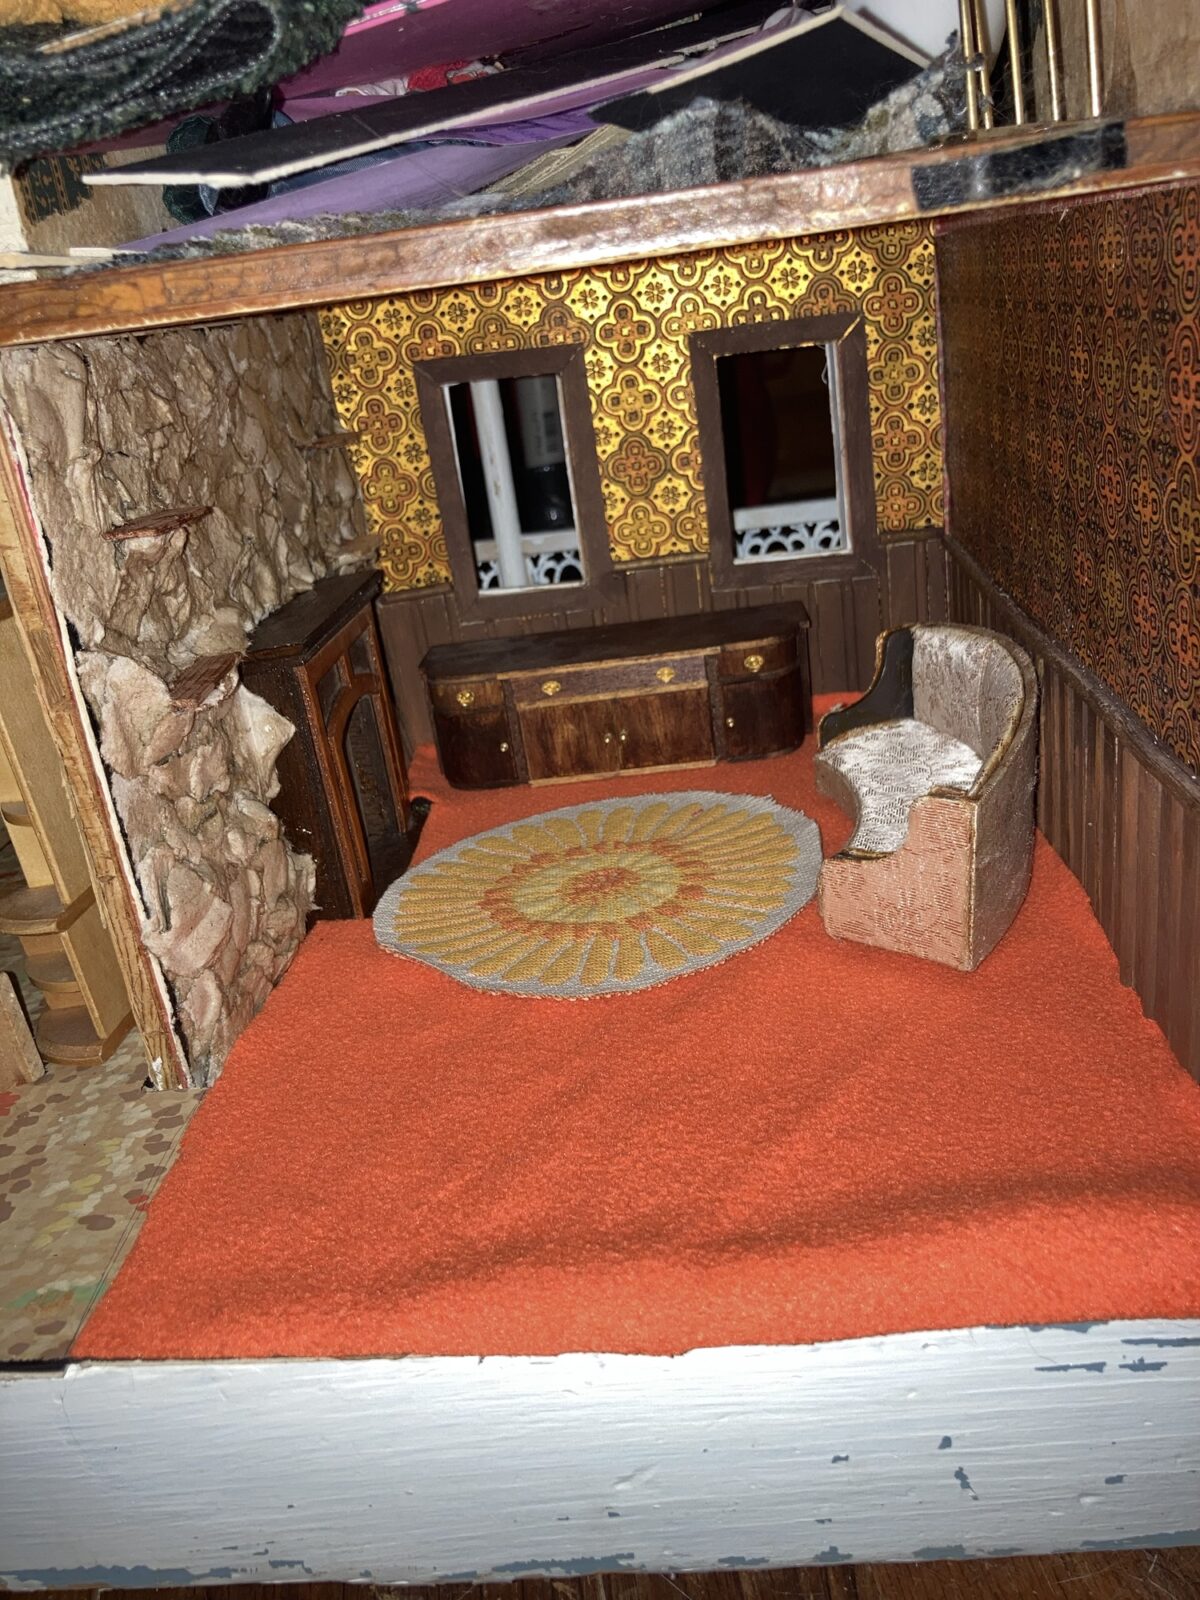
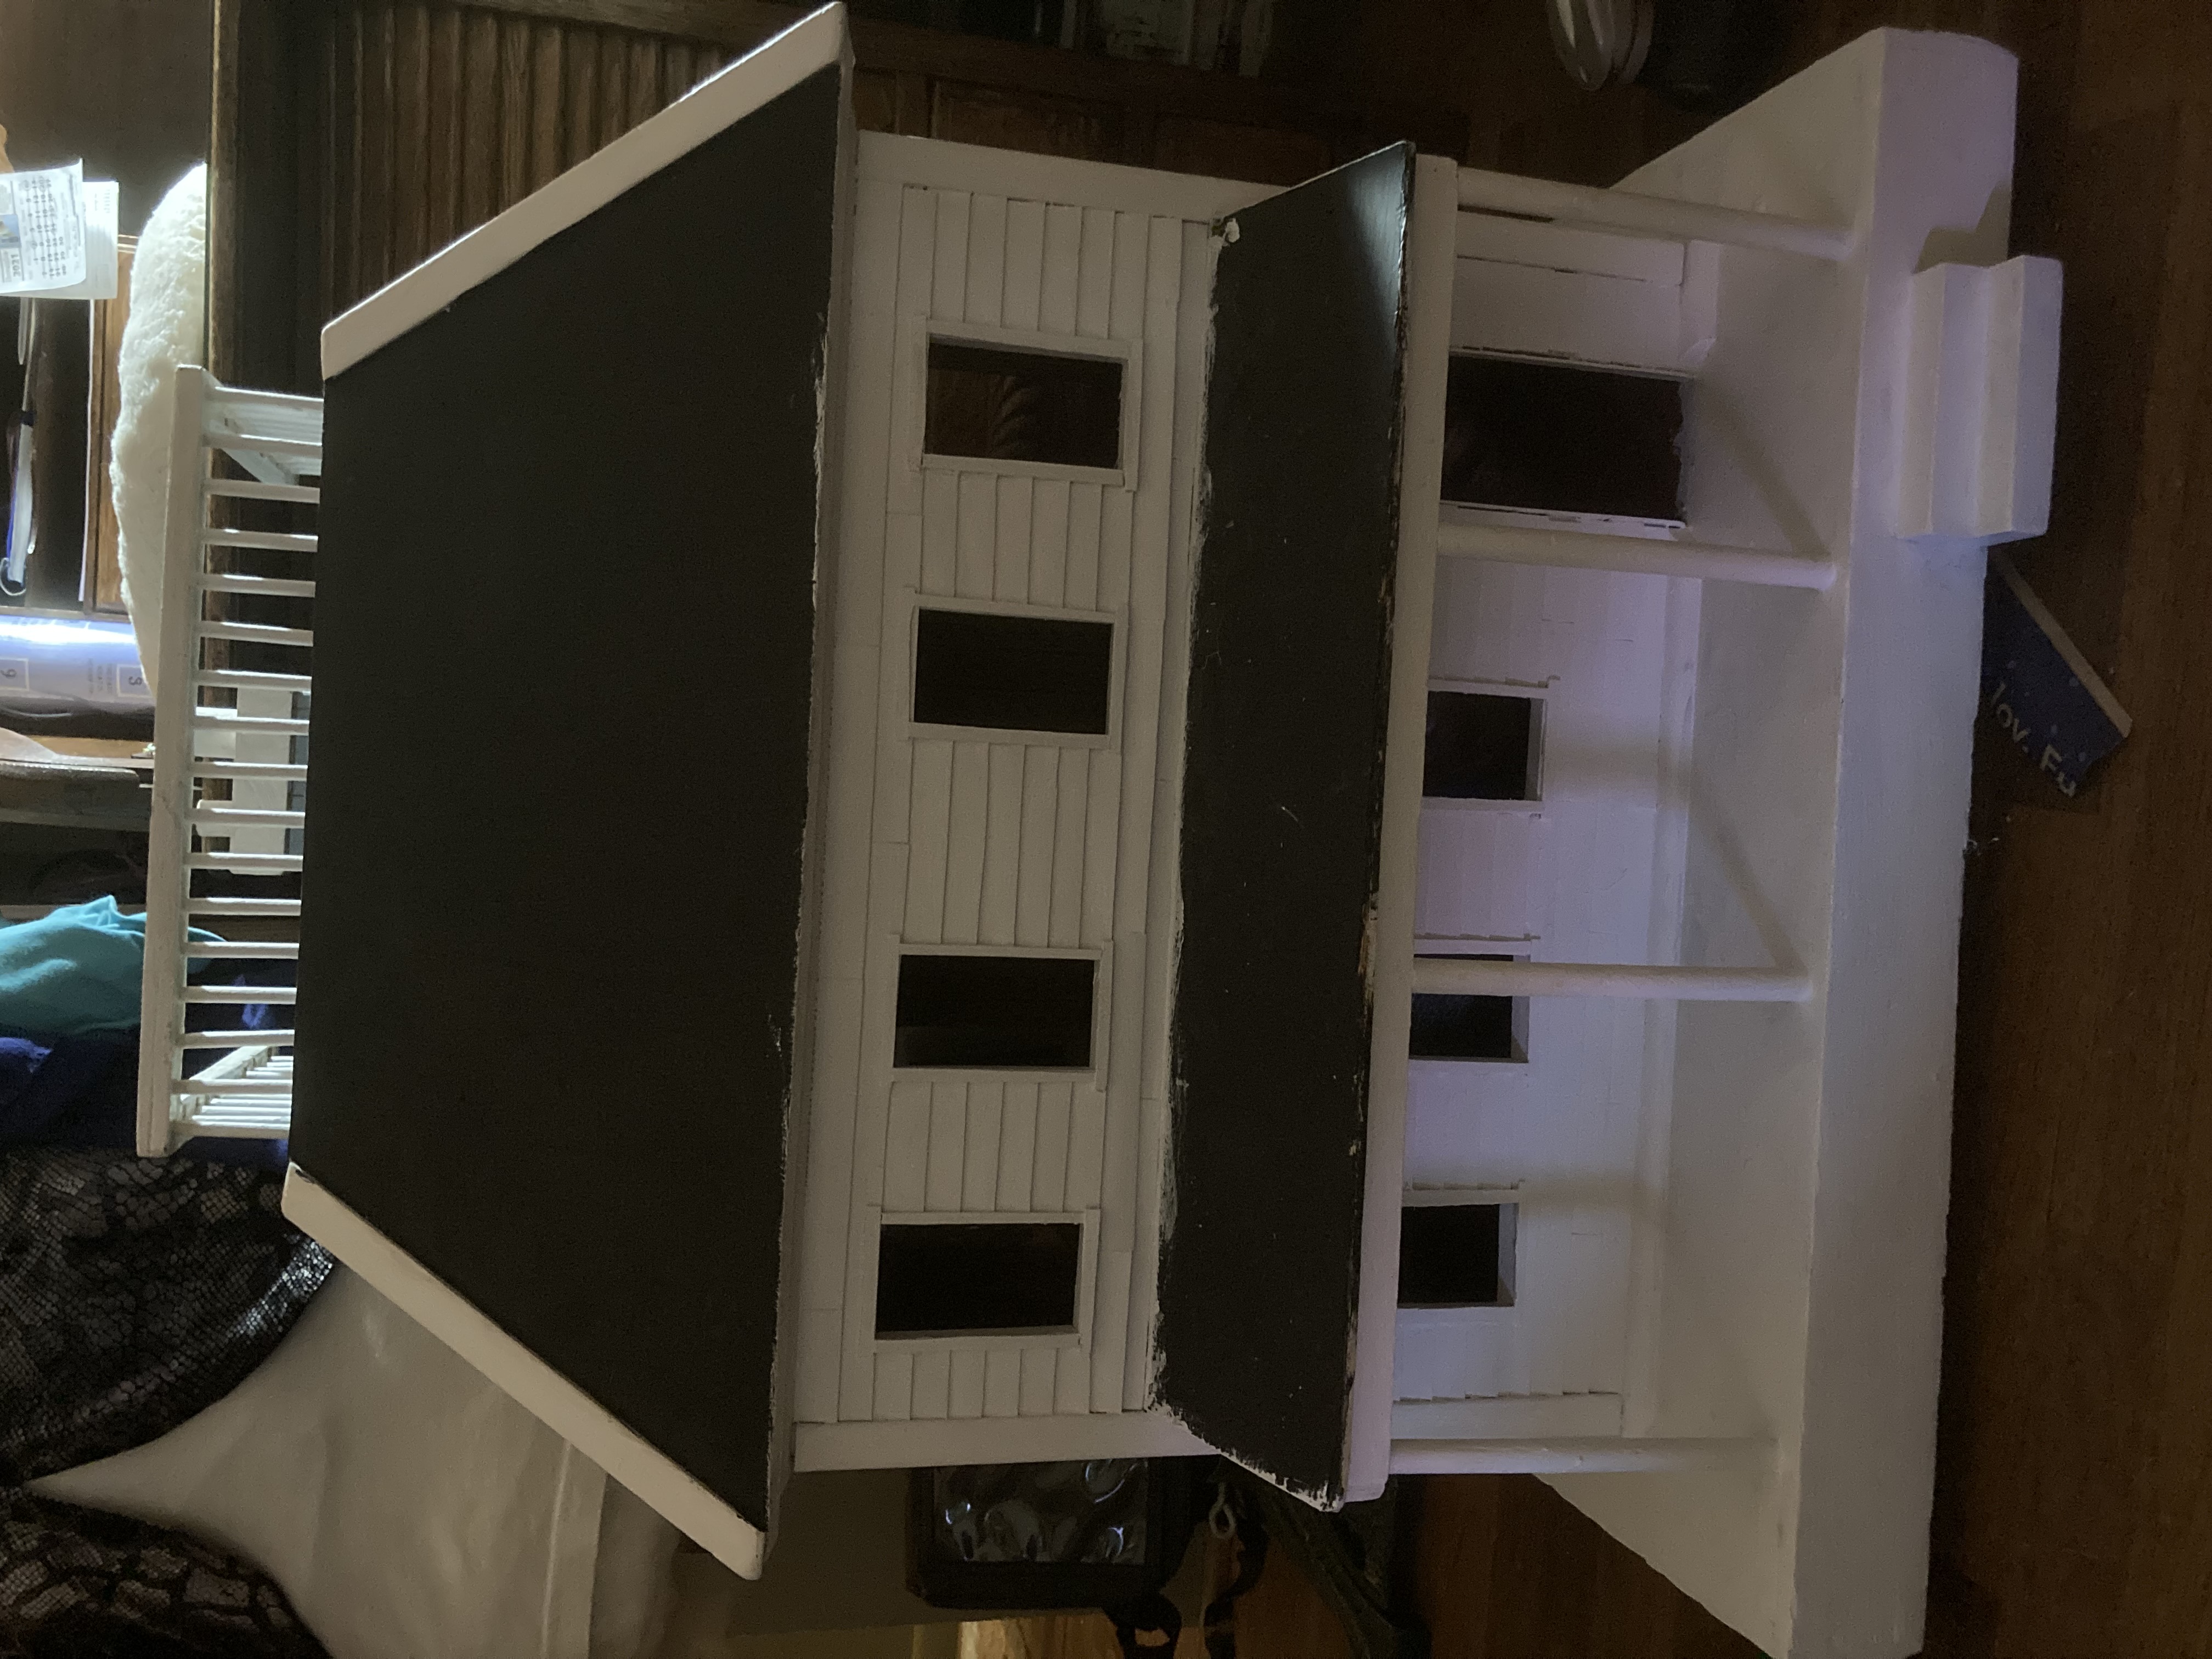
I decided to work on the living room of my 1970’s themed dollhouse. This house was basically gutted when I got it, so I am starting from scratch. I started out with a list of things I wanted in my 1970’s themed house, narrowed that list to what was actually do-able, and then decided on what projects for the house would be going in what rooms.
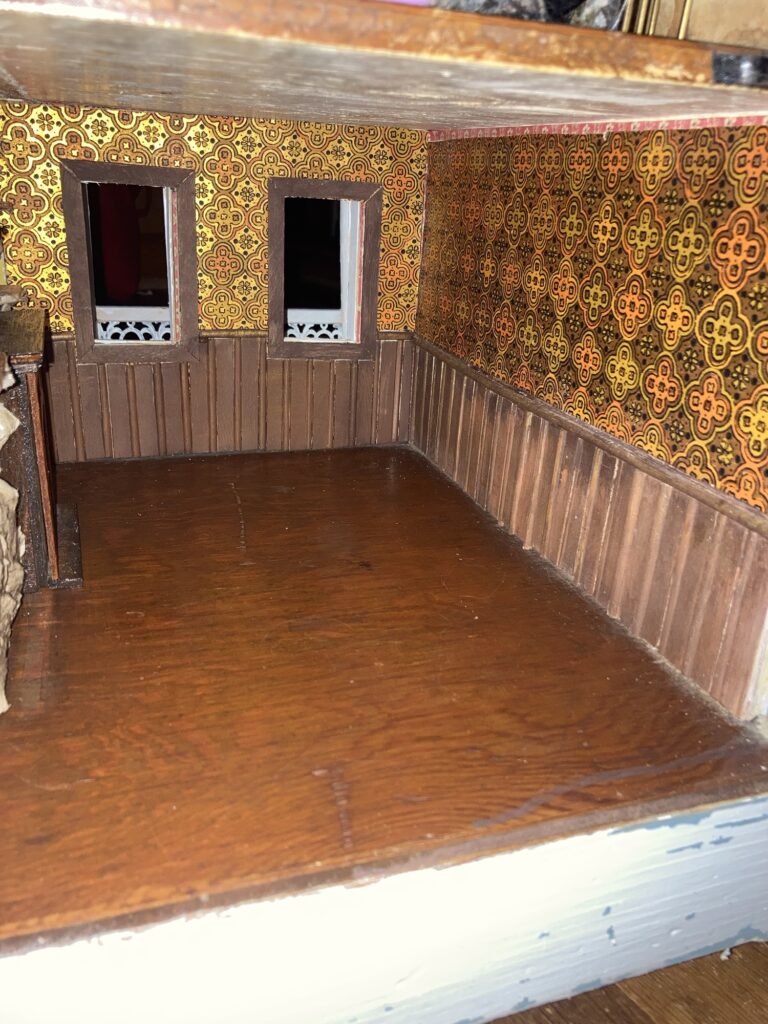
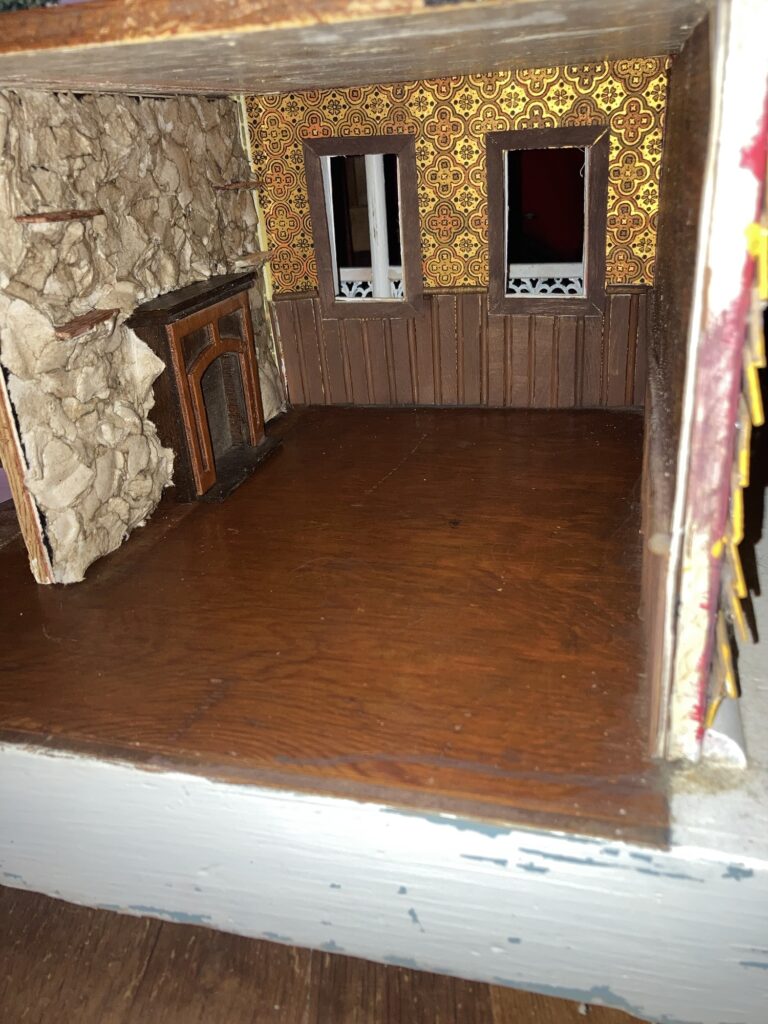
For the living room, i wanted a stone wall with a fireplace, wainscoting, and some authentic vintage wallpaper that we salvaged from my grandparents’ house before it was unfortunately torn down.
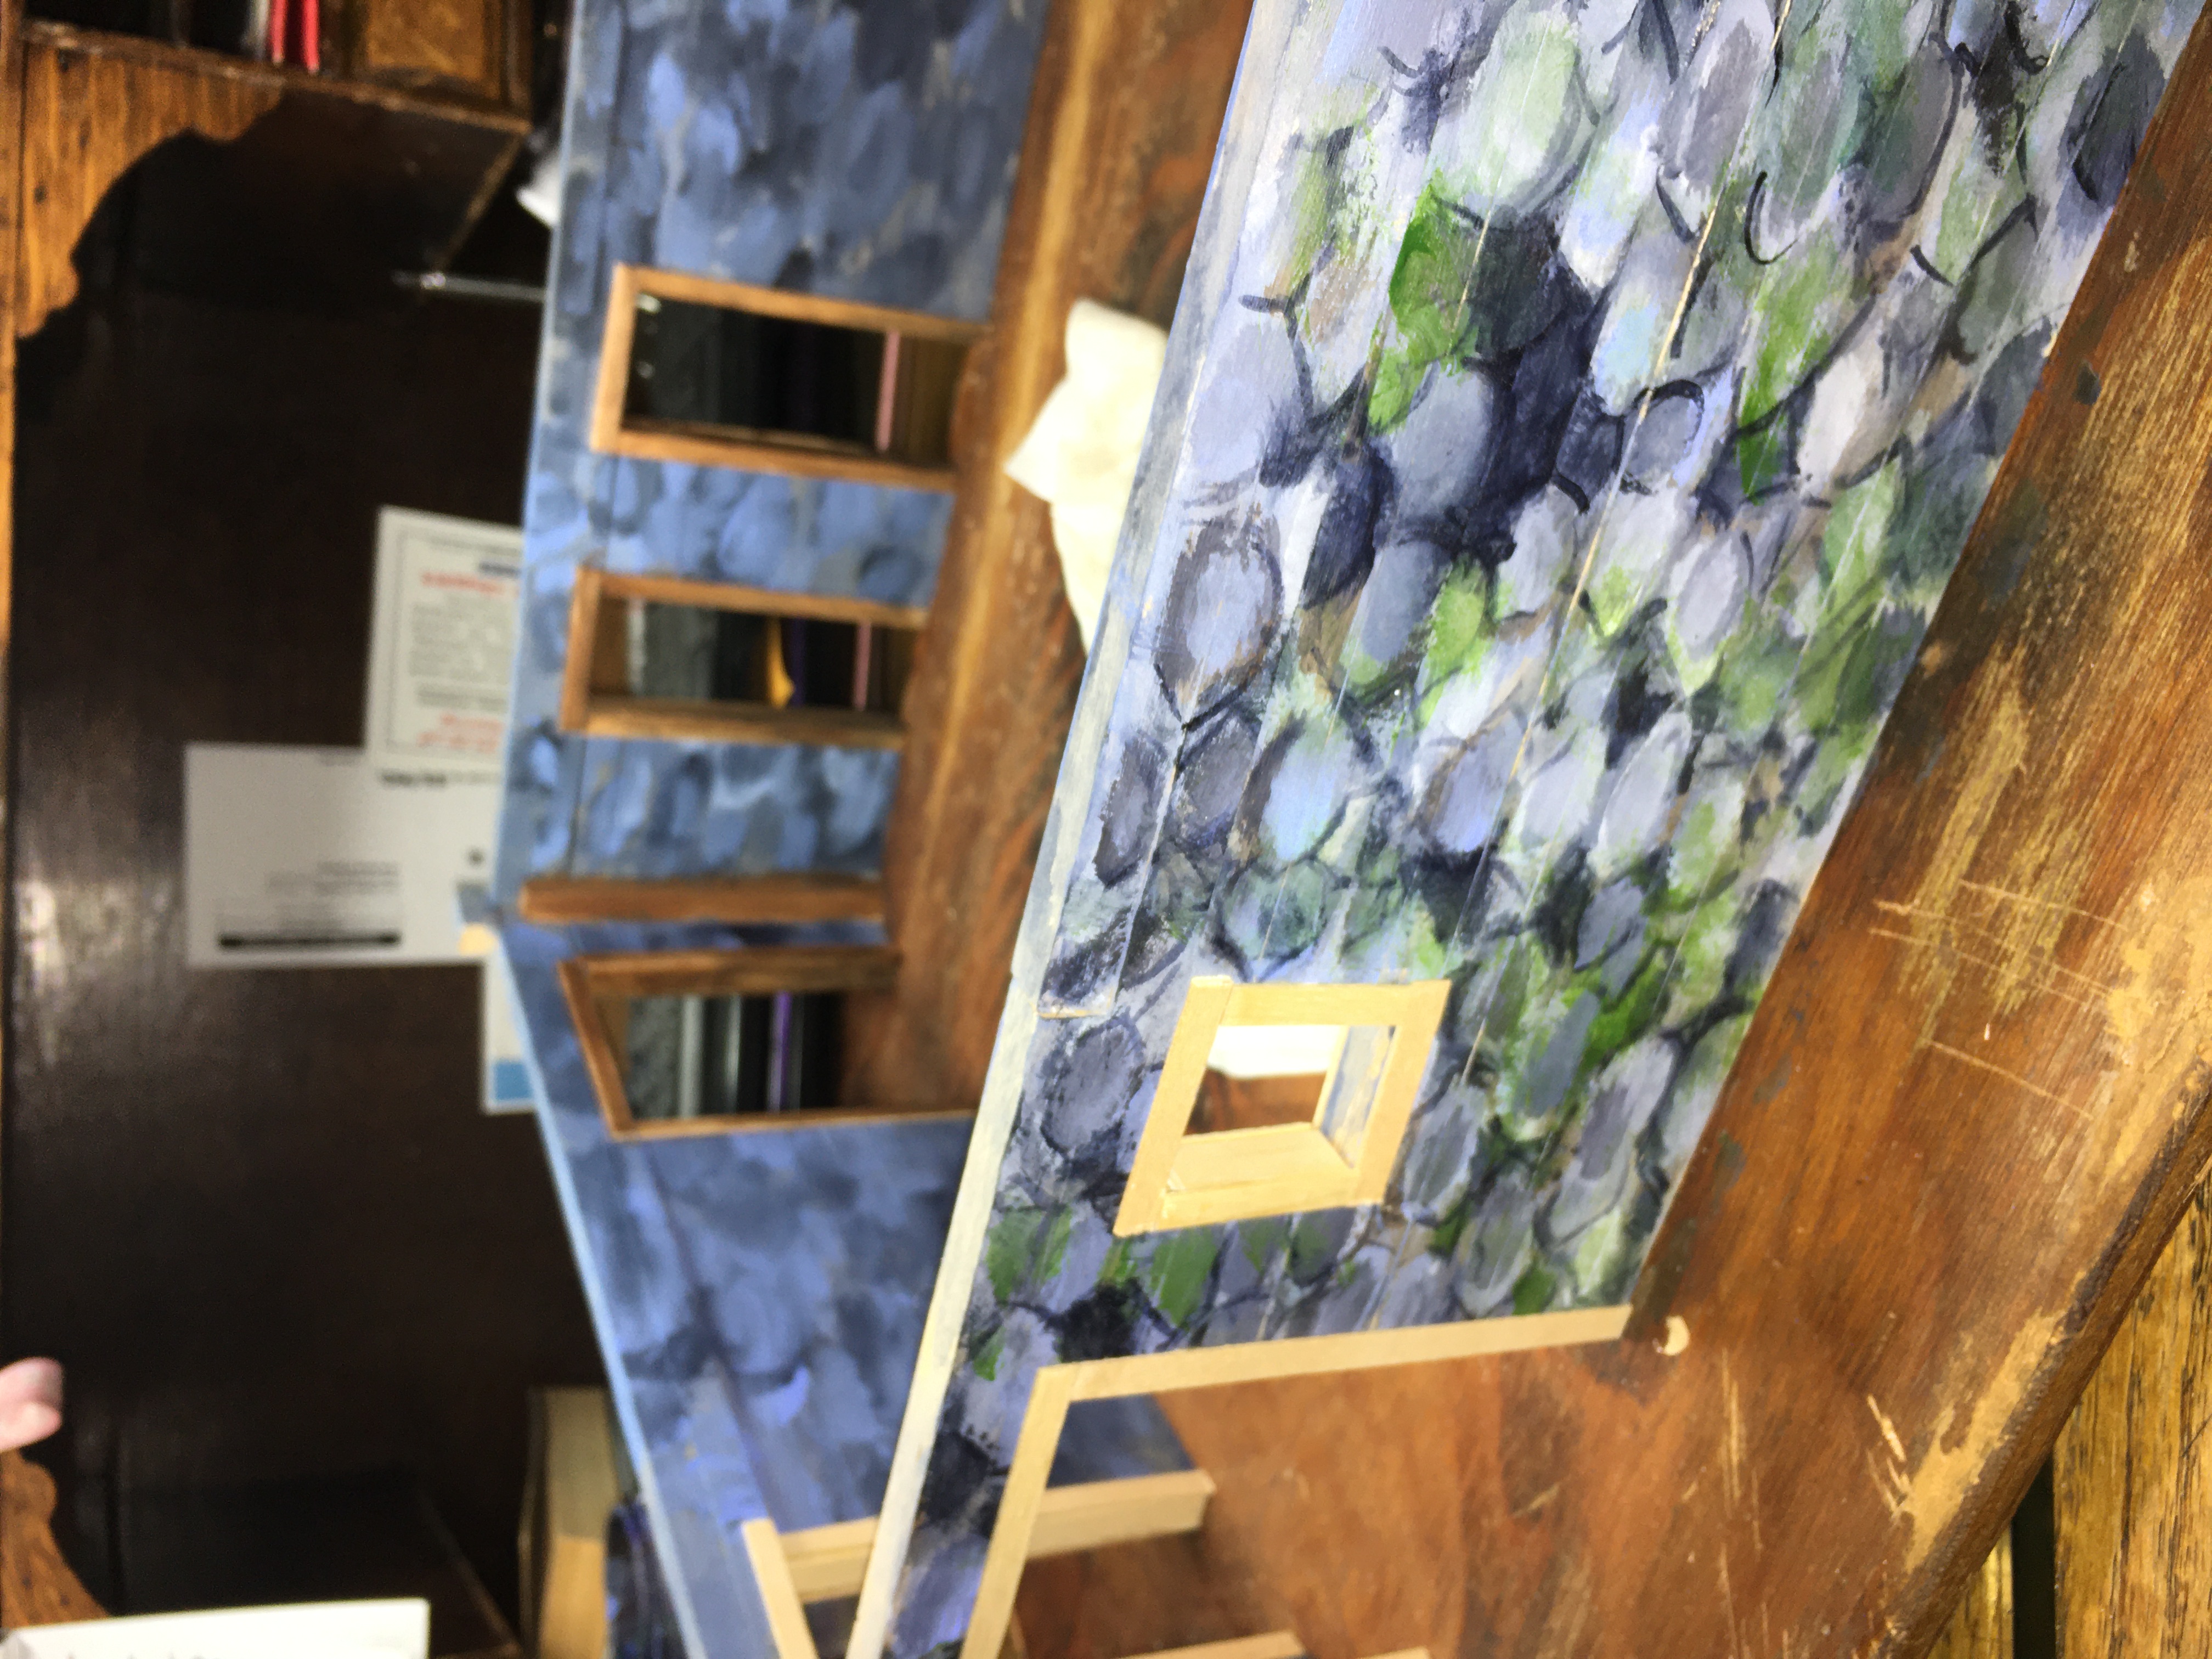
For the stone wall and fireplace, I first cut a piece of sturdy mat board to fit the wall it was going on. After double checking the fit, i attached the ready made fireplace that I chose for it.
I used mod podge to flue the egg carton
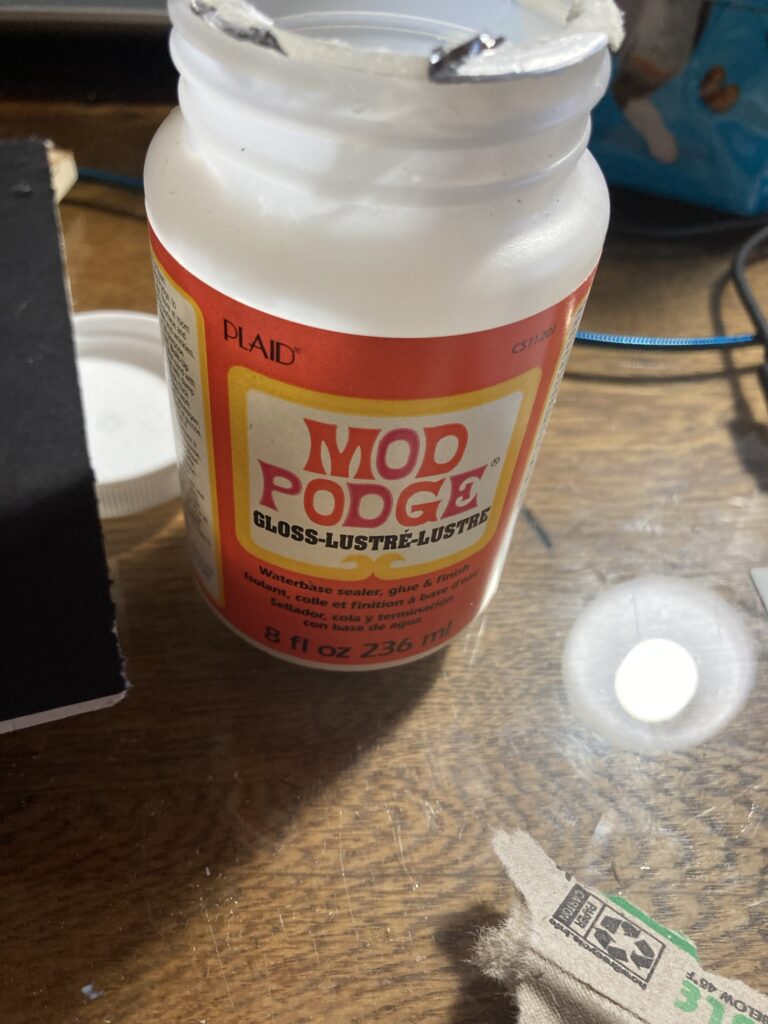
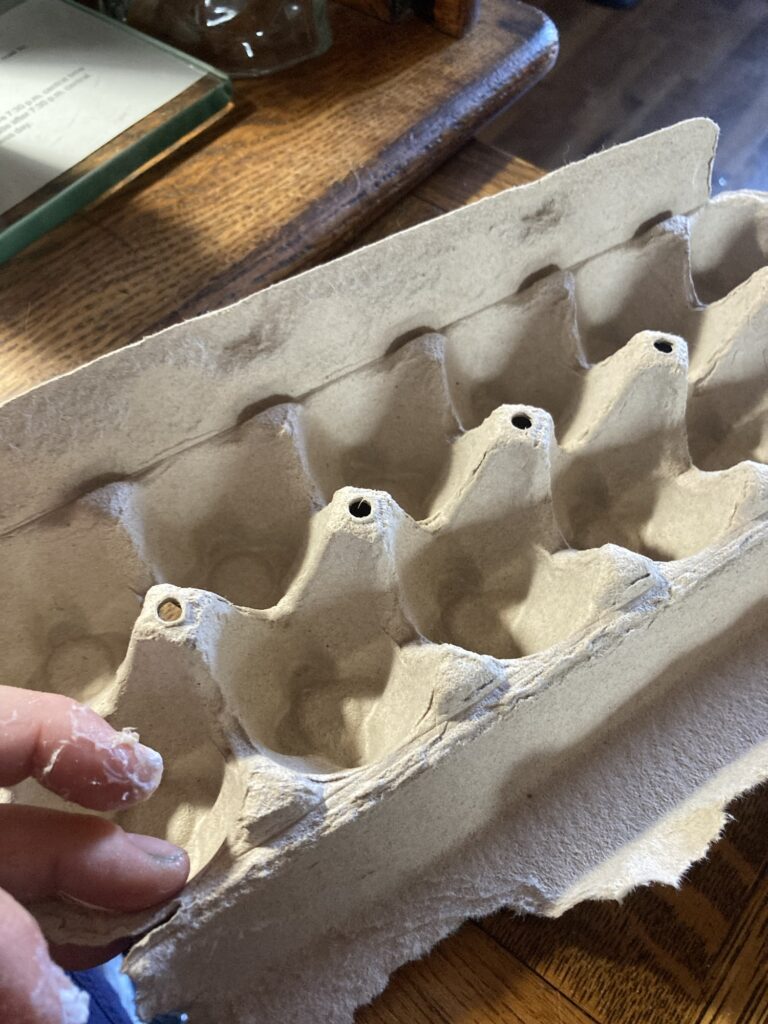
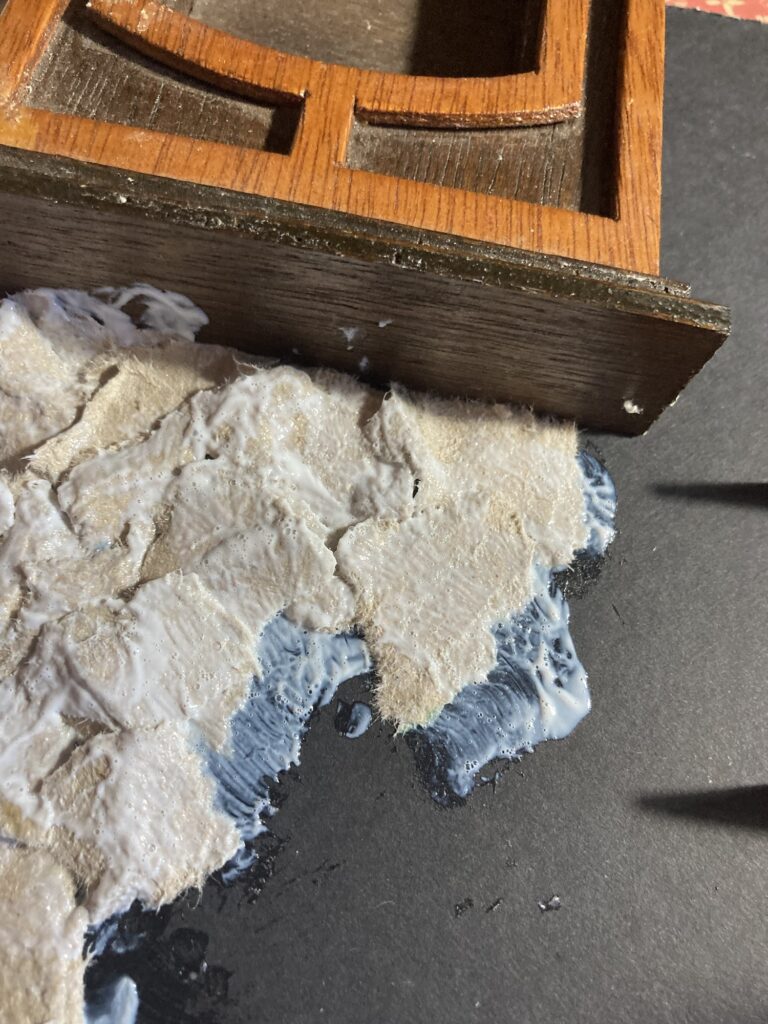
Next I used mod podge to glue little pieces of torn off egg carton (the cardboard type) onto the wall, layering it to form a stone texture. Note- keep the printed side pointed against the wall so it won’t have to be painted over later).
Tear off pieces of cardboard egg carton to use for the stone textureLayer the cardboard to form rough, rock-like texture, glueing it down and coating it with mod podge.I glued little pieces of craft stick on the wall to form shelves before placing the egg cardboard. What it looked like as it was drying.
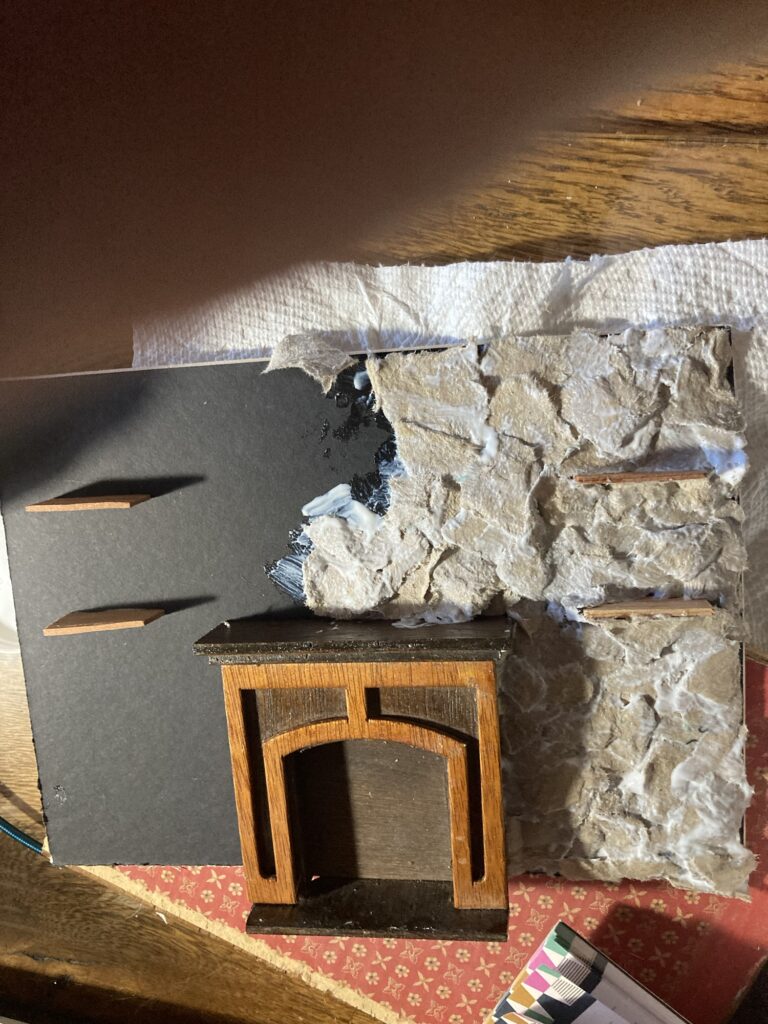
When it was dry, I slid it into place on the wall of the dollhouse, made sure all fitted as it should and looked the way i wanted, and then glued it in place with just a dab of glue.
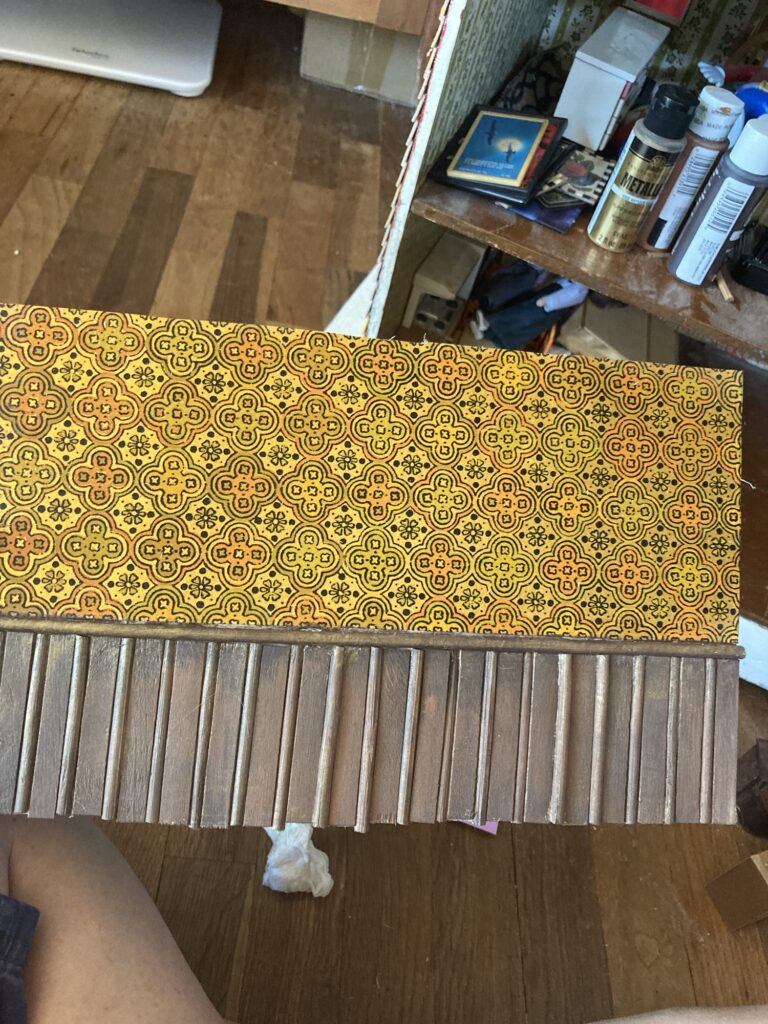
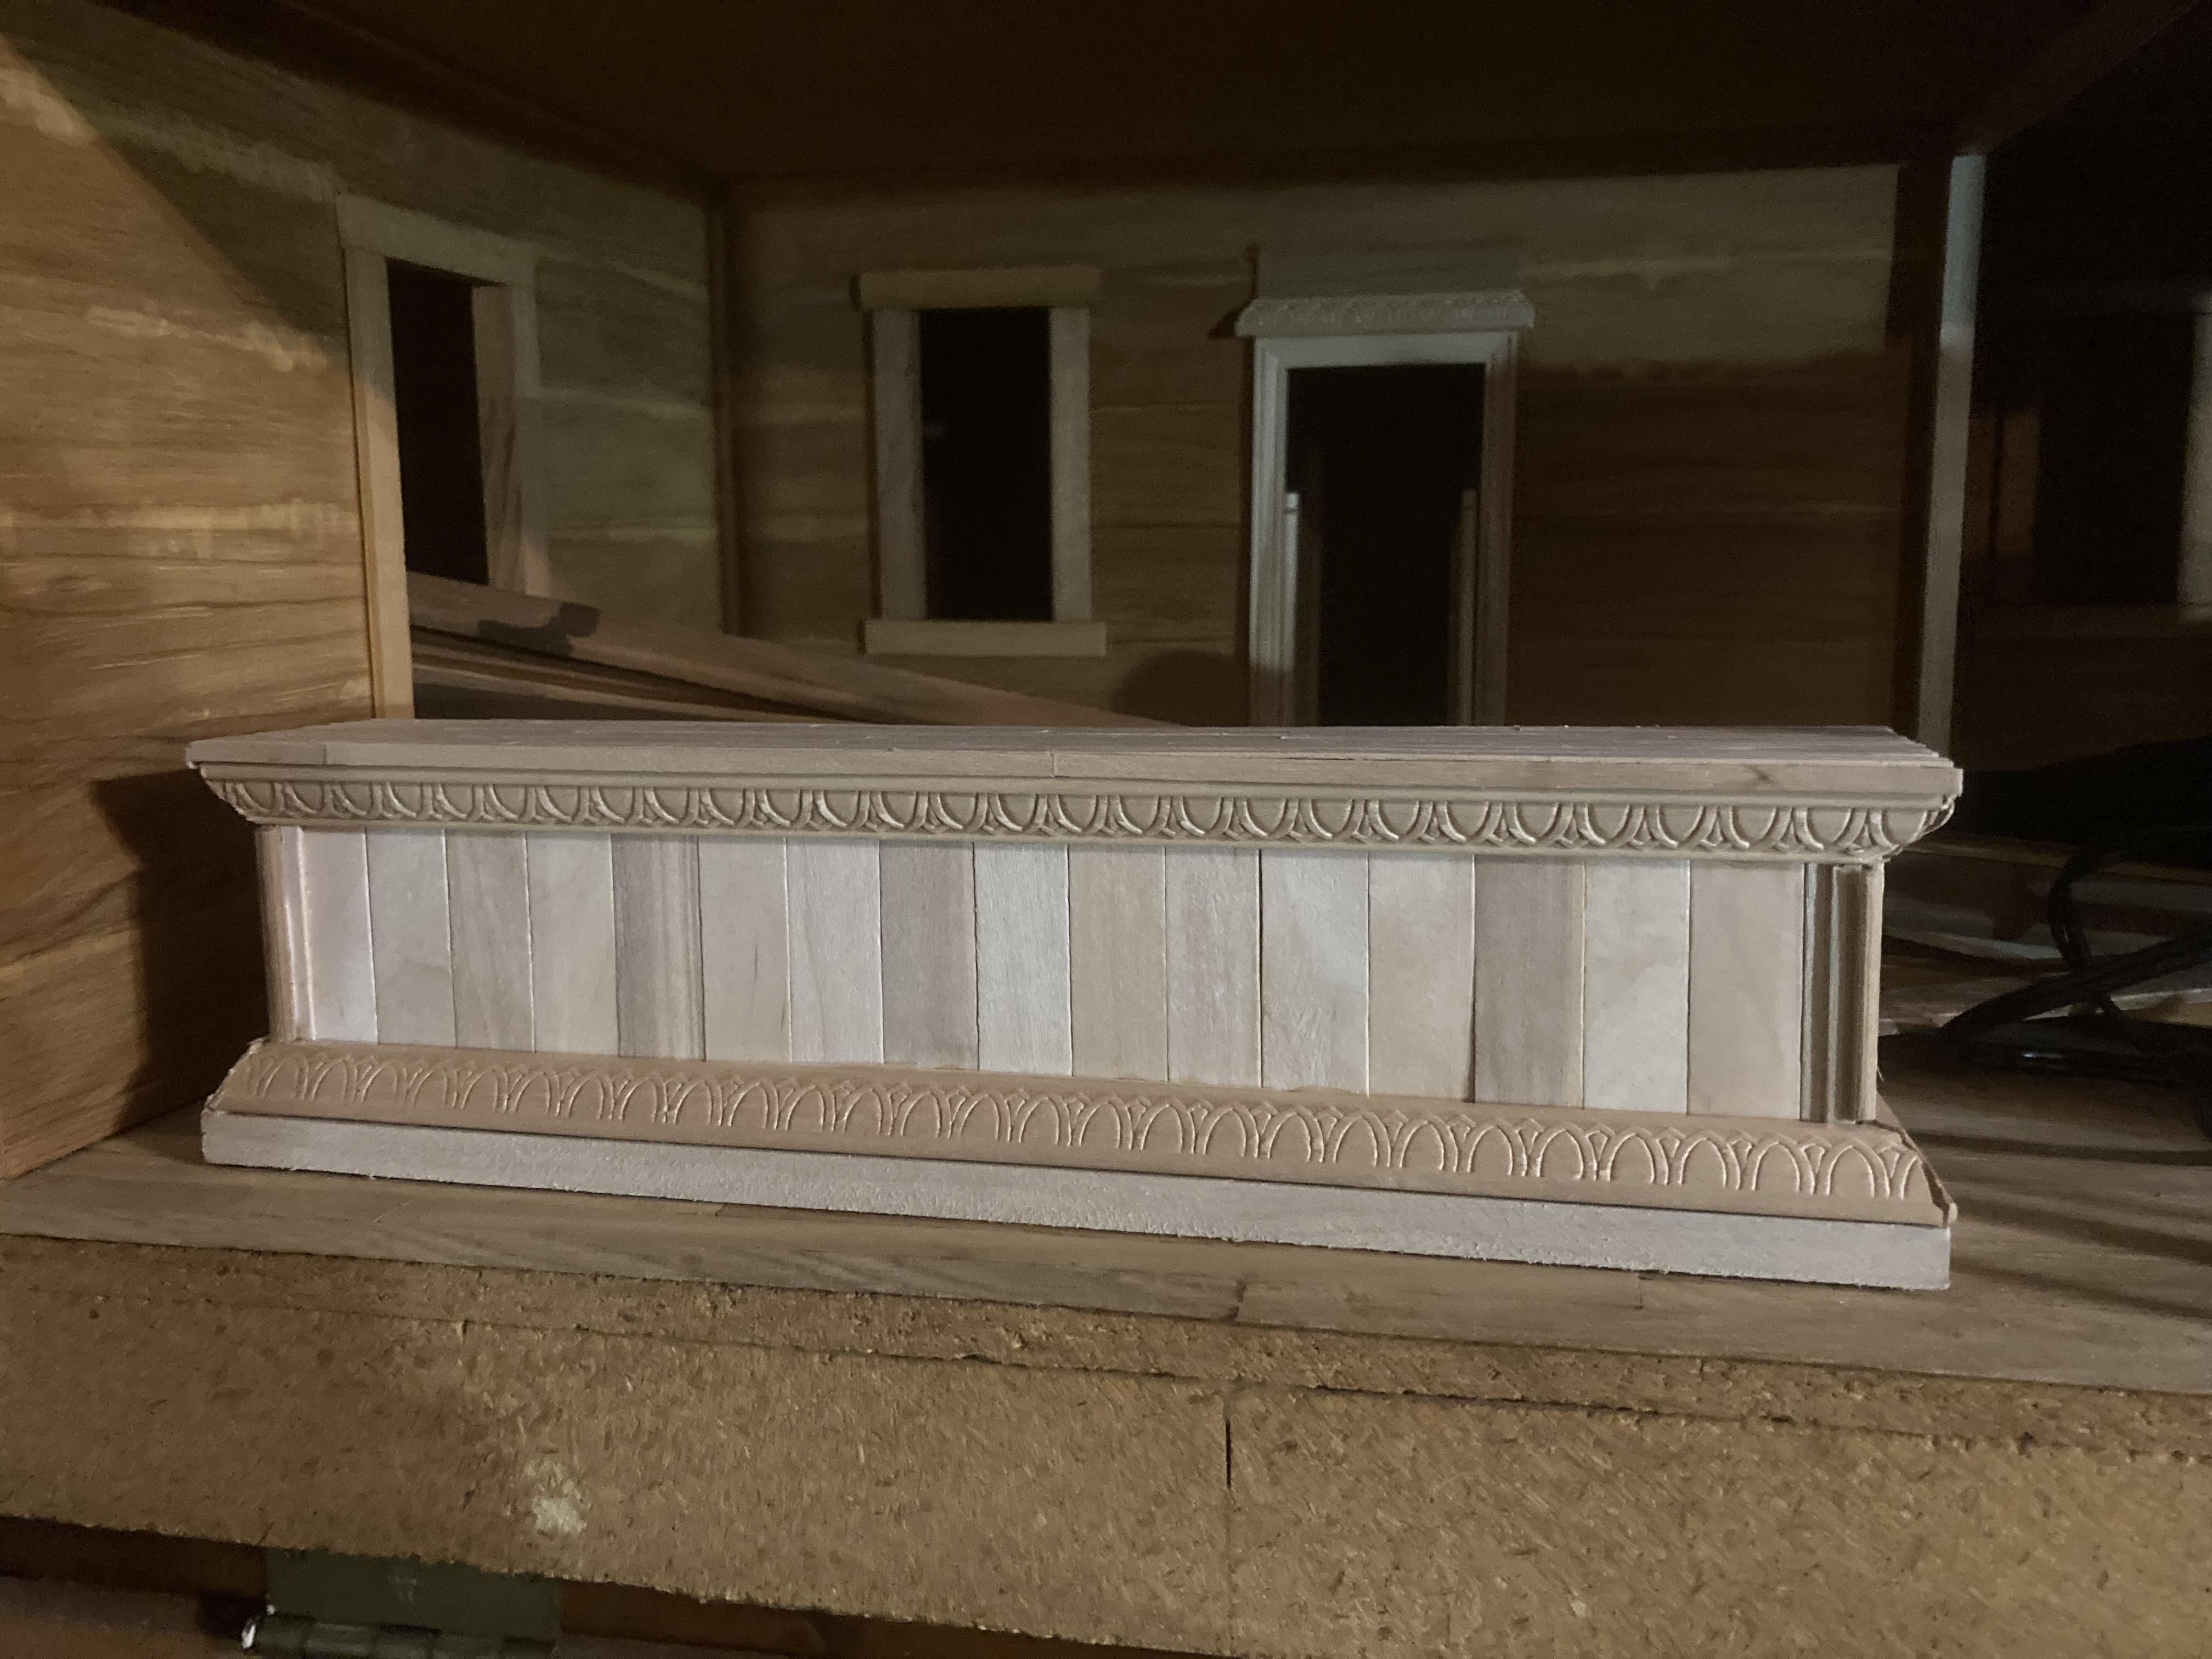
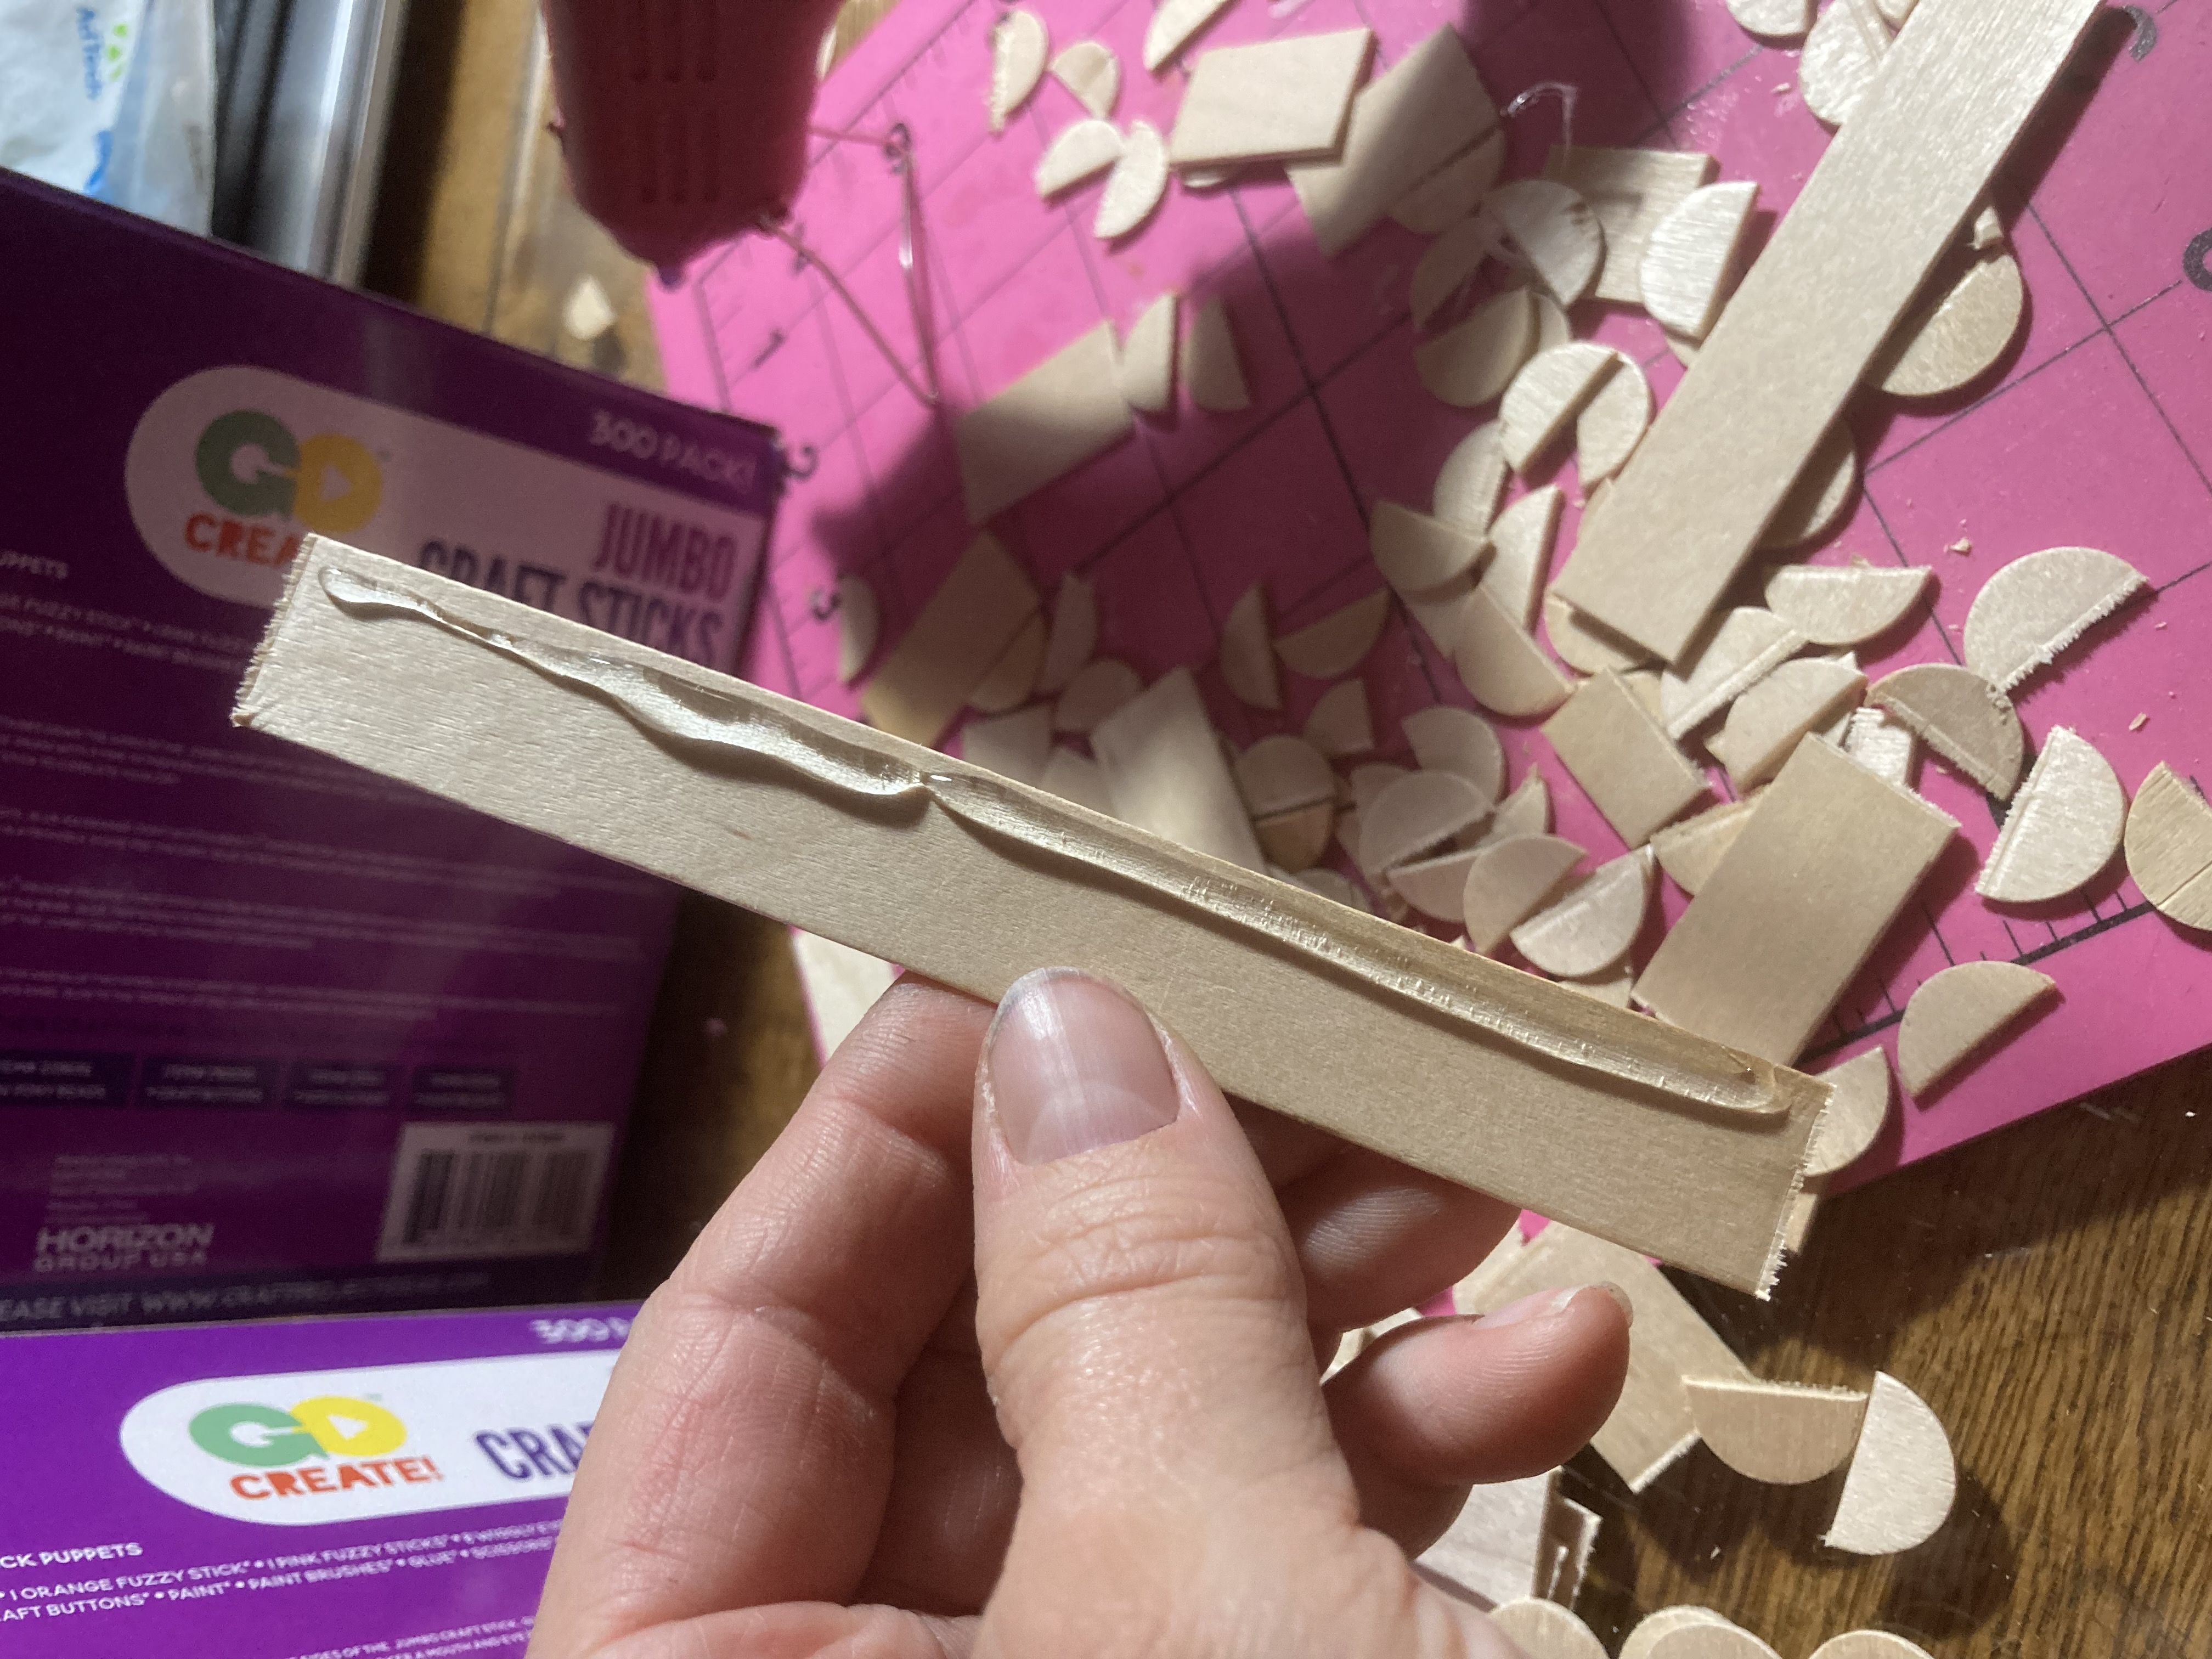
Next I cut another piece of mat board to fit another wall, and glued on a piece of my wallpaper. I cut pieces of popsicle stick and split dowels to create a pattern of wood for the bottom section of the wall, to form wainscoting.
I tinted the wood with thinned out paint so it looked like stain, and made a rail with a long split dowel.
I made sure it fit where i wanted and then glued it to the wall, then did the same for the other wall.
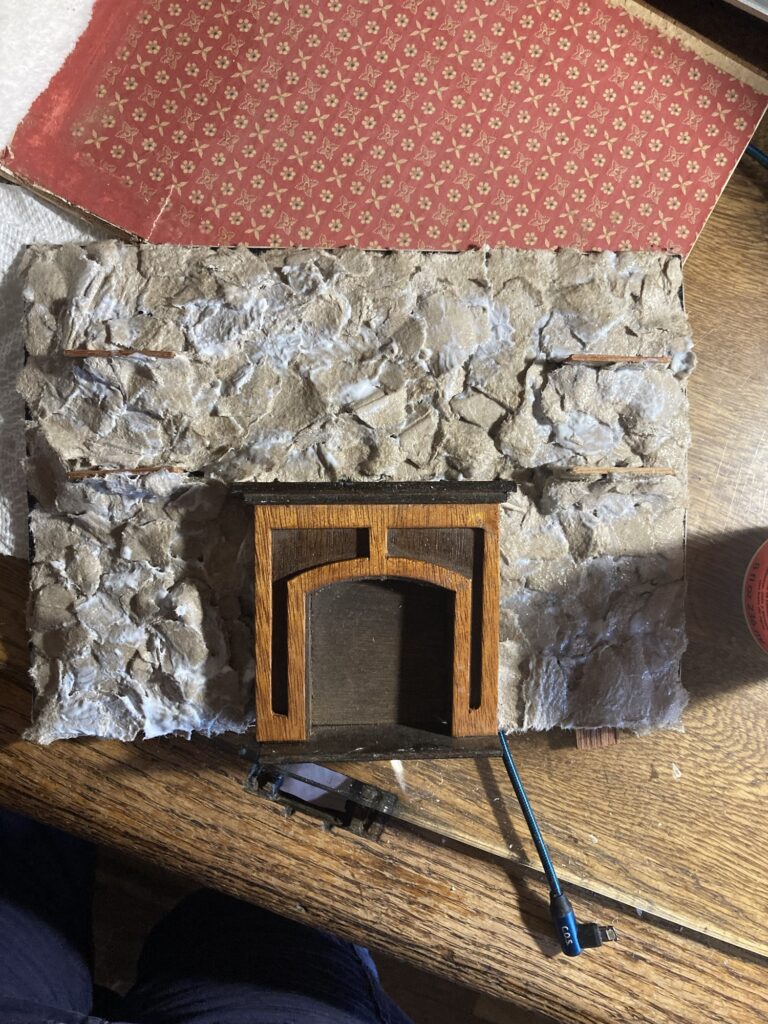
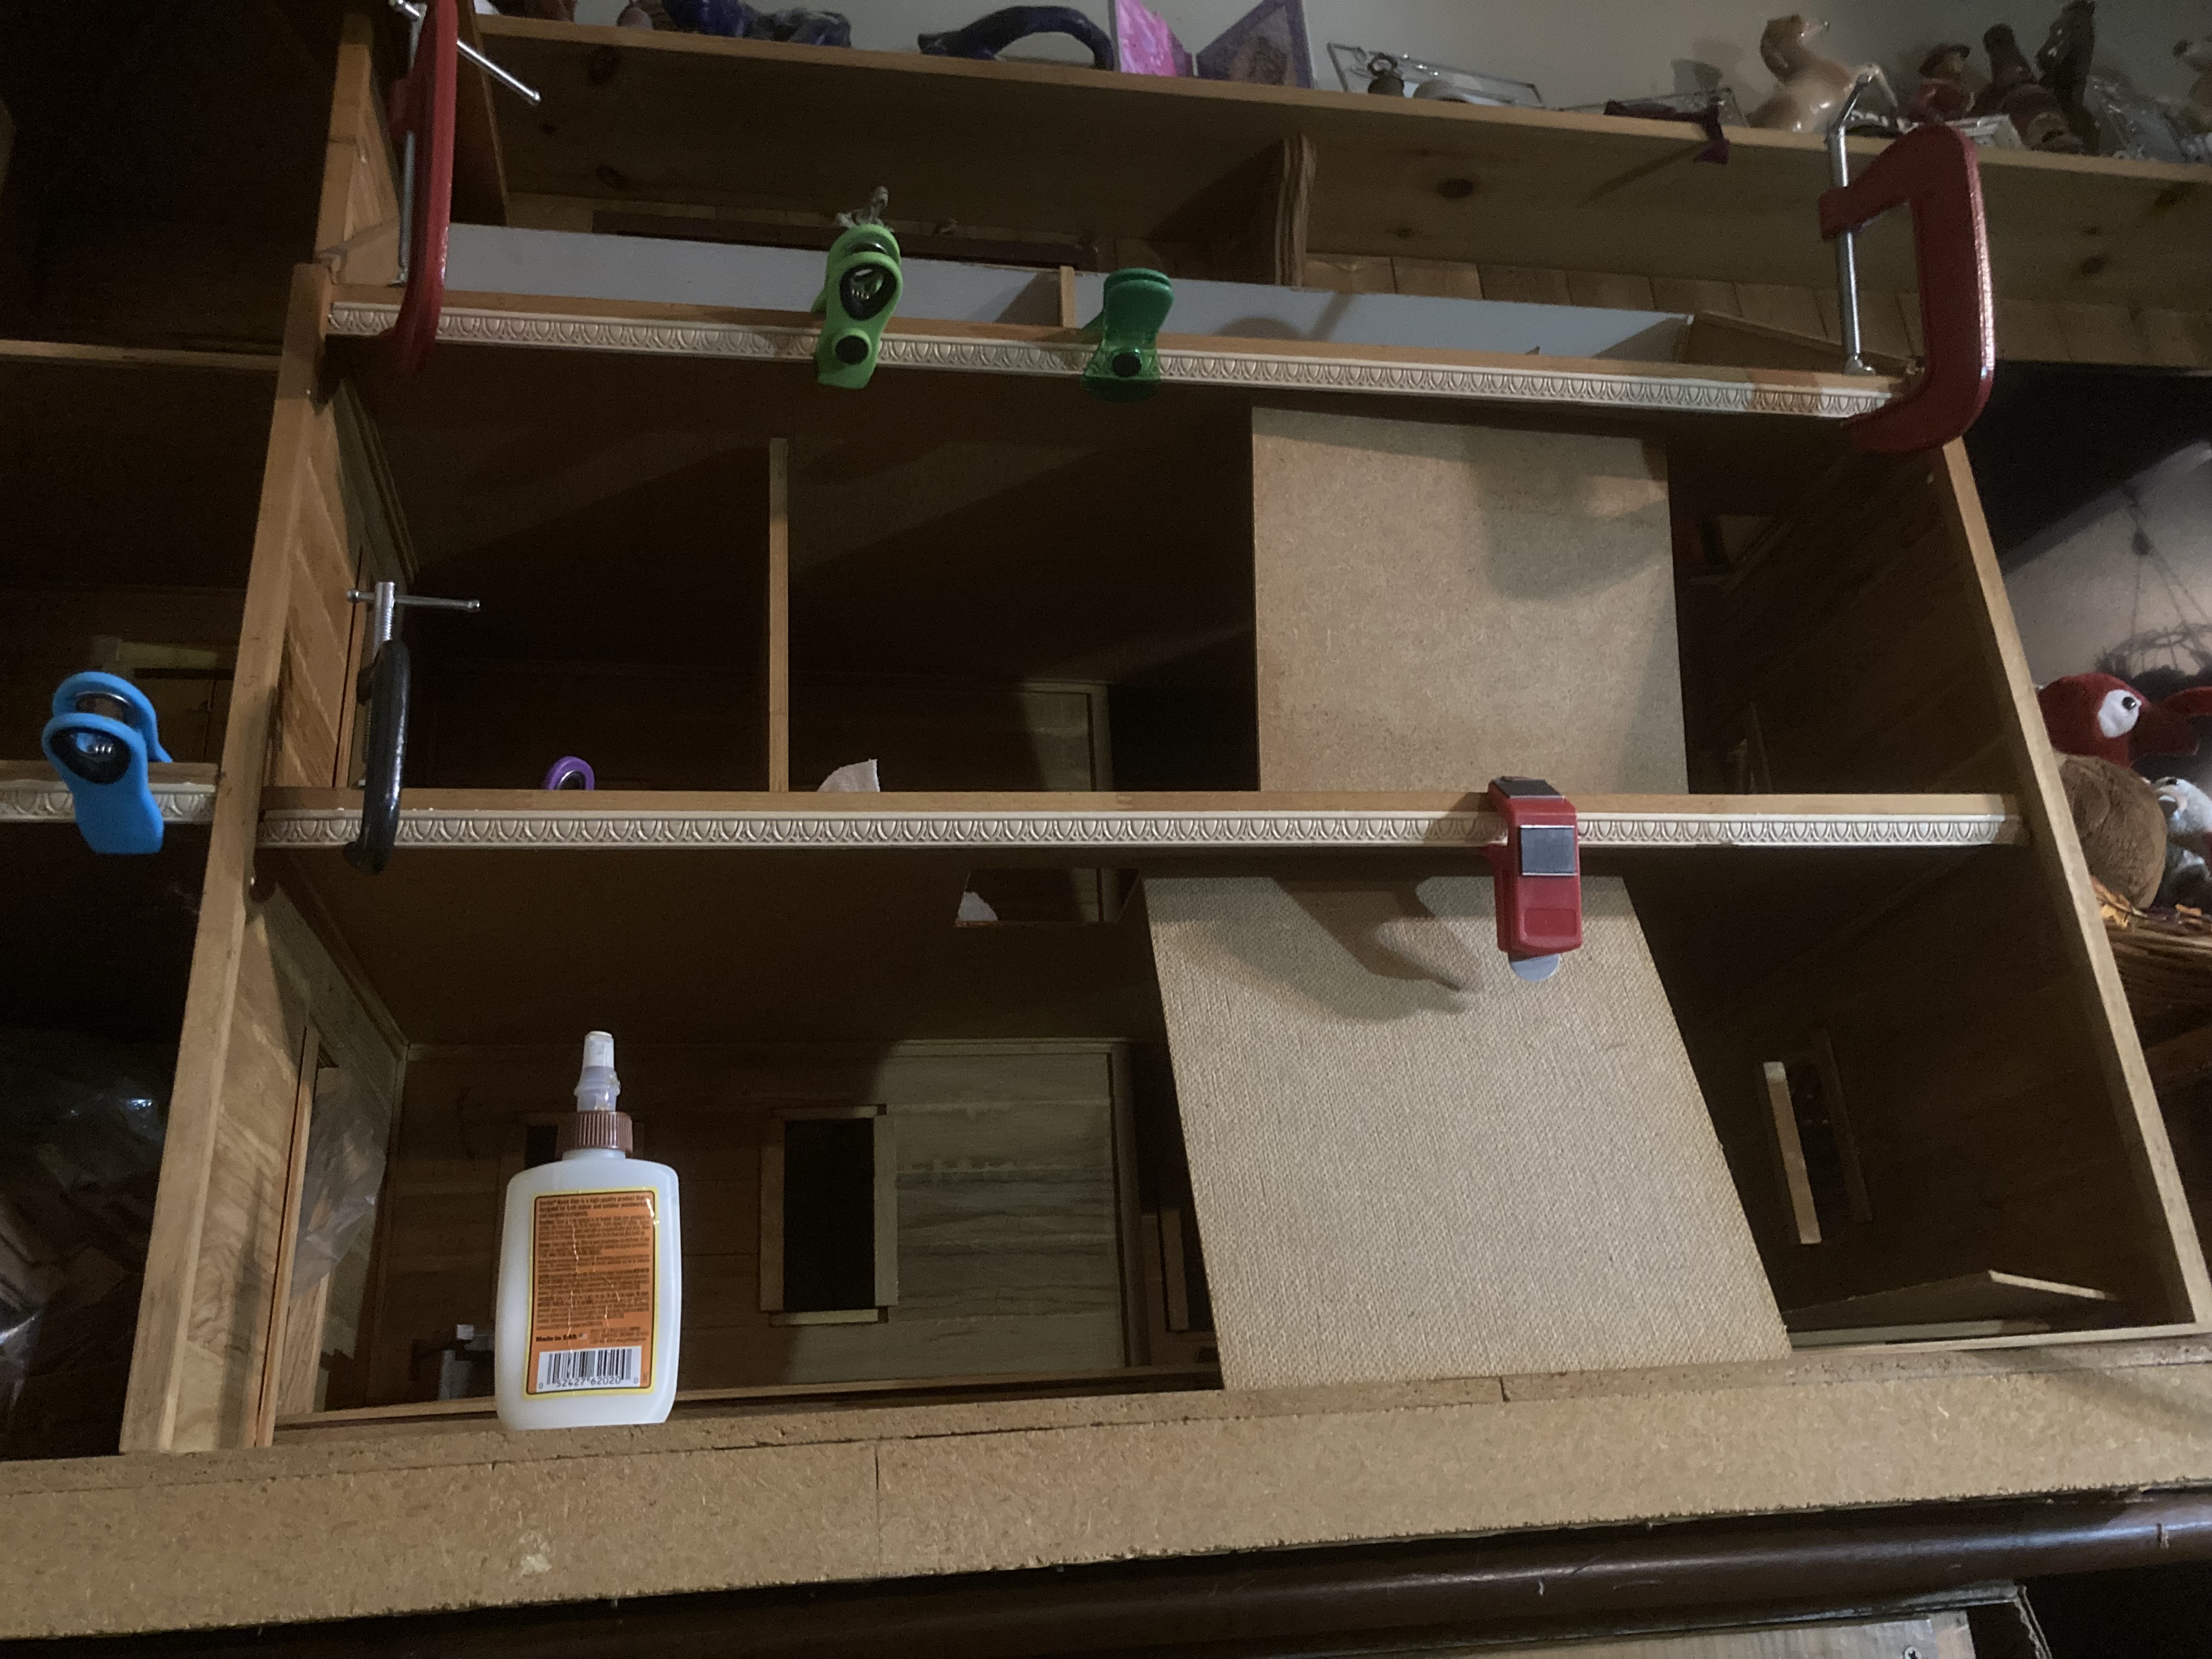
Eventually there will be trim along the ceiling, which will cover the little piece of old wallpaper peeking through.Another view
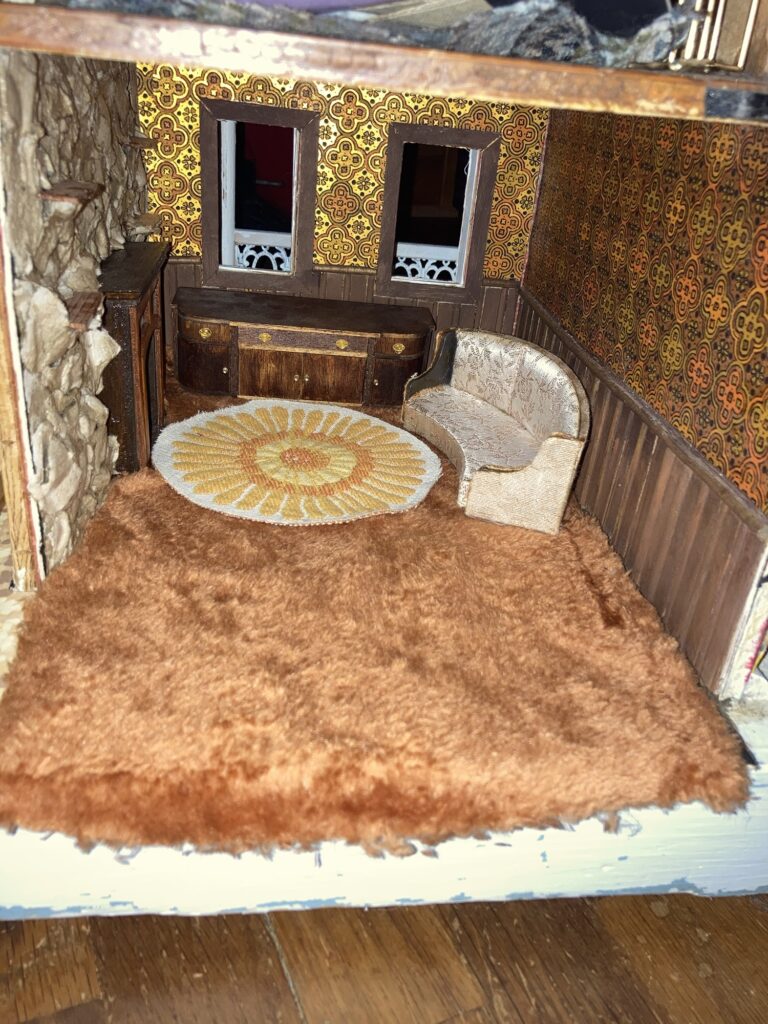
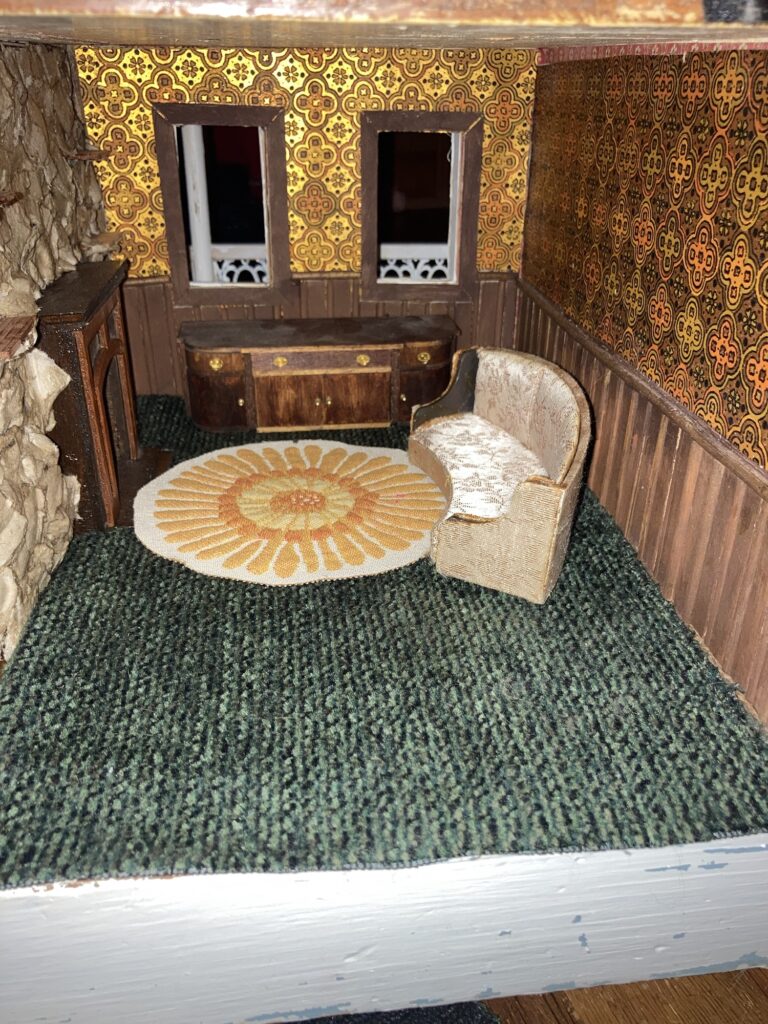
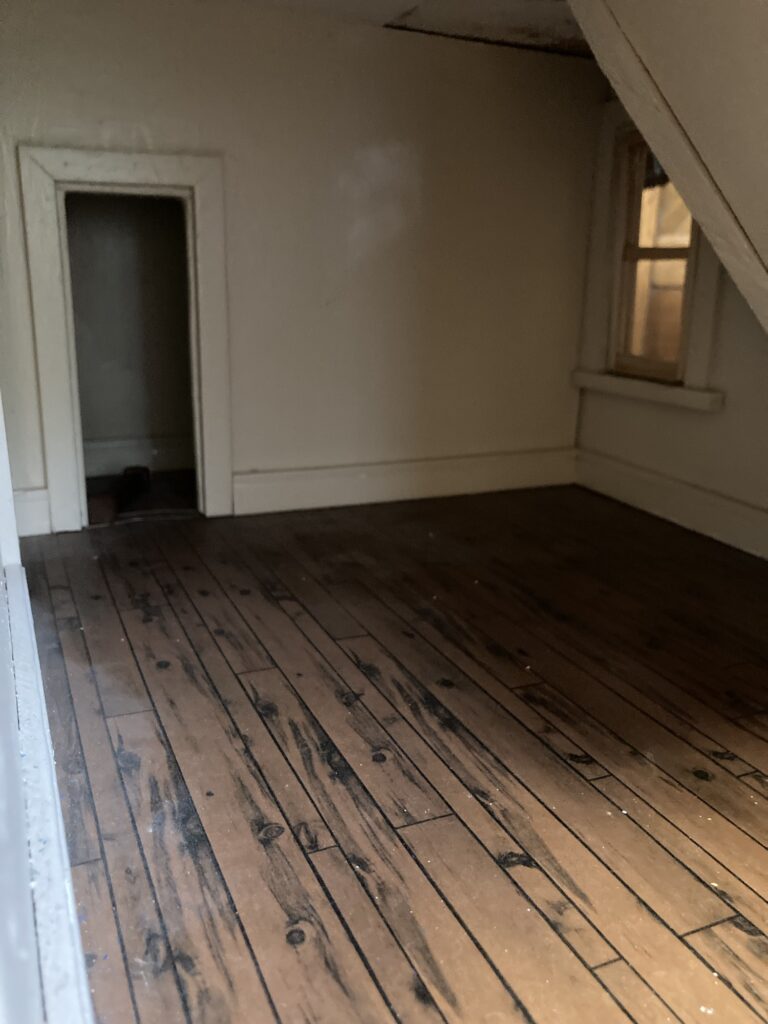
I haven’t been able to decide on a floor color, so I have tried several different colors of “carpet.”
Brown shag. I was hoping this would be a similar shade to the wood of the floor, as I like the rich warm hues, but it seems a little washed out to me now. (This is part of an autumn themed fuzzy pillow from a thrift store)Orange fuzzy (it’s the inside of an old sweatshirt, so it has that worn fuzzy carpet look to it 😆)Green (this is an old carpet sample)
I also tried a puke yellow but it definitely didn’t look good with the wallpaper. I am thinking of sewing an orange trim around my flower rug, and i would love to reupholster my couch to something like the orange flower velvet I used to see all the time, but haven’t found a good material for that, yet. Any thoughts? Which carpet do YOU think would look best? Leave a comment with your thoughts!
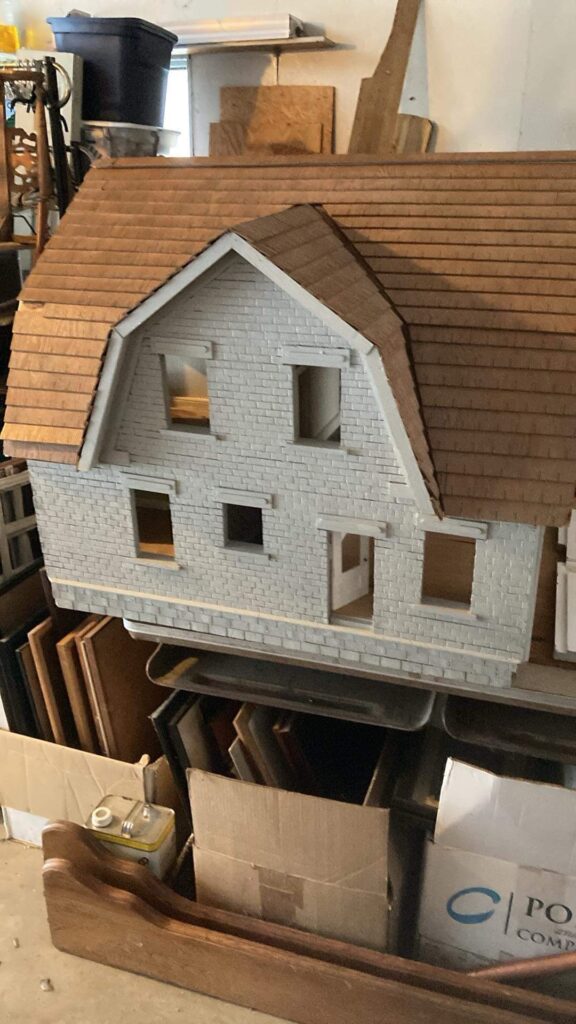
My newest acquisition. I was told that this dollhouse has been passed down through generations, and that it was made to resemble a family home. The previous owners decided that they didn’t have room for it and there was no longer an interest in keeping it, and so I purchased it.
Unfortunately my family recently lost the beloved real home of my grandparents, so this dollhouse came at a good time for me. It lost its family, and I lost a house. Maybe together we can find a little closure.
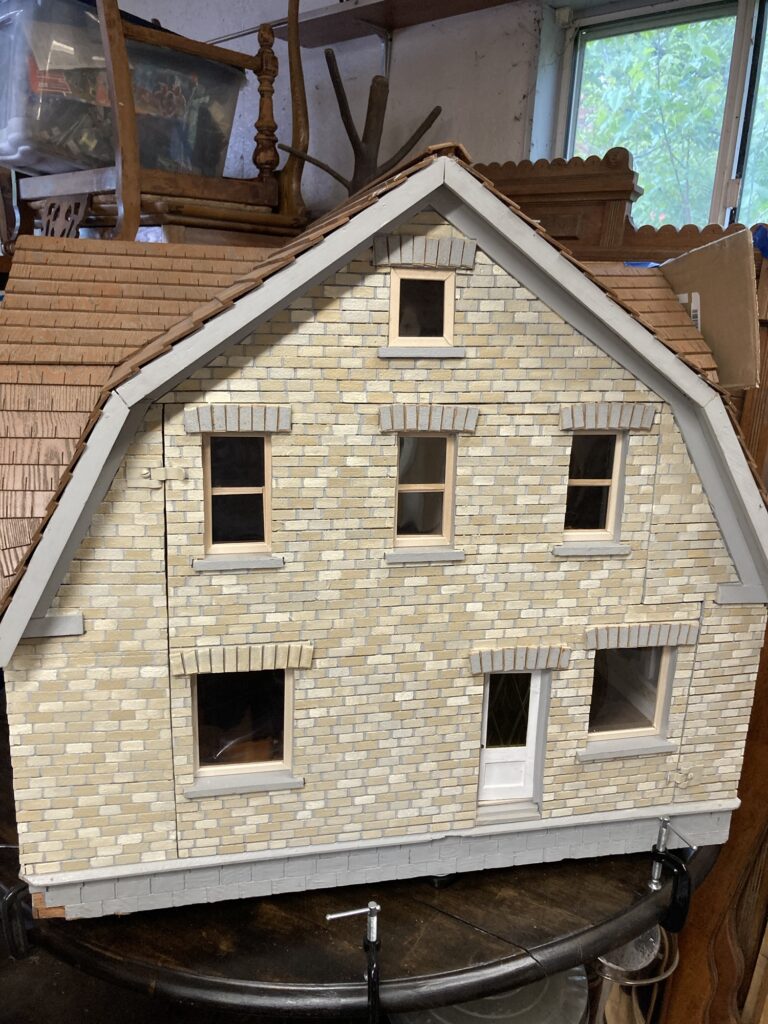
My ultimate plan is to turn this into my own family heirloom, as it slightly resembles my great-great-aunt’s house, which I have loved since childhood. It will only require new paint to emphasize the bricks, the addition of some small architectural details such as decorations in the roof peaks and some fancy brickwork, and replicas of a few family heirlooms.
Shortly after it arrived.
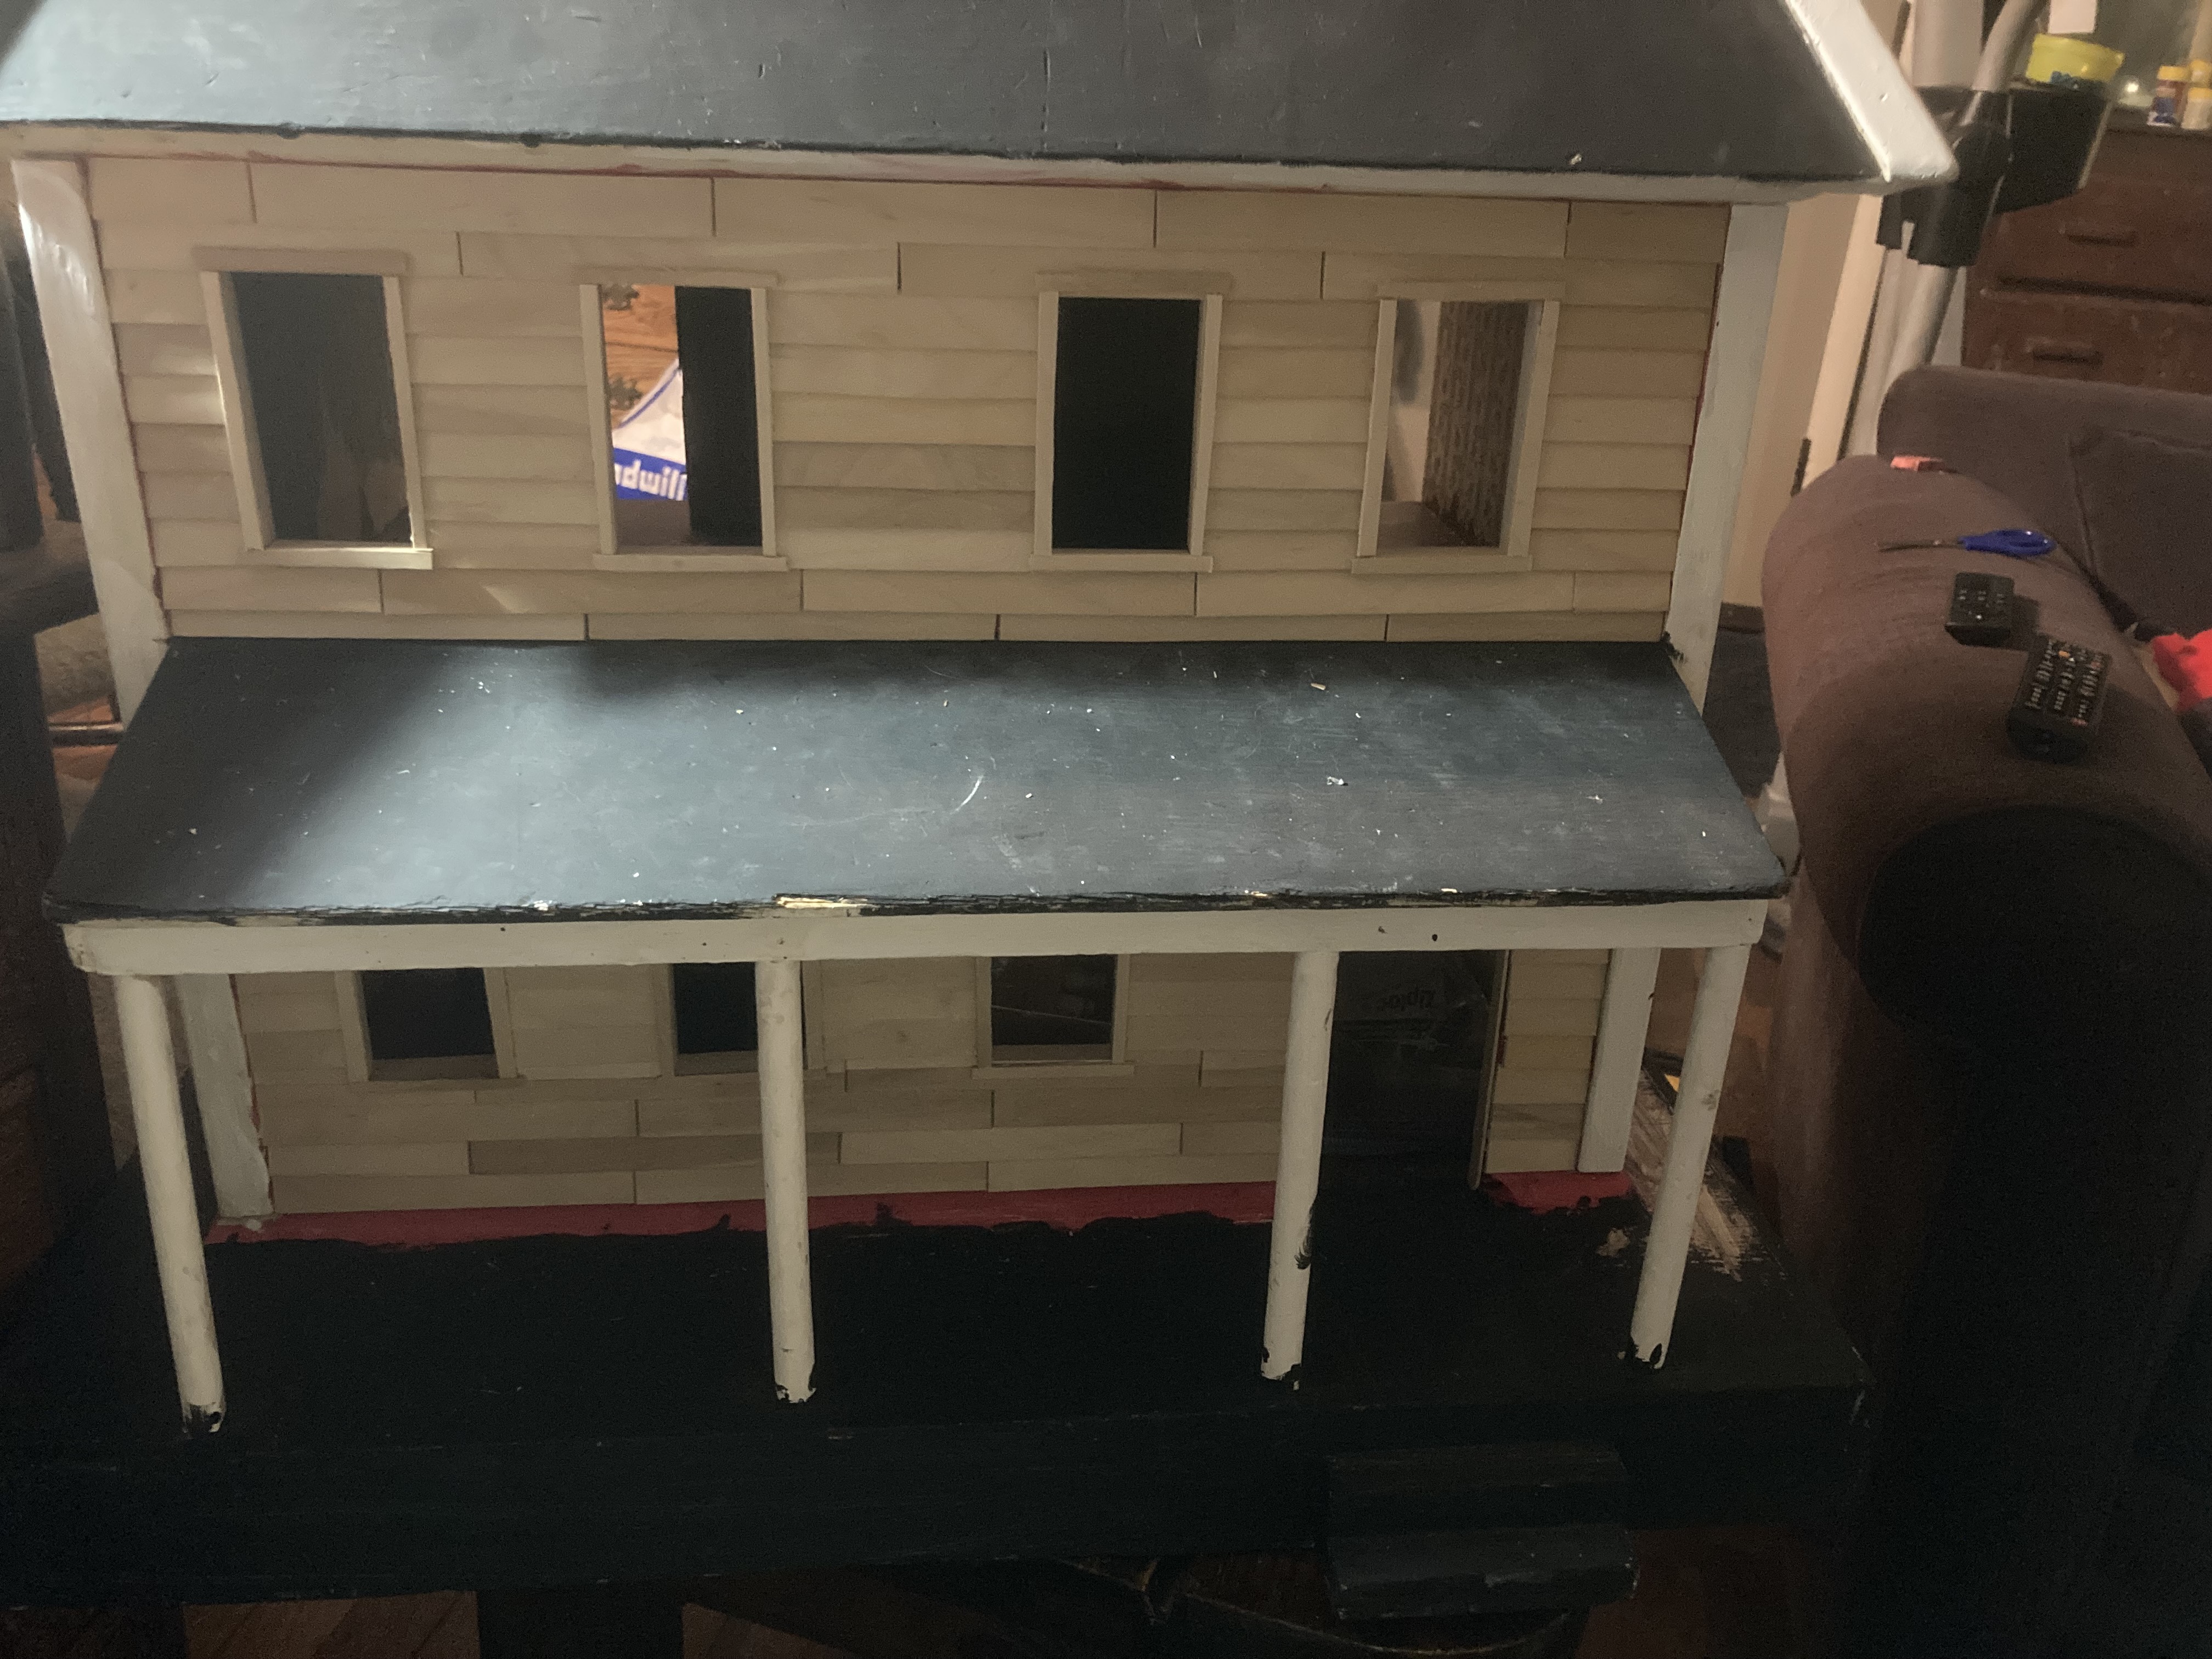
This house doesn’t fit in my real house-it’s about 3 feet square. As a consequence it resides in my garage until I can get a bigger house, or make the door bigger! It’s fine, though, as I spend a lot of time in my garage. Anyway…
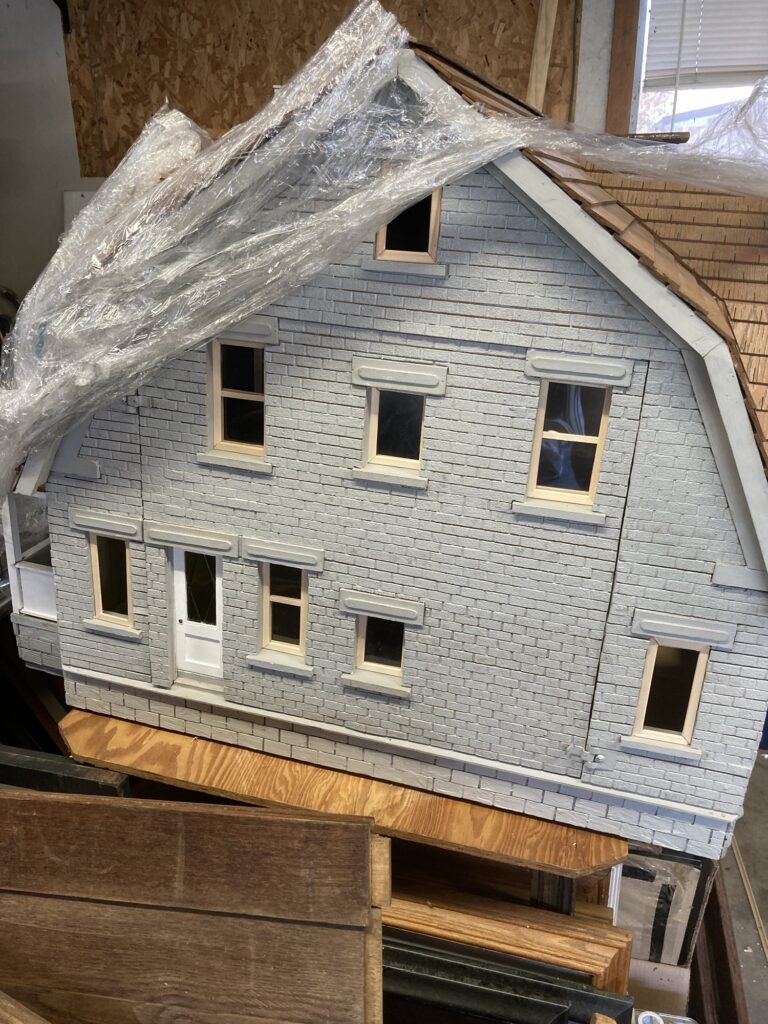
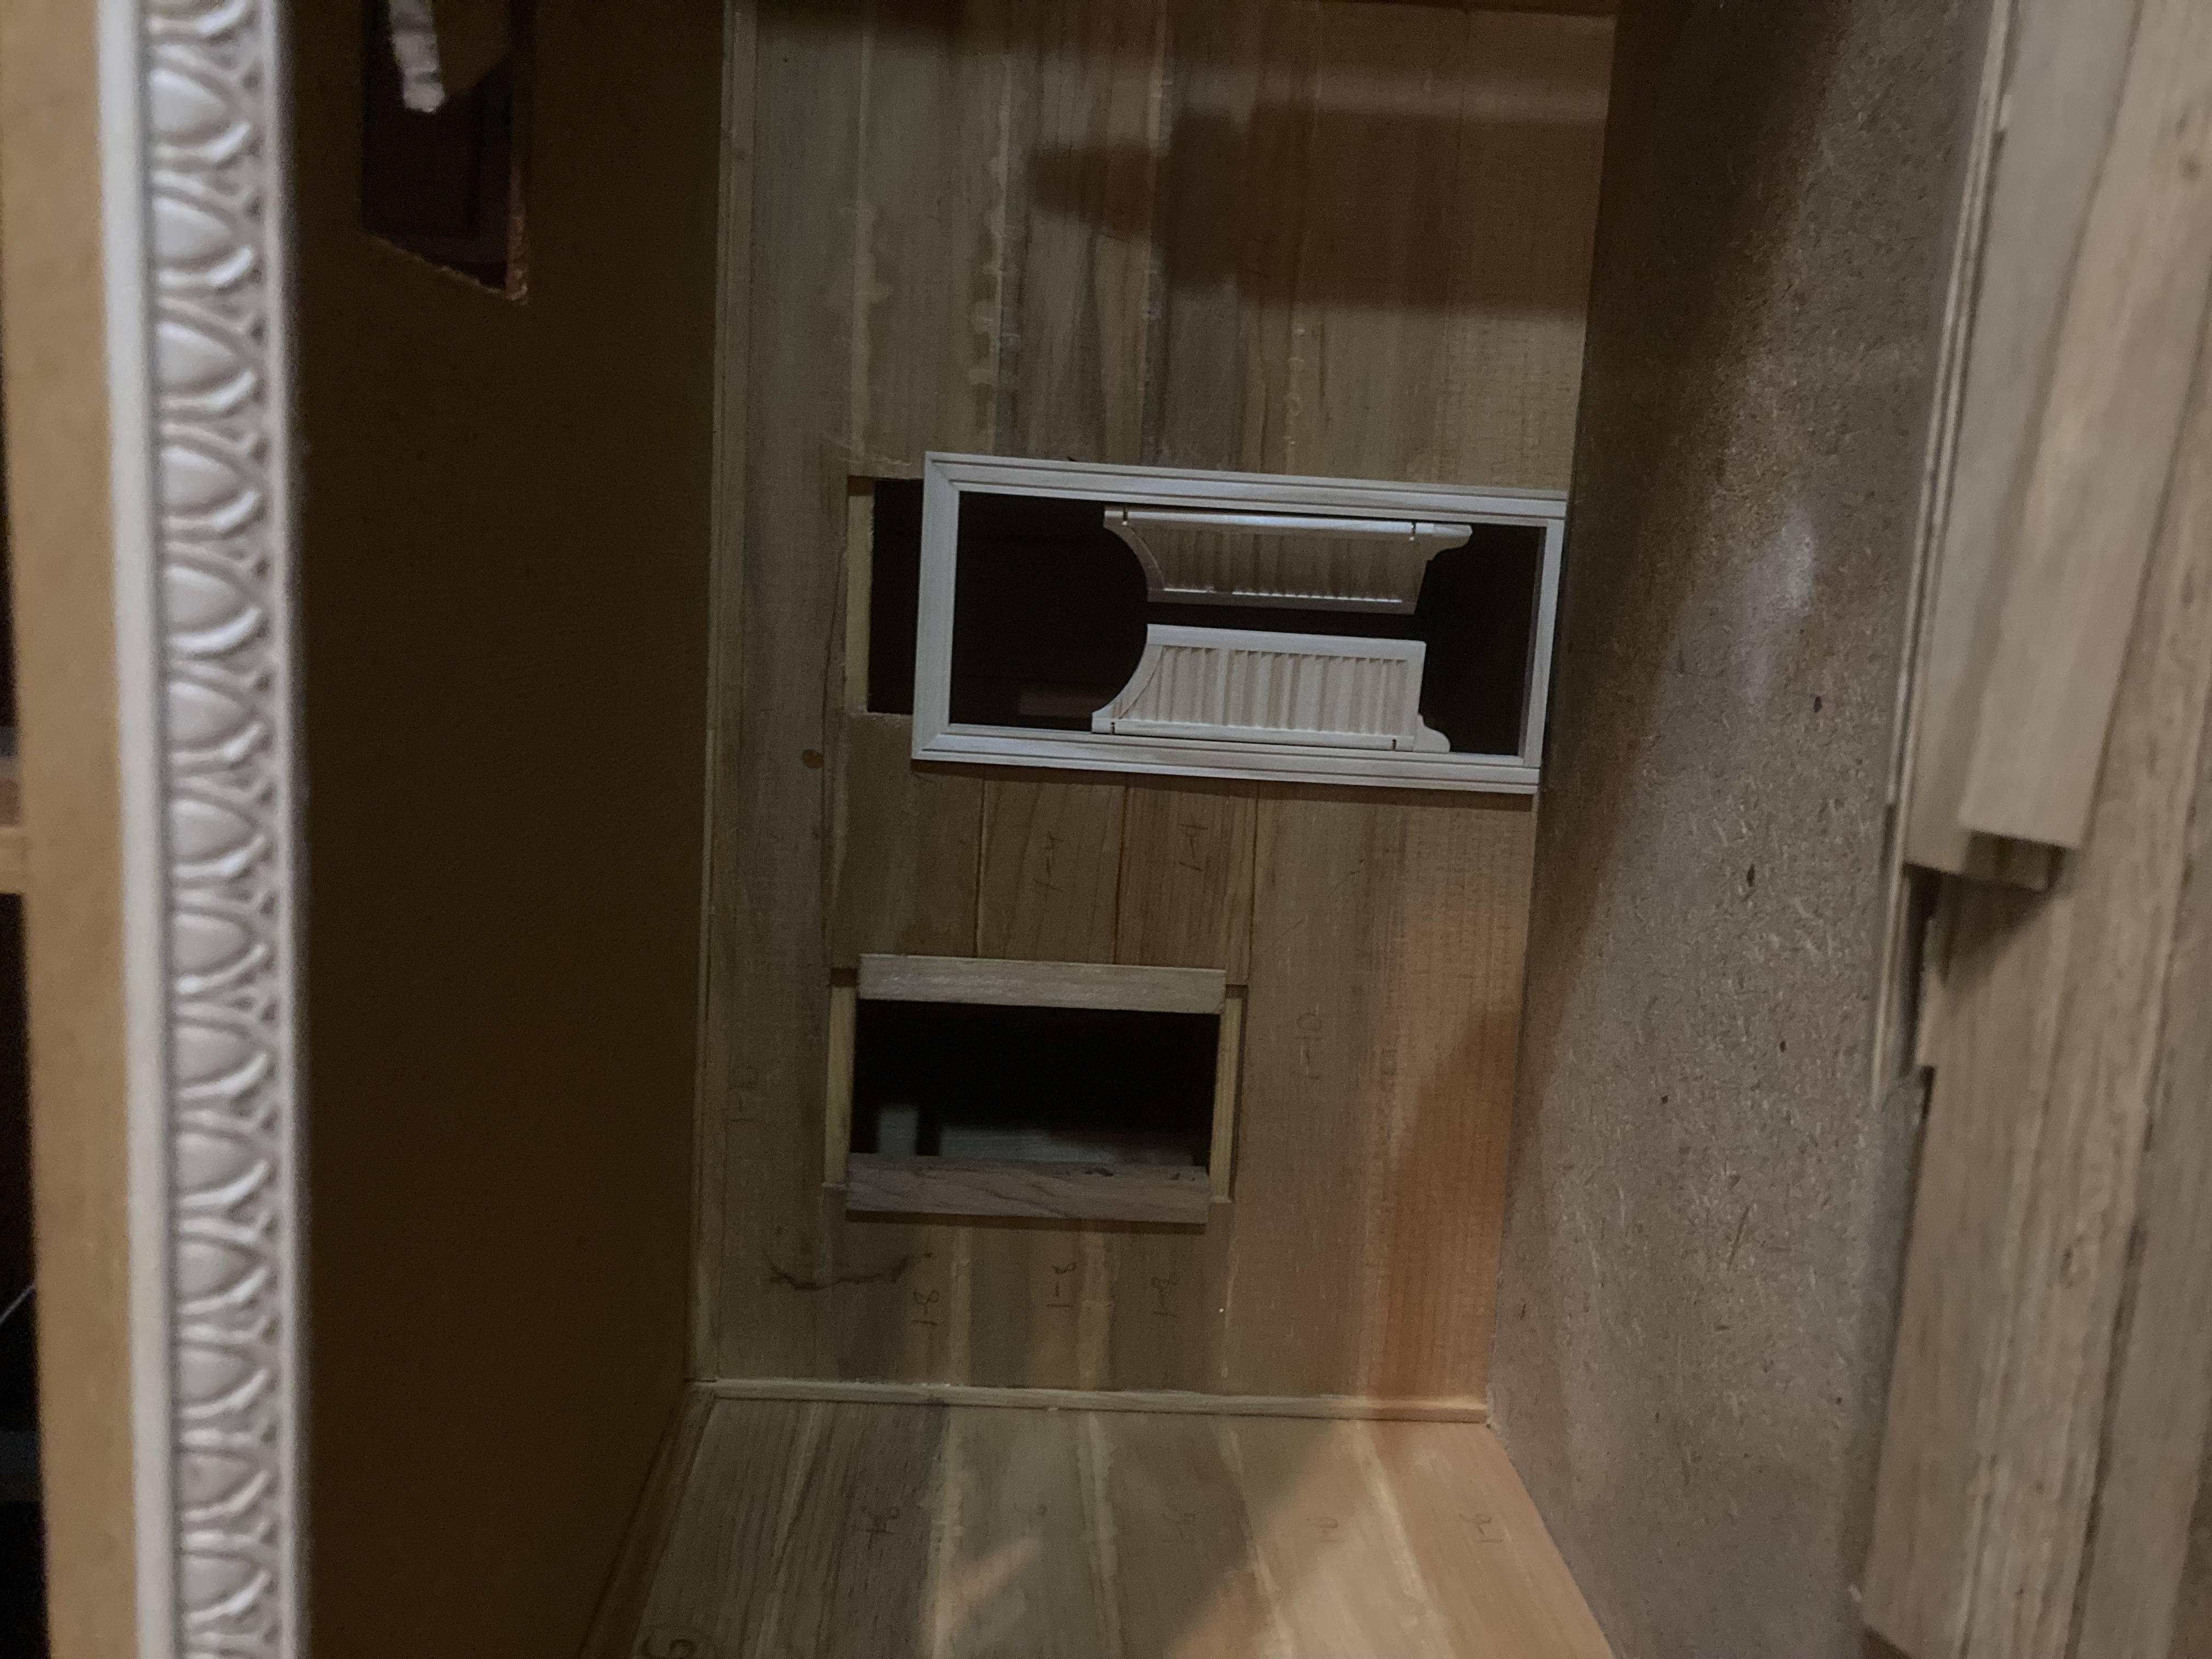
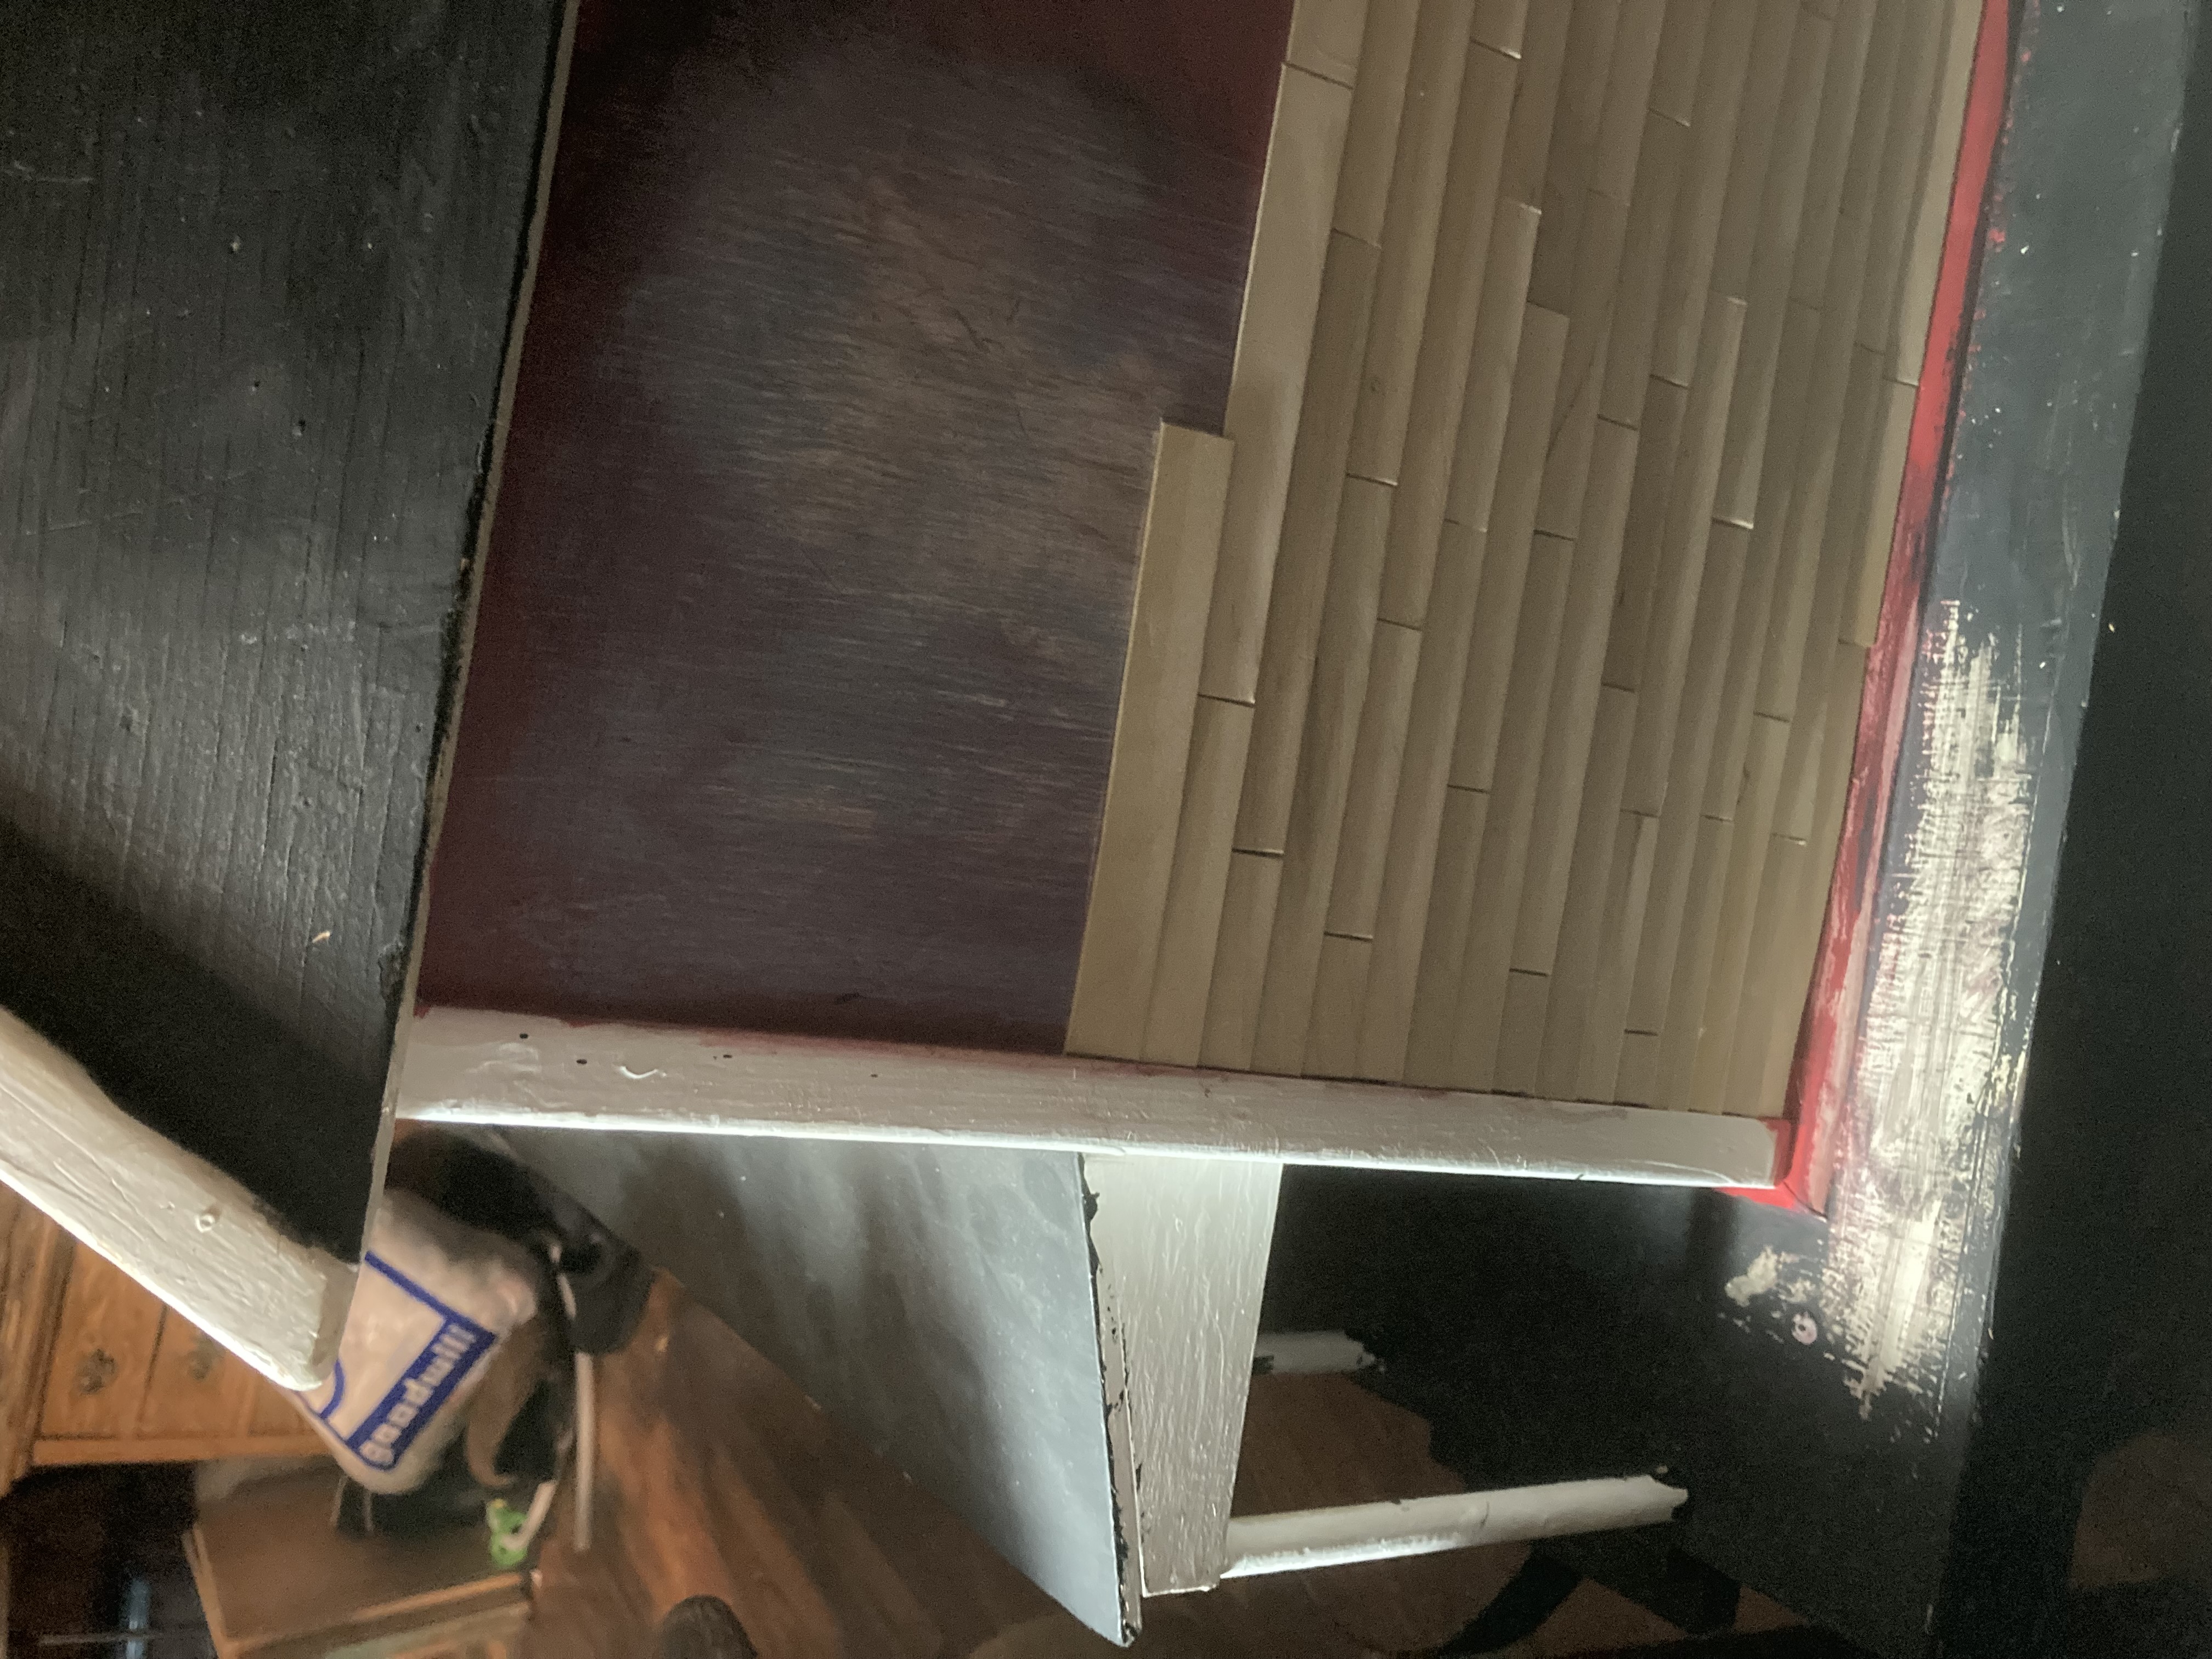
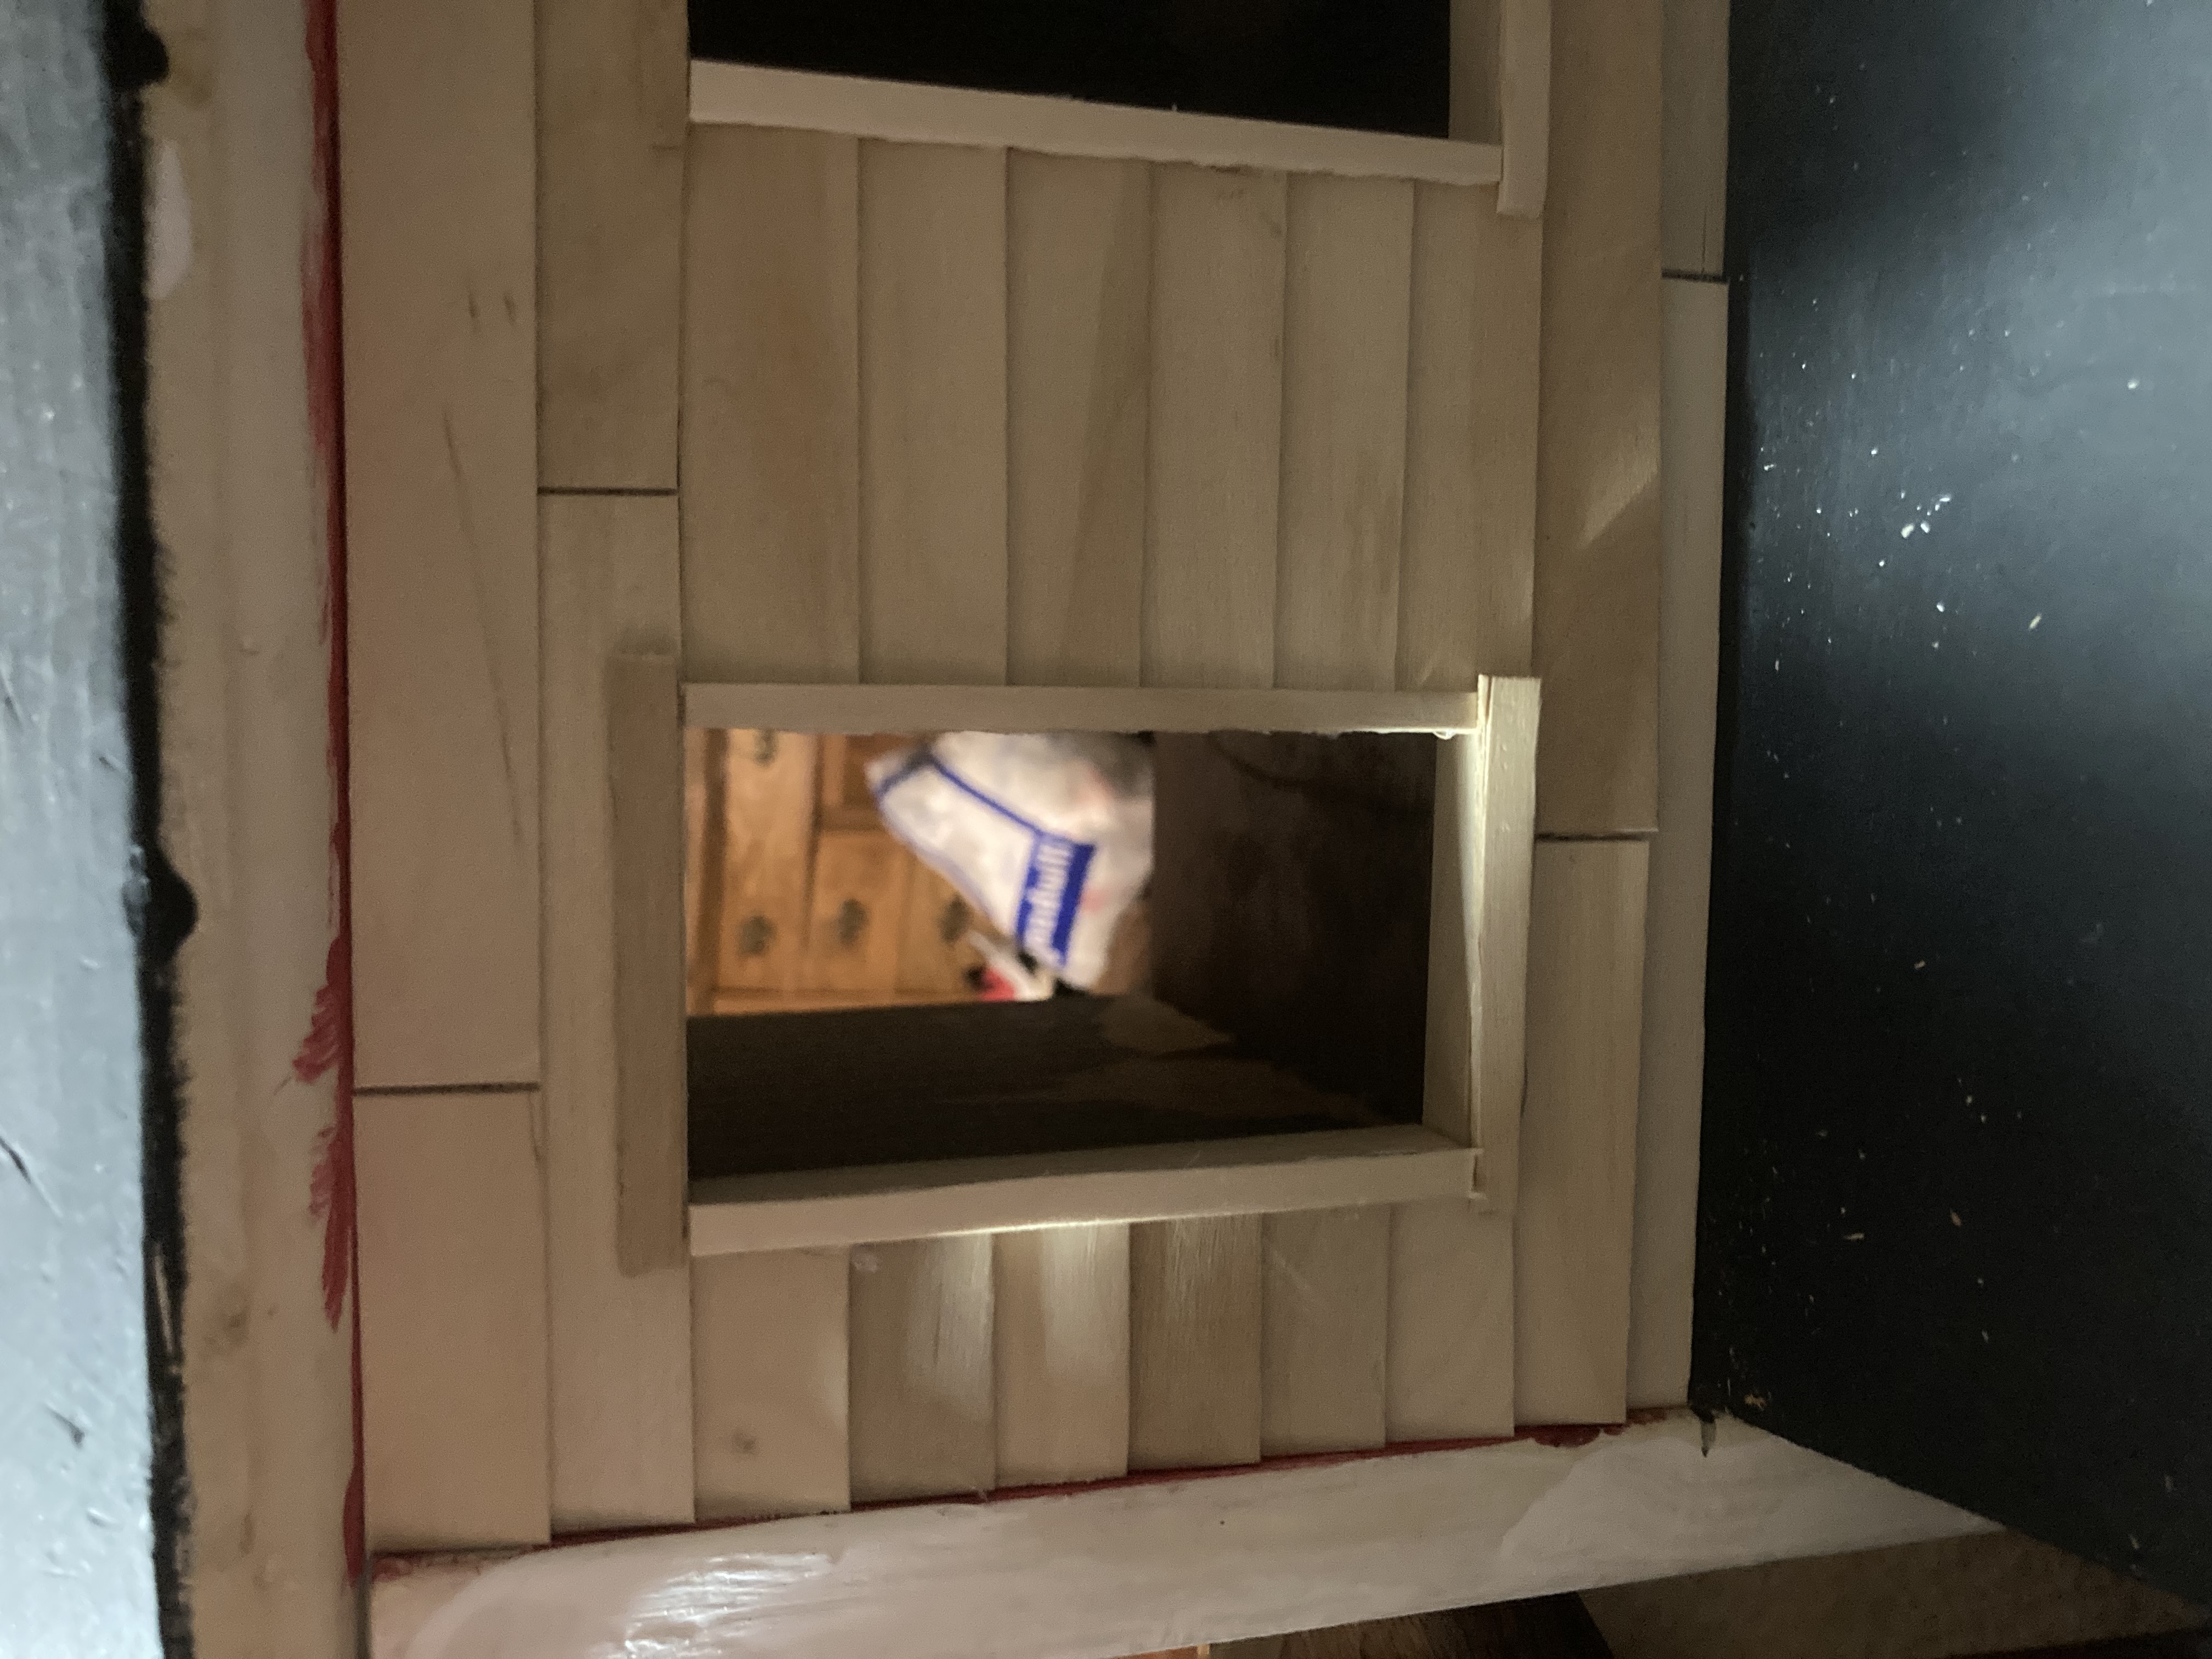
First things first, I decided that I need to get functional windows made and put in, to keep out any mice or insects.
I wrapped it in seran wrap over the winter to discourage pests. This is one wall of windows completed.
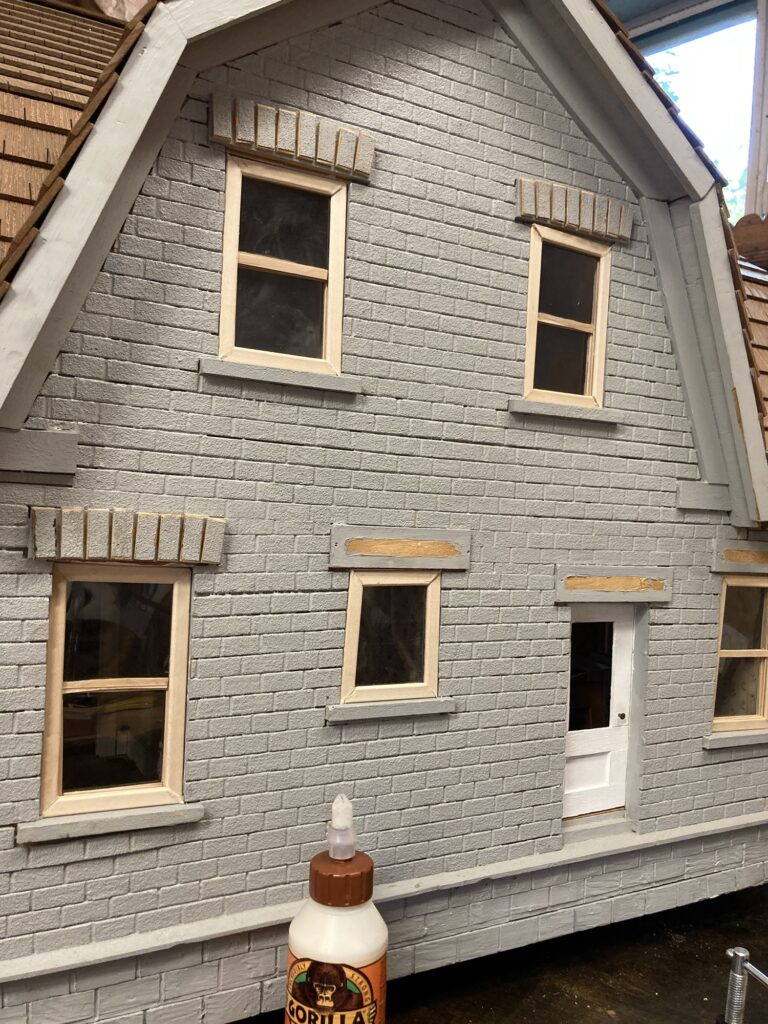
Using instructions posted in another article on this blog, I made all of the windows. Yay! Next, I wanted to make brick designs that go over the windows, to more closely resemble those found on my great-great-aunt’s house.
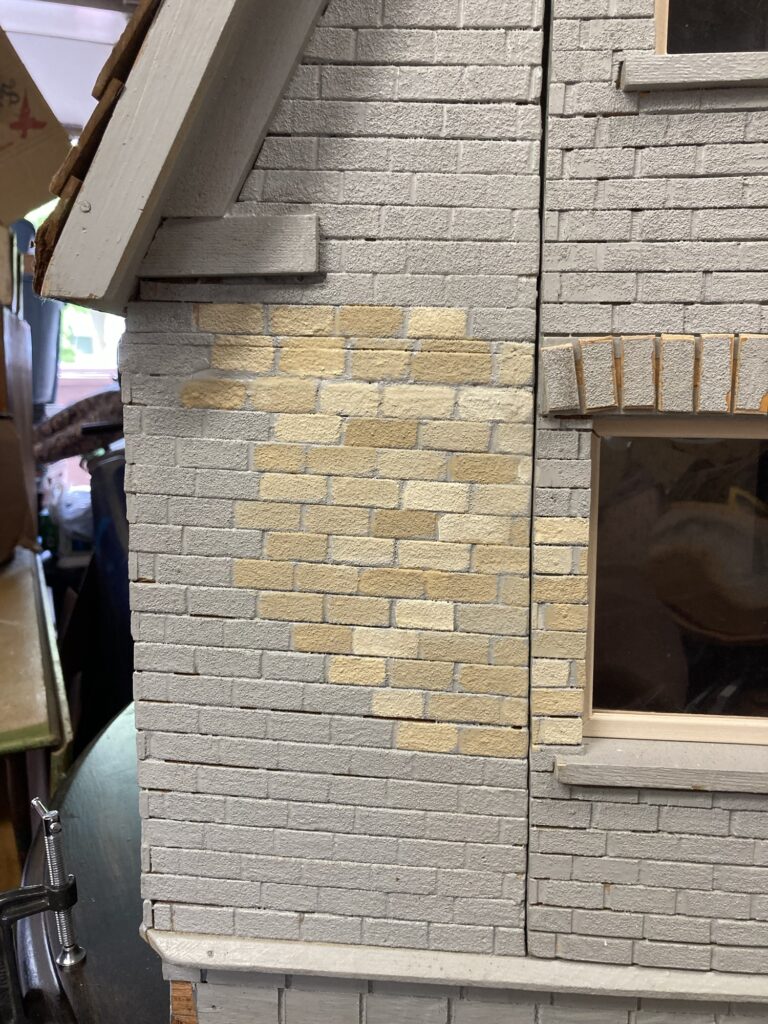
The bricks I added aren’t exactly the same as those on my aunt’s house, but I think with some creative painting I might pull off some similarity.
Fortunately for me, the house came with a few strips of wood with ‘bricks’ left over from the siding. It wasn’t quite enough to do the whole job, so I made more by gluing sandpaper to popsicle sticks, and then cut the sticks into brick-sized pieces.
Some of the old bricks and some of my ‘new’ ones made with popsicle sticks and sandpaper. They were virtually the same.
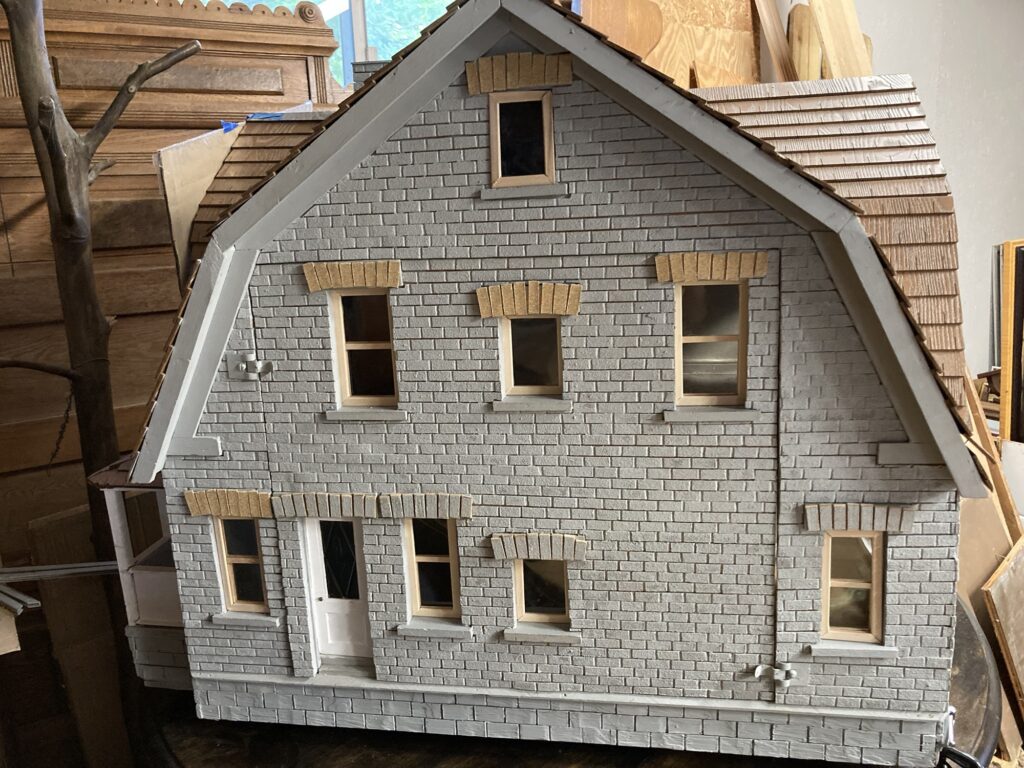
Now on to paint!
The paints I used. I used the paints right out of the bottle, plus mixed them together on a pallet to make new colors that are similar shades. I wanted them all to look like similar bricks but not all the same color.I wanted them all to look similar yet different. One side done. I will go back to the window bricks when the sides are all painted, and then, eventually, I will paint all of the trim.
When I am done with all sides plus the windows, my plan is to put a watered-down gray wash over the whole thing to add some weathering.
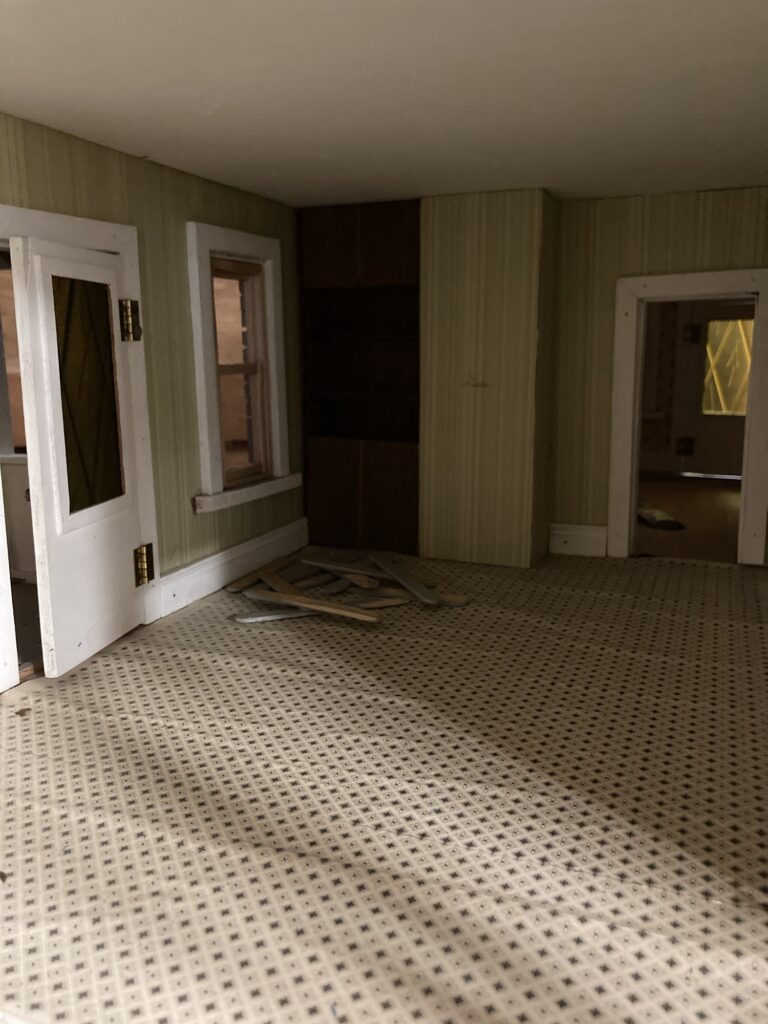
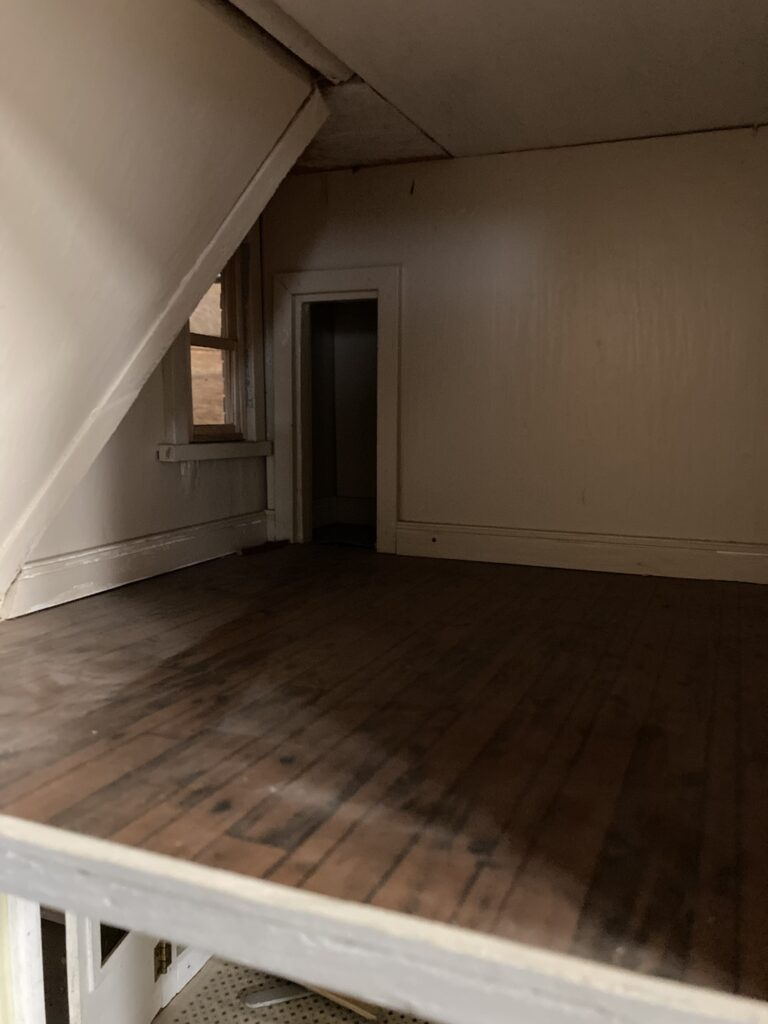
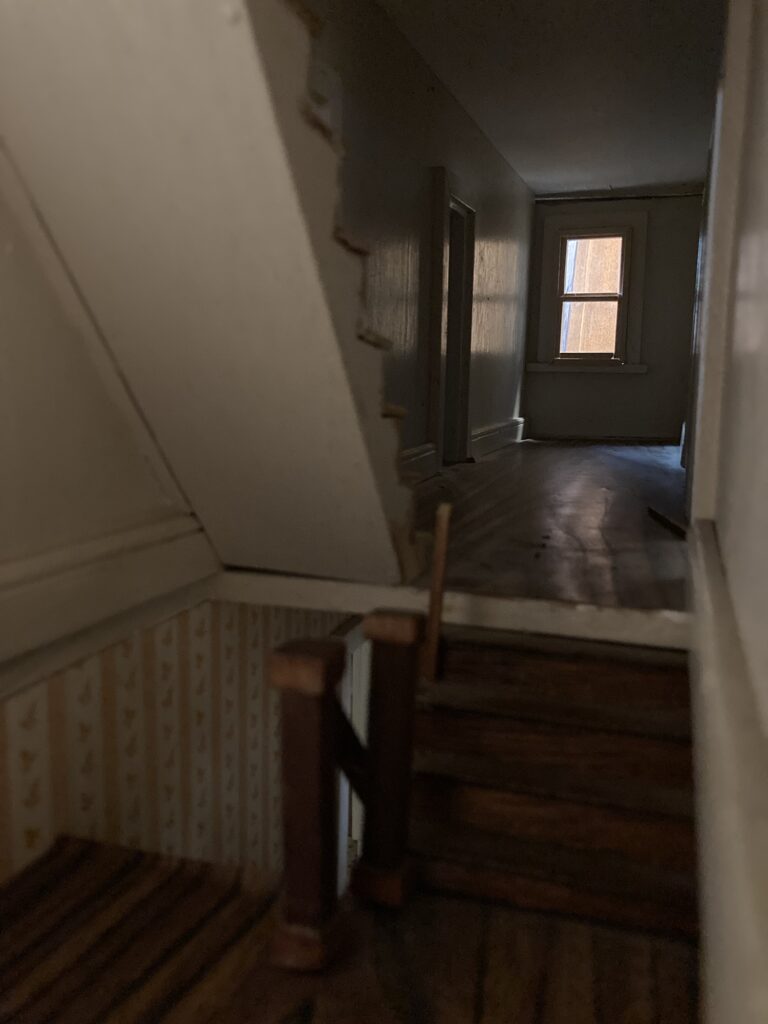
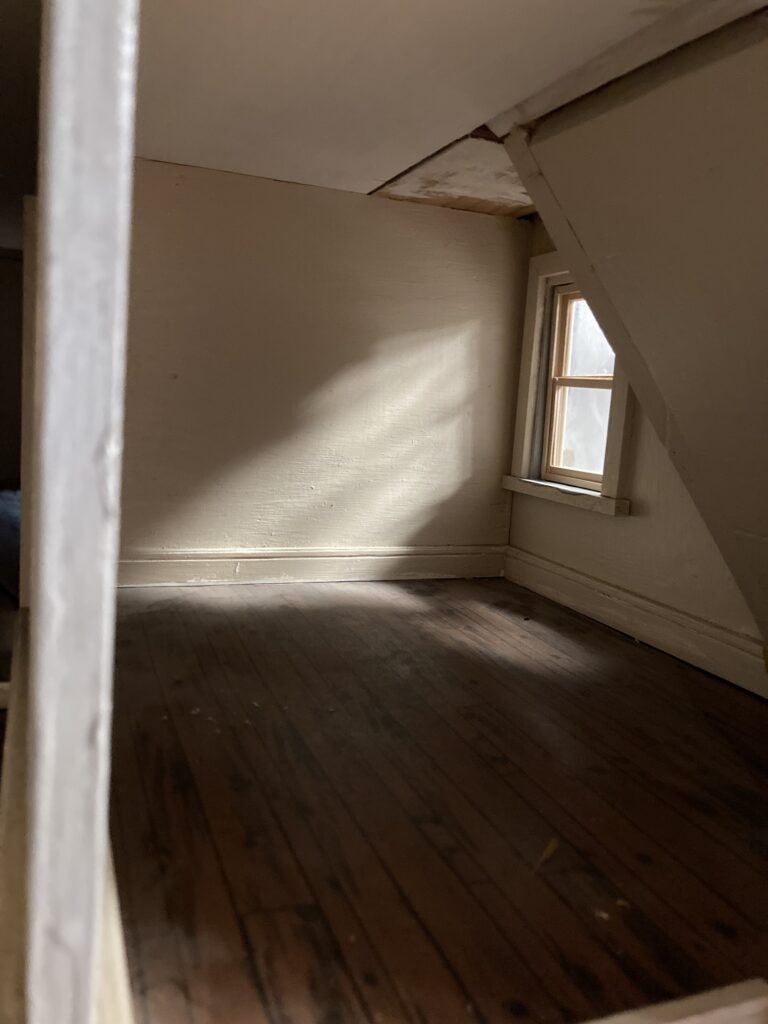
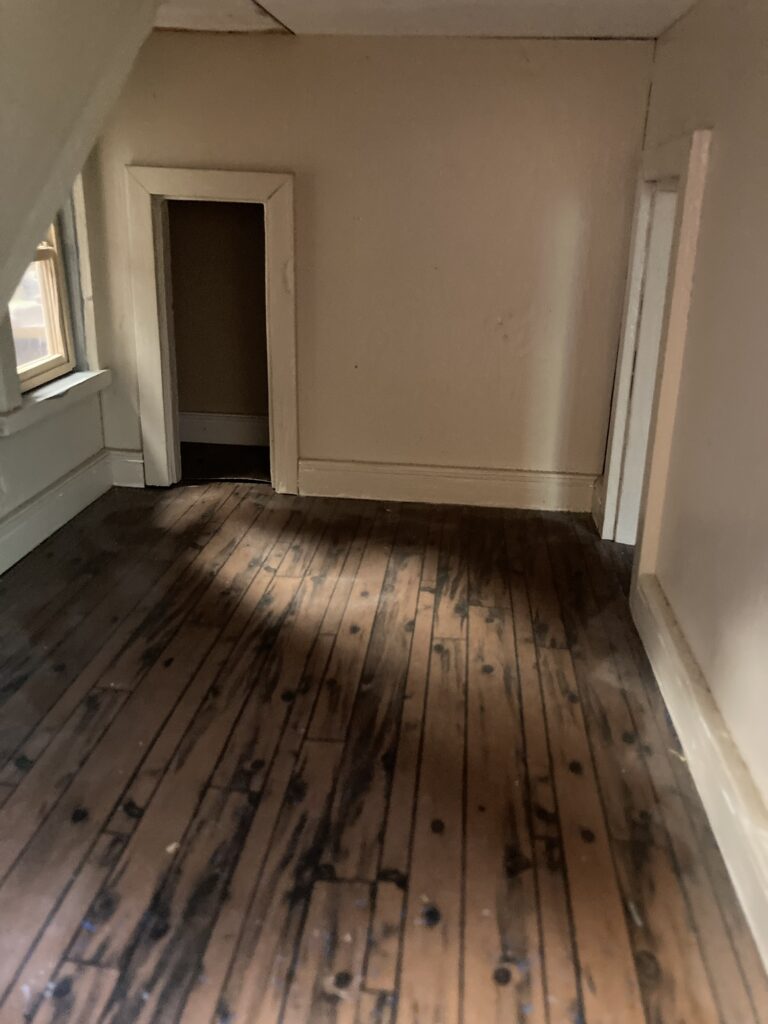
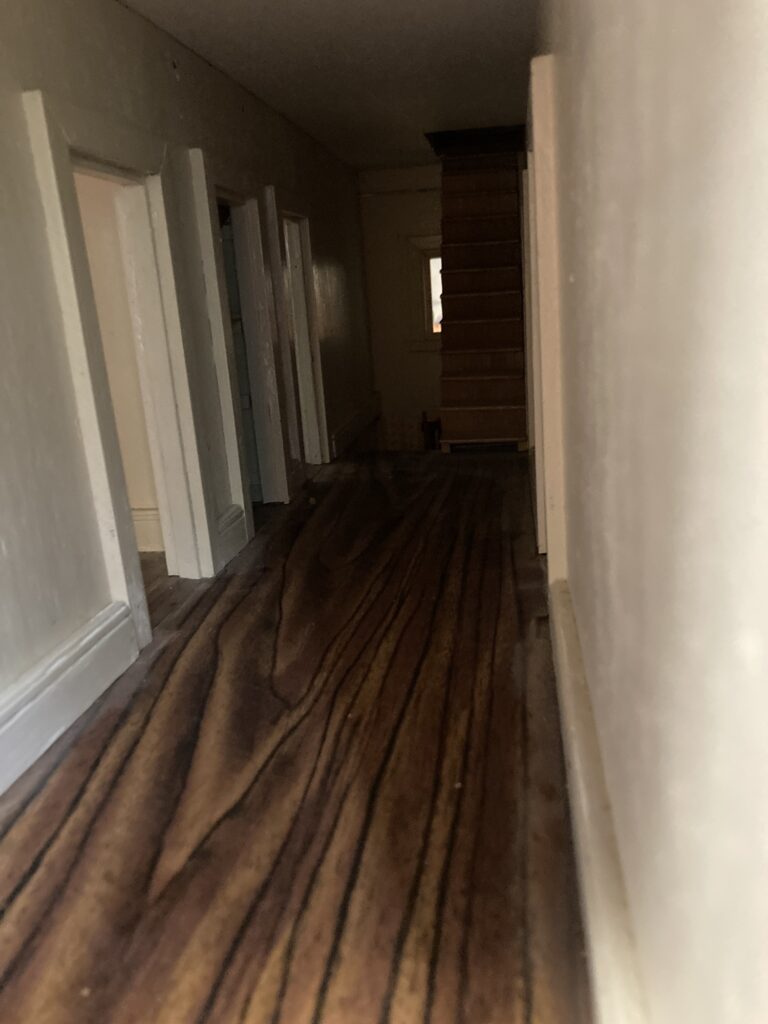
Here are some photos of the inside, which has not been touched (or unfortunately cleaned) yet.
A parlor or living room?A bedroomThe stairwayAnother bedroom. Love all of those angular ceilings!Another bedroom. It even has closets!!Upstairs hallway, with stairs to the attic.Another bedroomThe kitchenDining room
This house has lots of nice details, like closets and some built-ins, and the rooms are very big! The attic is only accessible by small windows. It does need some minor repairs, but it will be fun!
I am not sure how old this house is. When they say ‘generations’ it may just be made by grandma and given to grandchild. There is no real telling as I can see some updated items, and nothing points to this being an actual antique. It could be older, though, under its newer paint and flooring, as some houses are updated through the generations. I can say fairly confidently that it is one of a kind.
I can’t wait to get more done on this! This is my 13th dollhouse/structure. It’s nice because most of my houses have little projects that can be done on them, so I can pick and choose what I feel like working on on any given day. After the initial outside work, this house will be mostly a furniture-project house, as the inside is mostly decorated nicely already. Stay tuned for more updates!
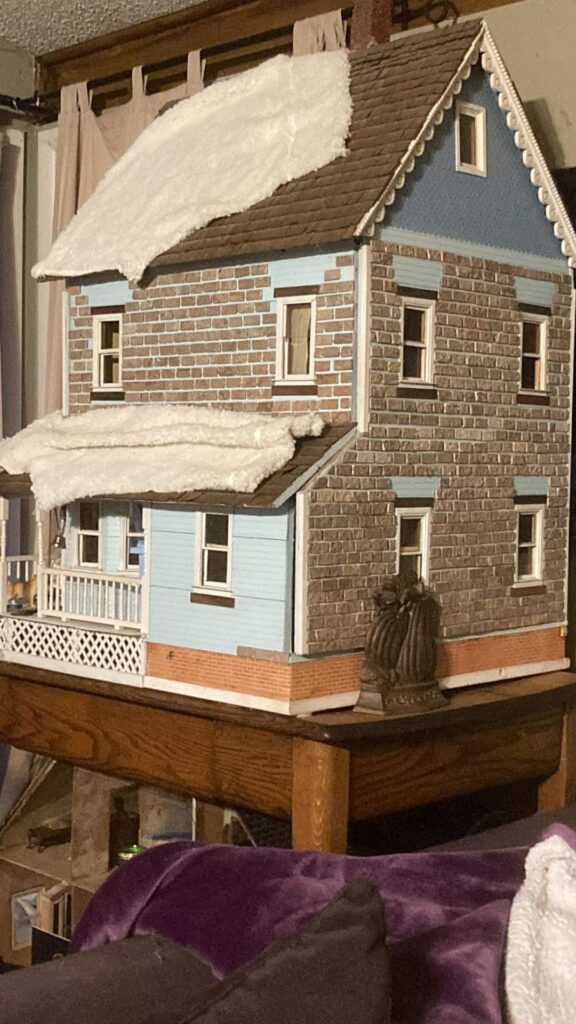
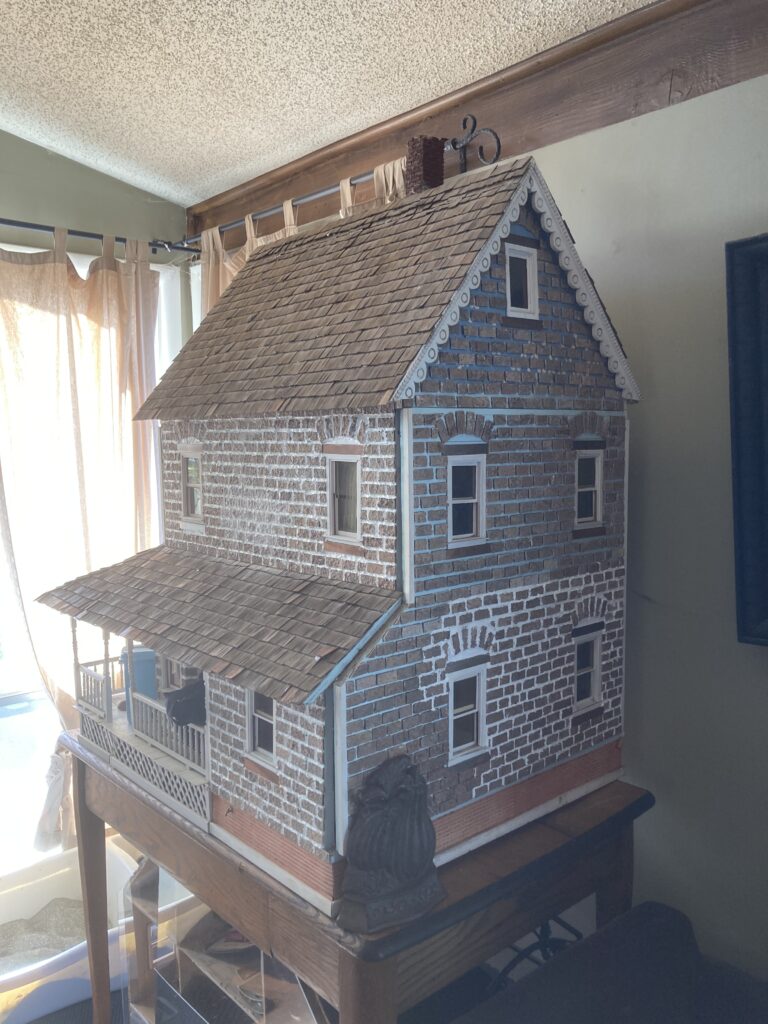
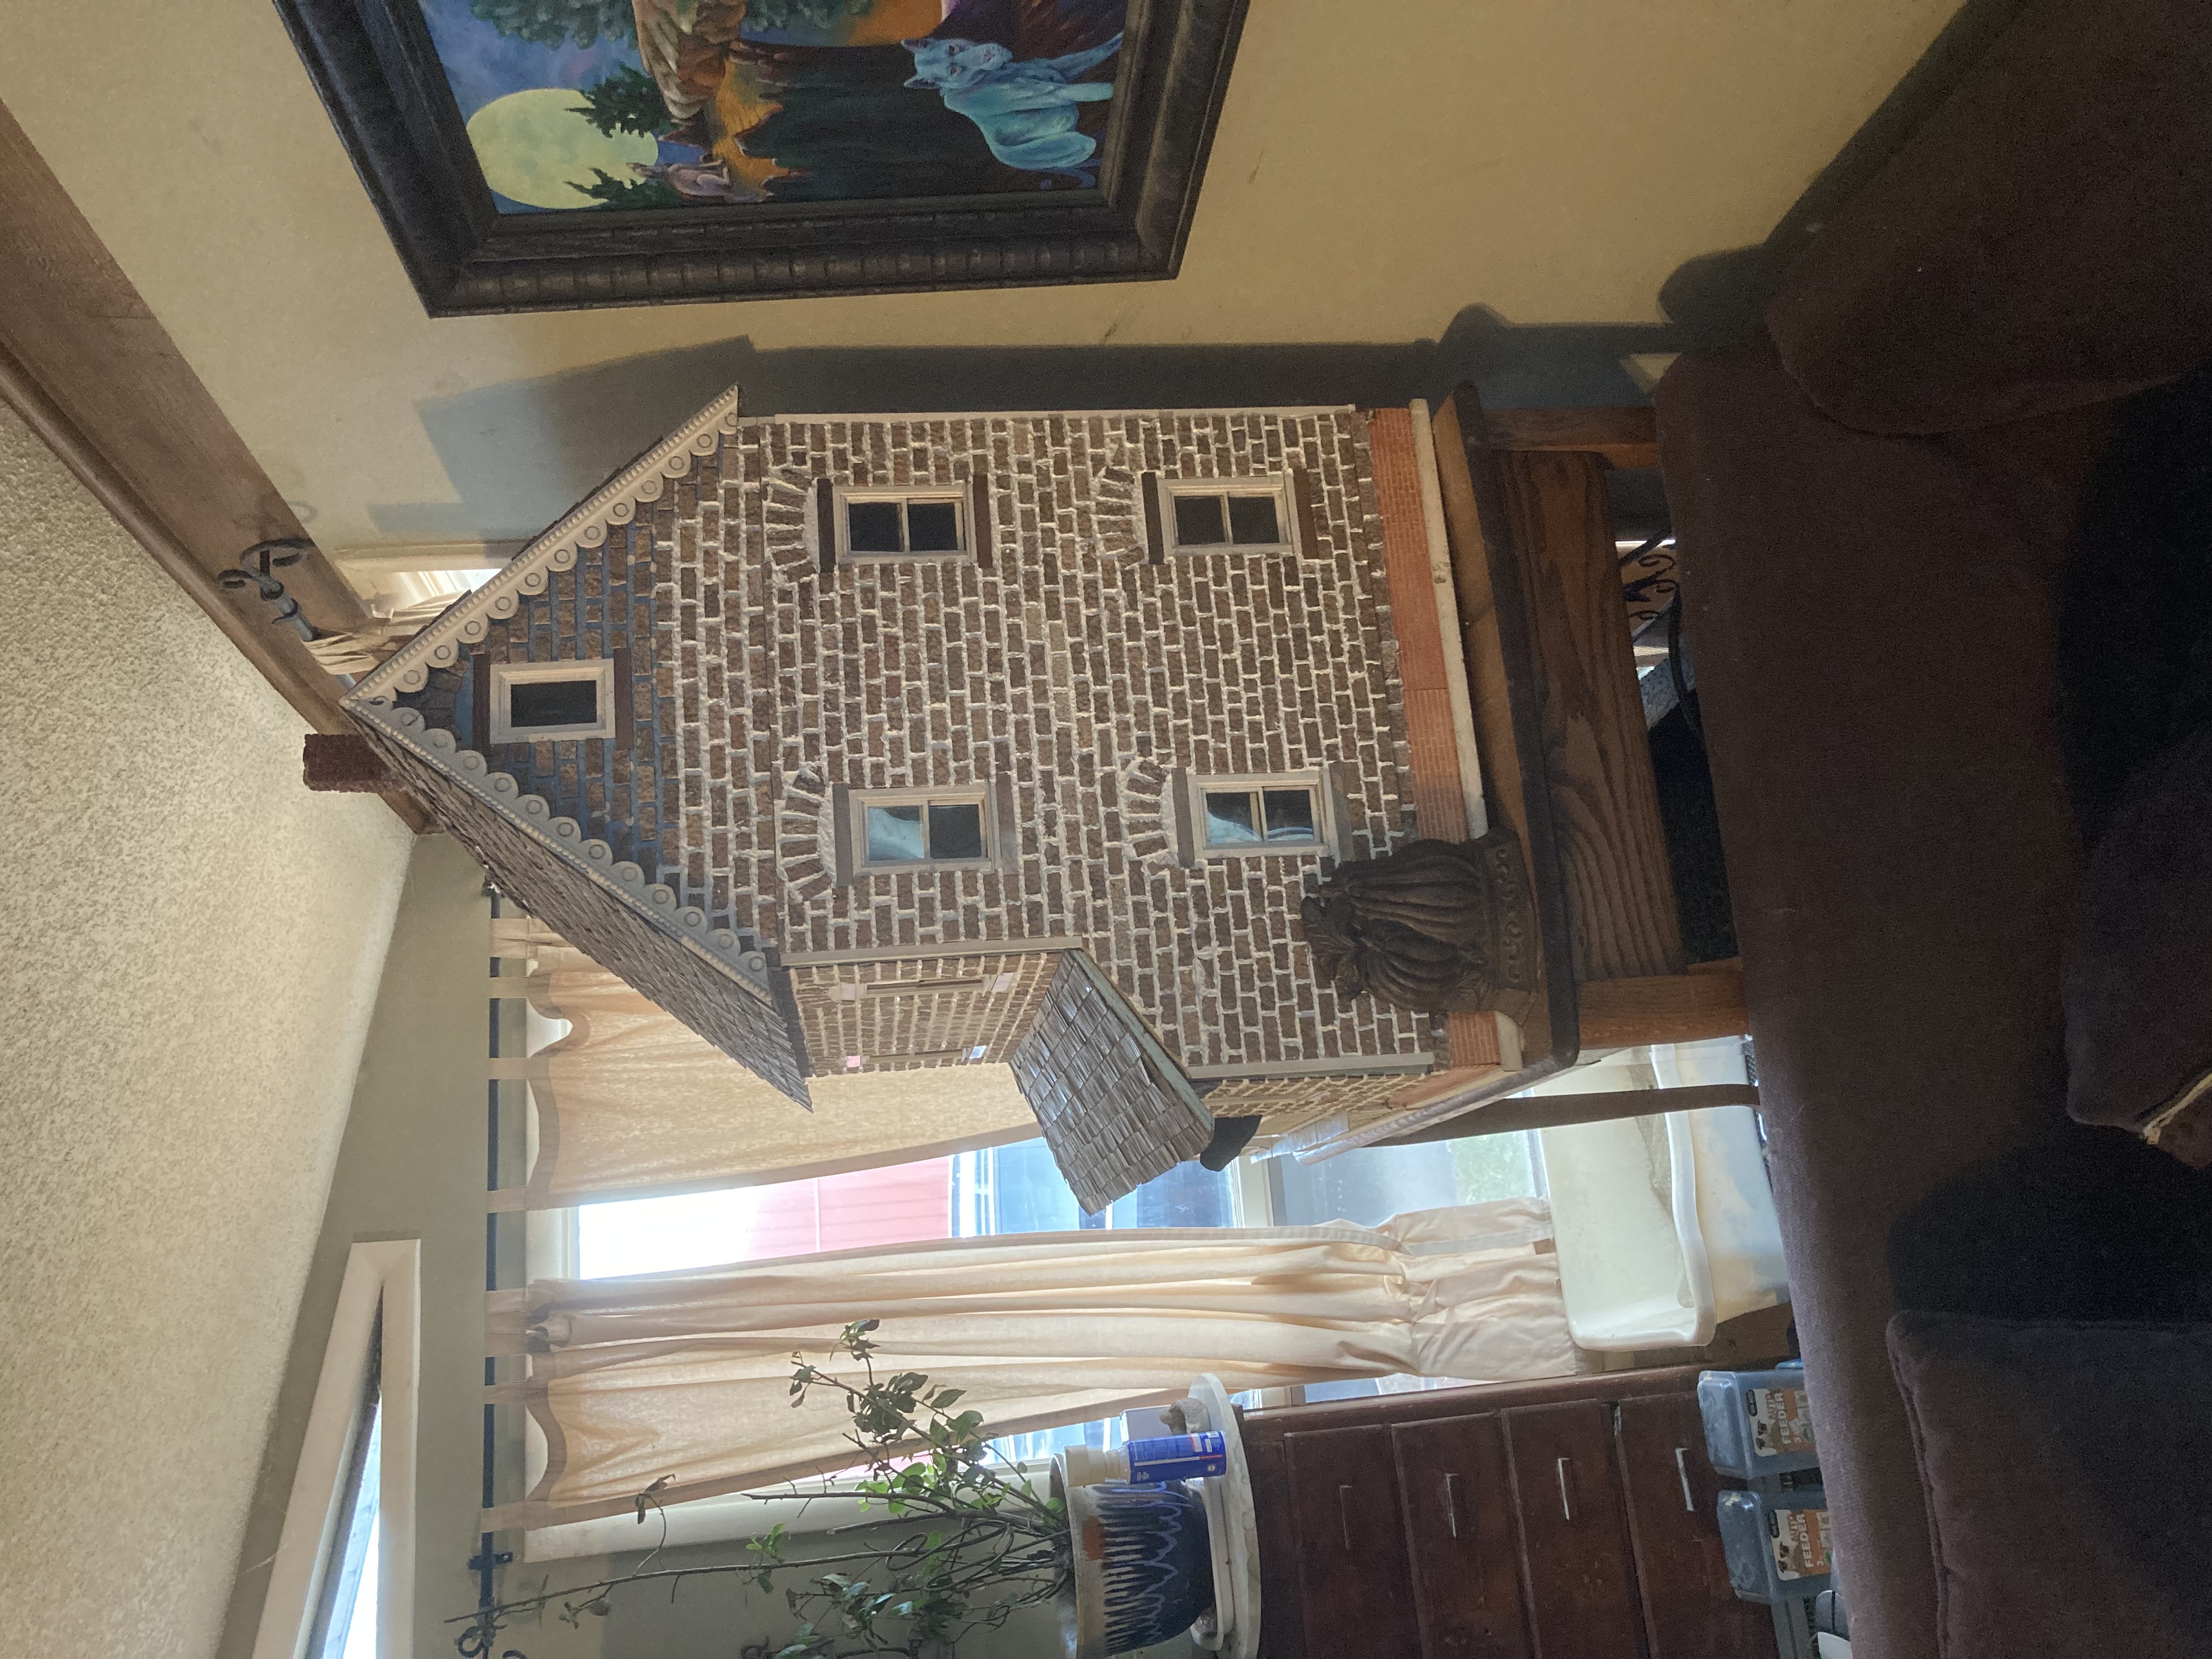
This is my Pepperwood Farm Dollhouse from previous posts, with an updated exterior!
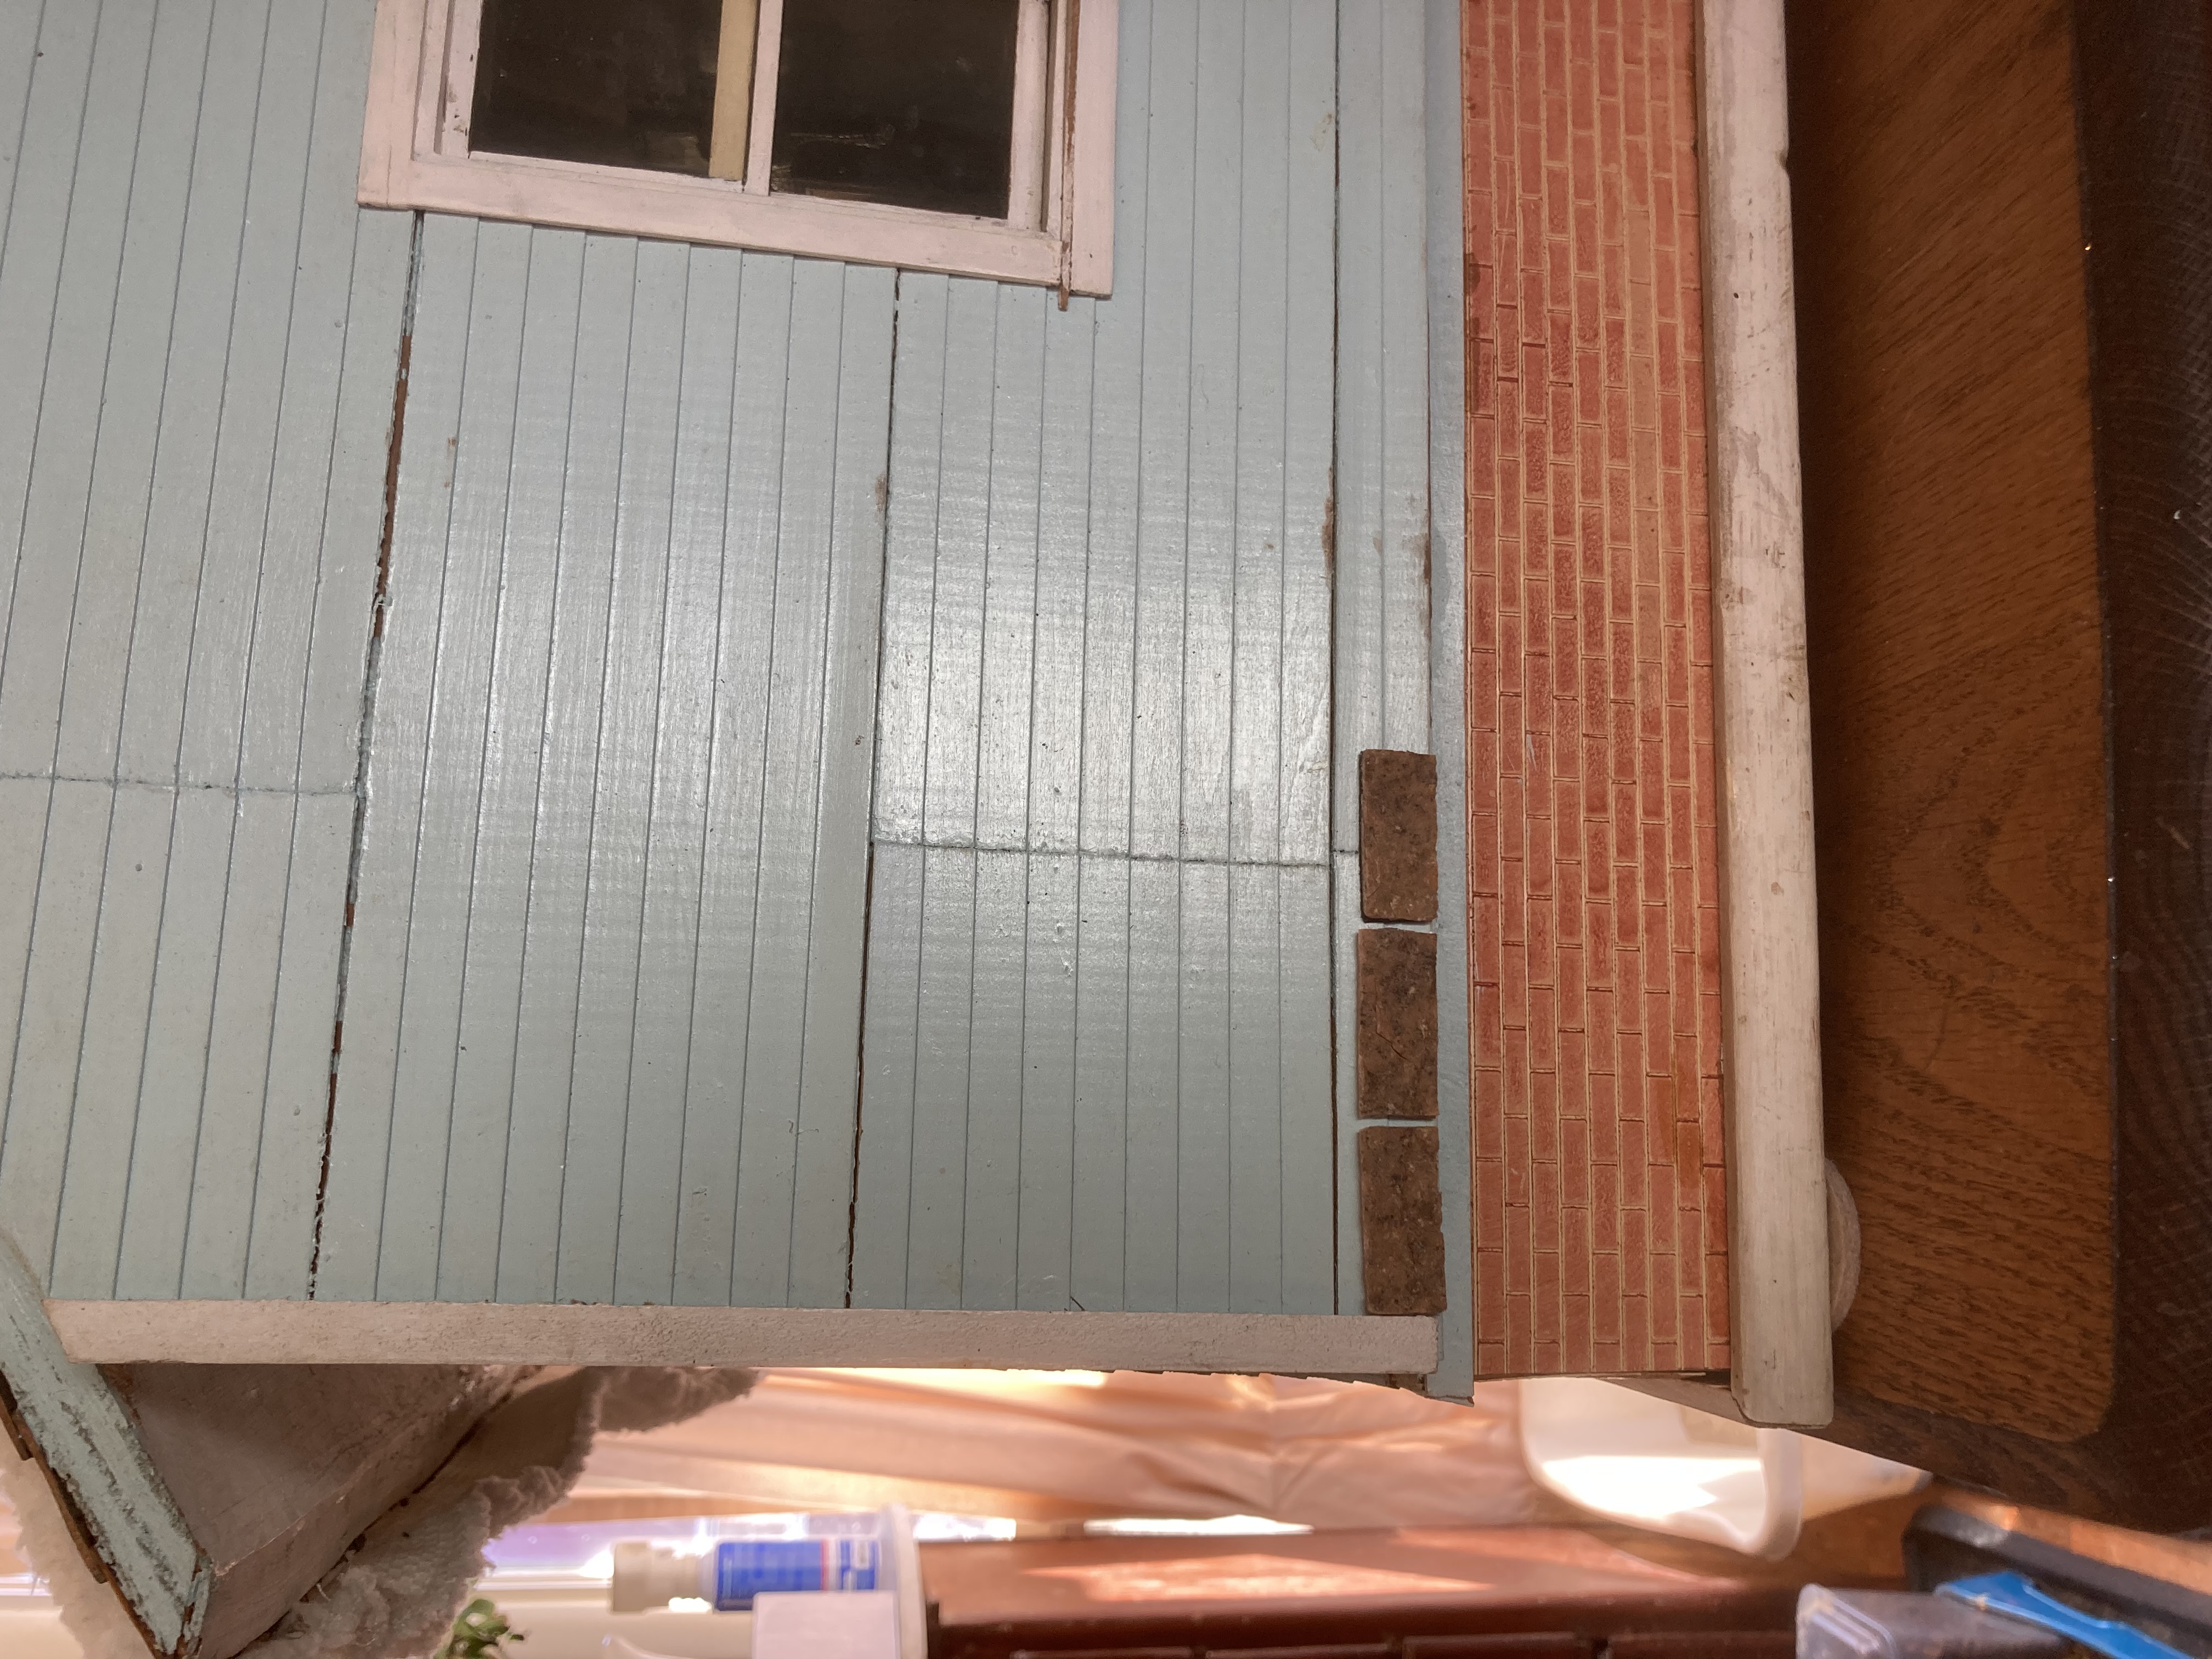
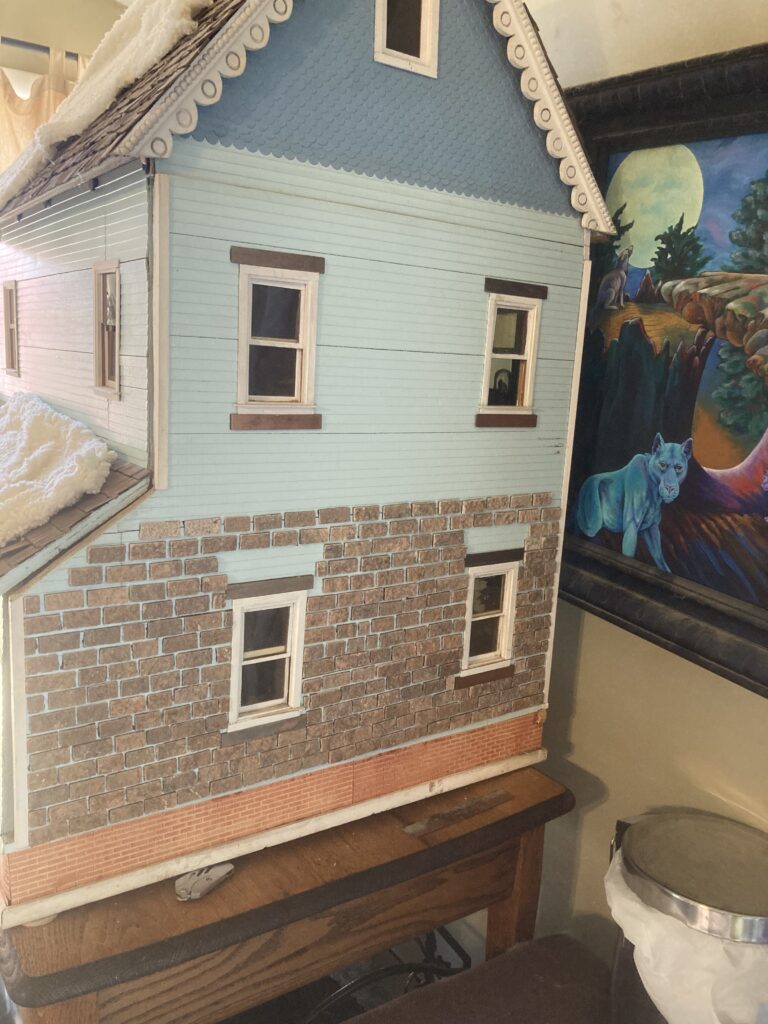
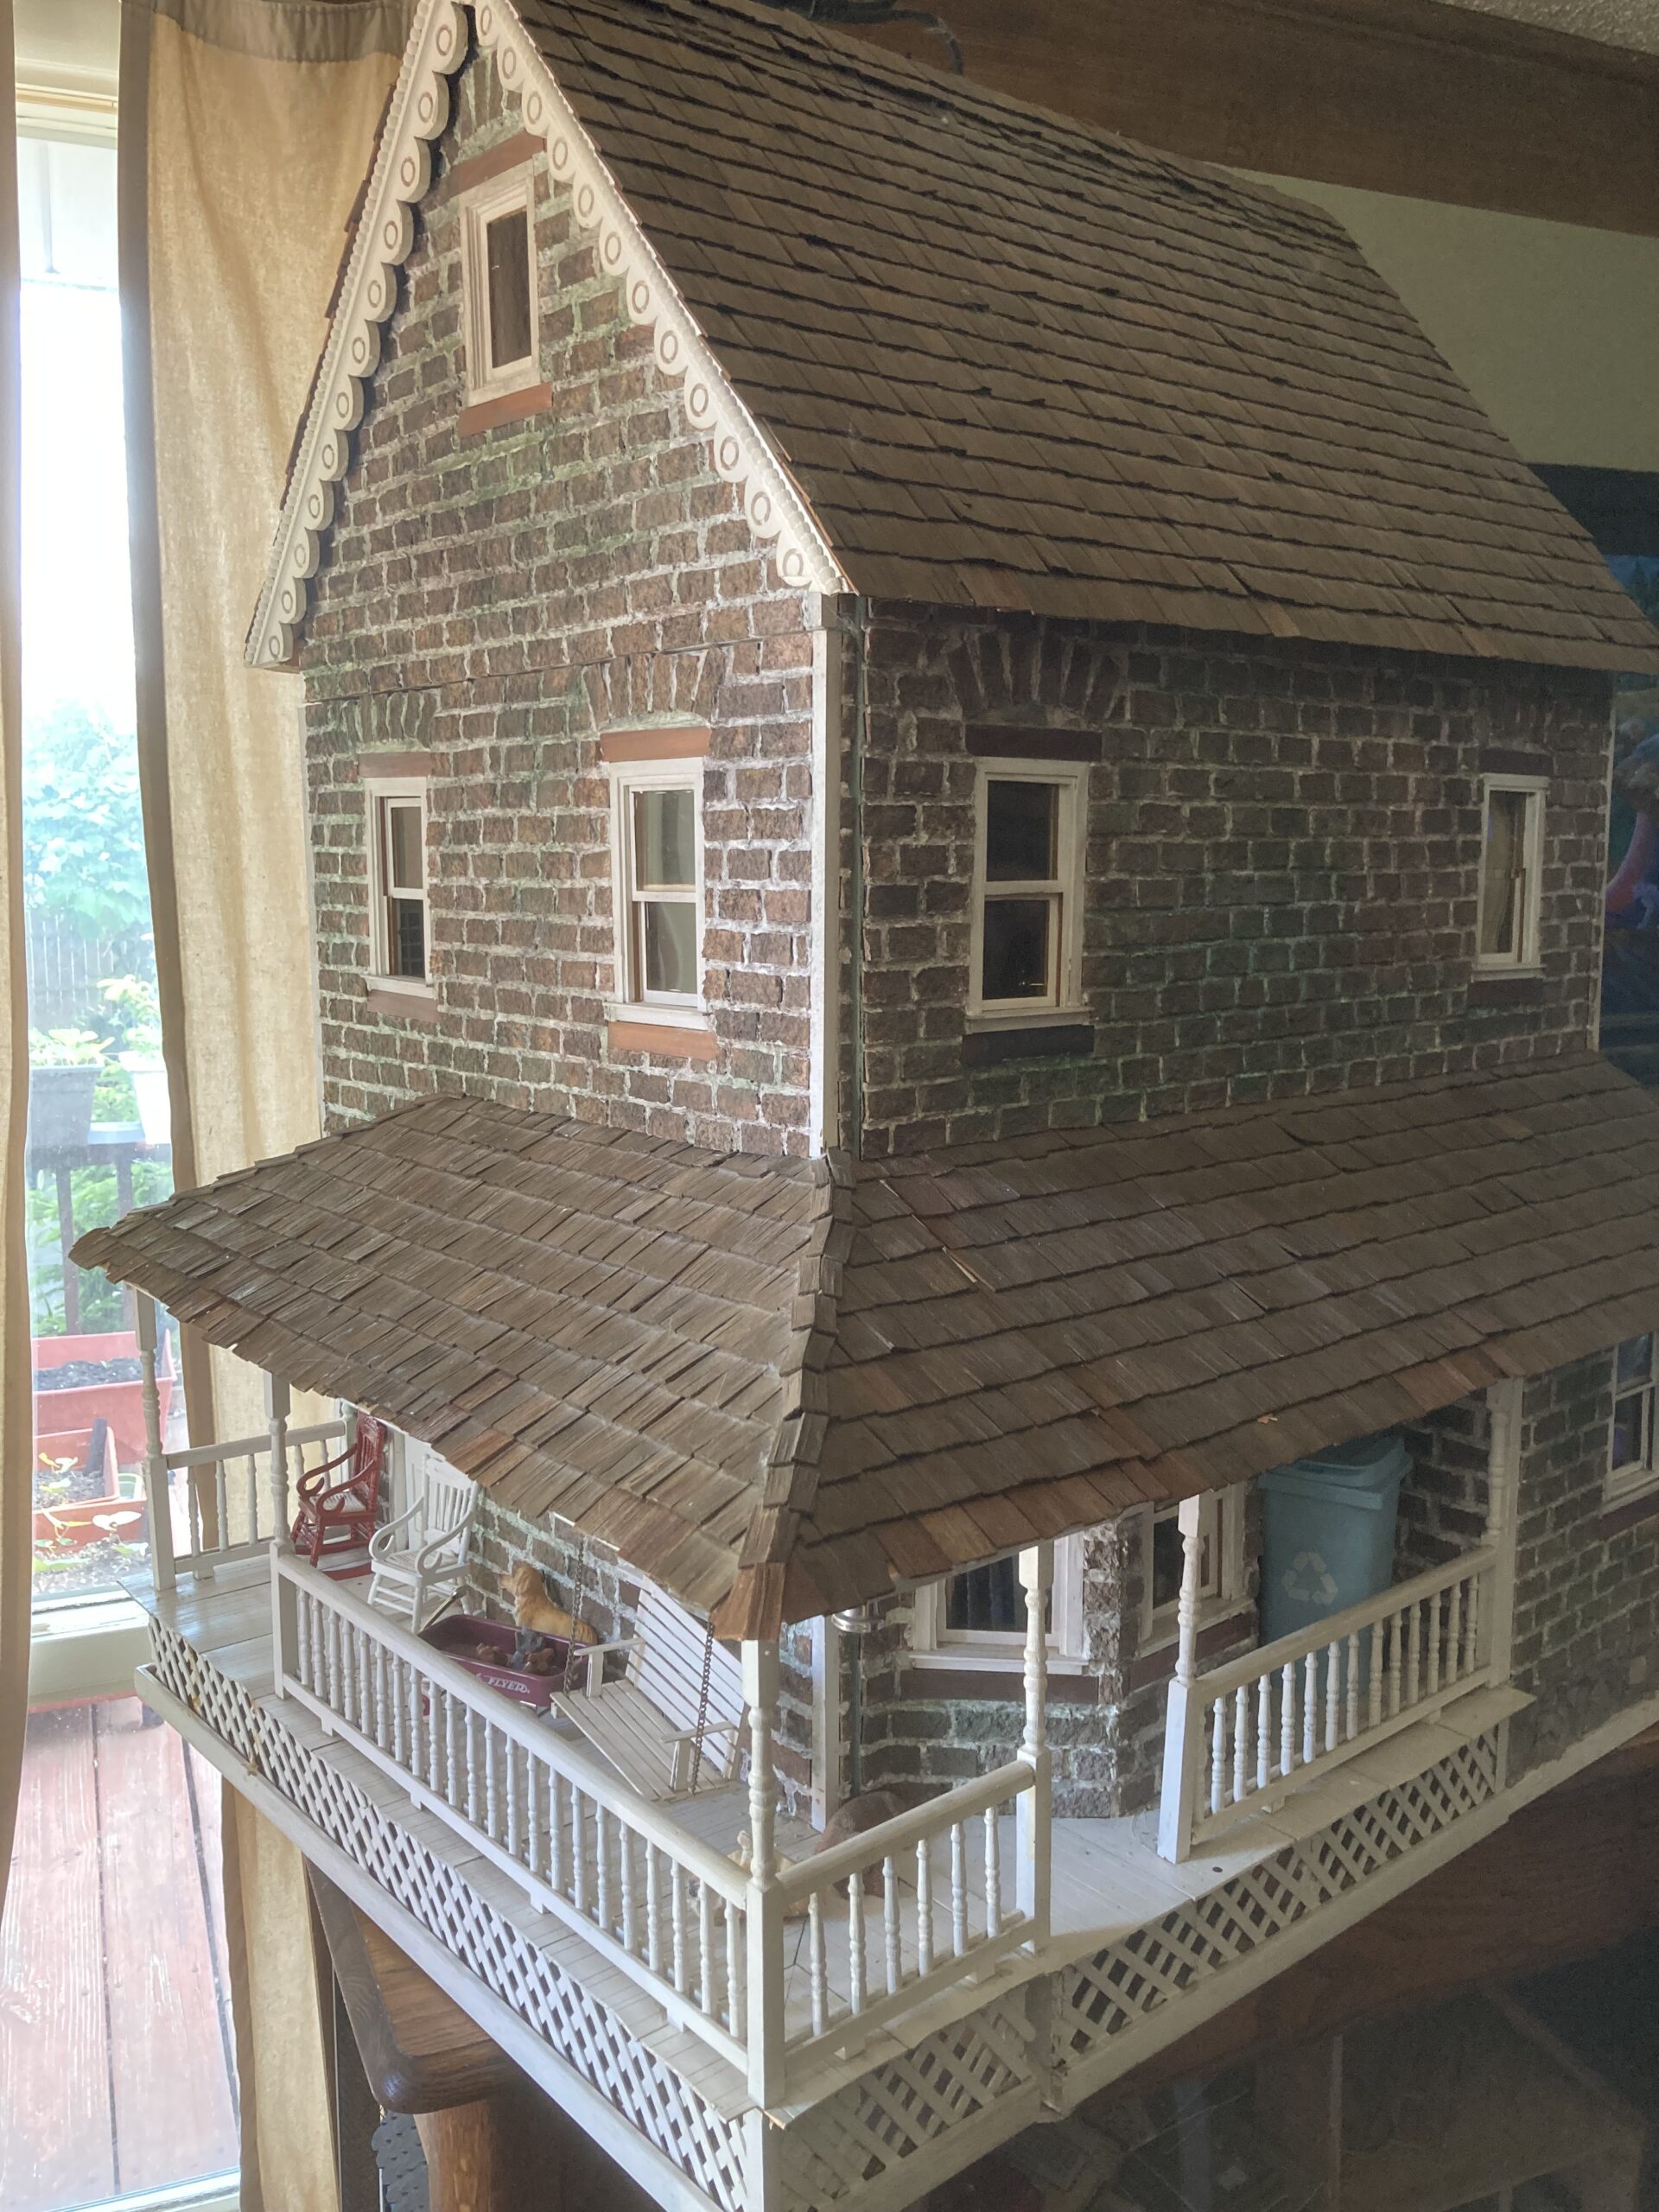
I have debated for a long time on the exterior of my Pepperwood Farm dollhouse–it had light blue siding on it from a previous owner, and the siding wasn’t done very well, or maybe it shrank over time, and had a lot of gaps. I have wanted a brick dollhouse for a while, and when my husband said ‘no more dollhouses,’ (which is reasonable, I guess, as I have 13 in our small house), I decided to update my Pepperwood with some bricks!
It all came about as I wandered the aisles of our local Menards hardware store and stumbled on a pile of stone-like backsplash on clearance.
The backsplash. It is very rough and stone-like.
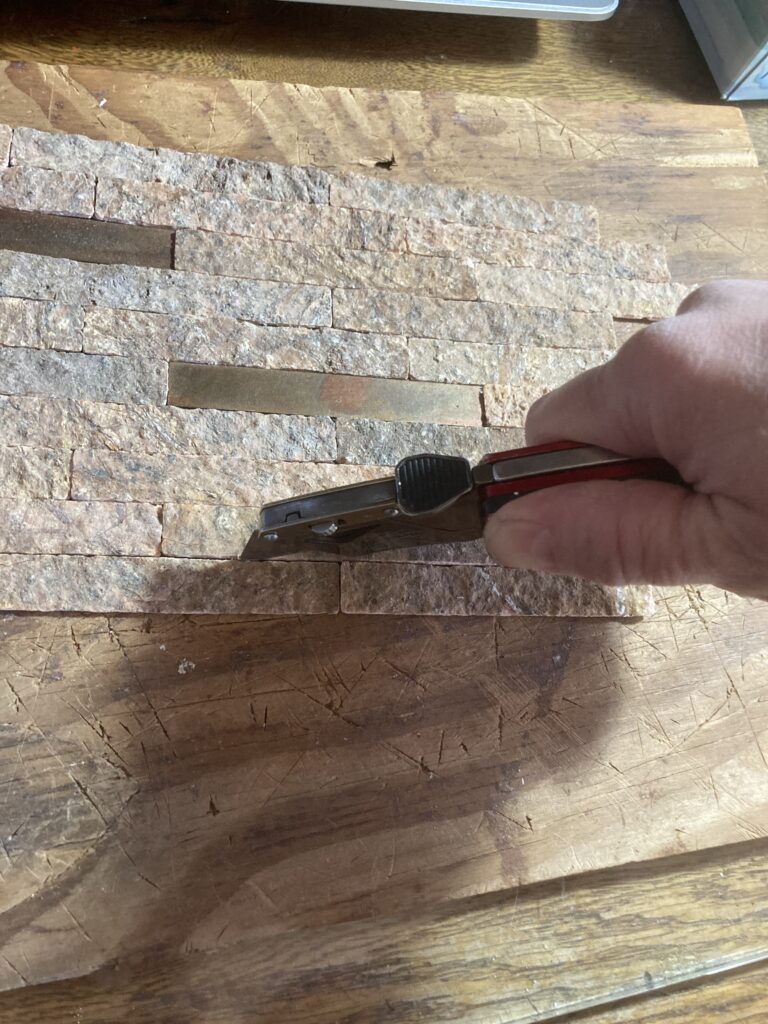
The backsplash came as strips of stone-like material, all held together with a big sticker on the back. I needed to separate these strips and then cut them into bricks to attach to my dollhouse.
Step 1: Separating the strips.
I used my handy-dandy box cutter and an old piece of wood as a cutting board, and scored the underlying sticker between the strips of bricks.
Individual strips.
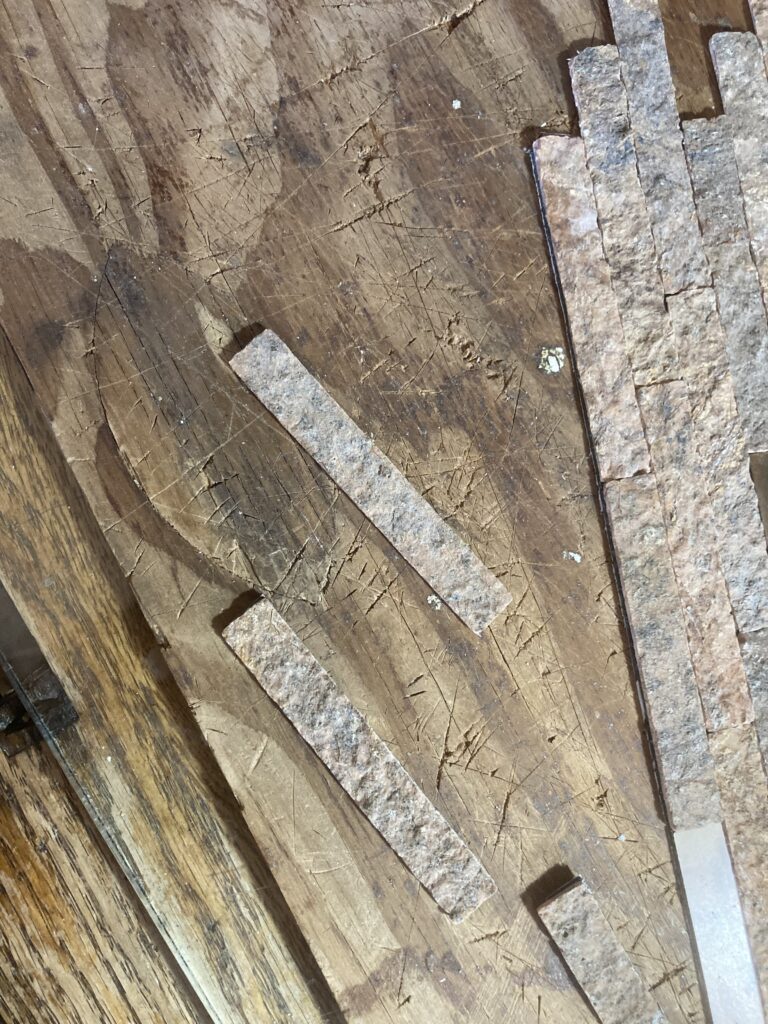
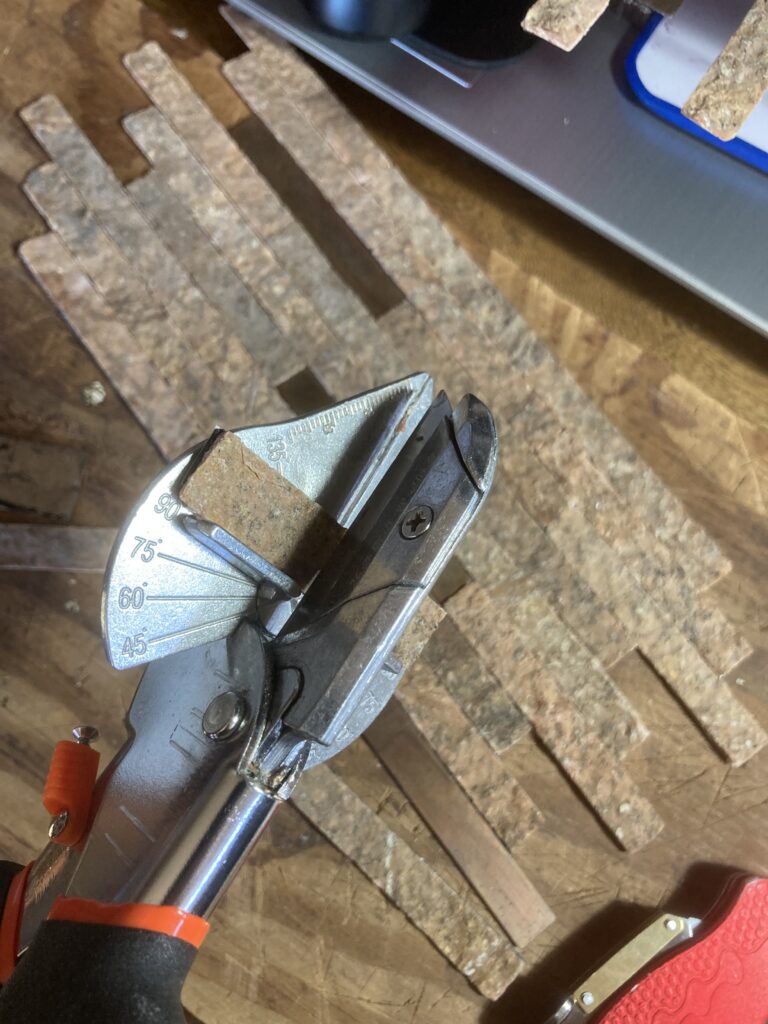
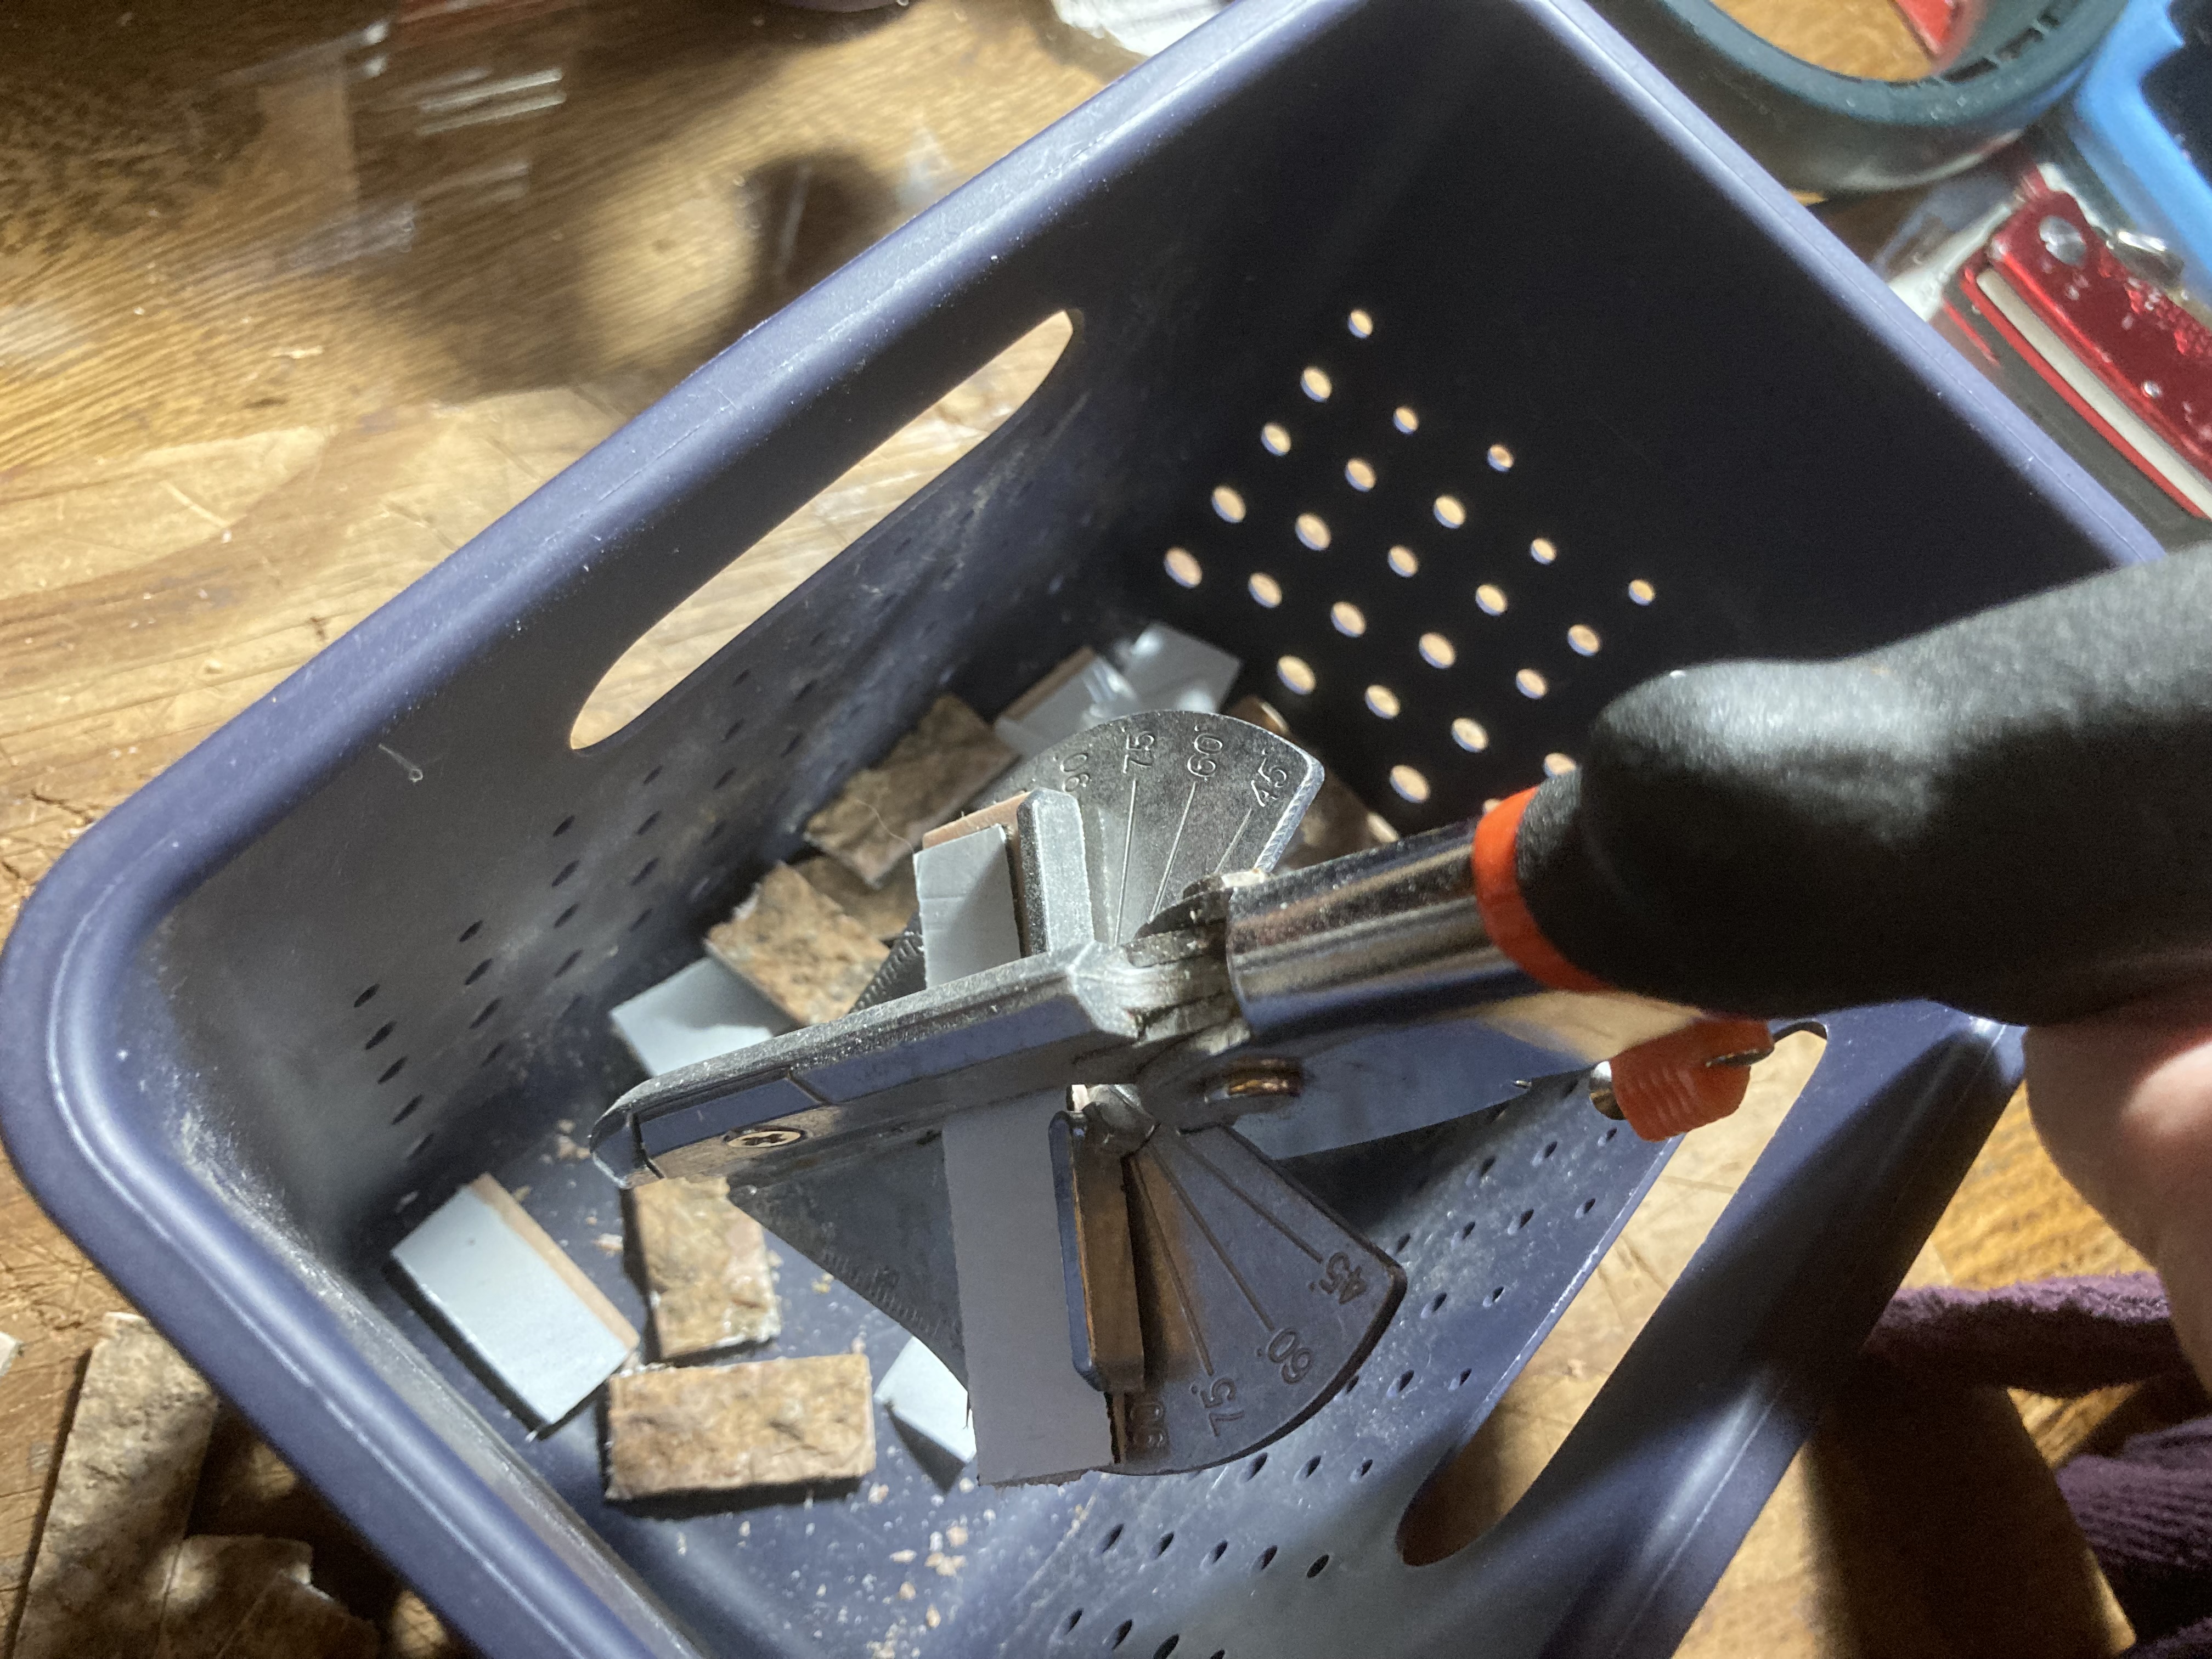
Step 2: Cutting the strips into bricks.
I used my miter shears to carefully cut the stone pieces into bricks. This was very difficult work, but worth it in the end. I eventually discovered that it was to my benefit to point the shears inside a box to catch the bricks, to prevent them flying all over the place after being cut.
Using a box to catch the bricks.
Step 4: Placing the bricks.
Placing the first bricks. These have an adhesive back, so I just peeled the paper backing and stuck them in place! The grout mortar I will add afterword will help seal them to the house better.
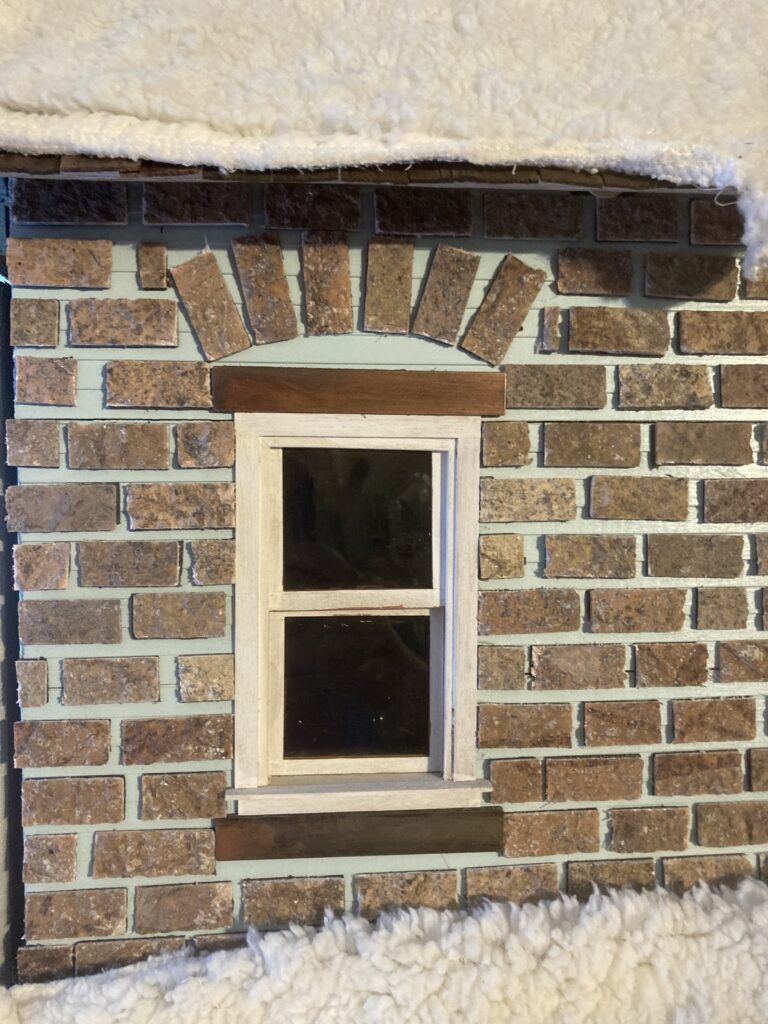
More bricks! I used the copper strips that were in the backsplash to make ‘supports’ for the windows. I left space above the windows to make fancy brickwork later.
And more bricks.
Most of the bricks placed.
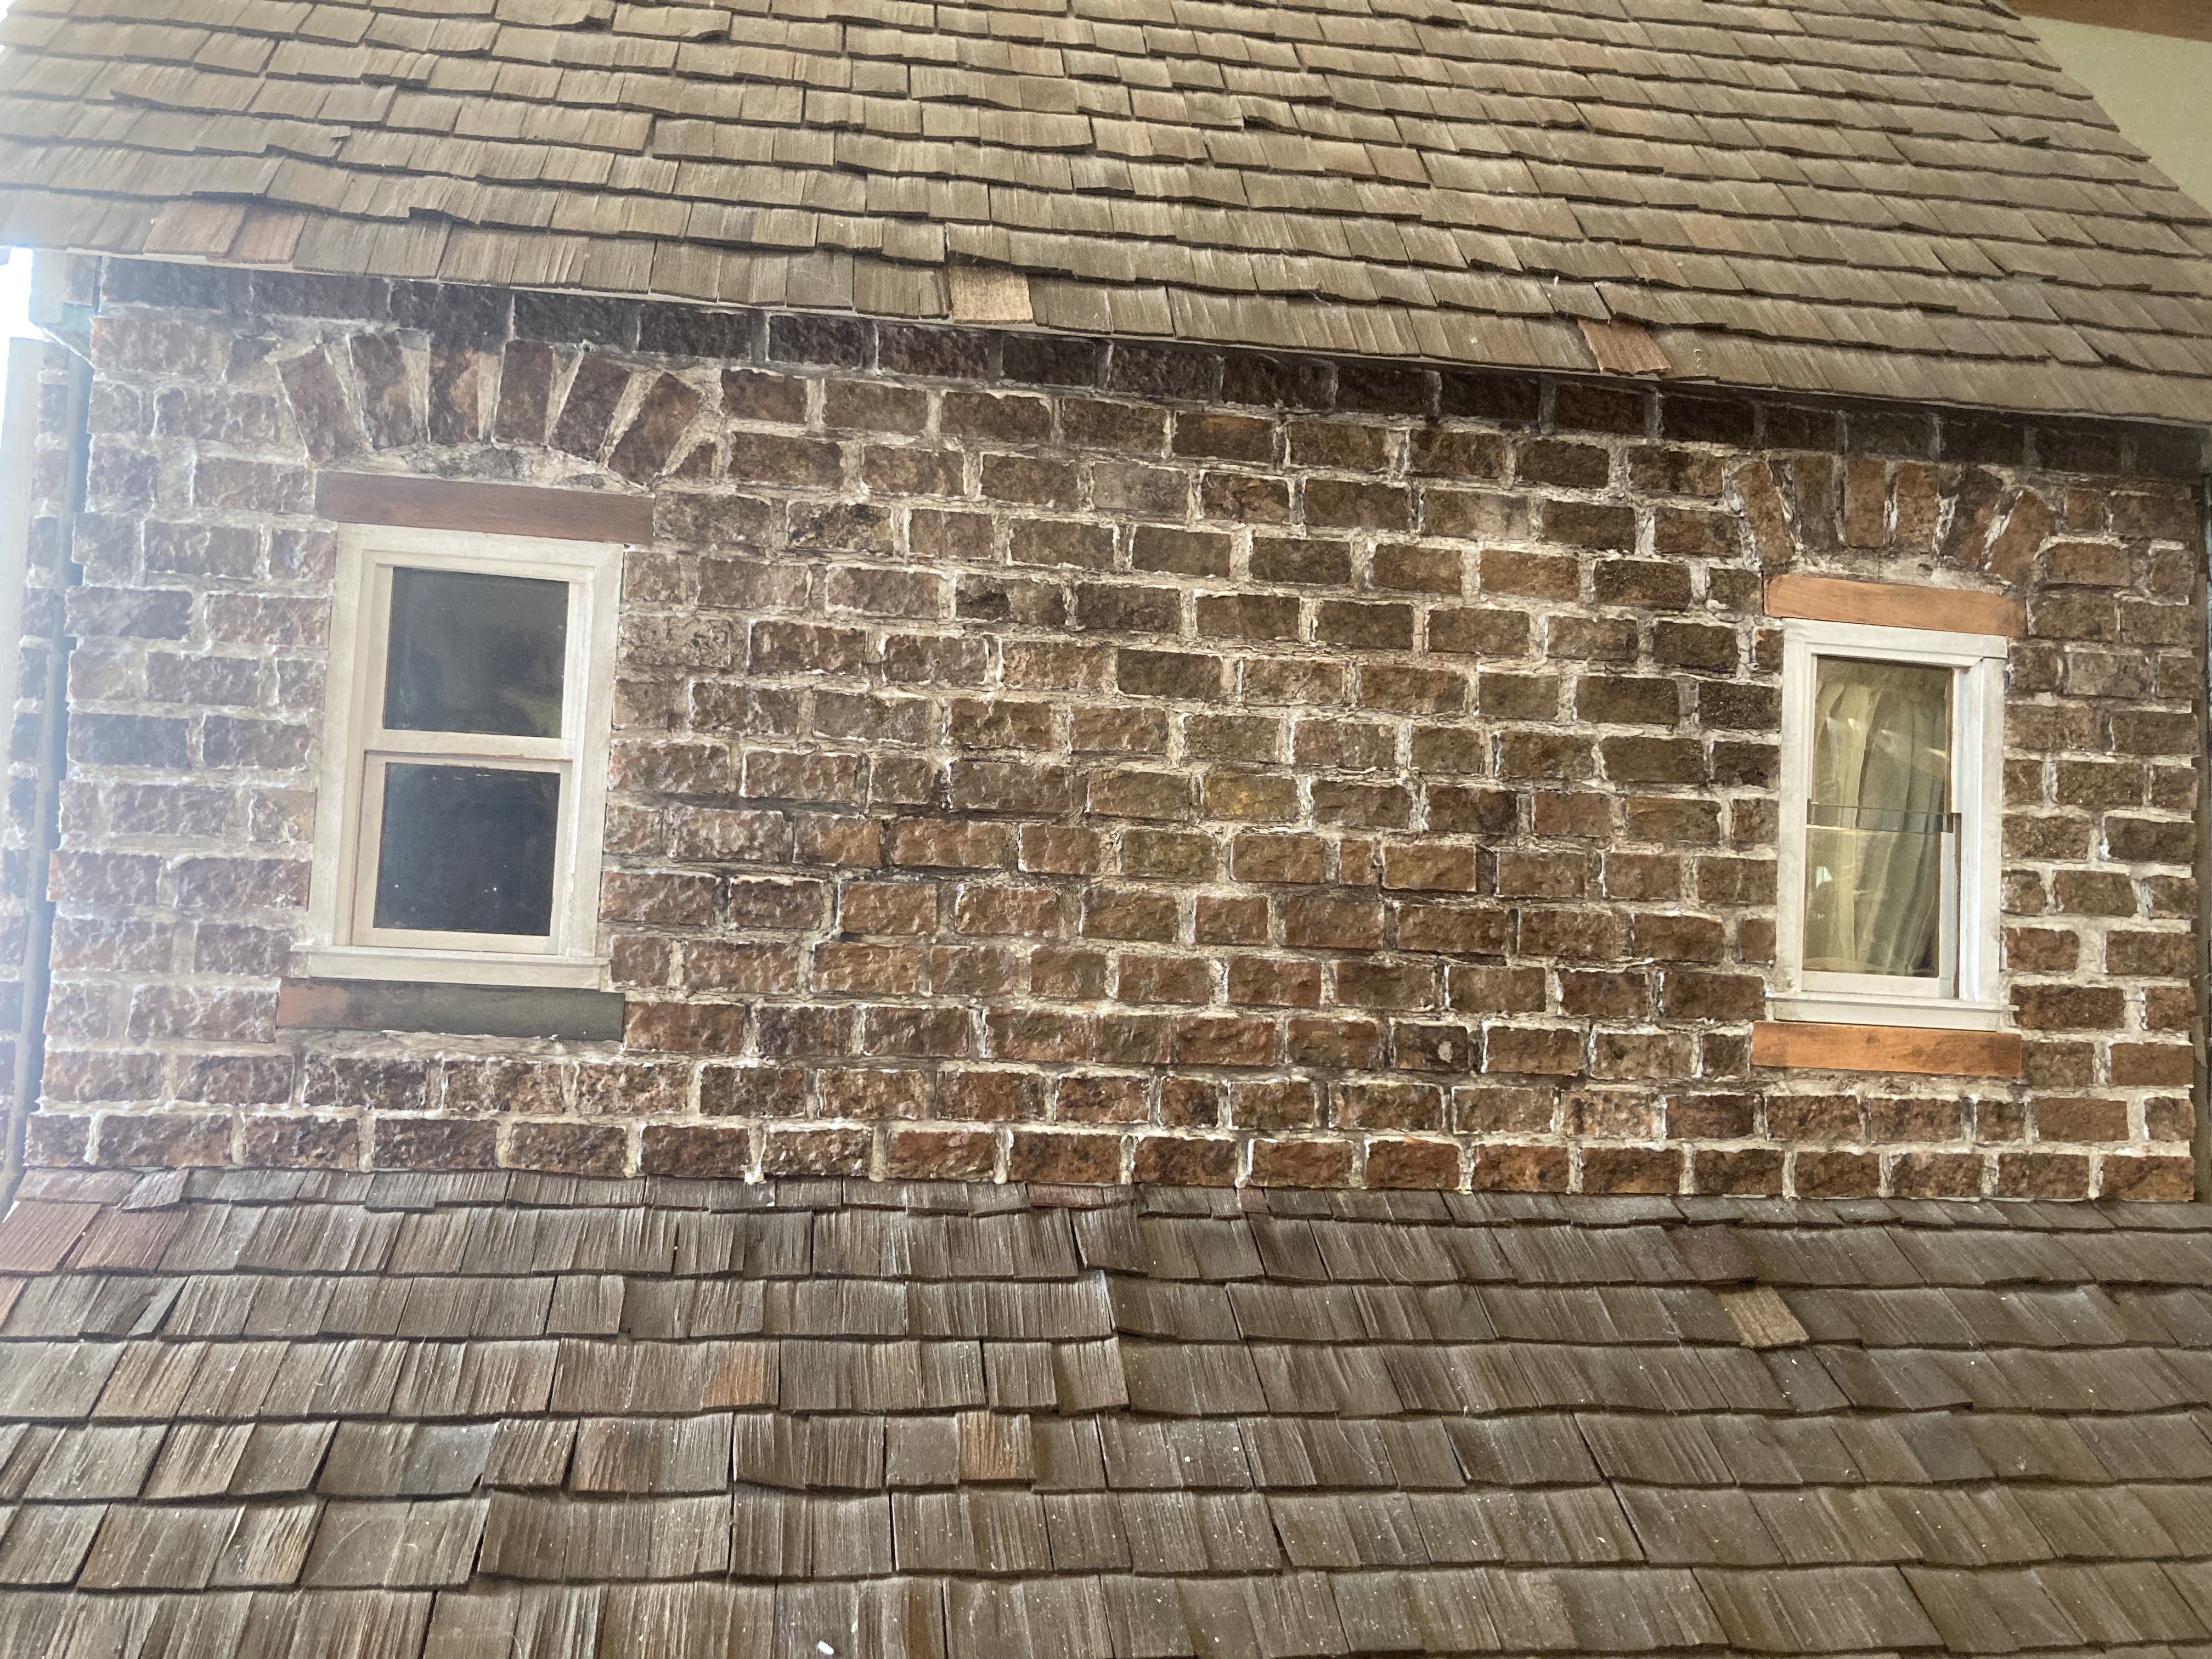
Brick arches above windows. I wanted it to be somewhat reminiscent of the brick farm houses common in my area.
Step 5: mortaring between the bricks.
This step was probably the hardest, most time-consuming dollhouse project I have yet accomplished. I can not begin to add up all of the many hours I spent performing this task.
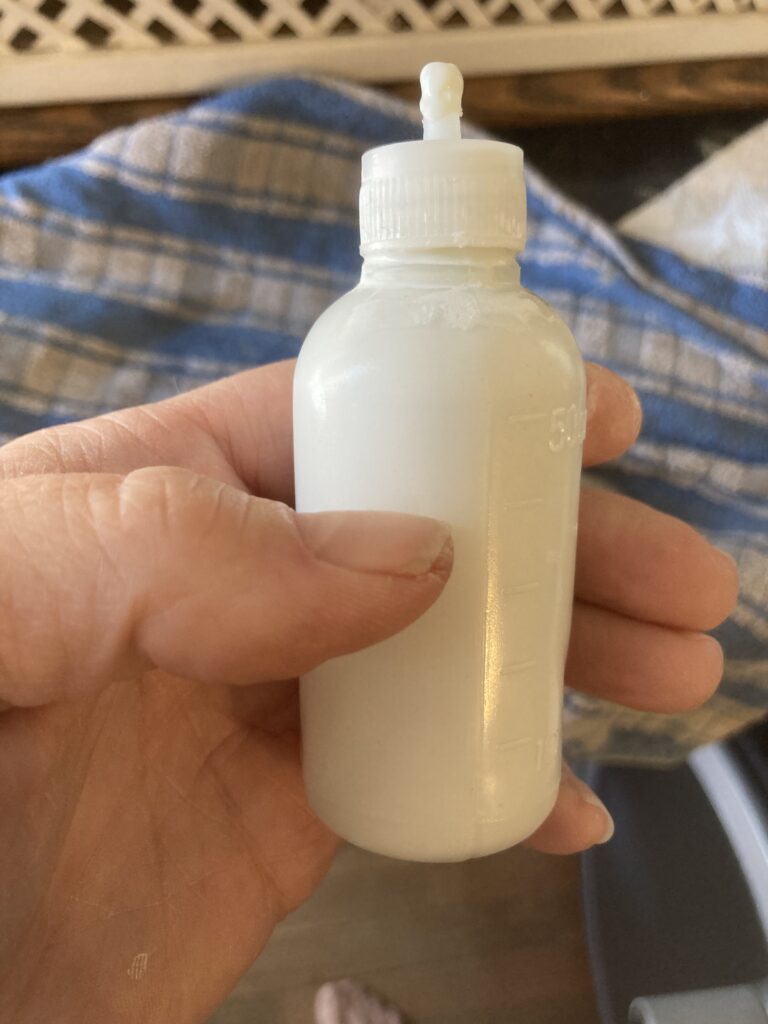
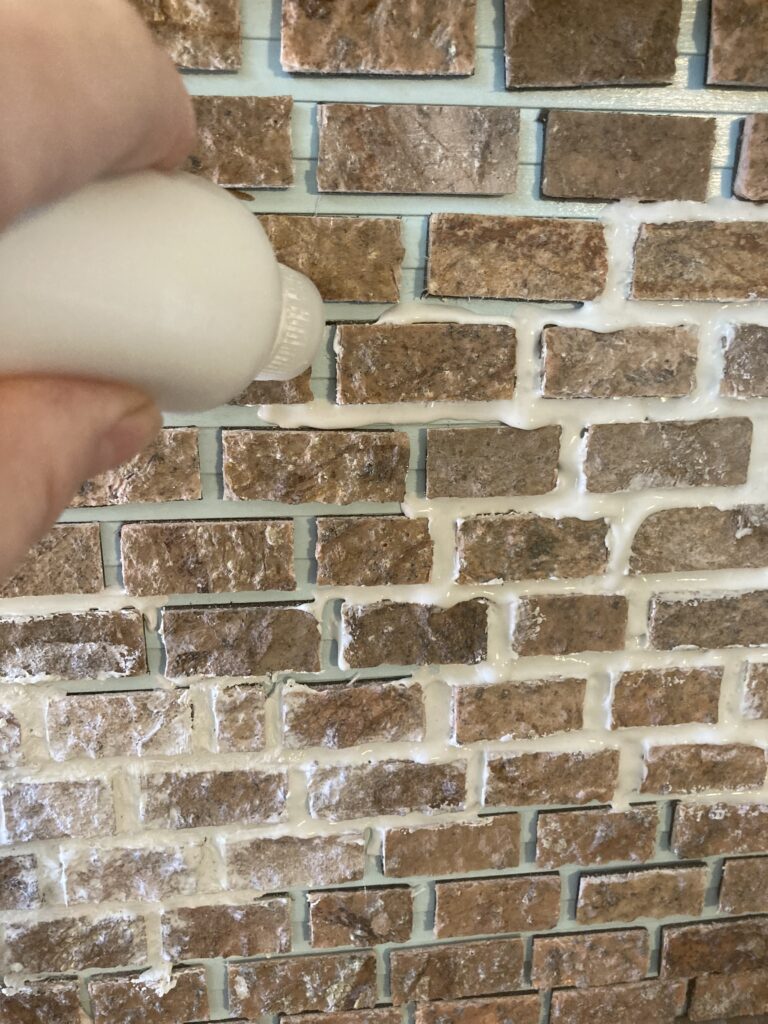
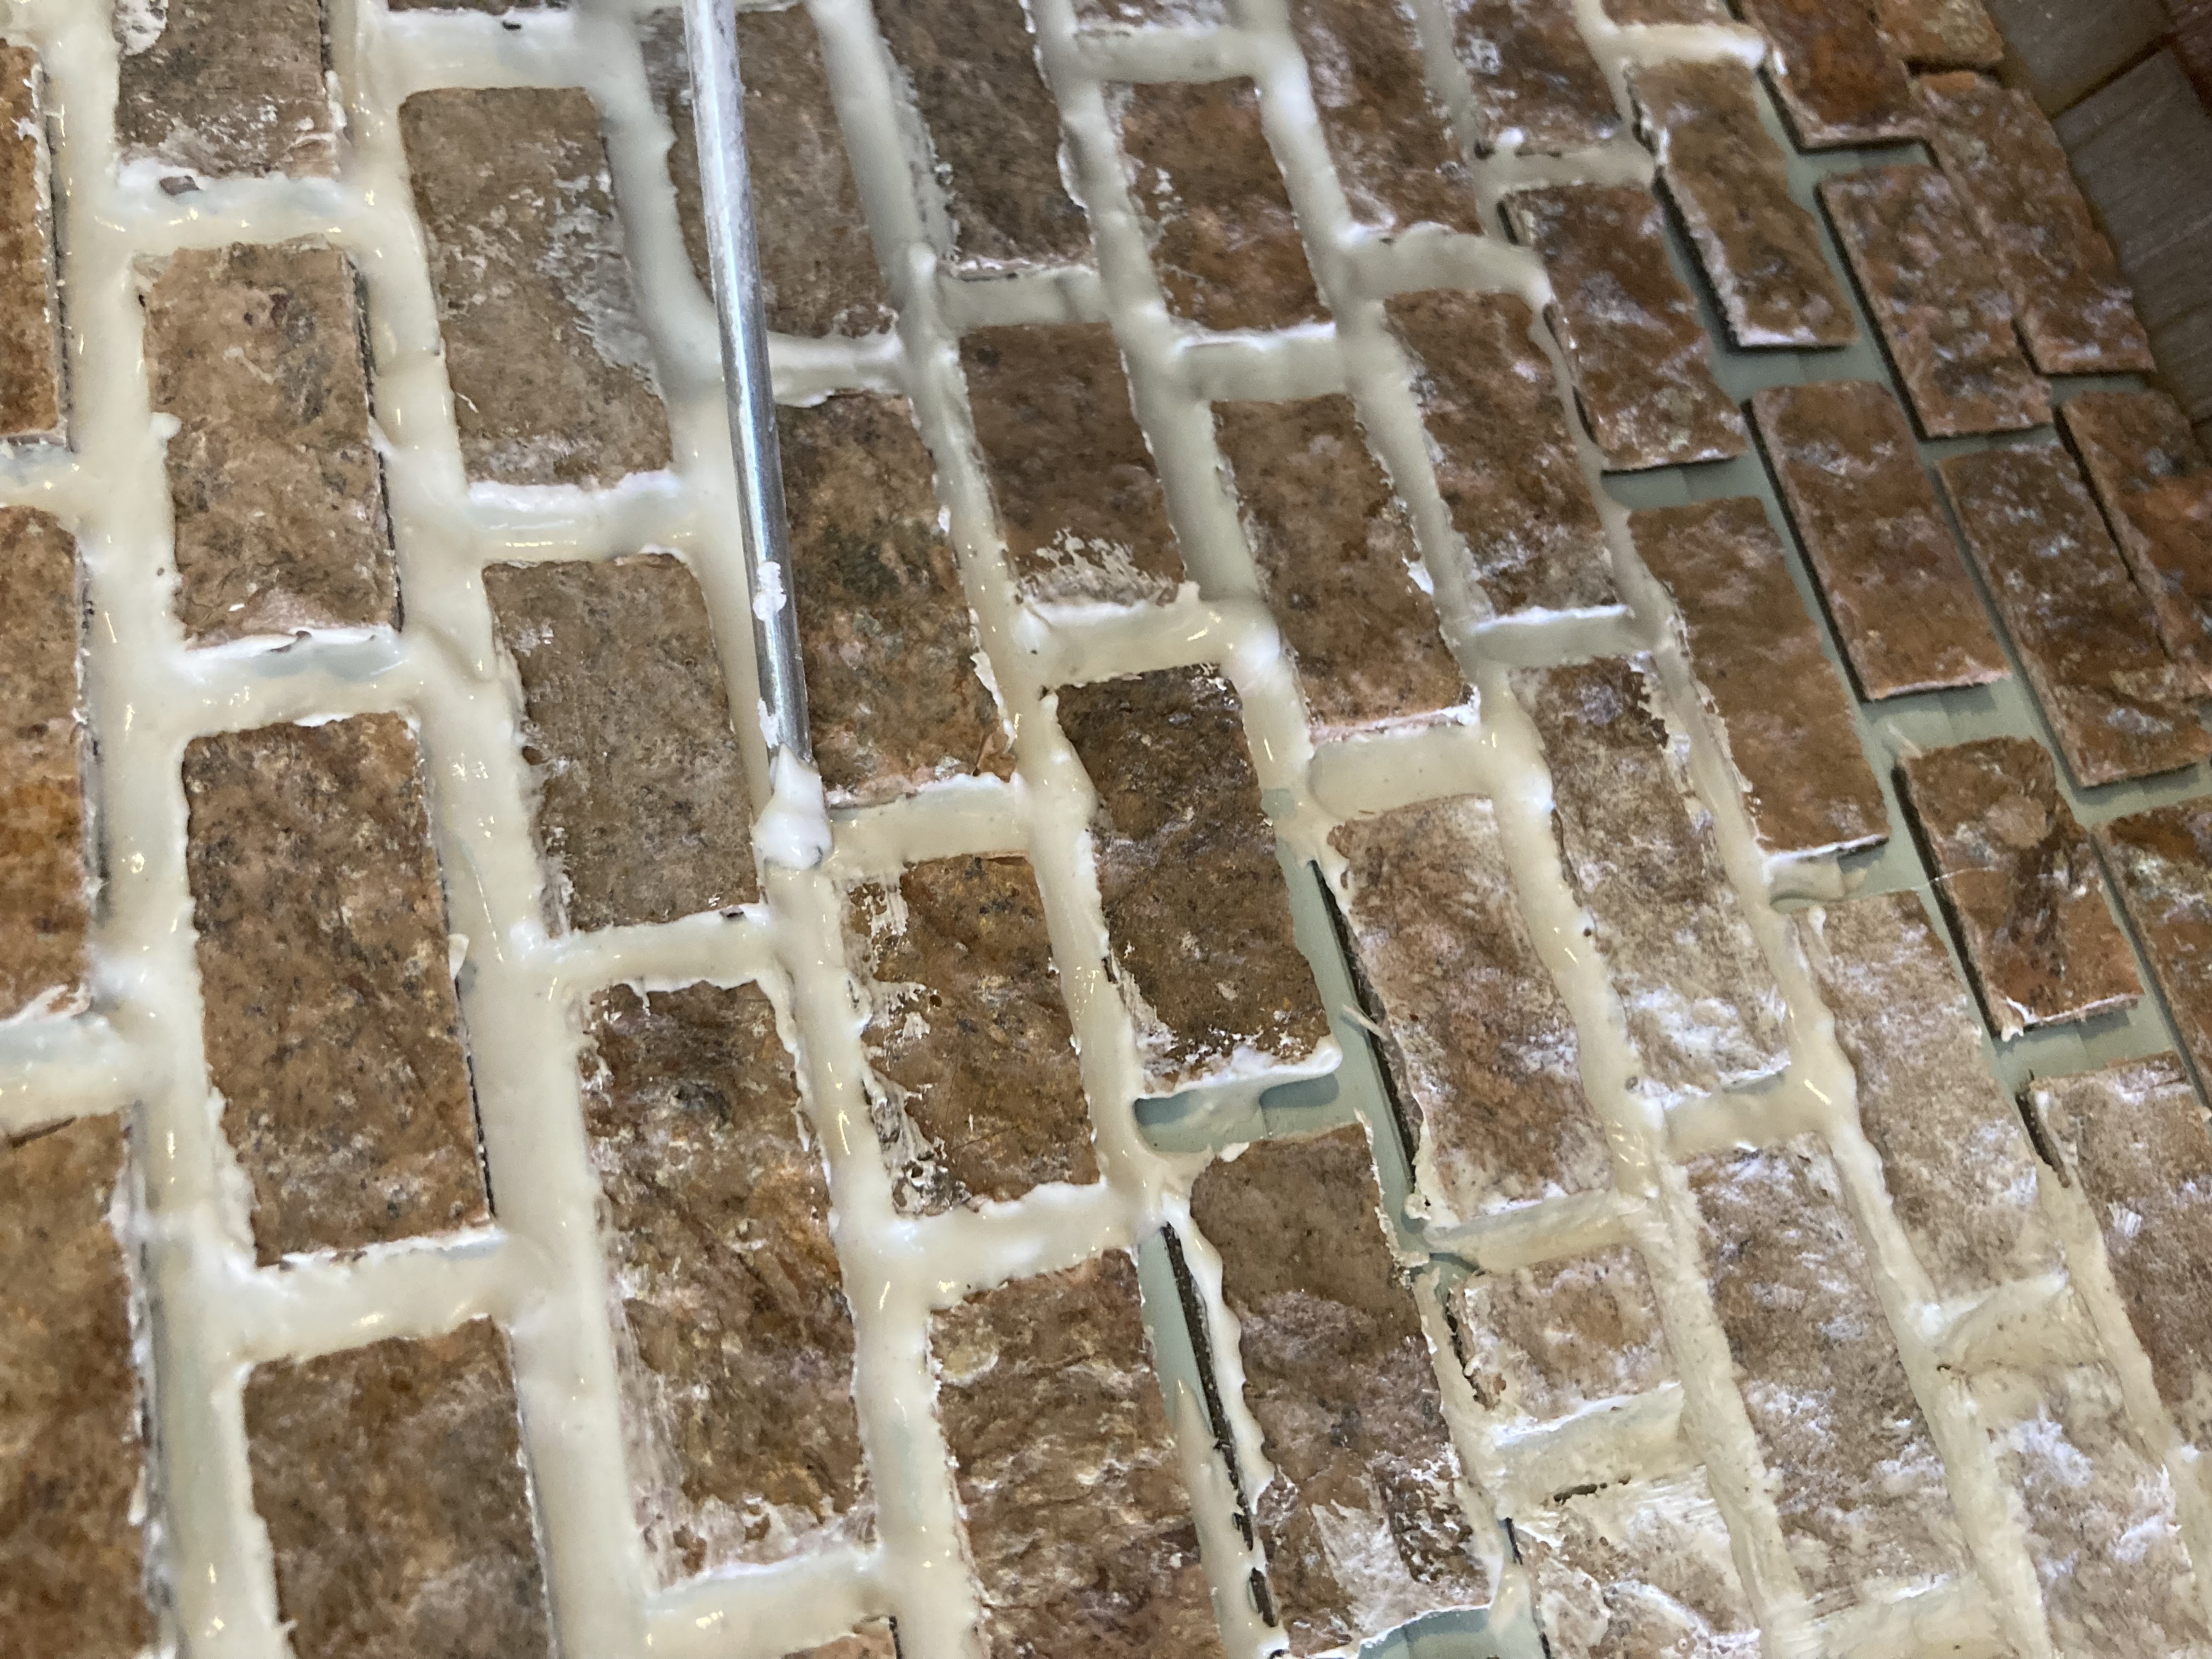
I ended up using un-sanded tile grout, mixing it into a thin paste, filling a tiny squeeze bottle, and squeezing it between the bricks. I had to used a thick piece of wire to push the grout around in between the bricks to fill any gaps.
This is the squeeze bottle I used. It came with many fine tips but this one worked best. The grout ‘mortar’ had to be mixed to just the right consistency to be easily squeezed from the bottle, but not thin enough that it runs when you squeeze it in place.
Squeezing mortar between the bricks. The white mess in the lower left was from when I first started, trying to get the hang of it. I eventually touched the bricks up with paint there.
Using a thick wire ‘rod’ to push the mortar around to fill in gaps.
A little more progress.
More progress. Many hours of work. That is a cast iron door stopper holding the back of the dollhouse closed, so curious cats don’t sneak in and redecorate.
Almost done
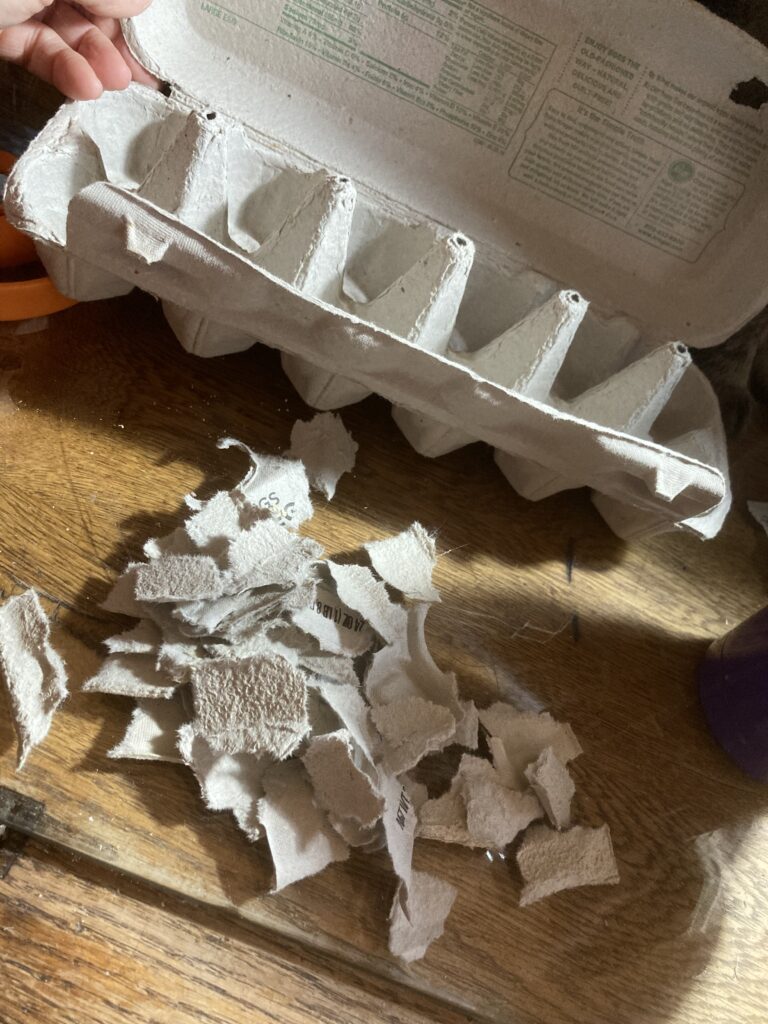
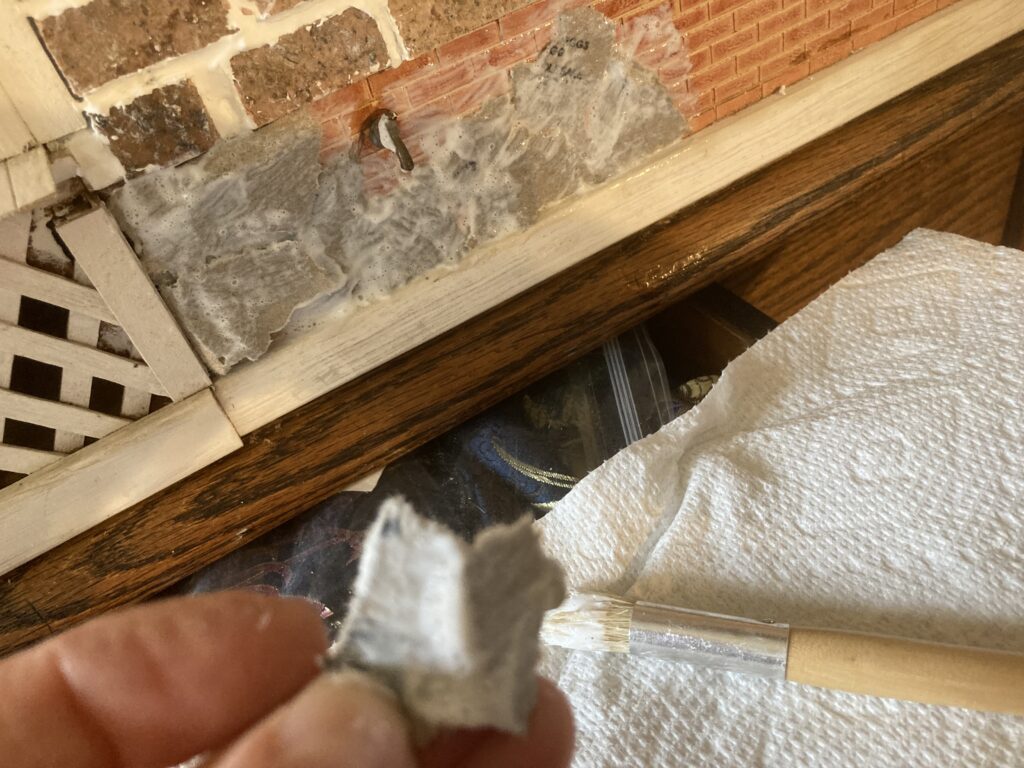
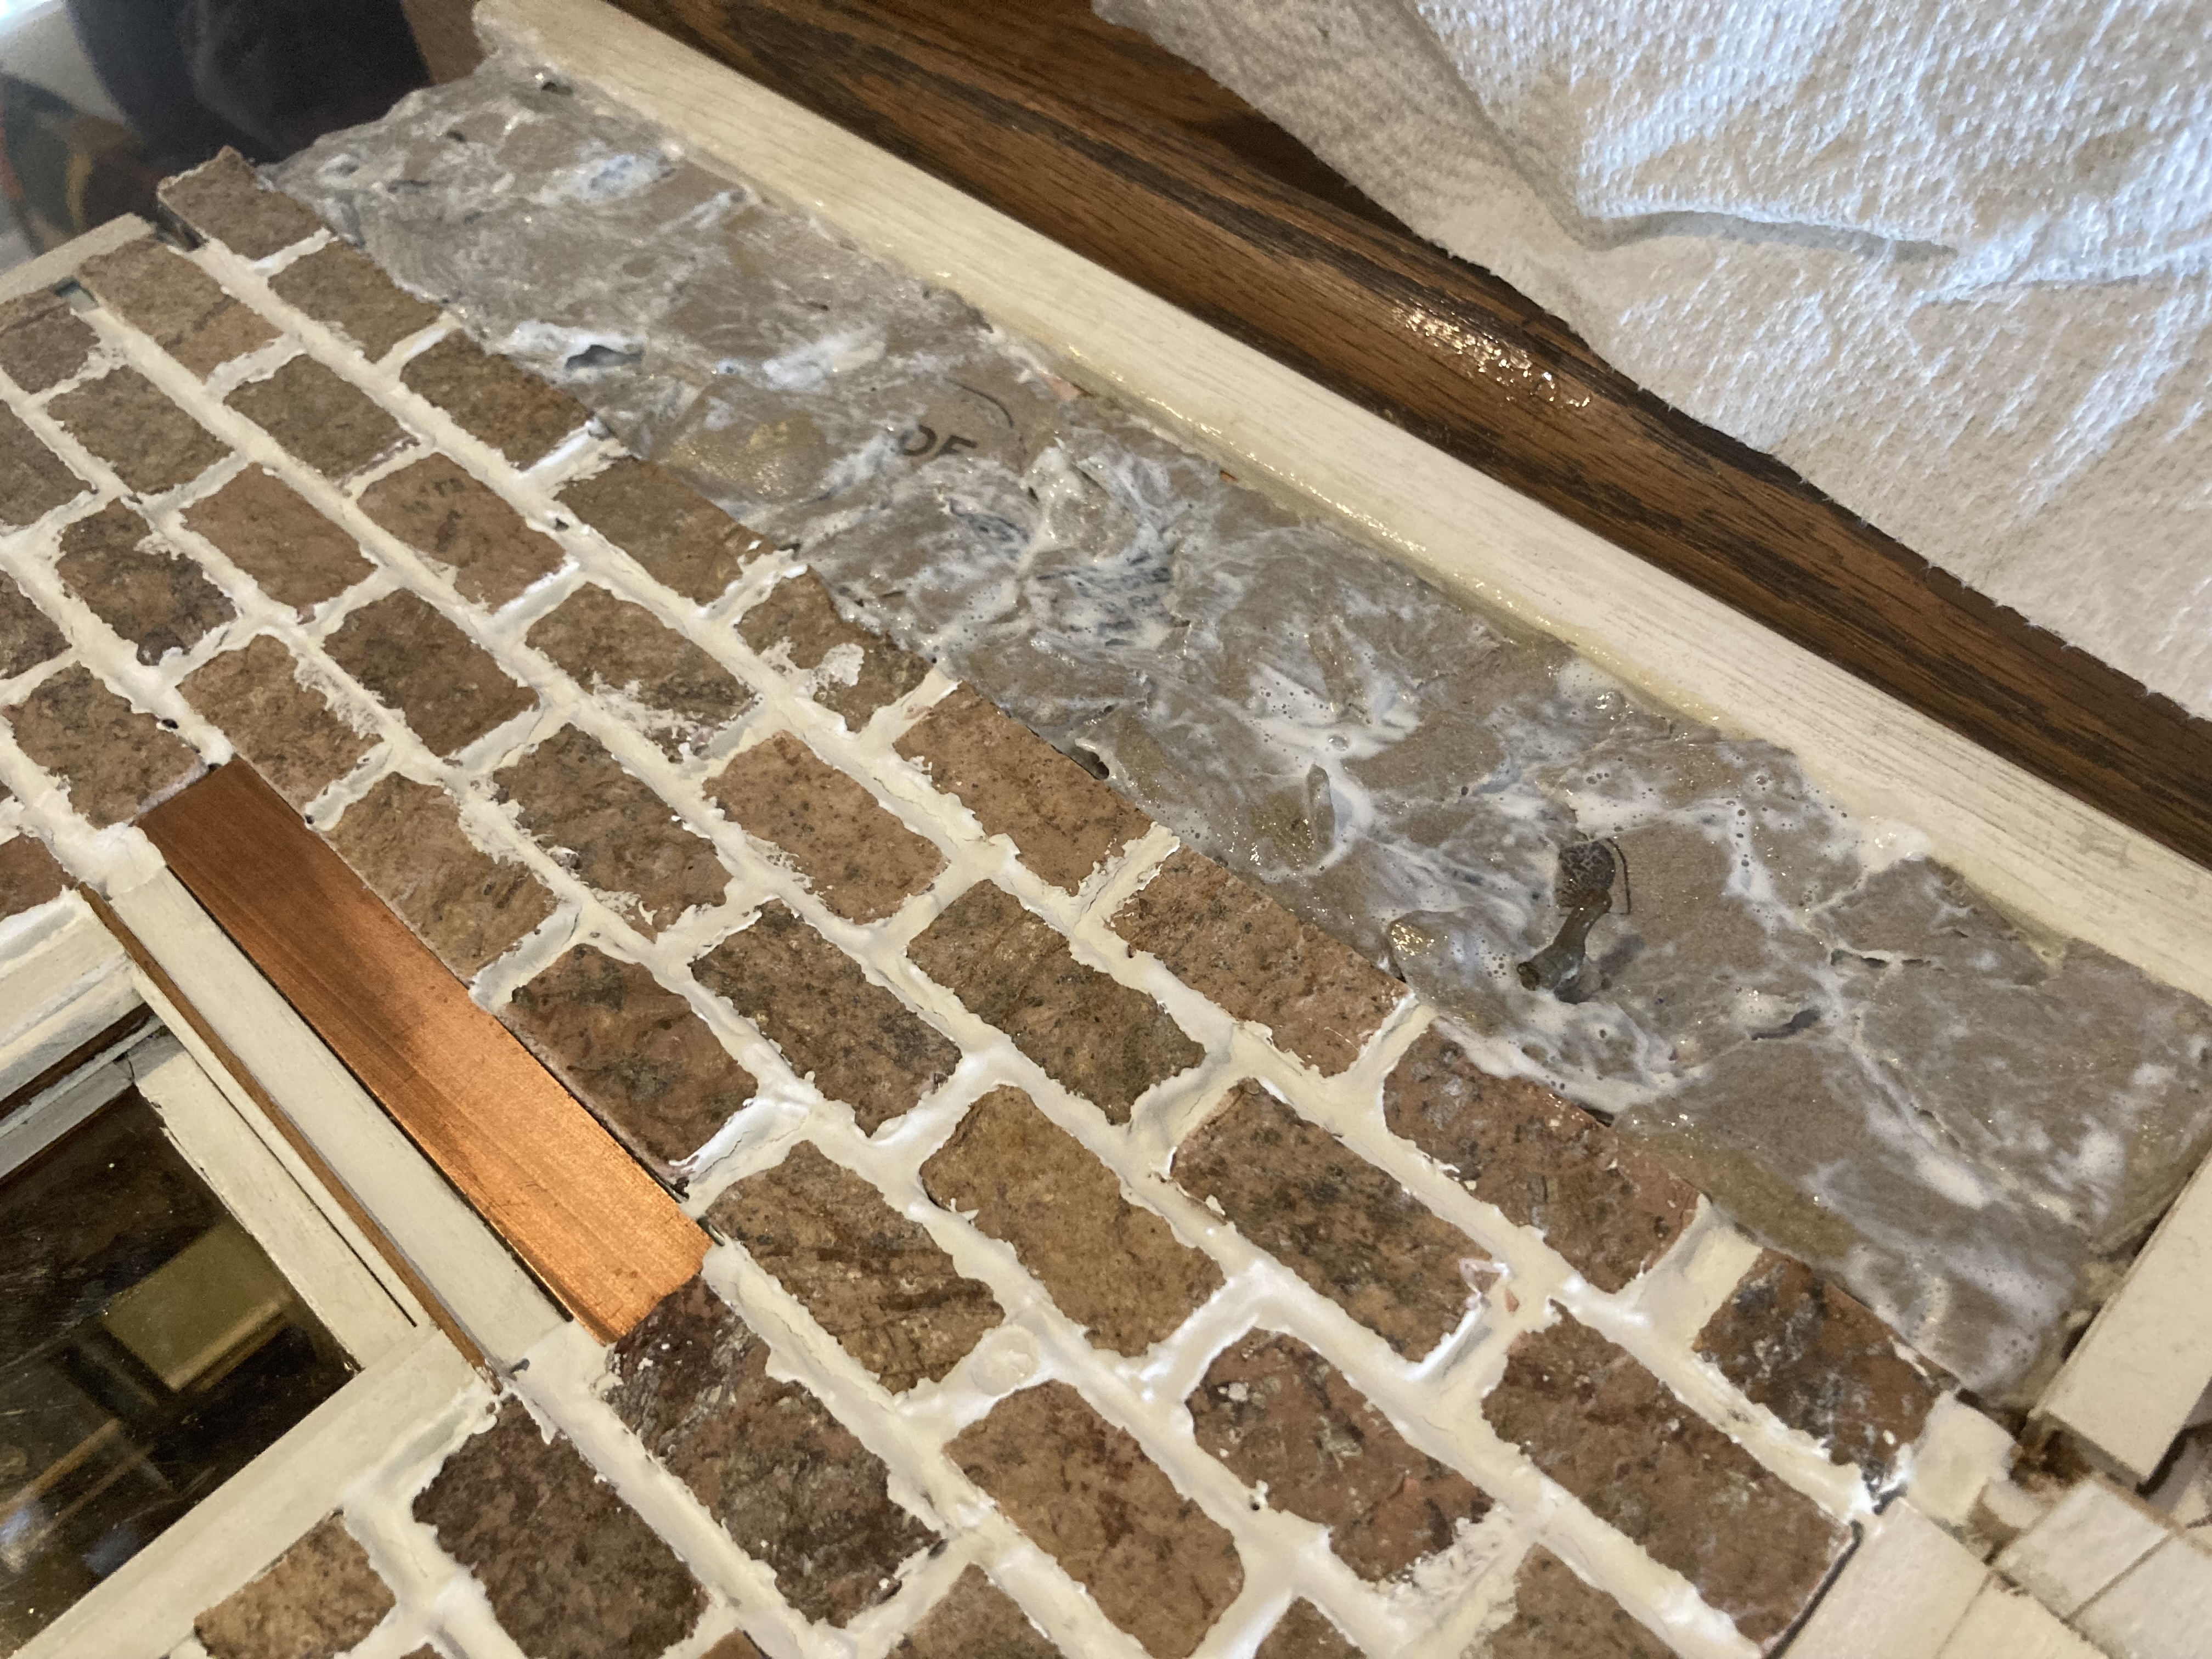
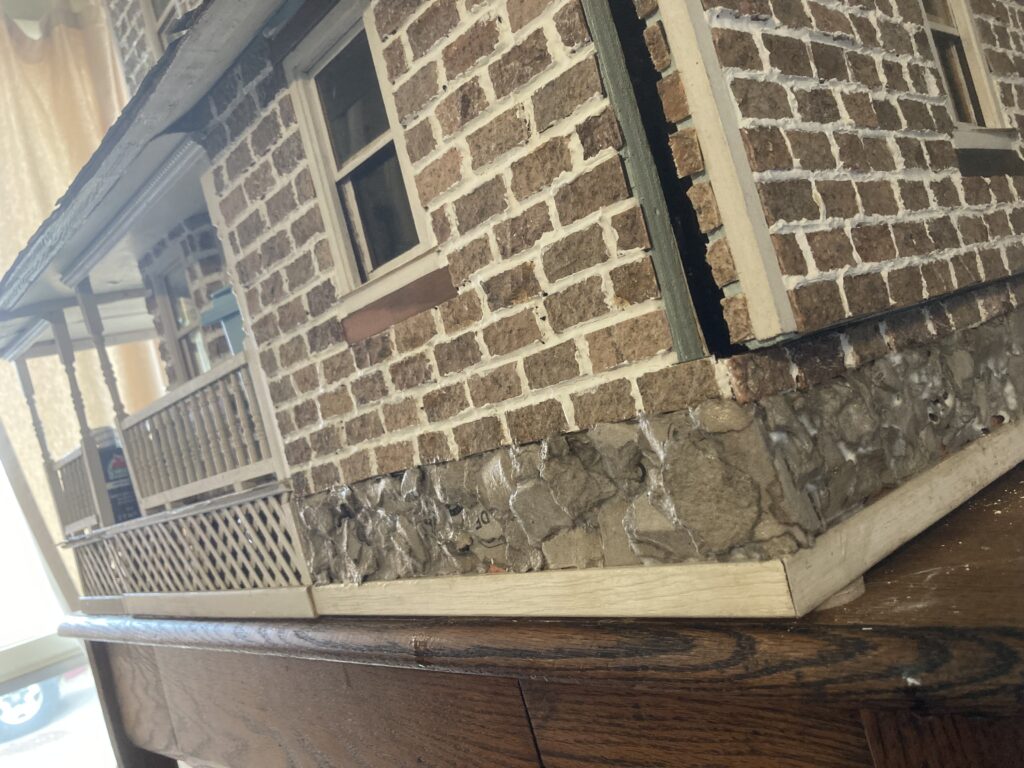
Step 6: a stone foundation. I wanted to add this before aging the bricks, so i could age the foundation at the same time.
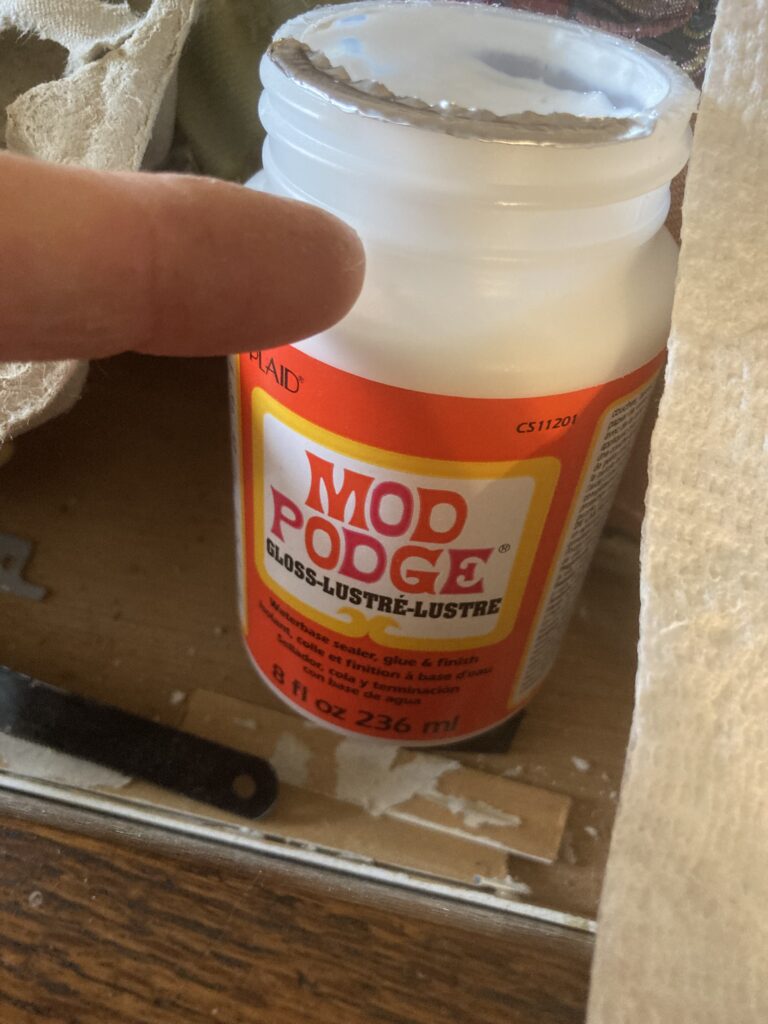
I wanted to make the bottom foundation more of a natural stone instead of bricks, so I thought I would try the egg carton/modpodge method. You start with a cardboard egg carton and break it into pieces (for this project I only needed one carton).
Egg carton
Then I used Modpodge and a cheap bristle paintbrush from DollarTree (I think it was a stencil brush).
I basically just pasted the cardboard pieces all over the base of the dollhouse so it looked like stones. I built them up in layers to add depth.
Doesn’t look like much while it is wet, but when it is dry…
So satisfying.
I eventually decided to keep the ‘stone’ on the base as-is, without painting it, so I went back through and added a few more pieces to cover up any writing left exposed on the cardboard.
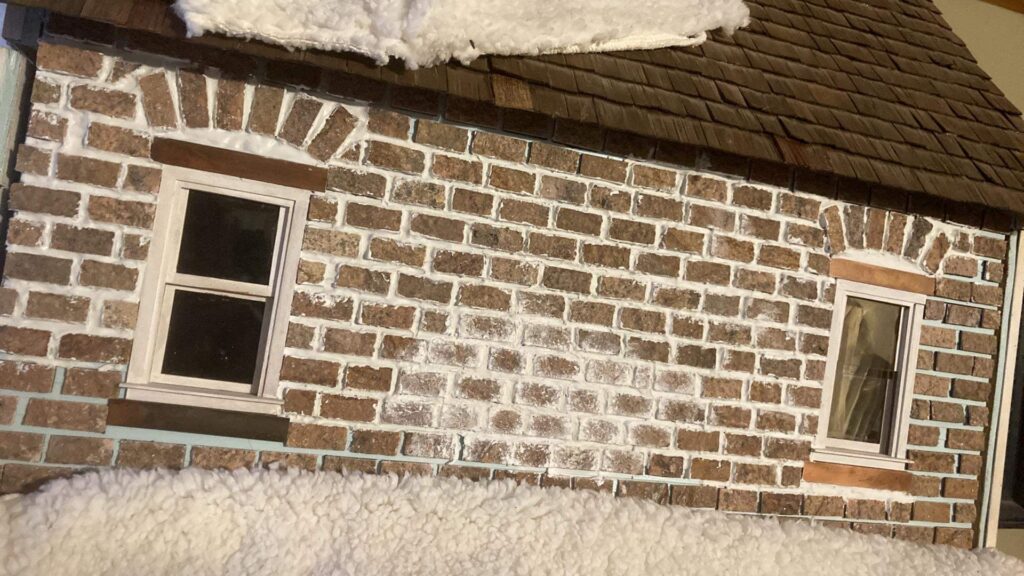
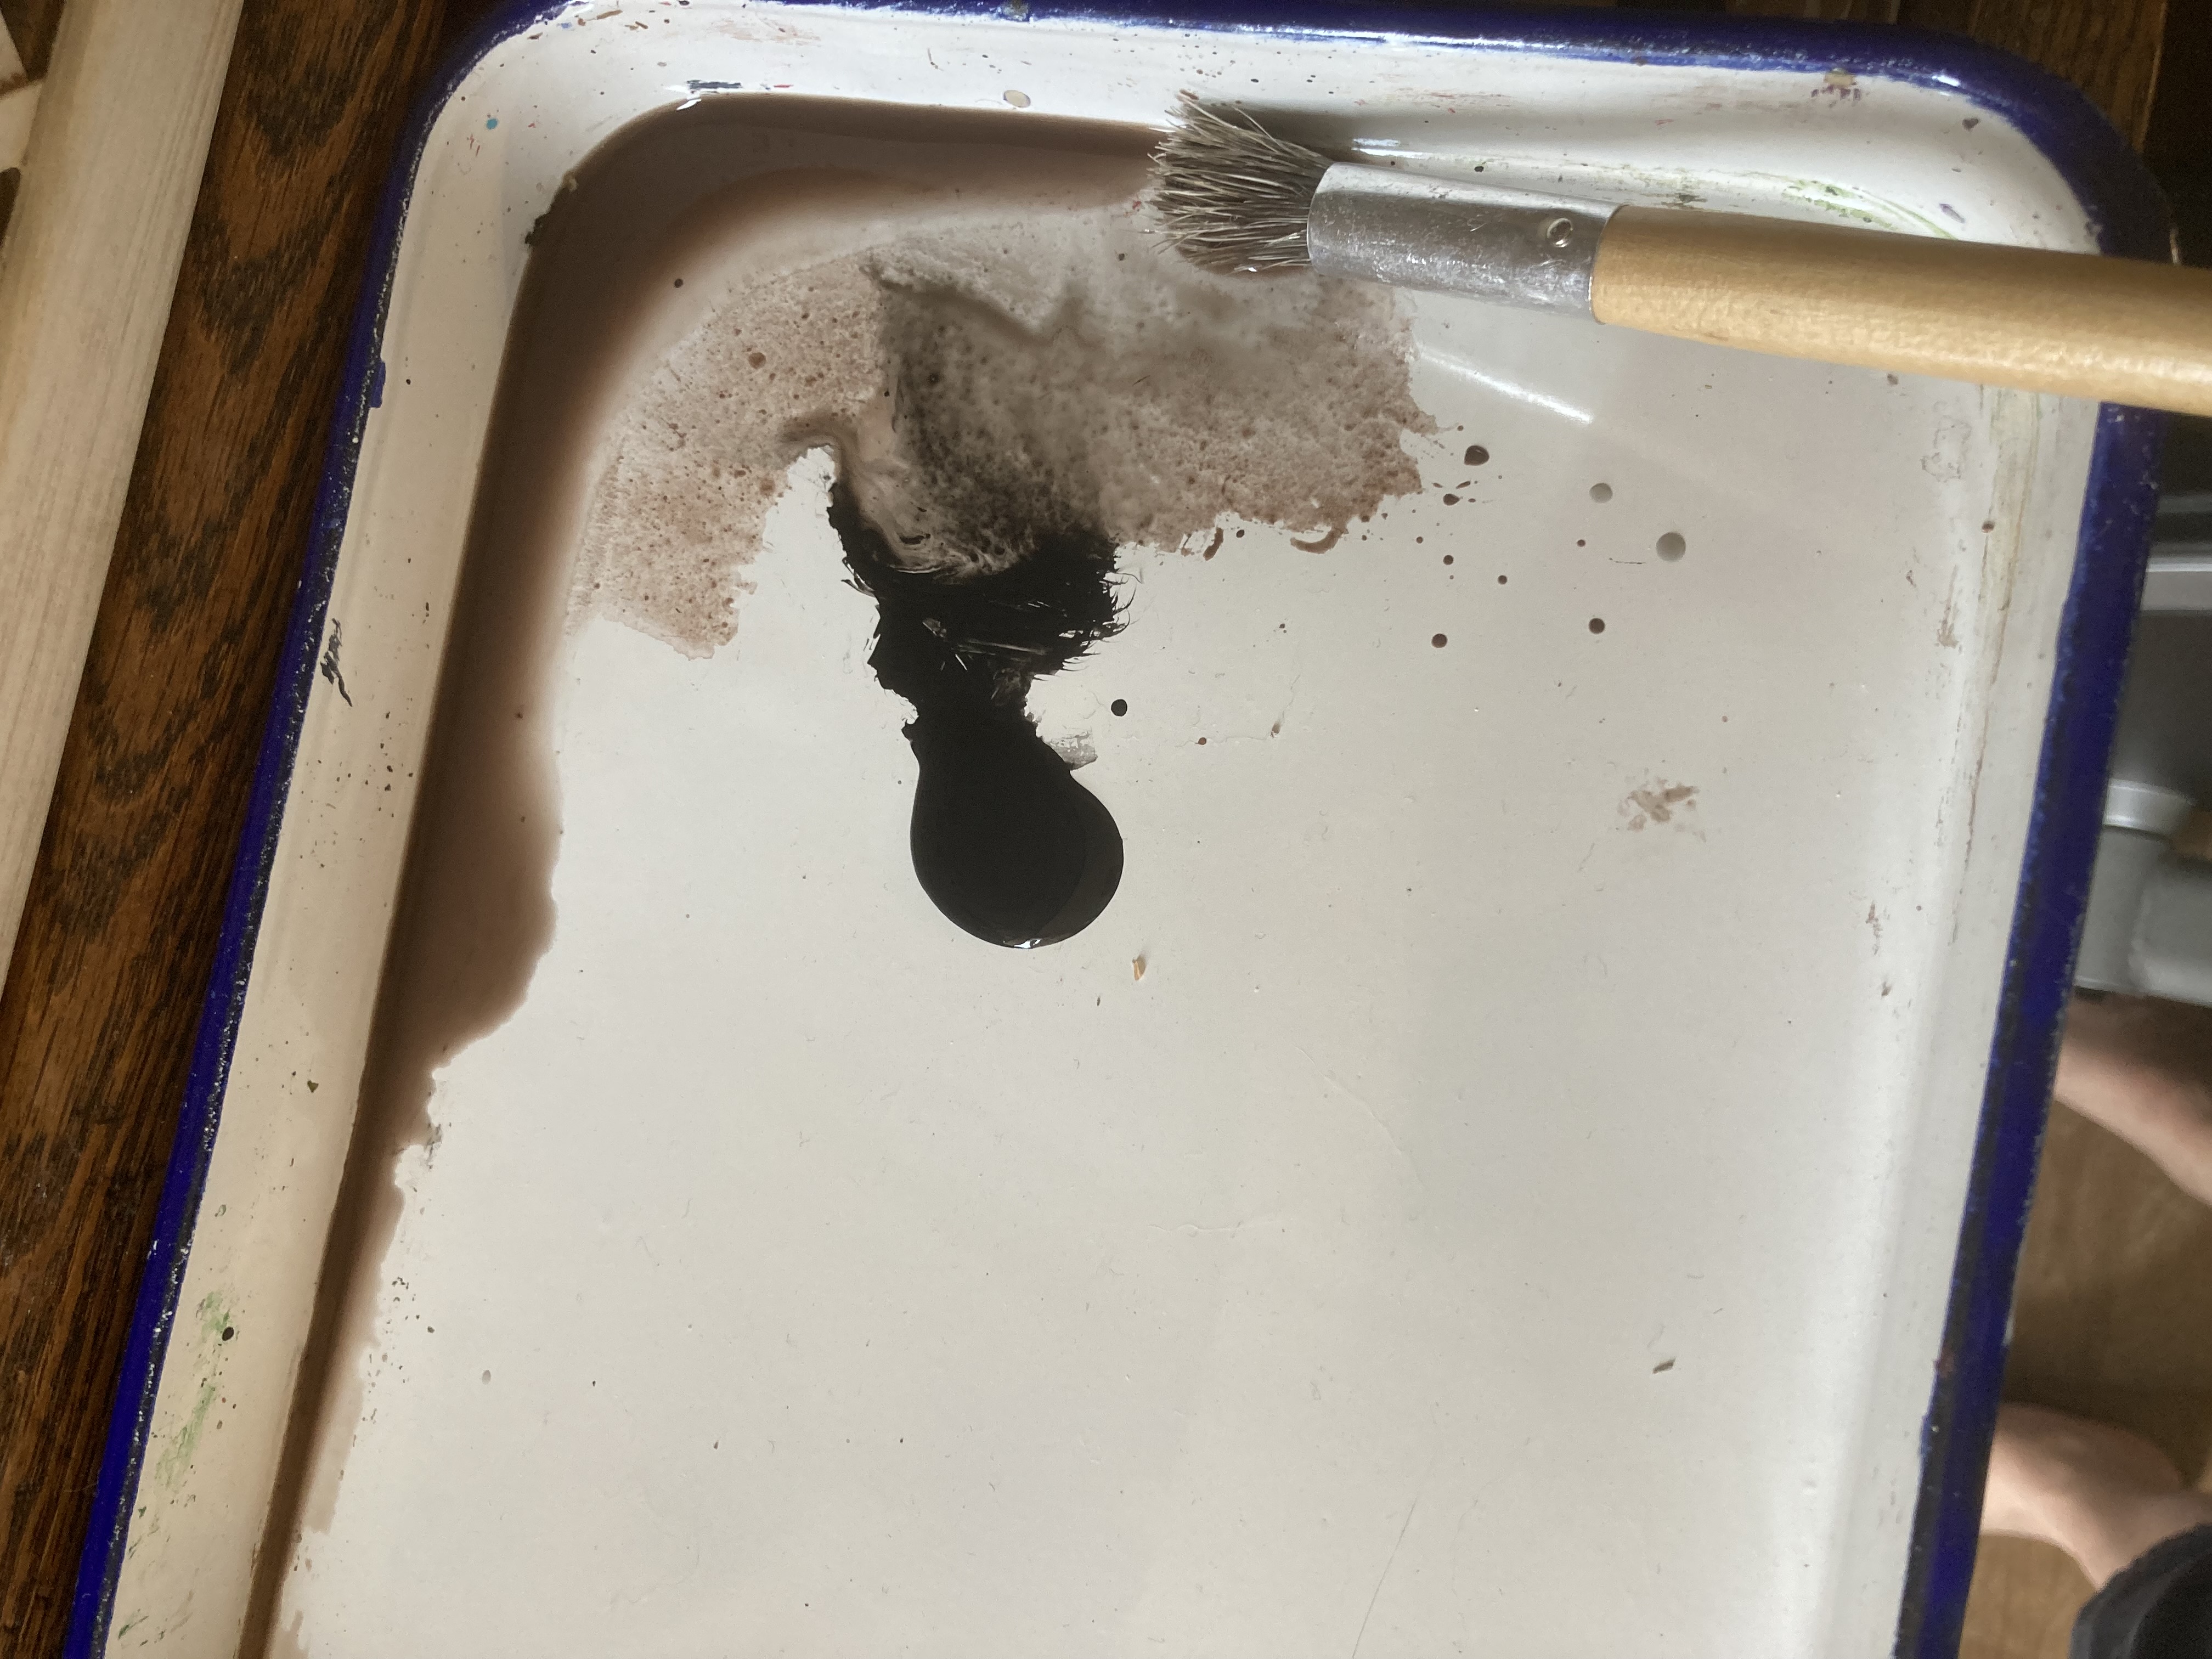
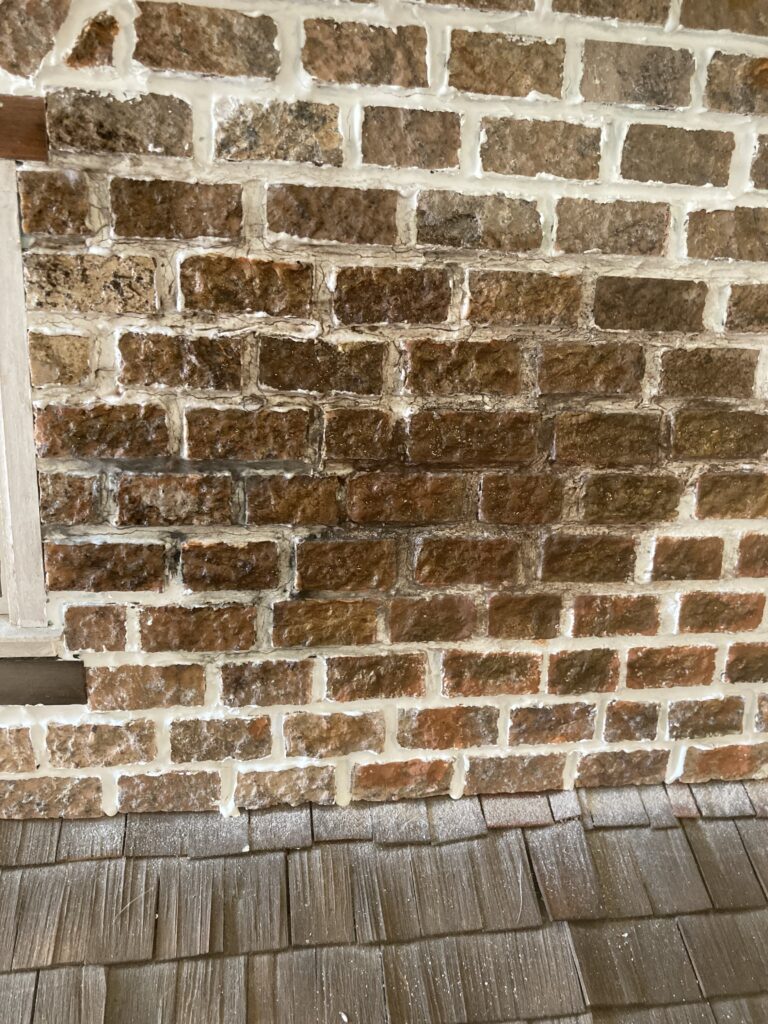
Step 7: Aging.
I didn’t want the stark white grout between the bricks to stay that color, as it just isn’t very natural looking, so I knew right away that I would age it with some watered down paints.
Watered down acrylic paints and my good old bristle stencil brush. The bristle brush is good for digging into crevices with your weathering paints.
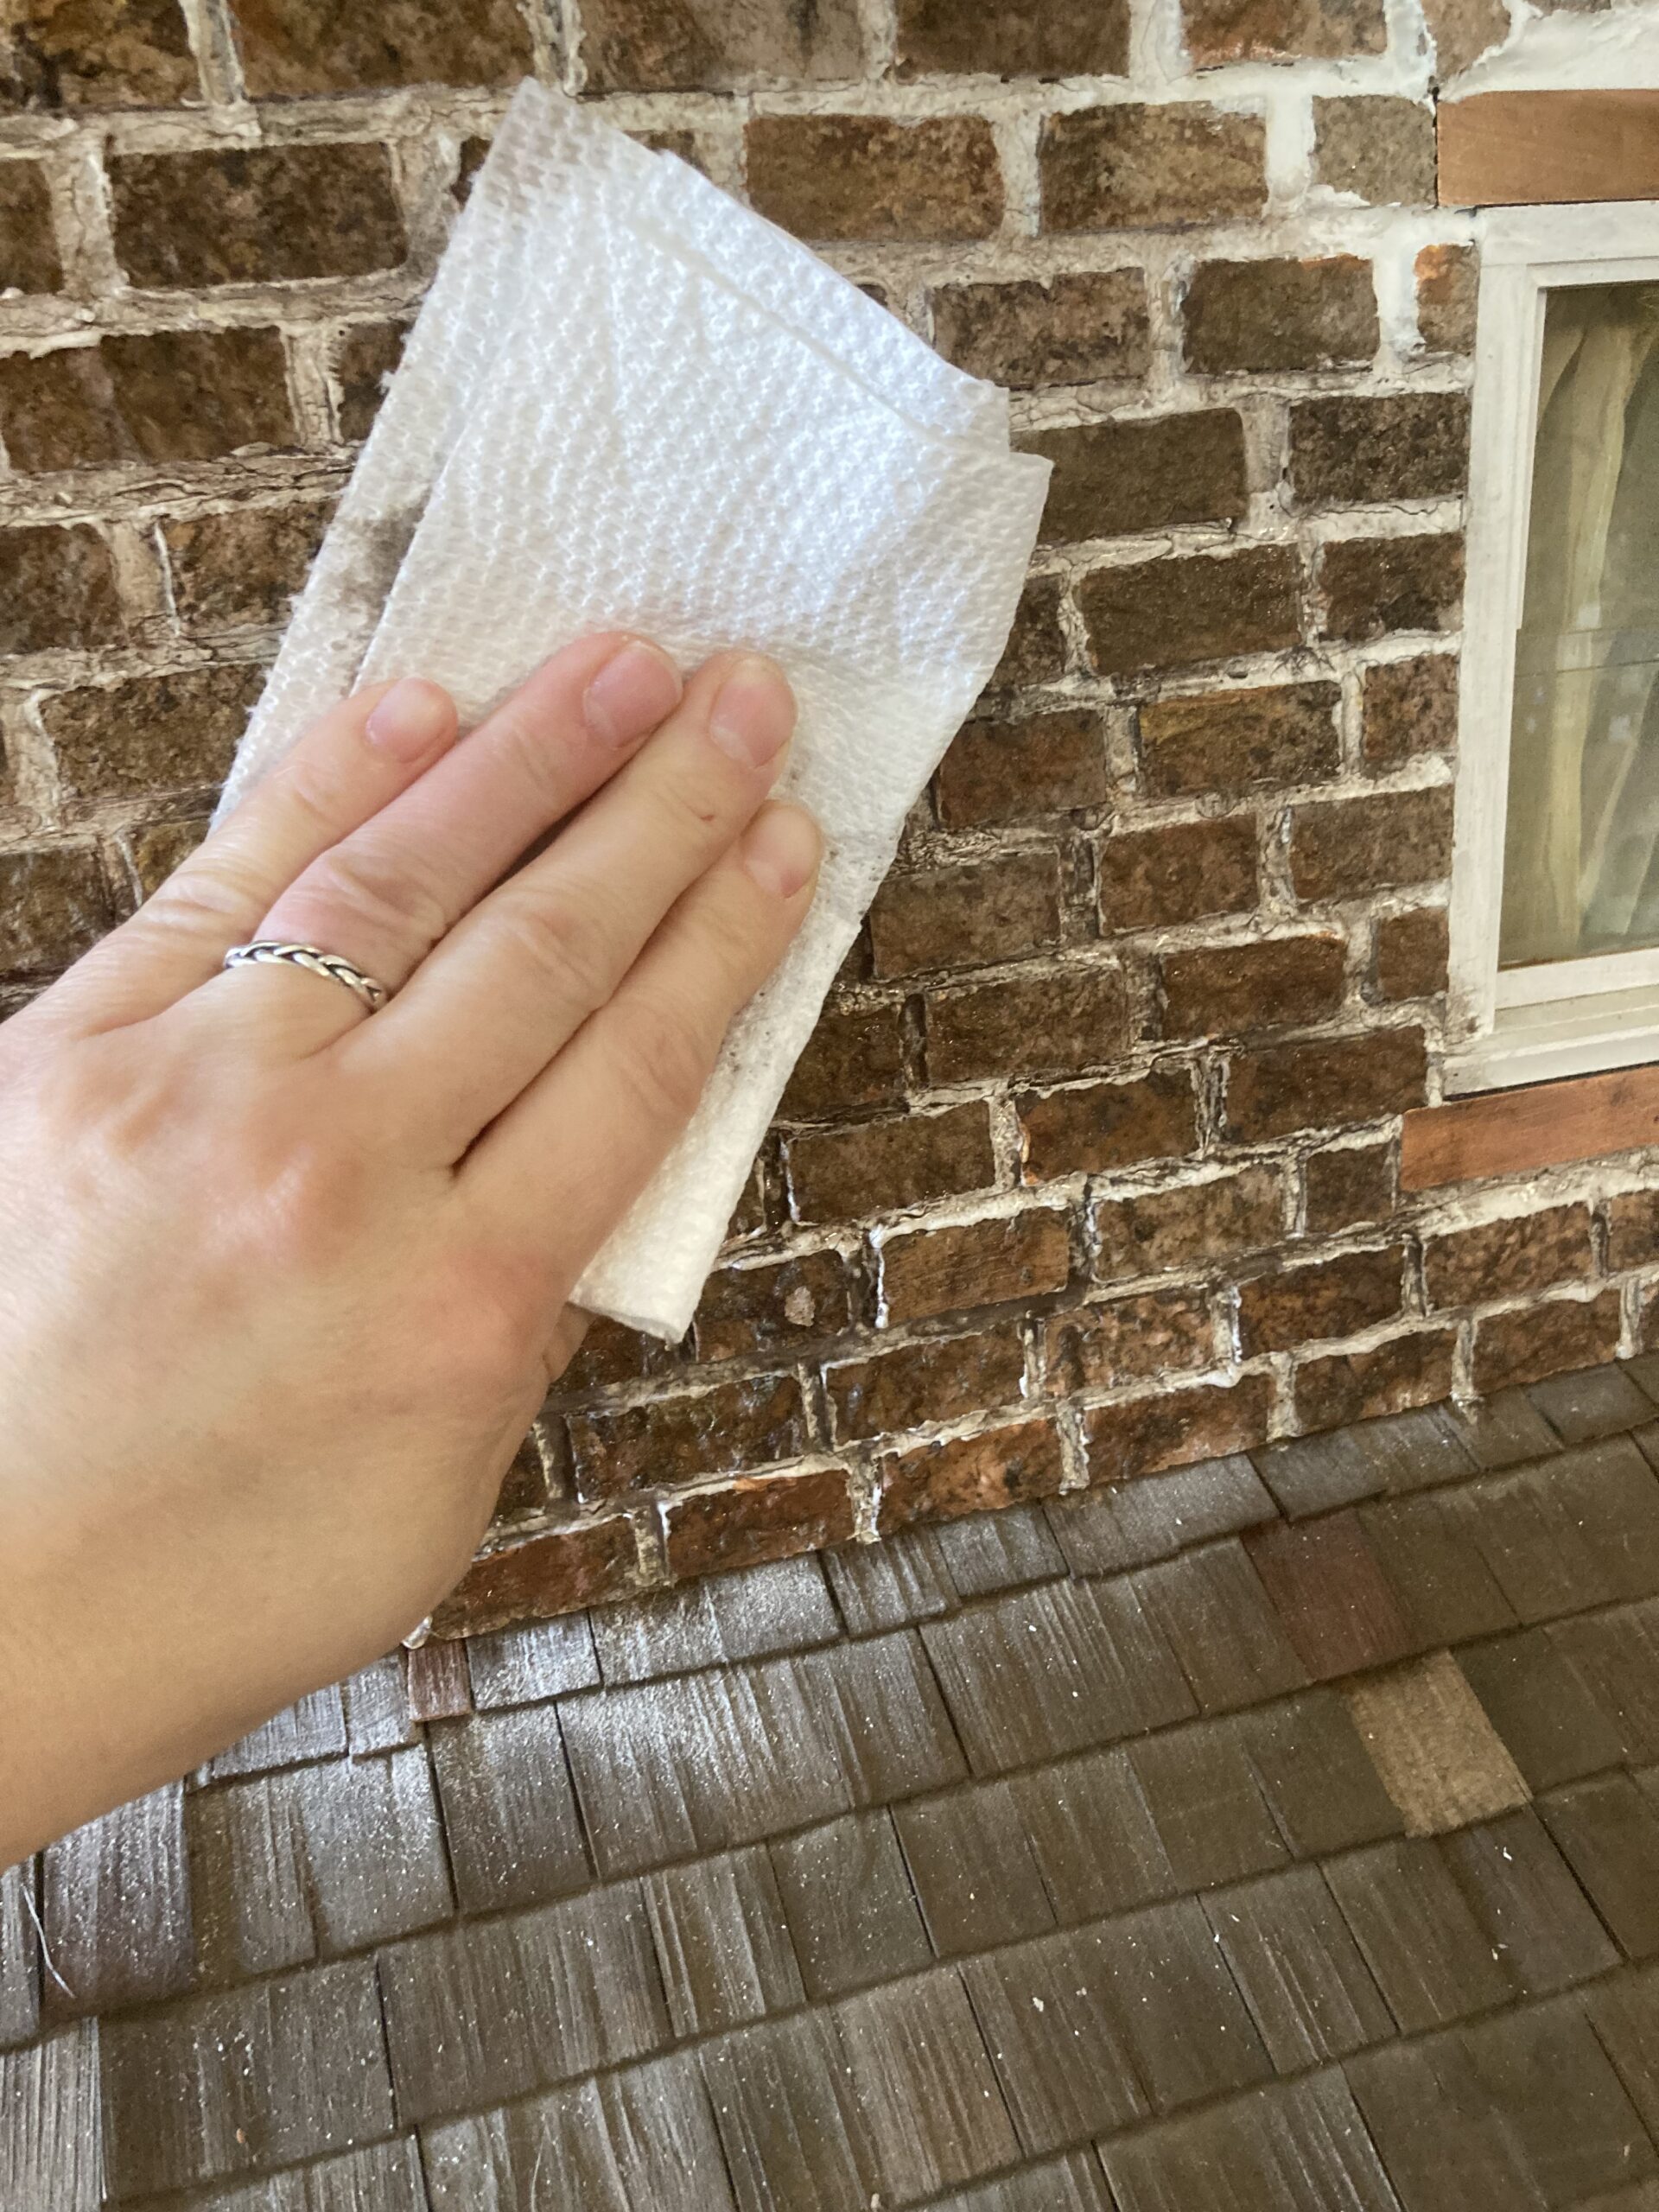
I ended up using brown, a little green, and a tiny bit of black, making various washes over different areas of the house to make it look weathered. Just like any real house, the weathering will not be consistent through the entire finish, as variations in architecture, sun exposure, potential leaks, water runoff, etc will create different effects. I just varied it enough to make it interesting.
Patting off excess paint with a paper towel.
Working paint into those cracks and crevices.
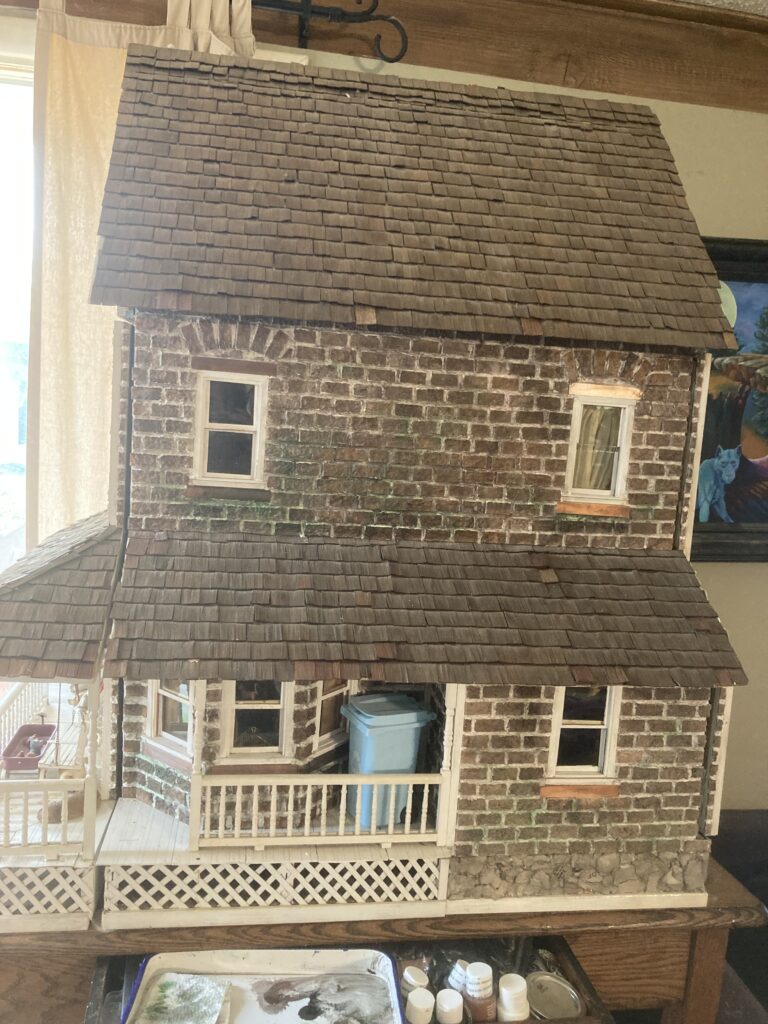
In a brighter light.
This house project took so MANY hours to complete, and my hands were so sore from squeezing that little squeeze bottle, but I am so pleased with how it all turned out. My next plans for this include making gutters to cover some of the white trim on the corners (I should have removed the trim before putting on the bricks, but hadn’t thought about it until it was too late). Also I have started remodeling the bathroom. Stay tuned for more!
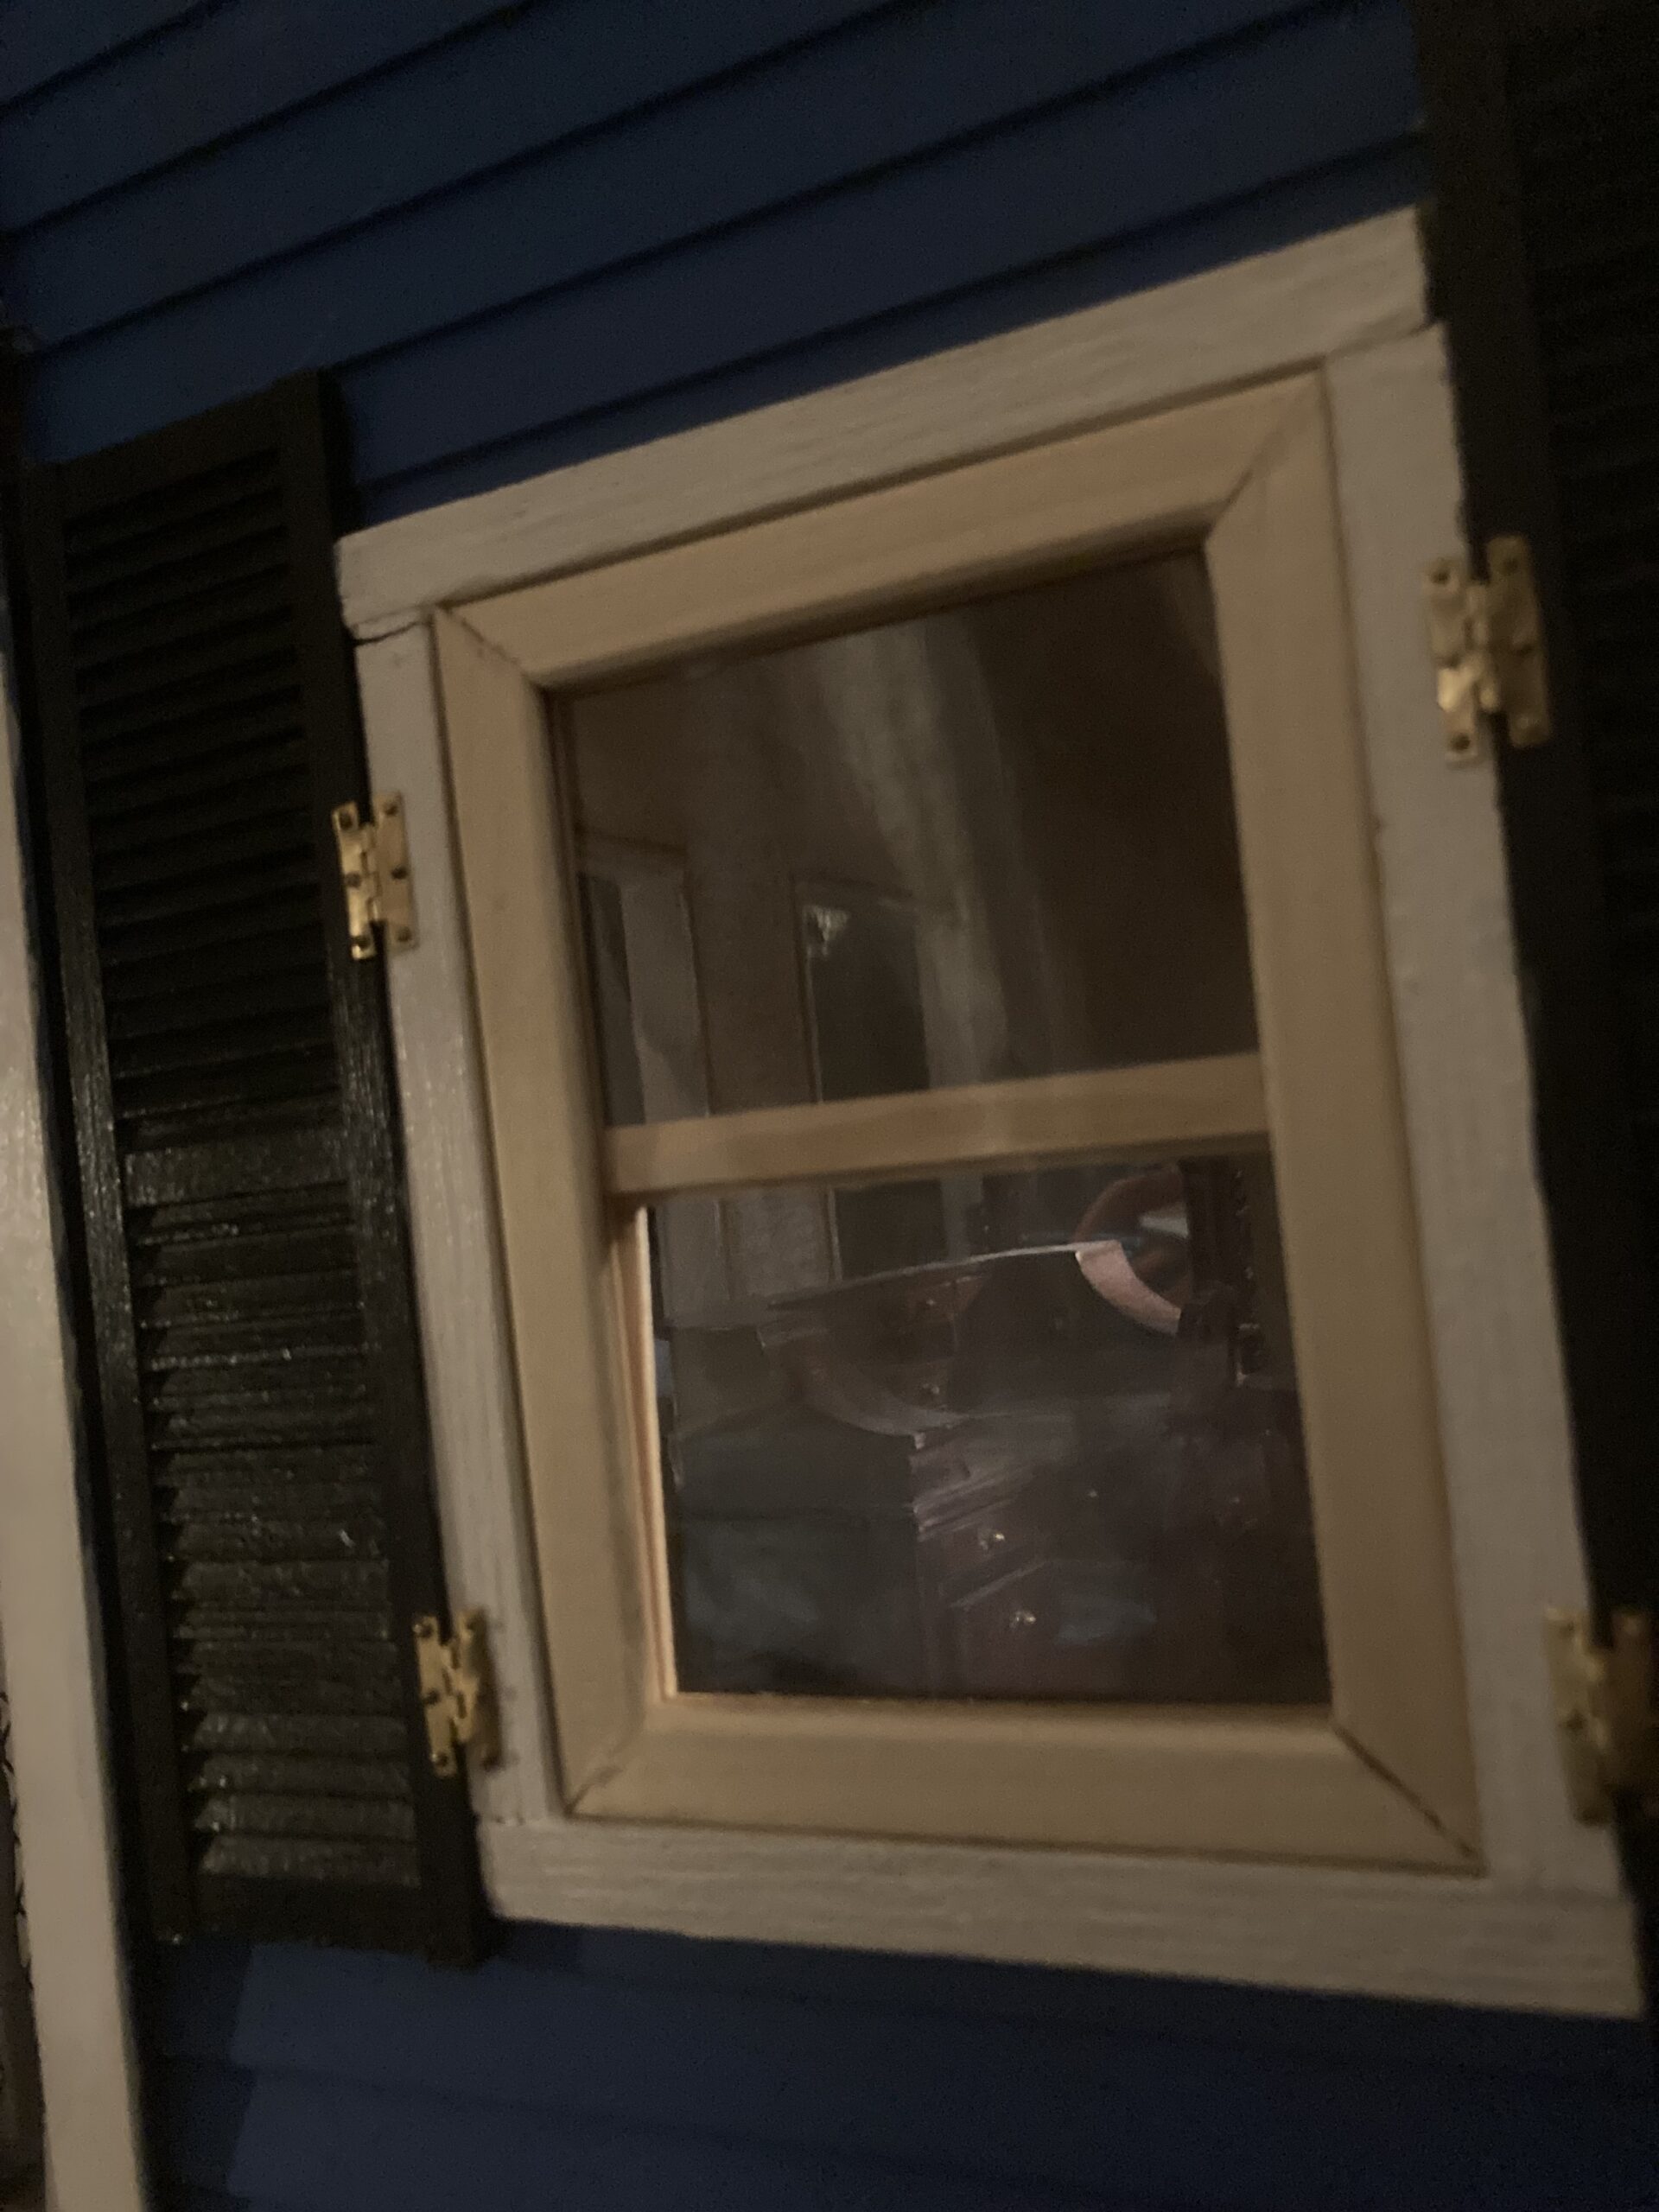
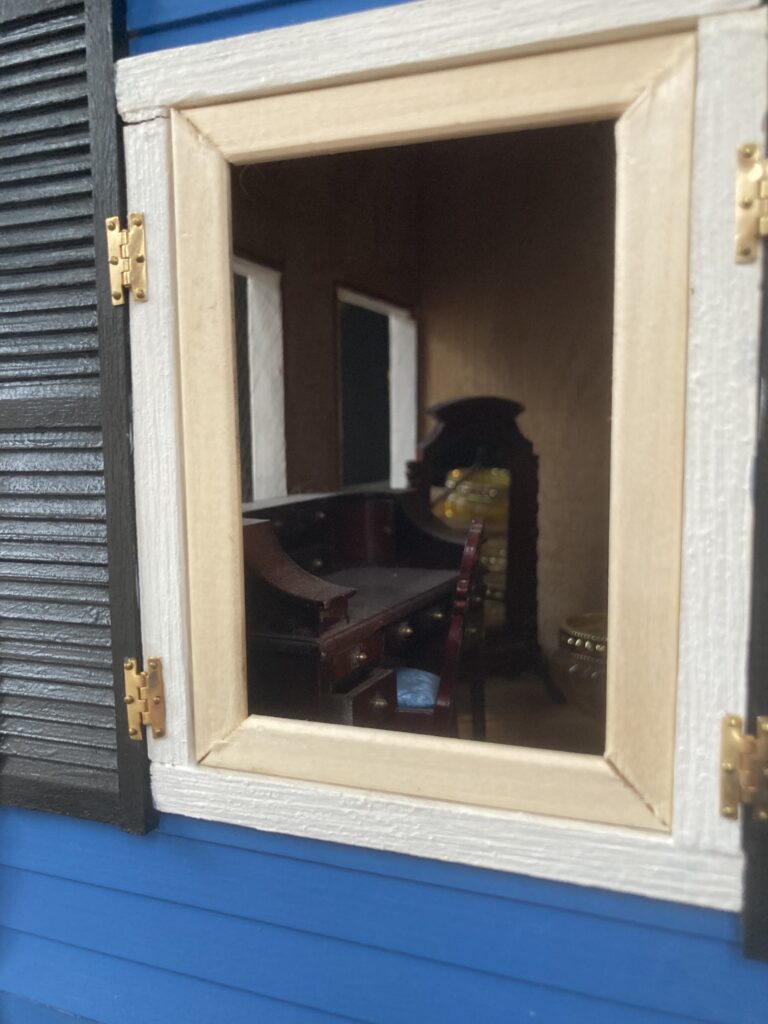
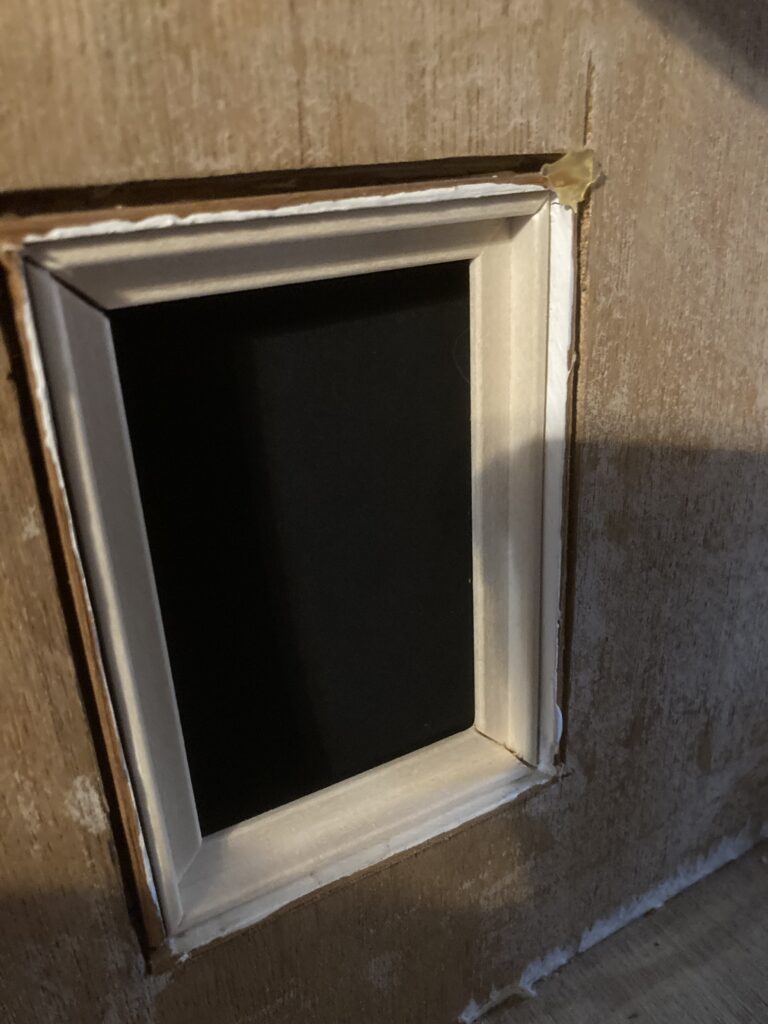
For my new-ish 1920’s style house, I had a hard time finding room for it and ended up keeping it on the floor, under a table that has another house on it. Unfortunately, my darling kitties have discovered that it has no plastic in the windows, and they can slip their paws in and play with my mess. (I have furniture inside, but the inside was basically stripped before I got the house–no trims, doors, flooring, even the wallpaper was ripped off the walls.) Anyway, I made it a priority to get windows on it.
At first I was just going to slap clear plastic into a frame and call it done. Then, after studying the working windows in my Pepperwood farm house, I decided that I might be able to make some working windows.
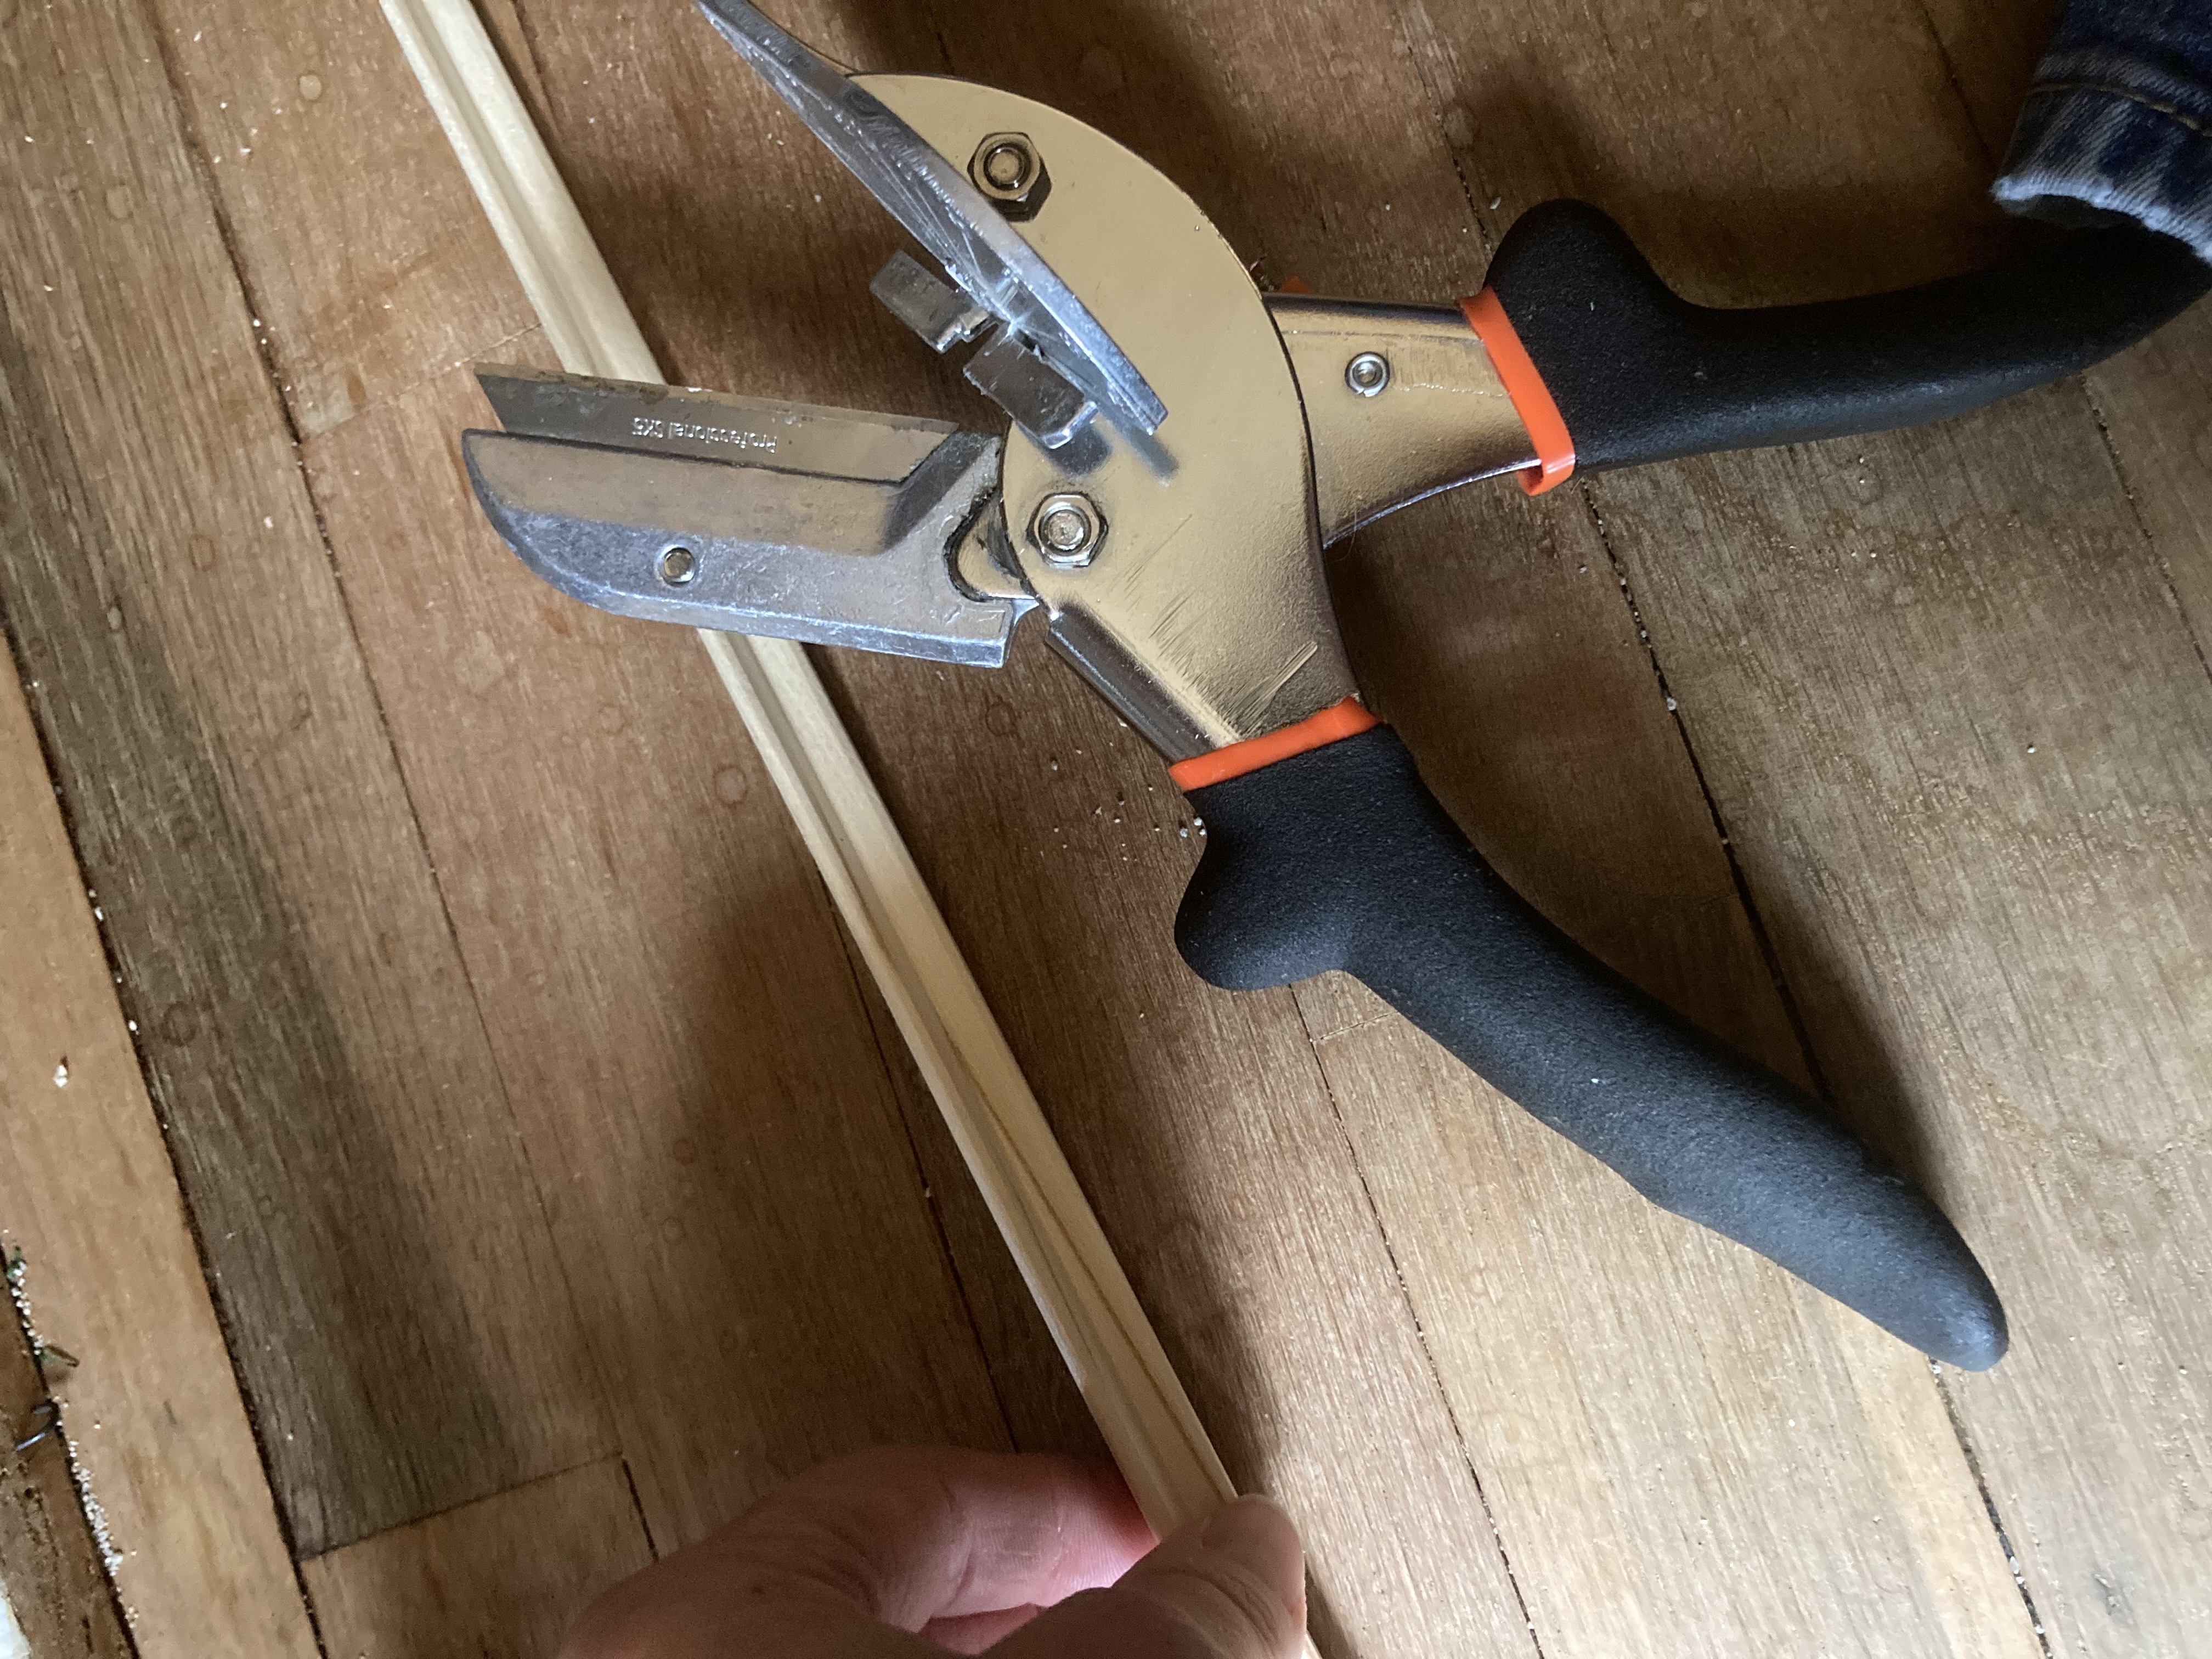
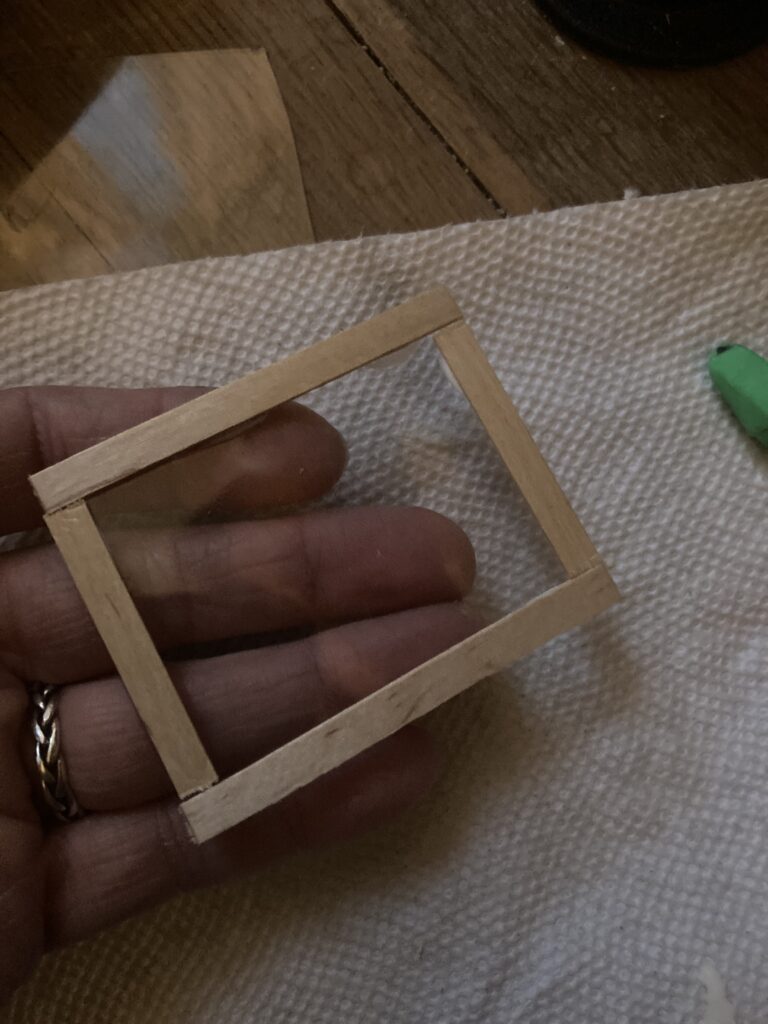
For this project, I collected clear plastic from different food containers to use as the ‘glass.’ It is clear, it is cheap, it is sturdy enough, and it is easily available. I have my own little collection that I have been building over the past couple of years for projects such as this, mostly the tops off mini doughnut lids from Walmart. Anyway, I also used Hardwood Outside Corner Trim from Menards. This trim has two equal sides that form a right angle to each other.
Hardwood Outside Corner Trim from Menards, with my handy dandy miter shears.
I also used my miter shears, wooden coffee stirrers, and wood glue.
First, I used the miter shears to cut the corner trim at the proper angles and sizes to make a frame inside the window. I glued the pieces together, so it is an inner frame for my window hole. When you hold it up, it will look like a picture frame where the outside of the frame is nice and flat, while the inside has a raised ridge that will hold the window workings.
Example of a measured and cut piece to line the inside of the window hole.
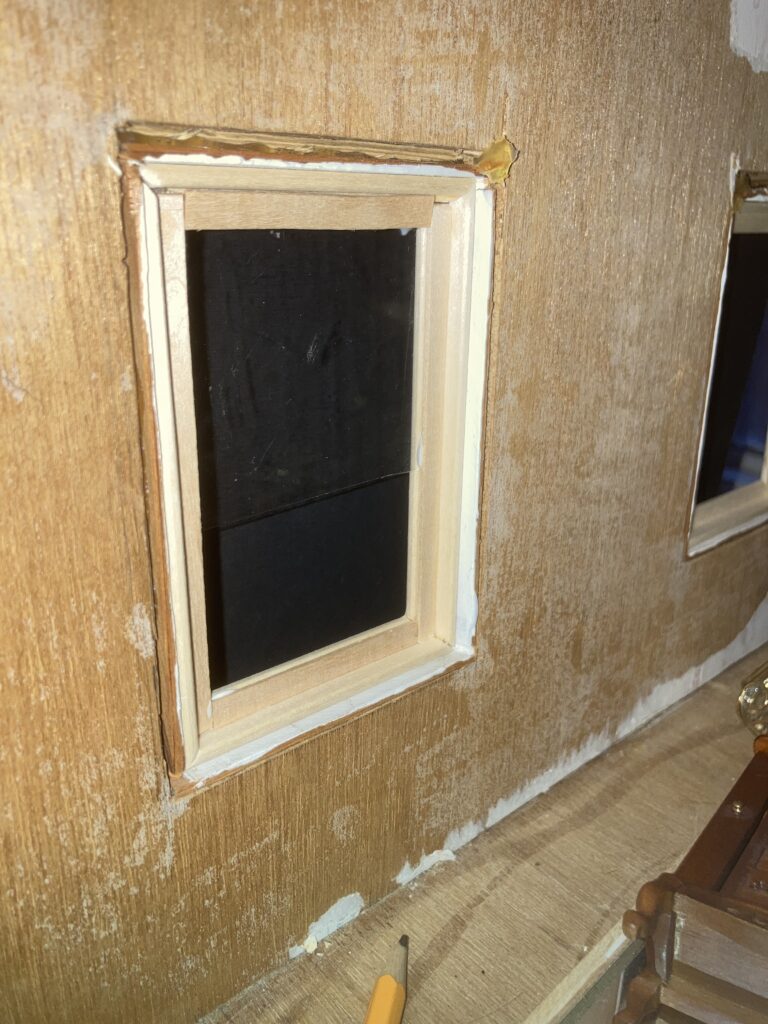
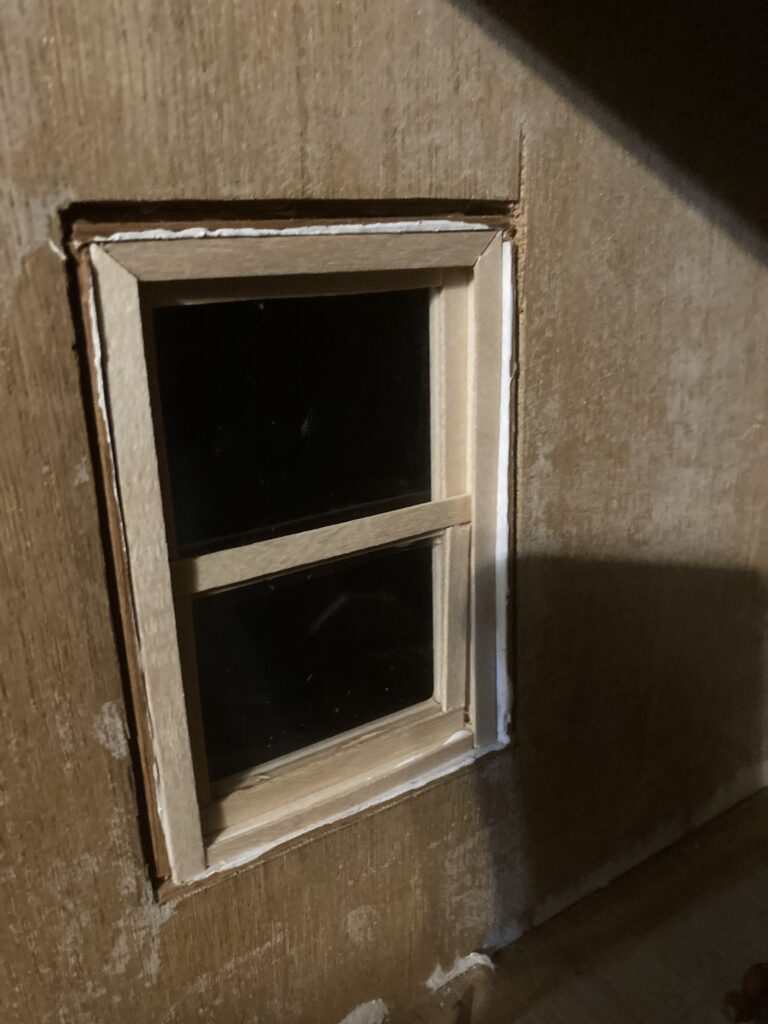
I placed the new inner window frame so that the section that looks smaller is pointing outward, while the side with the wider opening is pointing inward, to the interior of the house, and the side with the smaller opening is pointed outside.
The outside section of the frame is flat against the side of the house.The inside section of the frame has a lip all around it to help hold in the window workings.
After this inner window frame is in place and the glue is dry, I started on the window workings.
First I cut a piece of clear plastic to fit the top section of the inside of the window. I glue it in place at the top of the frame. Then, using wood coffee stirrers, I made a little wooden frame for the whole inside of the window. It covers the edges of the top section of plastic glass and stretches all the way to the bottom of the window frame.
First section of plastic in place, with frame glued around it.
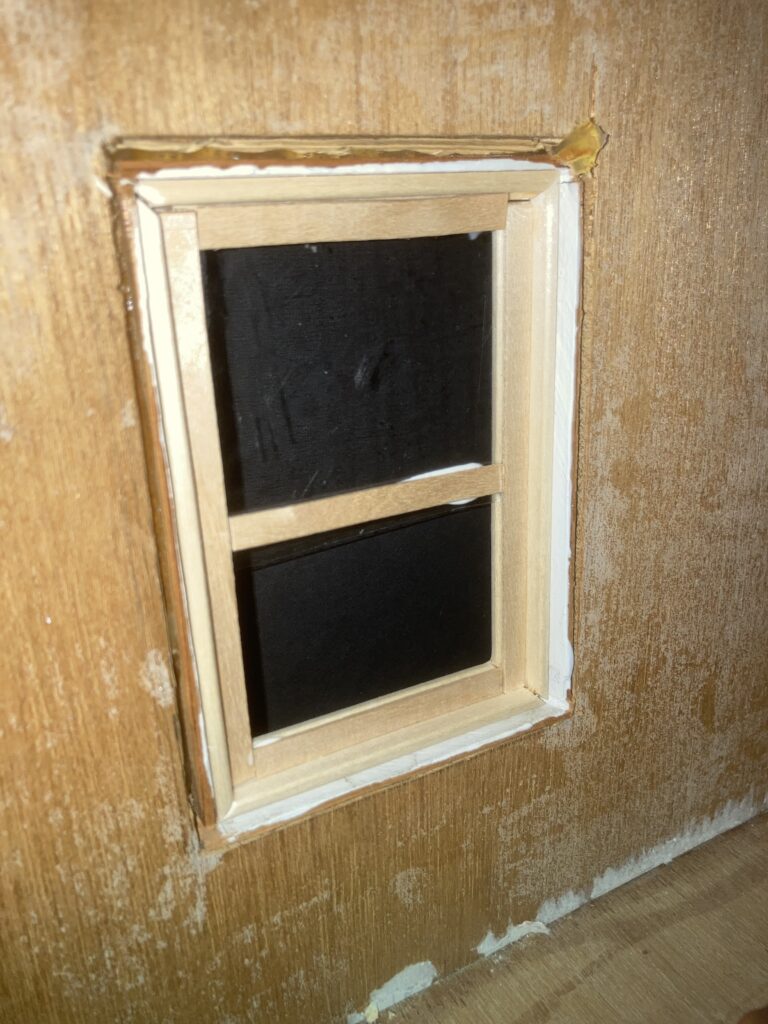
Next, I cut a piece of coffee stirrer to finish framing off the top half of the window.
Top half is framed off. Note that I have to trim the plastic at the bottom as it was made a bit too long. I will do that with an exacto once the glue is all dry.
Next, I cut a section of clear plastic to fit the bottom half of the window. I cut this so its frame will overlap the the bottom of the top frame. This will keep the bottom half of the window from falling out to the outside.
Lower window plastic is cut so it is tall enough that its frame will line up with the wood in the middle of the window.
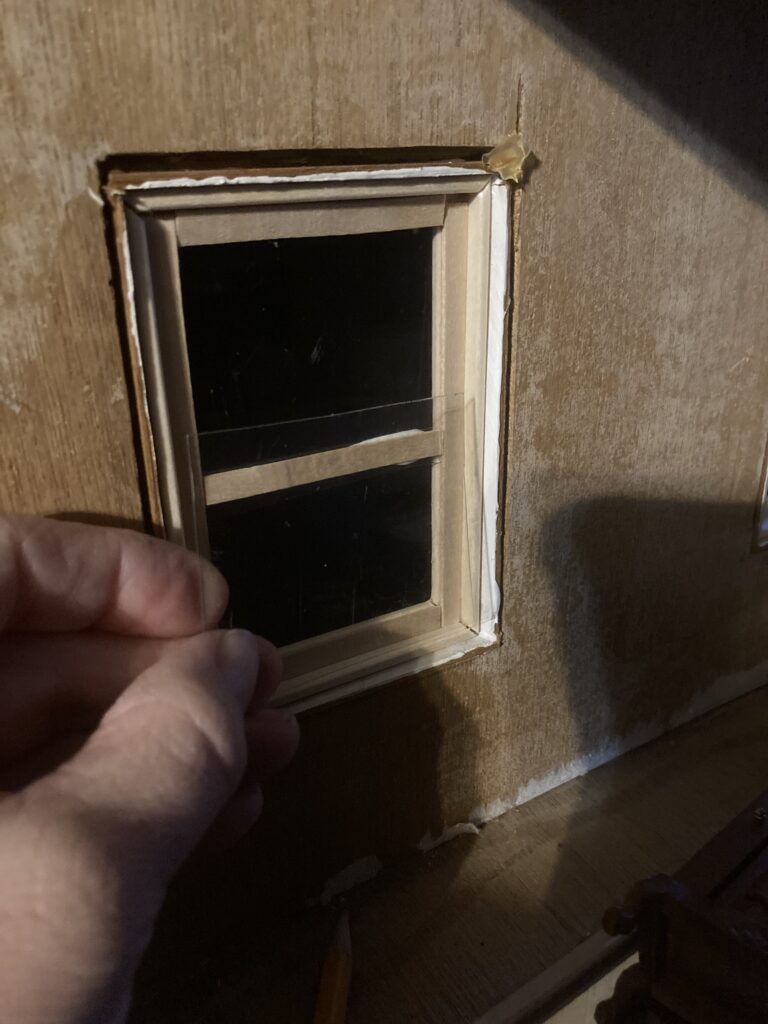
Next, I made a little frame around this piece of glass out of the coffee stirrers. I make sure that it will fit inside the window ok.
Frame built around the lower half of the window.
I set this lower window frame in place at the bottom of the window.
Lower half of window, the part that will move up and down, set in place.
Finally, I made a frame around the edges of the window frame. This wood will hold the lower part of the window in place so it won’t fall out of the window on the inside. Make sure you don’t get any glue on the moving, lower section of window, as it won’t be able to open if it is glued to the trim.
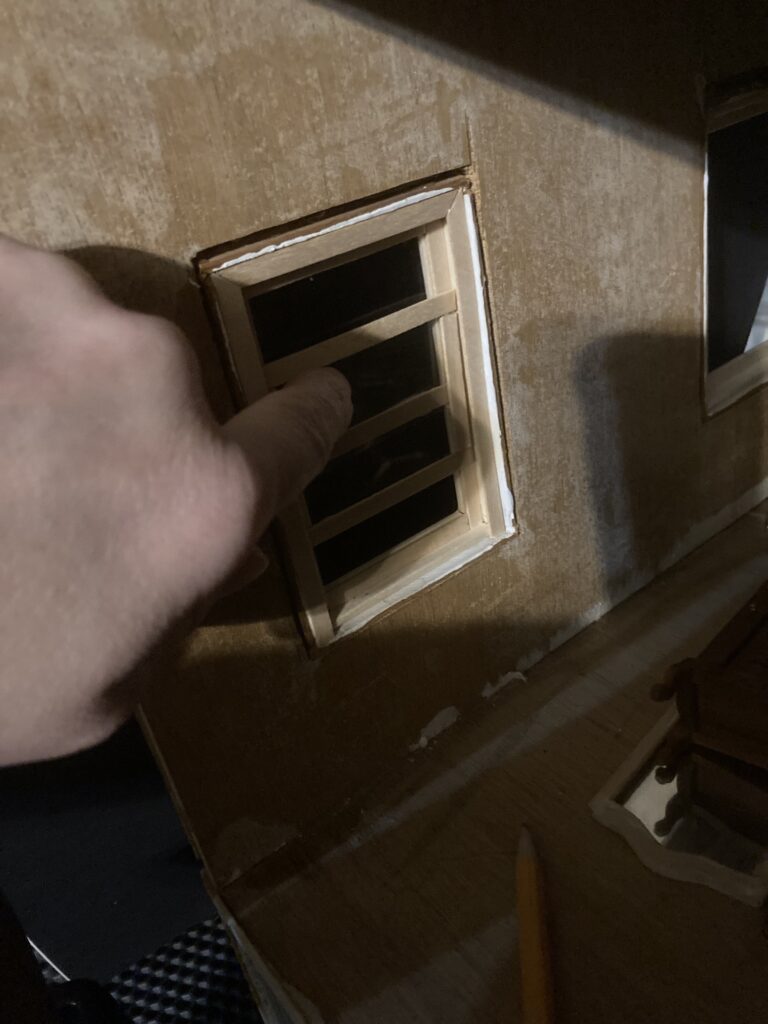
Trim glued in place to keep lower half of window from falling out.When it is done, you should be able to easily move the lower half of the window up and down. It won’t stay open on its own, but you could cut a small dowel to prop it open.
Once the inside of the house is complete, I will finish it off with a nice bit of decorative trim around the whole window. I plan on making a small framed piece of screen to use as a window prop to hold the window open in some rooms. You could also use a section of dowel if you want the widow to remain open. Mine will probably stay closed to keep curious paws out.
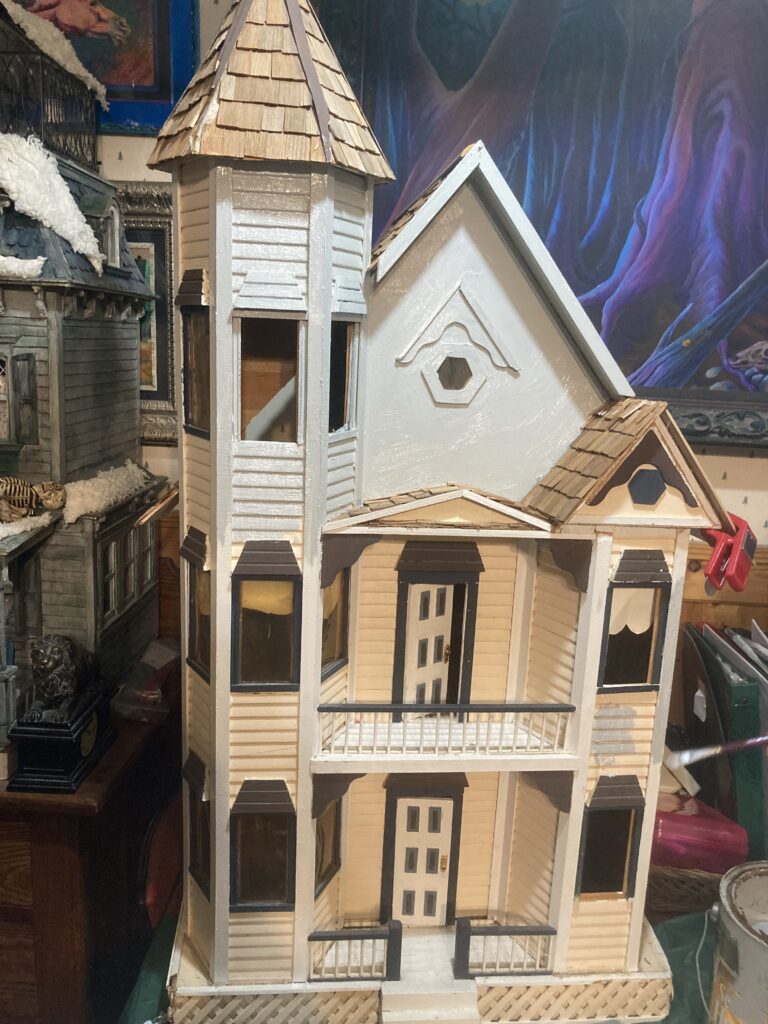
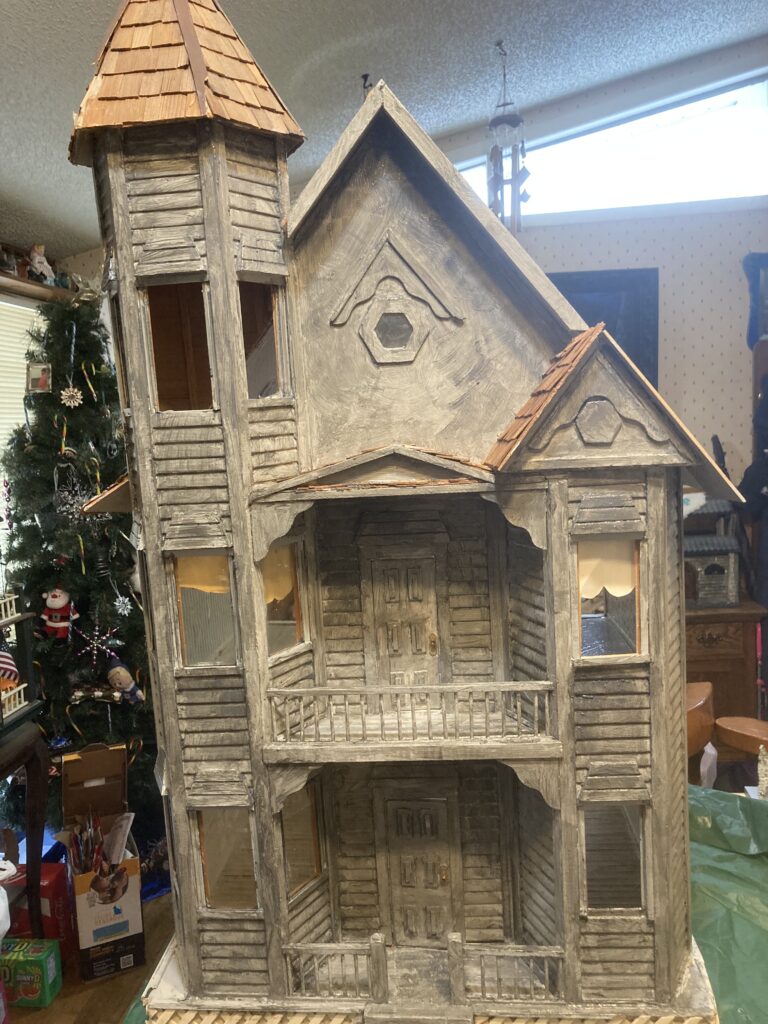
Recently, I was at the local Goodwill store with my 10 year old daughter, and we came upon a very dilapidated San Franciscan dollhouse for only $15. I wasn’t very interested in it, myself, because I already have a very nice Victorian mansion (the Beacon Hill, see other posts), and the San Franciscan didn’t really interest me much. My daughter, however, fell in love. She told me she would trade my Bayberry Cottage house back to me if I got her this one. I decided to go for it.
As we bought it. It needed a LOT of work. Part of the roof needed mending, parts of it weren’t attached correctly, interior walls are missing, etc. Luckily a lot of the parts were there and just needed to be reattached.
My daughter is a big fan of my haunted Beacon Hill dollhouse, and plays in it often. She has been bugging me to repaint her San Franciscan to look haunted like my Beacon Hill. I LOVED painting my Beacon Hill to look abandoned, and relished the opportunity to try it again on a different house.
After a lot of mending was done, i started putting on the first coat of paint. This is the beginning of the base coat of light gray.
First thing, I had to make a few structural repairs to the outside. I was lucky in that a lot of the missing pieces of this house were in a ziplock bag that came with it. I also had to take off and reattach a few pieces that weren’t put on correctly by a previous owner. After these initial repairs were done, we started painting.
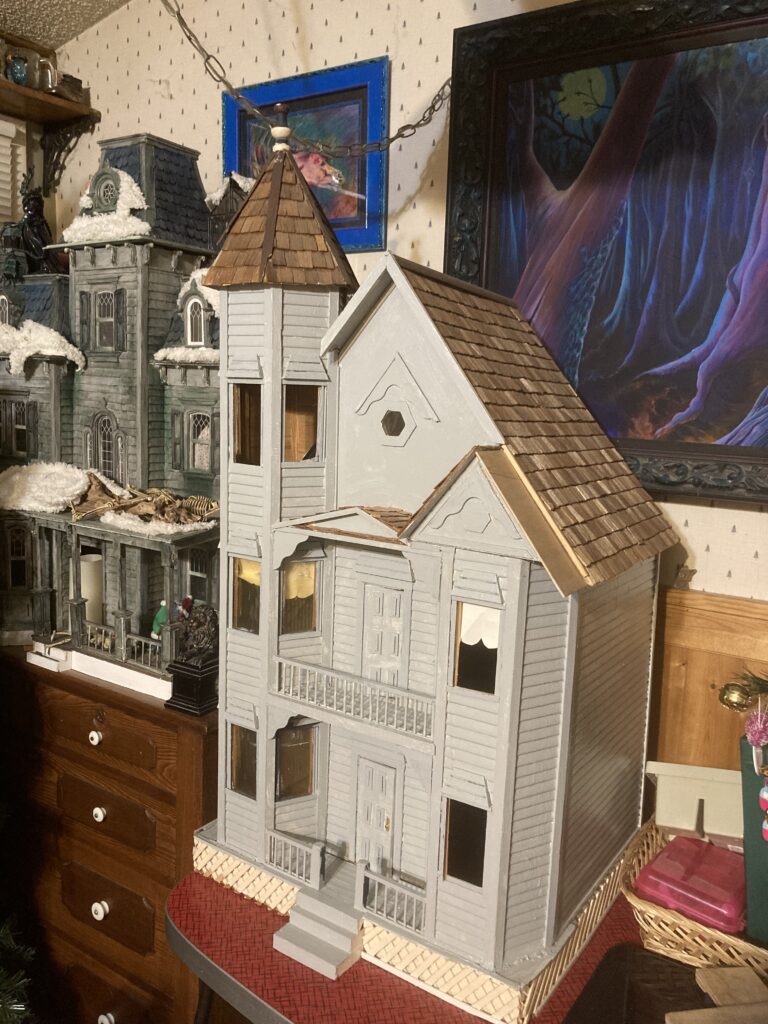
I started with a base coat of light gray exterior paint that I had left over from previous projects. We worked it into all of the nooks and crannies of the siding, on all of the railings, and pretty much anywhere that we wanted to look aged.
After the base coat. In the background you can see the Beacon Hill decorated for Christmas. While my paints were out I was finally able to get that bright white trim at the bottom of it darkened to match the rest of the house lol!
After the gray coat is on, I let the paint dry thoroughly before moving on to the next step.
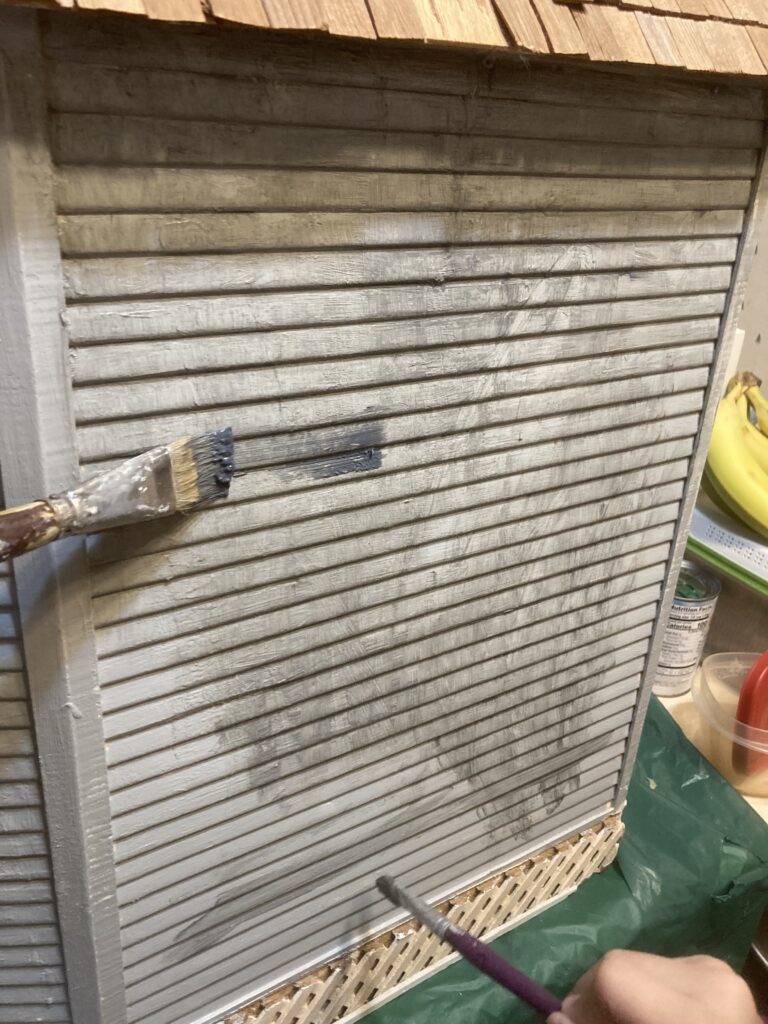
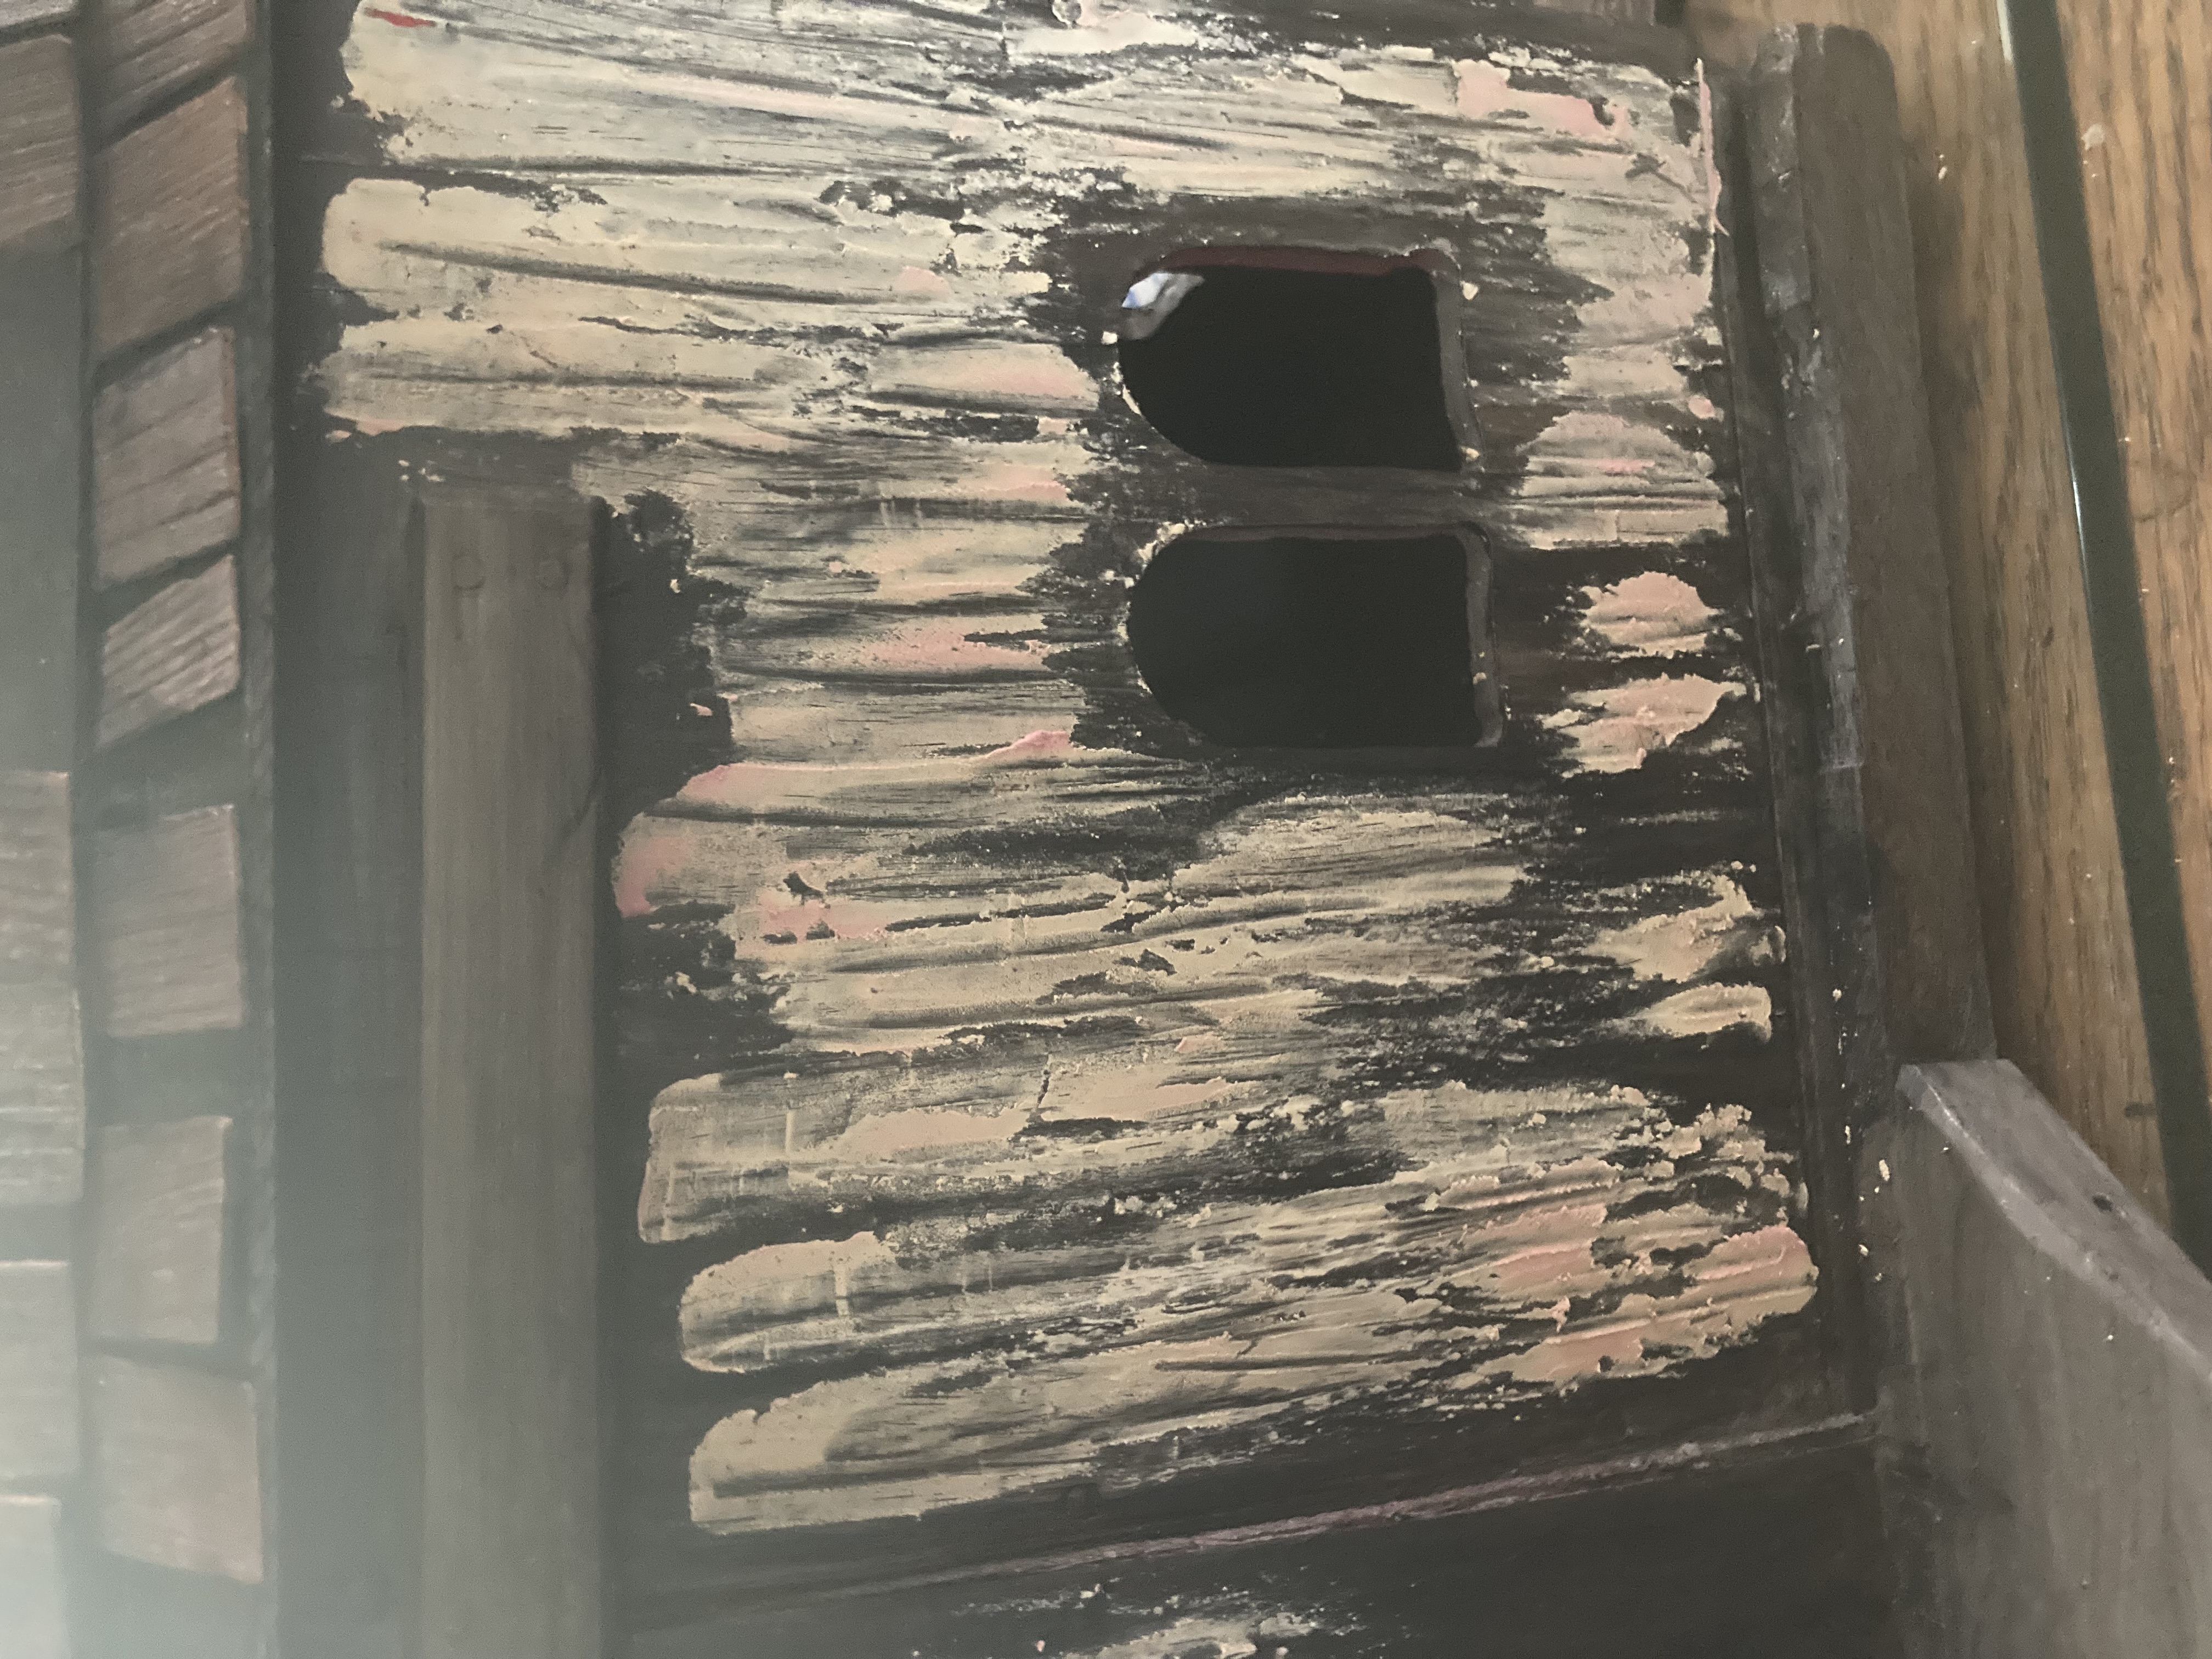
Applying the darker gray ‘dirt.’
For the next step, I found it easier to use two brushes. I used one brush to apply a small amount of a dark gray paint. I wet the second brush with water (but not sopping wet), and then brushed it over the wet dark paint. My wet brush had stiff, coarse bristles that I used to scrub the ‘dirt’ into the crevices of the siding. I scrubbed the pigment up and down, back and forth, and all around until I was satisfied with its grungy appearance.
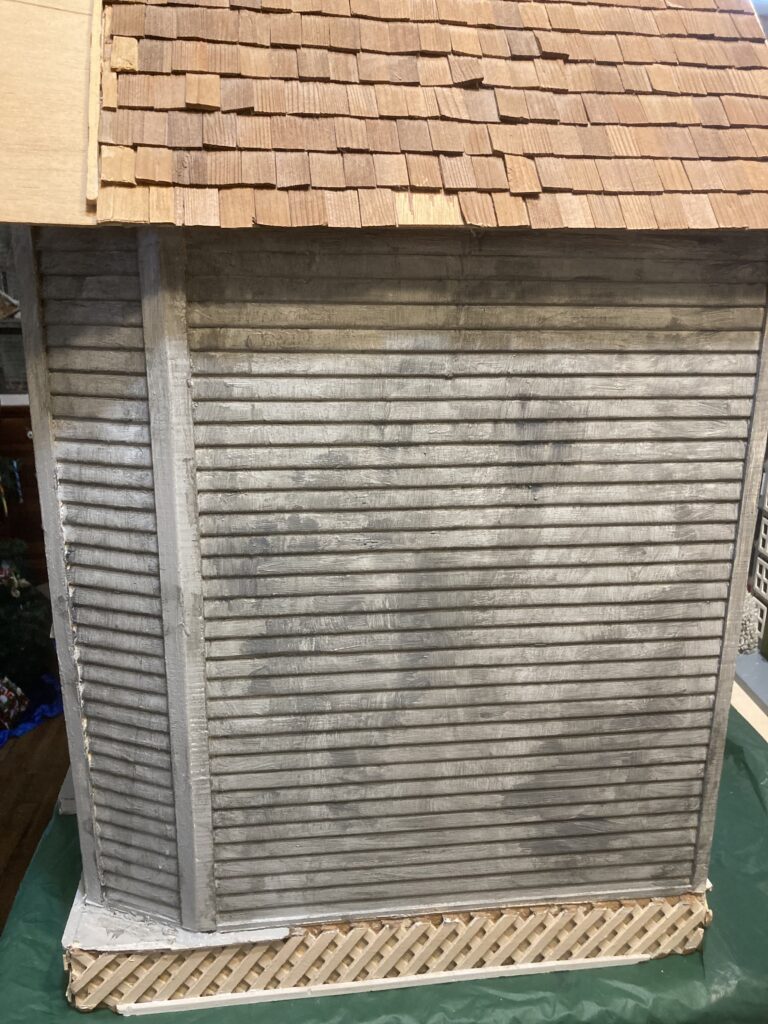
More grunge. It’s a little thick in this photo–I think I softened it up more later.I continued the dark gray ‘grunge’ over the whole house until I was satisfied.
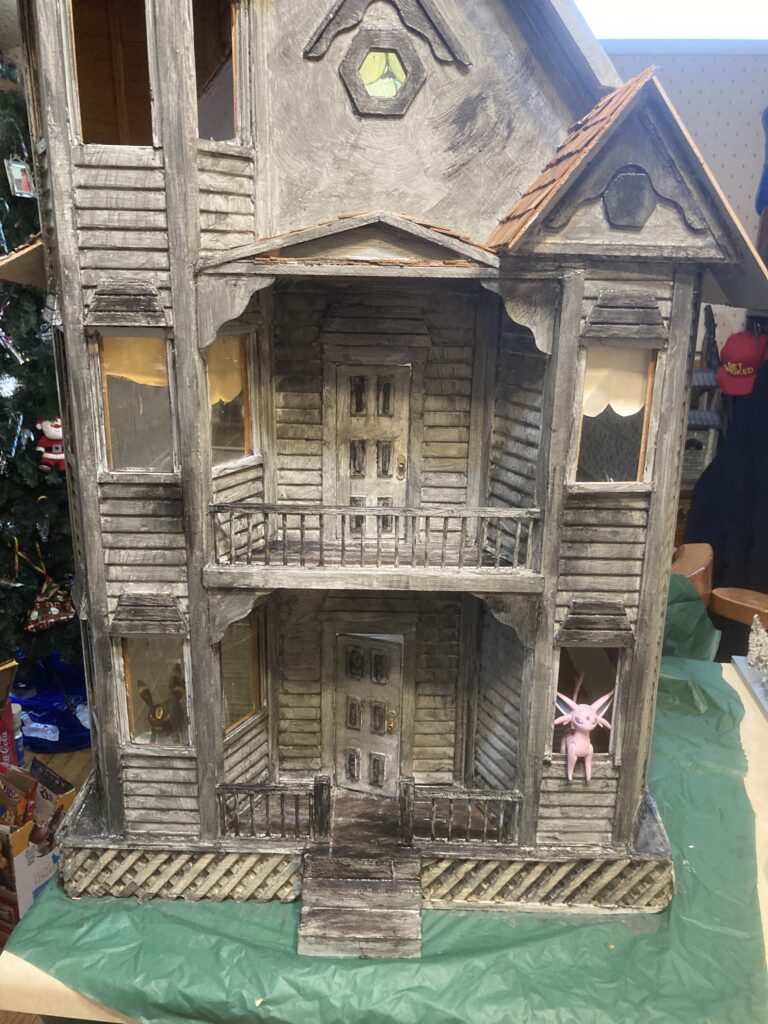
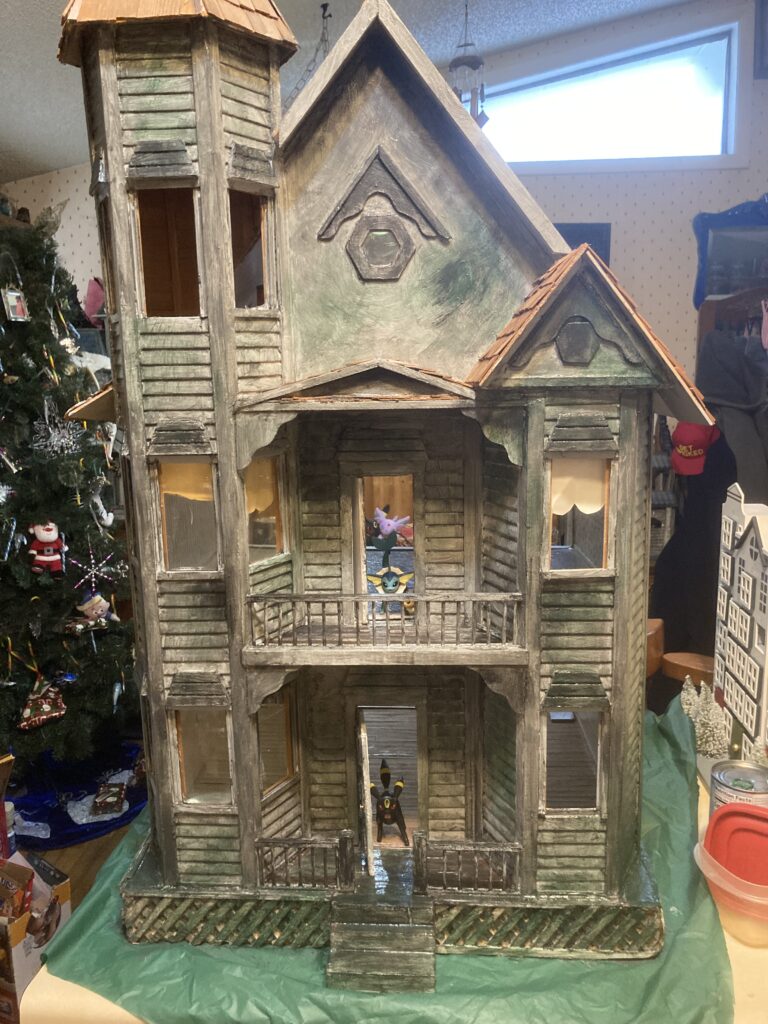
After the dark gray looked satisfactory, I moved on to the next color. I wanted more contrast, so I added JUST A BIT of black. Black is a very overpowering color and I did not want to overdo it. I applied it in just a few areas, particularly the porch rails, the trim above the windows, and a little on the porch floor where I felt there might be more dirt and rot accumulated.
With a small amount of black highlights. The black is also scrubbed in (using the same method as the dark gray) to keep it more weathered looking. (My daughter has her Pokemons in it already lol).
After black, I wanted a little green as wood can get a thin film of mold on it over time. I kept the green paint watered down a LOT because it didn’t want it very strong. Just a very thin hint of it is enough.
With some green added for mold. It is very watered down. I made it stronger in some areas for interest. Front view after the green wash was applied.
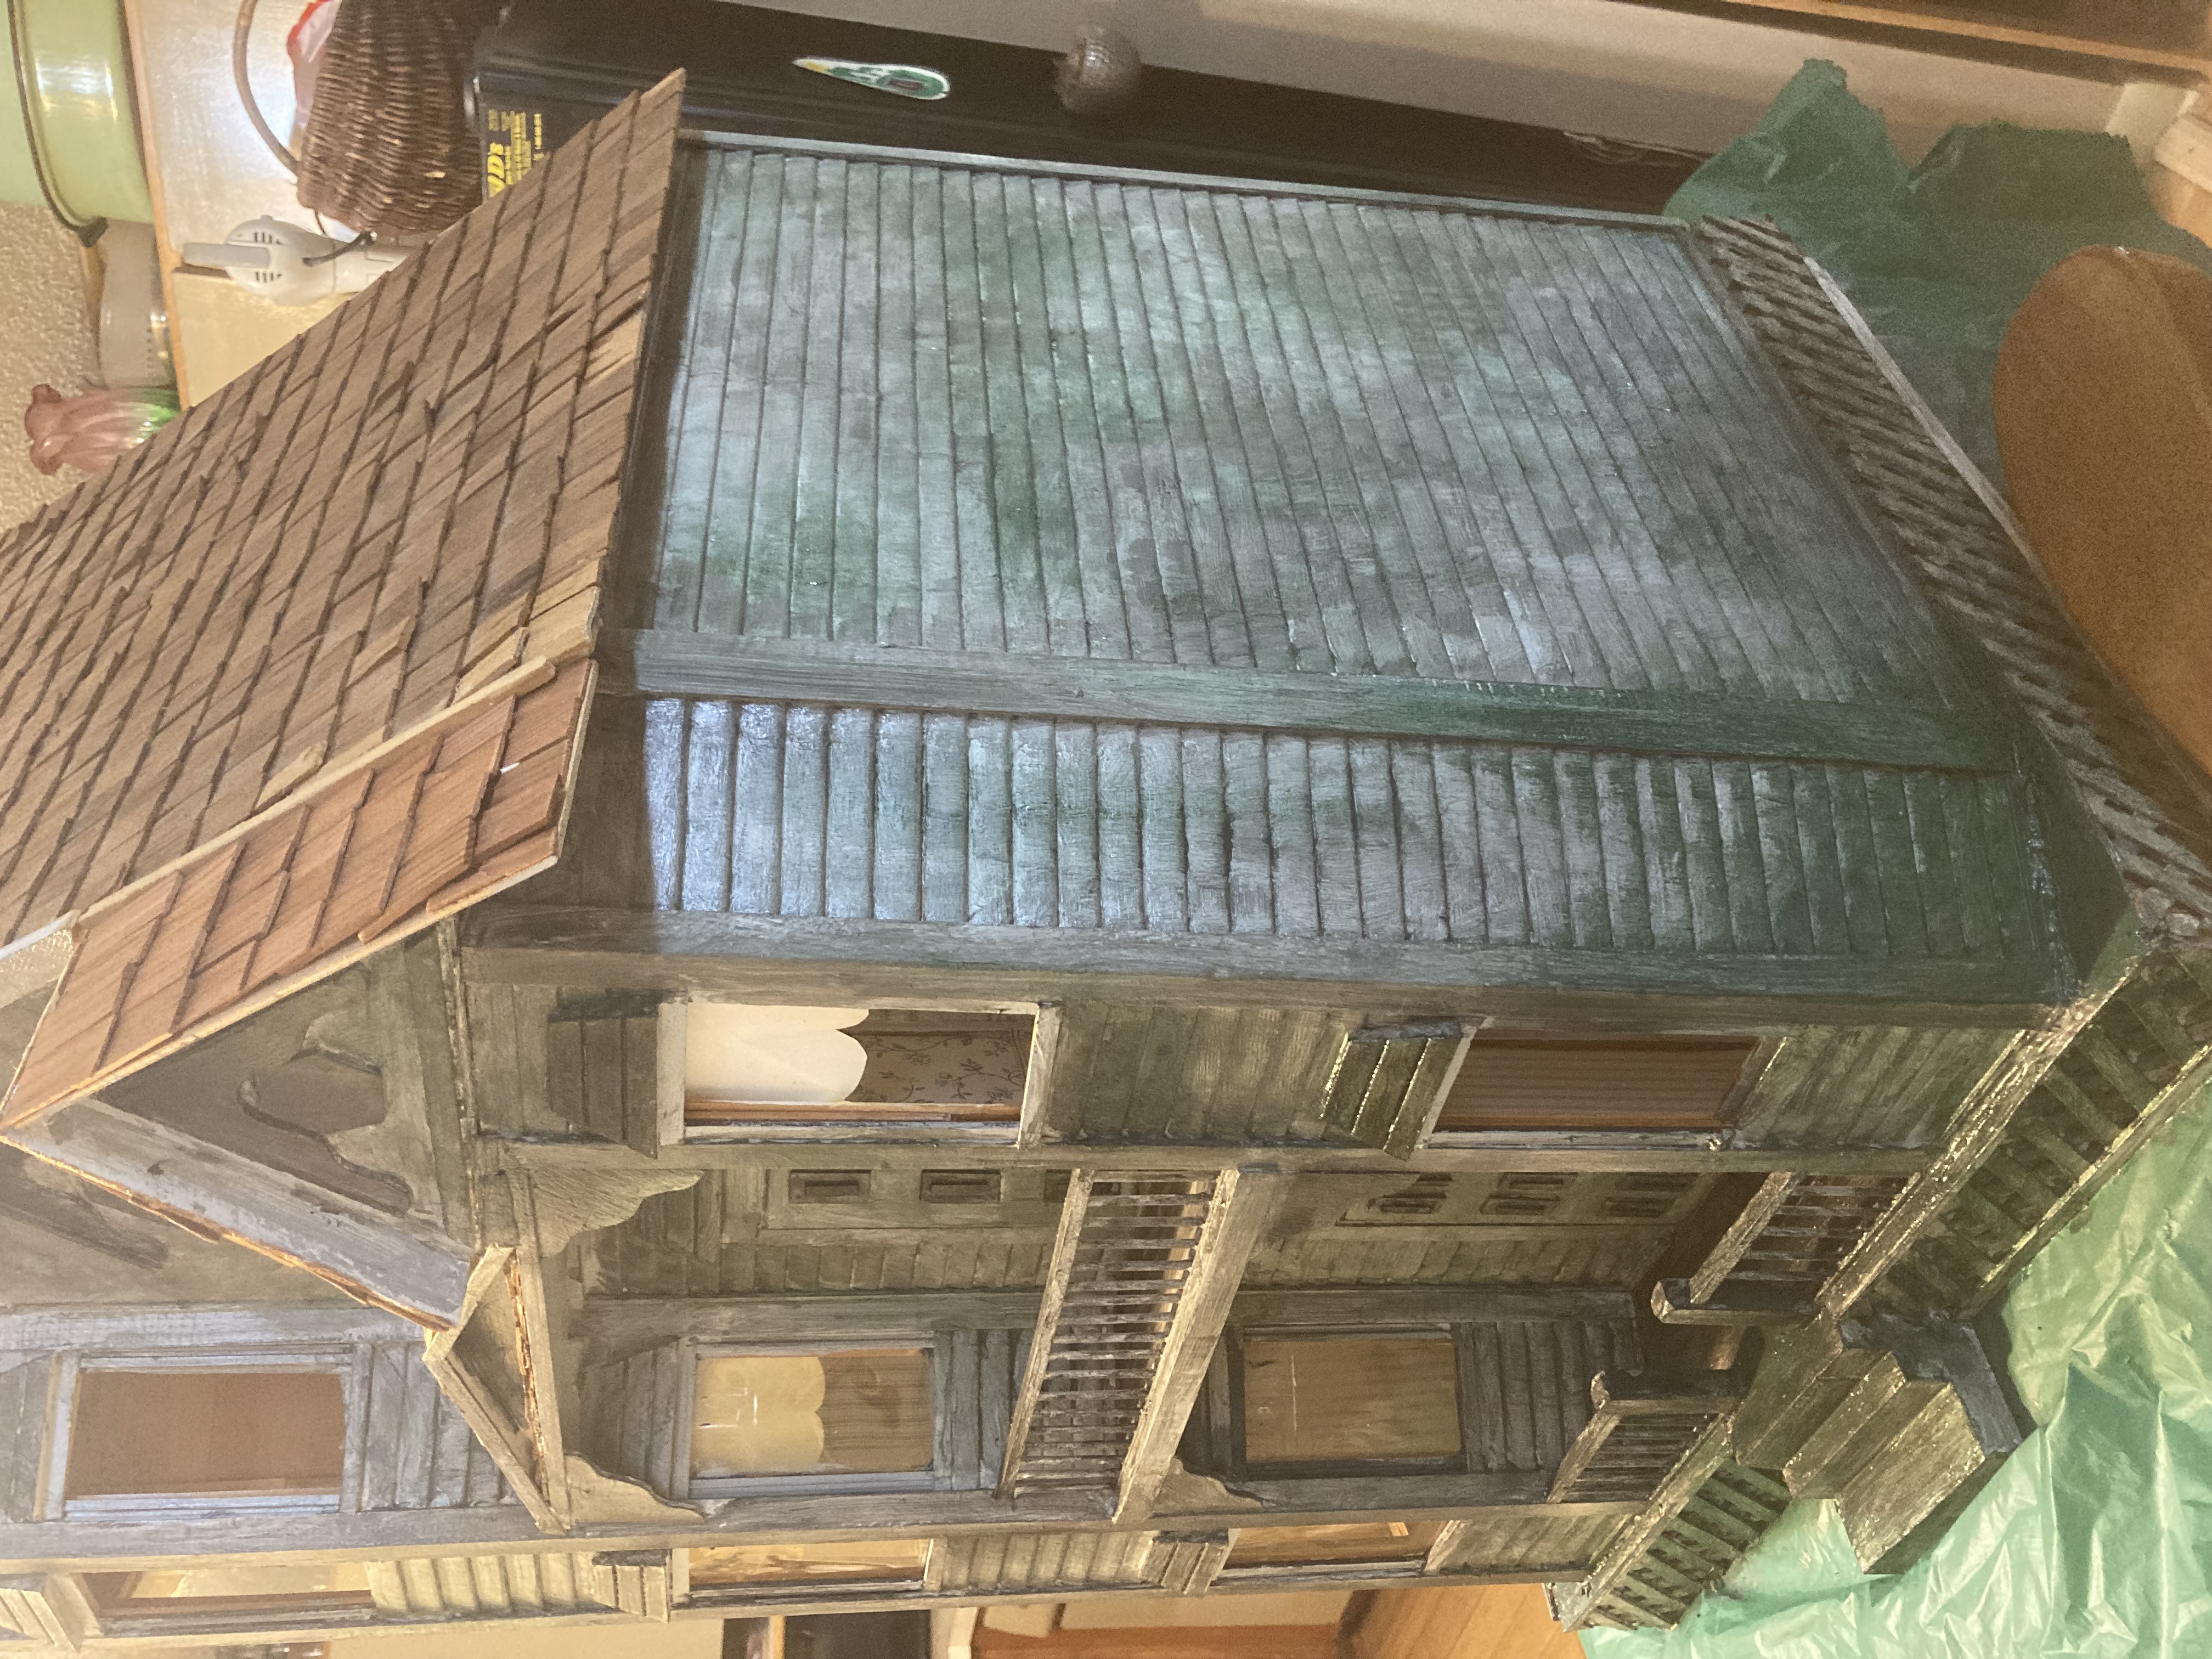
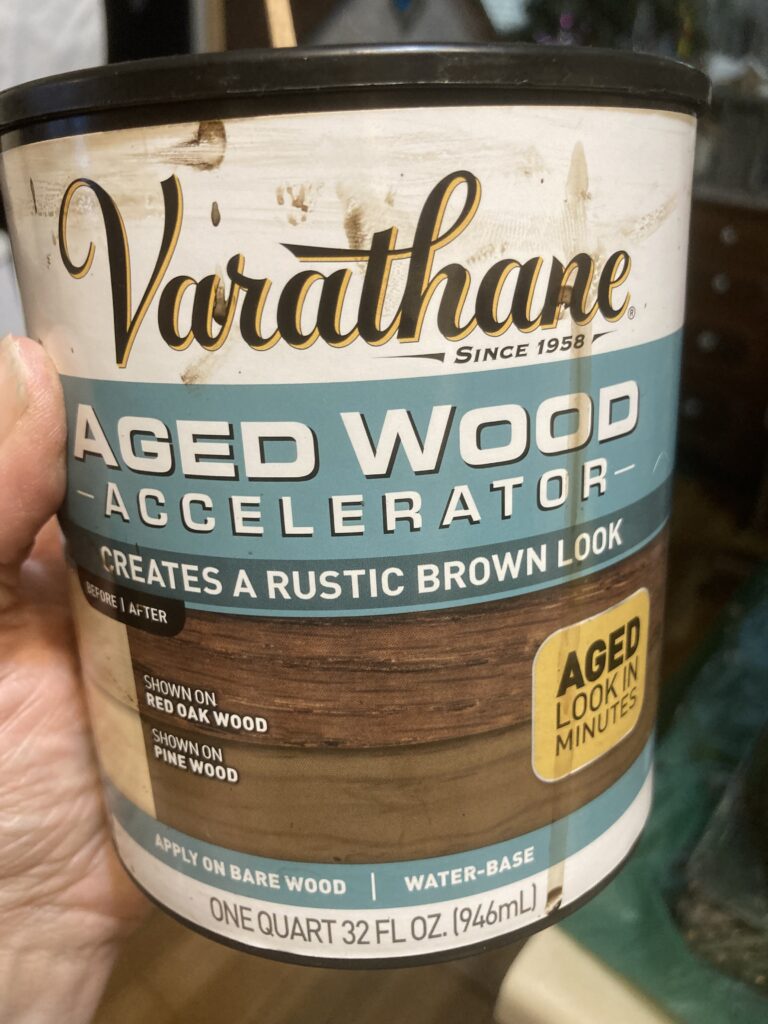
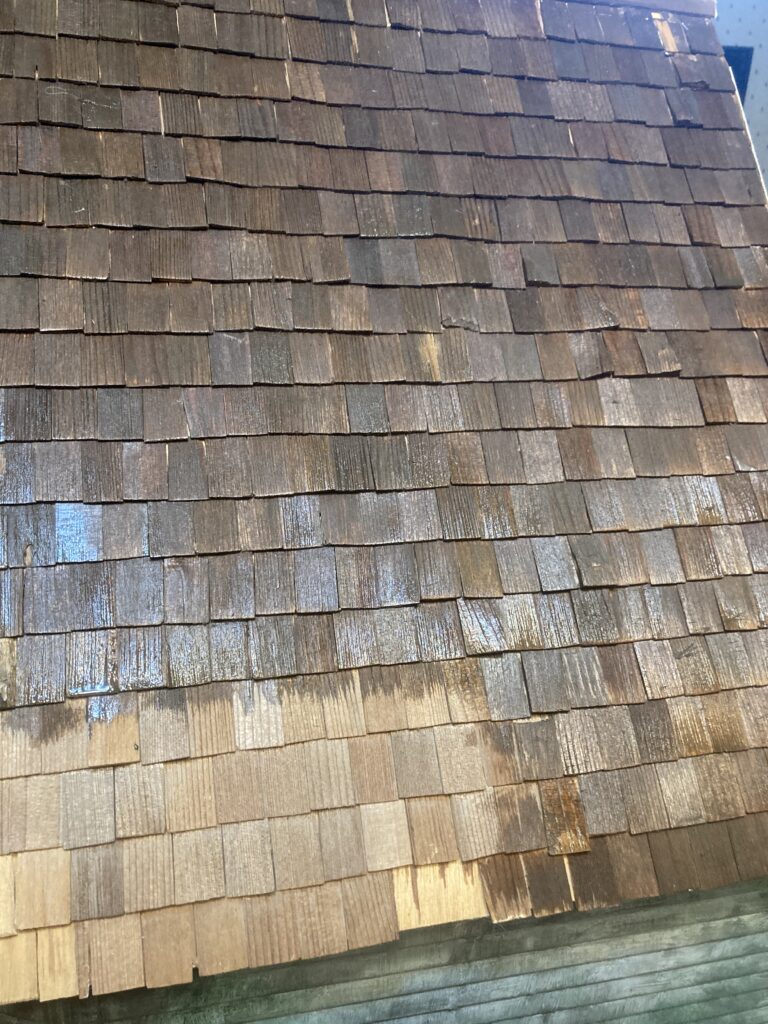
Feeling fairly satisfied with the paint, I moved on to the shingles. As they were, they looked way too new for an abandoned building, so I needed to age them somehow. Luckily, I have this handy-dandy Aged Wood Accelerator from Varathane. This was purchased in the wood stain department at Menards. So far this product has come in handy for several of my dollhouse projects.
Handy-dandy!Here is a color comparison of the original shingles (bottom left) opposed to having them stained. A word of note- any areas of glue will not stain. If that bothers you, you could go back over those sections with a bit of matching paint. I wasn’t bothered so I just left them, as they weren’t very noticeable to me.Final product.
We were both pretty pleased with how this project turned out. Eventually we might move on to the interior, but for now it is a blank slate for my child to decorate as she pleases. Let me know if you have any questions or comments!
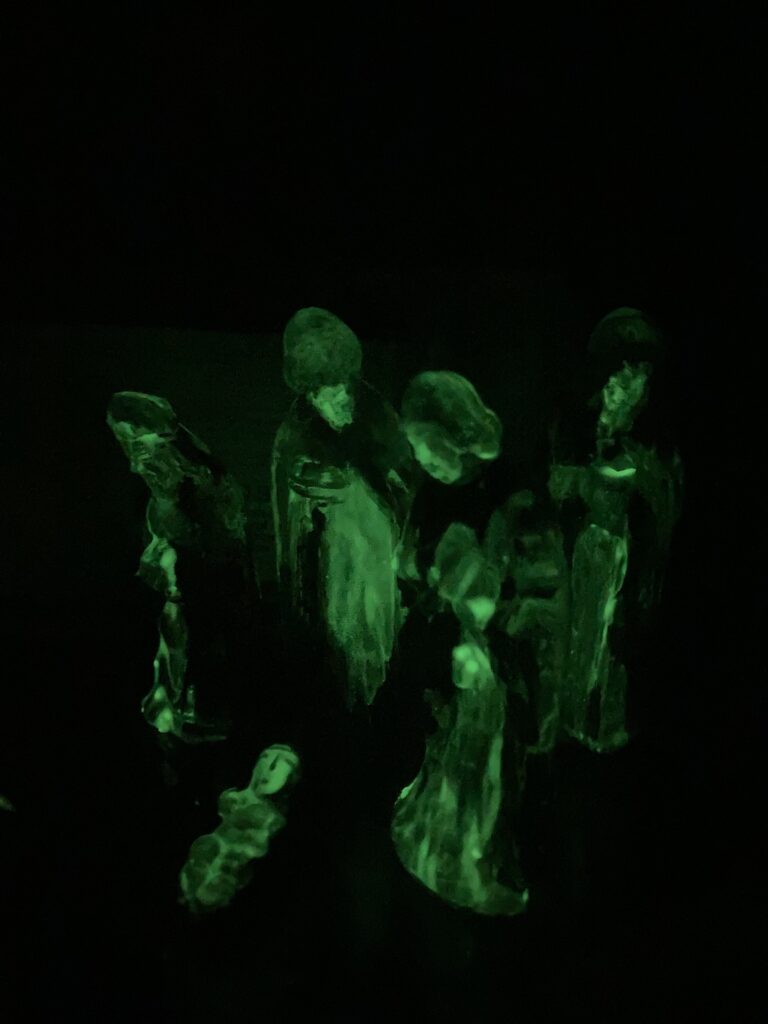
Finished ghosts with glow-in-the-dark paint on them.
I have been wanting to make some ghosts for a while to inhabit my antique church. My church is a little on the rough side, so making it a bit haunted seems reasonable (without, of course, altering or damaging my church in any way). Anyway, this is a solution I really like.
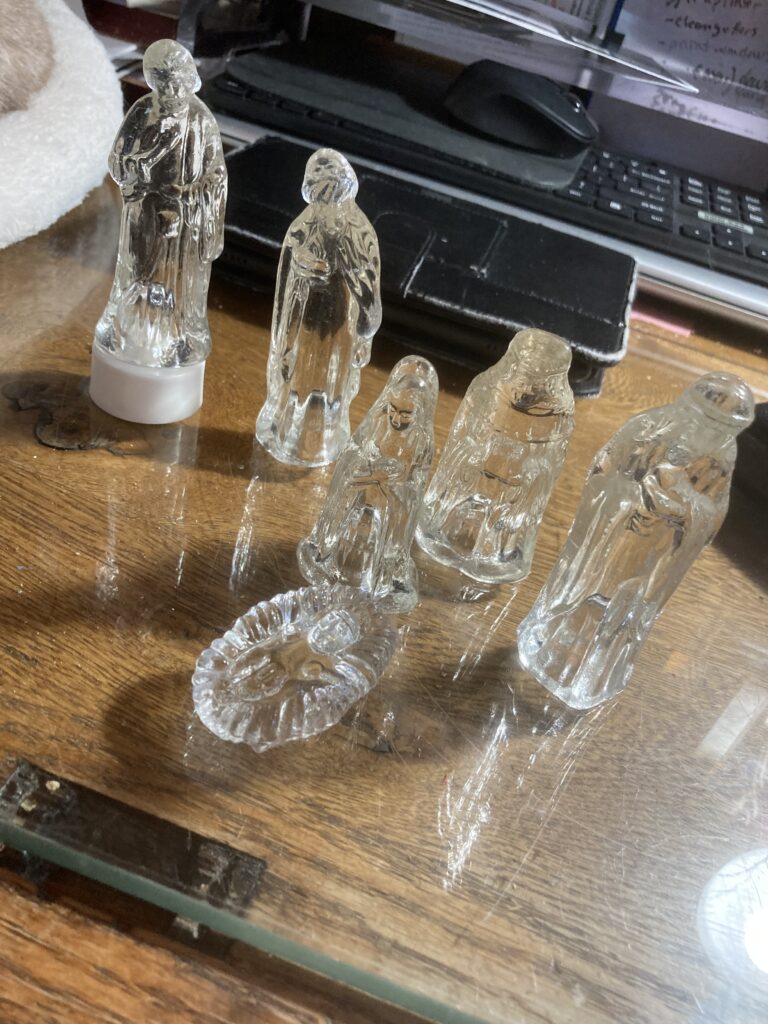
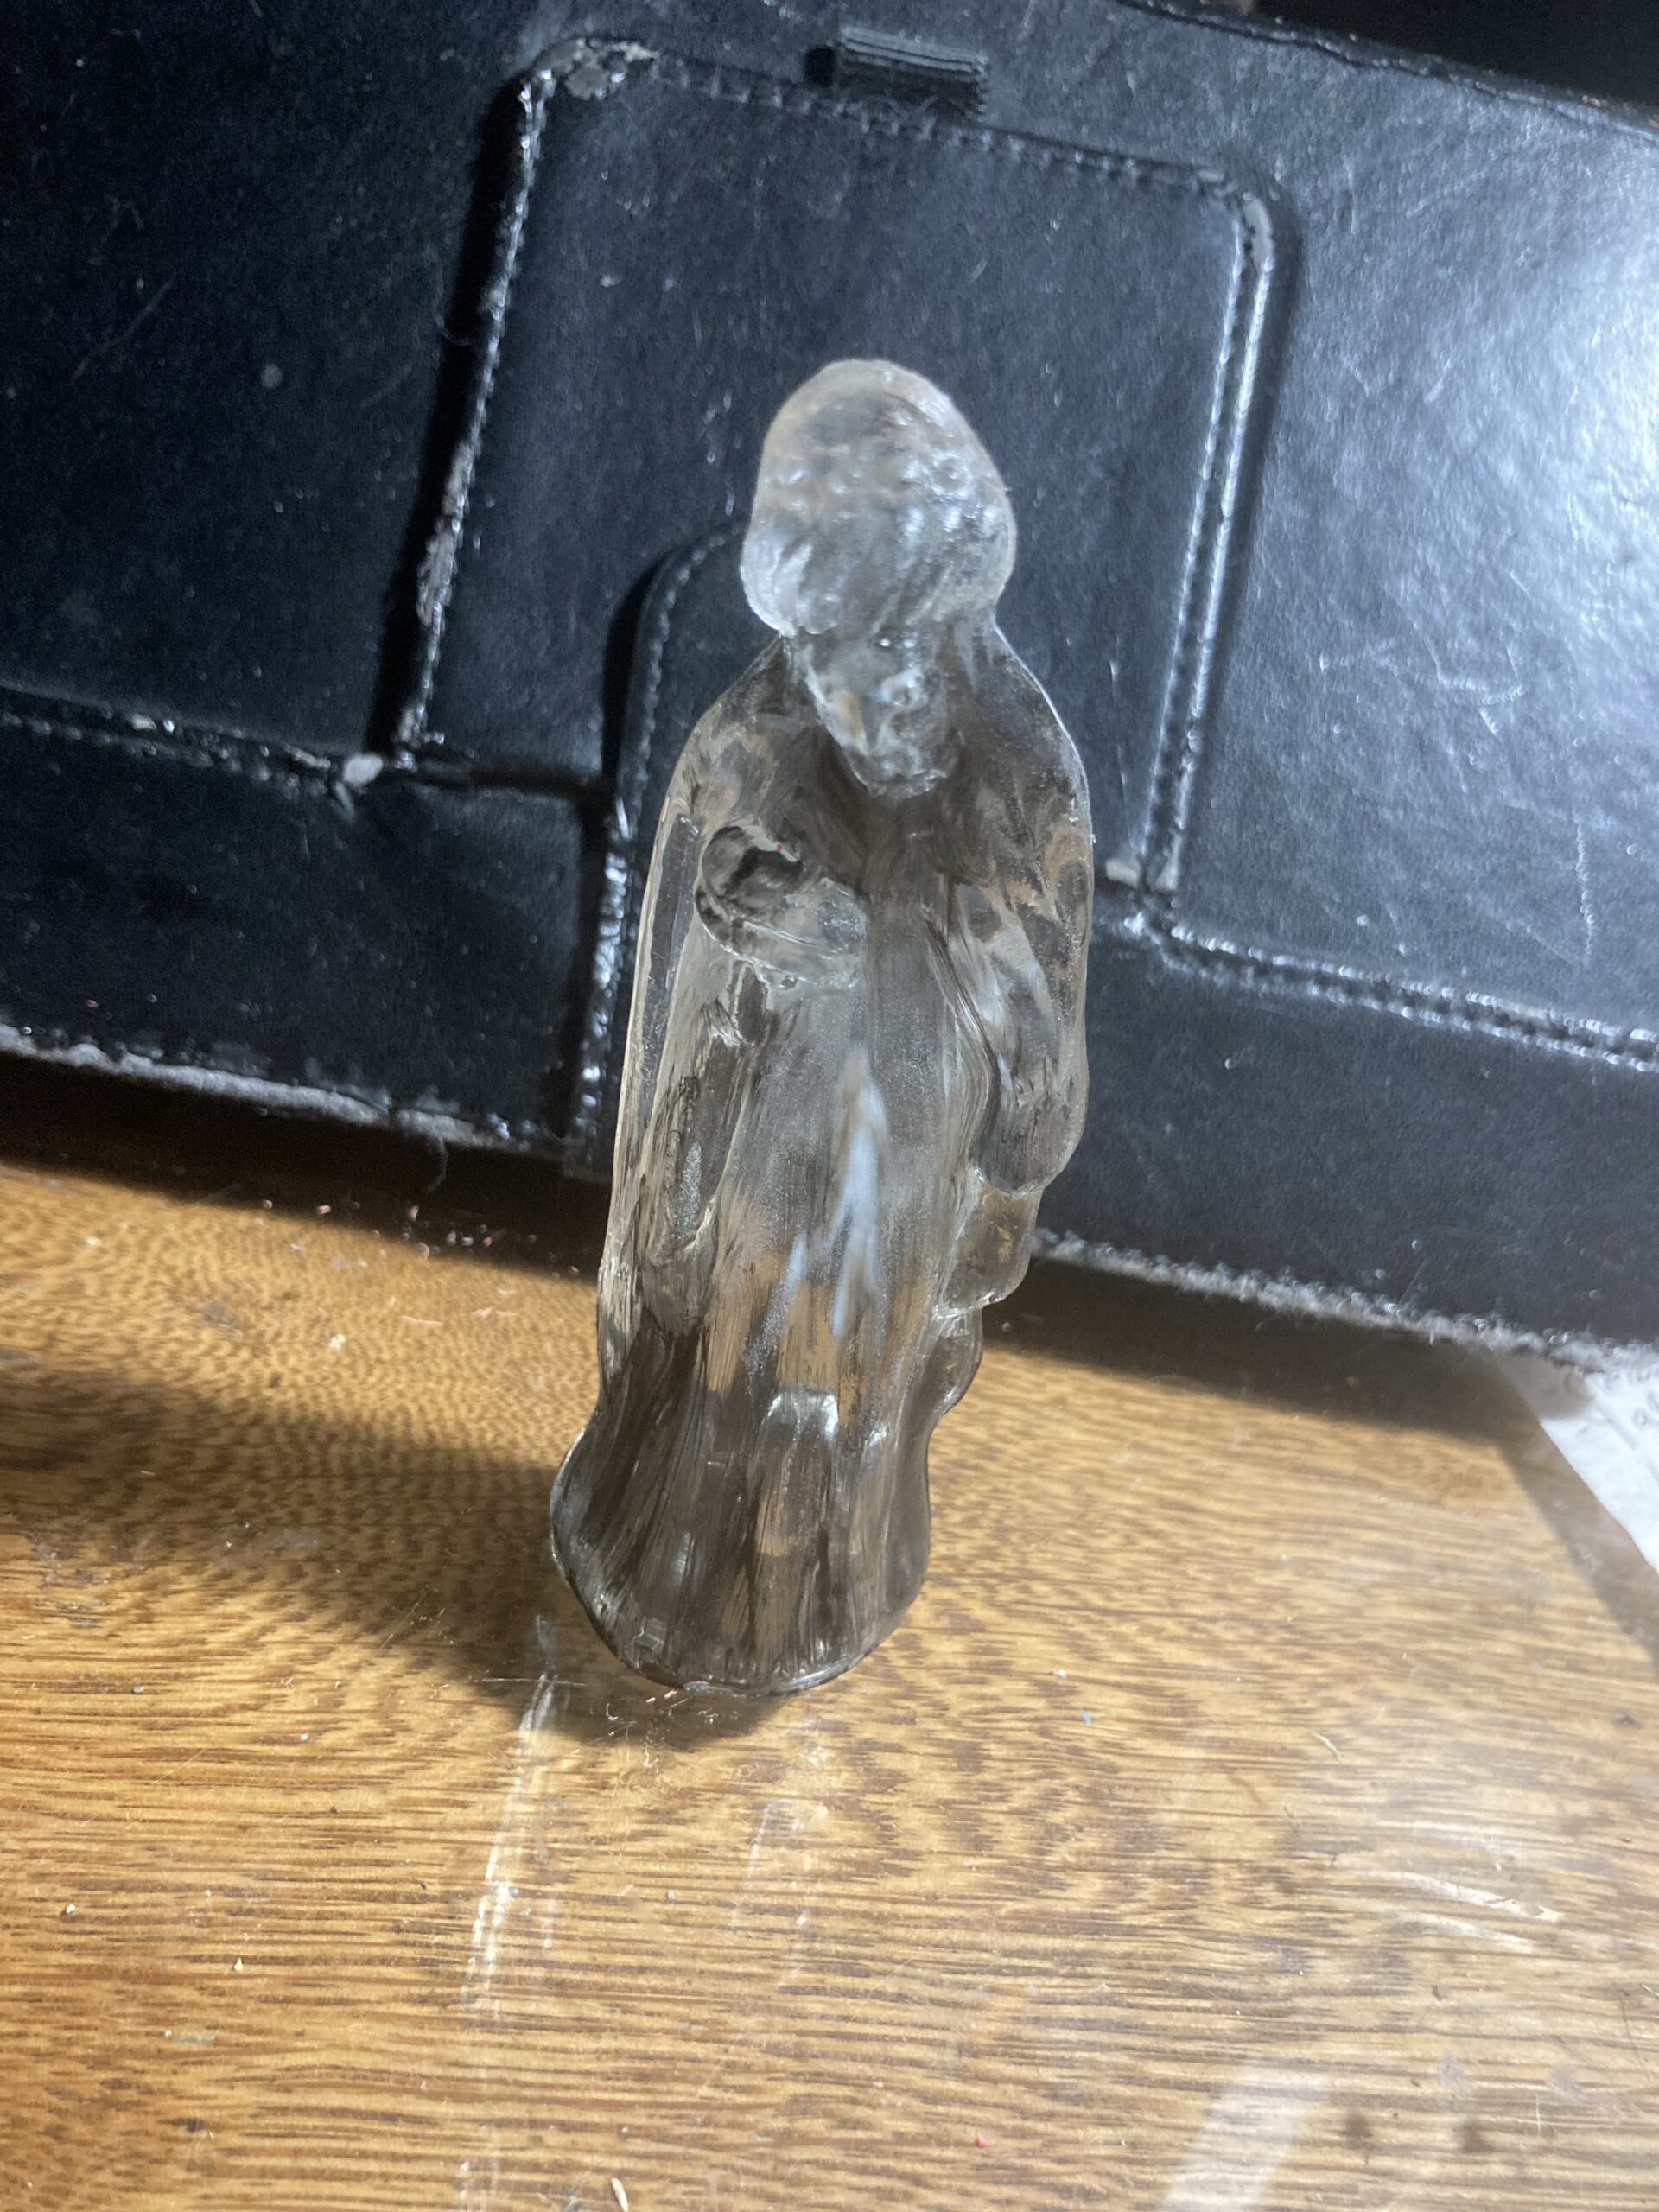
I started looking for clear glass figurines, and finally settled on a nativity set.
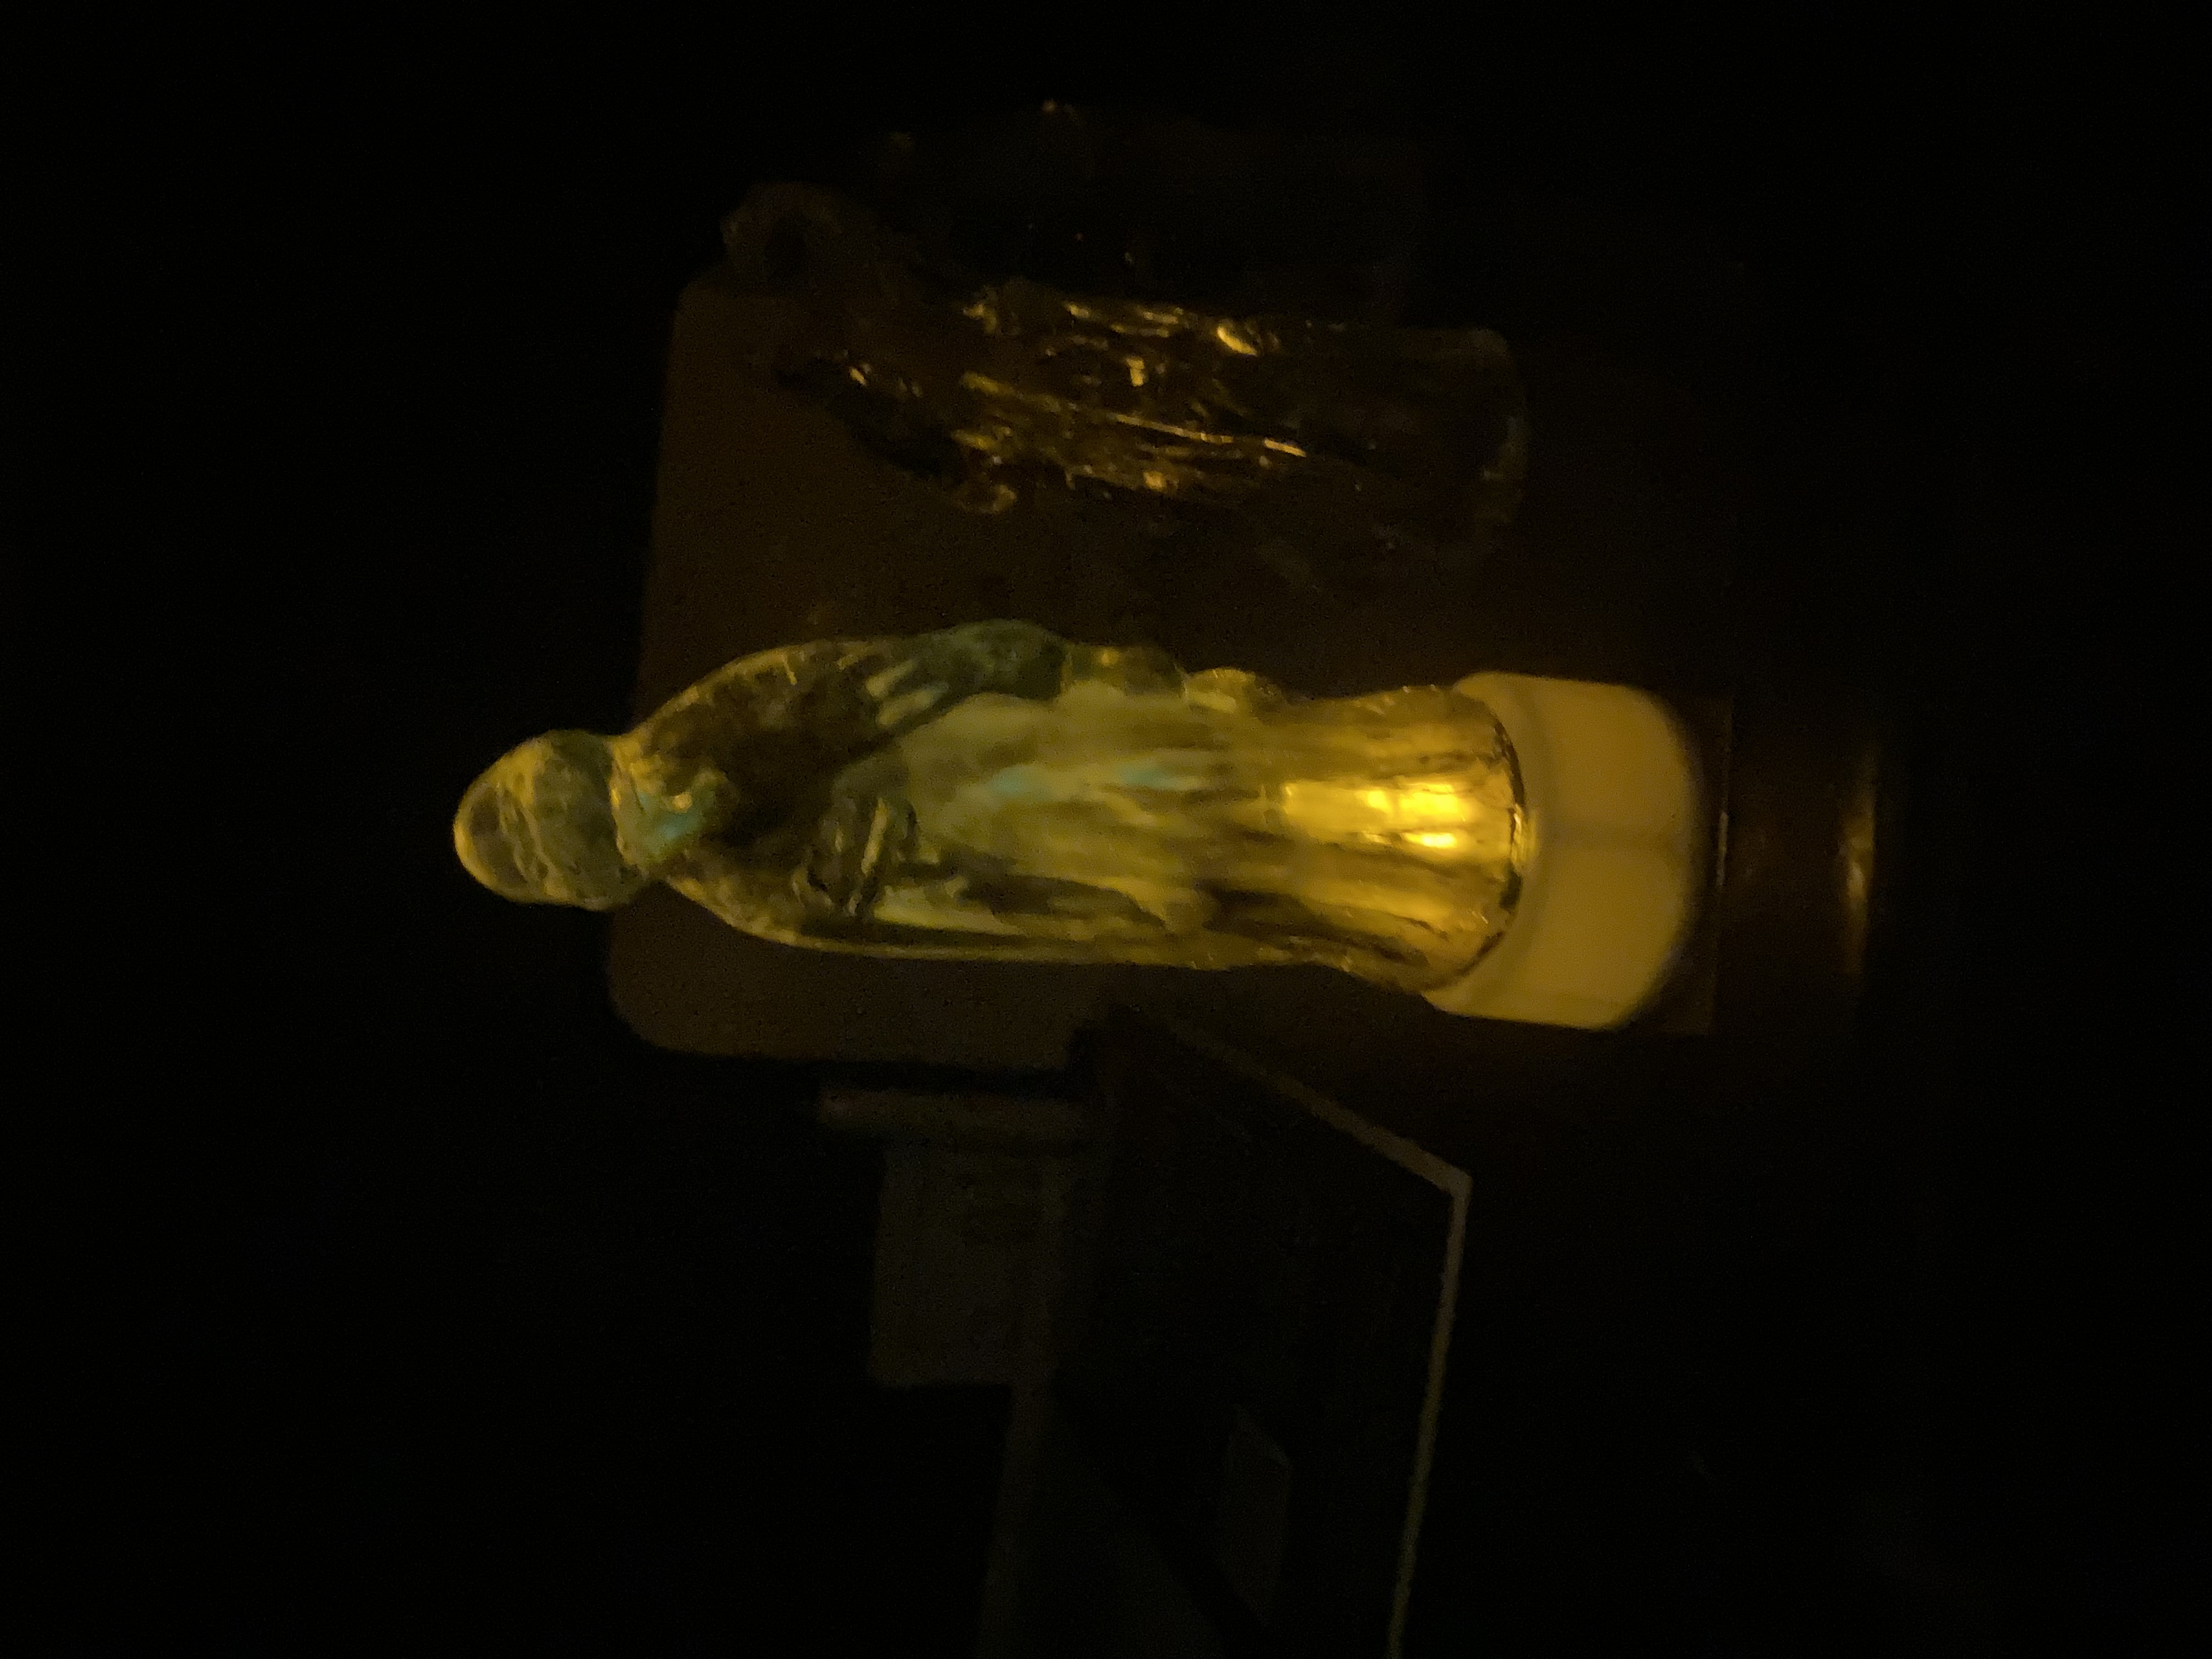
These figures worked out perfect! The base is a bit hollow, so a battery operated votive candle can be used, if desired, to light it up (the figure in the upper left corner is standing on a votive candle.)
These figures will fit well in my church, as they are about the right scale for the building, and also they look holy. I decided that, for my purposes, I wanted them to glow by themselves instead of having them elevated by sitting on candles. The candles would work fine if I had them in different settings, but I like using glow-in-the-dark paint.
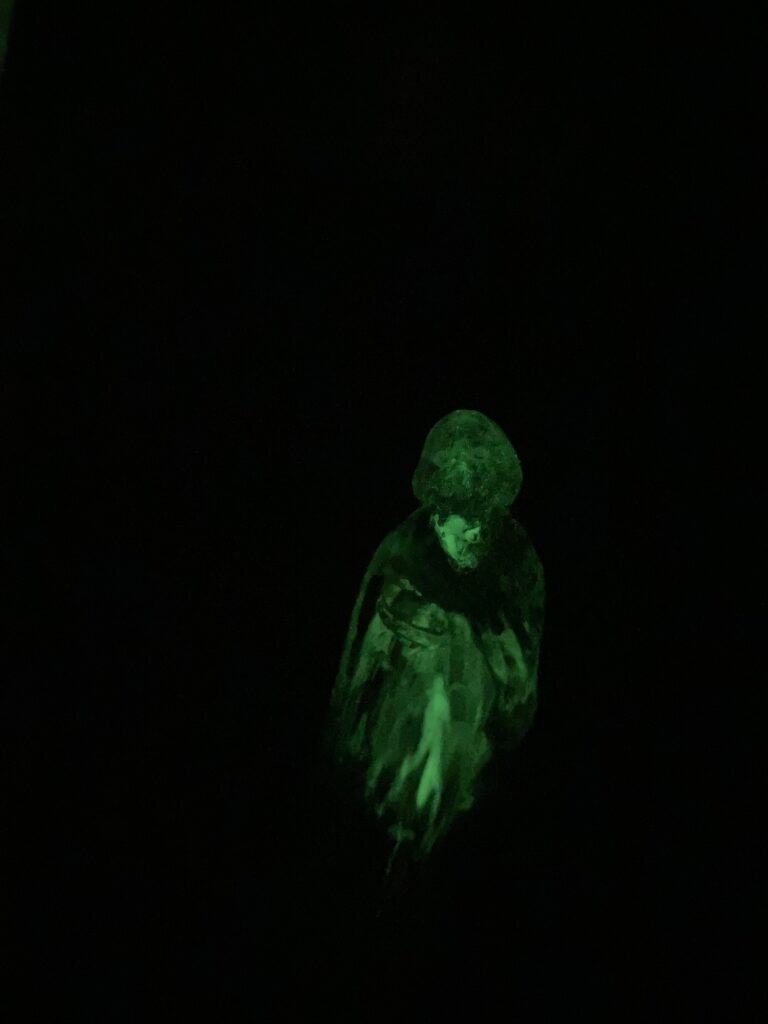
The glow-in-the-dark paint I use is just a run of the mill crafting paint that can be found in the paint aisle of many craft supply stores. There are different brands and probably any brand will work. I bought mine from Walmart. I also used a darker paint for shadows; I believe I used payne’s gray acrylic.
I watered down the payne’s gray and put layers of paint in areas I want to be shaded, just to add more definition to the form, because otherwise the clear glass makes it hard to make out details. After the shadows, I put on thicker layers of the glowing paint in the raised areas like the head and hands, shoulders, sleeves, etc.
After painting the shadows and glowing highlights.
In order to make the figure glow, you need to hold it under a light, shine a flashlight on it, or just keep it in a well-lit place for a while to ‘charge’ it. The glow won’t last for very long before it needs recharging with a light source, but it is still fun.
Charged and glowing.The same figure standing on the battery operated candle. It still looks spooky.As viewed through the broken window of my antique church. This church is featured in another of my posts if you would like to view it in more detail.
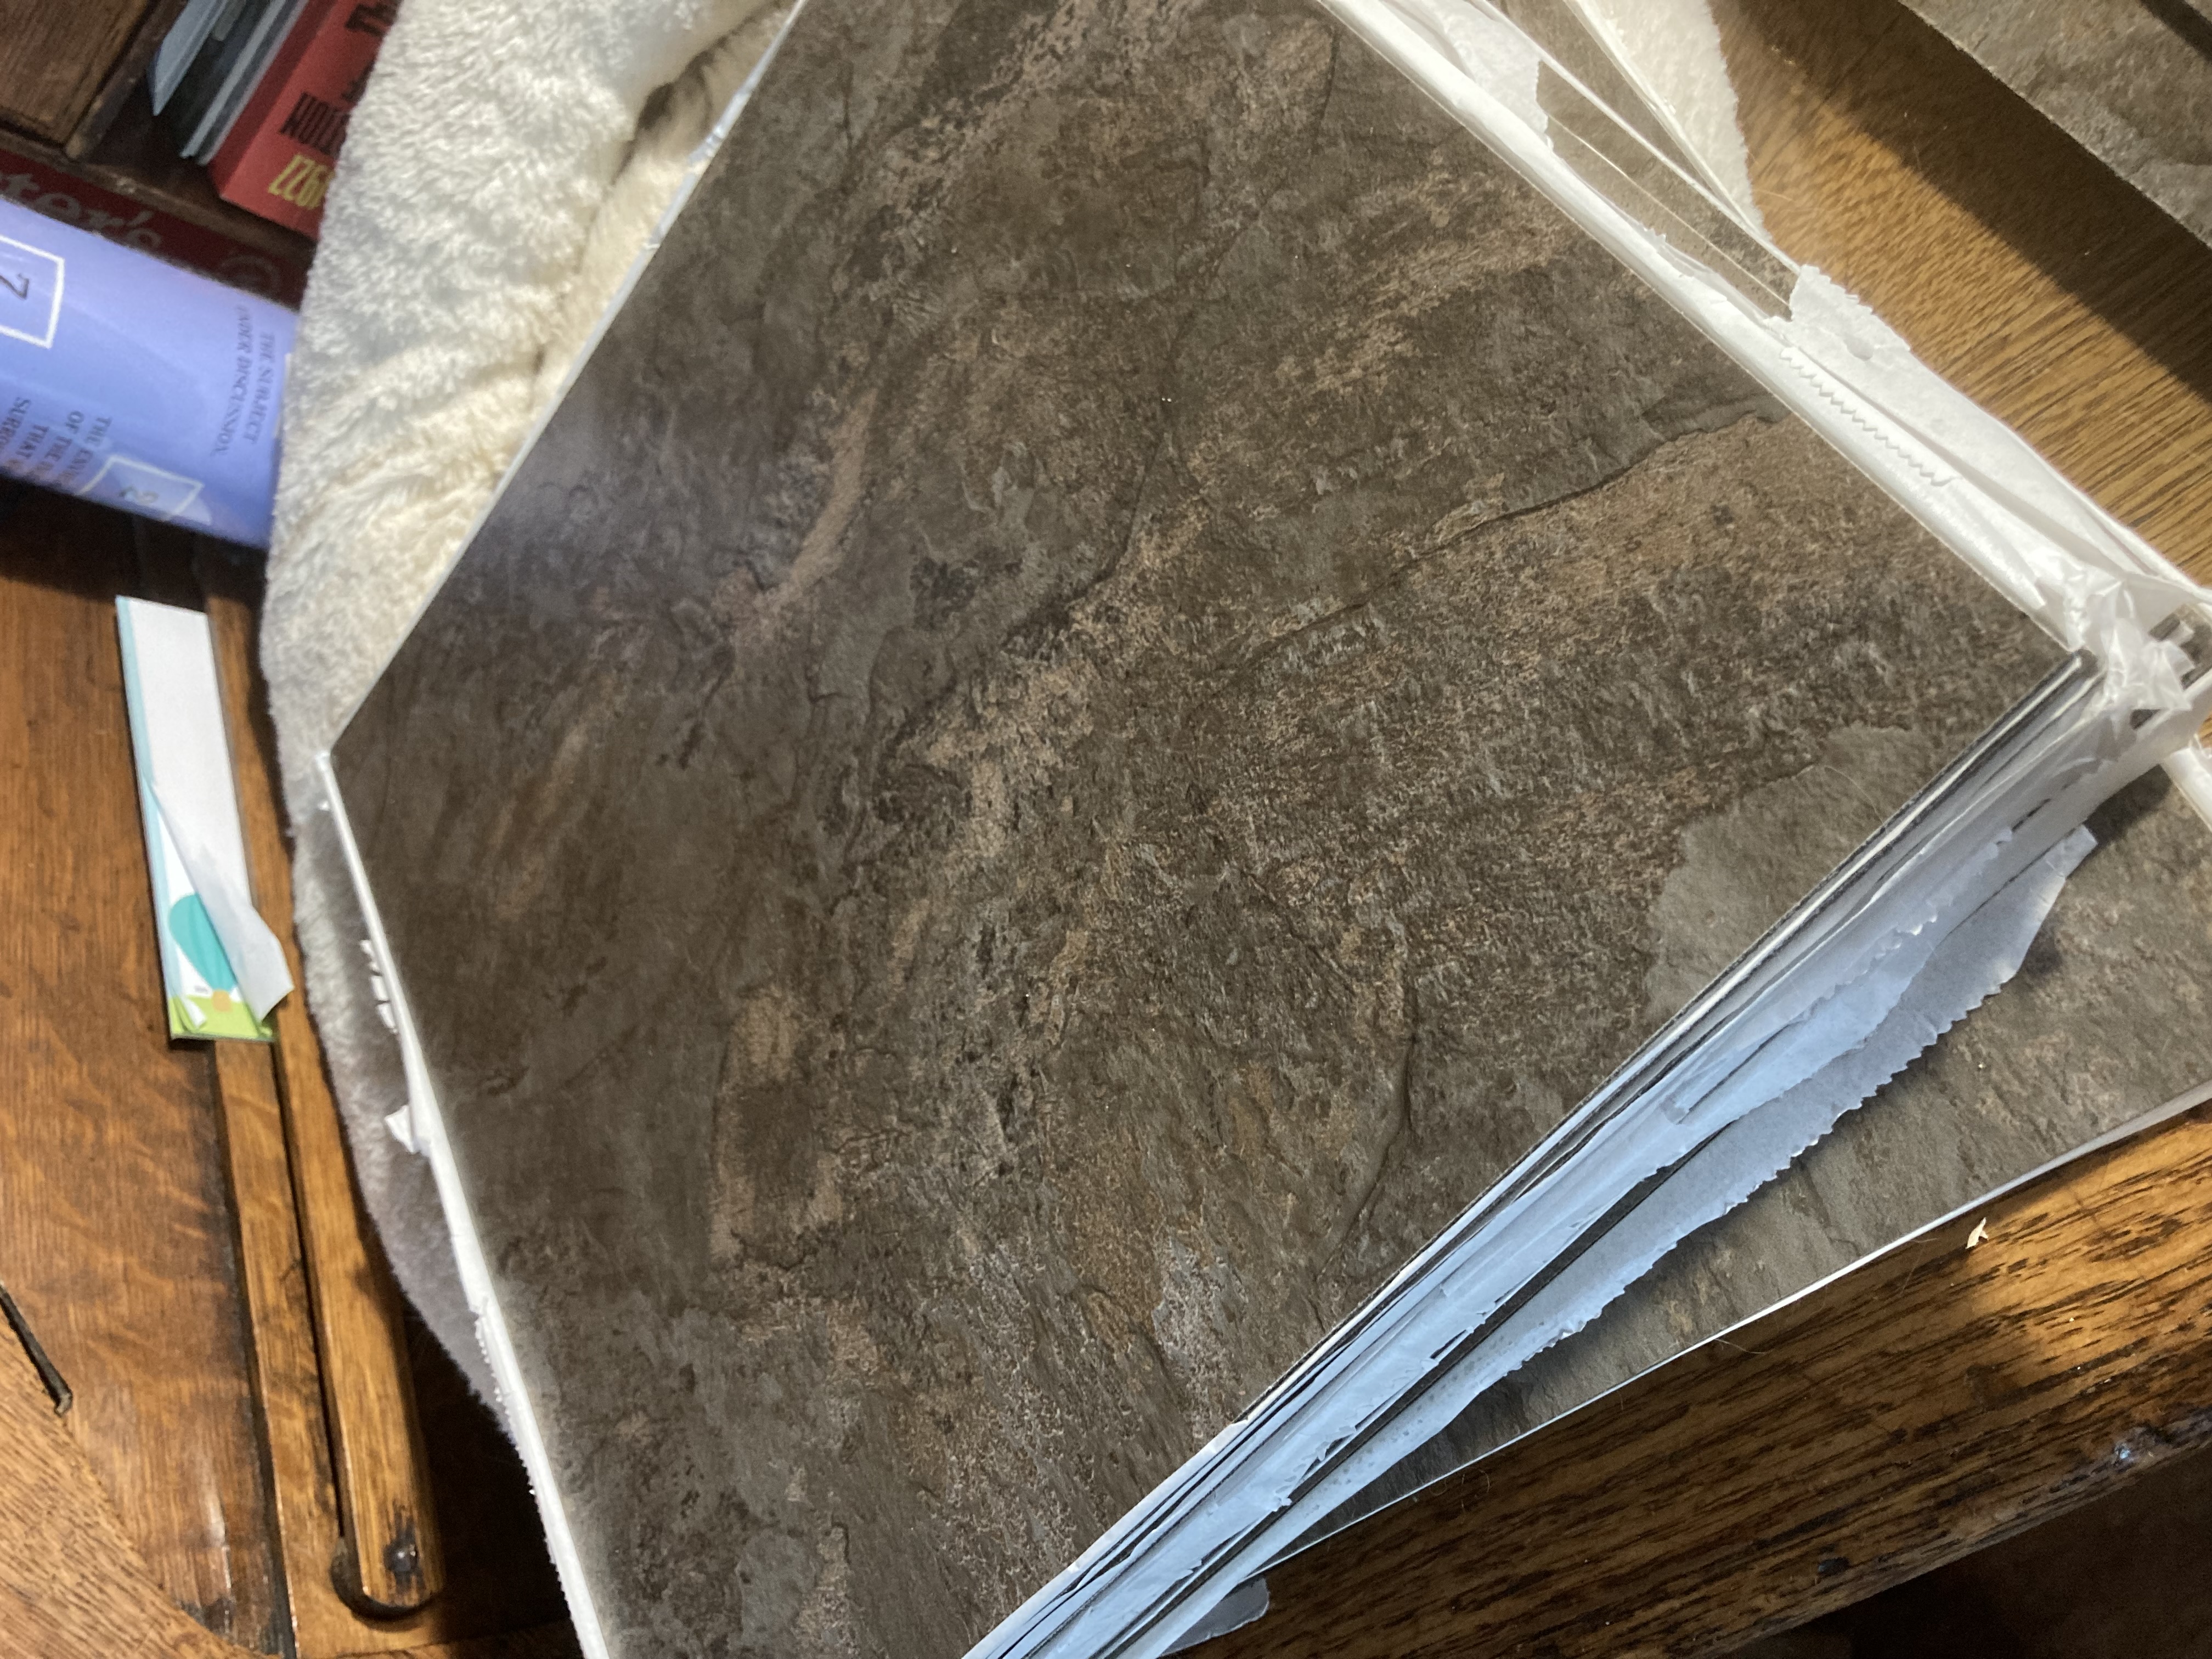
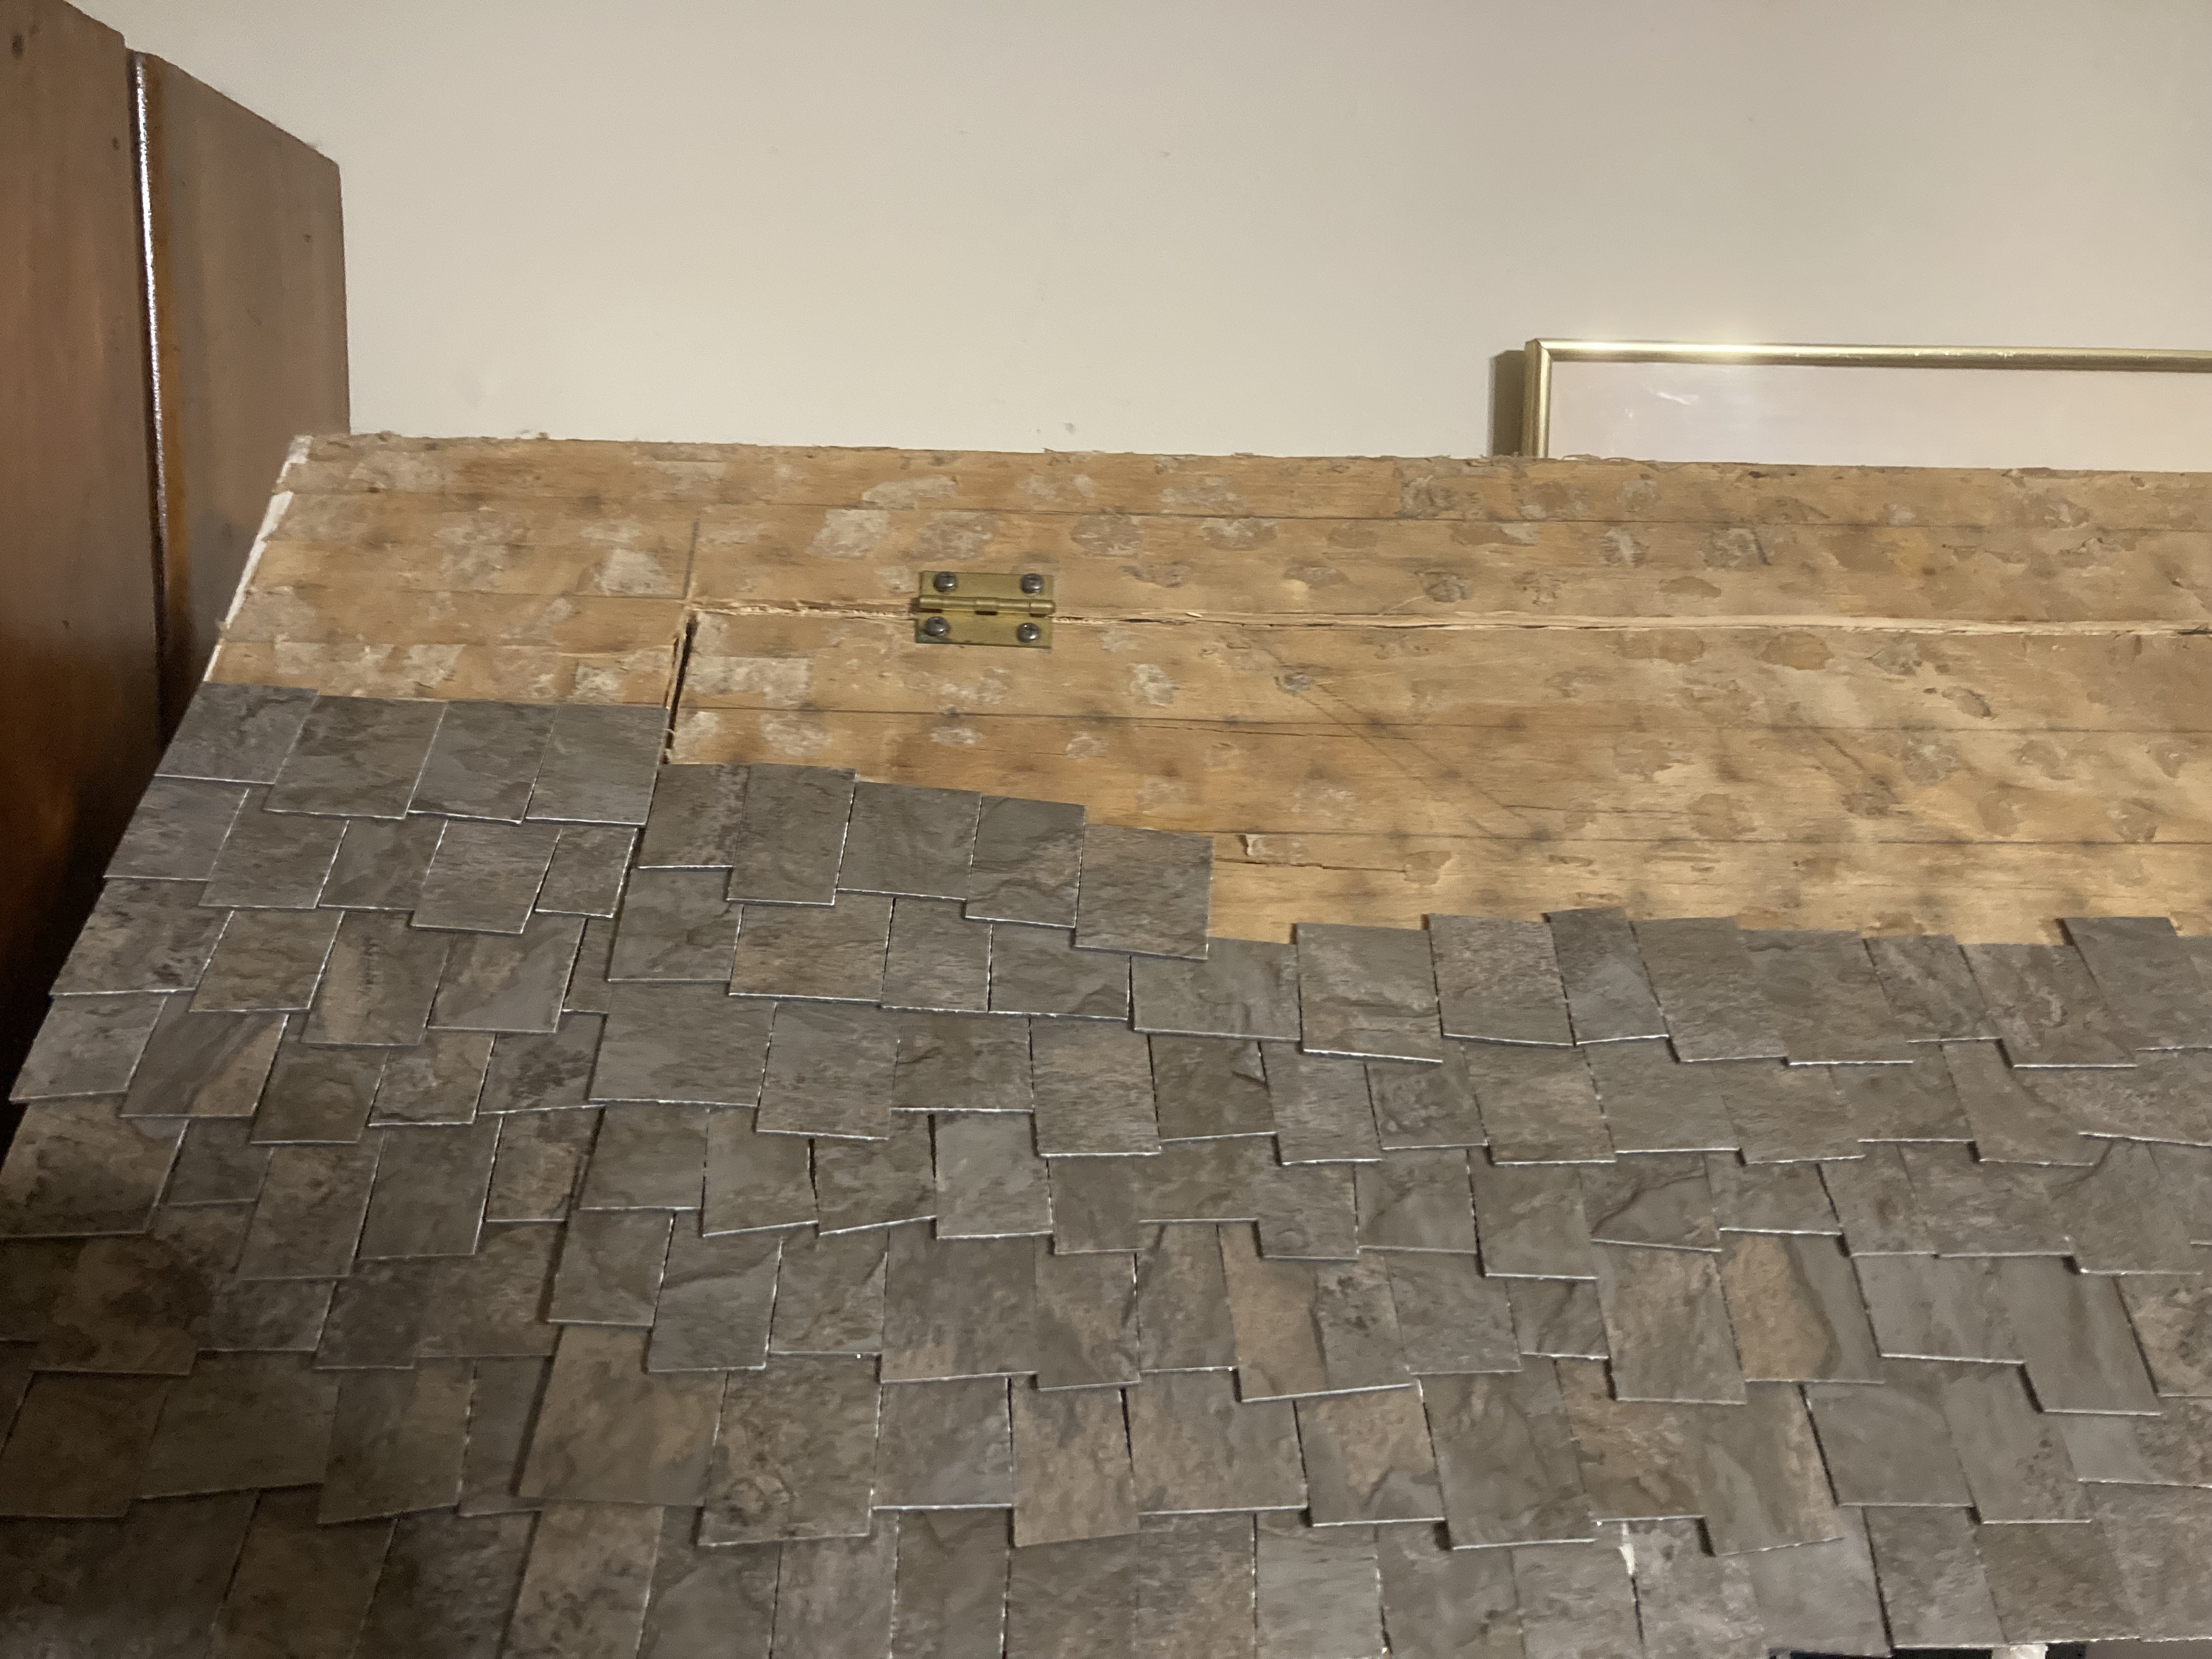
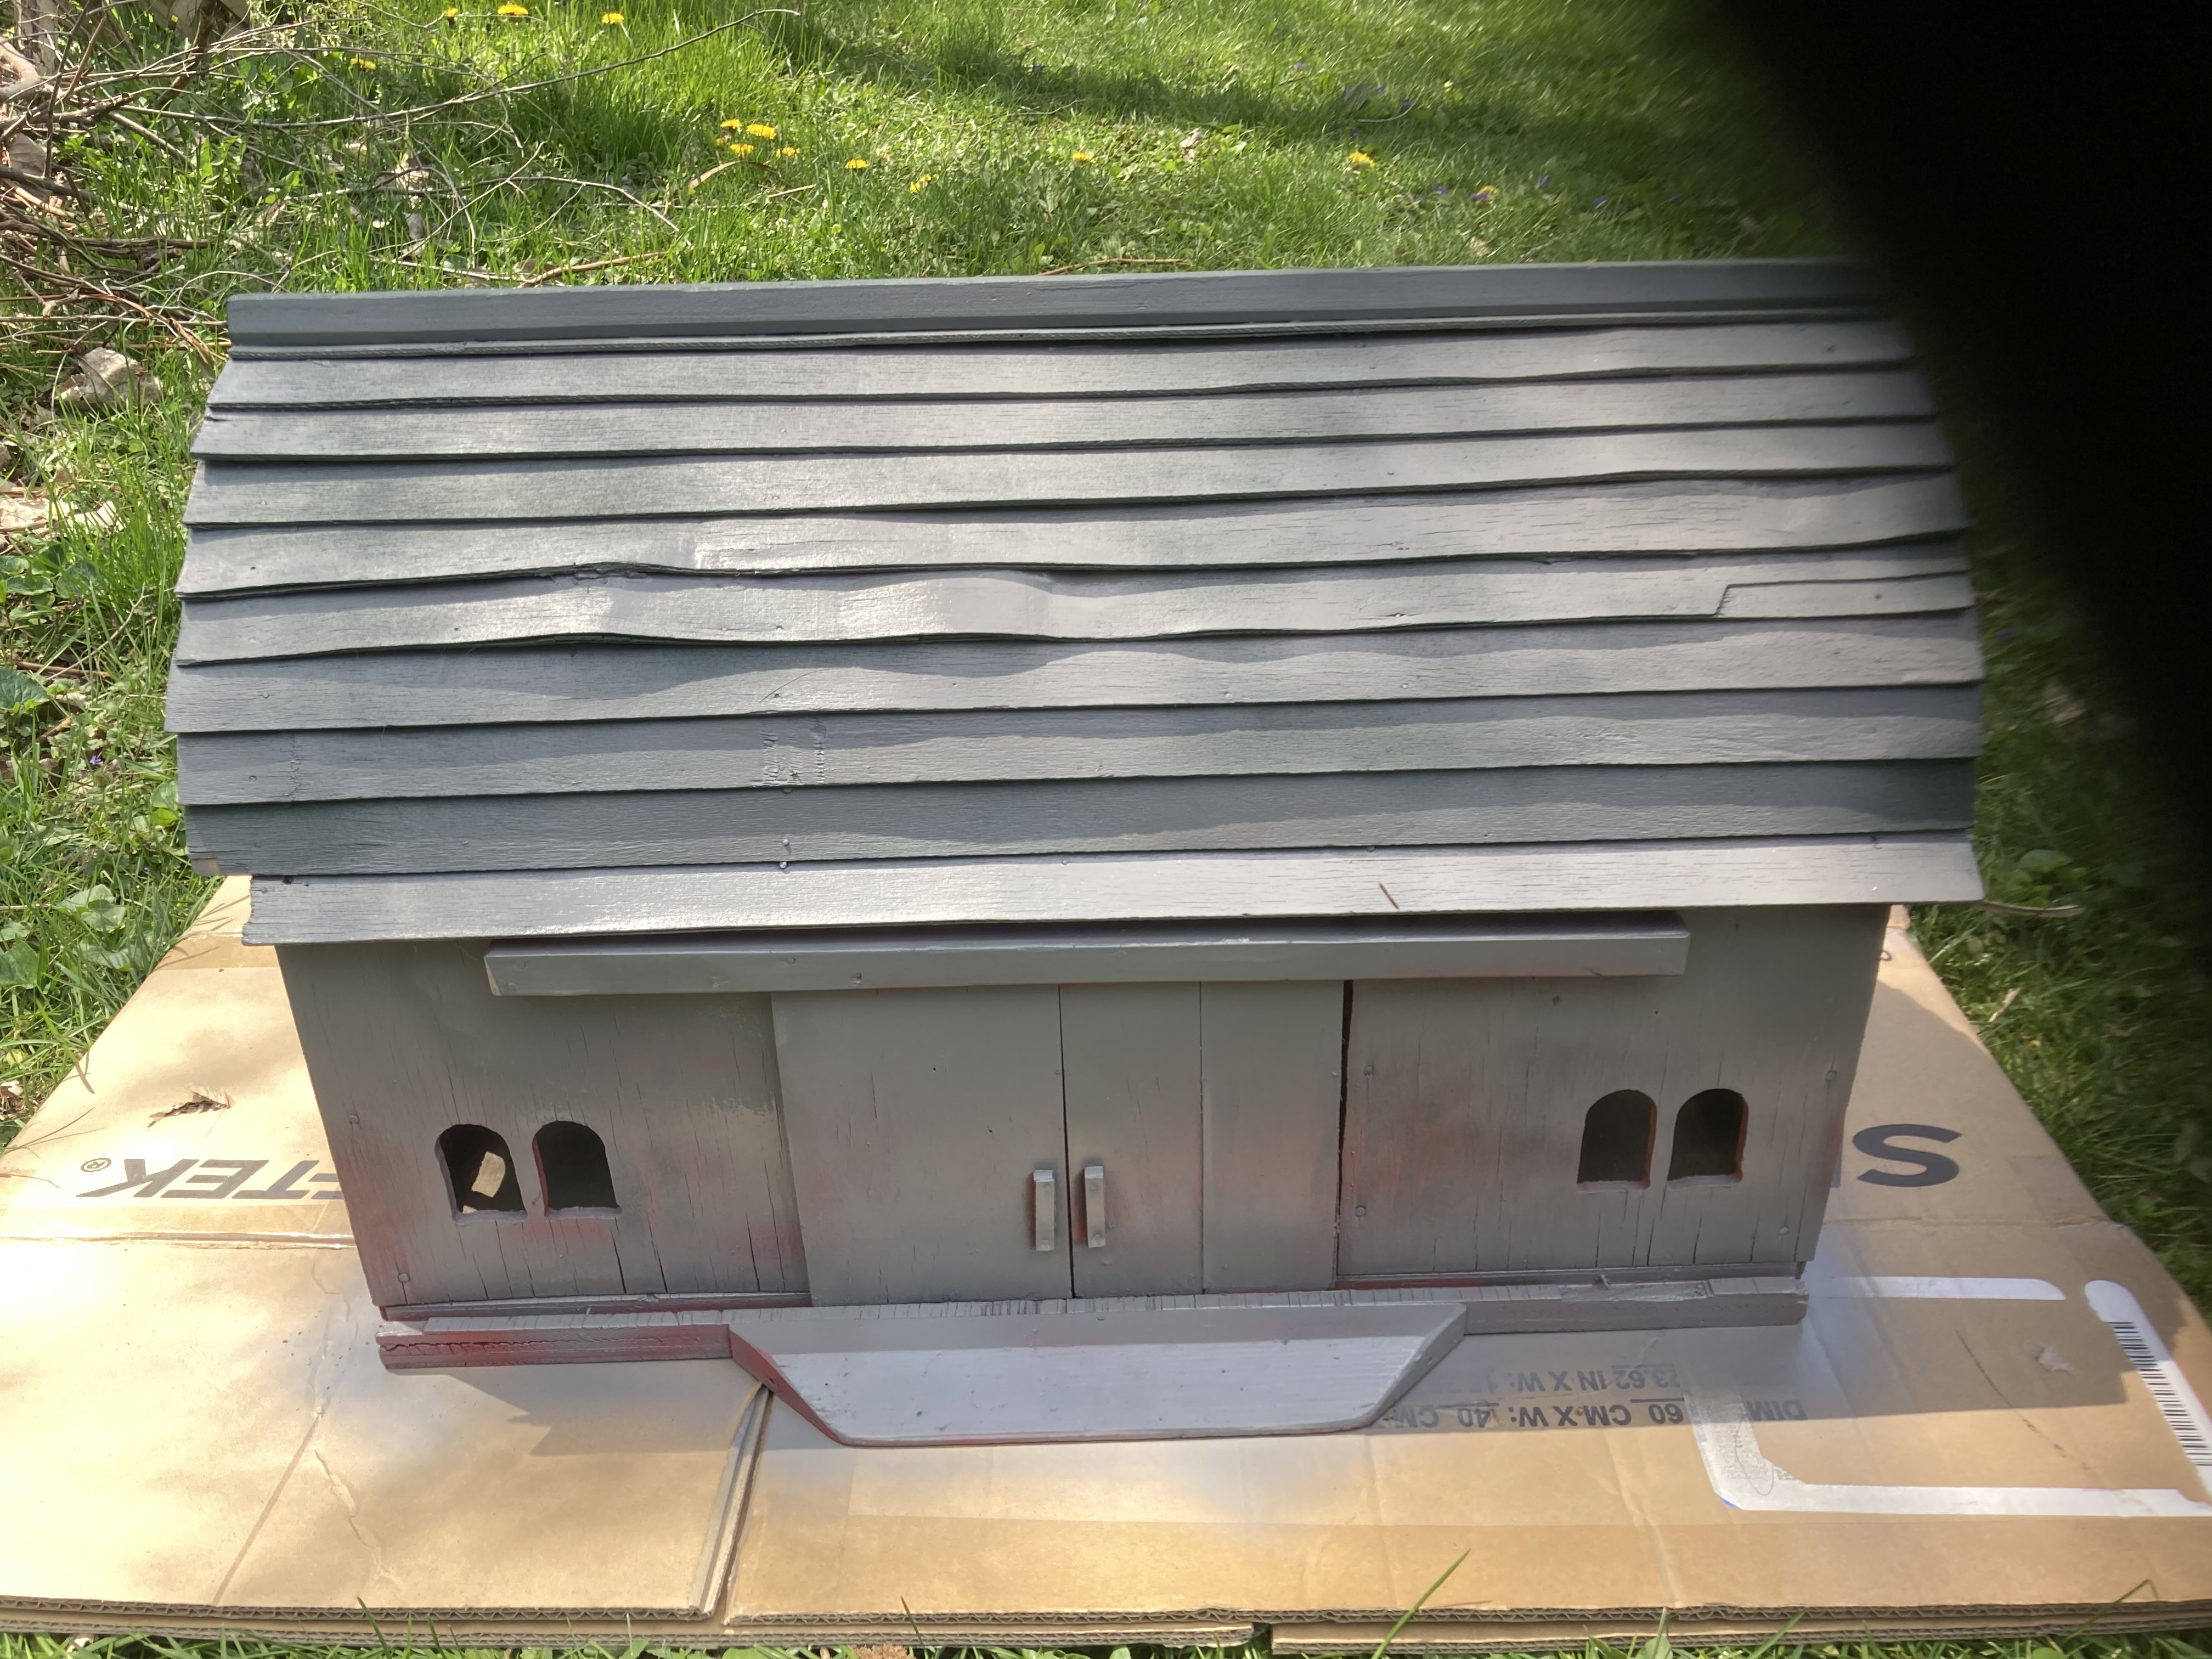
For my white First Period Colonial style house, I had removed the old shingles (see original post) and hadn’t decided what type of shingle I wanted to put on it. I had always kicked around the idea of slate shingles, but wasn’t sure how to proceed with that. For one thing, real slate shingles for a dollhouse would be very expensive, not to mention hard to find. Also, they would add a significant amount of weight to the house and would be difficult to attach. Finally, after a bathroom flooring project, I came up with the perfect, cost effective idea. I would make my own ‘slate’ shingles out of bathroom floor tiles.
The tiles I chose are from Menards, and are very thick linoleum. They are textured and colored to look very similar to slate.
Close up of the tile I chose. They are nice and thick and will have some substance on the roof.The back of the tile, in case anyone wants to use the same ones.
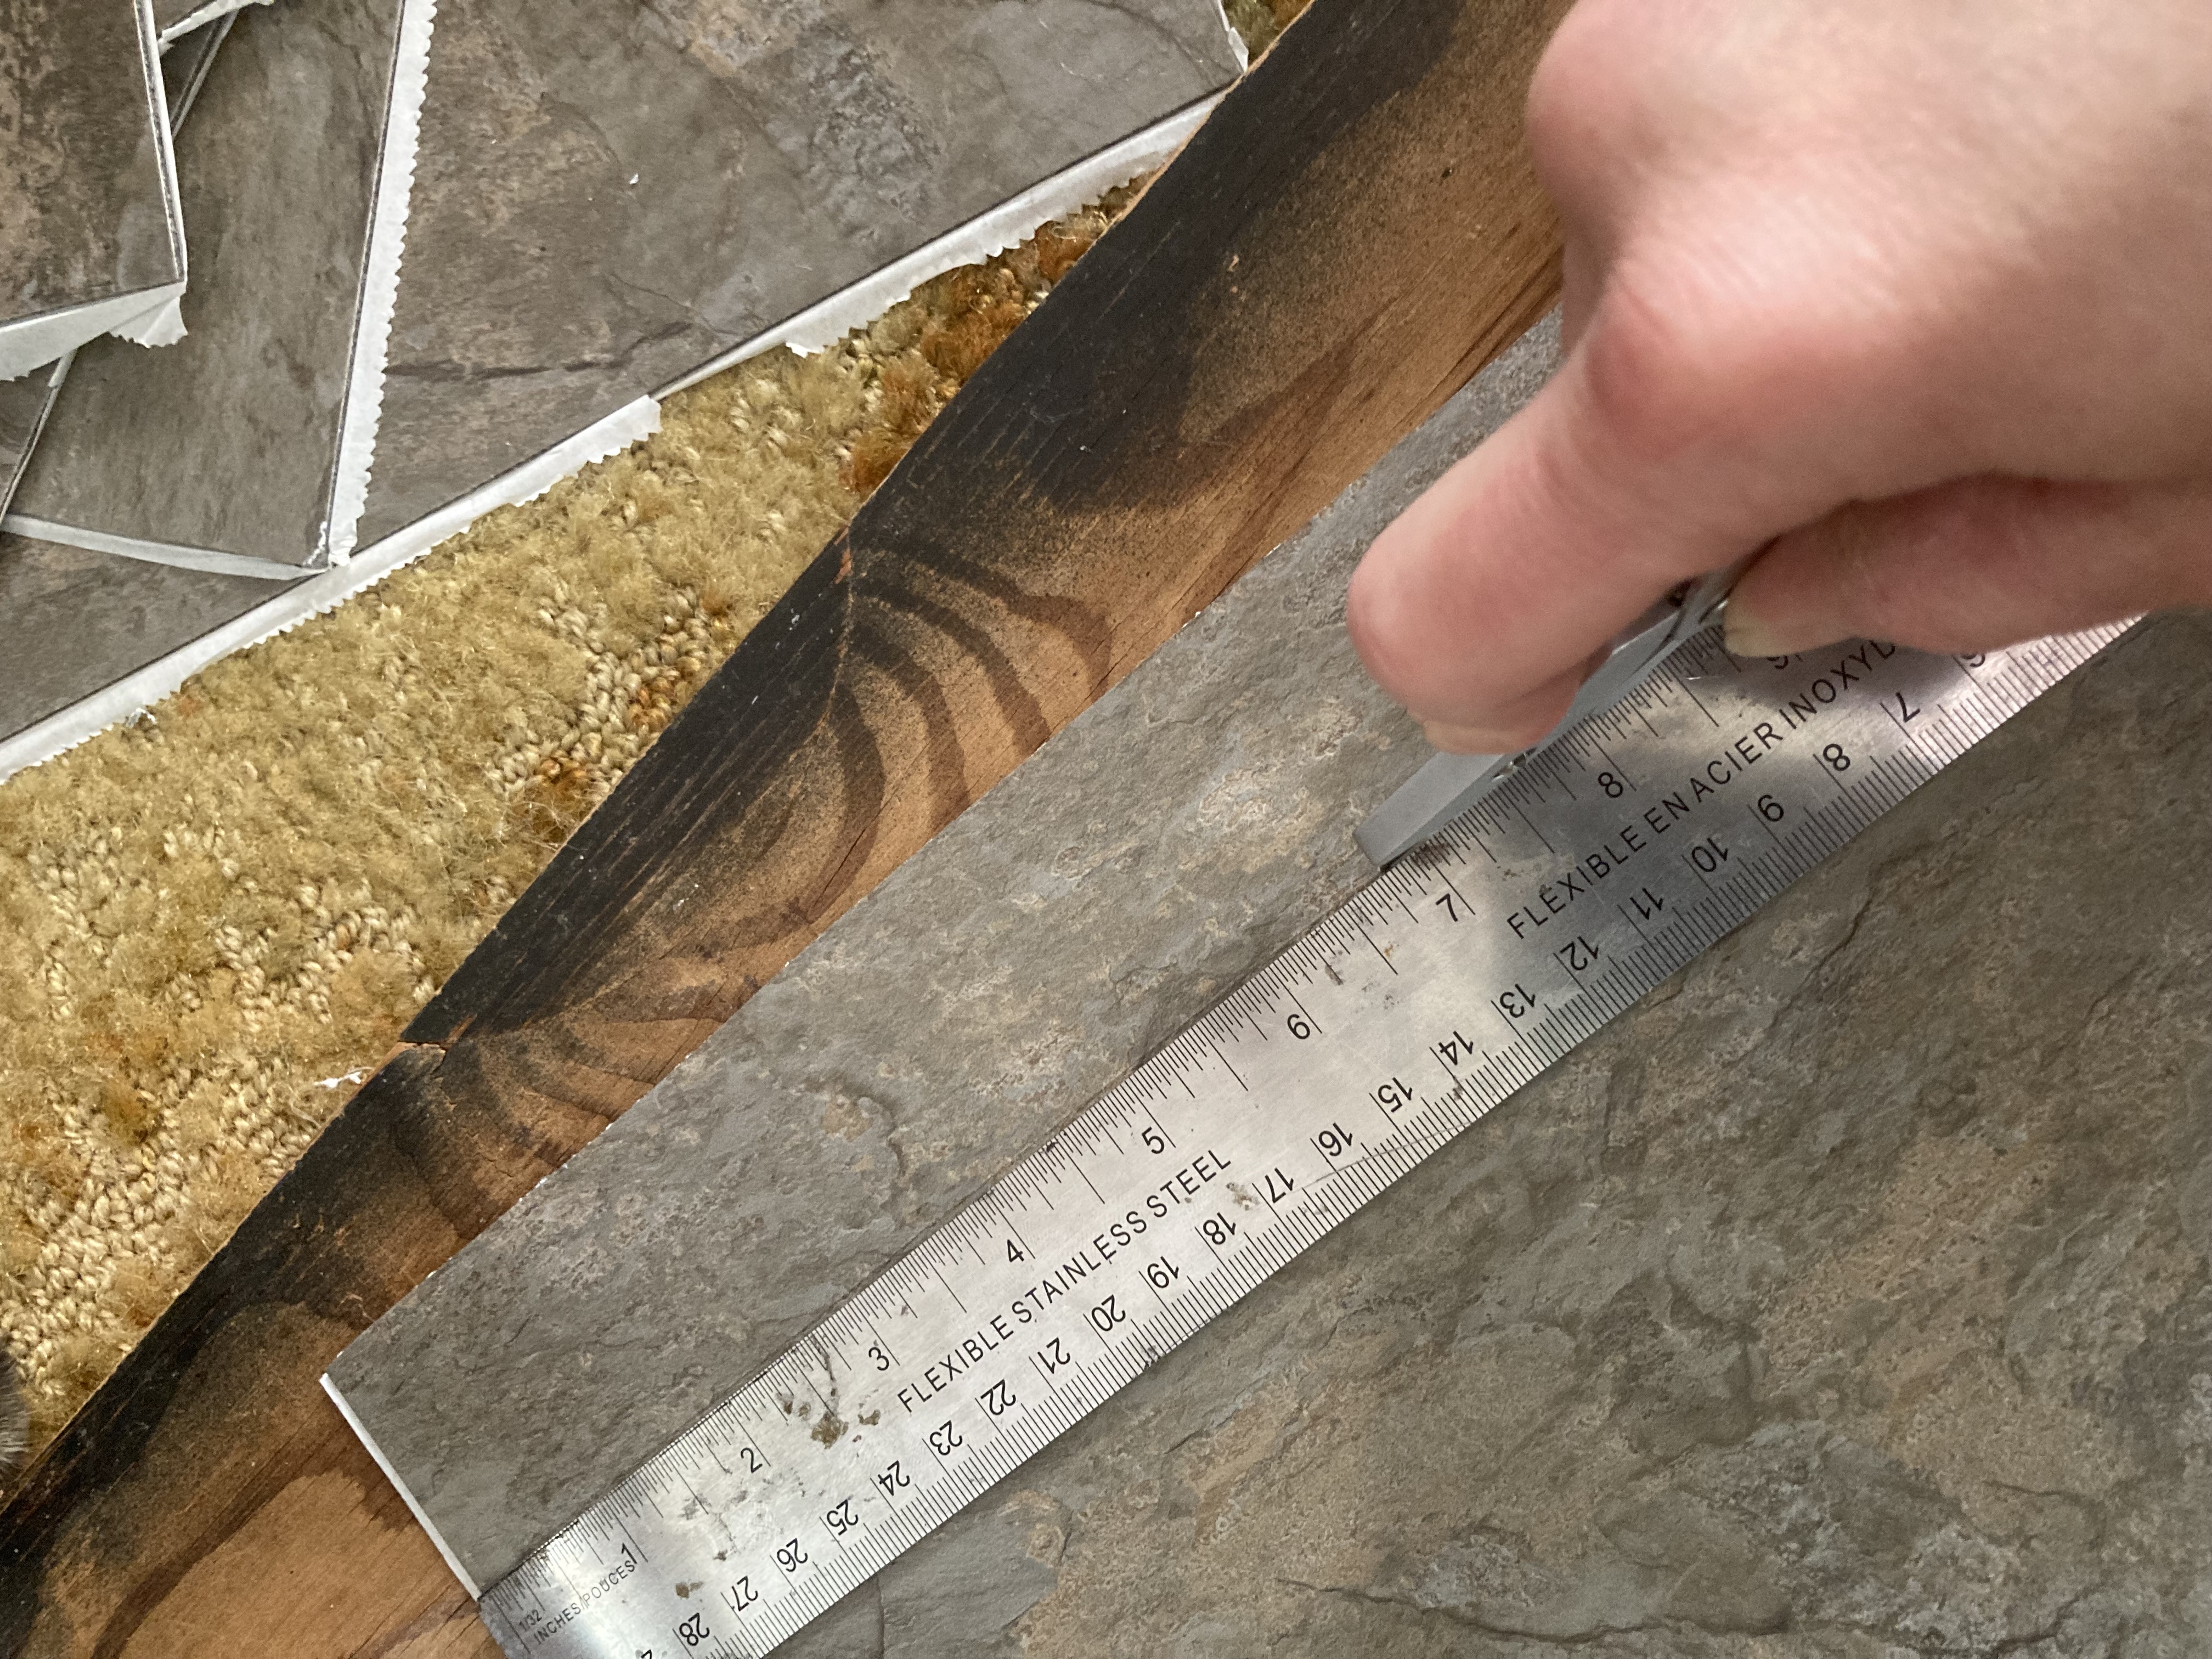
After selecting the tiles, I had to cut them into squares. I wanted them to be random widths to they would add some interest to the project, so I didn’t use any real measurements when I cut them. I used a scrap piece of wood as a cutting board so I wouldn’t damage any surfaces.
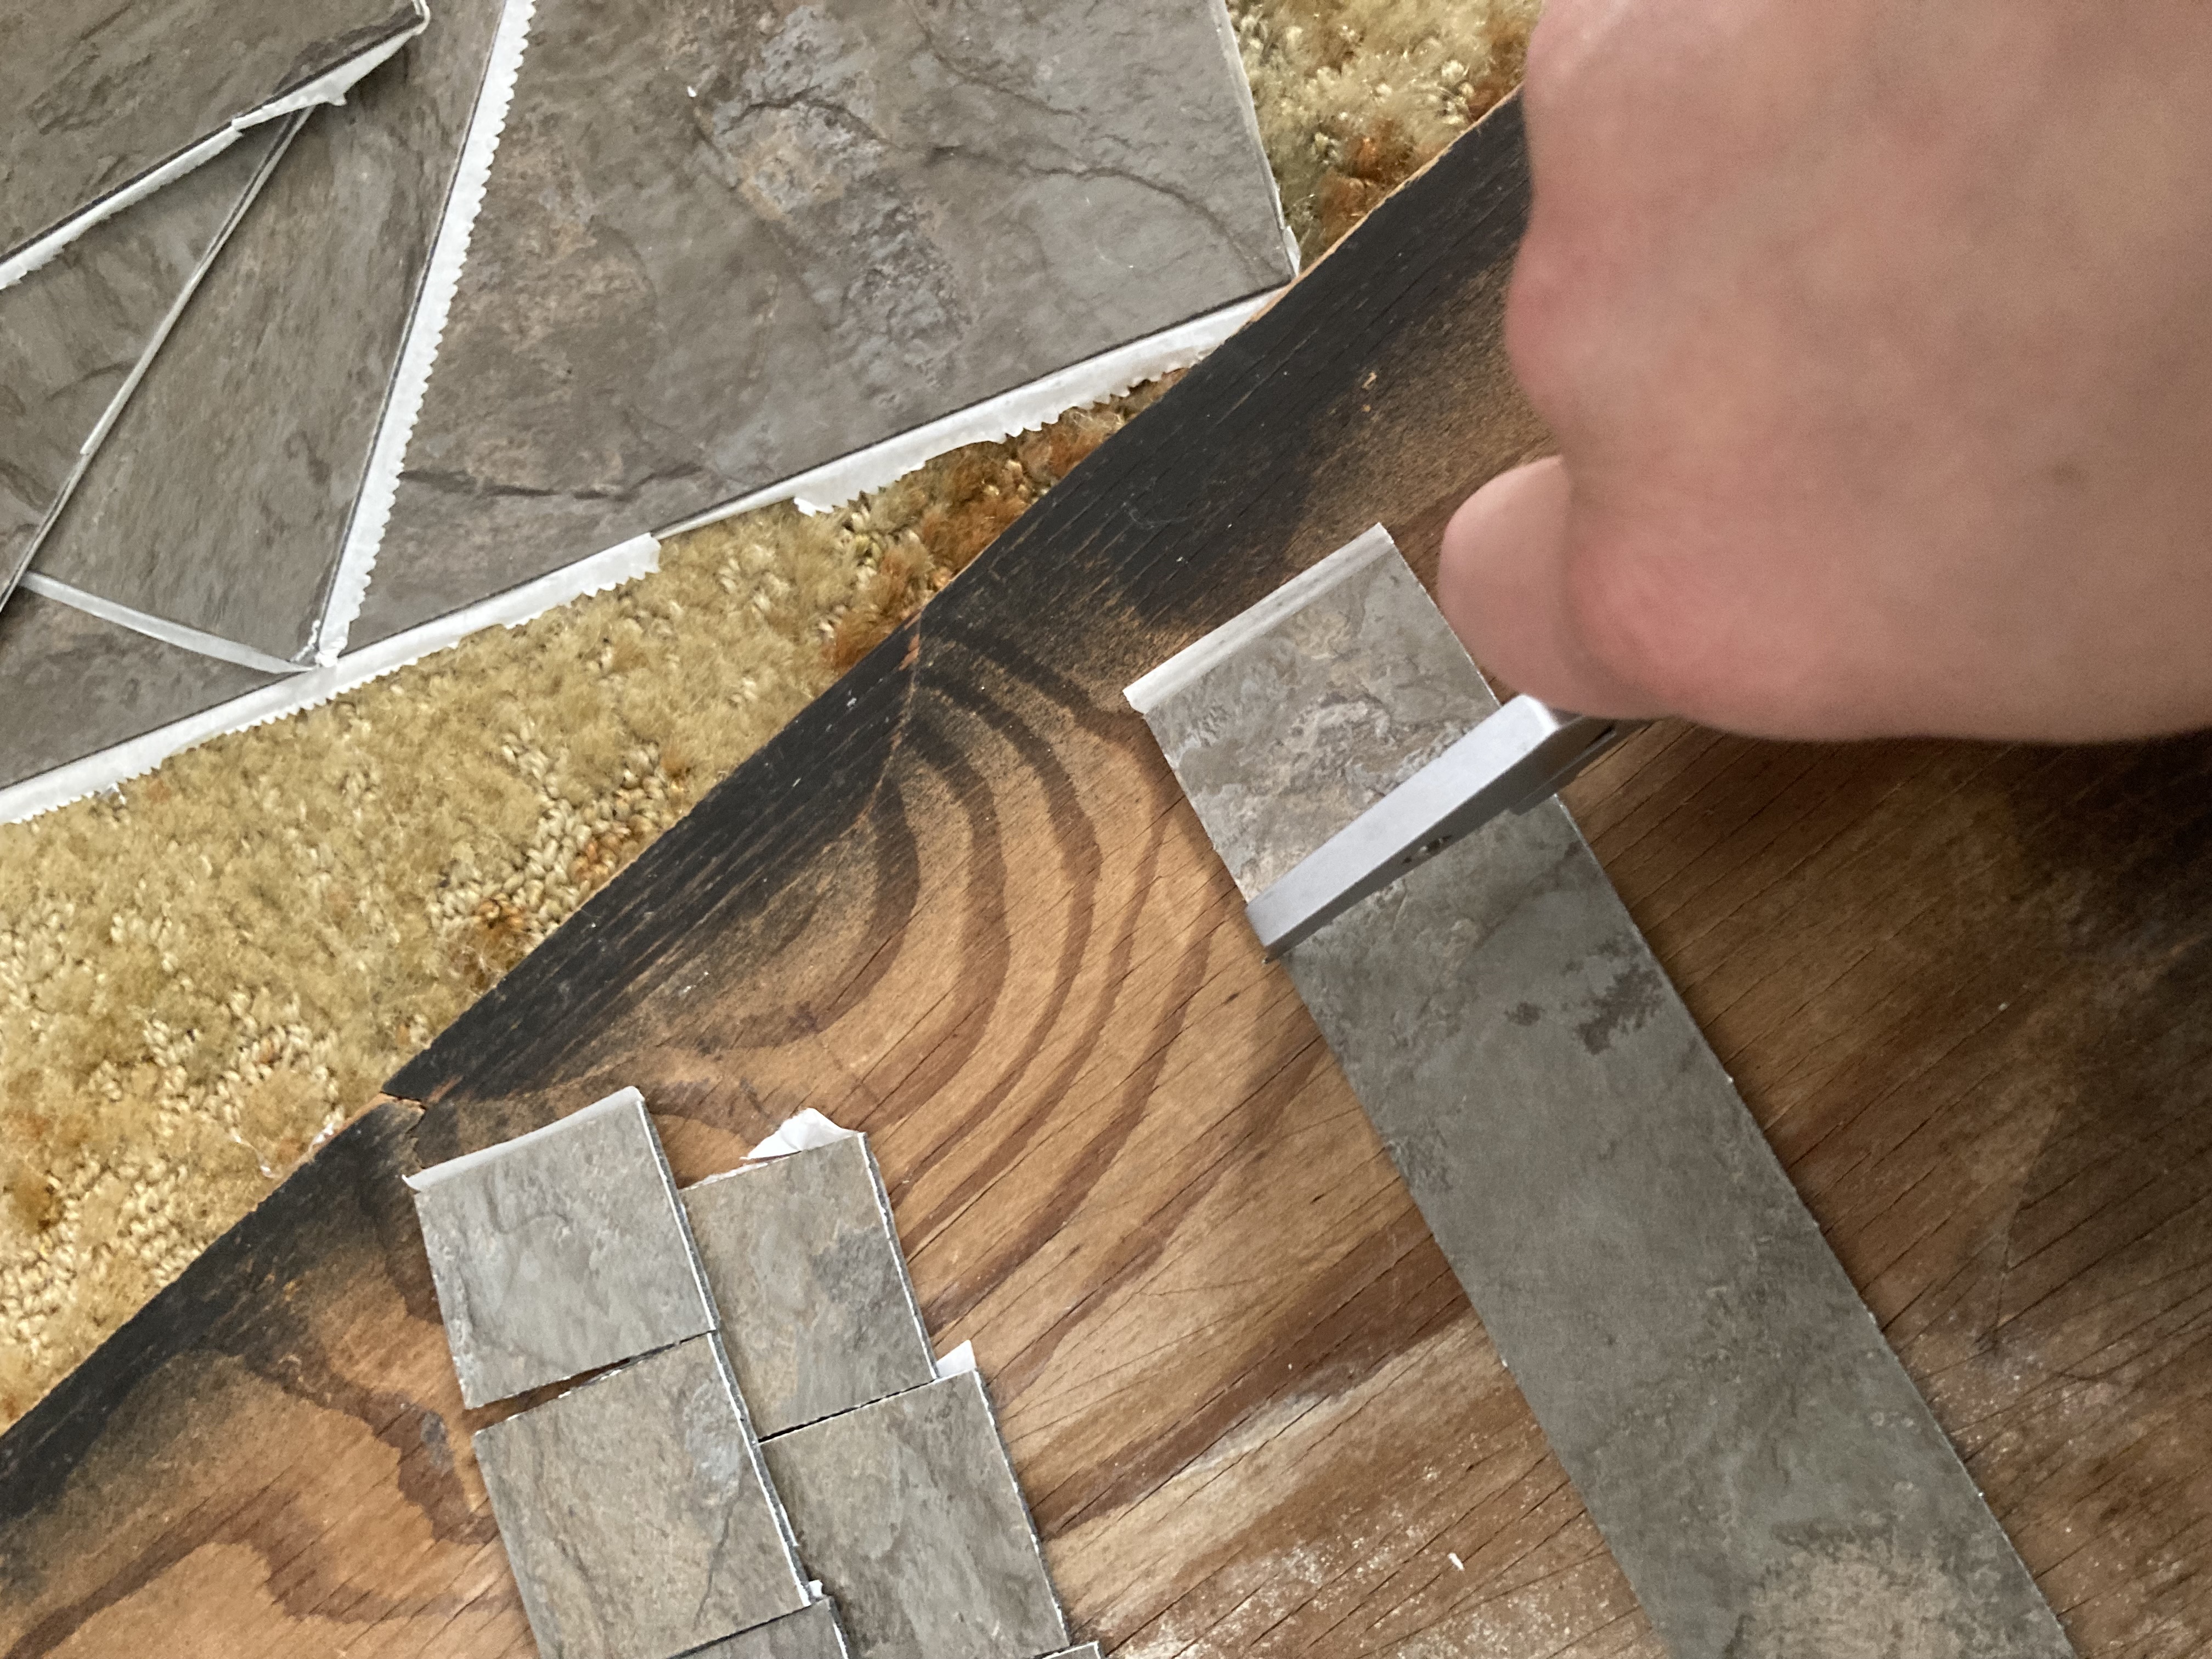
Scoring with a box cutter, using a ruler as a straightedge.
To cut these tiles, I held a ruler as a straightedge and used my box cutter to score a shallow mark along the top of the tile, in the area I wanted to cut. The knife does not need to cut all the way through the tile. It is important to note that you need to score it from the DECORATED SURFACE of the tile, so that when you break it you will have a nice, clean line. If you score the back and break the front, the cut will be jagged and might peel off part of the decoration.
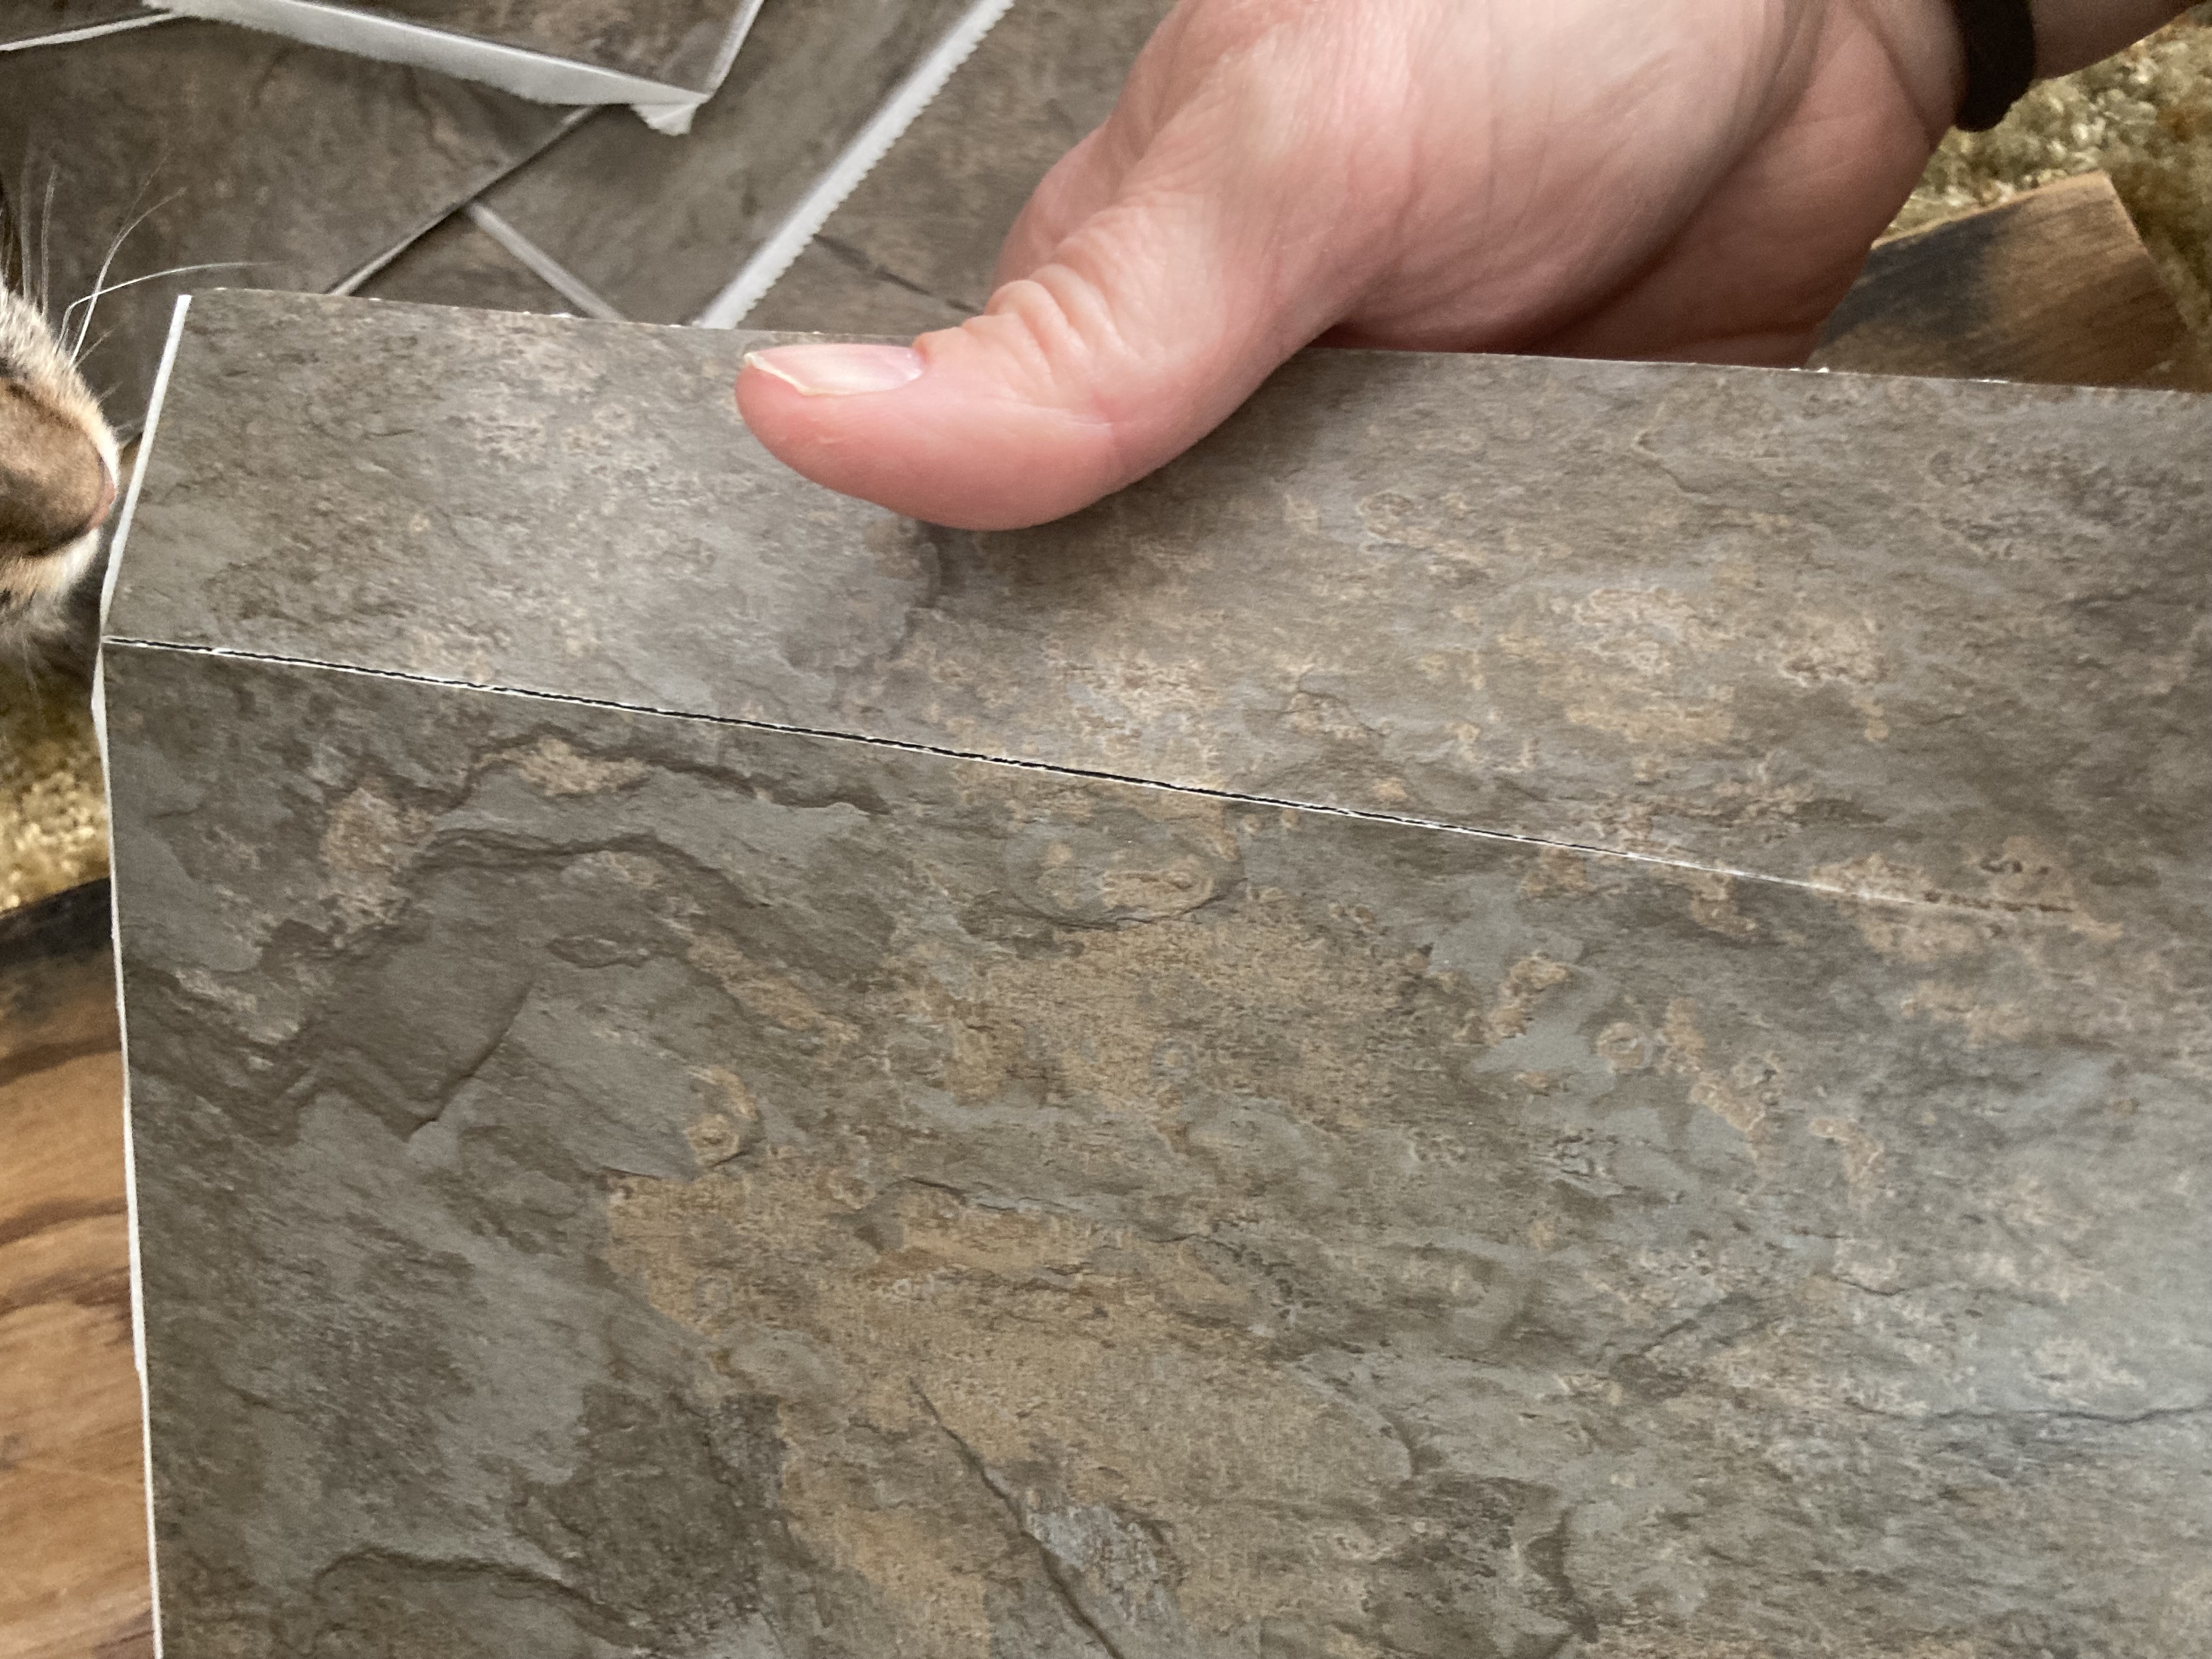
Breaking the tile along the score.
After you score the front with the knife, hold the tile in your hand, decorated side up, and use your fingers to snap it along the cut, from the back side. It should break pretty easily.
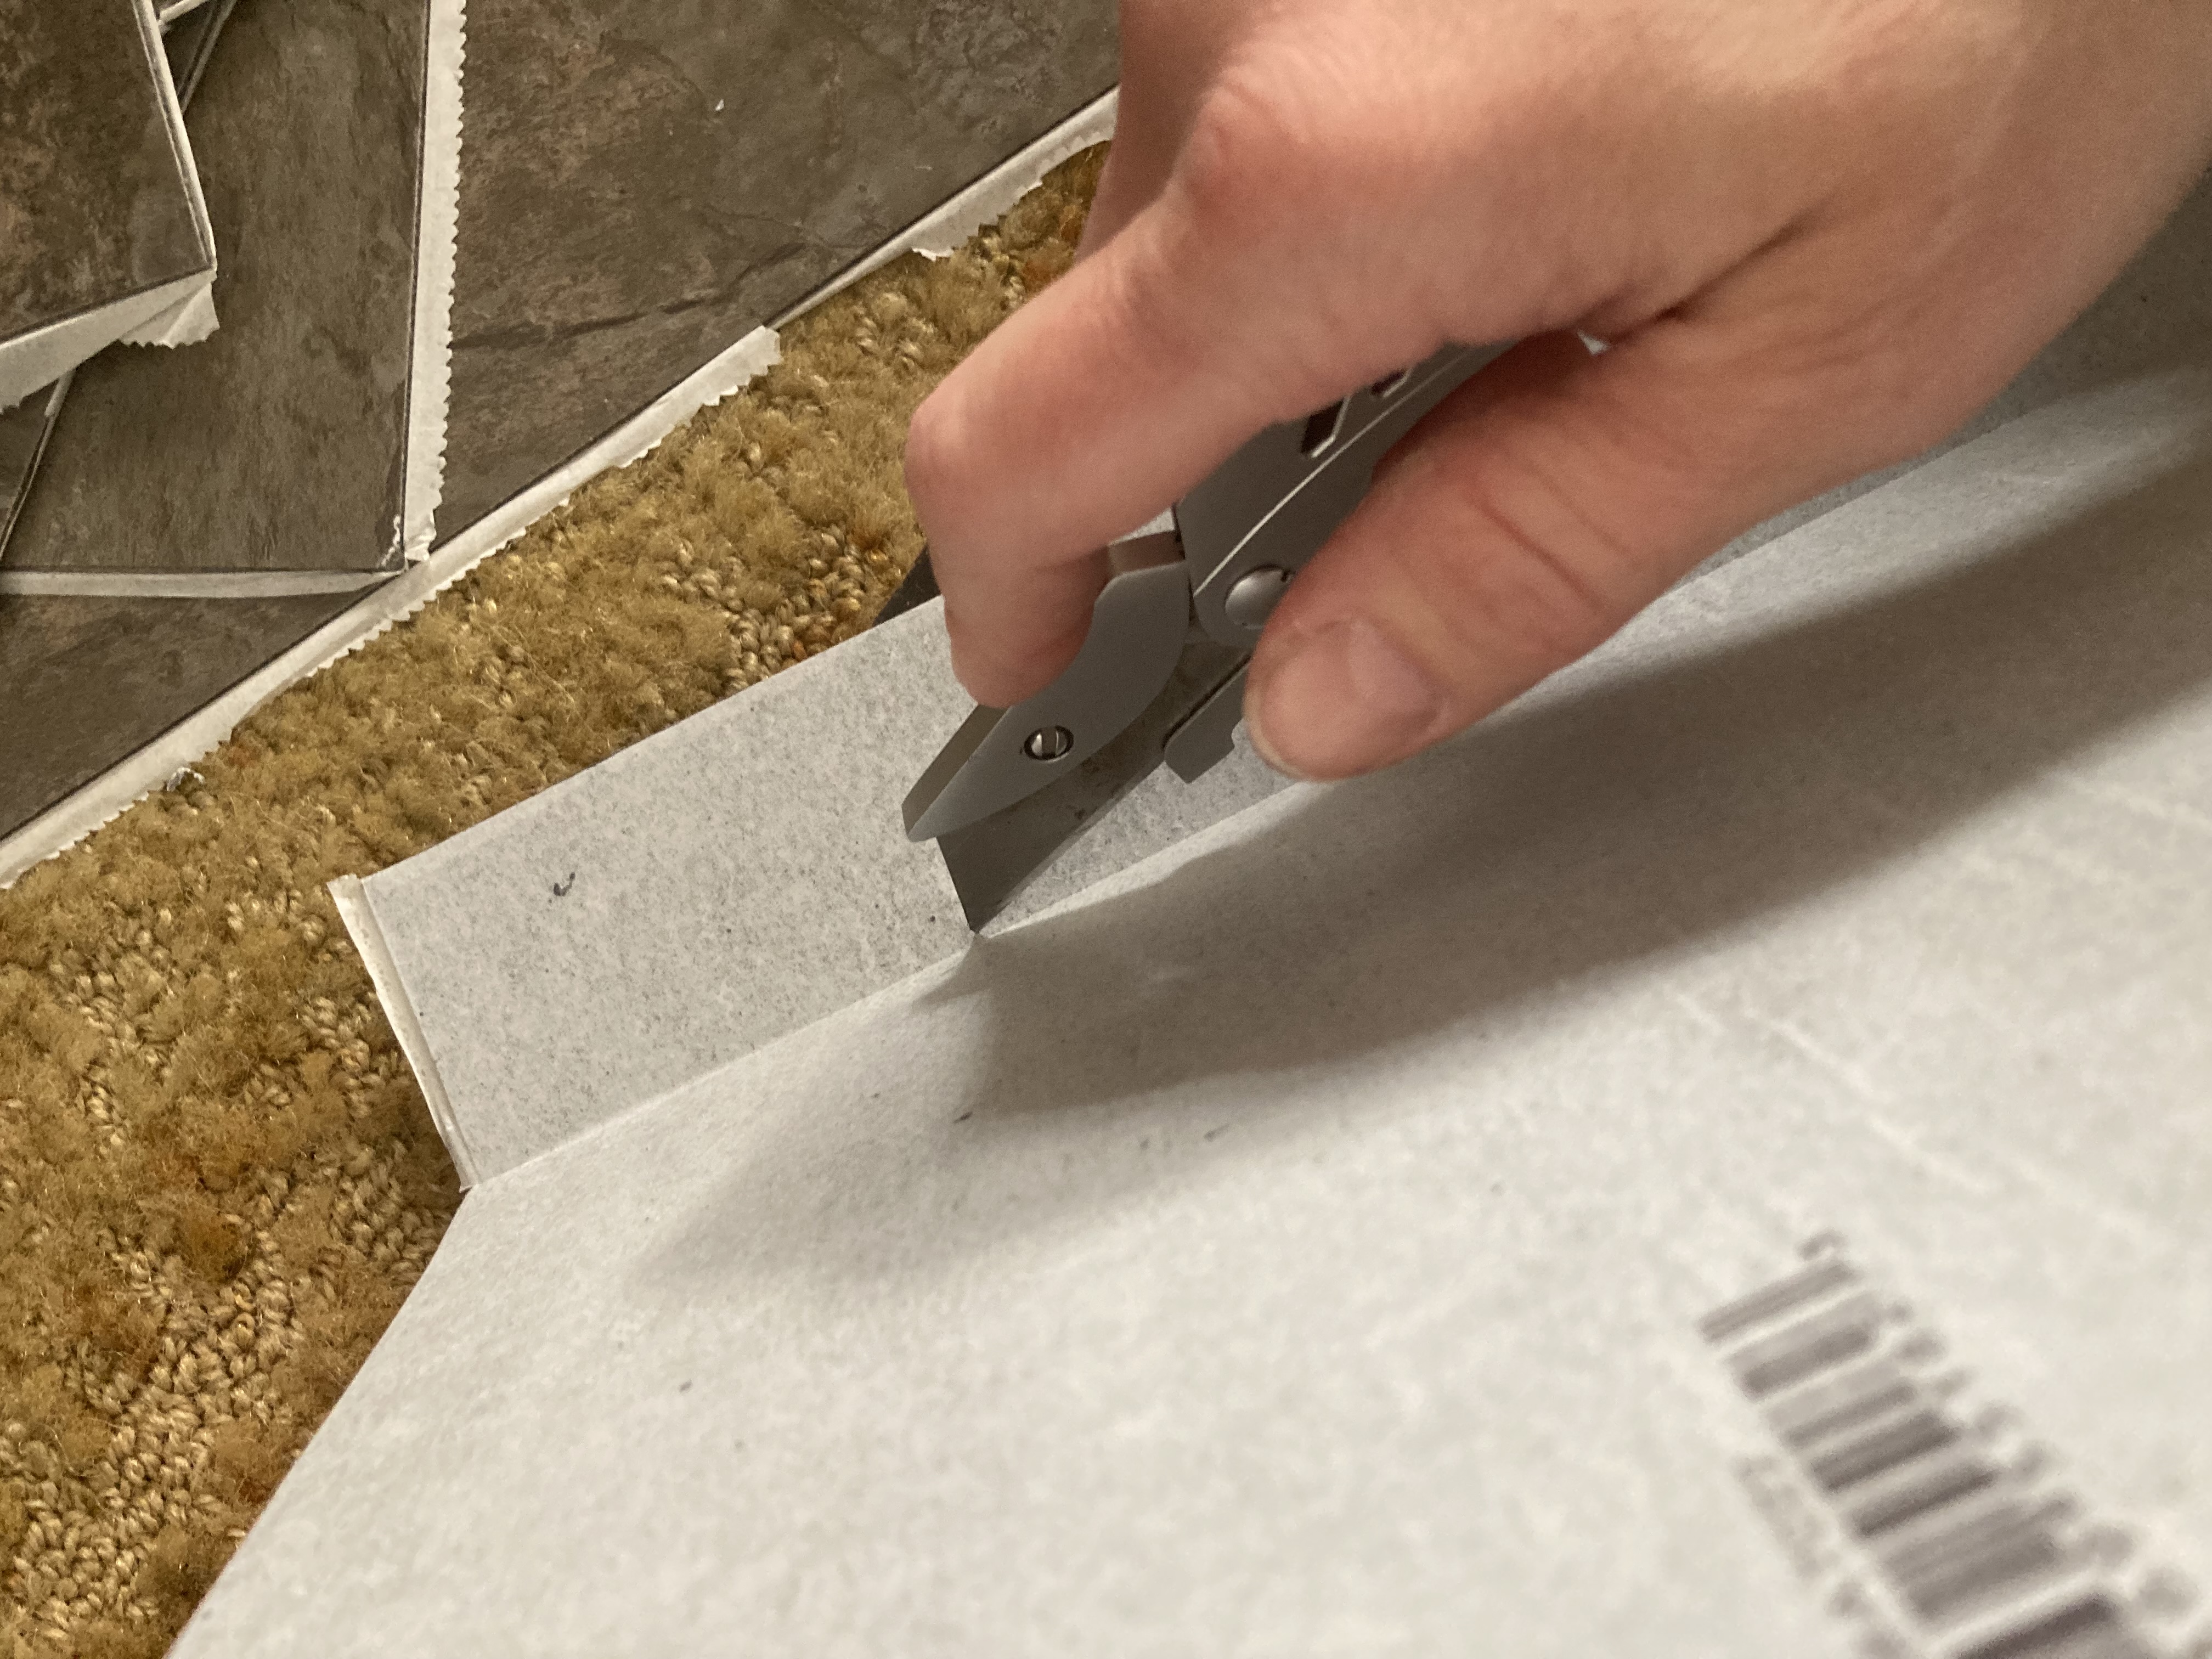
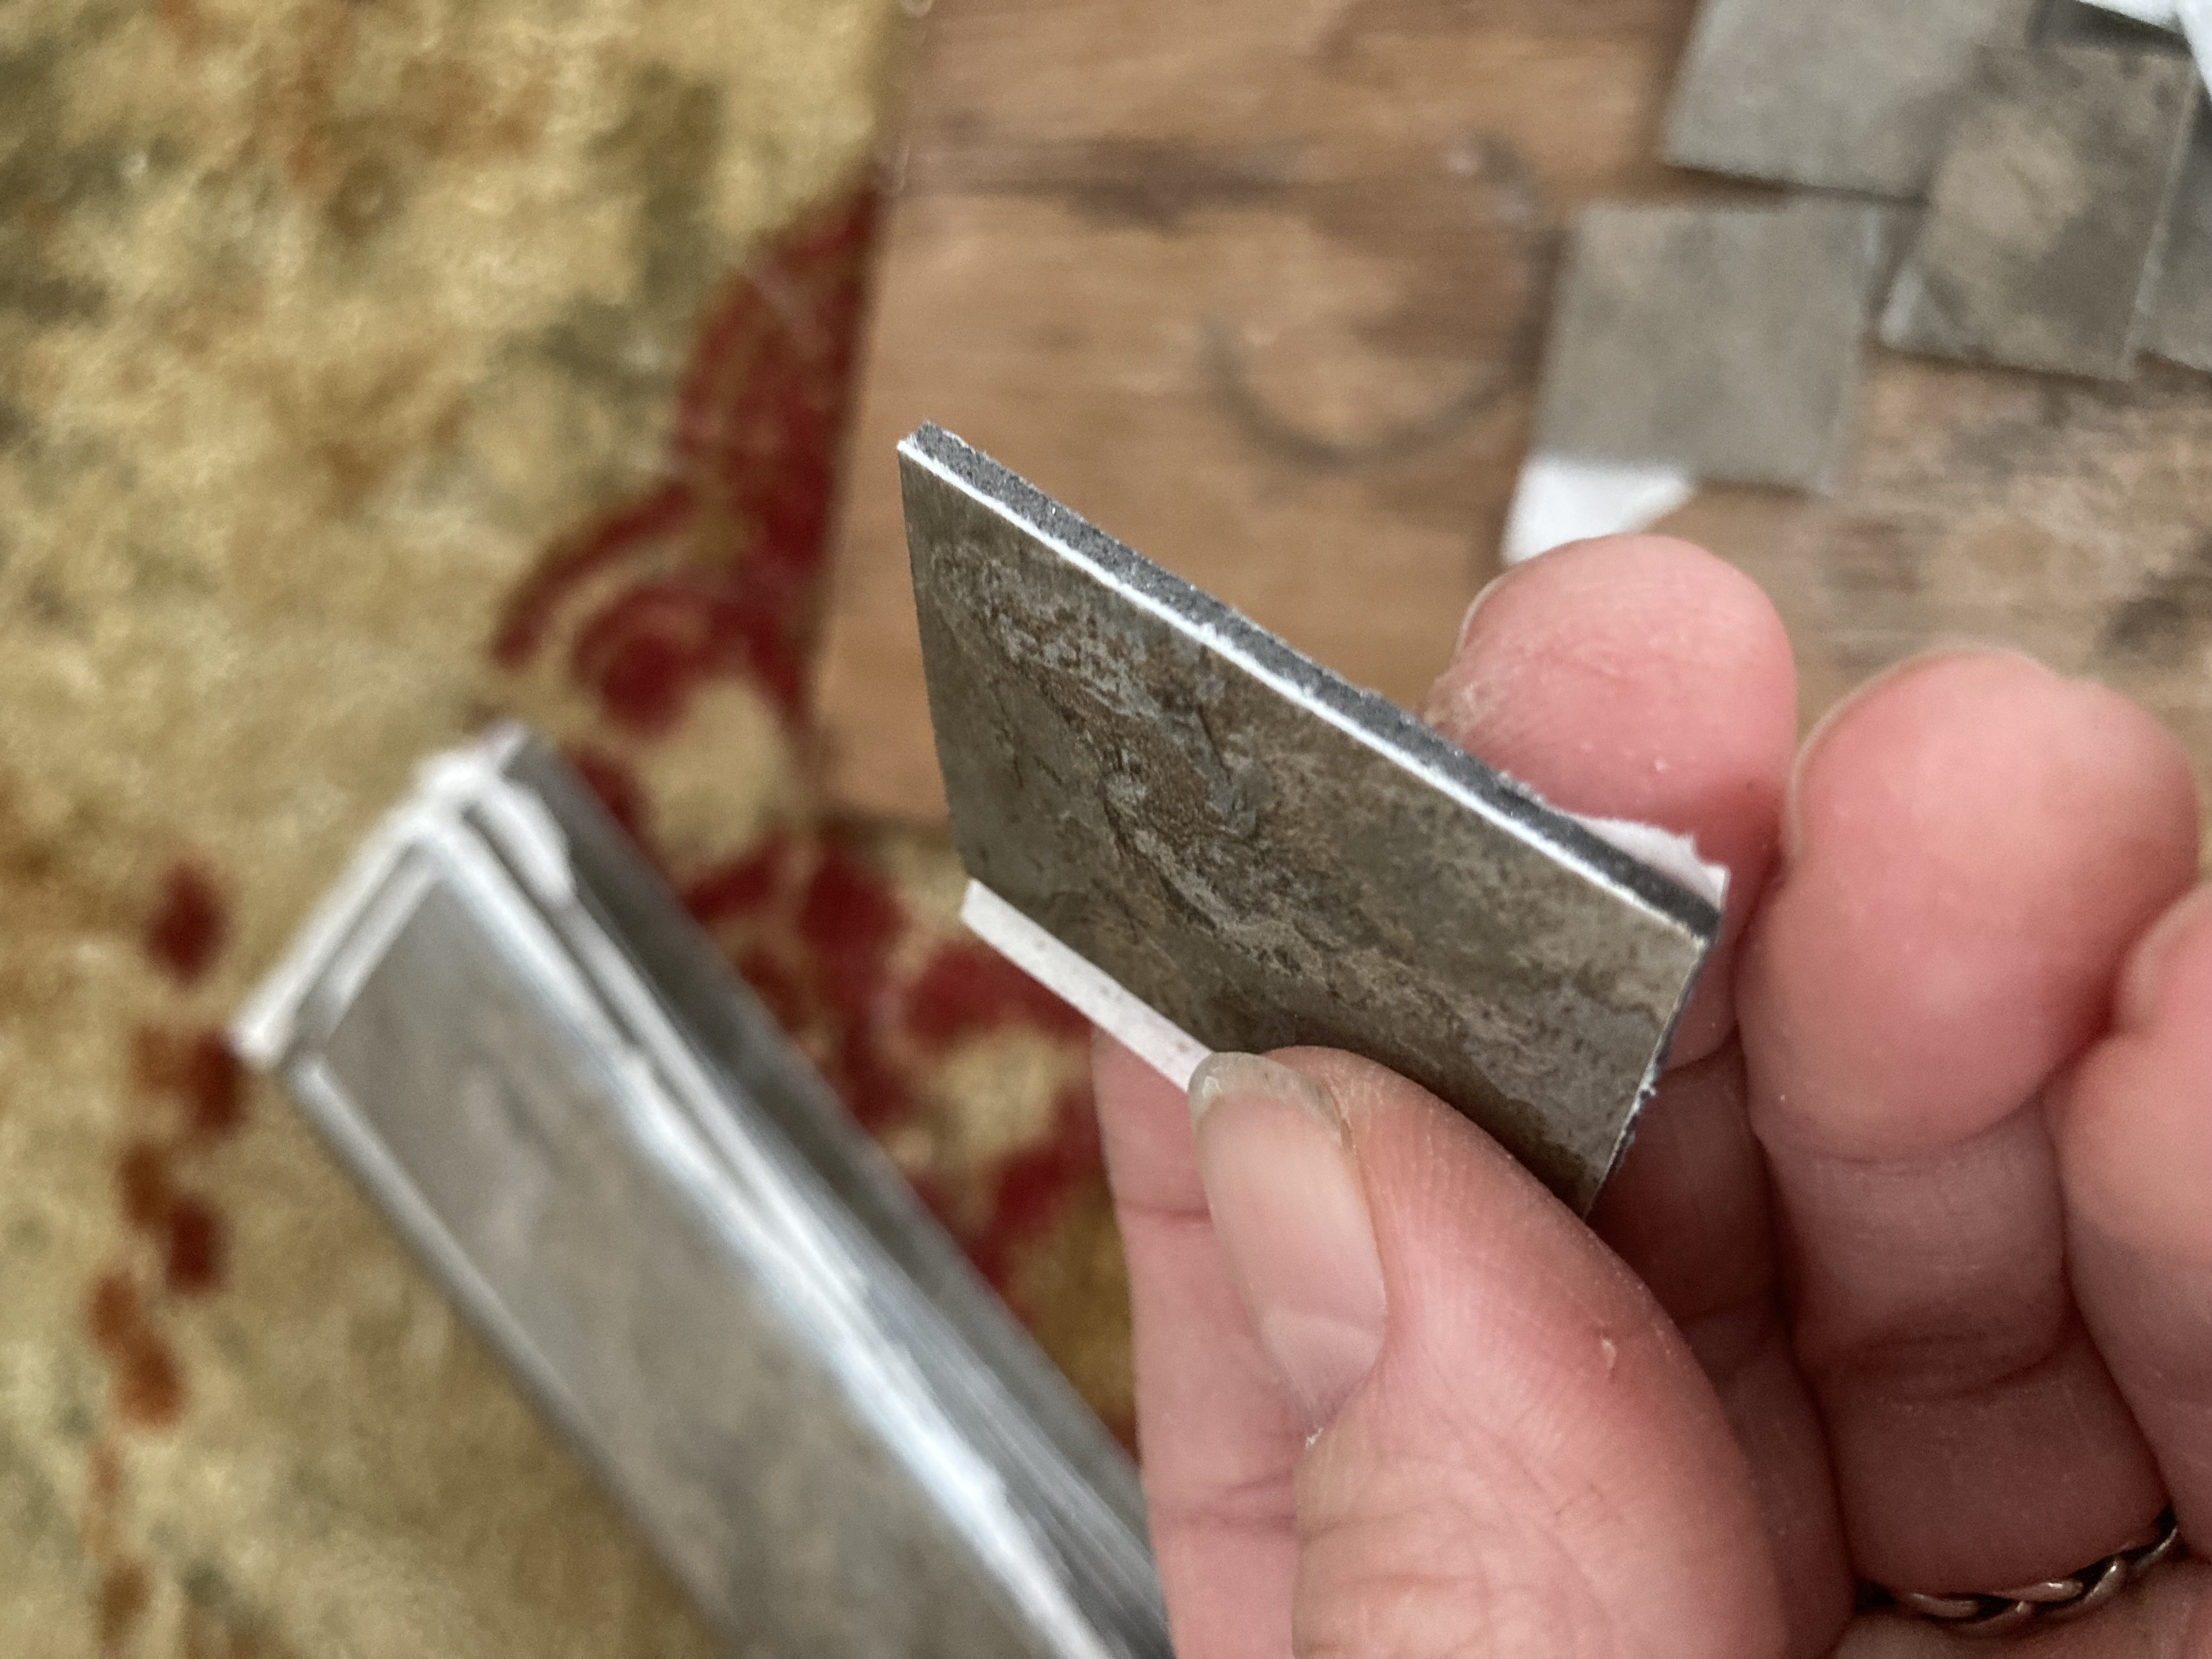
Cutting the tile’s paper backing after the front has been snapped.
I chose to keep the paper backing on the tiles as I went, at least until I was done cutting them. Otherwise (I used self-adhesive tiles) the sticky backing will make them stick to the cutting board and cause some difficulty. Anyway, because I kept this paper backing on, I had to make an additional slice on the back of the tile to cut the paper after I had snapped the tile.
I cut the tiles into long strips, about 1.5 inches wide.
Slicing the long strips into shingles.
After my strips were cut, I cut them into smaller sized shingles. I used the same method, scoring with the knife (except for this cut I didn’t use the ruler as a guide as the cuts were so short and it was pretty easy to keep them straight), and then snapping them into small squares. I started out leaving the paper on the backs of these smaller pieces, but after a while I found it went faster to just peel the paper off after they were cut.
A small shingle. Nice, thick edges.
Next comes the fun part.
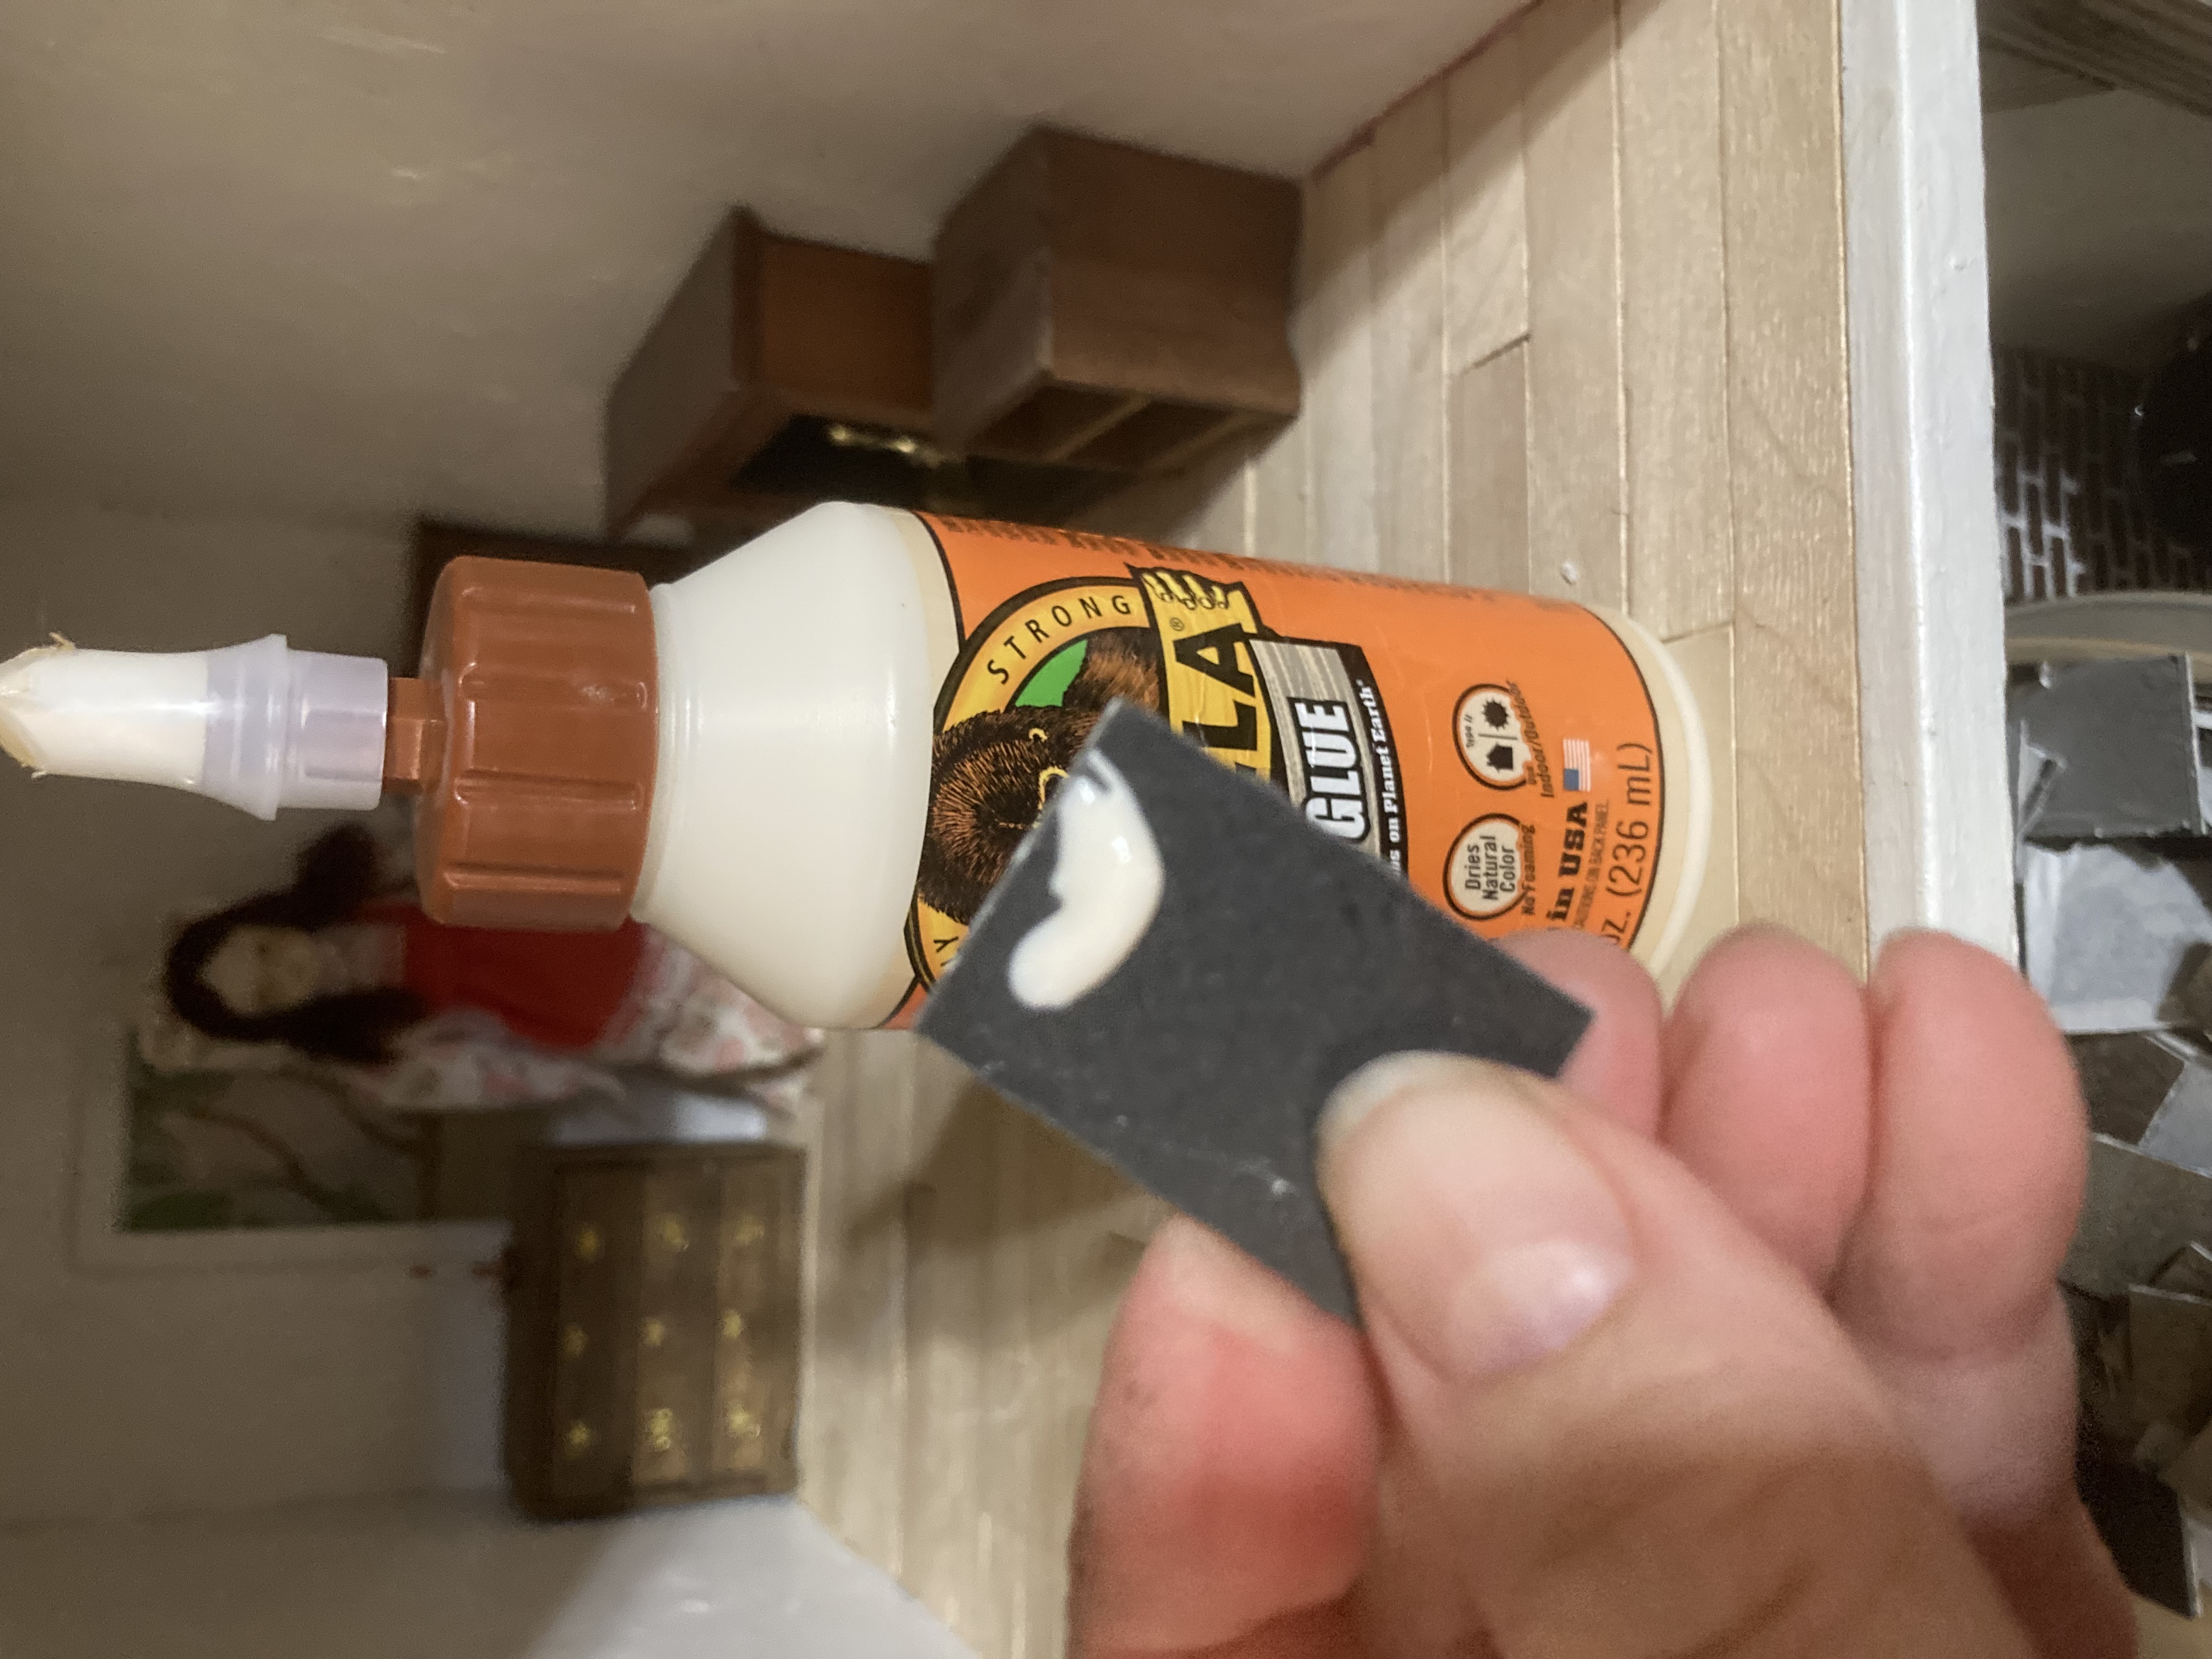
Gluing the shingles. The glued edge will be laid pointing towards the roof’s top, so that it makes contact with the wood part of the roof. The bottom edge that isn’t glued will be overlapping the shingles below it. If I glued the whole shingle it has more chance of dripping glue onto the shingle below it.
After my shingles are cut, and the paper backing is removed, I dabbed a little glue on one end (because the sticky backing isn’t as sticky as I would like it to be, and I don’t want my shingles falling off), and started installing them on my roof.
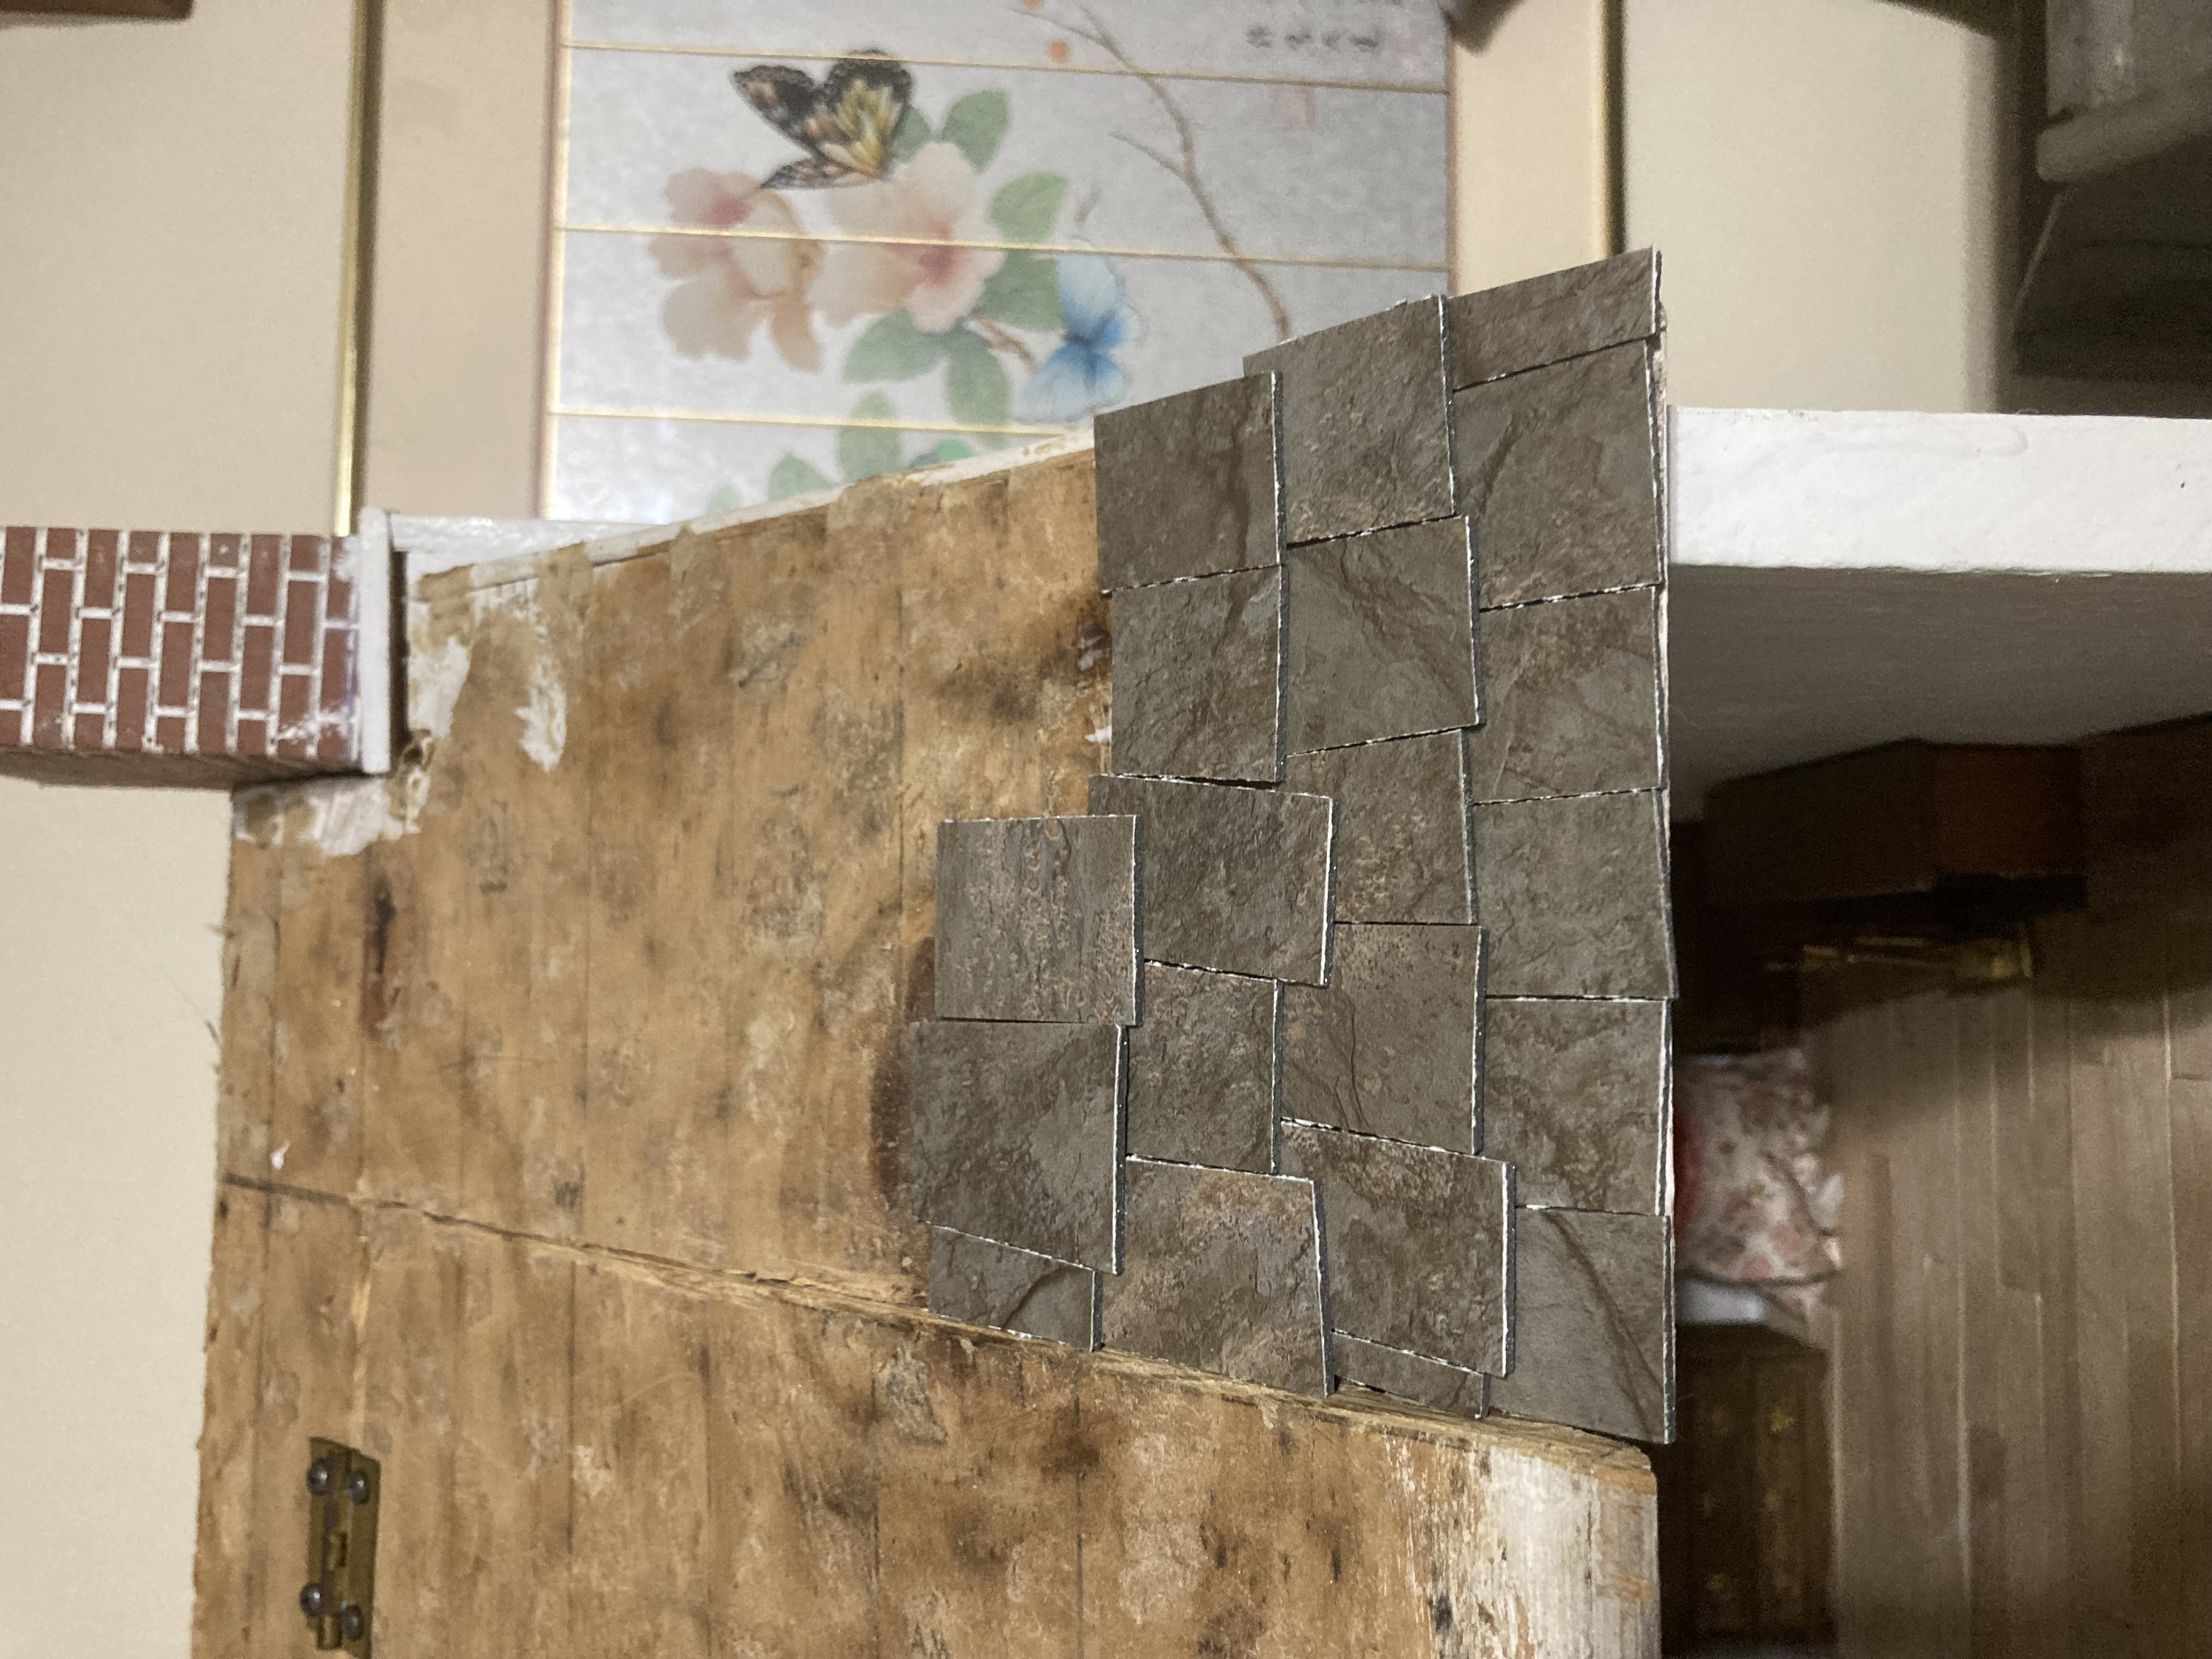
This roof has an opening for the attic, so I had to work around it.
When installing the shingles, start from the bottom and work your way up. Overlap them a little bit, so that the next row is hanging over the one below it slightly. In real life, the cracks between the shingles won’t line up, to help prevent water from leaking into your house, so keep them staggered. My shingles are not straight as I wanted a more primitive look.
More shingles done.
Just keep going until you cover the whole roof. In the sections where my attic ‘door’ is, I made sure to keep the shingles around the door out of the way so that it will still open. Then on the door itself, I let the shingles overlap the flap just enough to blend into the shingles on the rest of the roof, which helps camouflage the door but without hindering its functionality.
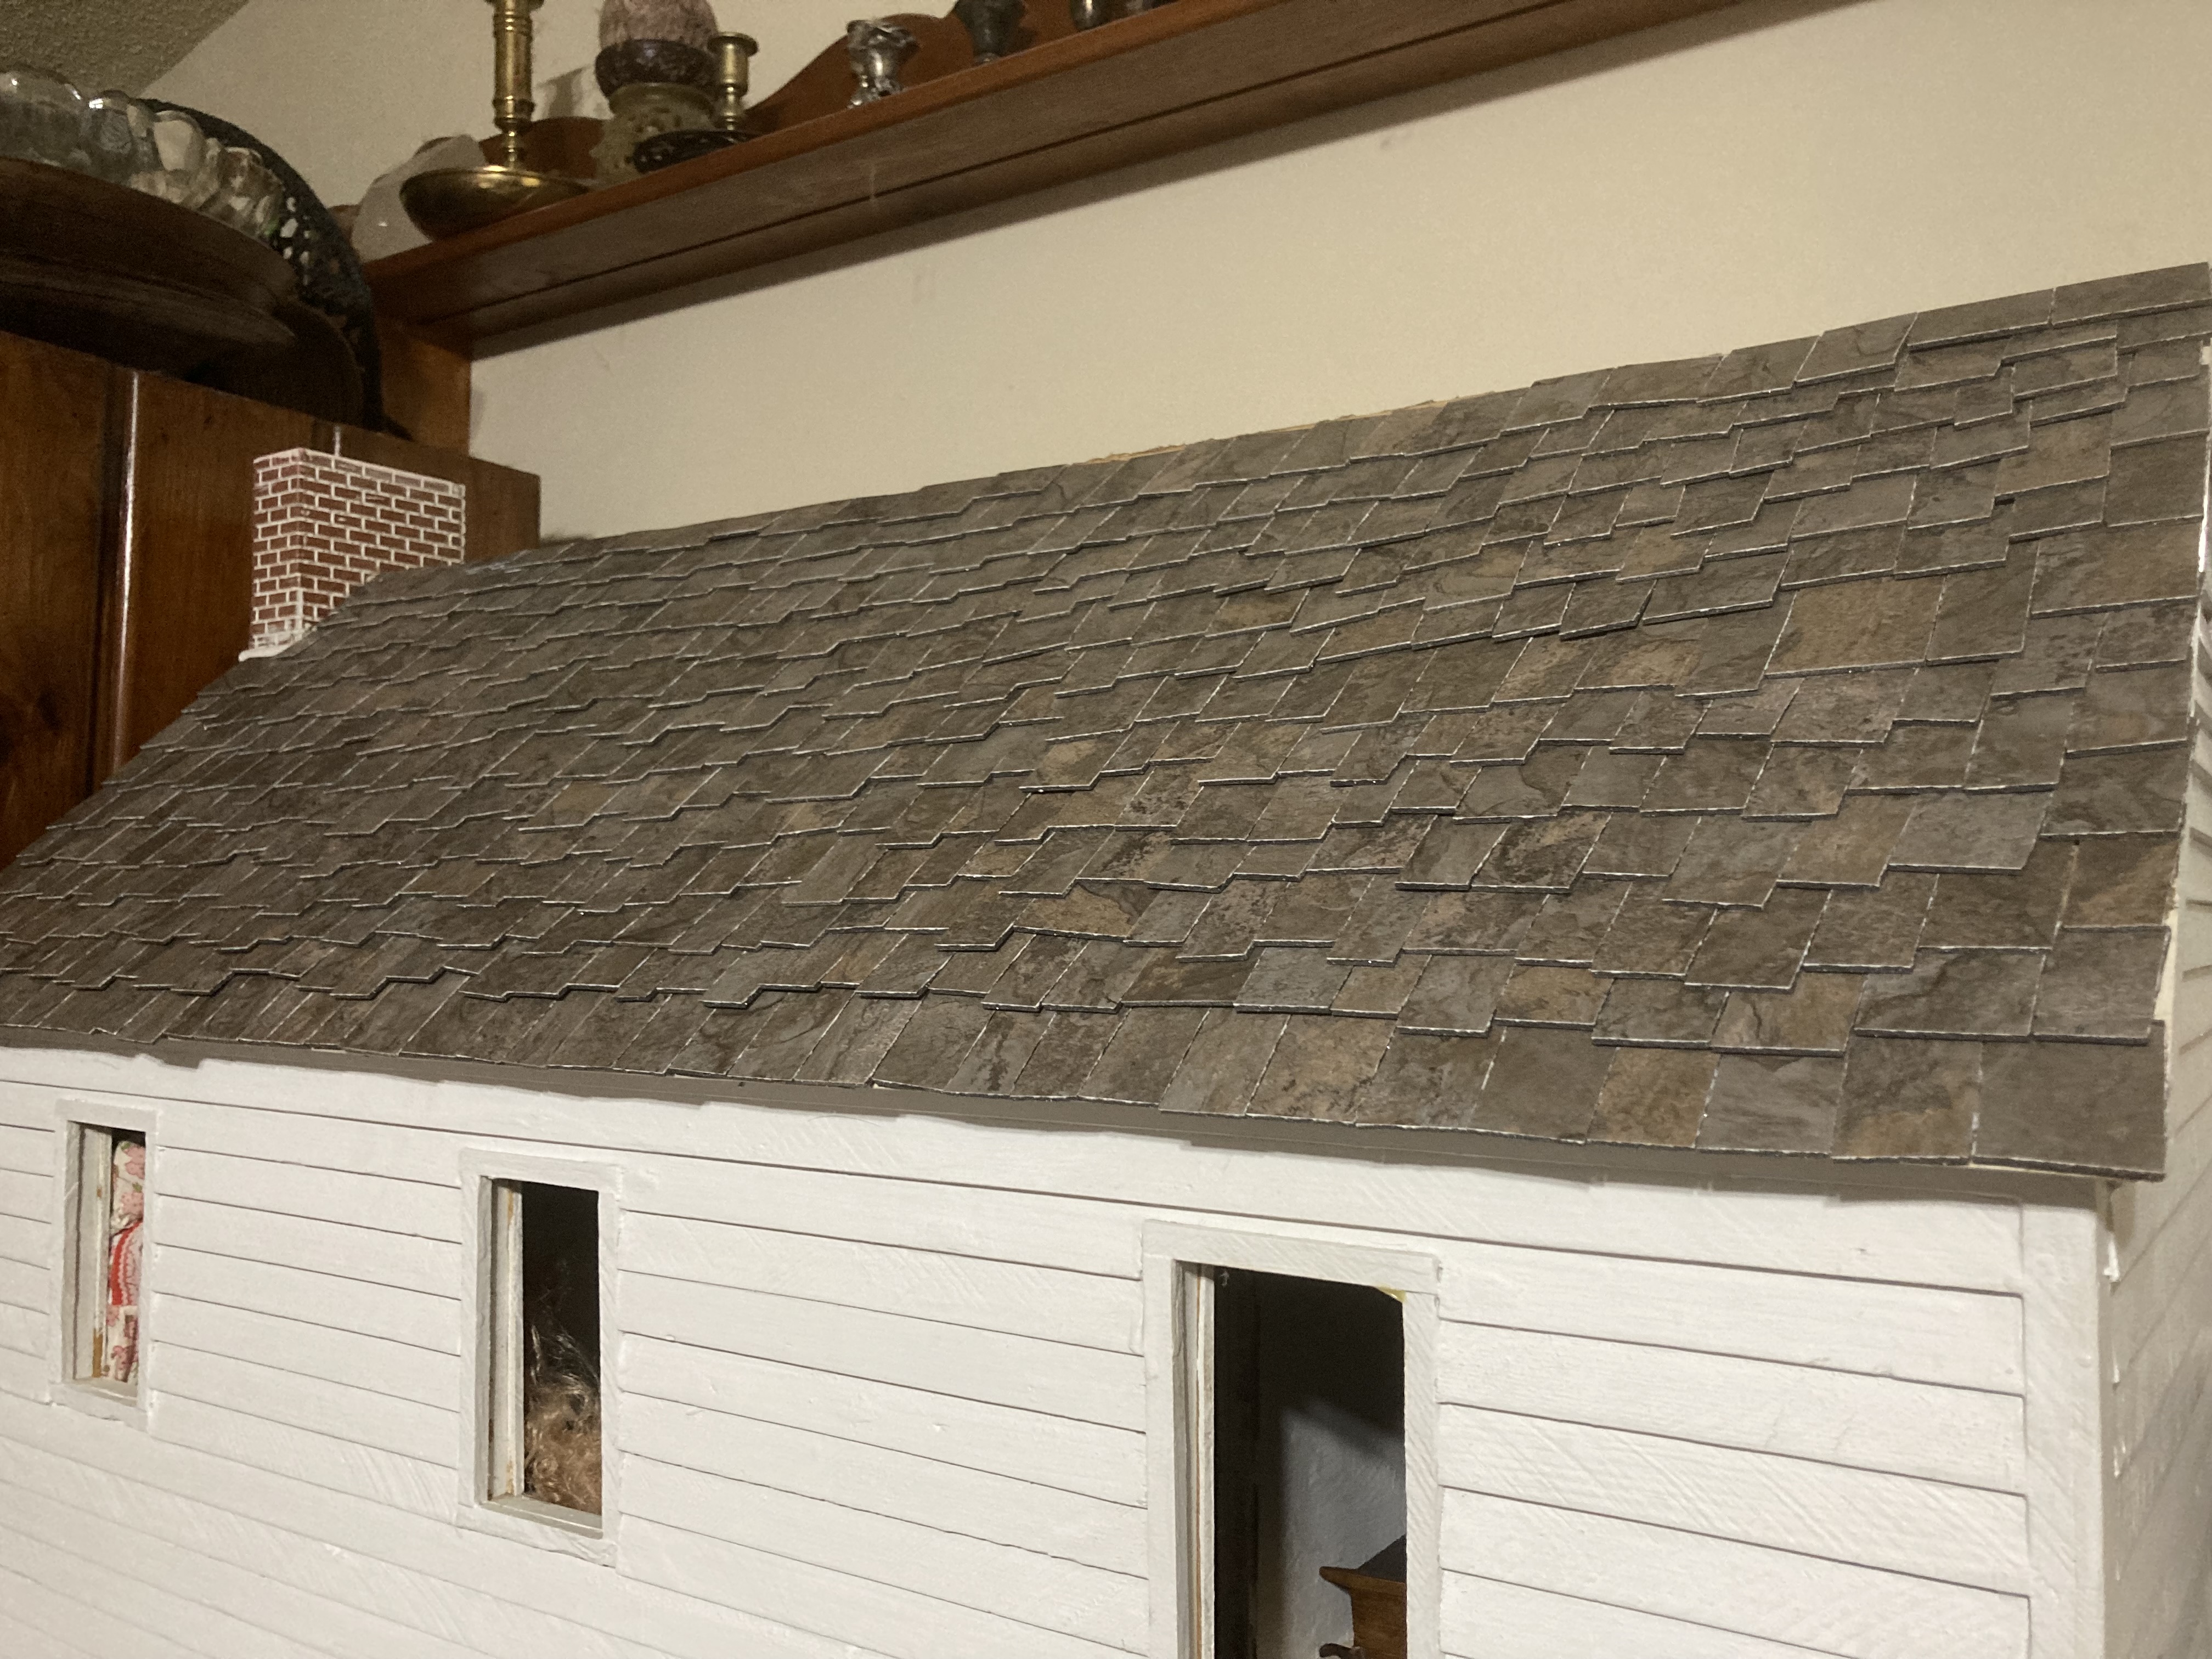
Finished roof (but this is on the other side of the dollhouse).
Once I was done, I cut tiny strips of shingle and glued them along the top to hide gaps where the shingles of either side meet. (Not pictured). I had initially planned on painting the edges of the shingles to get rid of the white edge, but I feel pretty good about how they look as-is. These tiles were heavy, so they do add a bit of weight to the house, but they sure do look good, and I am sure they are lighter than real slate would be. Feel free to comment with any questions or suggestions!
This house was an unfinished kit that I bought on Facebook Marketplace. It still had the instruction manual, plus an old sales catalog from Frank’s Nursery dated 1982, with this kit circled. I am guessing that was when it was purchased, and it had never been finished. It has a lot of dust on it.
Something about this dollhouse makes me think of a large saloon and brothel in an old west town. We just finished watching the old ‘Deadwood’ series (HBO) and I can’t help envisioning Al sitting on the upper porch drinking his coffee. When I found this house available within easy driving distance, at an affordable price, especially in its unpainted state, I dove for it!
After the porch railings were finished. It looks more like a saloon to me now!
The first thing I did was finish the porch railings. The kit hadn’t been completed, and fortunately they included the instructions and the unfinished parts. It was easy to follow the instructions and install the porch rails.
Once the railing was installed, I turned the house around to focus on the inside. None of the inside walls had been installed, so the inside was a blank slate, which is great for me and my saloon intentions. However, without the support of the inside walls, the floors had sagged with time. I think someone probably used it like a shelf, which would have added to the problem. I decided that it needed some support, but I didn’t want any extra walls to break up that glorious open space on the bottom floor, so what to do?
Bracing the inside floors.
I bought some fancy decorative wooden trim from Menards and glued it along the front edges of the floors, where it sagged the most. I clamped it until the glue was dry. I used pieces of wood to brace it up as it dried to it wouldn’t sag anymore. This would work temporarily, but I knew that it would be weak over time if it didn’t have some better support. Before I could add any extra support, however, I would need to get the floors done on the bottom floor.
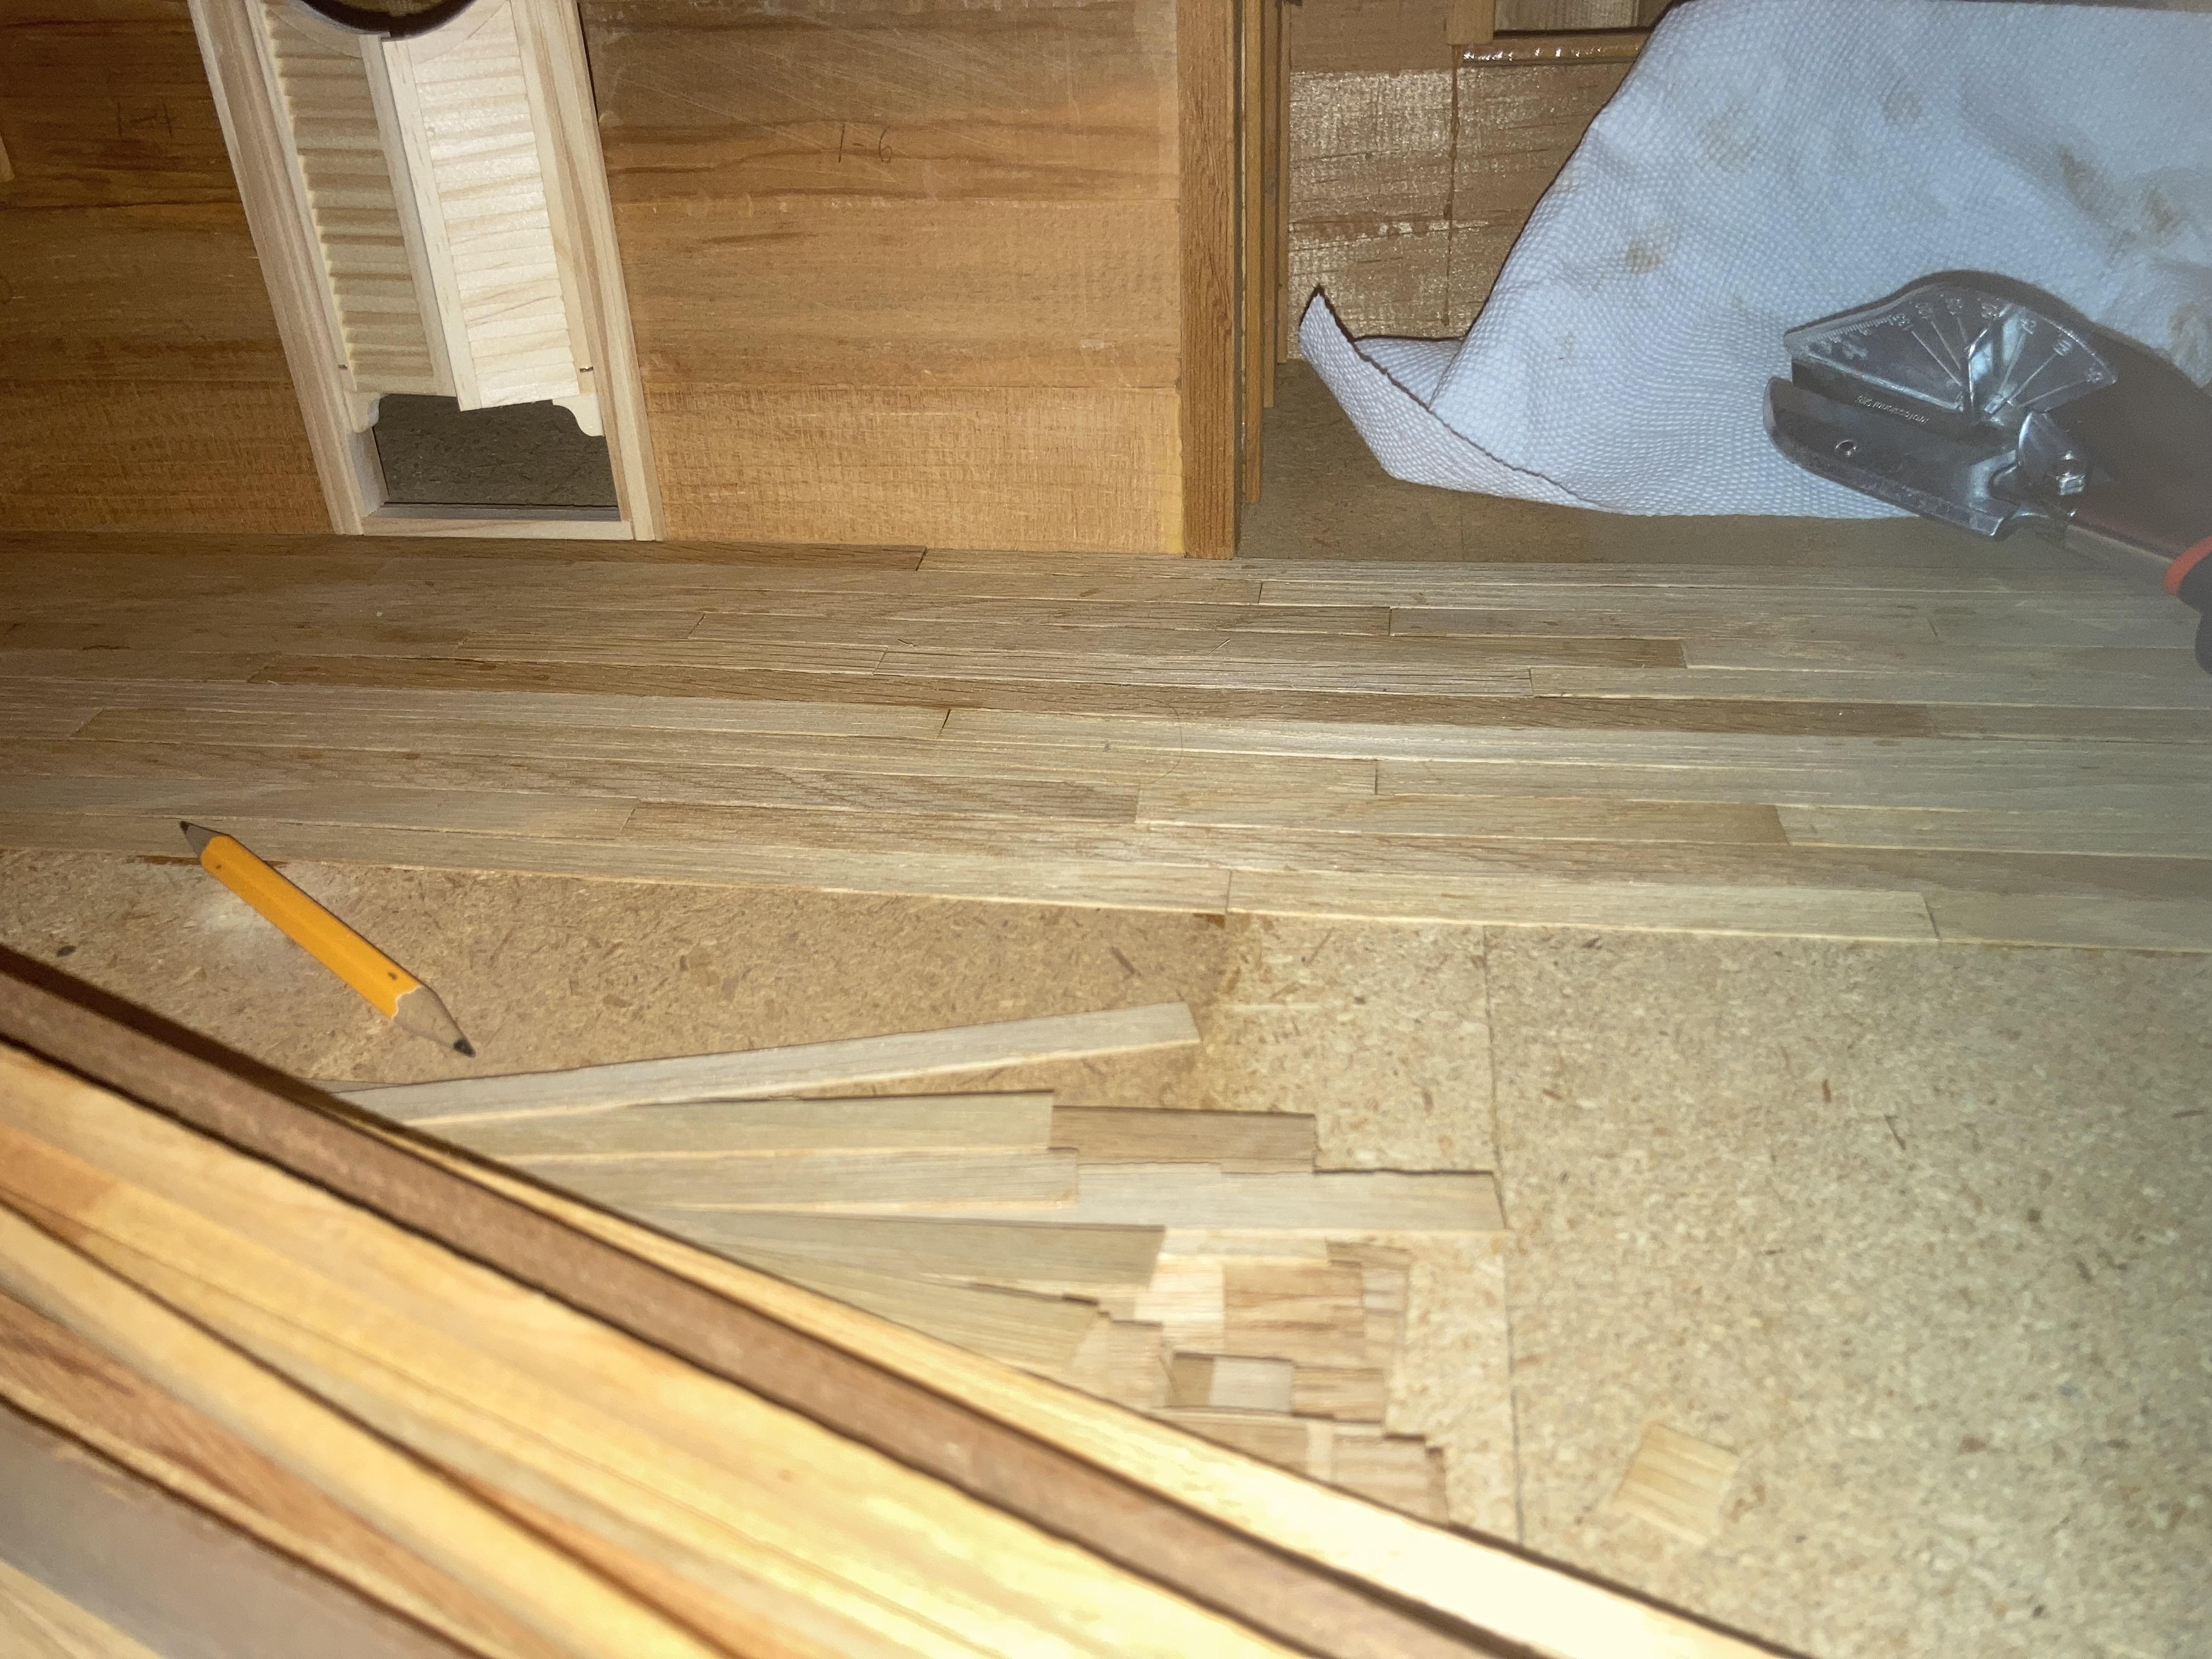
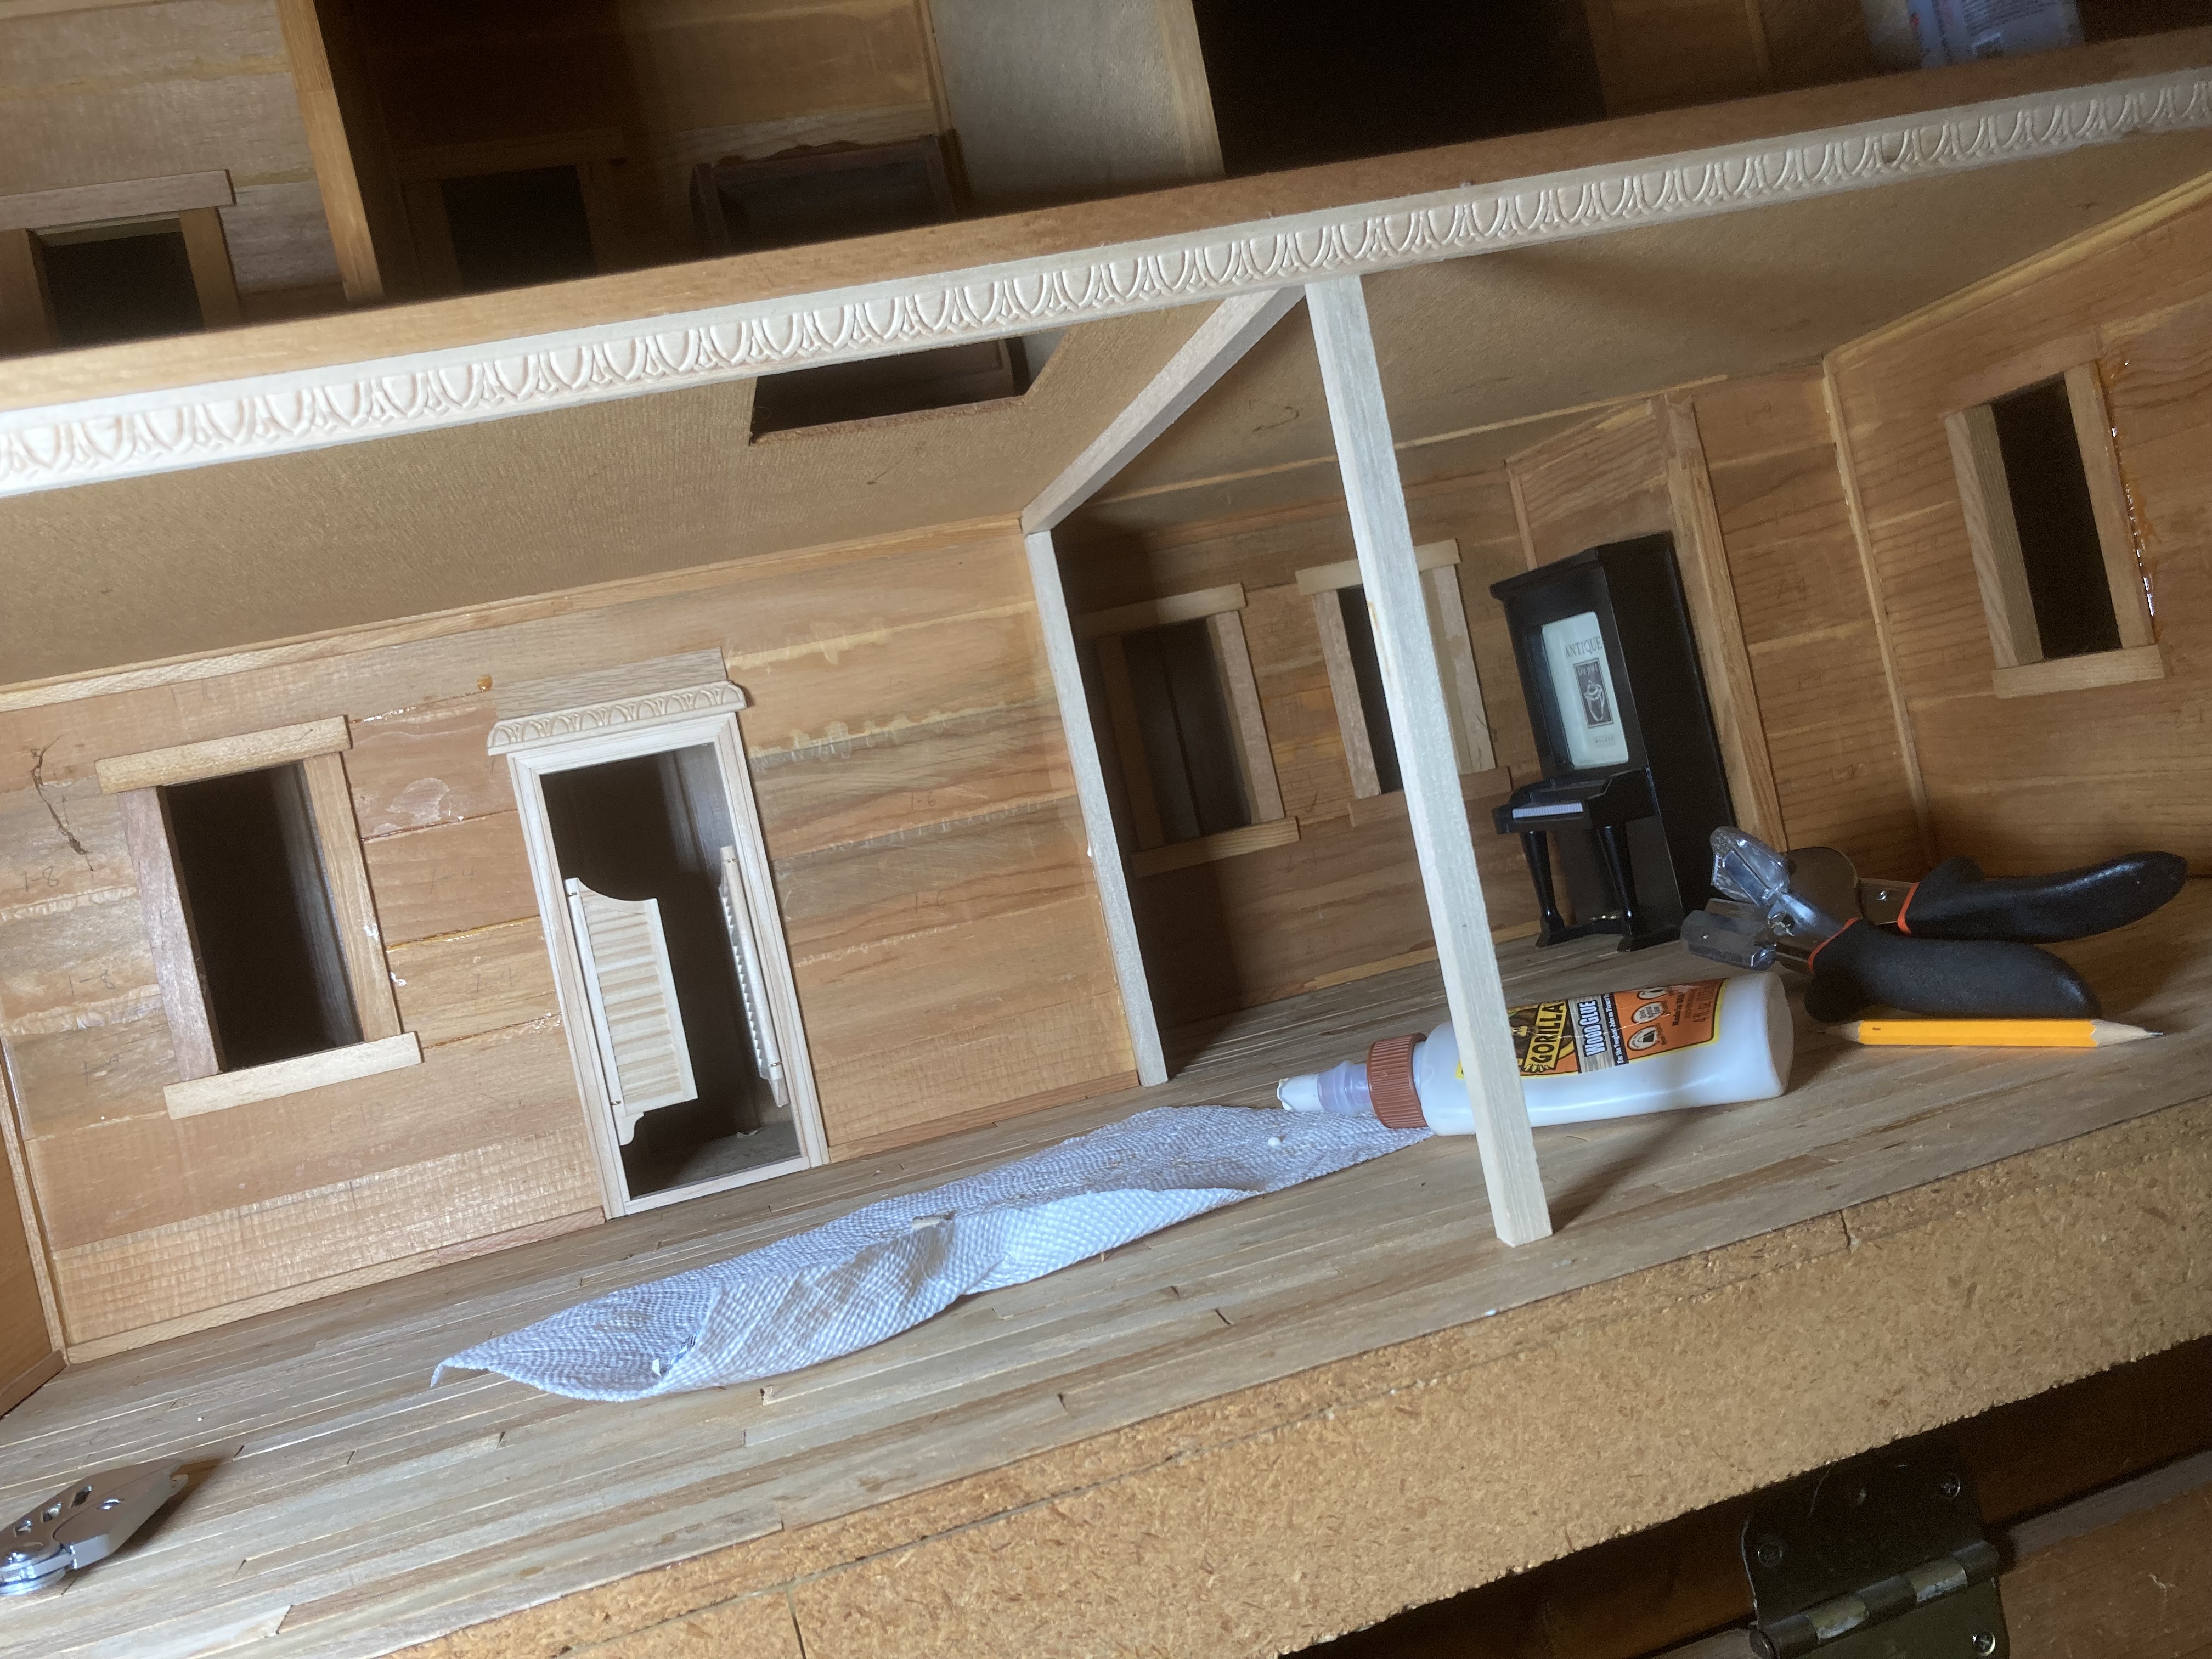
I also cut one of the front windows bigger, making it into a door. I bought a swinging bat-wing door on Amazon and glued it in place, but there is a gap on the top that will need to be repaired.Installing flooring strips.
The kit came with flooring strips (YAY) so I worked at cutting and gluing them down. I kept the lengths staggered so there is no pattern to the wood that would draw the eye, just like a real wood floor. The pieces were so thin that the wood glue I used made them curl up in some areas. I weighed them down with heavy glass cup holders until they were dry.
When the floor was laid, I cut some square wooden dowels to make a bracing framework across the middle of my floor. Eventually I can make some sort of fancy corbels or something to spruce it up, but I am confident that it will help to brace the floor above just as a wall would. In this picture you can see the trim I added above the doorway to cover the gap–it wasn’t quite tall enough, so I added a strip of leftover flooring above that. It seems to blend in the with the wood of the walls enough that it works.
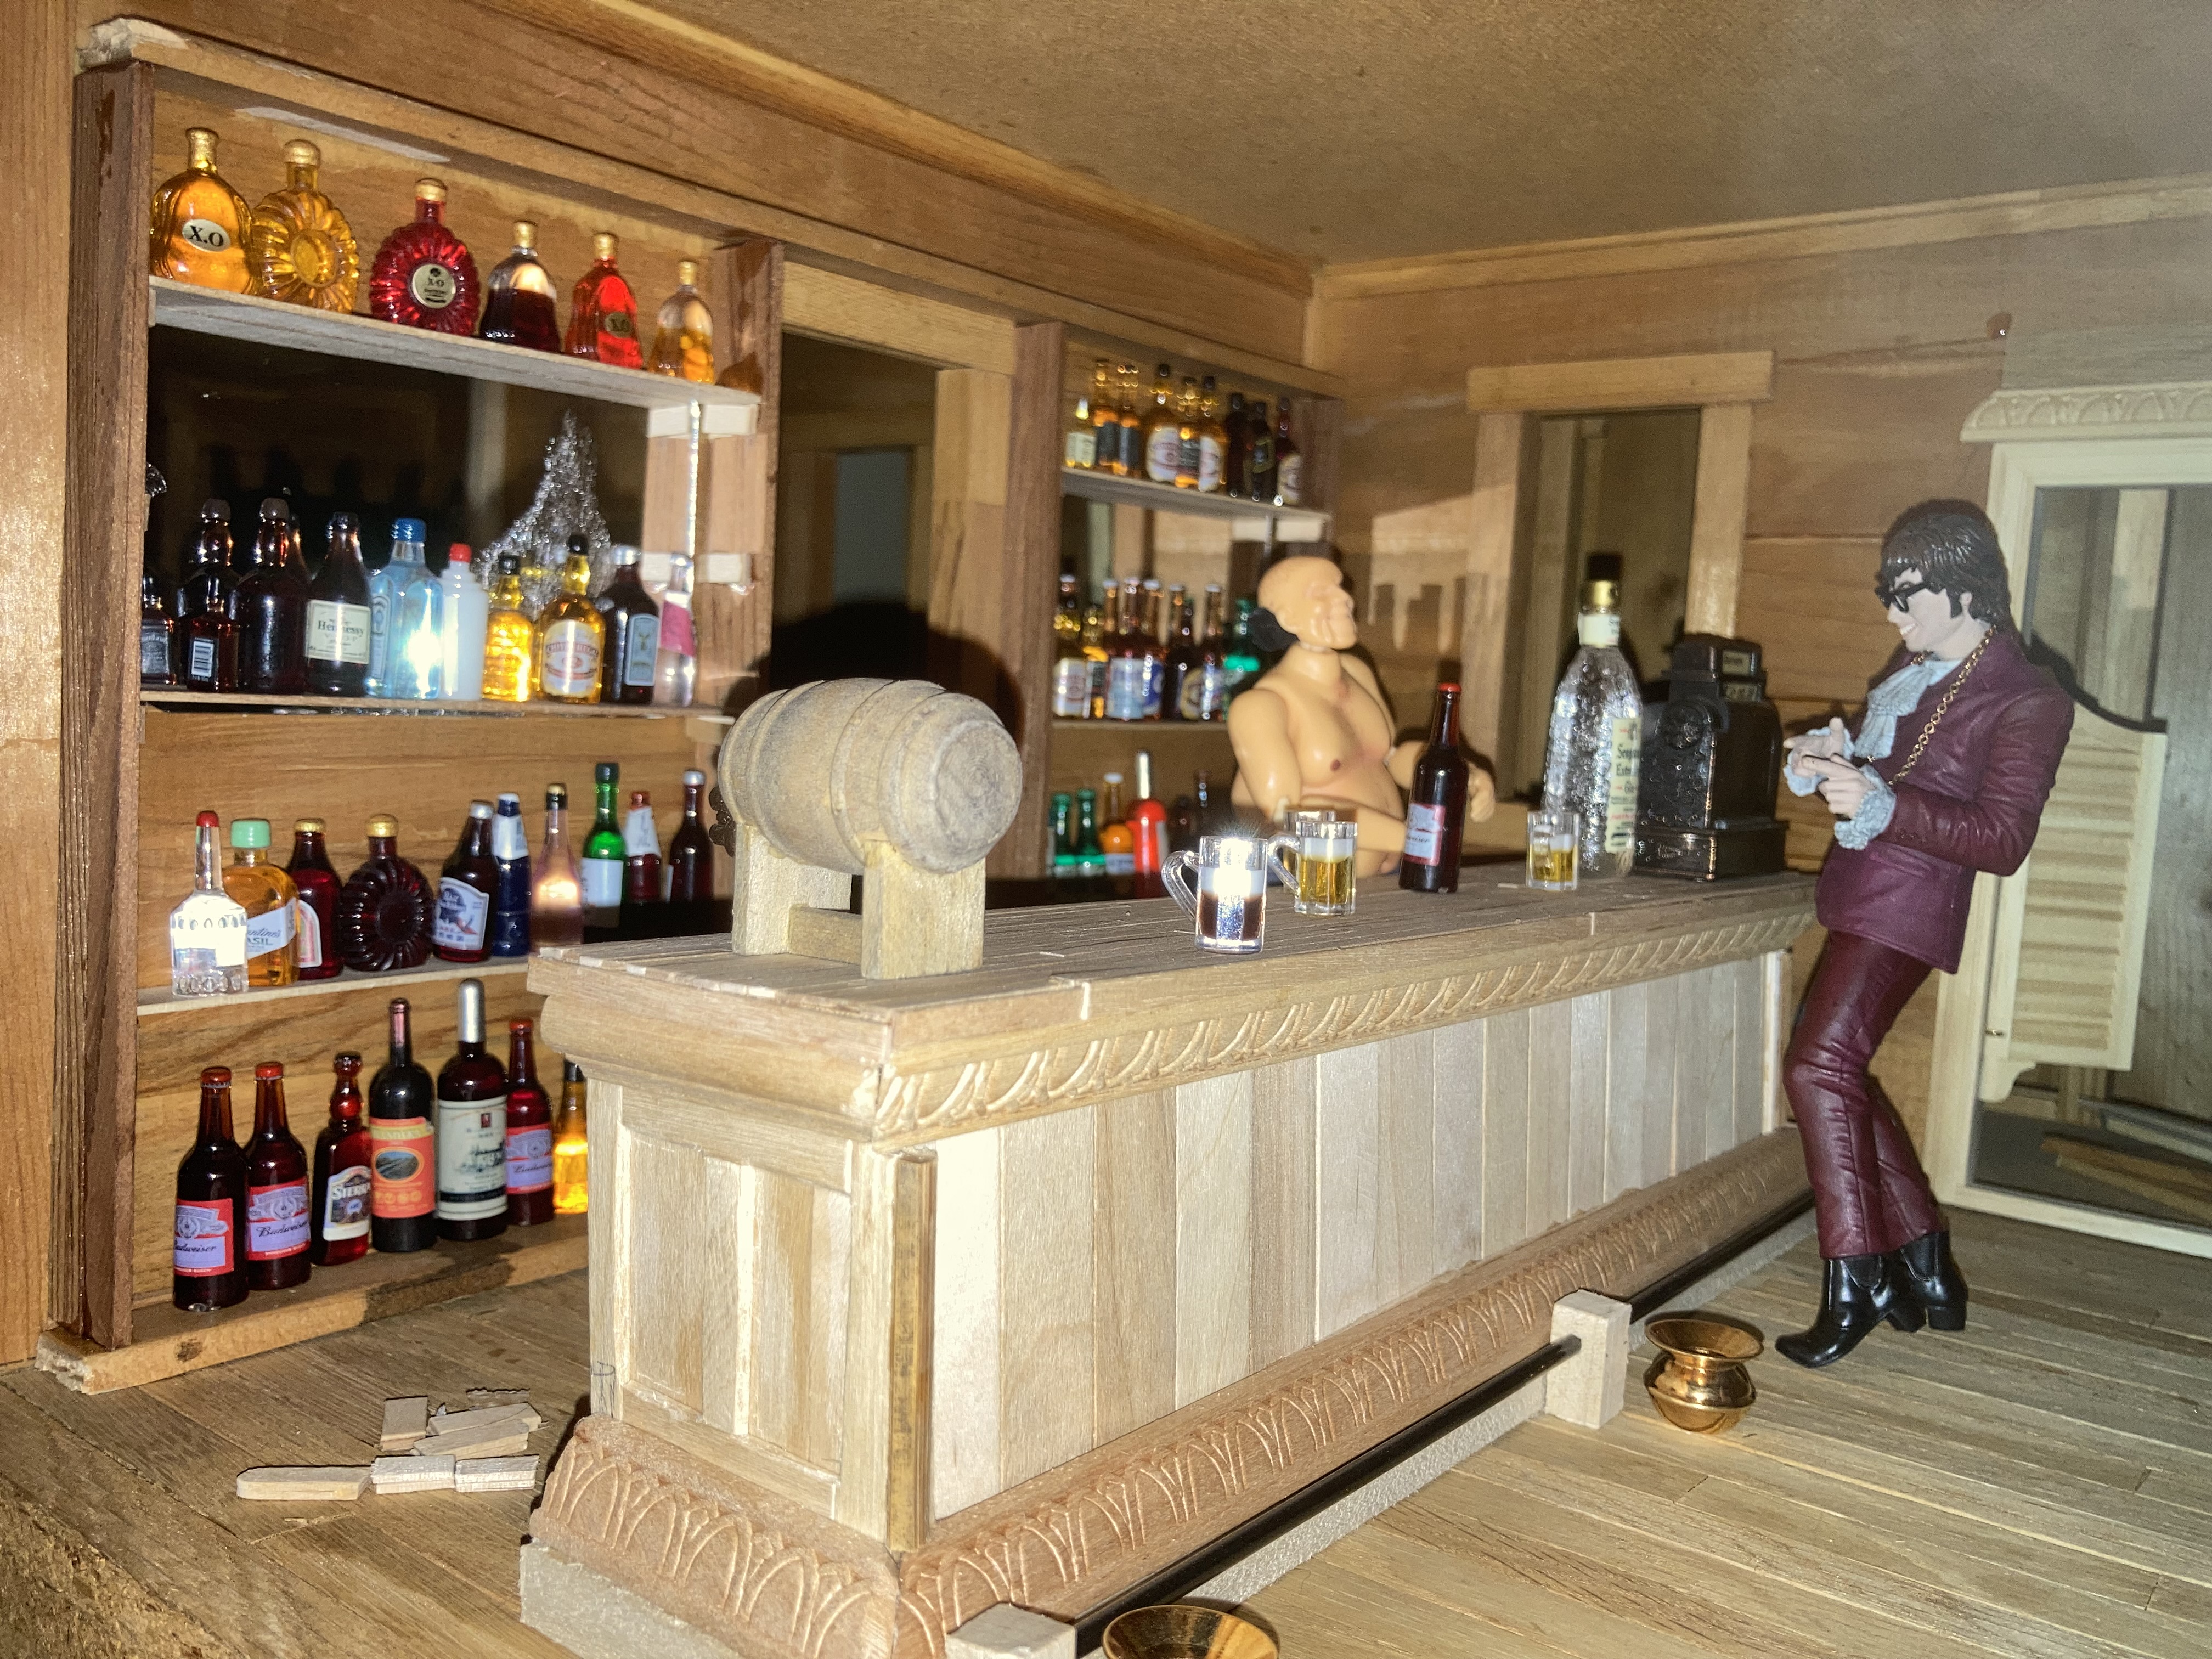
Next I need a bar.
This was made with leftover fancy trim from what I used to brace the edge of the floor, plus jumbo craft sticks and square dowels. I used small round dowels, cut in half length-wise, for the round edges on the ends. Bar in place, with a couple of dolls posing. I built some narrow shelves around the doorway to the back room, lining them with alcohol bottles I found on Amazon and Ebay. The mirror behind the shelves is from the back of a mirrored phone case I bought at dollar tree. The foot rest at the bottom of the bar is made of coffee stirrers (I shoved round toothpicks inside for support) and pieces of square dowel. I bought the spittoons on ebay.
This is where I’m at right now. I plan to get more dolls. I want some bored dancing girls, some patrons playing cards, rooms upstairs, and a storage room behind the bar. Stay tuned!
Outside view (As I bought it.) The paint was just AWFUL!Inside view (before).
This house spoke to me for one reason or another when I found it on Marketplace. For some reason it feels older to me than the 1980 signature on the bottom. I have seen other, older houses that share the same basic shape but have different porches or a balcony on the window. I don’t know if it was built from a kit or maybe (and more likely) from plans. It has handy dandy wheels on the bottom and rolls so nicely!
The first thing that had to go on this house was the atrocious paint job. I cringed each time I looked at it. I swear someone decided to ‘spruce it up’ with chalk paint before listing it for sale, and they painted it so sloppily i just… well, I just had to fix it.
First I tried a little acetone on a cotton ball to see what exactly was underneath the paint. Was there some grand finish that begged to be restored? No–it looked like it was just white paint underneath, and it would be a mess to clean off the old paint just to get it back to white. I could just paint over it.
It took me a while to decide what I actually wanted to do with this house. I had plans for a saloon at some point, and a 1920’s style house party, with flapper girls and a grand banquet. My first thought was to make this a saloon, as the covered porch might be made old-west-ish, I suppose, but then just a week or so after I brought this house home I discovered a saloon-of-my-dreams house (actually it is a Duracraft Deluxe Victorian Mansion) that will make an awesome saloon and brothel. So this one will be my 1920’s house, and I think I am happy with that decision.
I started with some new siding to try to spruce up the outside. My mother had just re-sided her dollhouse with craft sticks, and I liked the result, and so I decided to try it myself.
Jumbo craft sticks with curved ends trimmed off (using miter shears). I used hot glue, applied only to one edge of the stick.
I used jumbo craft sticks, cutting the curved ends off to make them squared. Using hot glue (or I am sure that wood glue would be a better choice, but with a bit more patience needed for drying), I glued one long edge of the sticks at a time, overlapping them and keeping them staggered so they looked randomly applied.
Start at the bottom, doing one row at a time, and work your way up, overlapping the rows just slightly. Also try to keep the stick lengths random so you don’t form a pattern that will distract the eye.Window trim
After I got the siding done, I cut some sticks length-wise to make slimmer window trim, and then glued them in place over the siding.
Siding and window trims in place.White paint.
Once siding and trim were in place, I painted it white. It took several coats of paint to cover the wood and especially the black porch, but I am much pleased with it. I haven’t decided what to do with the roof, so for now, it will remain messy black. I will probably paint it, maybe like slate? I’ll have to do some research.
The porch still troubles me a little. I want to get more of an art deco feel, but something that will still fit in with the rest of the house. I am considering railings and corbels, to fancy it up a bit. Of course it still needs doors and windows, but that will come later.
I haven’t done much on the inside, yet. I am really hoping for some sort of grand staircase, but somehow without cutting into the wood floors. Hmm. Maybe a freestanding staircase that can be moved around? Lots to consider. I will, however, add a railing to the second floor so I can have guests leaning on it and looking down. And also, perhaps, a speakeasy in the attic. So many ideas!
12/26/2022 UPDATE: I’ve been toying with different ideas for a while on this one. After initially writing this post, I came across a different house that I want to make into a flapper girl house, so I wasn’t sure what to do with this one. I decided to try a 1970’s theme. I repainted it gold for now, and plan on adding shingles. Here is an updated pic:
Looking for that ’70’s look.
I have also added a lattice handrail made from tin ribbon. I might add triangles of that ribbon into the upper corners of the porch posts for decorative brackets. I have toyed with the idea of painting the trim brown but I don’t think I can bring myself to do it.
The idea for this house is now to decorate the inside with golds, browns, oranges, and greens to catch some of that 1970’s feel. I always loved the show “That 70’s Show” and hope to recreate some of that.
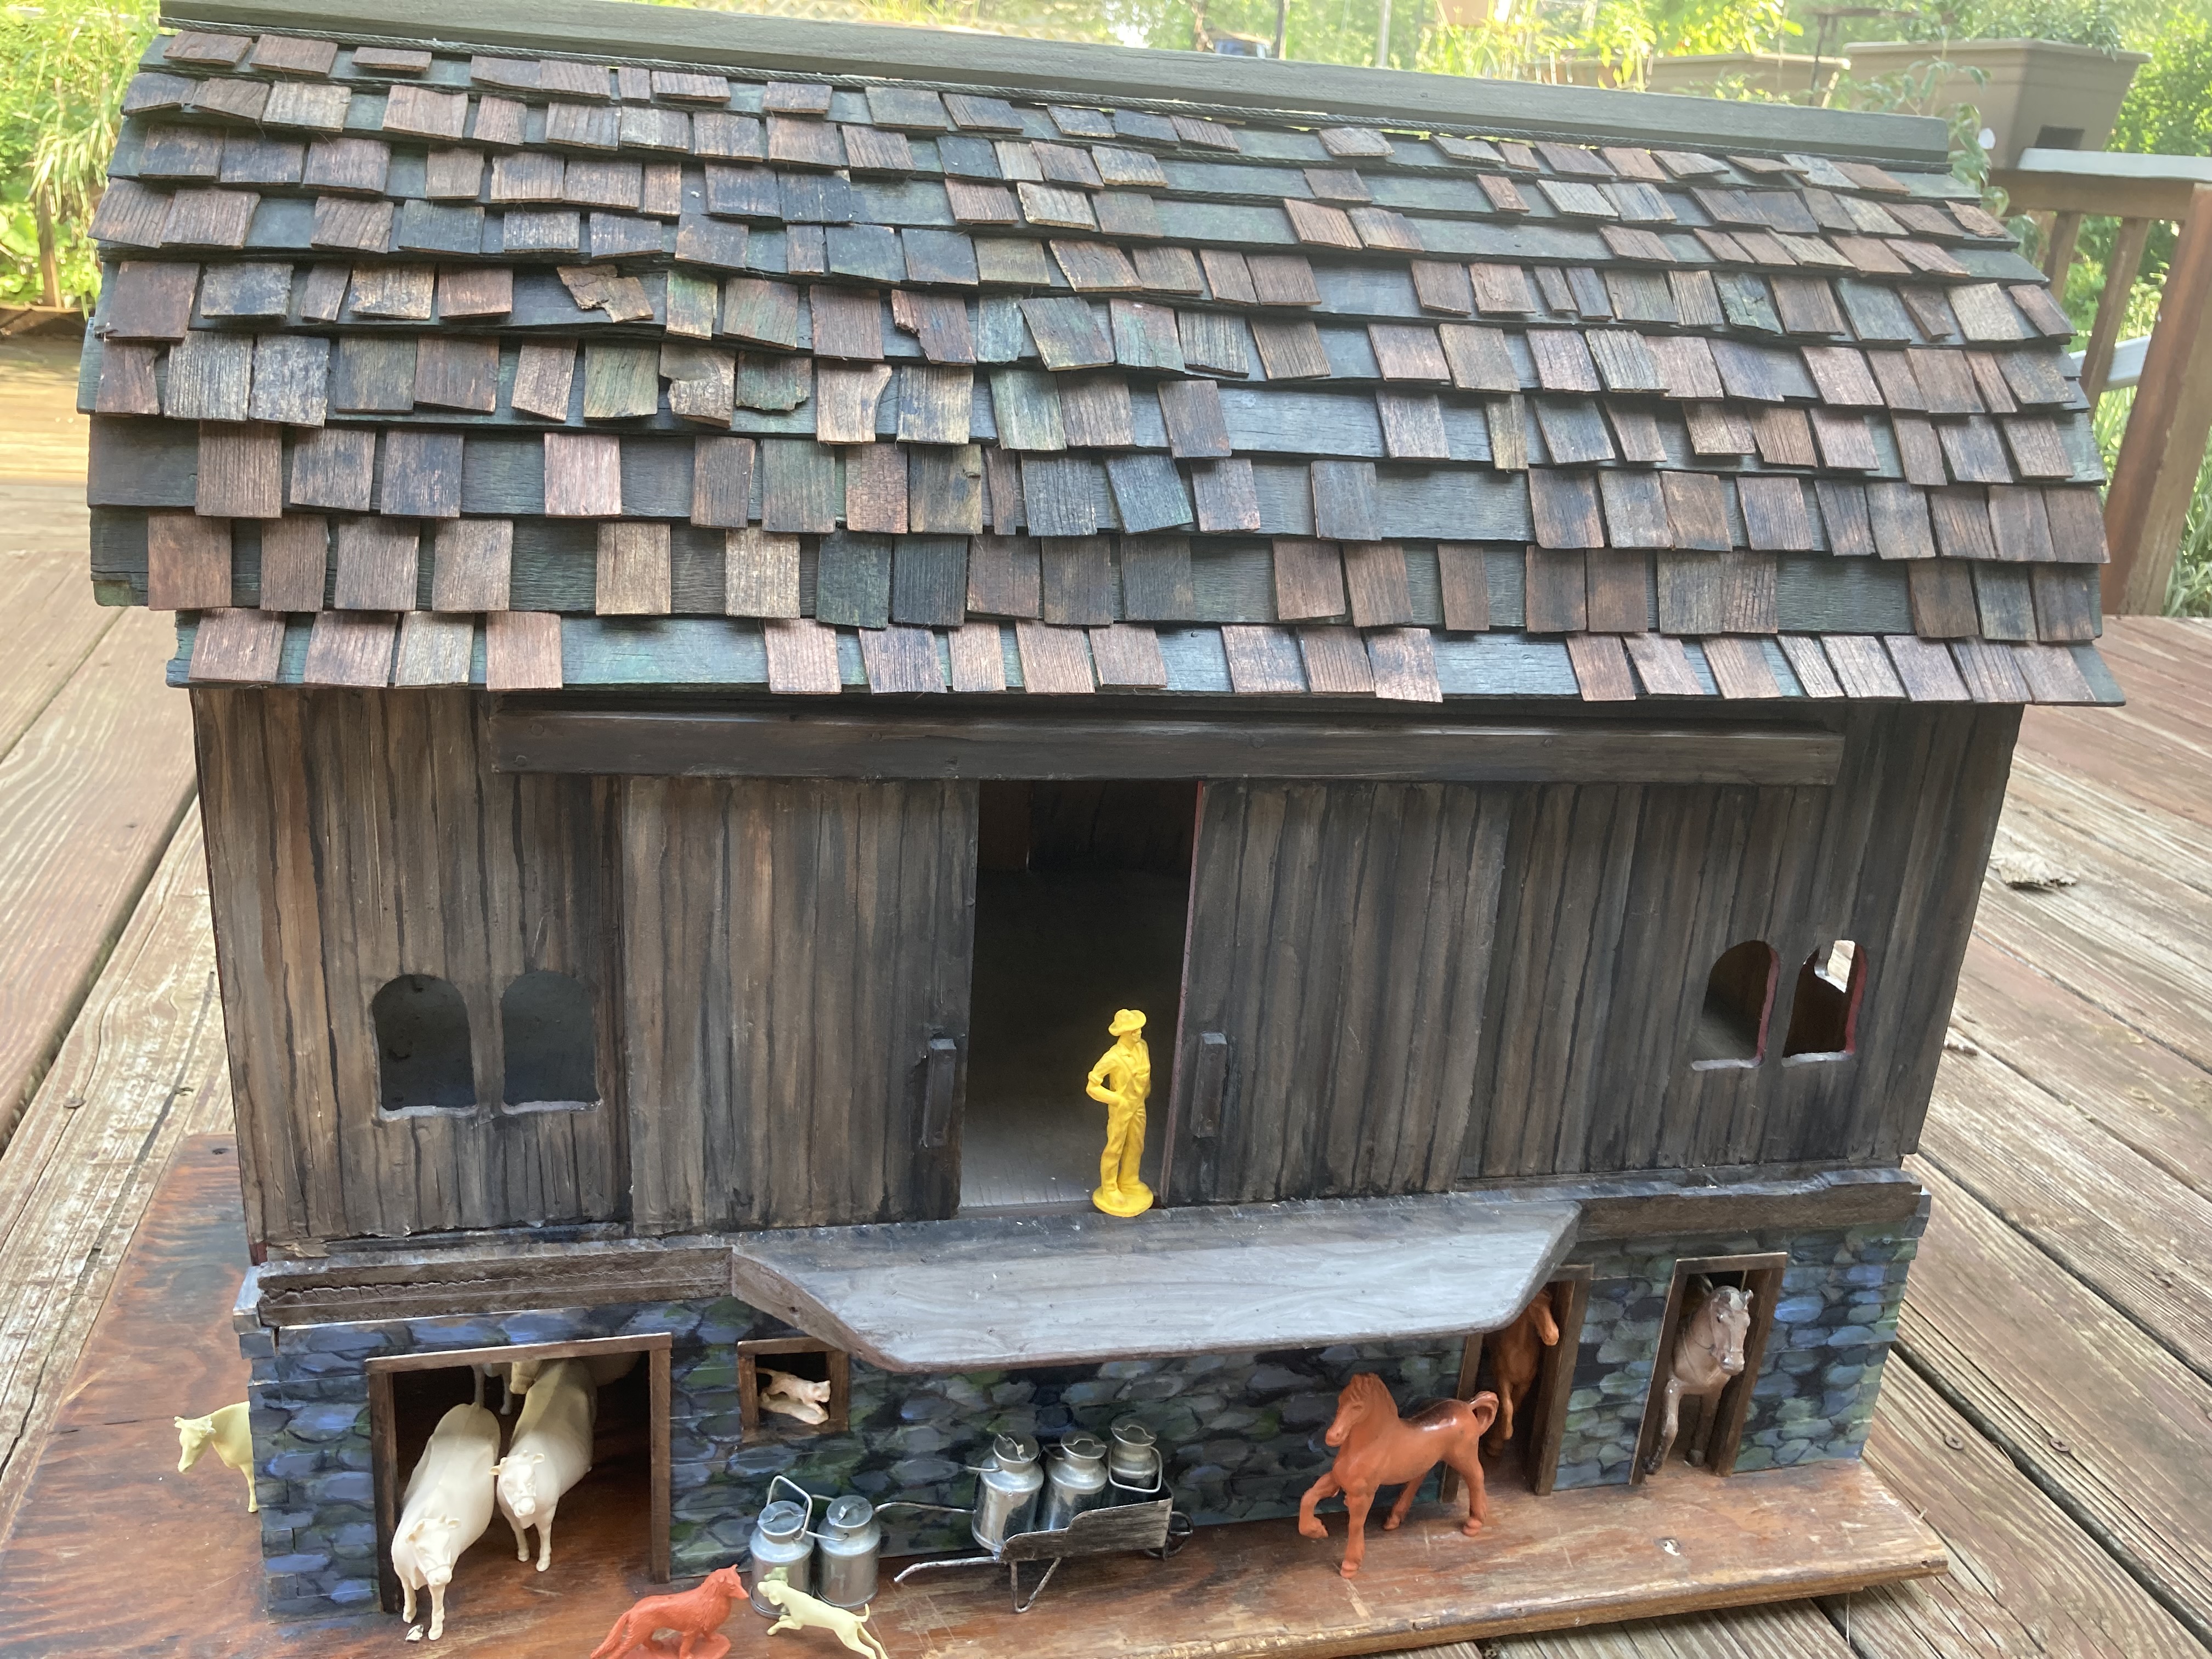
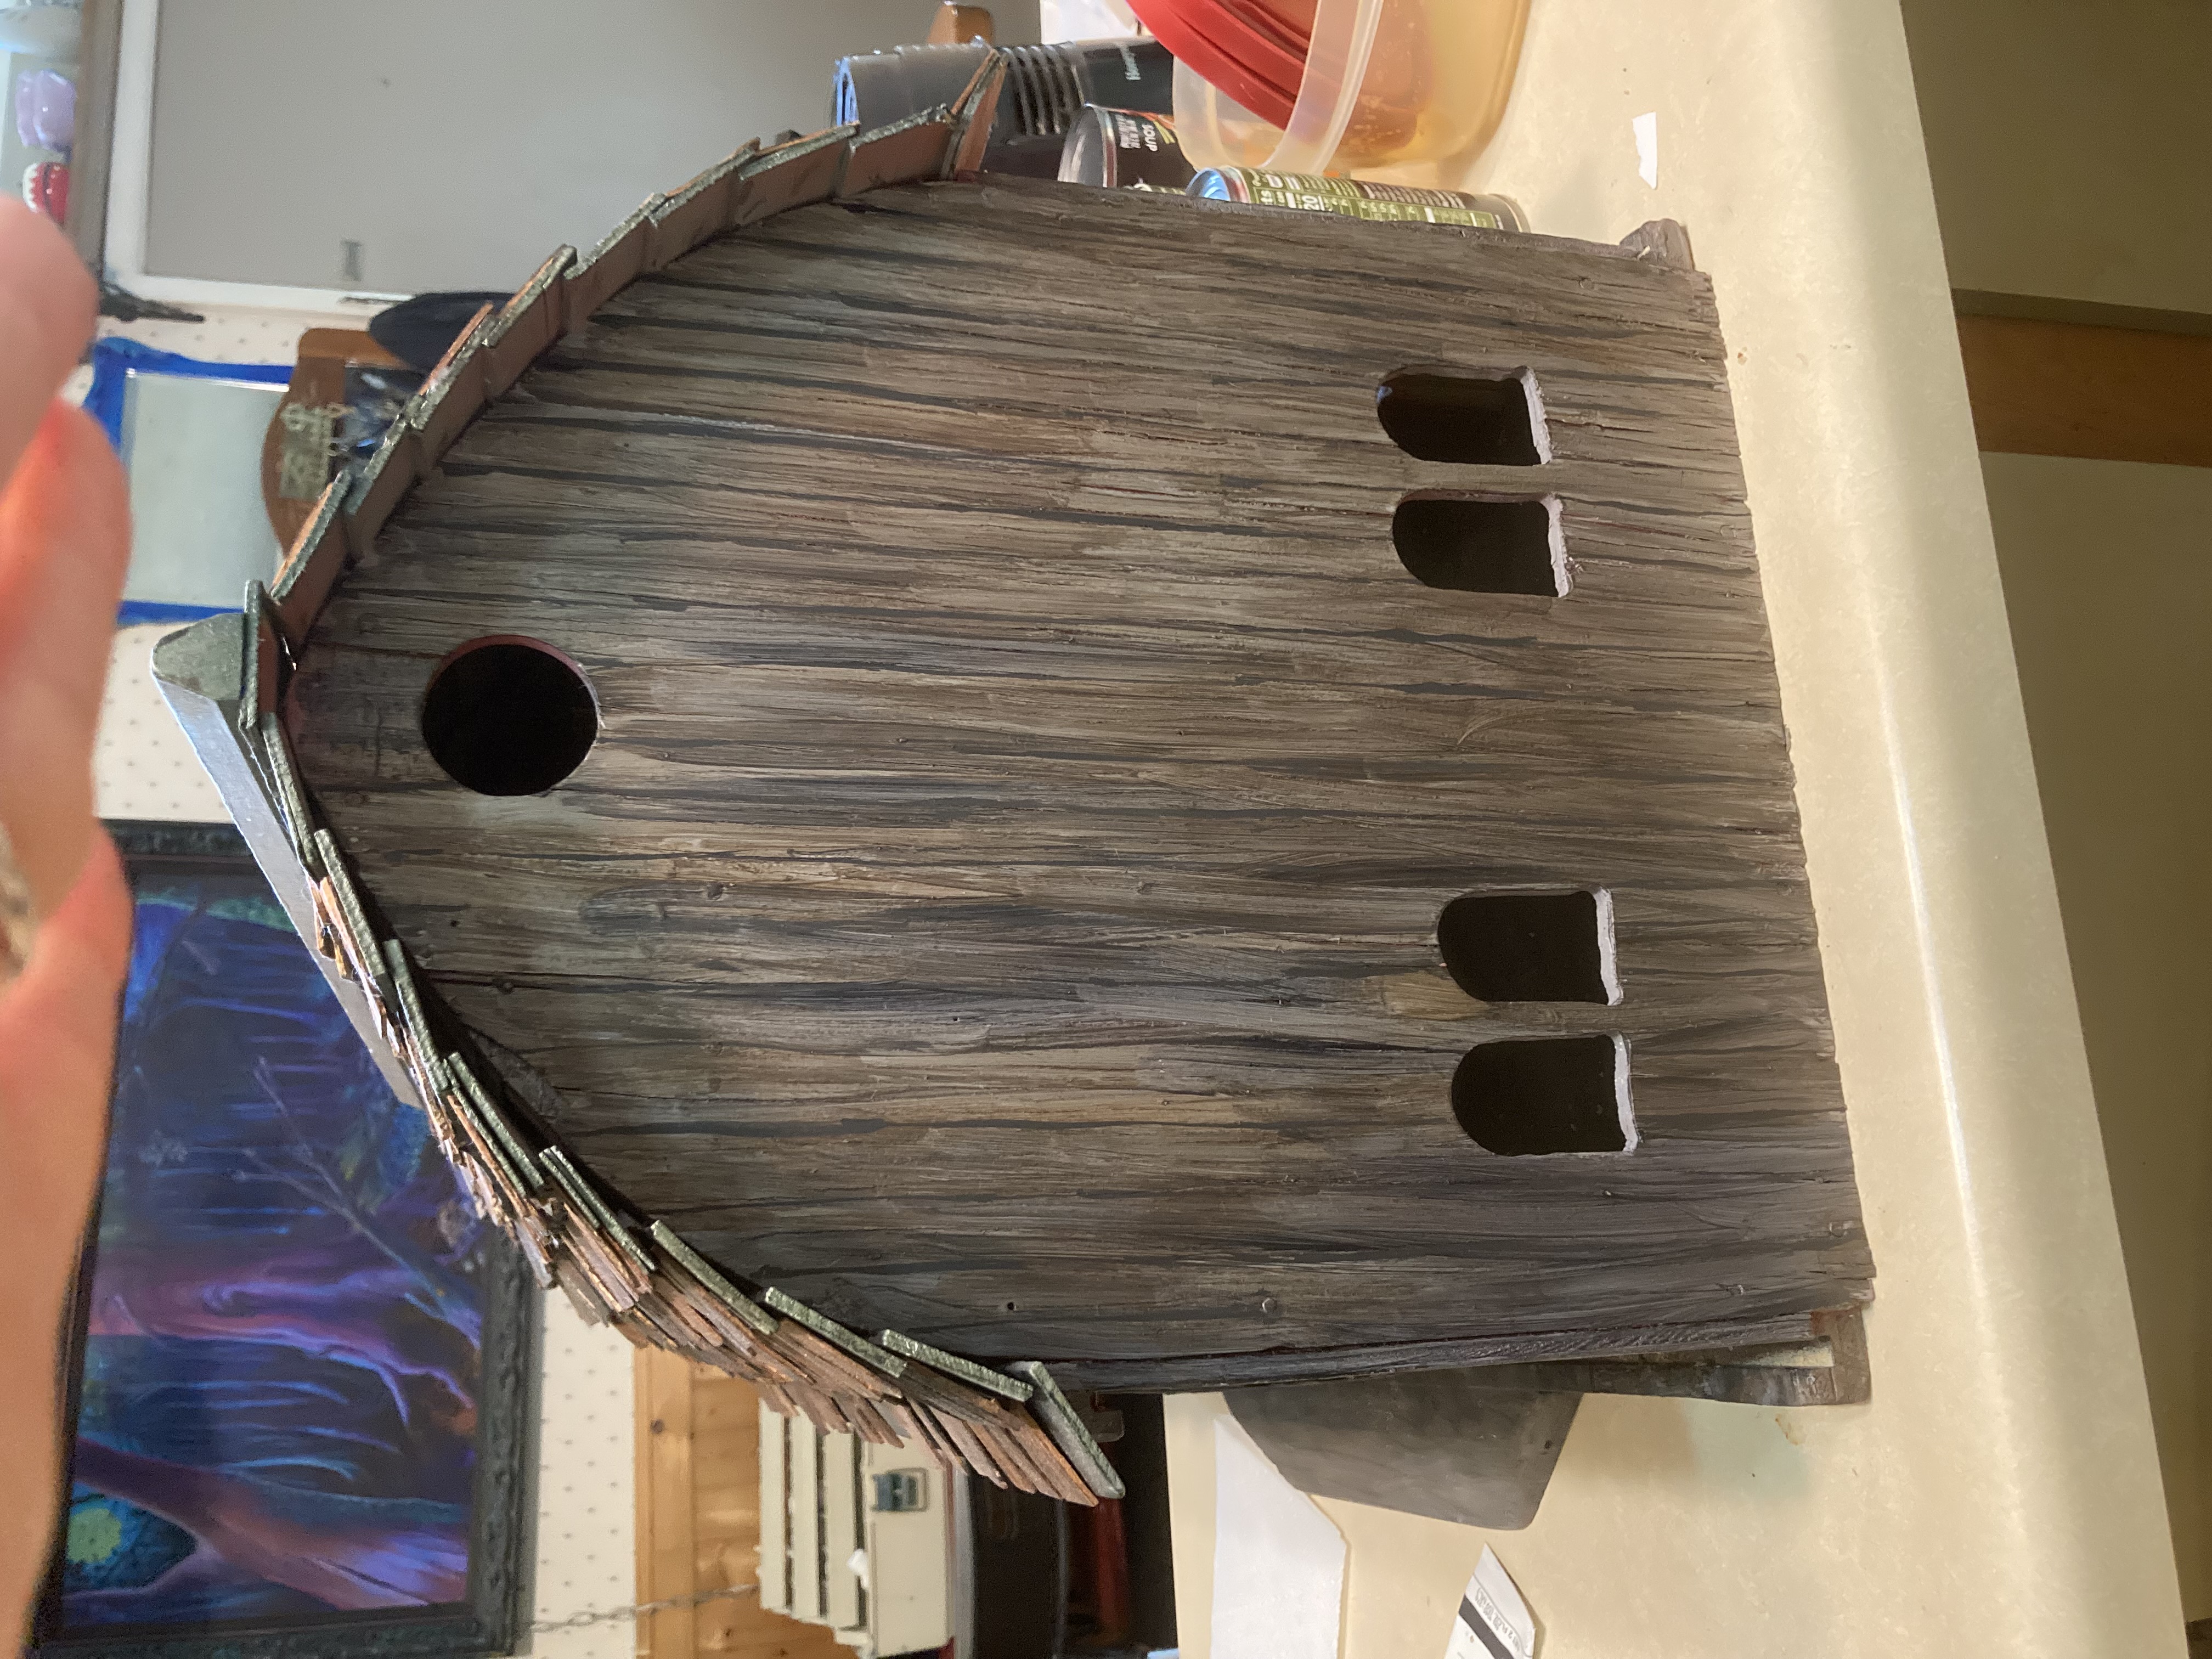
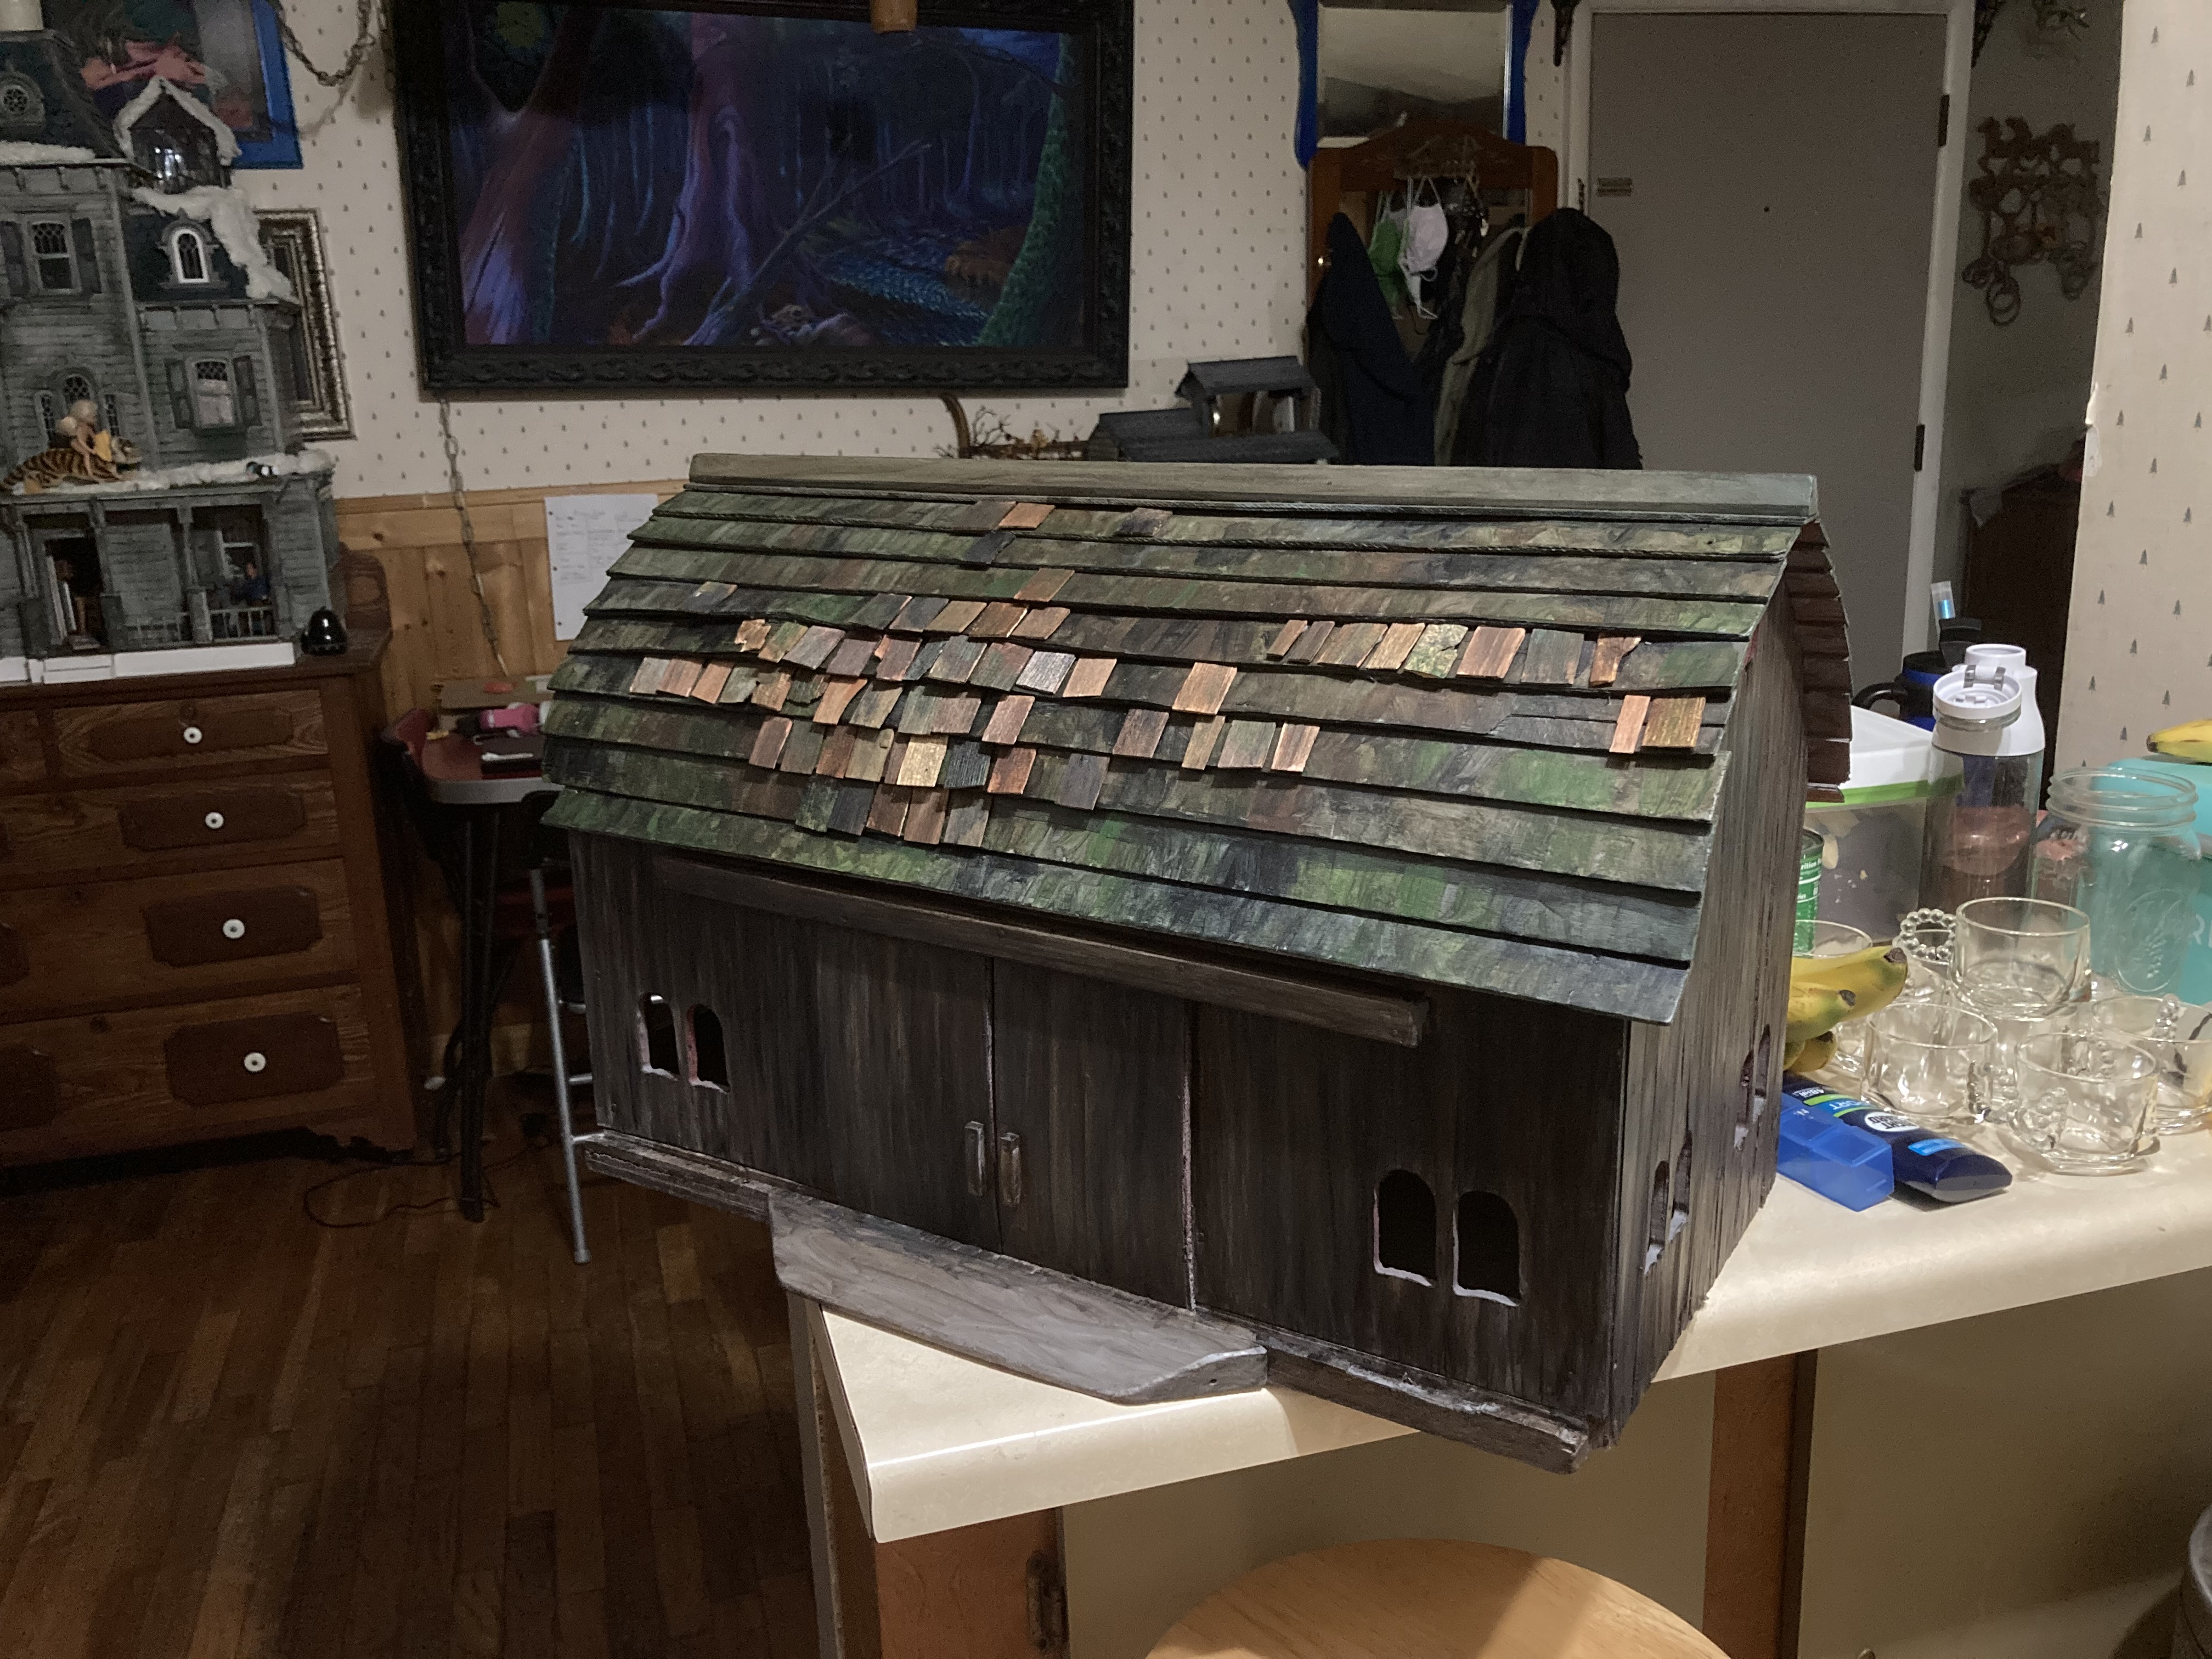
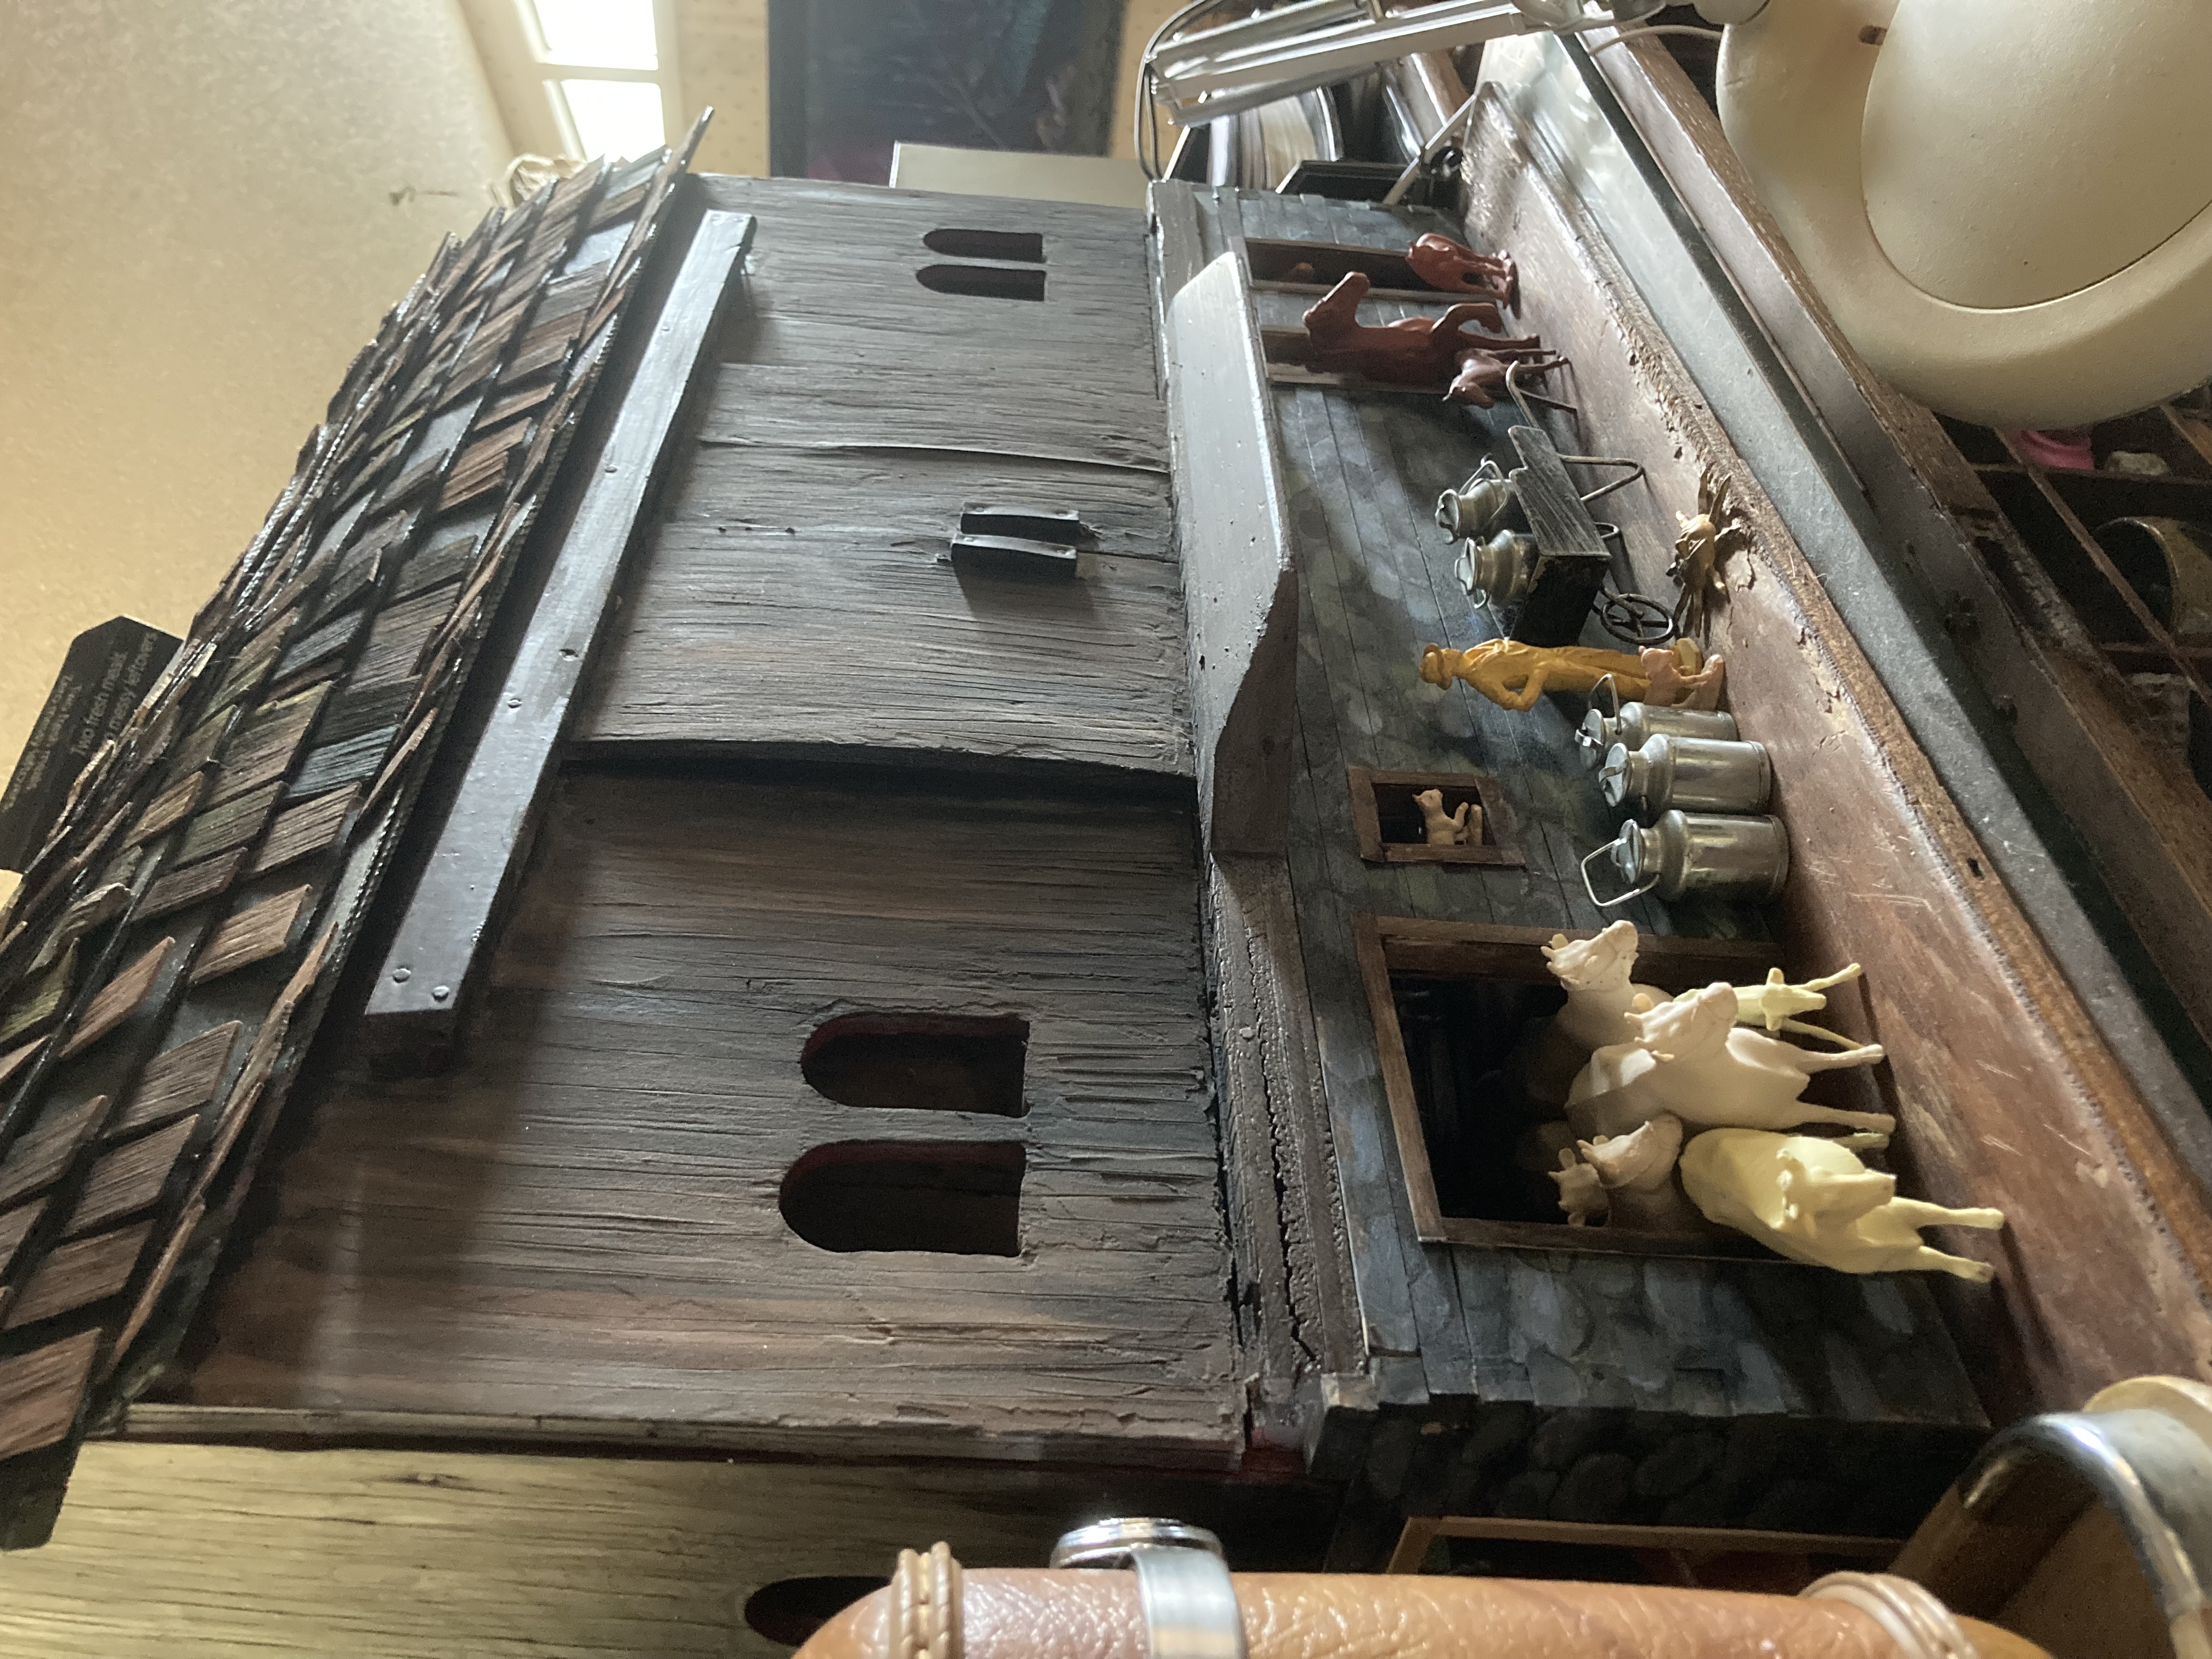
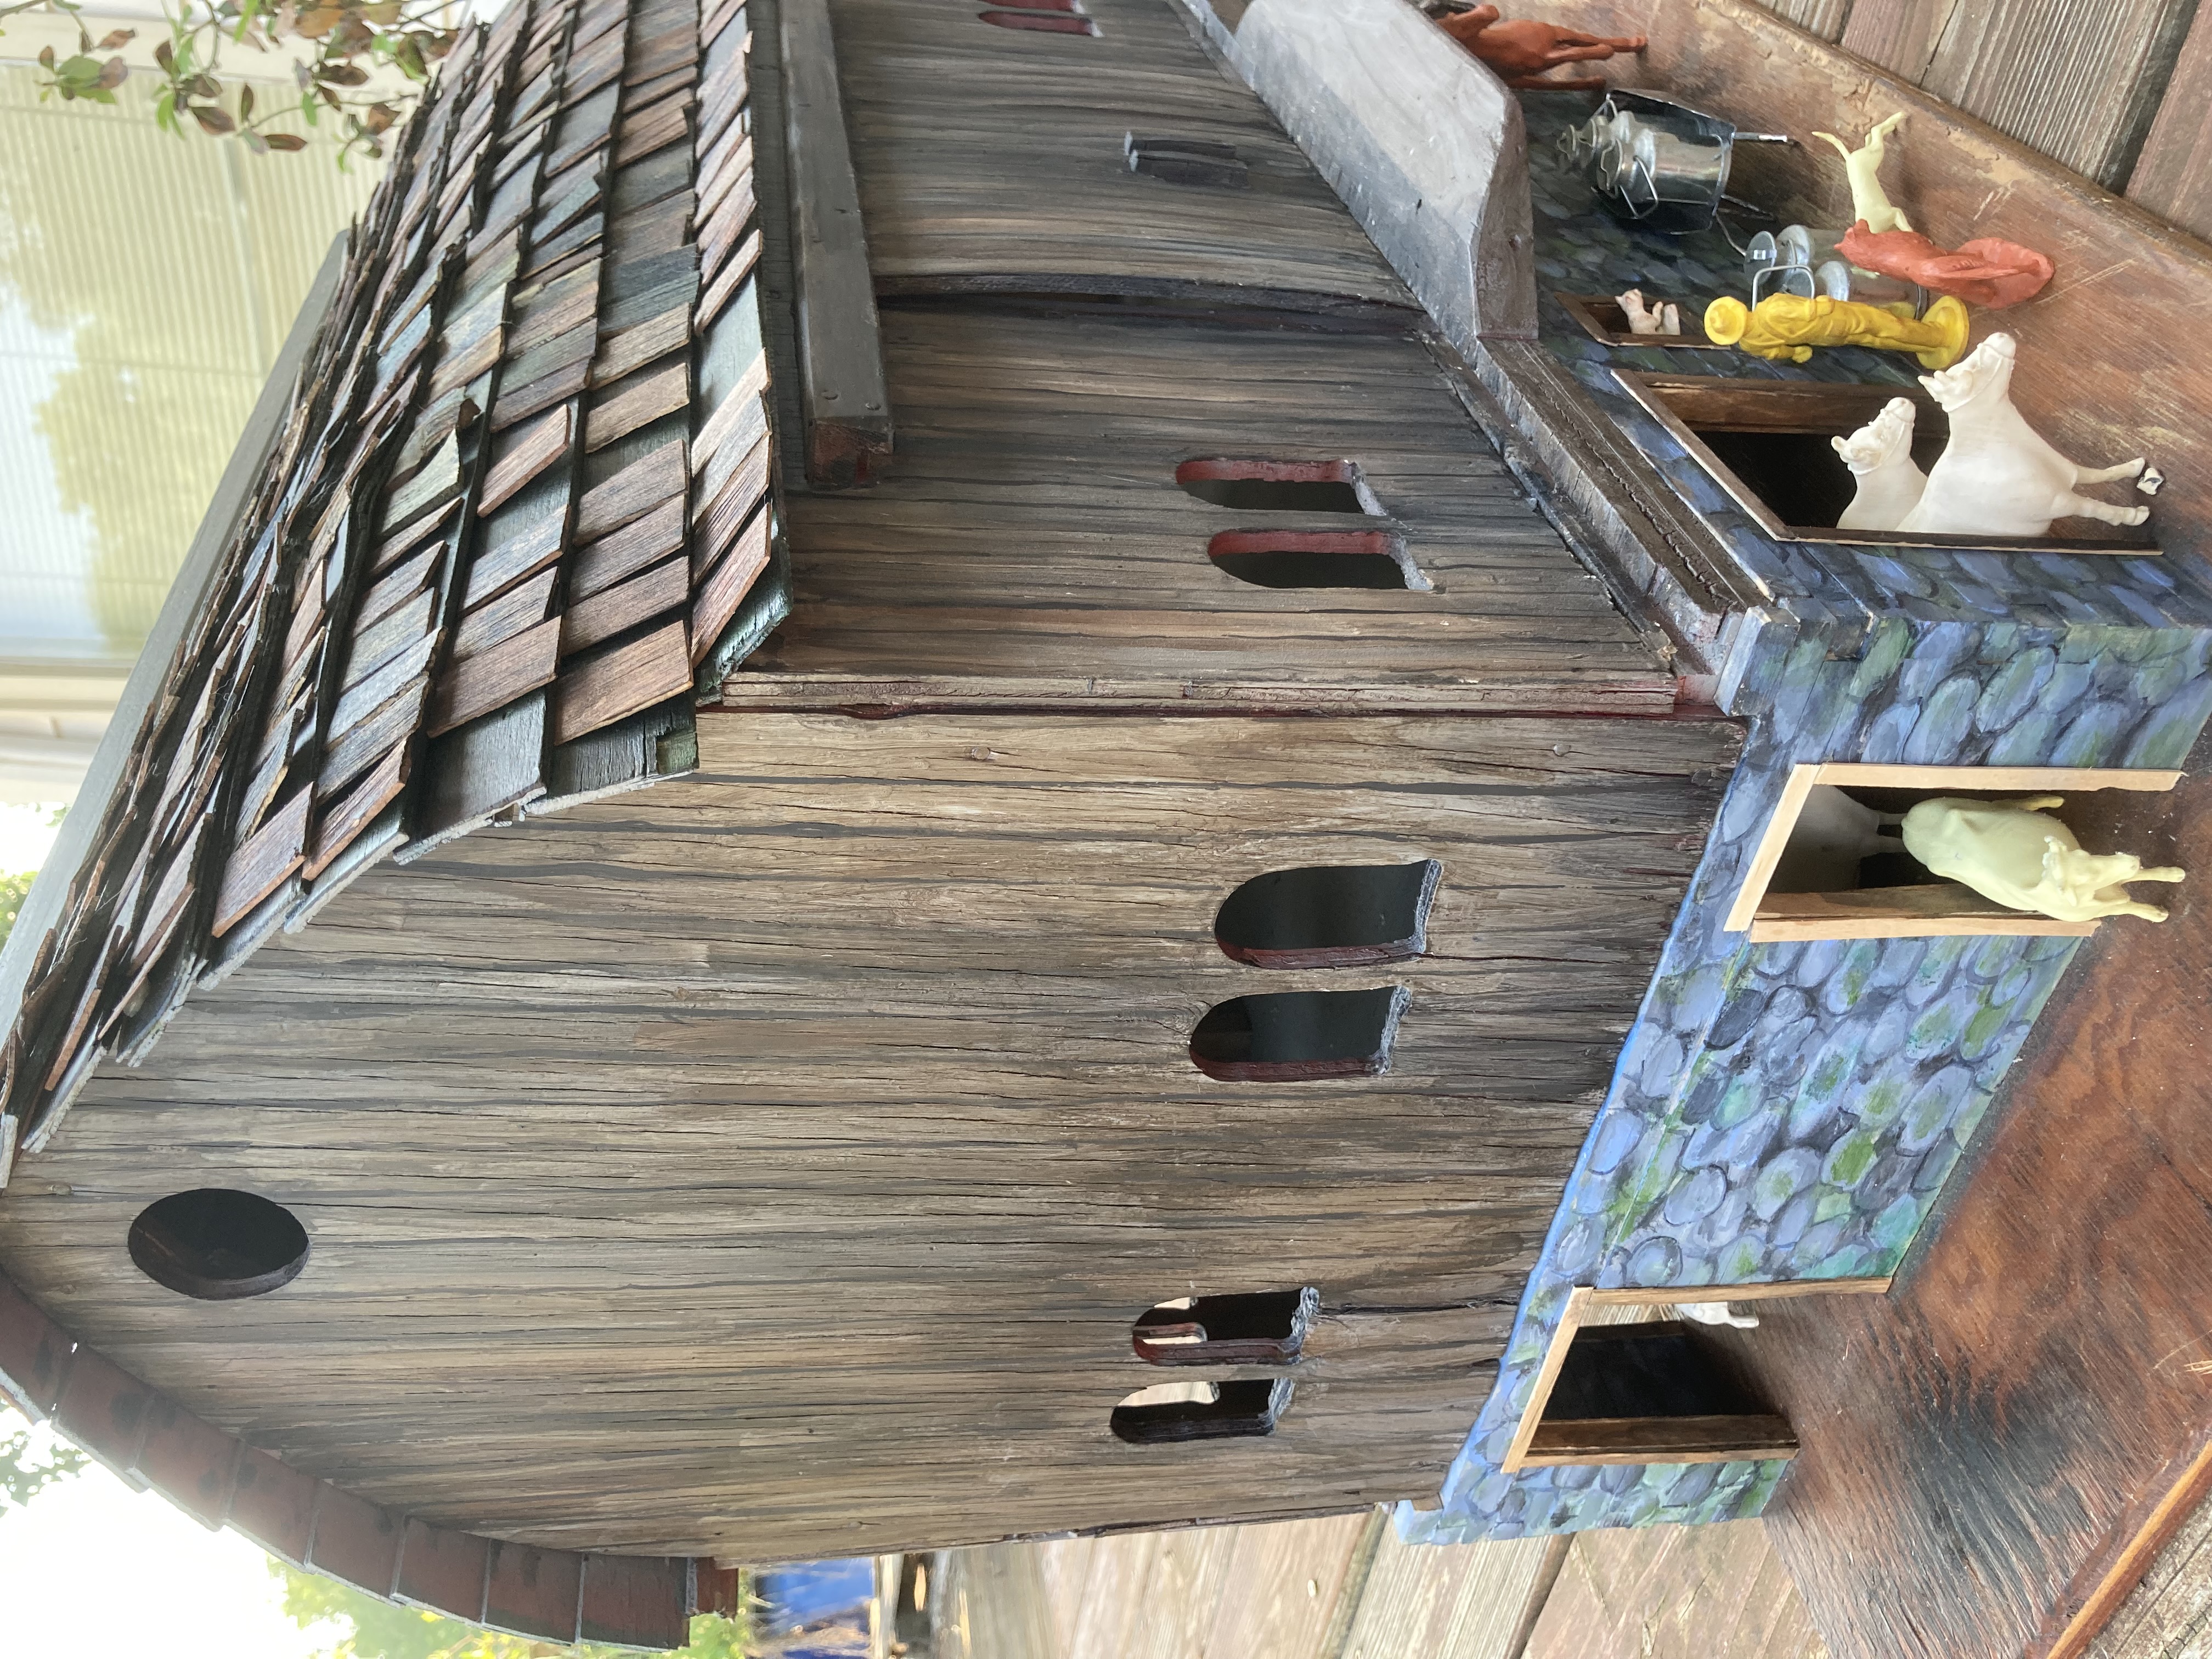
This barn was once part of someone’s railroad table. I had been looking for a good barn project (I love old farms, especially the barns, especially when they once had horses in them. I am a now-horseless horse-nut).
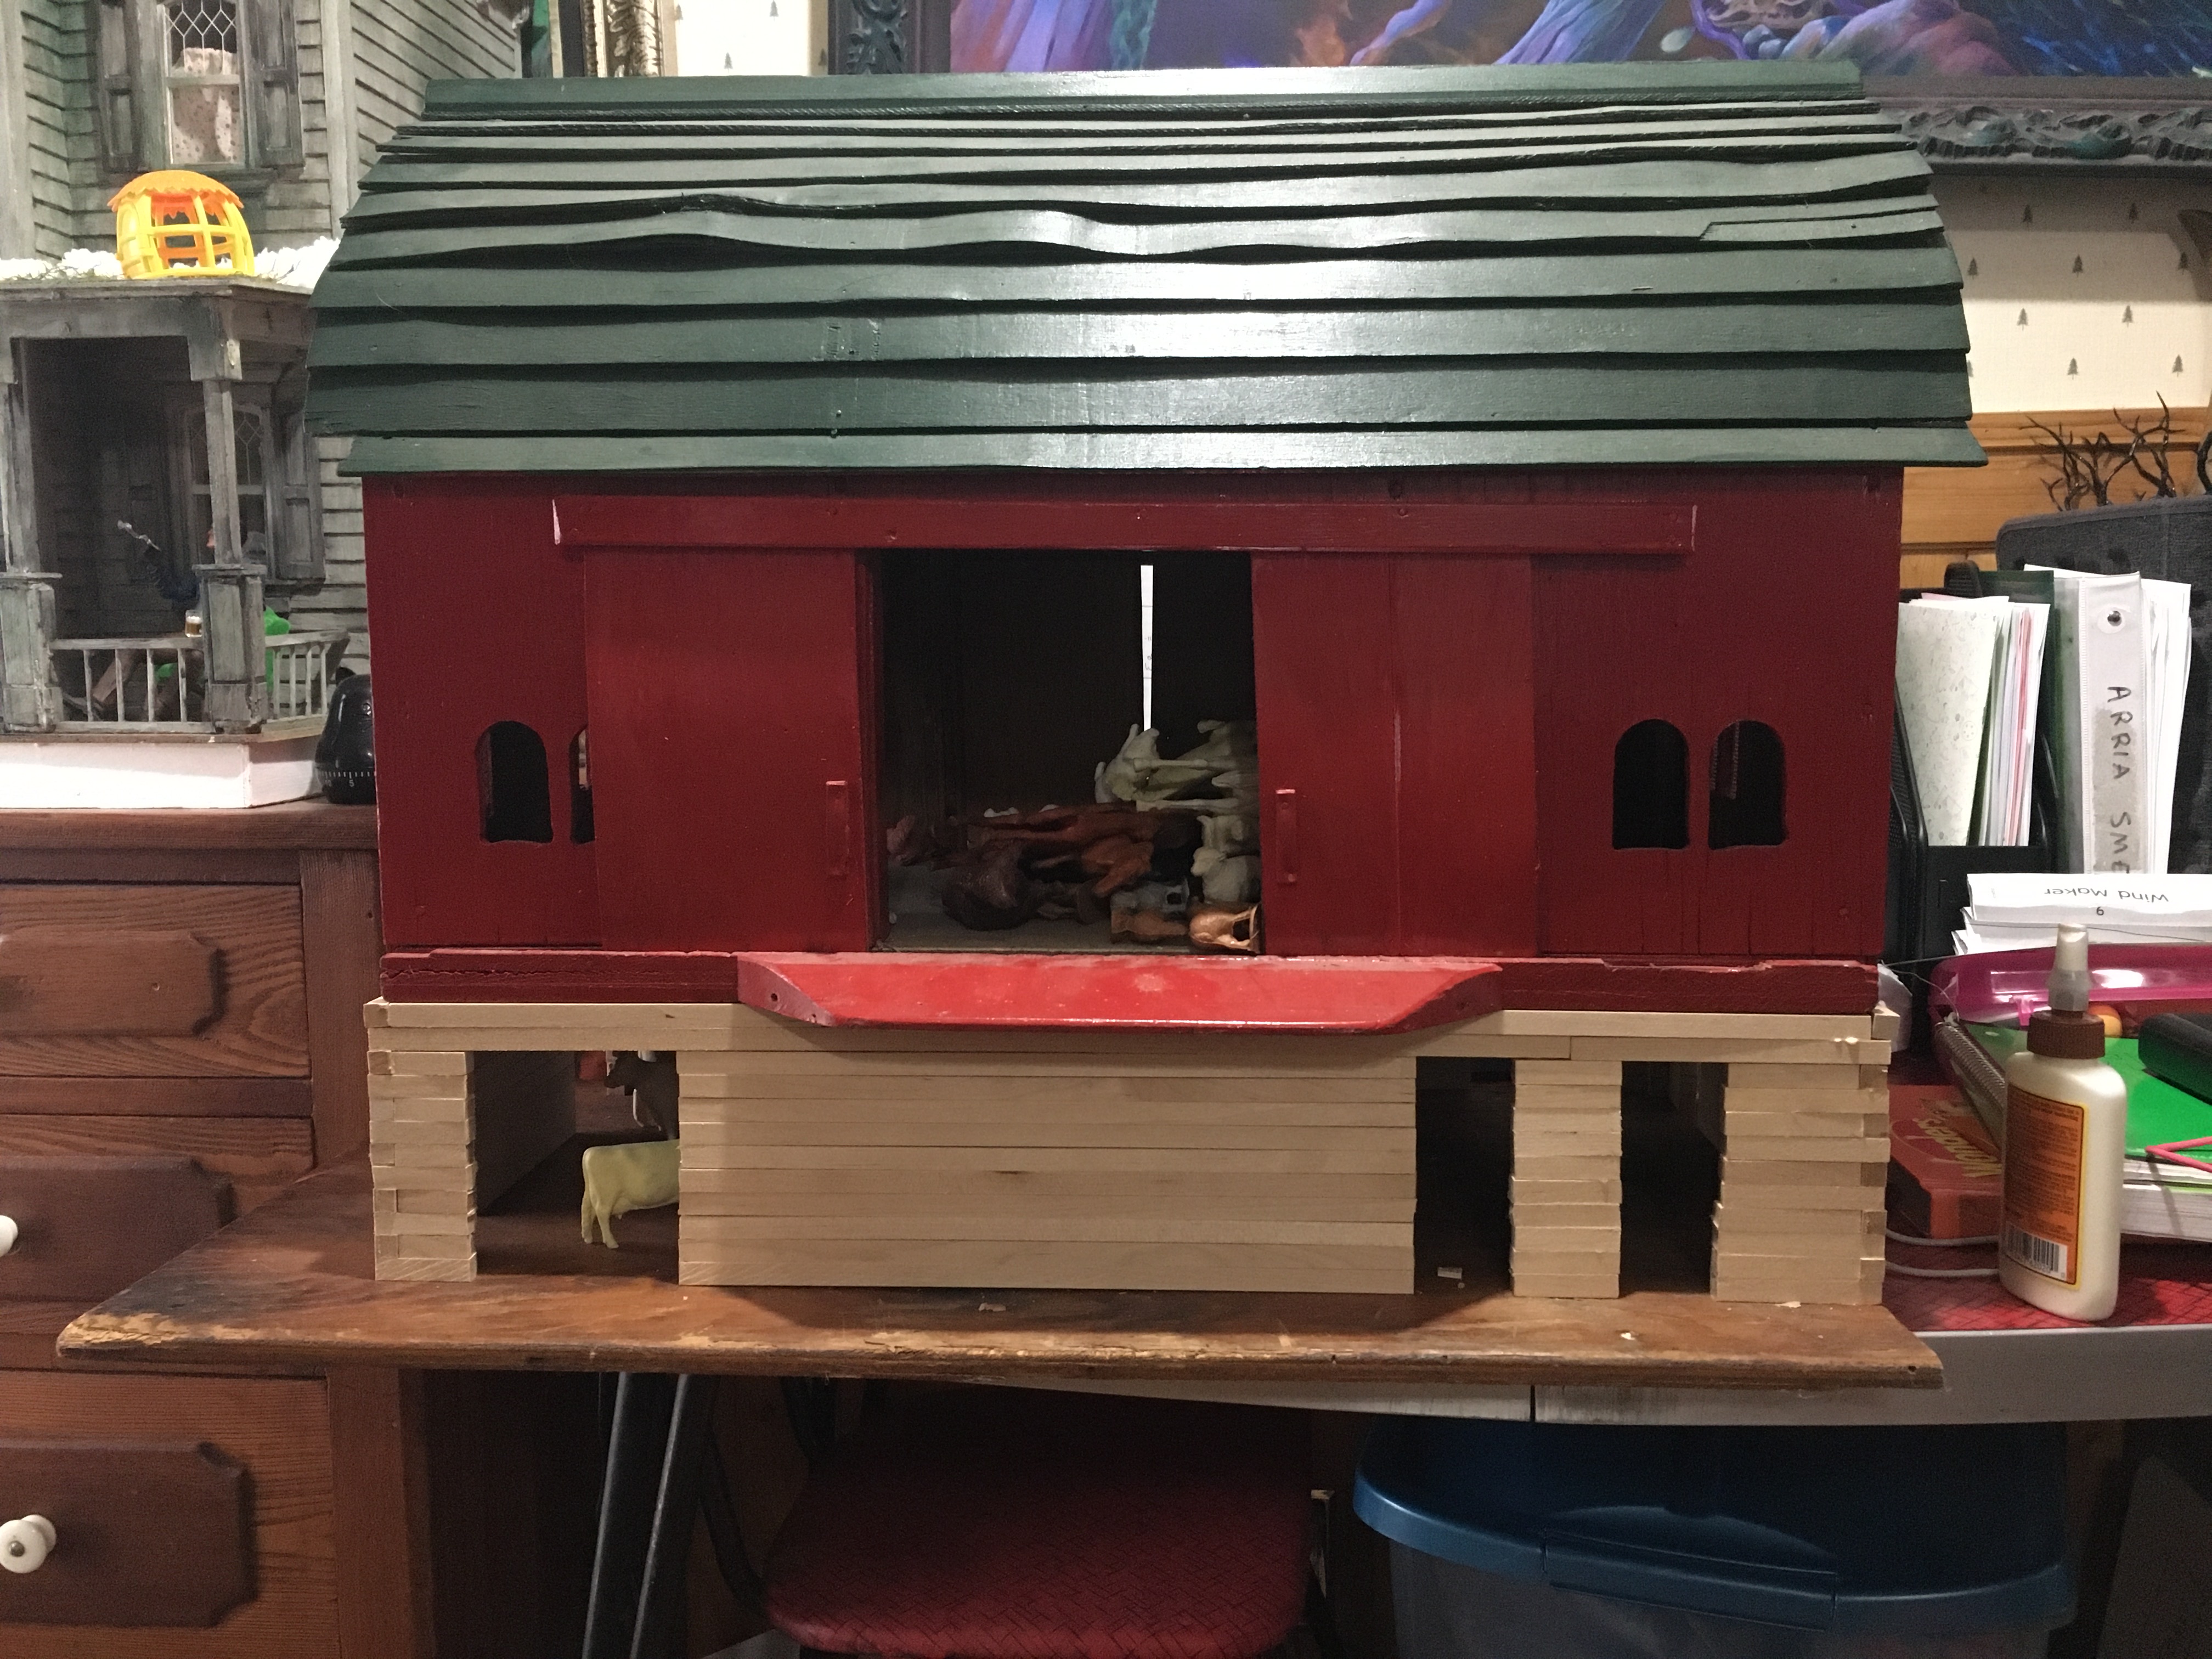
This barn was originally made to sit flat on the ground, but I wanted a lower level with livestock pens, more similar to my grandparents’ bank barn. In order for that to happen, I would have to build a base for it to sit into.
Building the base.
I started with a good plywood board for the base, set the barn on top, in the position I wanted to permanently affix it in. I traced out the barn’s outline.
Next I decided on the locations of doors and marked them with a pencil. I then cut lengths of square dowel to fit the walls, leaving open spaces for the various doors. I built up layers of dowel, alternating overlaps in the corners for structural strength, gluing them down as I went.
Original version of barn, sitting on top of its new base. I forgot to make the windows, so I later disassembled a few areas to cut out the windows and then glued it back together.
When the bottom of the barn was as tall as I wanted, I customized the dowel placement so the original barn would sit comfortably on it without moving. The main upper section of the barn is not glued onto the base, so that I can lift the top original barn off and see the inside of the lower level.
With trim on windows and doors and a little paint added.
I used halved craft sticks to add trim around the windows and doors. This helped to give the edges a more finished look.
After first coat of primer.
I didn’t like the original shiny red finish, so I sprayed the barn with two coats of Rustoleum 2x gray primer and paint to prepare it for acrylics. However, when I started painting, I discovered that the texture just didn’t seem right. The barn’s smooth wood was too flat to look like real barn wood, even with painted texture. I ended up using a pallet knife to apply a thin coat of wood putty, then scratched into it with the edge of the knife to give it texture.
Adding some wood putty for texture.One end painted. Also with some shingles applied.I decided to make my roof look rough, so I staggered the cedar dollhouse shingles on the roof. I started out painting the shingles first, but finally just put them all on and then painted afterwards, as it helped to keep the colors coherent.Shingles done, front partially painted.
I used a mixture of browns, payne’s gray, and black on the wood, with a tiny bit of green for highlights.
This is a closeup of some of the texture from wood putty under the paint. This was before I was finished painting.
In case you were wondering, the animals are mostly vintage Auburn Toy Company plastic animals. I used to play with similar ones at my grandparents’ when I was a child. When I made arrangements to get this barn, I glanced at marketplace and found these animals for sale, and was able to snatch them up. I almost cried when I found them, as I haven’t seen any like them since my childhood. I have since found others on Ebay.
I have plans for further projects, including a small milk house/barn hill, beams in the hayloft, and possibly some horse drawn machinery. I think it would be cool to make stalls for the animals and milking stations. Stay tuned!